

TC.3000
Panel Carrier
INSTRUCTION MANUAL
Attention: Read the instruction manual before using the appliance.
1
Instruction Manual
• Do not overreach on the equipment. Maintain
balance and feet in comfortable position at all times.
Important information you should know:
• The images in this manual are illustrative and are
meant to demonstrate the correct operation of your
product, there may be small changes in relation to the
images.
Online Support: Visit our YouTube
Channel to nd several videos
that will assist you with Maksiwa
machines. Use the QRCode.
READ ALL INSTRUCTIONS
CAUTION:
If maintenance is required, replace only with identical
parts. Also, repair or replace faulty wiring.
SAFETY INSTRUCTIONS
FOR ALL EQUIPMENT
WARNINGS
• Keep a clean work surface. Cluttered areas and work
surfaces invite accidents.
• Do not use the Panel Carrier in hazardous
environments. Do not use the machine in damp or
wet locations or areas that are exposed to rain. Keep
in a well-lit work area.
• Keep children away from machines. Visitors should
be kept at a safe distance from the work area.
• Keep all tools in order. Keep tools sharp and clean for
better and safer performance. Follow the instructions
for lubricating and changing accessories.
• Check for damaged parts before continuing the use
of Panel Carrier. Any part that is damaged should be
examined carefully to determine its proper operation
and perform its function properly. Check the alignment
of moving parts, breakage of parts, mounting and any
other condition that may aect its operation. Any
part that is damaged should be repaired or replaced
immediately.
CAUTION: Failure to heed these warnings may result
in severe injury or damage to the machine.
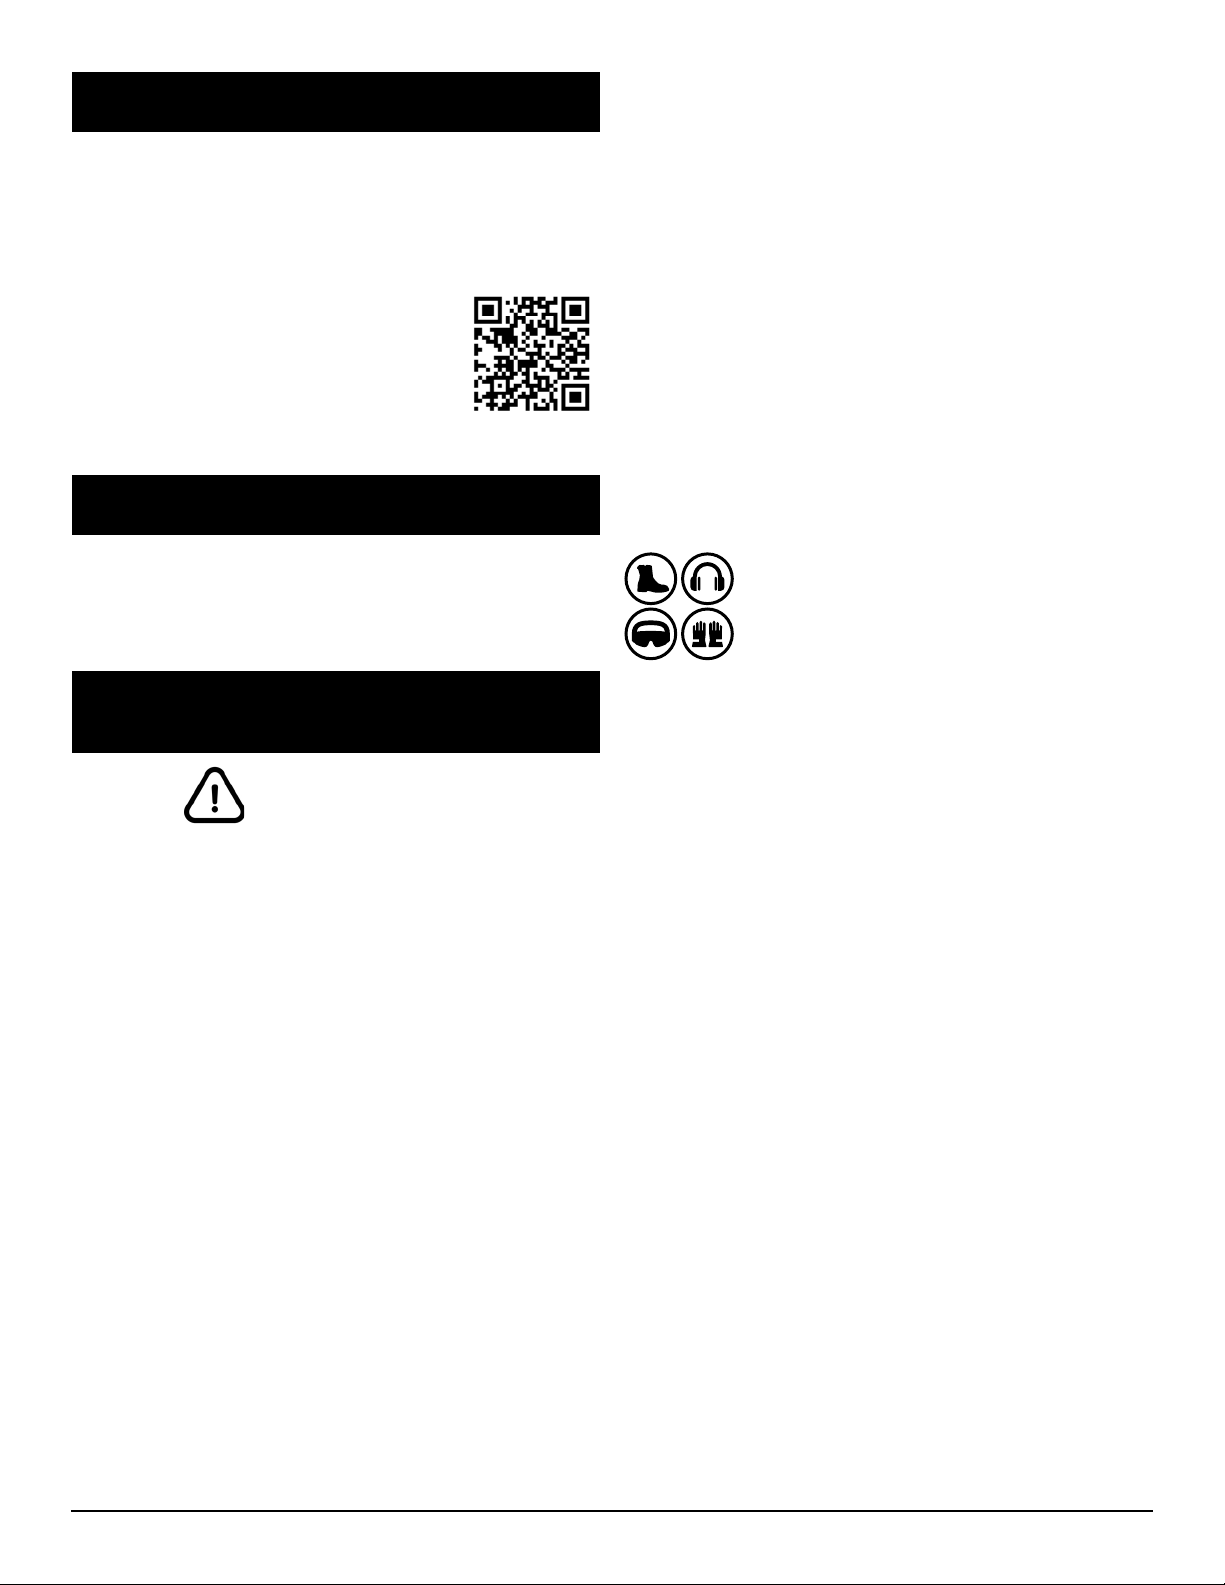
ALWAYS USE PROPER PROTECTIVE
EQUIPMENTS TO OPERATE THIS
MACHINE.
• Always use safety glasses. Also use face or dust mask
if cutting operation is dusty. Everyday eyeglasses only
have impact resistant lenses, they are NOT safety
glasses.
• Make sure that the knobs and screws are properly
tightened and safe before starting any operation.
WARNING: Some dust created by the act of sanding,
cutting, grinding, drilling and other constructionrelated activities contains chemicals that can cause
cancer, birth defects or other reproductive harm.
Some examples of these products are: Lead-based
paint; crystal silica bricks, concrete and other masonry
products; and arsenic and chromium from chemically
treated wood.
• Make the workplace childproof making use of
padlocks.
• Do not force tools. Tools should be used for the
intended use only.
• Use appropriate equipment. Do not wear loose
clothing, jewelry, or other accessories that could get
caught in moving parts.
• It is recommended wearing shoes with non-slip soles.
Use protection for the hair in order to hold them.
• Always wear safety glasses. Also use hearing
protection.
Do not operate the machine unless the guards are in
their proper places. Always use protective goggles.
Familiarization
Use the pictures and read the descriptions carefully
to familiarize yourself with its components. The next
section will deal with the necessary adjustments for
the proper functioning of the machine. You should
know these parts and where they belong.
Specications
The TC.3000 Panel Carrier was made to facilitate
the day-to-day tasks of the modern woodworker.
Its durable structure and 4-wheels allow anyone to
2
easily carry up to 2 full sheets of wood at once. It
has an adjustable height mechanism making it easy to
work in conjunction with virtually any woodworking
equipment you have, such as panel and table saws.
With a carrying capacity of up to 254 pounds, this will
help you increase productivity, reduce injuries from
carry heavy loads, and it only requires one person to
operate it.
Minimum table height: 33”
Maximum table height: 37”
Equipment dimension: 43” x 49” x 28”
Maximum capacity: 254 Lbs
Maximum panel size: 108” x 1” x 72”
Weight: 70.5 Lbs
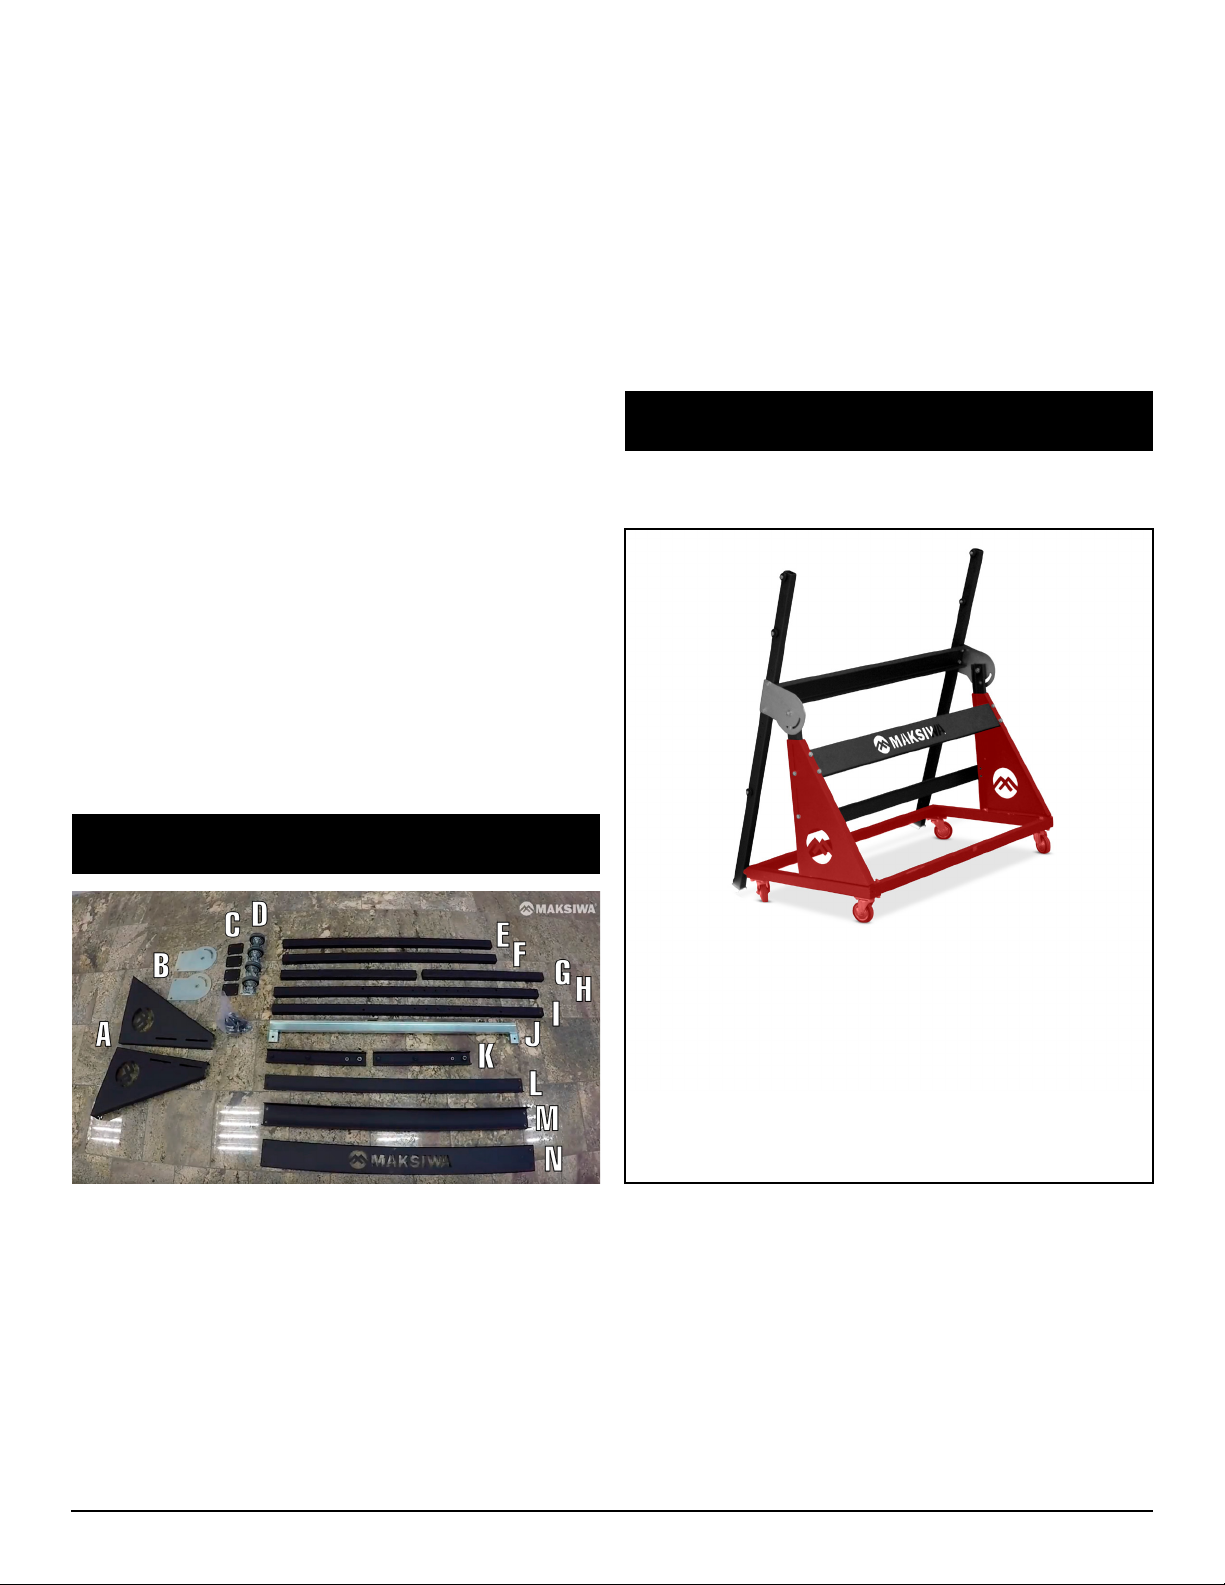
H - Left bar panel support;
I - Right bar panel support;
J - Support panel section set;
K - Support height regulation;
L - Structure cross reinforcement;
M - Top reinforcement;
N - Structure upper reinforcement.
ASSEMBLY
Transport and Installation
By ergonomic issues, this equipment must be carried
by at least two people.
For packaging purposes, the machine is not fully
assembled. If you notice any damage caused by
transportation, while you open the package, notify
your supplier immediately. Do not operate the
machine.
Please dispose the packaging in an environmental
friendly way.
CONTENTS
You will receive the pieces in 3 kits with their respective
screws.
Kit 1:
- Left and right structures
- Crossbar rear structure
- Front structure
- Side structure crossbar assembly
- Base structure wheels
- Mobile rubber wheels 3”
- Screws, nuts, washers, and bolts
A - Left and right structures;
B - Support panel;
C - Base structure wheels;
D - Mobile rubber wheels 3”;
E - Crossbar rear structure;
F - Front structure;
G - Side structure crossbar assembly;
3
Kit 2:
- Support panel
- Support height regulation
- Structure upper reinforcement
- Structure cross reinforcement
- Screws, nuts, washers, and bolts
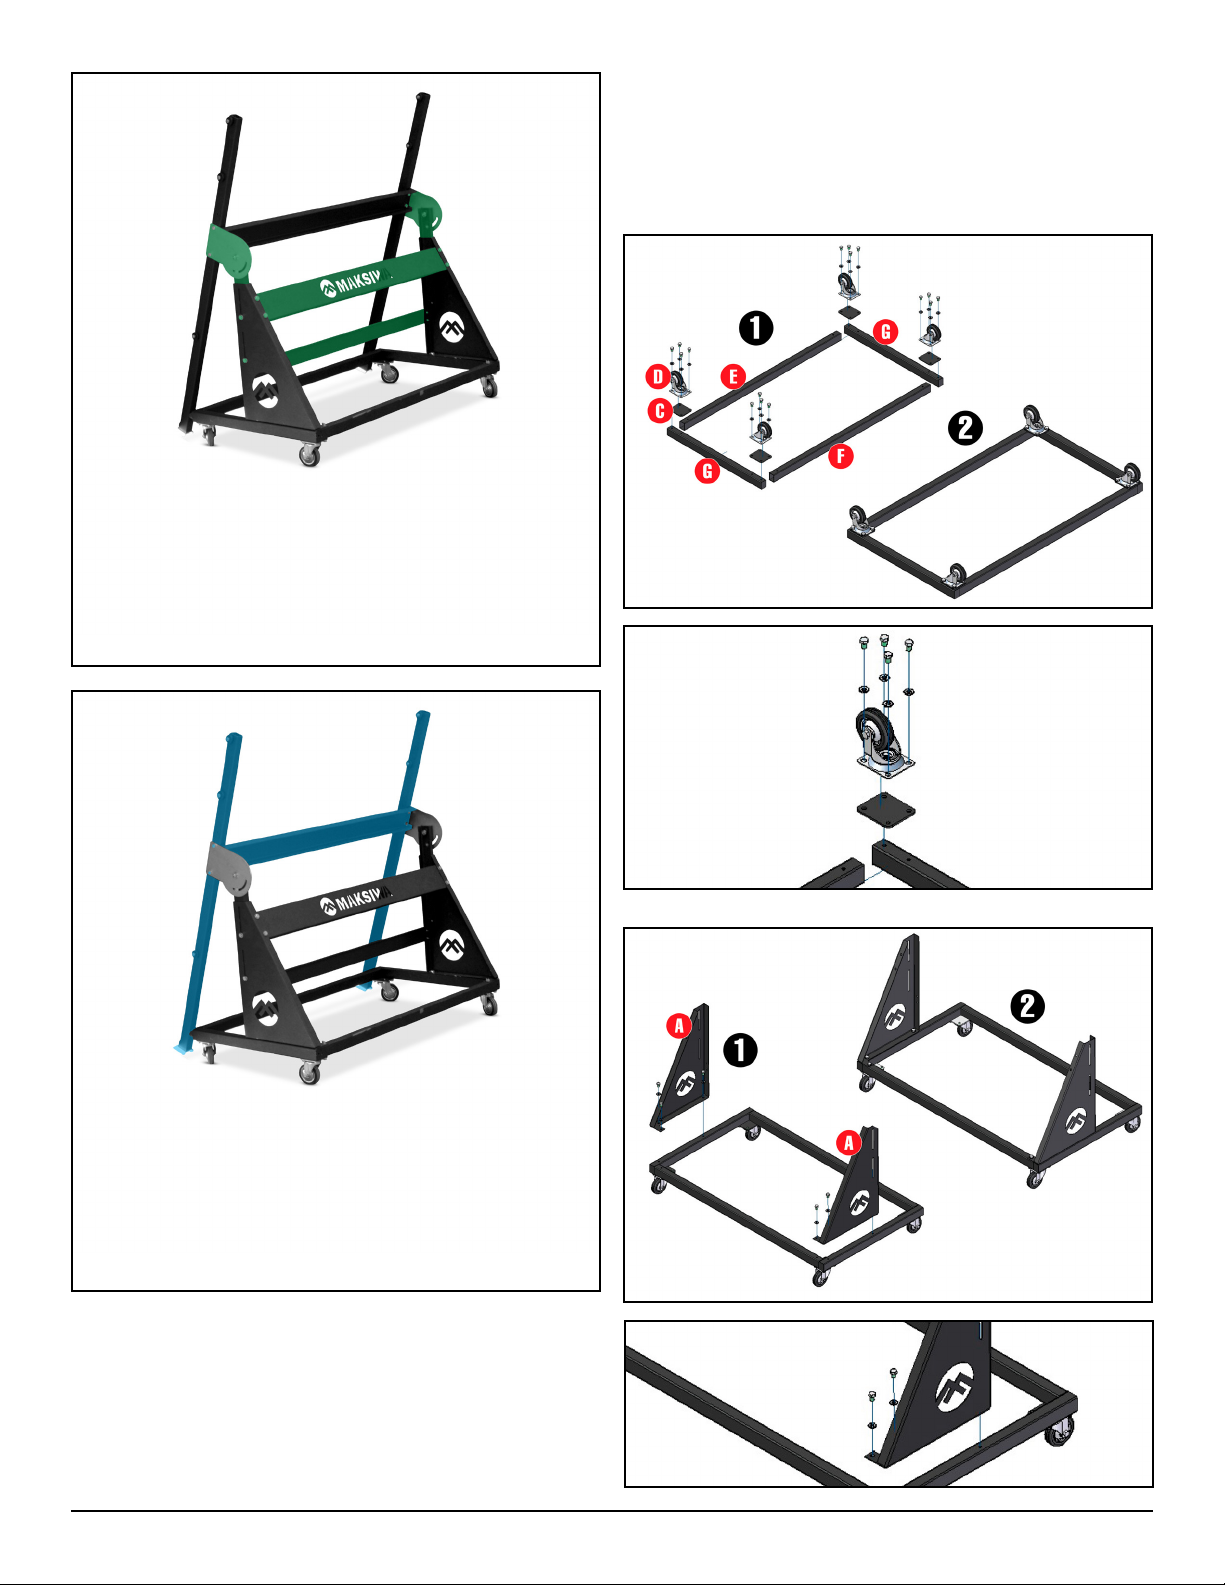
First, assemble the kit 1:
1) Mount the panel carrier base with the drive wheels.
Take the structures and align them at the vertices of
the base. After that, place the drive wheels and screw
them.
Detail
Kit 3:
- Left bar panel support
- Right bar panel support
- Top reinforcement
- Support panel section set
- Screws, nuts, washers, and bolts
2) Mount the left and right structures.
Detail
4

Ready! Kit 1 is properly mounted.
2) Mount the structure upper reinforcement.
Detail
Now, assemble the pieces of Kit 2:
1) Mount the structure cross reinforcement.
3) Mount the side structure crossbar assembly.
Detail
Detail
5
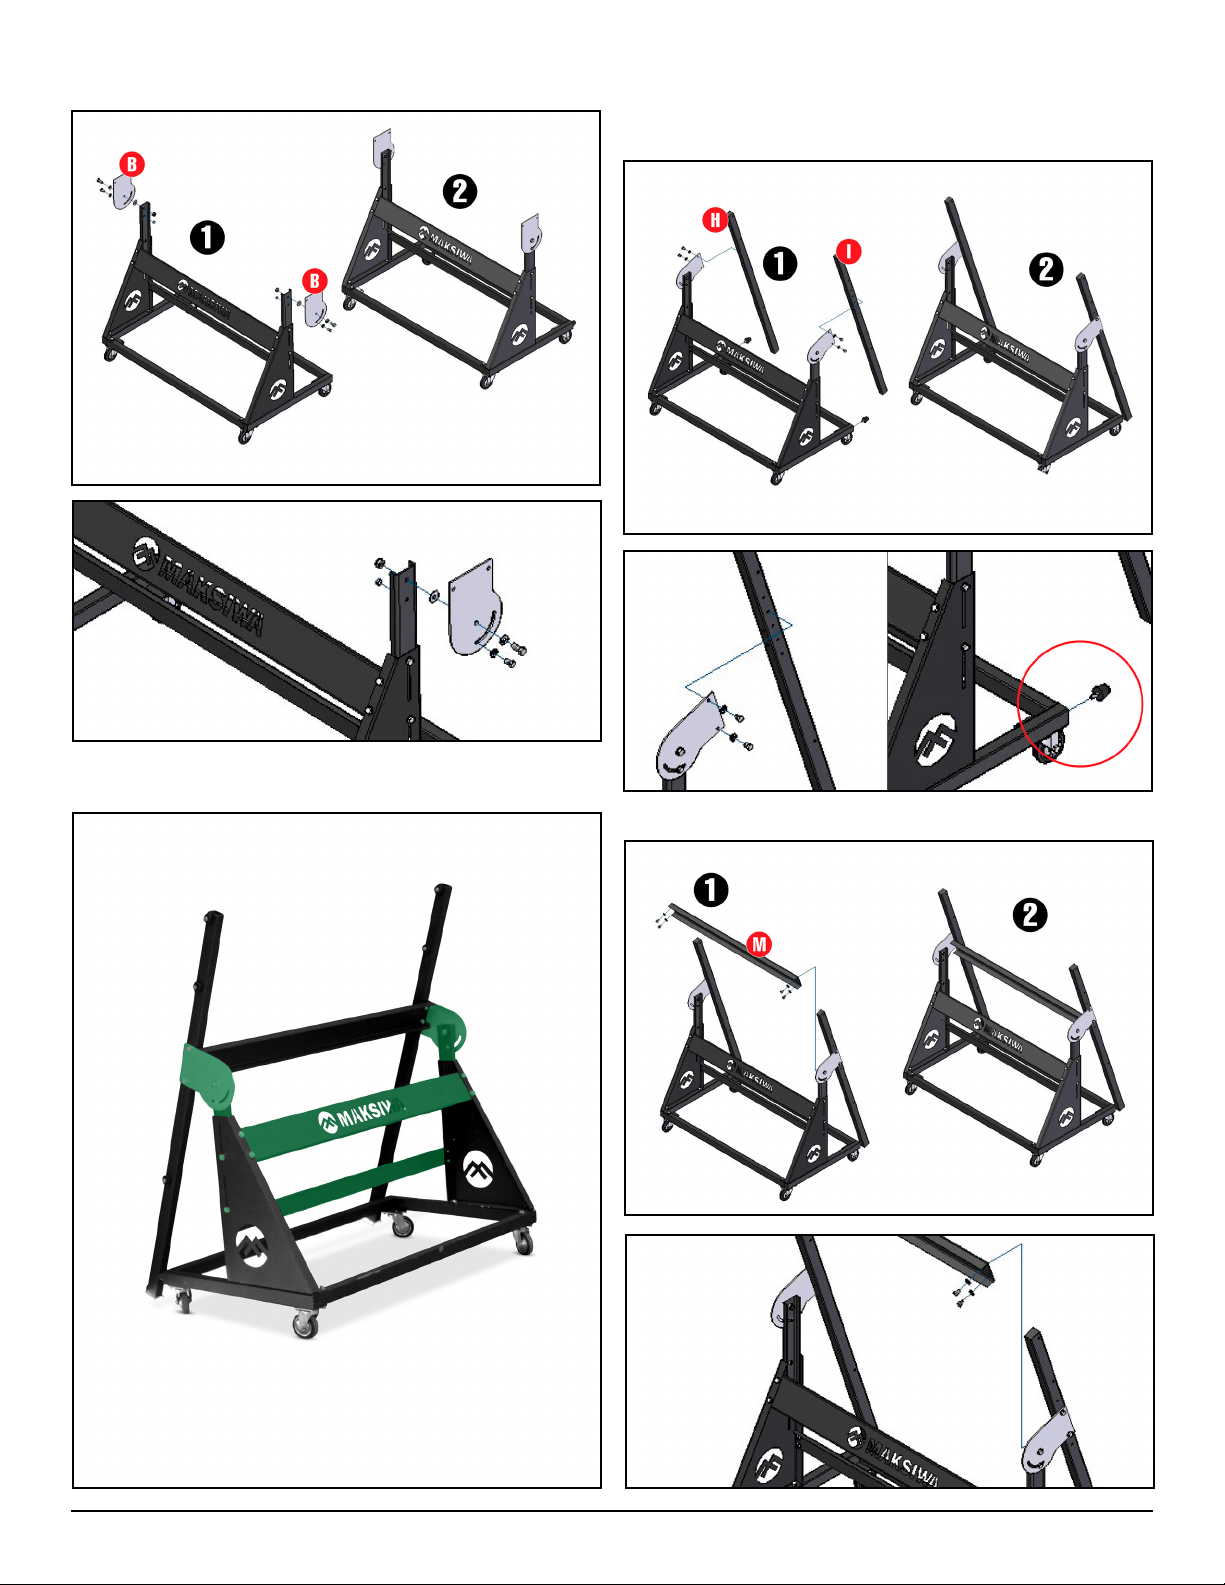
4) Mount the support panel.
Finally, assemble Kit 3:
1) Mount the left and right bar panel support.
Detail
Detail
Ready! Kit 2 is properly assembled.
2) Mount the structure cross reinforcement.
Detail
6

3) Mount the support panel section set.
Kit 3 is assembled.
4) Install all pulleys.
Ready! The TC.3000 Panel Carrier is subject to
assembly. Before using, remember all safety and
installation regulations.
Detail
7

WARRANTY TERMS
MAKSIWA assures the owner that their equipment,
identied by the Serial number issued on the Warranty
Terms.
The equipment under warranty, for two (2) years, is
as followed:
g) Damage caused by bad weather (oods, ooding,
lightning, power outages etc.).
For your safety, trust the repairs, maintenance and
adjustments (including inspection and replacement)
for technical assistance recommended by MAKSIWA,
always use genuine spare parts and accessories,
reassembling to its original machine the same way.
1. The warranty period begins on the date of the
Warranty Terms below.
2. Within the warranty period, the manual labor and
the components replaced by manufacturing defect
will be provided for free as long as duly proved by
Maksiwa Service.
3. Third-party manufacturing equipment that makes
up the MAKSIWA equipment (such as motors,
electrical equipment, belts etc.) are subject to the
terms and conditions of warranty of their respective
manufacturers.
4. In case an exchange of machine is needed, please
return the defective part or machine to MAKSIWA.
5. All workplace adaptations for the equipment are
under the responsibility of the machine owner.
6. If you notice any defect or malfunction when
receiving the equipment, get in touch immediately
with the manufacturer or Dealer. Do not turn it on.
7. Not included in this warranty is any technical visits
aimed at cleaning or adjustments caused by wear,
resulting from normal use of the equipment.
Maksiwa International Inc.
4100 N Powerline Rd, Suite D1
Pompano Beach - Florida - USA
ZIP CODE: 33073
www.maksiwa.com
8. The warranty does not cover problems caused by
mistreatment, carelessness, misuse or inappropriate
use of the functions designed for this equipment in
this manual, as well as poorly executed operations by
untrained operators to operate it.
9. MAKSIWA is not responsible for lost productivity,
direct or indirect damages caused to the owner of the
equipment or to third parties, or any other expense,
including lost prots.
10. Even under warranty, you may lose its validity as
follows:
a) Application of non-original components;
b) Alteration of its original features;
c) Lack of proper maintenance;
d) Improper use of the equipment;
e) Change in equipment or electronic connections;
f) Damage caused by mechanical shock or exposure to
unsuitable conditions (humidity, salt spray, corrosive
agents, etc.);
8

16
19
15
20
26
27
17
28
18
25
24
22
21
23
3
3
2
10
13
12
11
1
8
14
4
5
6
7
9
28 HEX SCREW M8X16 ZB 2
27 SCREW M10X25 ZB 2
26 FLAT WASHER M10 ZB 2
25 SCREW AUTO PILOT PARLOCK M10 2
24 FLAT WASHER 3/8 ZB 2
23 SCREW M8 X 20 ZB 2
22 SUPPORT PANEL 2
21 SCREW AUTO PILOT PARLOCK M8 8
20 PA 6.6 BLACK 8X9X30 12
19 SCREW M8 X 60 ZB 6
18 SUPPORT PANEL SECTION SET 1
17 LEFT BAR PANEL SUPPORT 1
16 RIGHT BAR PANEL SUPPORT 1
15 TOP REINFORCEMENT 1
14 FRONT SUSPENSION LOWER TRAY BRACKET 2
13 STRUCTURE UPPER REINFORCEMENT 1
12 STRUCTURE CROSS REINFORCEMENT 1
11 LEFT STRUCTURE 1
10 RIGHT STRUCTURE 1
9 FRONT STRUCTURE 1
8 CROSSBAR REAR STRUCTURE 1
7 HEX SCREW M8X12 ZB 40
6 FLAT WASHER M8 ZB 52
5 MOBILE RUBBER WHEELS 3” 4
4 BASE STRUCTURE WHEELS 4
3 HEX SCREW M8 ZB 12
2 SUPPORT HEIGHT REGULATION 2
1 SIDE STRUCTURE CROSSBAR ASSEMBLY 2
Nº REF. NAME QTY.
PANEL CARRIER
1
9
 Loading...