

Page 1
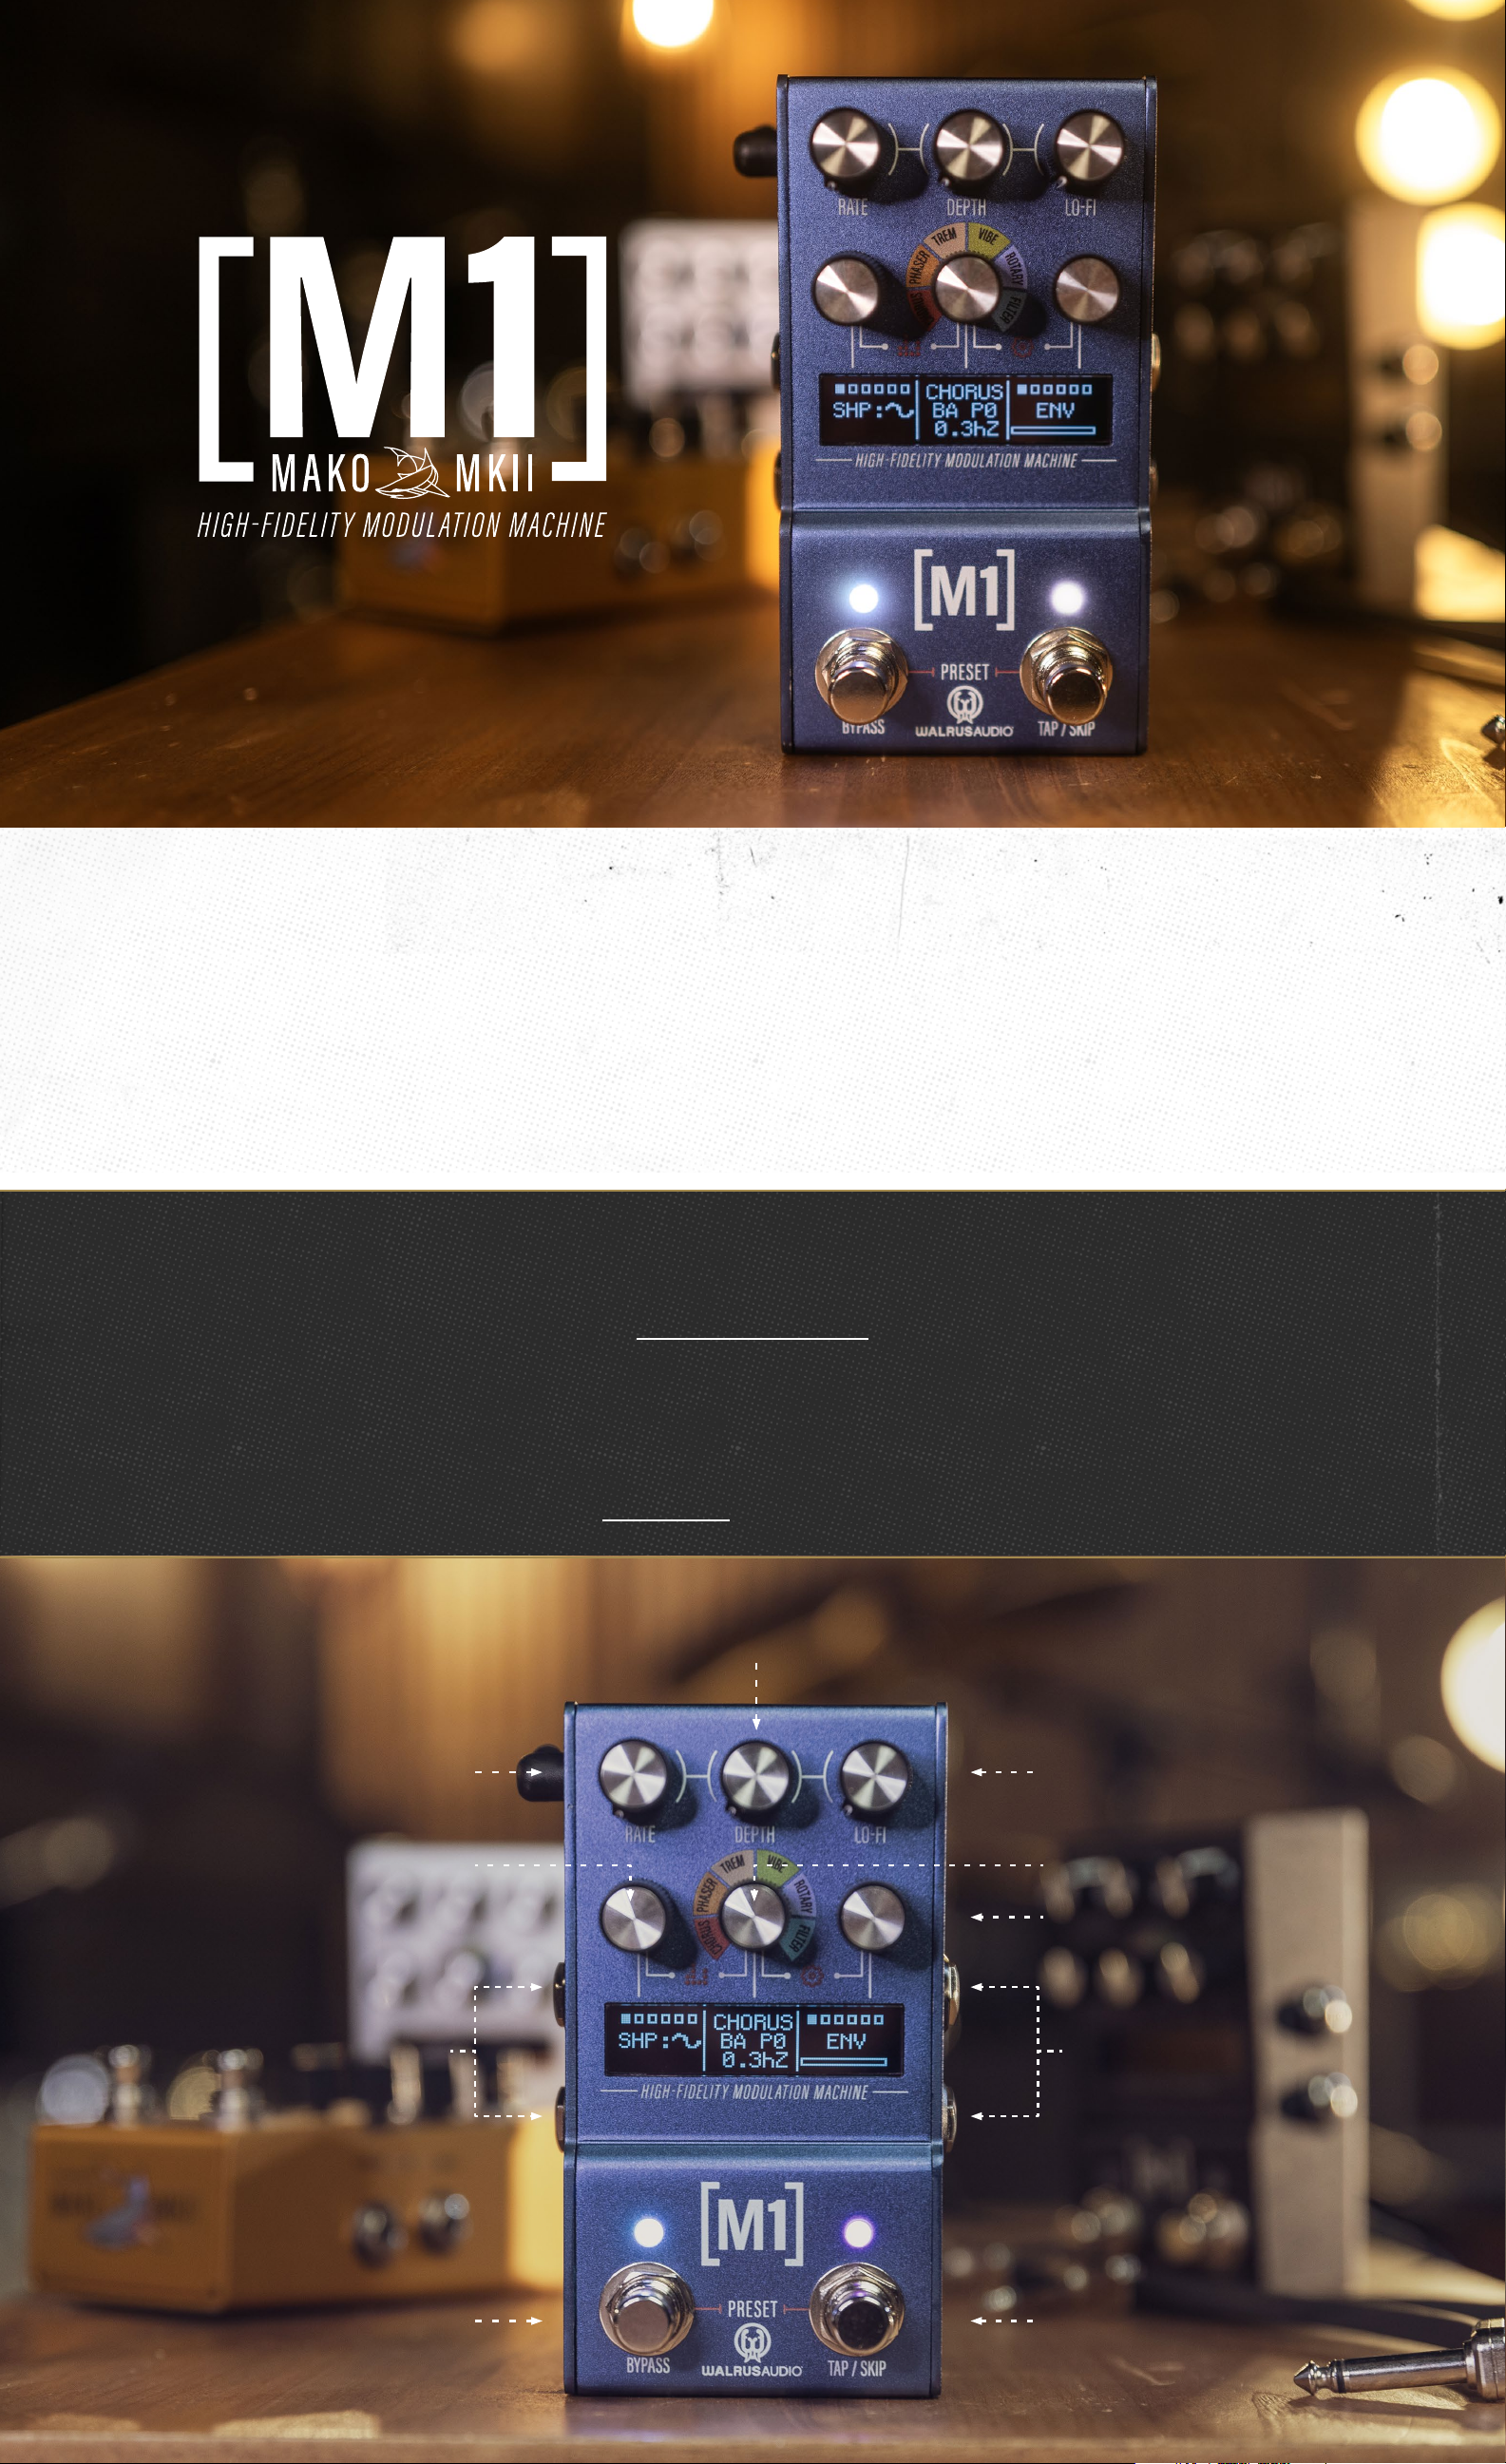
The M1 is a powerful multi-function modulation machine with six customized, studio-quality
programs: Chorus, Phaser, Tremolo, Vibrato, Rotary, and Filter. Each program has a wealth of
options to tune, tweak, customize, and then save to one of nine onboard presets (128 with MIDI).
A sound explorers delight, the M1 features a dedicated lo-fi knob allowing you to mix various lo-fi
parameters into every program. Add subtle movement and texture to float under your playing or
make a massive statement with a thick swirling chorus to choppy panning tremolo. Write your
sonic story in any style and genre with the M1 High-Fidelity Modulation Machine.
9 volt DC, Center Negative • 300mA min*
*The use of an isolated power supply is recommended for powering all Walrus Audio Pedals.
Daisy chain power supplies are not recommended.
Got questions or need a repair?
Email [email protected] to talk with a real live human about your Walrus gear!
CONTROLS
LEFT ENCODER
This product comes with a limited lifetime warranty.
RATE
Click Here for more info.
DEPTH
LO-FI
MIDDLE ENCODER
RIGHT ENCODER
LEFT LEFT
INPUT JACKSOUTPUT JACKS
RIGHT RIGHT
BYPASS SWITCH TAP/SKIP SWITCH
Page 2
ADJUSTING PARAMETERS
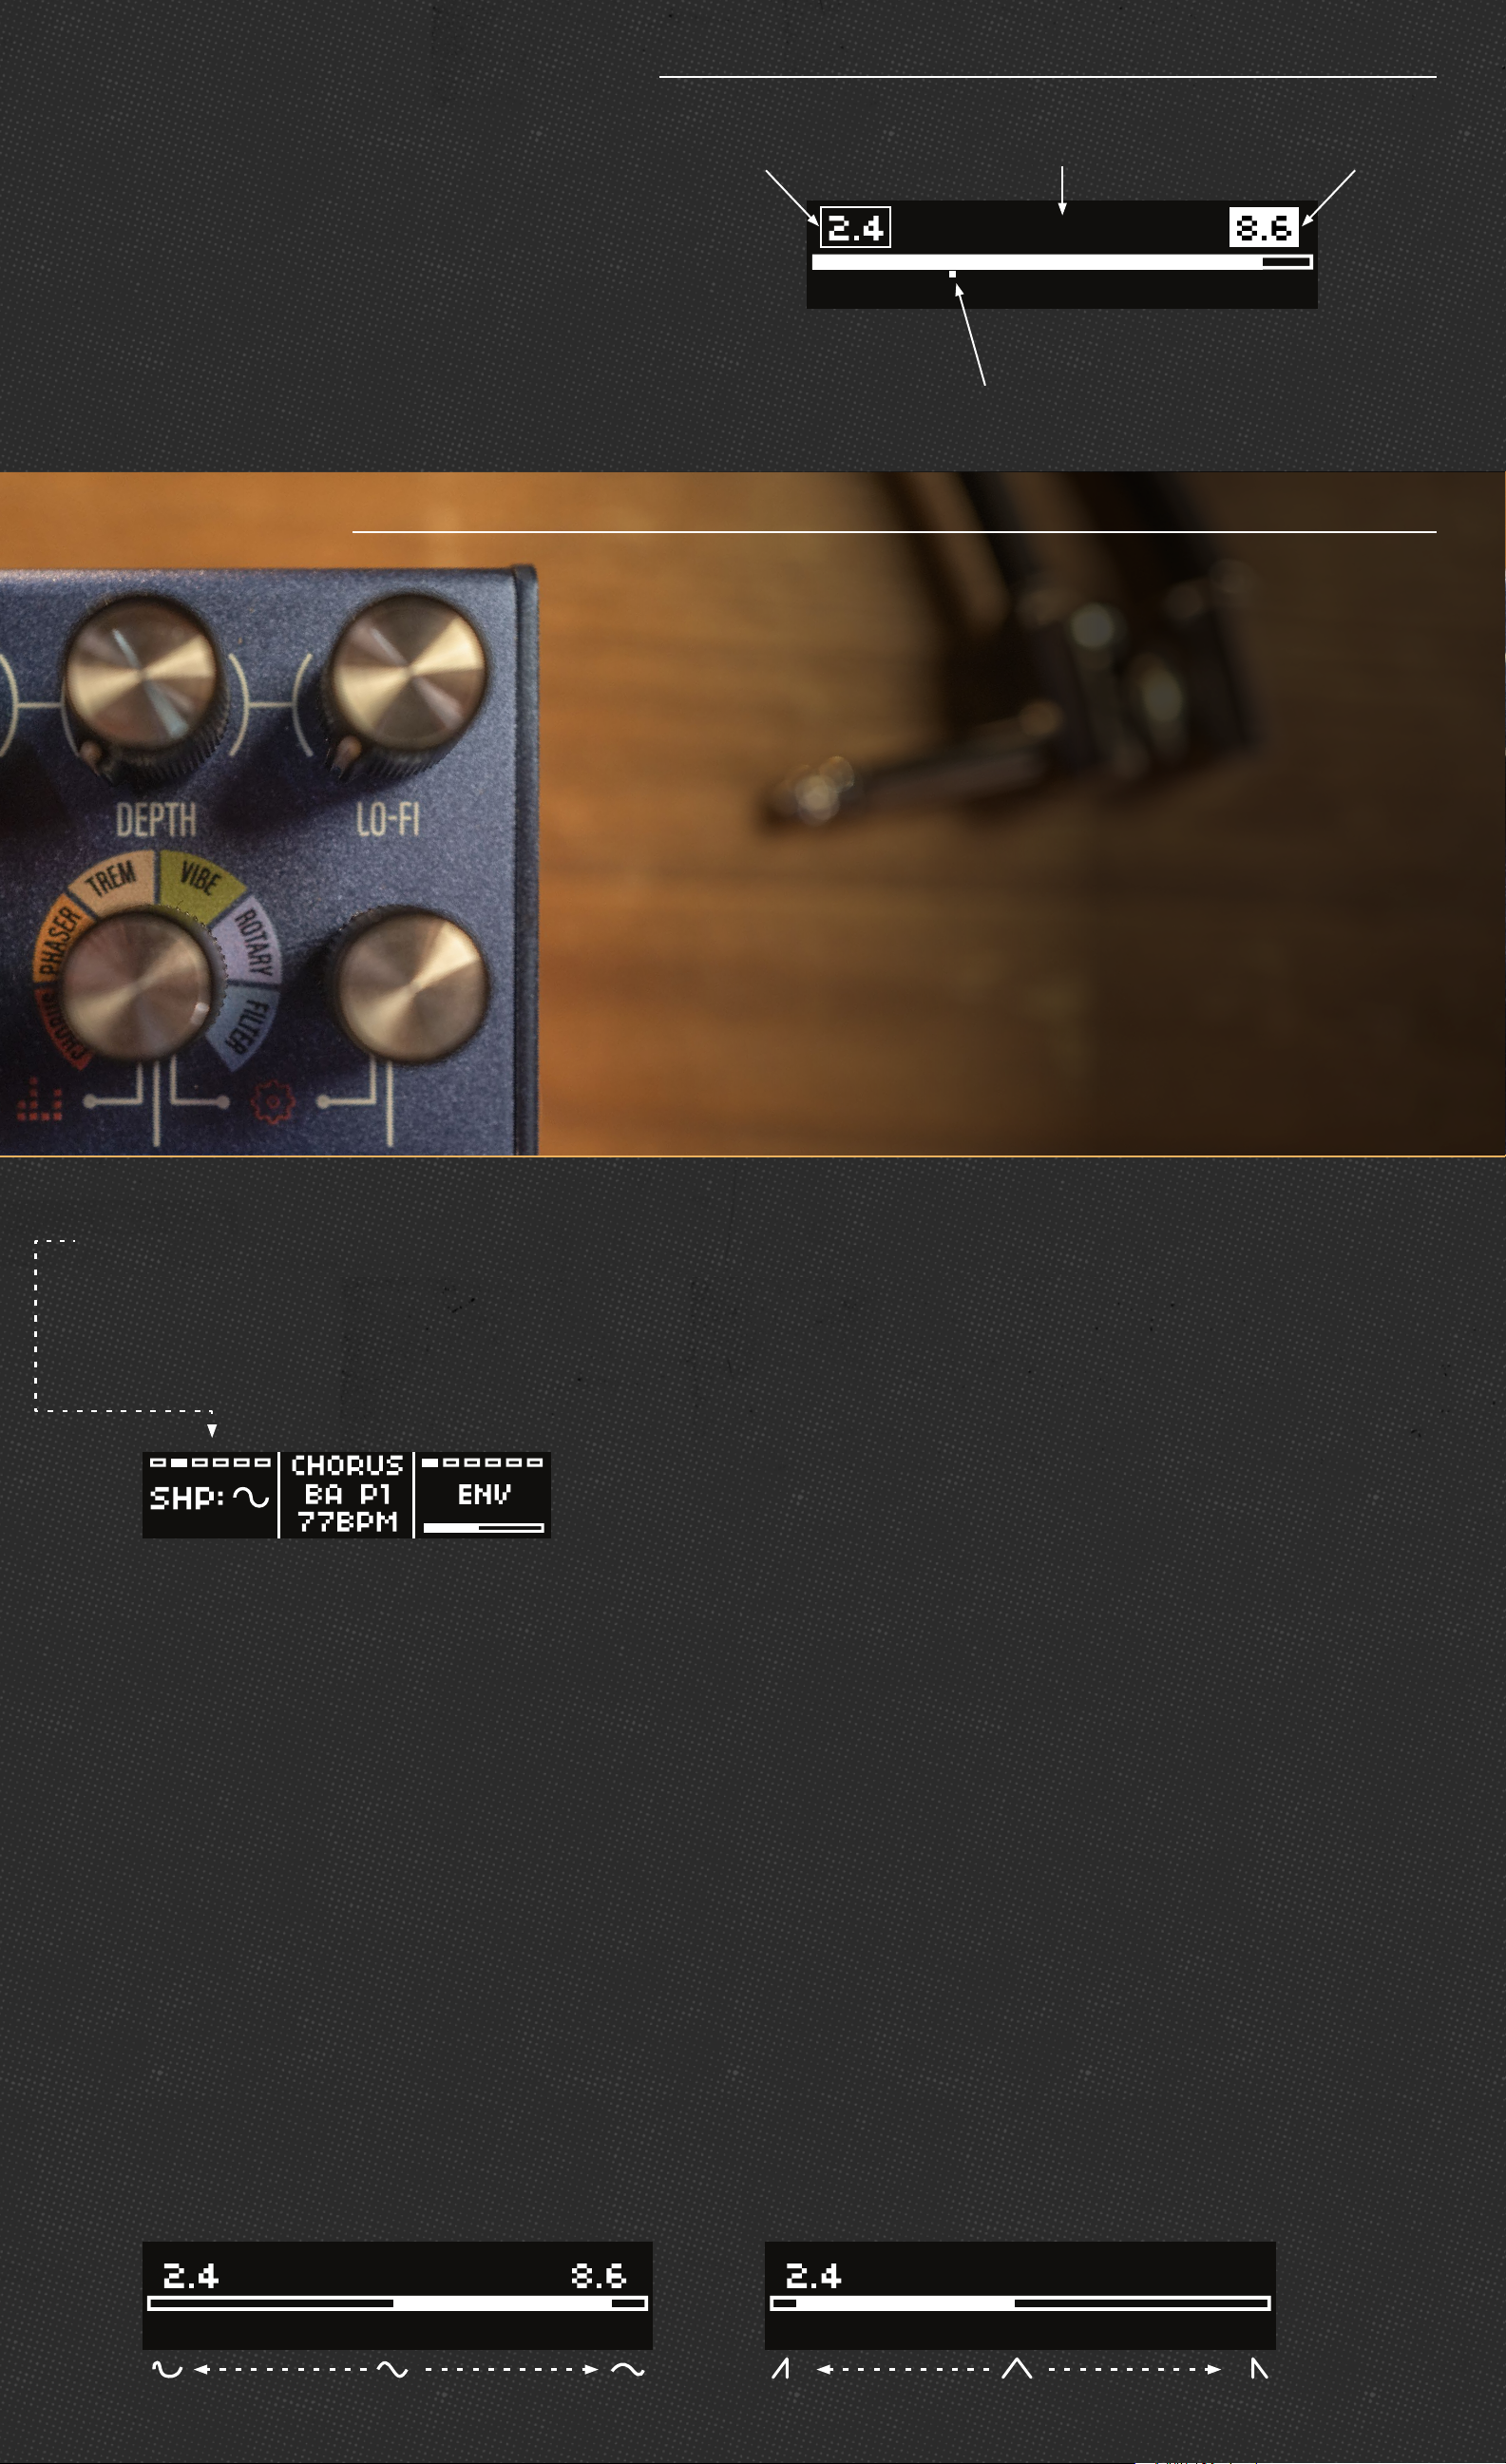
When adjusting any knob parameter, you will
see a bar appear on the screen. The higher
you turn up a parameter, the fuller the bar
will appear. The top left number is your stored
preset value. The top right number shows the
value of where the knob is currently set. The dot
below the bar shows you the last value used
before turning the knob.
CONTROLS
Rate - The Rate knob sets the speed of the main LFO. Set lower for long
gentle movement, and higher for wild and fast modulation.
PRESET
VALUE
NAME OF PARAMETER
BEING ADJUSTED
RATE
8.6hZ
LAST VALUE USED
CURRENT VALUE
WHERE KNOB IS SET
Depth - The Depth knob determines the amount of modulation heard
by setting the amplitude of the main LFO. Go from no modulation at
minimum to seasick, mind-bending effects at higher settings.
Lo-Fi - The Lo-Fi knob allows you to adjust the overall amount, or “mix”, of
the six lo-fi parameters. Turning this knob up brings in any lo-fi parameters
that are engaged while maintaining their relative mix, making it easy to
blend in unique combinations of these effects to taste. Setting this knob
to minimum turns off all lo-fi parameters no matter their individual levels.
See the Lo-Fi section for more info on all the adjustable parameters.
Left Encoder - The Left encoder offers creative control over key modulation parameters for each program
allowing you to creatively shape each modulation program to taste. Cycle through each option by pressing
down on the encoder until you reach the desired control, then turn the encoder knob to adjust. Alternatively,
press and hold down the encoder and then turn to scroll through options then release to select. Note that
not every option listed below will apply to every program.
Type: Choose between three different effect types within each program. See the program section for
a description of each program type.
Shape: Choose sine, triangle, or square LFO wave shapes to modulate your signal.
Division (Div): Adjust the tap division used by the M1 to set the LFO speed when tapping a tempo.
Choose between quarter, quarter note triplet and eighth note, dotted eighth note, and sixteenth note.
Tone: Adjust the overall tone of the effect. Set lower for darker, more muted sounds and higher for
brighter, full-frequency tones.
Symmetry(Sym): Adjust the symmetry of the main LFO shape you have selected. Setting at 0.0 will
yield traditional LFO shapes corresponding to the selected shape. As you move this control away from
noon, the LFO wave shape will asymmetrically deform toward the beginning of the wave with
negative values and toward the end of the wave with positive values. For example, selecting the
triangle shape and setting the symmetry knob to minimum would produce a traditional sawtooth
wave. See below for other examples of wave shapes at min and max settings with the symmetry knob.
Explore the areas in between to create unique, non-traditional LFO waves.
SINE WAVE EXAMPLE TRIANGLE WAVE EXAMPLE
SYMMETRY SYMMETRY
-8.6
<|> <|>
Page 3
CONTROLS
Left Encoder Continued
Lag: Sets the center delay time that the LFO
modulates around. From smooth tight modulation at
lower settings, to noisy nauseating detune at
maximum.
BPM: Manually set the rate in beats per minute for
Chorus, Phaser, Tremolo, and Vibrato.
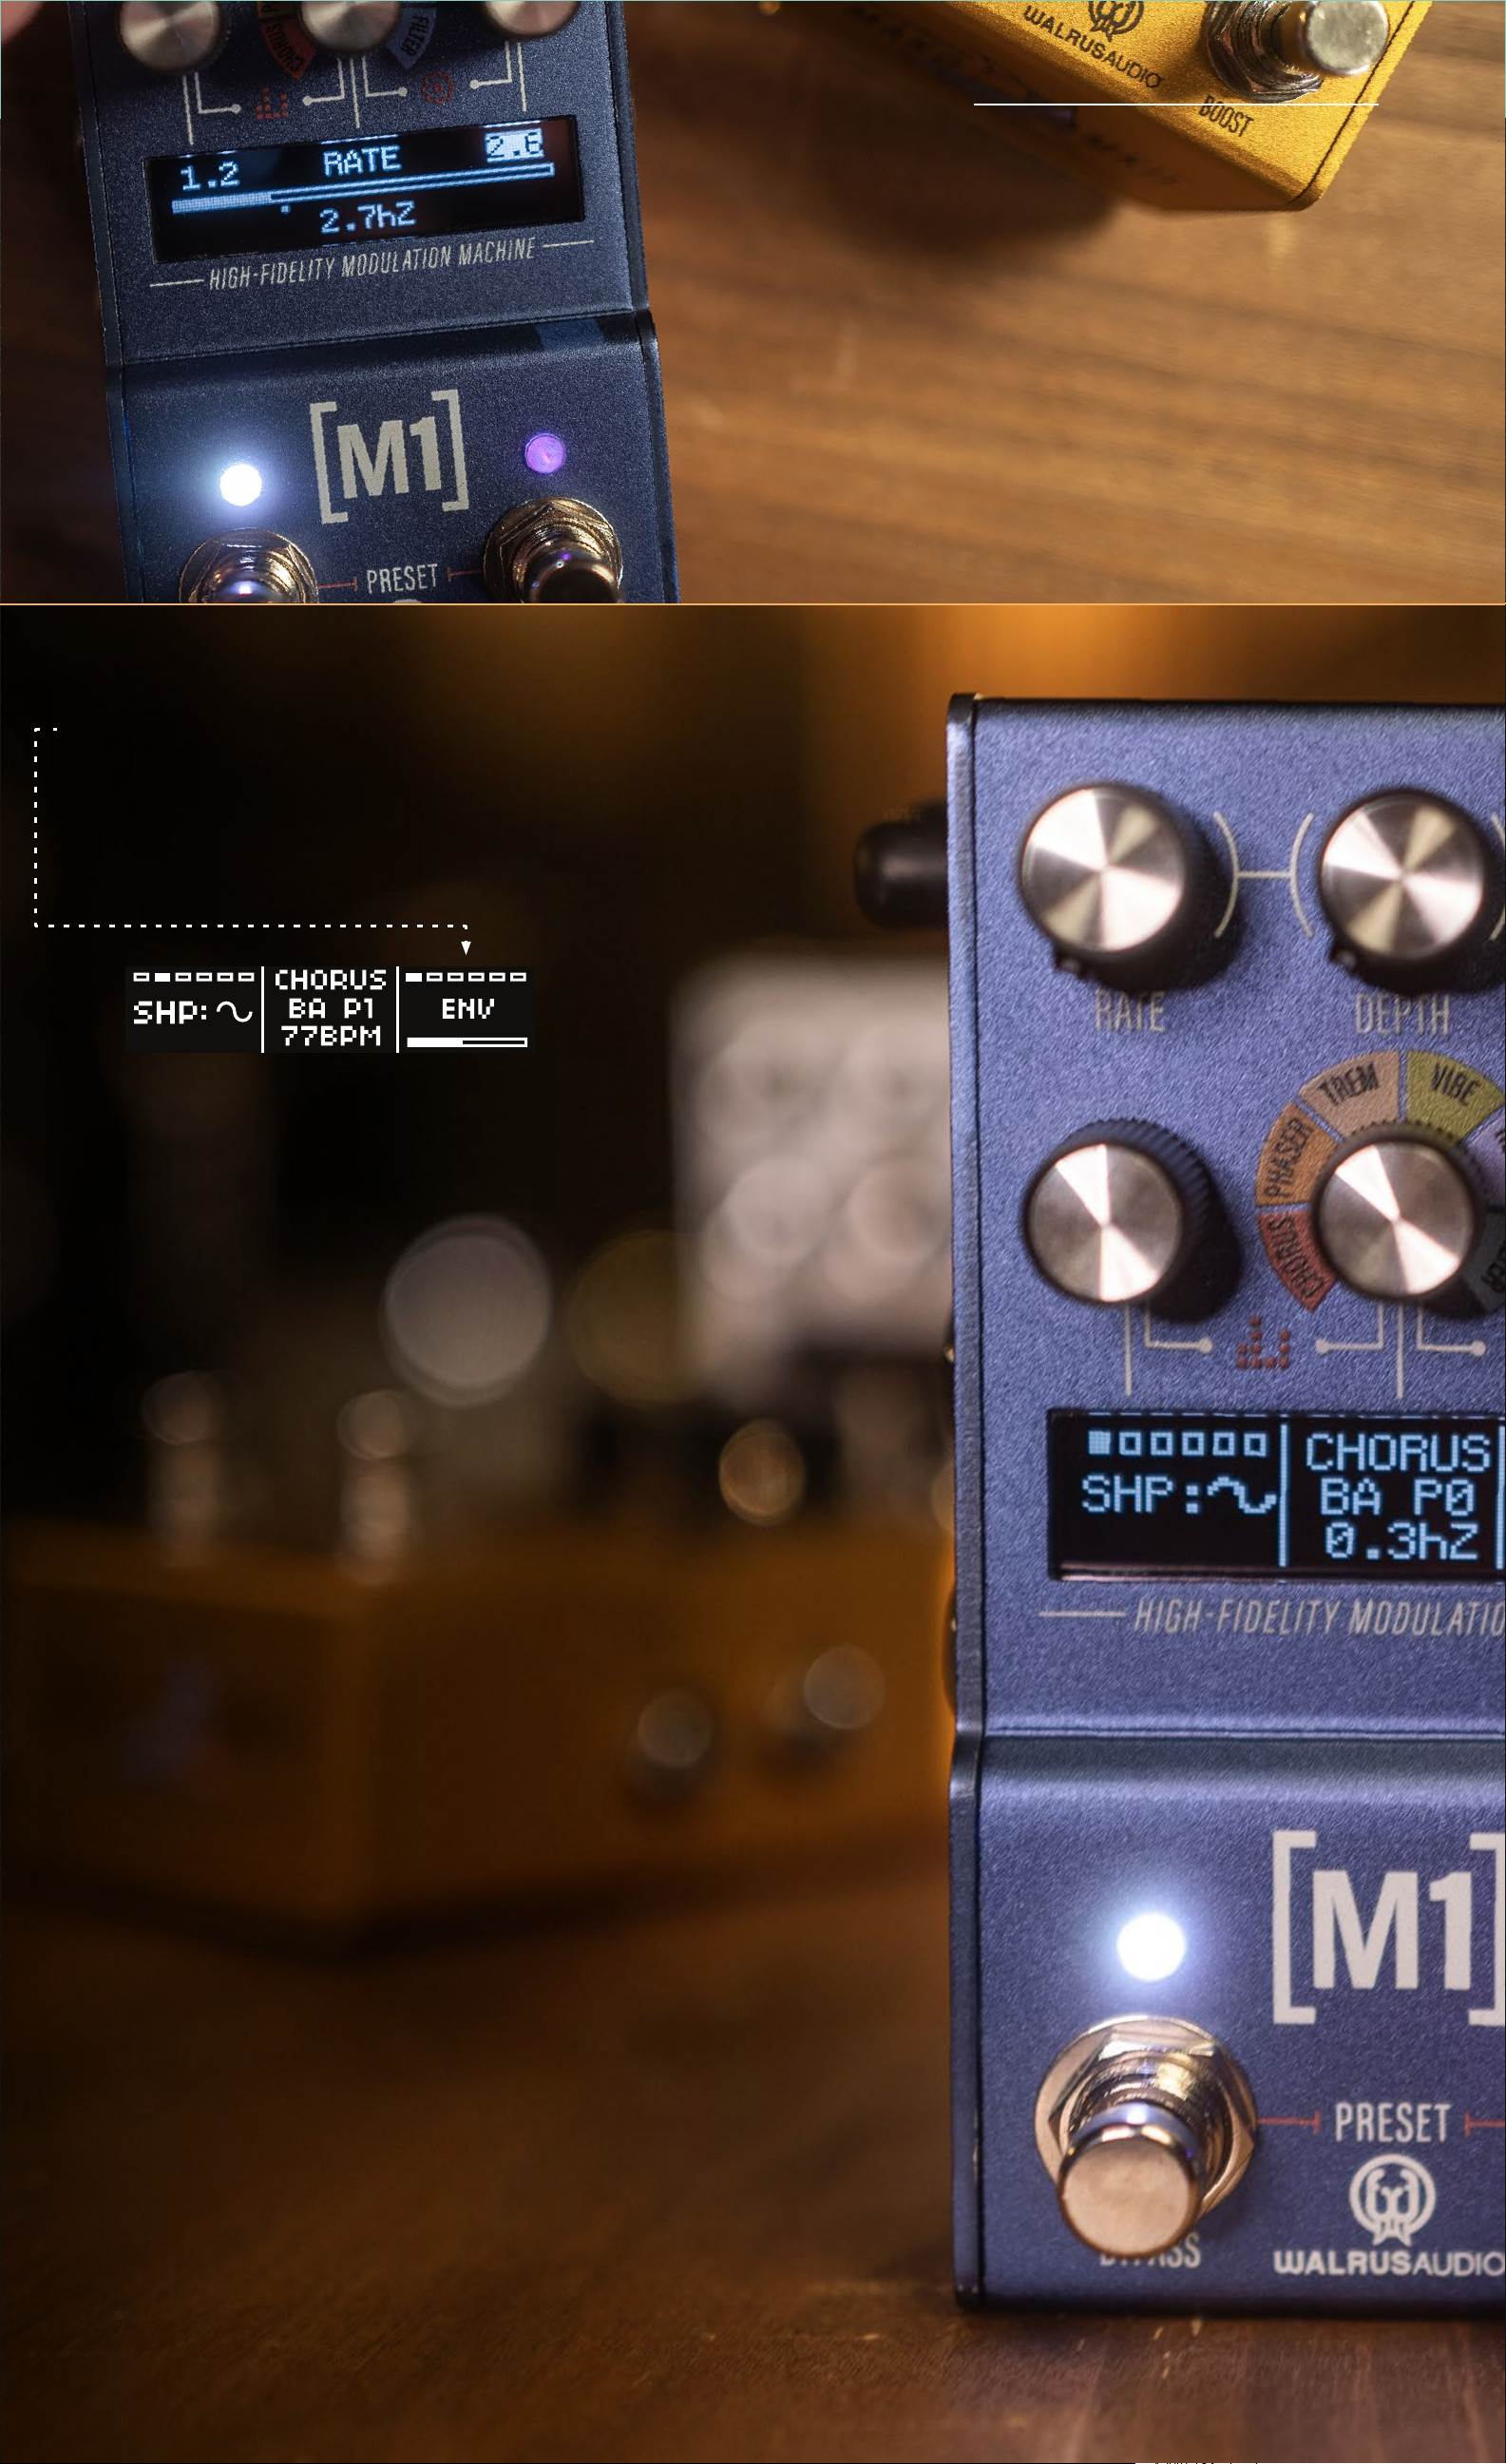
Center Encoder - Rotate the Center Encoder to change
programs.
Right Encoder (LO-FI Parameters) - Use the lo-fi parameters to make
your High-Fidelity modulation machine sound...not so High-Fidelity.
Take your signal back in time and degrade it to sound like the tech of
yesteryear with envelope, drive, space, age, noise, and warble. Apply
the lo-fi sounds to any program or preset then use the Lo-Fi knob to
adjust the overall mix.
Env: Lo-fi Envelope allows you to dynamically open the Tone
control based on how hard you play. Lower settings will cause a
small increase in your Tone knob position and higher settings will
cause a bigger jump in the Tone knob position. Hint: This effect
will be more apparent when the tone knob is around noon or
below.
Drive: Lo-fi Drive offers a crunchy analog-style drive to be added
to your signal simulating the warm sound of overdriven analog
circuity.
Space: Lo-fi Space allows you to add some reverb to your
modulation chain. Turn to minimum to disengage and turn up
to increase mix and decay.
Age: Lo-fi Age engages a complex set of filters used to simulate
the limited bandwidth of vintage audio players and recording
equipment. There are five predefined filter combinations
around the dial. As you turn it up, you go further back in time
removing more lows and highs from your signal. From modern,
full-frequency at minimum to subtle low-fidelity tones in lower
positions and old, thin AM radio sounds in higher positions. Note:
as you turn this control up and move back in time, the character
of the lo-fi Noise also changes.
Noise: Lo-fi Noise adds analog-inspired noise to your signal.
The noise character changes depending on what Program and
Type are selected. Turn this control up to add tape hiss and vinyl
crackle and pop to the selected program.
Warble: Lo-fi Warble manipulates the main LFO wave shape
causing it to deform making interesting and less predictable
modulation. Set the knob below noon for a more gentle “warping”
of the wave and above noon to push the LFO into more of a
random shape.
Page 4
PRESETS
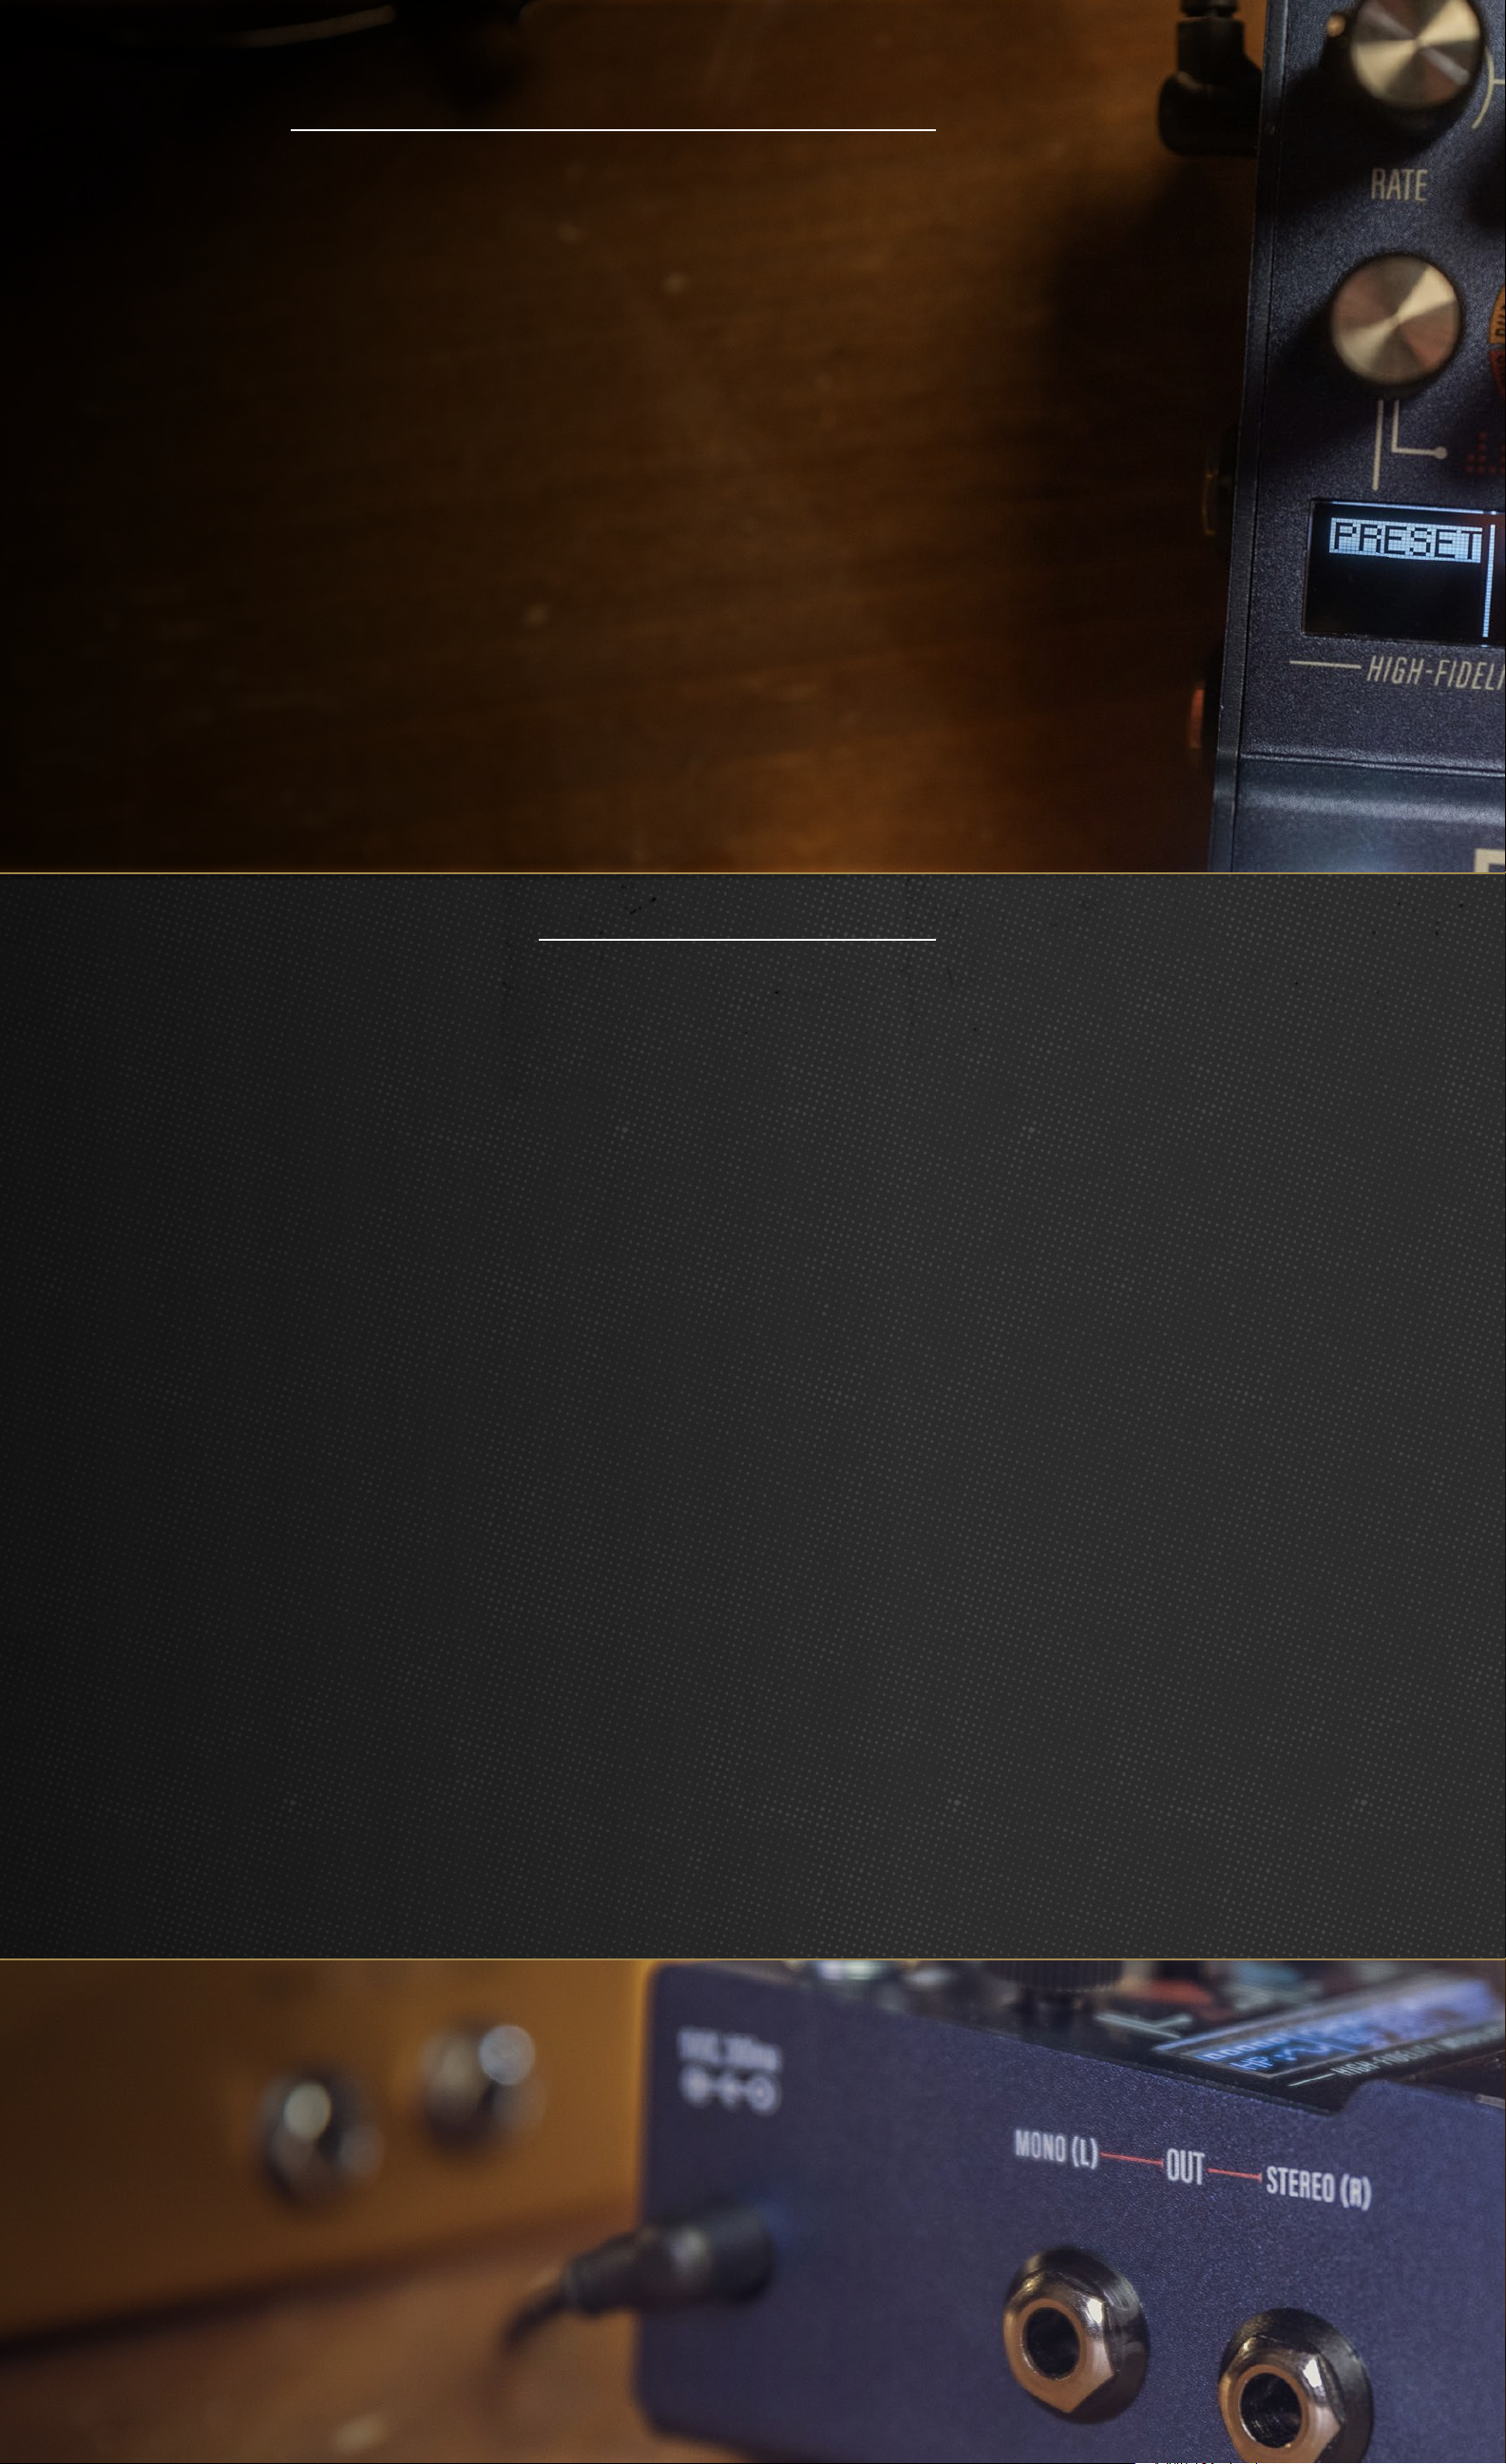
The pedal includes 128 total preset slots. Good luck using them all! Access them by pressing the Left and Center
encoders simultaneously. The first 9 presets are accessible from the pedal in Banks A, B, and C and can be cycled
through three at a time by pressing both stomp switches simultaneously. All 128 are accessible by manually
selecting in the preset menu or via MIDI Program Change messages, which are outlined in the MIDI section.
o To recall a preset bank:
1. Enter the global sound menu by pressing the Left and Center encoders simultaneously.
2. With “Preset” highlighted in the first column, turn the Center encoder to select the preset bank. Press down
on the Center encoder to select the bank.
3. Scroll through the presets in that bank by turning the Right encoder. Press down on the Right encoder to
select your preset number.
4. Press the Left and Center encoders simultaneously to exit the menu.
o To save a preset:
1. Scroll to the preset color (red, green, blue) in the bank you want to save a new sound by pressing Bypass and
Tap/Skip simultaneously.
2. Using the knobs and switches, dial in the desired modulation sound. The Rate LED will turn purple indicating
the preset has been modified.
3. To save, hold down the Bypass and Tap switches until the preset LED blinks. The preset is now saved and the
LED will return to the preset color.
PRESET COPY/PASTE
Any preset can be copied and placed into another preset slot. While in the preset menu, press and hold down
the Right encoder for three seconds to enter the copy/paste menu. You will have the following options:
• COPY:
1. Scroll to the preset you want to copy then press and hold down the Right encoder to open the copy/
paste menu.
2. Select copy.
3. The menu will now return to the preset menu.
• PASTE:
1. Scroll to the preset you want to paste then press and hold down the Right encoder to open the copy/
paste menu.
2. Scroll to the Paste option. You will now see the number of the slot that you have copied and will be
replacing in the new slot.
3. Select Paste to confirm. The menu will now return to the preset menu.
• OVERWRITE:
1. Overwrite saves the current parameter values into the preset (this is the same thing as pressing and
holding both stomp switches to save a preset).
• SWAP:
1. Scroll to the preset you want to swap then press and hold down the Right encoder to open the copy/
paste menu.
2. Scroll to the Swap option and press down on the Right encoder to select Swap. This will return you to
the preset menu.
3. Scroll to the preset slot you wish to swap with and press and hold down the Right encoder to enter
the preset/swap menu.
4. Scroll to the Swap option. You will now see the number of the slot that you will be swapping presets
with.
5. Press down on the Right encoder to confirm. The menu will now return to the preset menu.
• BACK: Returns to the preset menu without making changes.
INPUTS AND OUTPUTS
The M1 offers multiple input and output
configurations and features true bypass circuity.
• Mono In / Mono Out
• Mono In / Stereo Out
• Stereo In / Stereo Out
USB-C - Used to load IR files and update
firmware via computer via walrusaudio.io.
Page 5
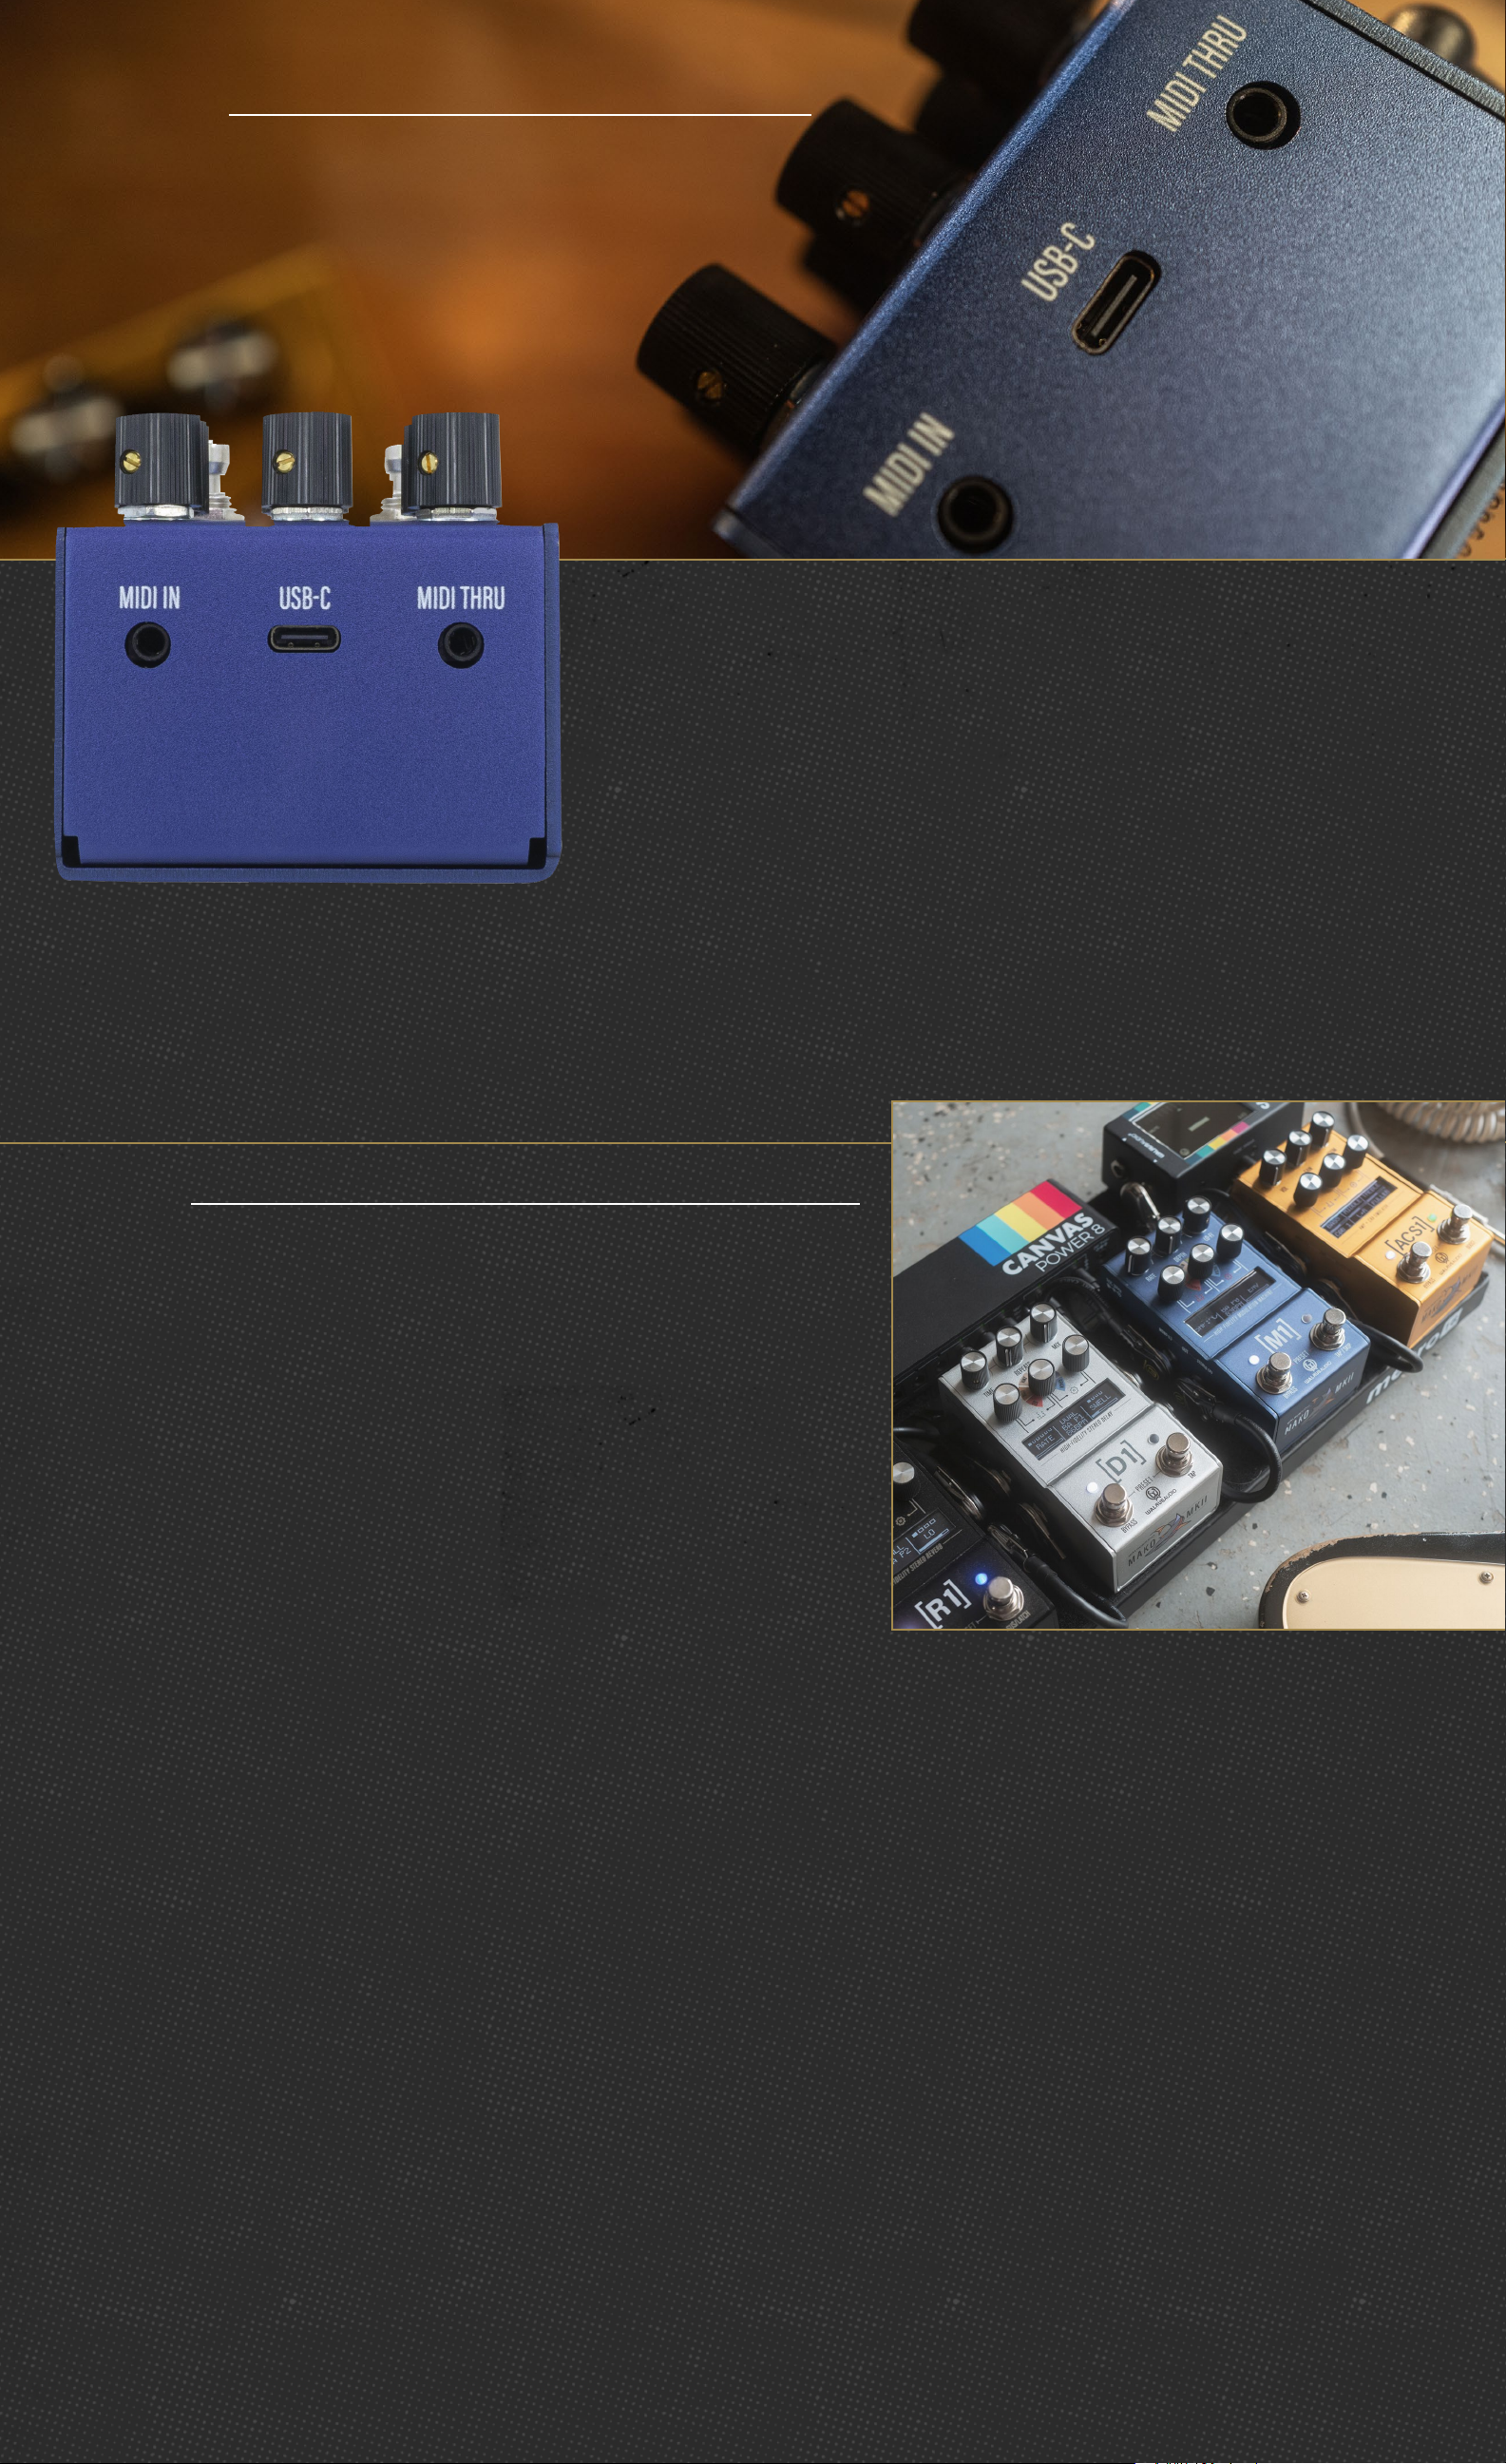
MIDI
The M1 can be controlled via standard MIDI messages.
Simply connect your MIDI controller to the M1 MIDI “IN”.
Downstream MIDI devices can be connected to the MIDI
“THRU” which simply lets all incoming MIDI messages pass
through to your other devices. The M1 ships with the MIDI
channel set to 1 by default.
o MIDI In – Connect upstream MIDI devices or your MIDI controller
to the M1 MIDI “IN.”
o MIDI Thru – Connect downstream MIDI devices to the M1 MIDI
“THRU.”
o MIDI Clock - The M1 accepts MIDI clock and sets its modulation
time anytime it sees a change in MIDI clock tempo. MIDI clock,
when sent, will override the tempo set with the Time knob or Tap
switch. You can, however, tap a new tempo after the tempo has been set with MIDI clock. It’s a good practice
to limit your MIDI clock to only send a few clock pulses at a time since the M1 will quickly lock in the tempo.
o MIDI PC – Presets on the M1 are able to be recalled via MIDI program change messages. To recall a preset,
simply send a program change message corresponding to the desired preset to be recalled on the M1 MIDI
channel.
MIDI
PRESET MIDI PROGRAM CHANGE (PC)
Bank A (Red) 0
Bank A (Green) 1
Bank A (Blue) 2
Bank B (Red) 3
Bank B (Green) 4
Bank B (Blue) 5
Bank C (Red) 6
Bank C (Green) 7
Bank C (Blue) 8
Accessible via MIDI 0-127
o MIDI CC – Most parameters on the M1 can be controlled via MIDI CC messages. The list below shows all
applicable MIDI CC numbers and their associated parameters and control values.
PARAMETER /PARAMETER / MIDI CC # / MIDI CC # / VALUES / MIDI RangeVALUES / MIDI Range
Rate 3 0.2 - 10.0 0 - 127
Tap 85 0 || 1 0 || 127
Bpm N/A 12 - 600 0 - 127
Depth 9 0.0 - 1.0 0 - 127
Lo-Fi Mix 14 0.0 - 1.0 0 - 127
Shape 15 0 - 2 0 - 2
Div 16 0 - 5 0 - 5
Type 17 0 - 2 0 - 2
Tone 19 0.0 - 1.0 0 - 127
Sym 20 (-)1.0-1.0 0 - 127
X 21 0.0 - 1.0 0 - 127
Lofi Env 22 0.0 - 1.0 0 - 127
Lofi Drive 23 0.0 - 1.0 0 - 127
Lofi Space 24 0.0 - 1.0 0 - 127
Lofi Age 25 0 - 4 0 - 4
Lofi Noise 26 0.0 - 1.0 0 - 127
Lofi Warble 27 0.0 - 1.0 0 - 127
Program 18 0.0 - 1.0 0 - 5
Bypass 31 0 || 1 0 || 127
Tap Held 87 0 || 1 0 || 127
Rotary Speed 86 0 || 1 0 || 127
Output Gain 88 0.0 - 1.0 0 - 127
Midi Clock Ignore 89 0 || 1 0 || 127
Wet Dry Mix 104 0.0 - 1.0 0 - 127
Flange Feedback 105 0.0 - 1.0 0 - 127
Rotary Slow Rate 106 0.2 - 10.0 0 - 127
Rotary Fast Rate 107 0.2 - 10.0 0 - 127
Page 6
PROGRAMS
Note: Some parameters share the “X” MIDI CC value (CC #21). These are marked with an (X) next to
them below.
CHORUS
From subtle chorus to vibrant, and lush tri-chorus that will instantly teleport you to the 80s. Type I is
a traditional chorus great for tight smooth chorus tones. Type II finds its roots in the classic tri-chorus
effect running three chorus units in parallel for a lush multi-dimensional chorus. Type III is a Flanger.
CHORUS PARAMETERS
. TYPE -
Type 1: Traditional Chorus
Type 2: Tri-Chorus
Type 3: Flanger
. SHAPE
. DIV (DIVISION)
. TONE
. SYM (SYMMETRY)
. LAG (X)
. BPM
PHASER
Classic 70s phaser sounds we all know and love, with added features that you wouldn’t expect. Type I
is a 2-Stage Phaser that produces a single notch to the classic mild phaser. Type II is a 4-Stage model
producing 2 notches for a stronger effect. Type III is a phaser modeled after the unique tuning and
LFO shape found in a Uni-Vibe.
PHASER PARAMETERS
. TYPE -
Type 1: 2-Stage Phaser
Type 2: 4-Stage Phaser
Type 3: Univibe Tuned Phaser
2. SHAPE
. DIV (DIVISION)
. TONE
. SYM (SYMMETRY)
. FEEDBACK
. BPM
TREMOLO
This program emulates tremolo with three different algorithms containing all the bells, whistles,
and even a cherry on top. Type I is excellent for traditional sounds similar to optical and bias
tremolos that raise and lower the entire frequency range – similar to the Monument in standard
mode. Type II is a warm and cozy harmonic tremolo – similar to the Monument in harmonic mode.
This unique sound is formed by raising and lowering your high and low frequencies opposite each
other. Type III offers several predefined patterns for rhythmic sequenced pulsing tremolo.
TREMOLO PARAMETERS
. TYPE -
Type 1: Traditional Tremolo
Type 2: Harmonic Tremolo
Type 3: Pattern Tremolo
2. SHAPE / PATTERN In type 3, shape
becomes tremolo pattern type.
. DIV (DIVISION)
. TONE
. SYM (SYMMETRY)
. STEREO SPREAD (X) Adjustable phase
difference between LFOs creating a wider stereo
sound.
. BPM
VIBE (VIBRATO)
Make good parts great with detuned, warbly, and vintage sounds that hearken back to the 60s. Type
I focuses on traditional vibrato sounds. Old record players inspire a digital take in type II. With classic
RPM’s on the rate knob and some noise character you’d find in your dad’s old dusty Speedwagon
LPs. The rate knob can select 33rpm, 45rpm, and 78rpm speeds in this mode. Type III is a modern
take on the wow and flutter pitch characters found in old tape players. Warm and charming with a
hint of nostalgia.
VIBRATO PARAMETERS
. TYPE
Type 1: Traditional Vibrato
Type 2: Vinyl Vibrato
Type 3: Tape Vibrato
2. SHAPE
3. DIV (DIVISION)
. TONE
. SYMMETRY
. PHASE (X) For Traditional & Vinyl, makes the right
channel further out of phase creating a wider stereo feel.
FLUTTER (X) For Flutter, determines amount of flutter
applied to your signal.
. BPM
Page 7
PROGRAMS
ROTARY
Because you can’t fit a Leslie speaker on your pedalboard. Type I aims for that traditional watery
sound of a well-oiled Leslie speaker. Type II only spins the horn but still plays the sound out of the
drum. Type III only spins the drum but still plays sound from the horn.
ROTARY PARAMETERS
. TYPE
Type 1: Horn + Drum (Traditional Rotary Speaker)
Type 2: Horn Only
Type 3: Drum Only
. TONE
. MIC - Adjusts virtual mic placement
relative to the Leslie speaker
models, allowing for creative control
of stereo imaging.
FILTER
Add tone-shaping movement to your signal with different modulated filters. Type I is a low-pass
filter good for modulated darker tones. Type II is a high-pass filter used to creatively modulate your
low frequencies.Type III is a bandpass filter forming a sliding “window” of frequencies.
Note: When in the Filter program, the Rate knob becomes a cutoff control and Depth controls the
envelope amount.
FILTER PARAMETERS
. TYPE
Type 1: Low-pass Filter
. ATK (ATTACK) - Attack speed of the
envelope follower.
Type 2: High-pass Filter
Type 3: Bandpass Filter
. RESONANCE (TONE)
. RELEASE (X) - Release speed of the
envelope follower.
MOMENTARY SKIP
Used to tap the desired LFO rate, which is scaled by the
selected tap division. The Tap/Skip switch also allows
you to momentarily engage a “skipping” effect like a
needle skipping on a record player. Press and hold to
engage the effect to automatically repeat the last few
milliseconds of audio until the switch is released. The
length of audio repeated is determined by the current
LFO rate.
Page 8
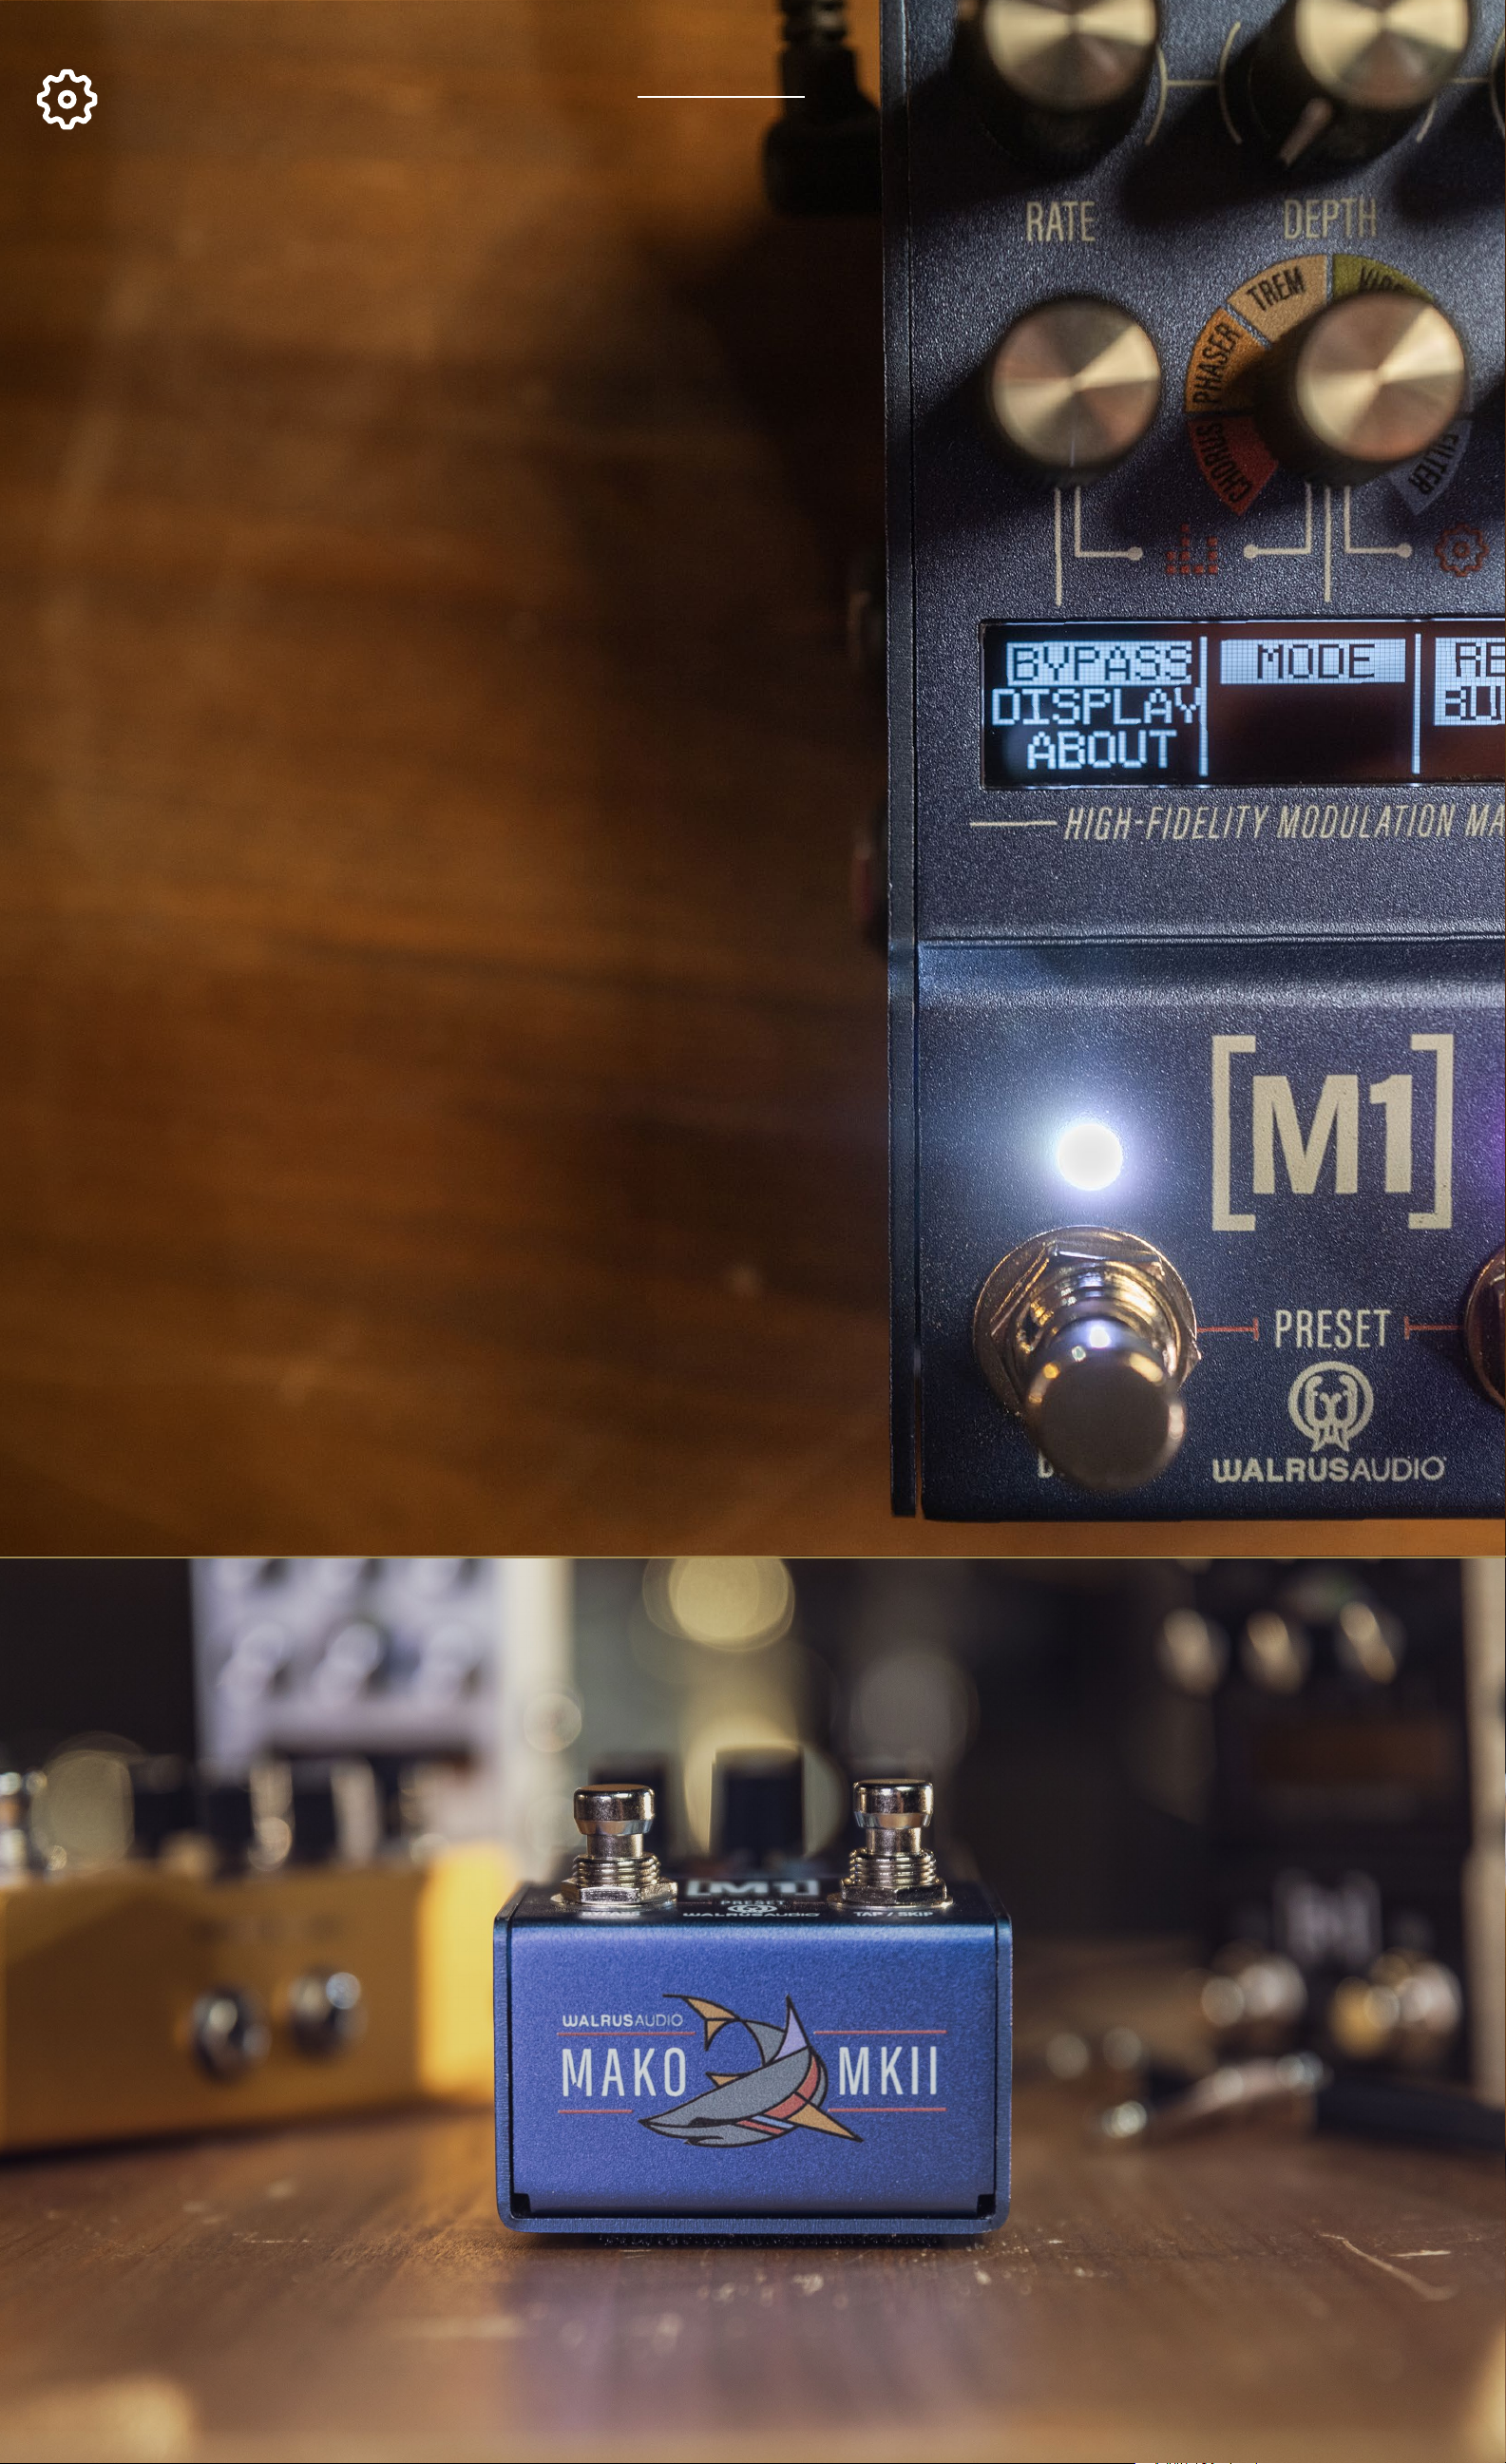
GLOBAL PREFERENCES
Access the global settings menu by simultaneously pressing
down on the Middle and Right encoders. Each encoder
then cycles through the column of options directly below it
on the screen.
Note that the solid white bar behind the text indicates
which row of text you have selected.
Press down on the Right encoder to confirm your selection
in the 3rd column. Press down on the Middle and Right
encoders again to return to the home screen.
Bypass Mode
The M1 offers two bypass modes. Relay Bypass and Buffered
Bypass.
In Relay Bypass mode, the M1 uses relays to bypass the
pedal.
In Buffered Bypass mode, the M1 locks the relays on and
uses the DSP to bypass the pedal.
The M1 ships in Relay mode by default and will remember
the selected bypass mode and use that each time it is
powered up until you change it.
About
Shows the current firmware version.
Display
Adjust the screen brightness level.
MIDI
Chnl - Select MIDI channel.
Page 9
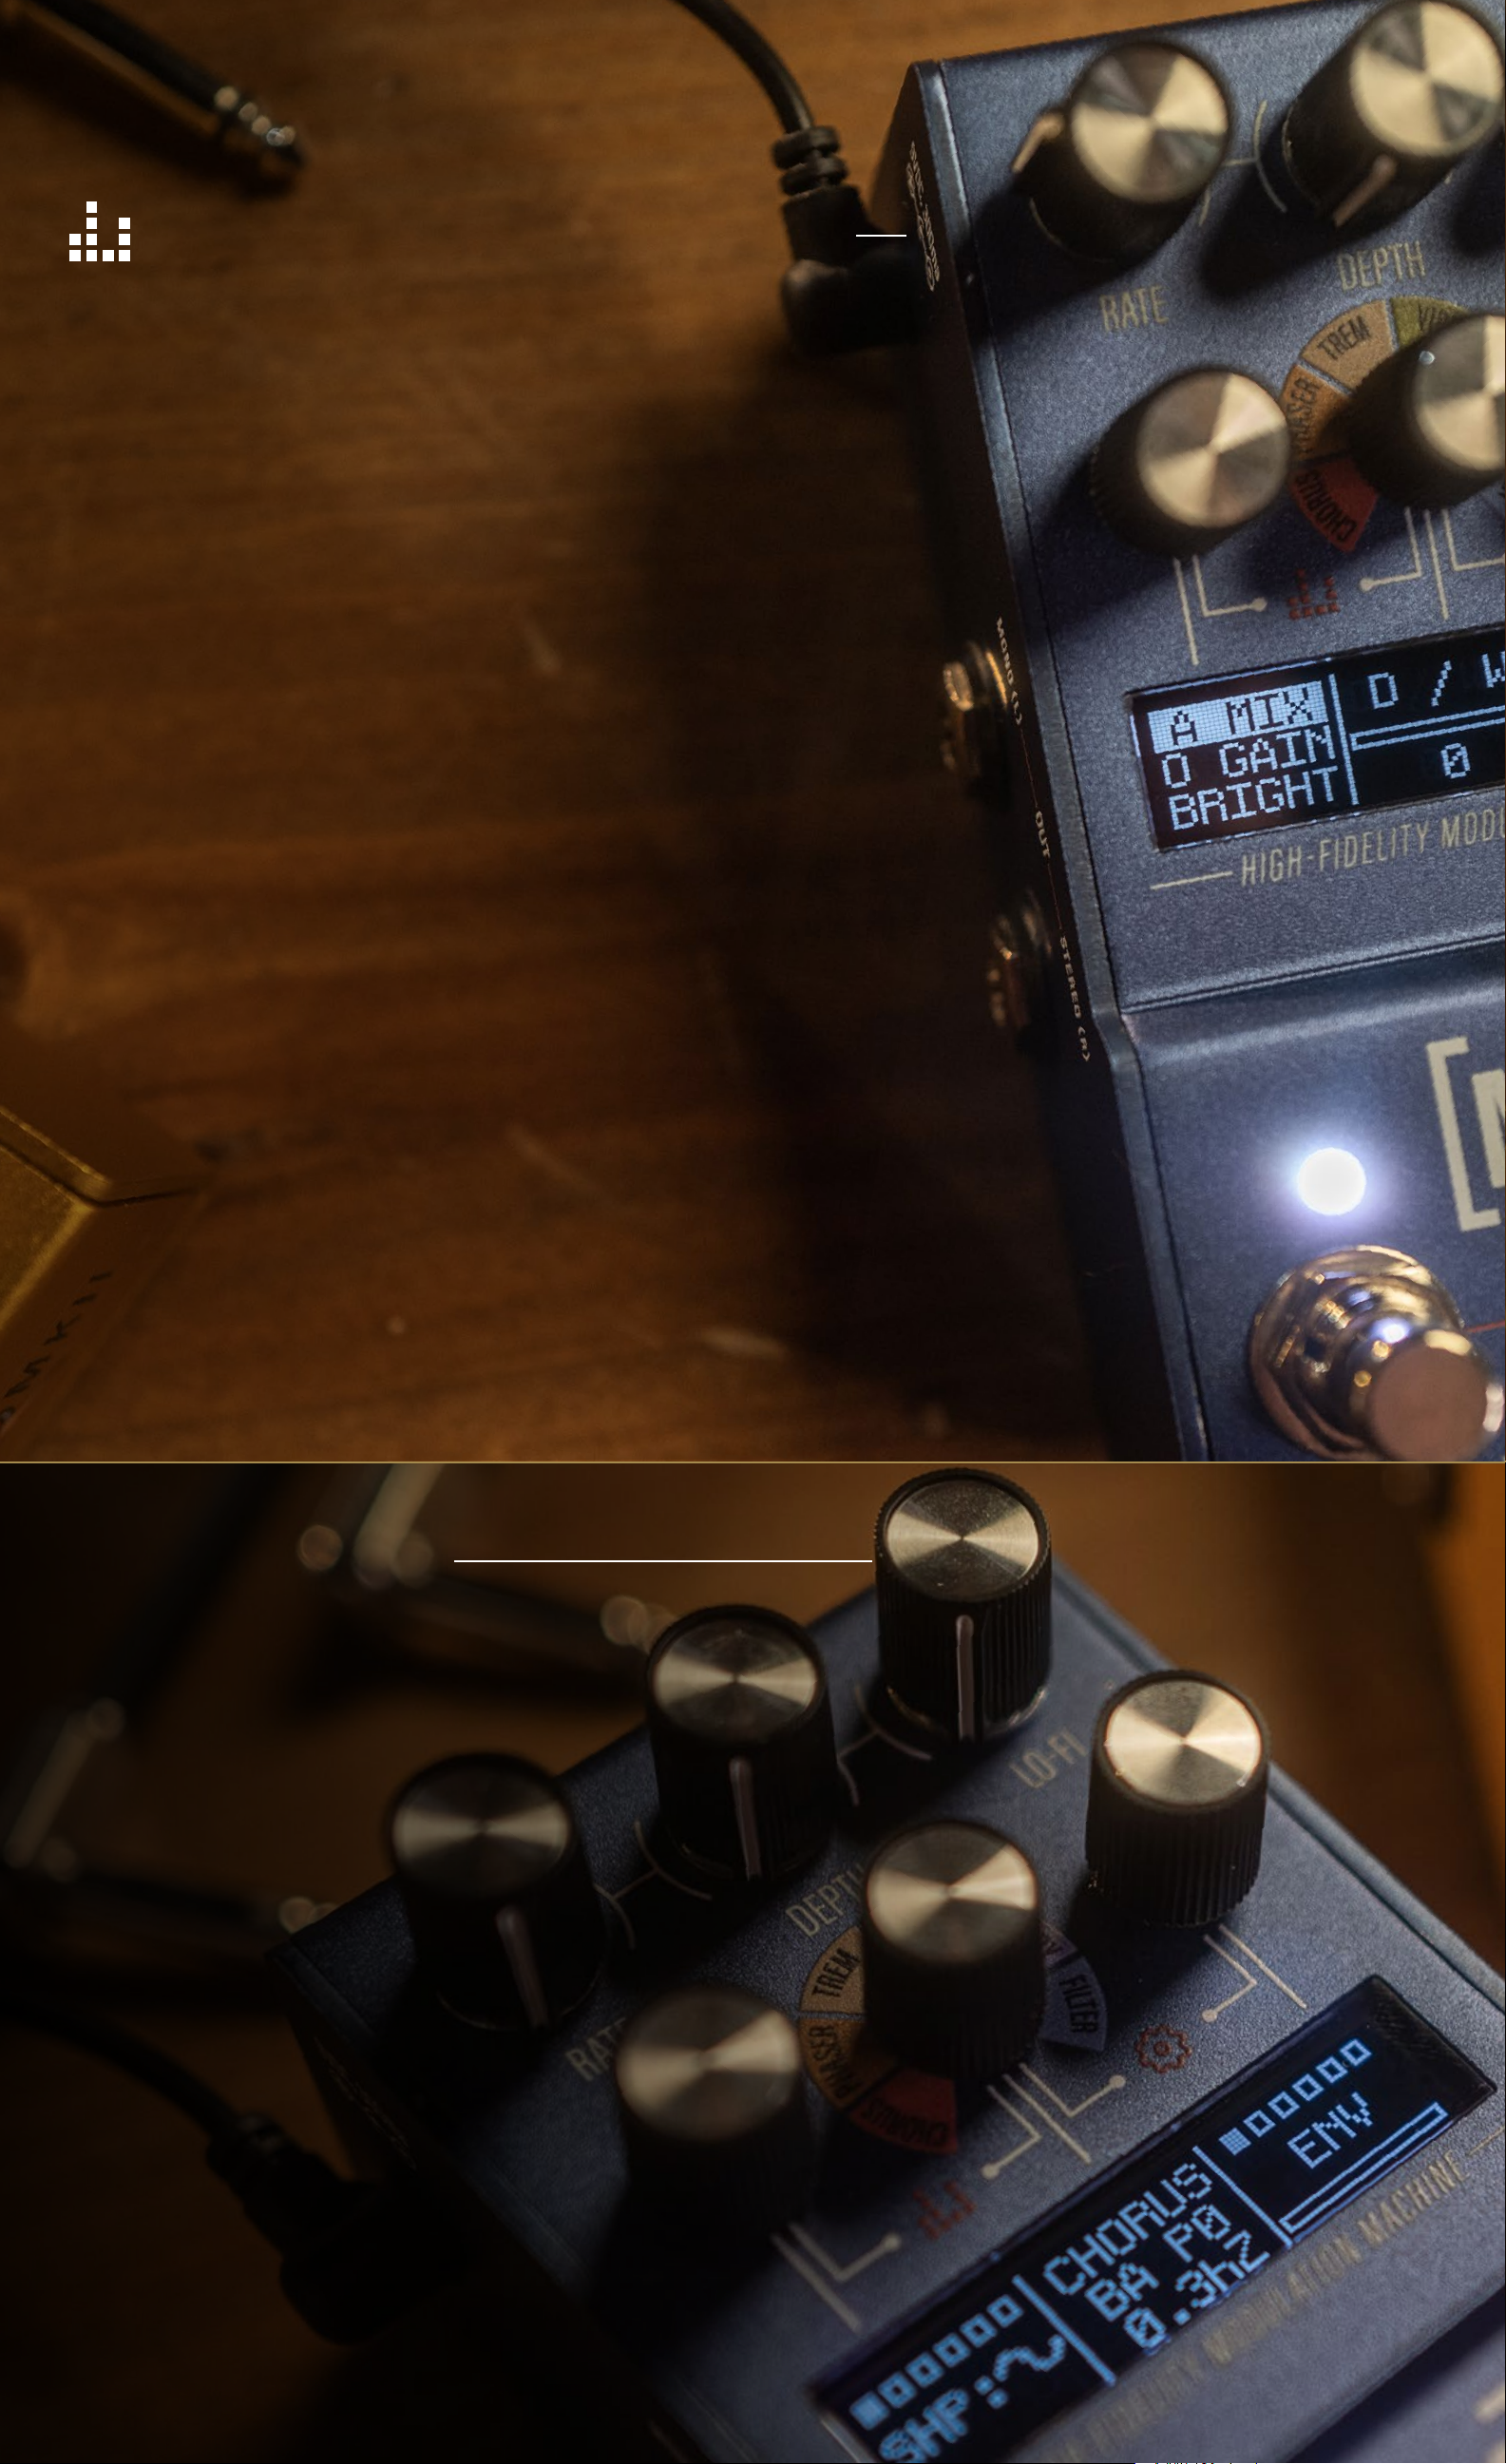
GLOBAL SOUND PREFERENCES
Access the global sound settings menu by simultaneously pressing
down on the Left and Middle encoders. Each encoder then cycles
through the column of options directly below it on the screen.
Note that the solid white bar behind the text indicates which row
of text you have selected.
Press down on the Right encoder to confirm your selection in the
3rd column. Press down on the Left and Middle encoders again
to return to the home screen.
Preset
Manually select the bank and preset slot you wish to use. After
selecting a bank, presets can be cycled through by pressing the
Bypass and Boost switches simultaneously. Each bank can store
three presets. Up to 128 can be used via MIDI.
A Mix (Analog Mix)
Analog Mix is an analog dry mix with the M1. Turn the Center
encoder to increase the dry mix and lower the wet signal.
Gain (Output Gain)
Adjust the overall output volume of the pedal to ensure the effects
sit right where you want them in the mix. Some modulation
effects work well at unity gain while others can benefit from a
slight increase in volume to help them stand out. If you experience
clipping, try lowering the level with this control.
FACTORY RESET
Use the following procedure to restore the pedal to its factory
settings.
1. Hold both stomp switches while applying power. The
screen will read “Factory reset, hold both stomps 10
seconds.”
2. After 10 seconds the screen will read “Factory reset, now
resetting, release both stomps.”
3. Release both stomp switches. After releasing the stomp
switches the screen will read “Factory reset, now resetting,
keep power on.”
4. Next, the display will read “Updating preset storage.” This
will take about 45 seconds. Once the pedal is done, the
screen will return to the home screen and the Bypass LED
will return to white and the Sus/Latch LED will return back
to red.
Note: Performing a factory reset will cause any custom stored
presets to be erased back to the factory default.
Page 10
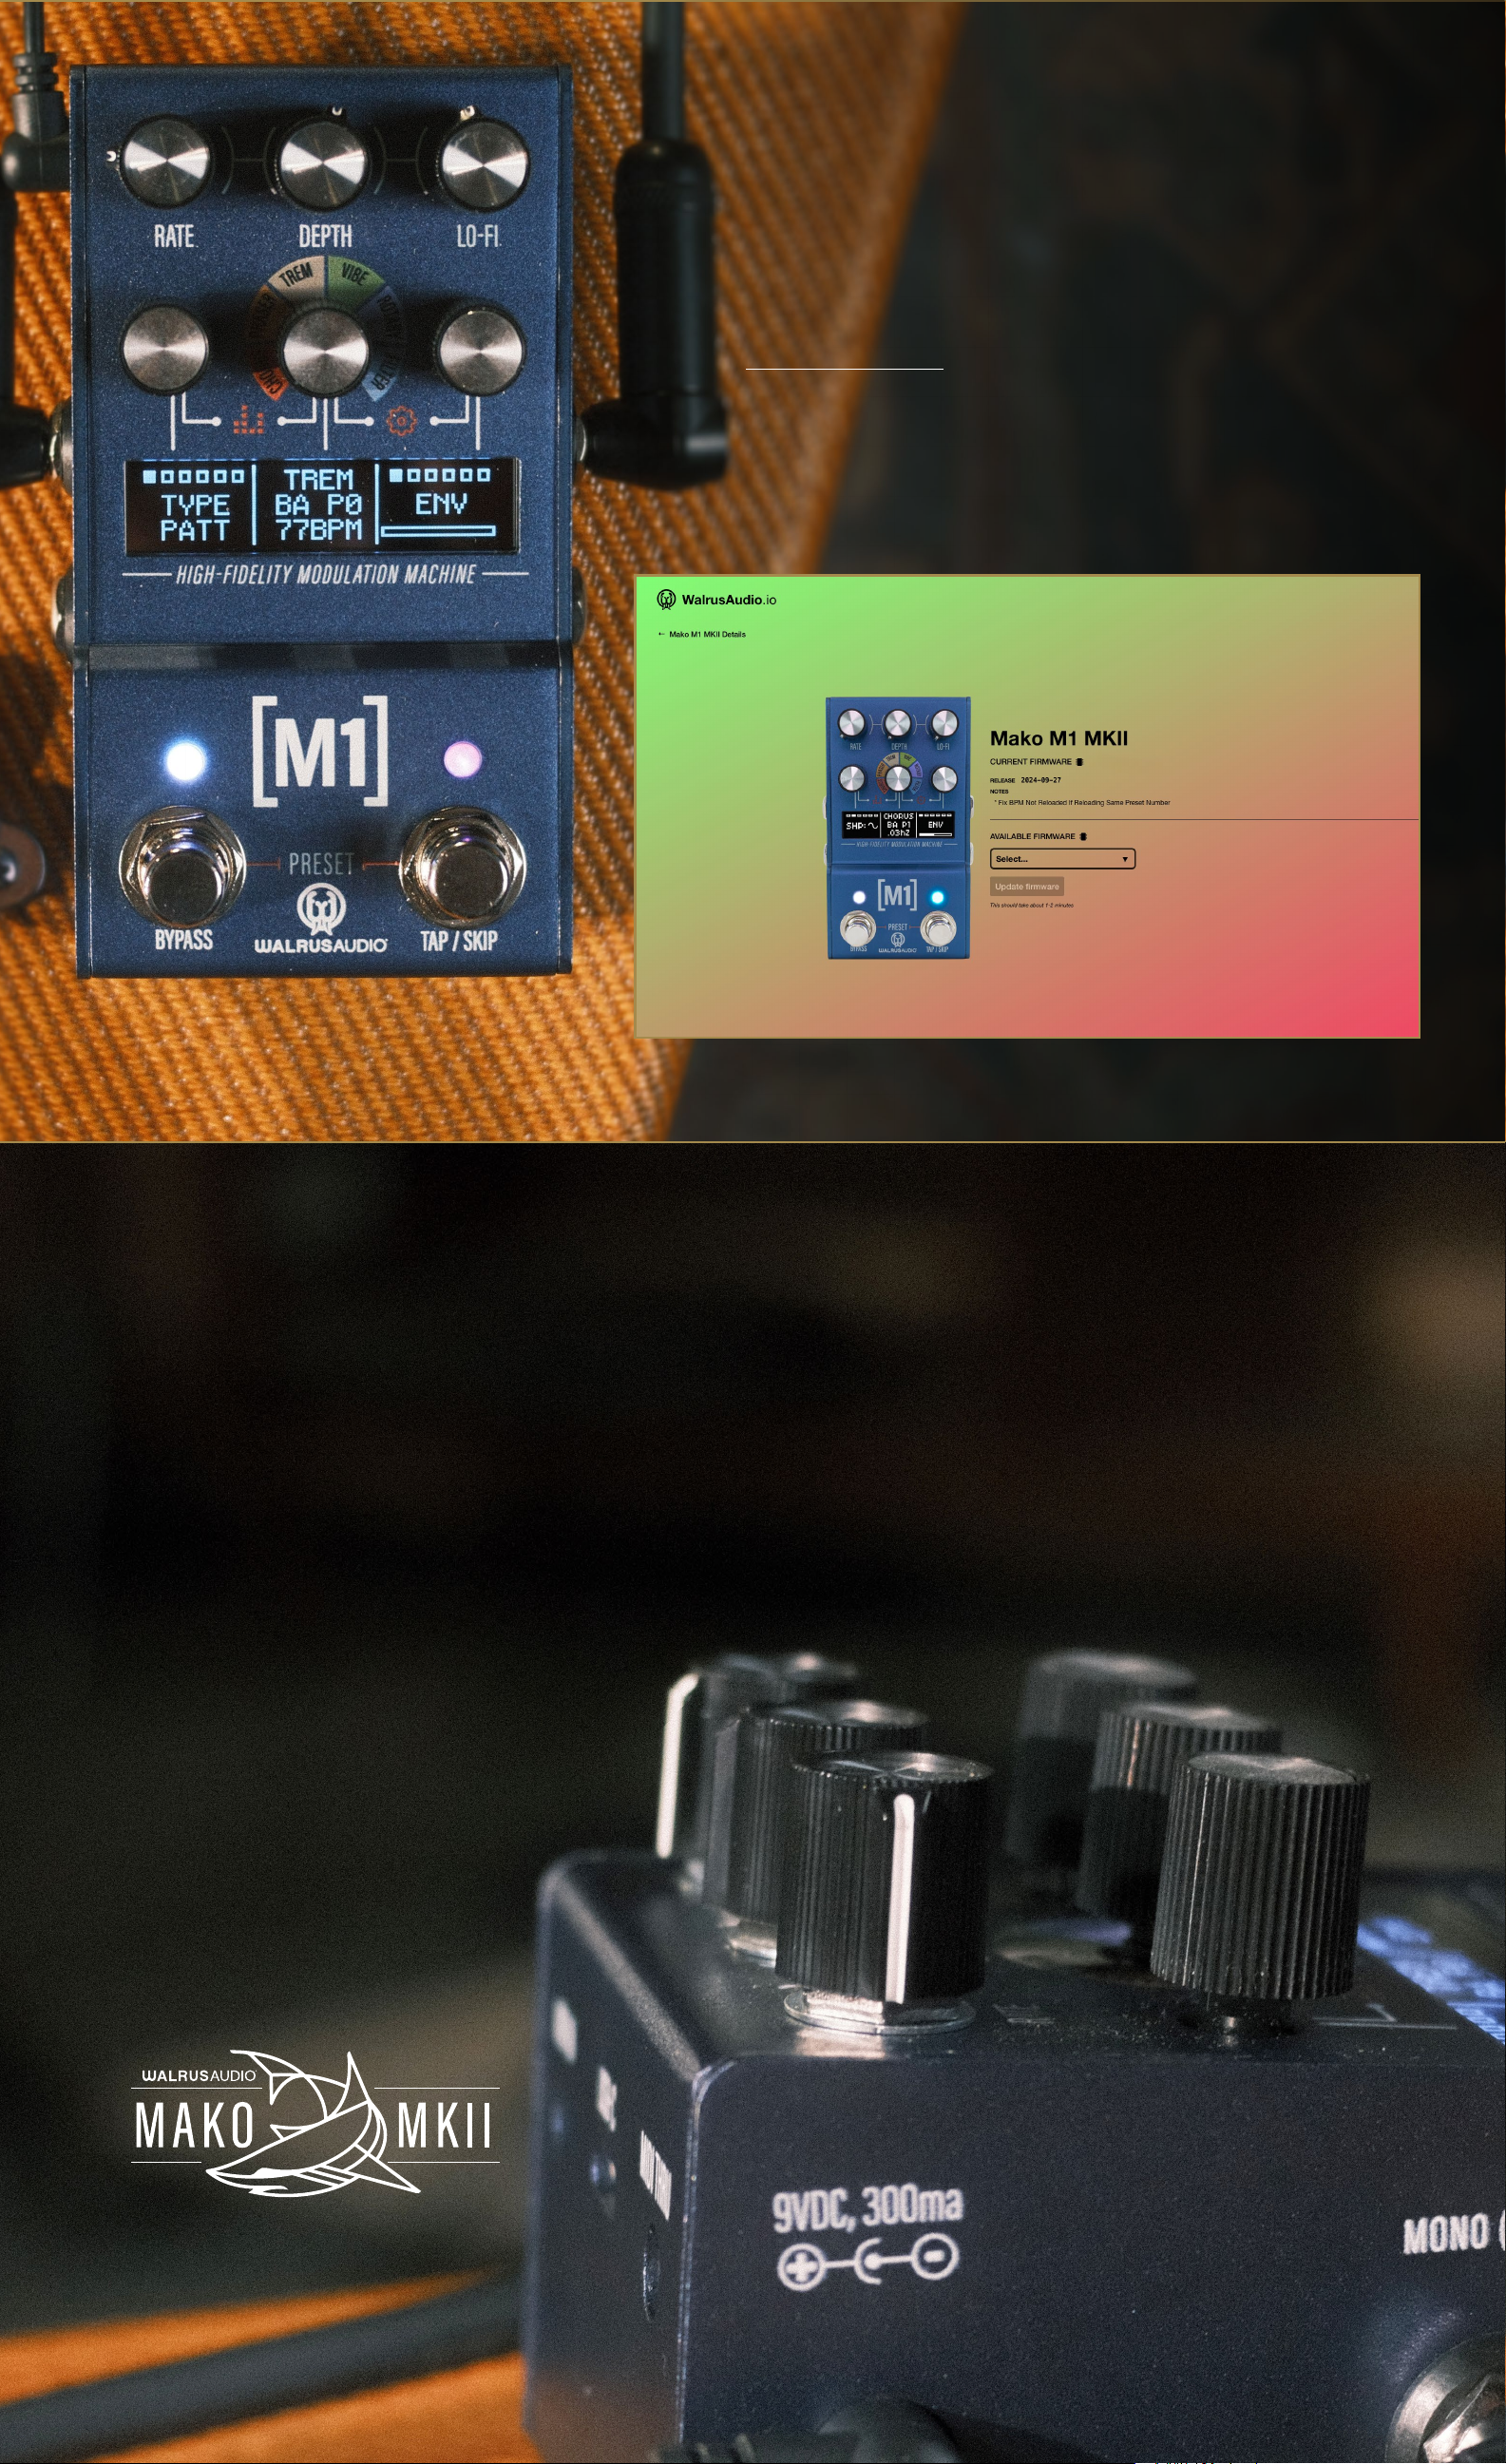
WALRUSAUDIO.IO
Walrusaudio.io is a simple interface to update your
pedal’s firmware.
*Note - Connecting a USB C cable to your M1 allows
you to access firmware updates using your computer
with a Chrome-based web browser.
TECHNICAL INFO
Input Impedance: 1.1M Ohms
Output Impedance: 220 Ohms
Frequency Response: 20Hz To 20kHz
Inputs: 2, 1/4” unbalanced TS
Outputs: 2, 1/4” unbalanced TS
USB Type C: For firmware updates via walrusaudio.io
Power Requirement: Isolated 9VDC,
center-negative, 300mA minimum
Size Including Knobs/Jacks:
Height: 2.48” / 63.15mm
Width: 2.9” / 74.33mm
Depth: 4.89” / 124.37mm
Weight: .8 lbs
 Loading...