

Makita BPS01 Original Instructions Manual
Battery Timer Setting Adapter
ENGLISH (Original instructions)
IMPORTANT: Read Before Using.
BPS01
• Non-EnglishversionsofoperatinginstructionlesareincludedinthesuppliedCD-ROM.

2
ENGLISH
WHATYOUCANDOWITHTHEBPS01
The Battery Timer Setting Adapter (hereinafter referred
to as “adapter” in this document) provides an antitheft
solution for Makita-brand battery cartridges by utilizing
the mobile devices or PCs (with the dedicated app
installed) required for timer setup.
Expirationtime/datesettingfeature
An expiration time/date can be set to battery cartridges
according to a construction schedule so that the cartridges
are not usable after the construction is nished.
PINcodeauthenticationfeature
A PIN code security feature is provided to prevent
unauthorized changes to the timer settings.
IDENTIFICATIONOFPARTS
1. Battery cartridge port
2.
Registration lamp
3.
Warning lamp
4.
Timer lamp
5.
NFC contact point
6. Operation mode switch
: Timer mode
/ : Communication mode
: Registration mode
7.
USB port (micro-B type)
8. Installation screw holes
9. Battery compartment cover
1
6
9
7
2
8
3
4
5
8
Conrmationfeatureforadapterand
batterycartridgesettings
You can conrm the settings for the adapter and battery
cartridge using the mobile/PC app.
Applicablelithium-ionbatterycartridges
BL1830B, BL1850B, BL1430B, and other battery
cartridges with model numbers ending in “B” or “C”
Flowchart
1. Install the adapter to a job site box, etc.
2. Install the app.
Mobile app for Android smartphones, etc.
or
PC app for Windows computers
3. Register a PIN code and a user name.
Register a PIN code and a user name
to the adapter.
Attach a battery cartridge to the adapter
to register the PIN code and user name
to the battery cartridge.
4. Set an expiration time/date.
Set an expiration time/date to the adapter.
Attach a battery cartridge to the adapter
to set the expiration time/date
to the battery cartridge.
NOTE: The BPS01 cannot be used with an iPhone
or Mac.

3
ENGLISH
SUPPLIED
ACCESSORIES
Check that the items in the following list are included in
the package.
• Coin cell (CR2450) battery (x1, pre-installed)
• Spanners (x4)
• Spanner bit (x1)
• Instruction manual (x1)
• Quick start guide (x1)
• CD-ROM (x1, incl. Instruction manual and PC app)
IMPORTANTSAFETY
INSTRUCTIONS
When using an electrical appliance, basic
precautionsshouldalwaysbefollowed,including
thefollowing:
This device is not suitable for use in locations where
children may be present.
CAUTION:Donotingestthebattery.
This product contains a coin cell battery. If the coin
cell battery is swallowed, it can cause severe internal
burns in just 2 hours and lead to death. This device
is not suitable for use in locations where children
may be present. Keep new and used coin cell
batteries away from children. If the coin cell battery
compartment does not close securely, discontinue
use of the product and keep it away from children.
If you suspect that a child may have swallowed or
ingested a coin cell battery, seek immediate medical
attention.
• Do not disassemble the adapter.
• Do not expose the adapter to rain or snow.
• Do not install the adapter in locations higher than
2 m.
• Do not apply heat to coin cell batteries or expose
them to re.
• Do not leave coin cell batteries in an extremely hightemperature environment.
• Do not disassemble the coin cell battery.
• Do not solder the coin cell battery.
• Do not short-circuit the terminals of the coin cell
battery.
• Do not use any other type of coin cell battery than
specied.
• Do not place the coin cell battery inside a pocket,
bag, etc. together with any small metal objects (such
as keys, coins, or necklaces).
• Do not mechanically crush or cut the coin cell
battery when disposing of it.
• Install the coin cell battery properly as indicated in
the instruction manual.
• If electrolyte leaks out, thoroughly wipe it off the coin
cell battery compartment, and then install a new
coin cell battery.
• In the event that any parts of your body come
into contact with leaking electrolyte, rinse them
thoroughly with water.
READALLINSTRUCTIONS
BEFOREUSINGTHIS
APPLIANCE.
SAVETHESEINSTRUCTIONS.
SYMBOLS
Read instruction manual.
Li-ion
Only for EU countries
Do not dispose of electric equipment or
battery pack together with household waste
material!
In observance of the European Directives,
on Waste Electric and Electronic Equipment
and Batteries and Accumulators and Waste
Batteries and Accumulators and their
implementation in accordance with national
laws, electric equipment and batteries and
battery pack(s) that have reached the end
of their life must be collected separately and
returned to an environmentally compatible
recycling facility.
4
ENGLISH
PRIORTOUSE
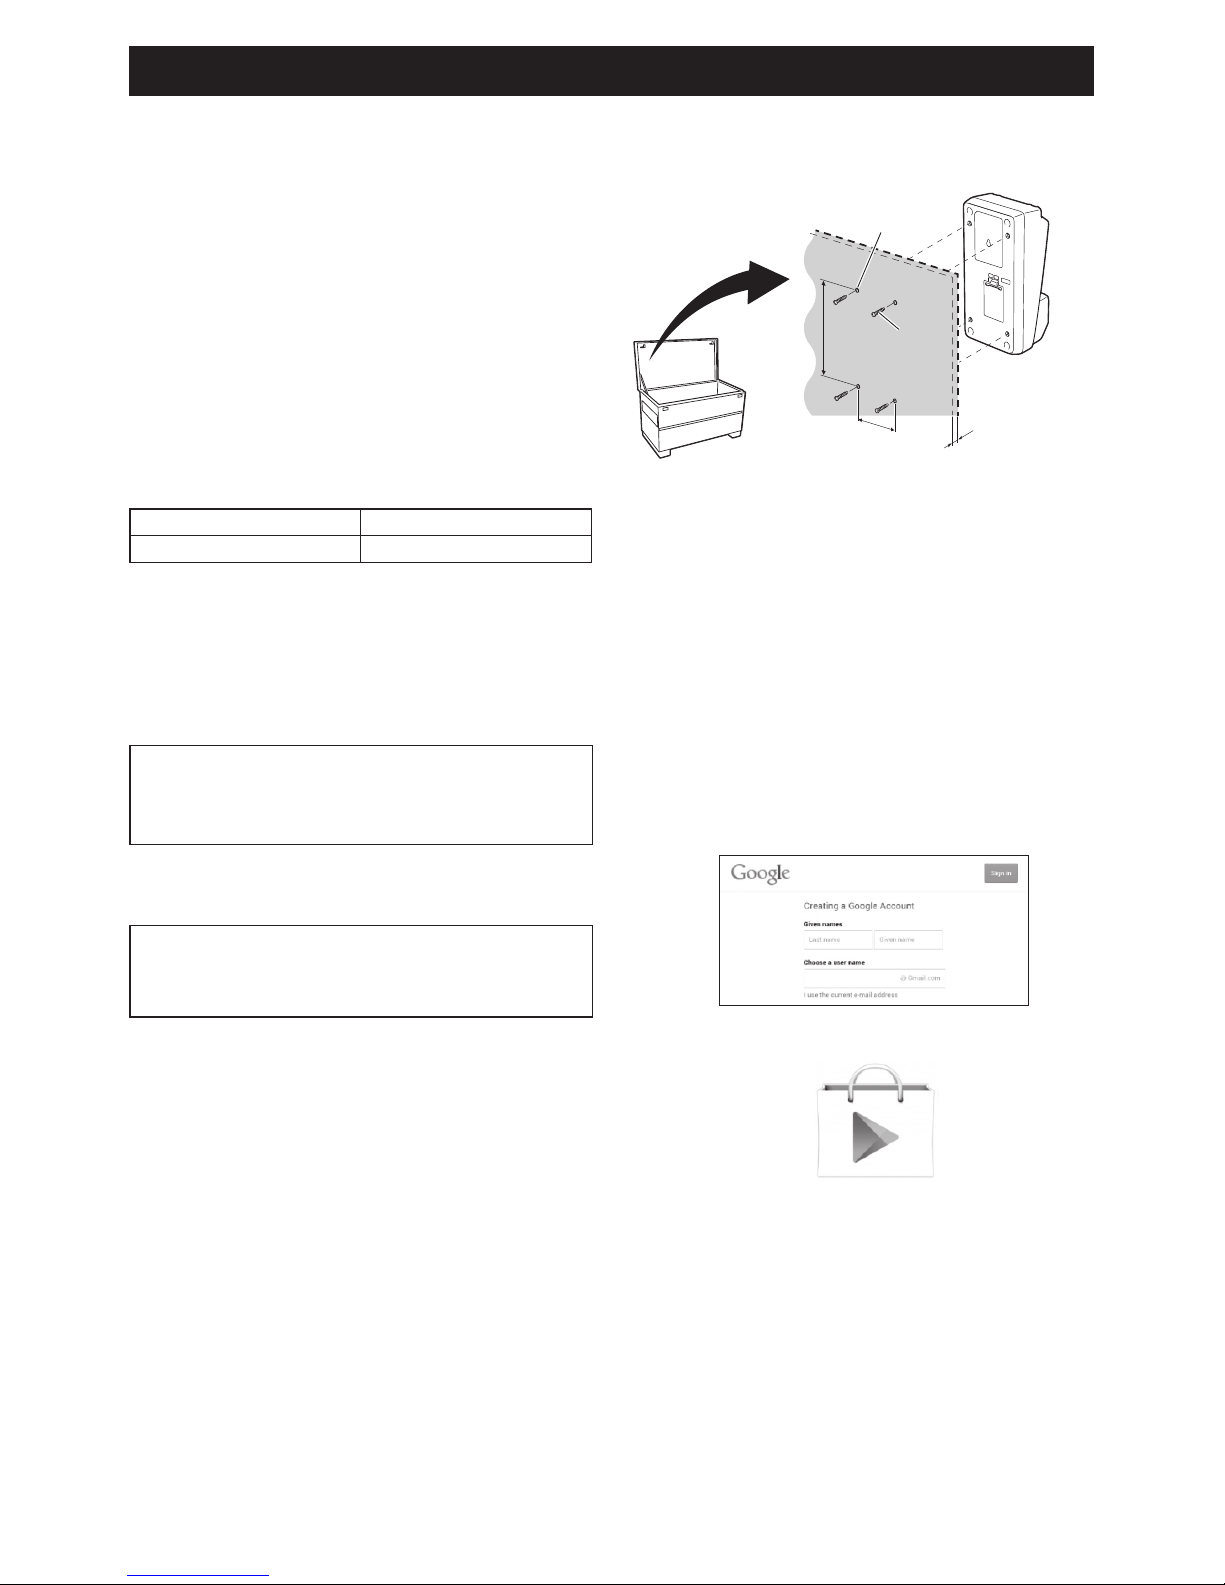
Installingtheadapter
The adapter can be installed to a board (up to 8 mm or
5/16 in. in thickness) such as the inner wall of a job site
box using the supplied spanners.
Make four installation holes with a diameter of 7 mm
(9/32 in.) on a board to form the corners of a rectangle
114 mm (4-1/2 in.) high and 57 mm (2-1/4 in.) across.
Secure the adapter using the four spanners (a) and the
spanner bit supplied with the adapter.
Installingthemobileapp
Supportedmobiledevices
Mobile device NFC-enabled Android devices
OS Android 4.2 or later
Note that support for all NFC-enabled Android devices
is not guaranteed.
Installingthemobileapp
The app is only downloadable from the Google Play
Store. A Google account is needed to use the Google
Play Store.
NOTE: The mobile device must be connected to a
cellular network or Wi-Fi network.
NOTE: Be sure to enable Wi-Fi when connecting to a
Wi-Fi network in a Wi-Fi enabled area.
1. Go to the Google account sign-in page and create
a Google account. (If you already have a Google
account, skip this step.)
NOTICE: Read the Terms of Service and Privacy
Policy before creating a Google account. Makita
Corporation is not responsible for damages resulting
from the creation or use of a Google account.
a
7 mm
(9/32 in.) dia.
114 mm
(4-1/2 in.)
57 mm
(2-1/4 in.)
Up to 8 mm
(5/16 in.)
1.
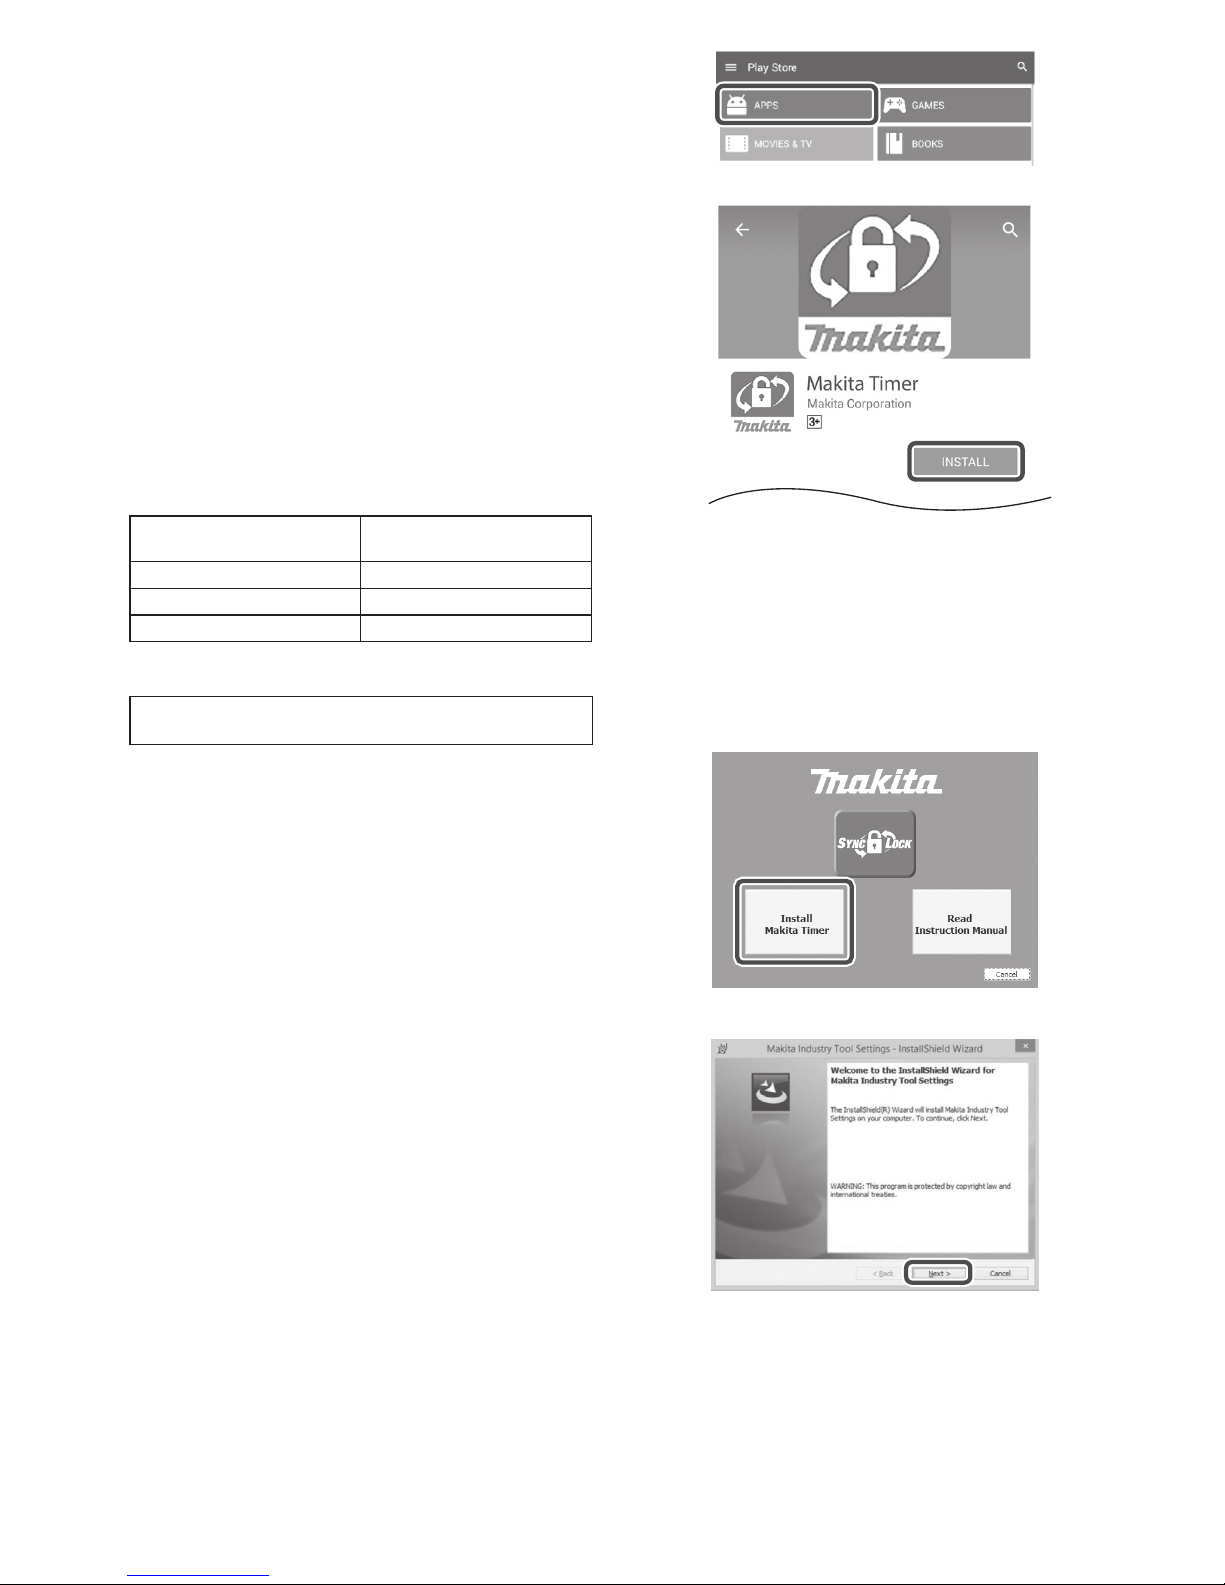
2. Tap “Play Store” on your device to sign in to the
Google Play Store.
2.
5
ENGLISH
InstallingthePCapp
Systemrequirements
The PC must satisfy the following requirements to use
the app.
OS
Windows 7, Windows 8, or
Windows 8.1
Processor x86 or x64
Display resolution 1366 x 768 or higher
Available disk space 4 GB or more
InstallingthePCapp
NOTE: Installation must be performed by a user with
administrator privileges.
1. Load the CD-ROM in the disc drive and click “Install
Makita Timer.”
1.
3. Tap “APPS” and search for “Makita Timer.”
3.
4. Tap “INSTALL” on the app installation page to
install. A “Makita Timer” icon will be created on the
home screen.
4.
2. Click “Next.”
2.
6
ENGLISH
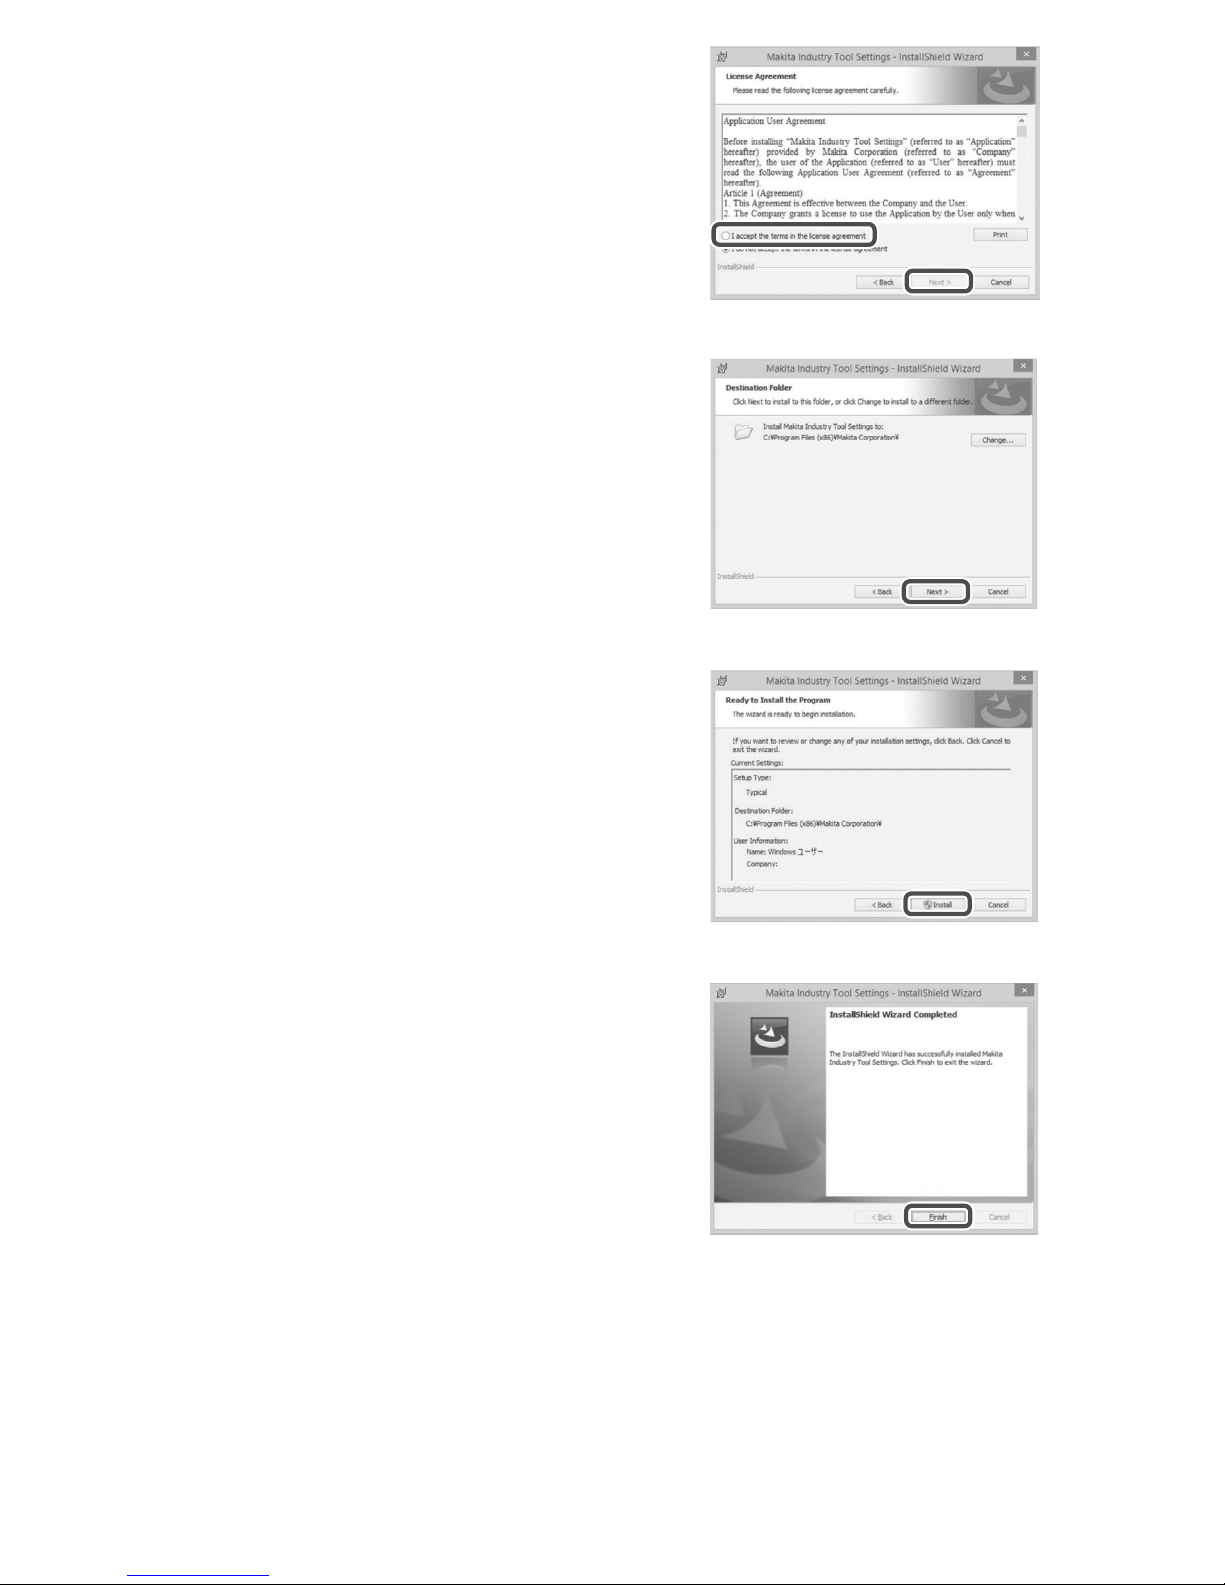
6. When installation is complete, click “Finish.”
A “Makita Timer” shortcut will be created on the
desktop.
6.
4. Conrm the destination folder and click “Next.”
4.
5. Click “Install.”
5.
3. Read and conrm the License Agreement. Select “I
accept the terms in the license agreement” and then
click “Next.”
3.
7
ENGLISH
Installingtheadapterdriver
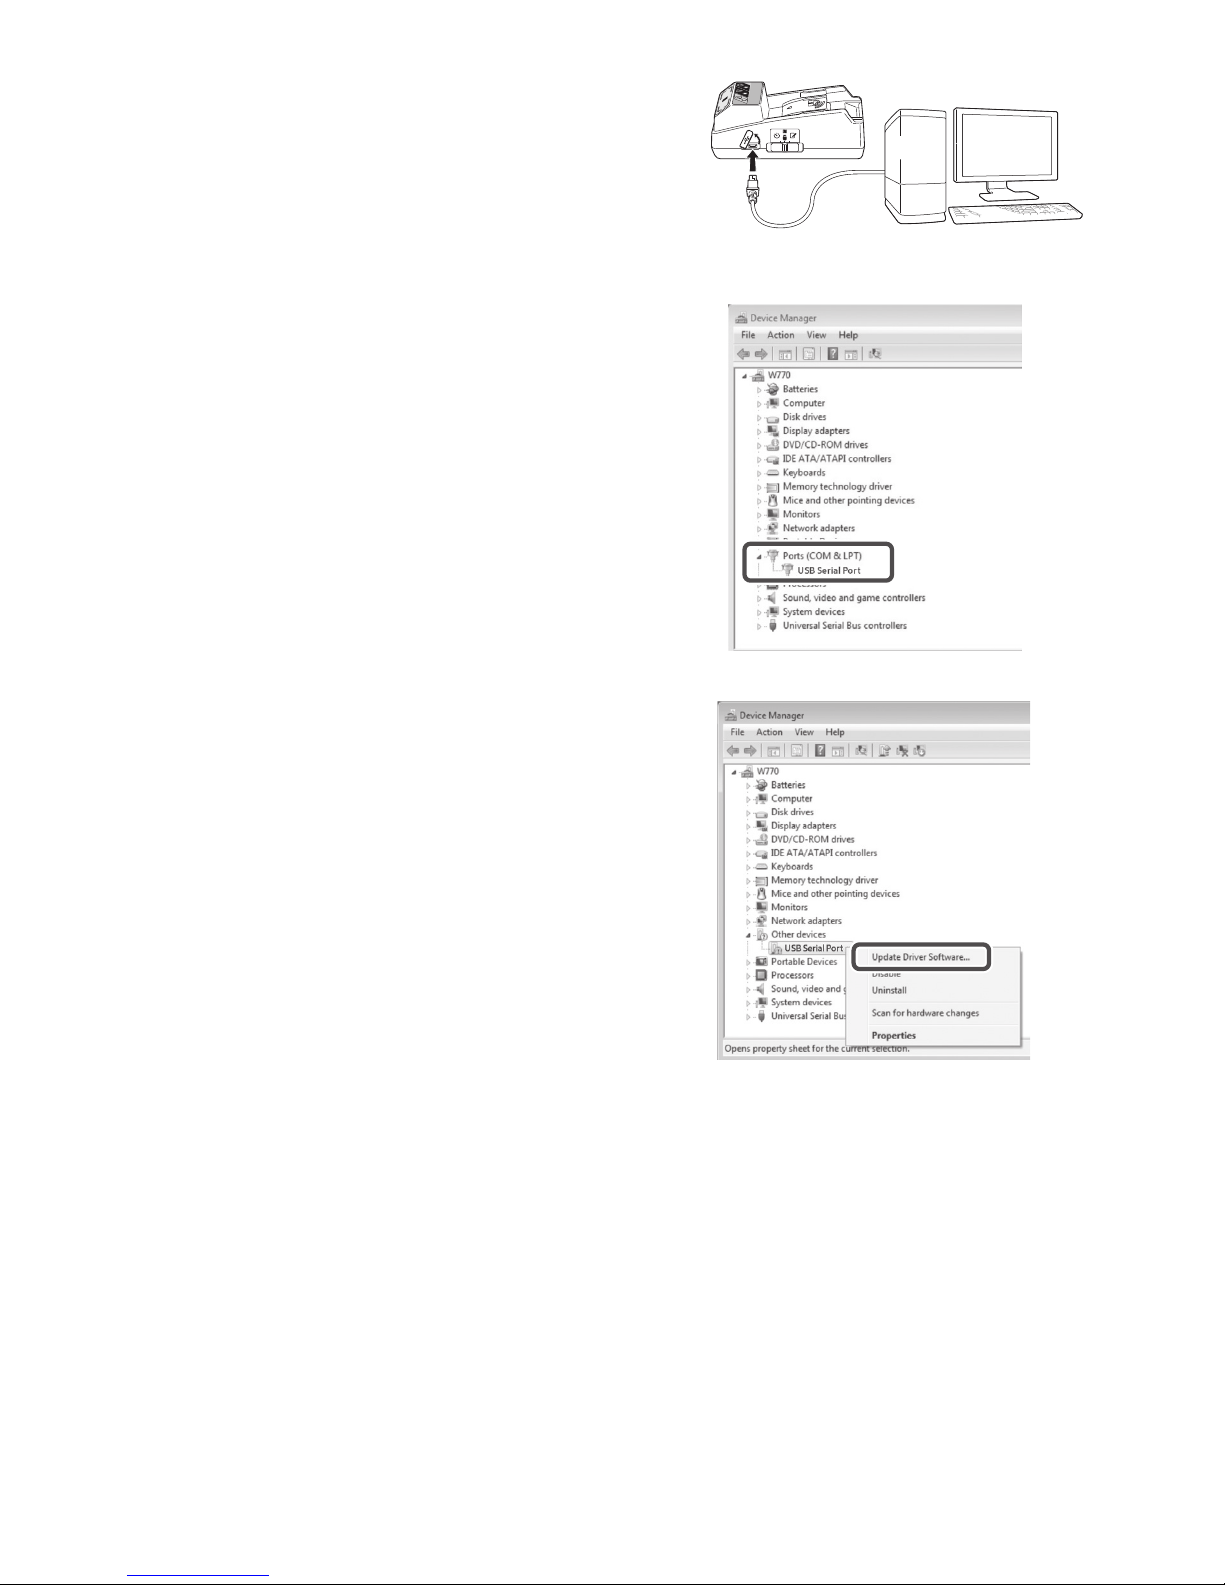
1. Connect the adapter to the PC using a USB cable.
The adapter driver will be automatically installed.
1.
3. If it was not installed successfully, “USB Serial Port”
will appear under “Other devices.” In this case, rightclick on “USB Serial Port” and select “Update Driver
Software.”
3.
2. Open Control Panel and click System and Security.
Under System, click on Device Manager and check
whether the “USB Serial Port” has been installed
successfully under “Ports (COM & LPT).”
2.
8
ENGLISH
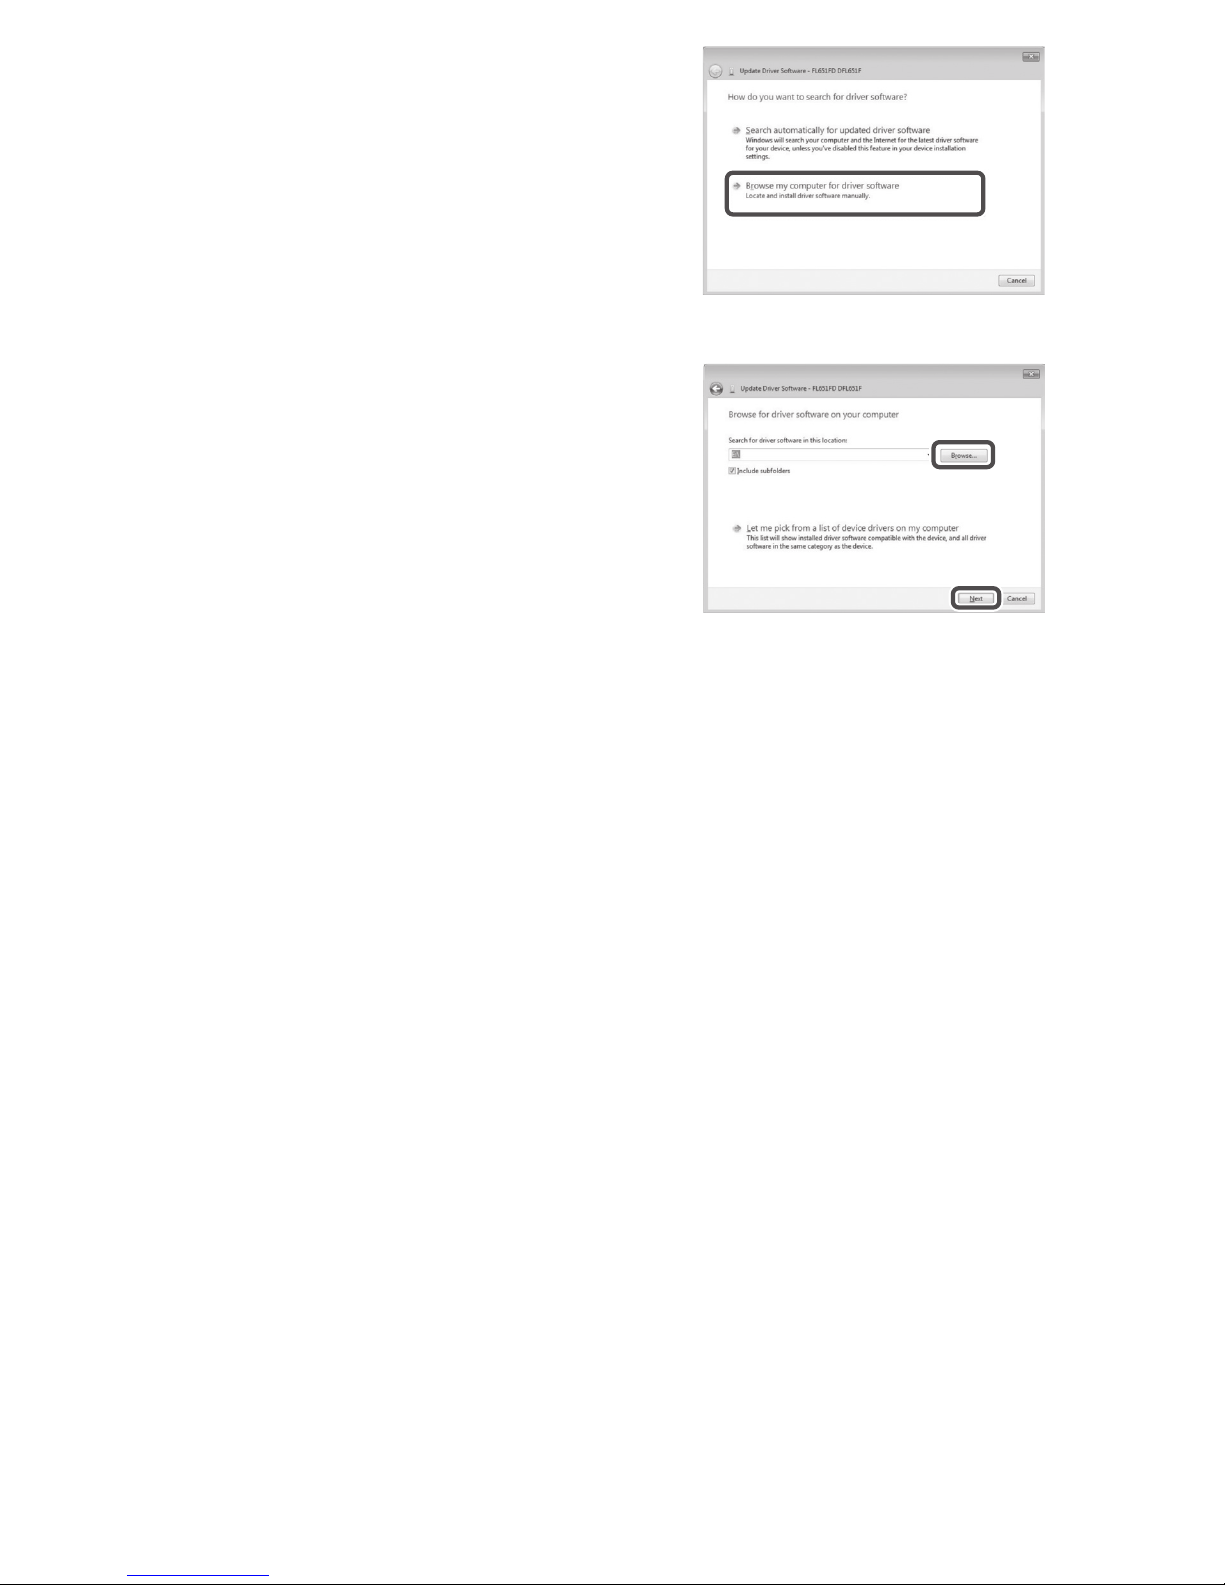
4. Select “Browse my computer for driver software.”
4.
5. Click “Browse.” Select the “Makita Timer” folder. And
then click “Next.”
5.
 Loading...