

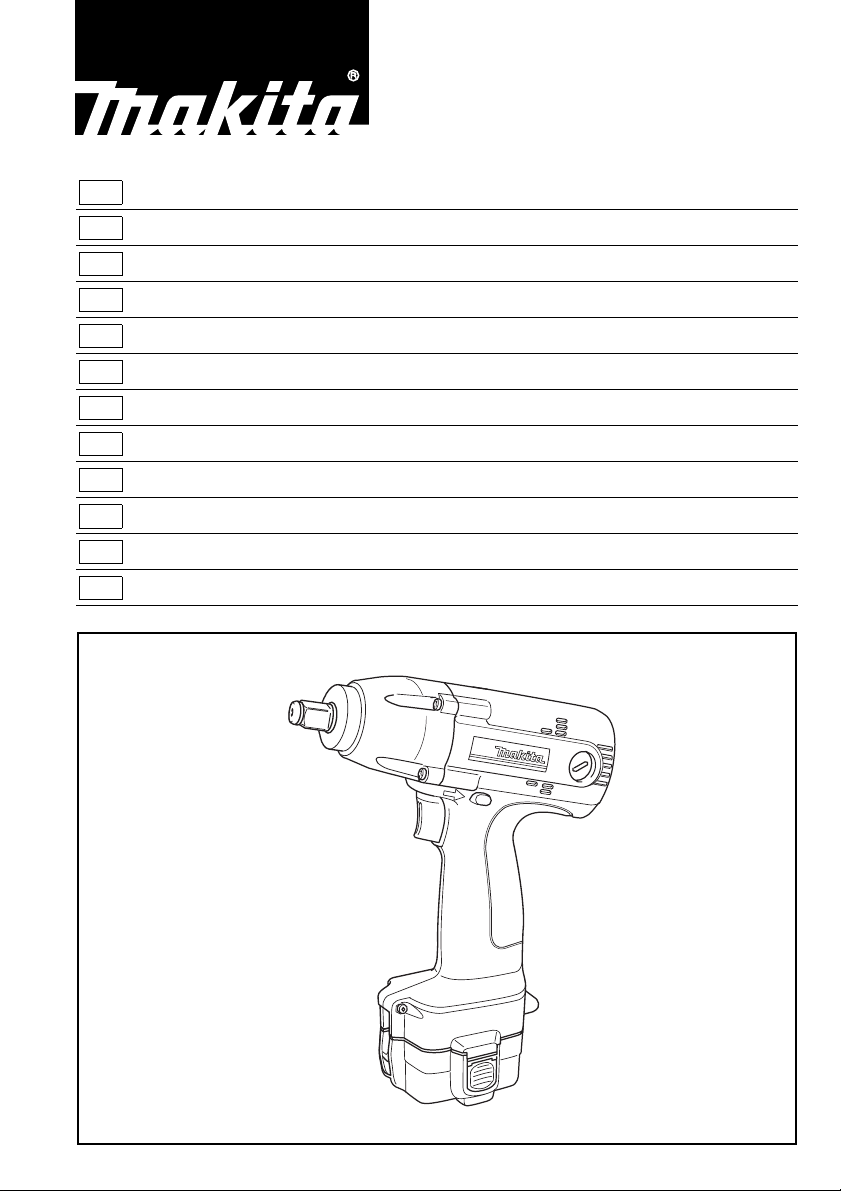
Makita 6992D User Manual
GB
Cordless Impact Wrench Instruction Manual
F
Boulonneuse sans fil Manuel d’instructions
D
Akku-Schlagschrauber Betriebsanleitung
I
Avvitatrice ad impulso a batteria Istruzioni per l’uso
NL
Snoerloze slagmoersleutel Gebruiksaanwijzing
E
Llave de impacto a batería Manual de instrucciones
P
Chave de impacto a bateria Manual de instruções
DK
Elektronisk akku slagnøgle Brugsanvisning
S
Sladdlös mutterdragare Bruksanvisning
N
Batteridrevet slagskrunøkkel Bruksanvisning
SF
Akku-iskuväännin Käyttöohje
GR Ασύρµατο κρουστικ κλειδί Οδηγίες χρήσεως
6991D
6992D
1
3
4
2
12
3
6
5
7
34
88
910
11 12
5
2

16
100
(1020)
80
(816)
60
(612)
40
(408)
20
(204)
0
N • m
(kgf • cm)
M14
M12
M10
1.0 2.0 3.0
13
15
15
15
14
(M14)
(M12)
(M10)
(kgf • cm)
N • m
16
100
(1020)
80
(816)
60
(612)
40
(408)
20
(204)
N • m
(kgf • cm)
0
1.0 2.0 3.0 4.0 5.0
13
M10
M8
15
15
(M10)
(M8)
14
67
GB Standard bolt
F Boulon standard
D Standardschrauben
I Bullone standard
NL Standaard bout
E Tornillo estándar
P Porca normal
DK Standardbolt
S Standardbult
N Standardbolt
SF Nornaali pultti
GR Κανονικ µπουλνι
GB High tensile bolt
F Boulon à haute résistance
D HV-Schruben
I Bullone altamente tensile
NL Bout met grote treksterkte
E Tornillo de alta resistencia
P Porca de grande elasticidade
DK Kvalitetsstålbolt
S Bult met hög hållfasthet
N Høy streskkbolt
SF Suurvetolujuuspultti
GR Μπουλνι υψηλής
εκτατικτητος
19
18
17
8
9
3

ENGLISH
Explanation of general view
1 Push button
2 Battery cartridge
3 Socket
4Anvil
5Pin
6O-ring
7 Switch trigger
SPECIFICATIONS
Model 6991D 6992D
Capacities
Standard bolt ............................................................................ M8 – M14 M8 – M14
High tensile bolt ........................................................................ M6 – M10 M6 – M10
Square drive ................................................................................ 9.5 mm 12.7 mm
No load speed (min
–1
) ................................................................. 0 – 2,300 0 – 2,300
Impacts per minute ...................................................................... 0 – 3,000 0 – 3,000
Max. fastening torque .................................................................. 100 N•m 100 N•m
Overall length .............................................................................. 168 mm 176 mm
Net weight (with battery cartridge) .............................................. 1.3 kg 1.4 kg
Rated voltage .............................................................................. D.C. 9.6 V D.C. 9.6 V
• Due to our continuing program of research and devel-
opment, the specifications herein are subject to change
without notice.
• Note: Specifications may differ from country to country.
Intended use
The tool is intended for fastening bolts and nuts.
Safety Hints
For your own safety, please refer to the enclosed safety
instructions.
IMPORTANT SAFETY INSTRUCTIONS FOR
CHARGER & BATTERY CARTRIDGE
1. Before using battery cartridge, read all instruc-
tions and cautionary markings on (1) battery
charger, (2) battery, and (3) product using battery.
2. Do not disassemble battery cartridge.
3. If operating time has become excessively
shorter, stop operating immediately. It may
result in a risk of overheating, possible burns
and even an explosion.
4. If electrolyte gets into your eyes, rinse them out
with clear water and seek medical attention right
away. It may result in loss of your eyesight.
5. Always cover the battery terminals with the bat-
tery cover when the battery cartridge is not
used.
6. Do not short the battery cartridge:
(1) Do not touch the terminals with any conduc-
tive material.
(2) Avoid storing battery cartridge in a container
with other metal objects such as nails, coins,
etc.
(3) Do not expose battery cartridge to water or
rain.
A battery short can cause a large current flow,
overheating, possible burns and even a breakdown.
8 Reversing switch lever
9A side
10 B side
11 Clockwise
12 Counterclockwise
13 Fastening time
14 Seconds
7. Do not store the tool and battery cartridge in
8. Do not incinerate the battery cartridge even if it
9. Be careful not to drop or strike battery.
SAVE THESE INSTRUCTIONS.
Tips for maintaining maximum battery life
1. Charge the battery cartridge before completely
ENC004-1
2. Never recharge a fully charged battery cartridge.
3. Charge the battery cartridge with room tempera-
4. Charge the Nickel Metal Hydride battery car-
ADDITIONAL SAFETY RULES FOR TOOL
1. Be aware that this tool is always in an operating
2. Hold tool by insulated gripping surfaces when
3. Wear ear protectors.
4. Check the socket carefully for wear, cracks or
5. Hold the tool firmly.
6. Always be sure you have a firm footing.
7. Be sure no one is below when using the tool in
15 Proper fastening torque for
16 Fastening torque
17 Limit mark
18 Screwdriver
19 Brush holder cap
locations where the temperature may reach or
exceed 50°C (122°F).
is severely damaged or is completely worn out.
The battery cartridge can explode in a fire.
discharged.
Always stop tool operation and charge the battery cartridge when you notice less tool power.
Overcharging shortens the battery service life.
ture at 10°C – 40°C (50°F – 104°F). Let a hot battery cartridge cool down before charging it.
tridge when you do not use it for more than six
months.
ENB025-1
condition, because it does not have to be
plugged into an electrical outlet.
performing an operation where the cutting tool
may contact hidden wiring. Contact with a “live”
wire will also make exposed metal parts of the
tool “live” and shock the operator.
damage before installation.
high locations.
4

8. The proper fastening torque may differ depending upon the kind or size of the bolt. Check the
torque with a torque wrench.
SAVE THESE INSTRUCTIONS.
OPERATING INSTRUCTIONS
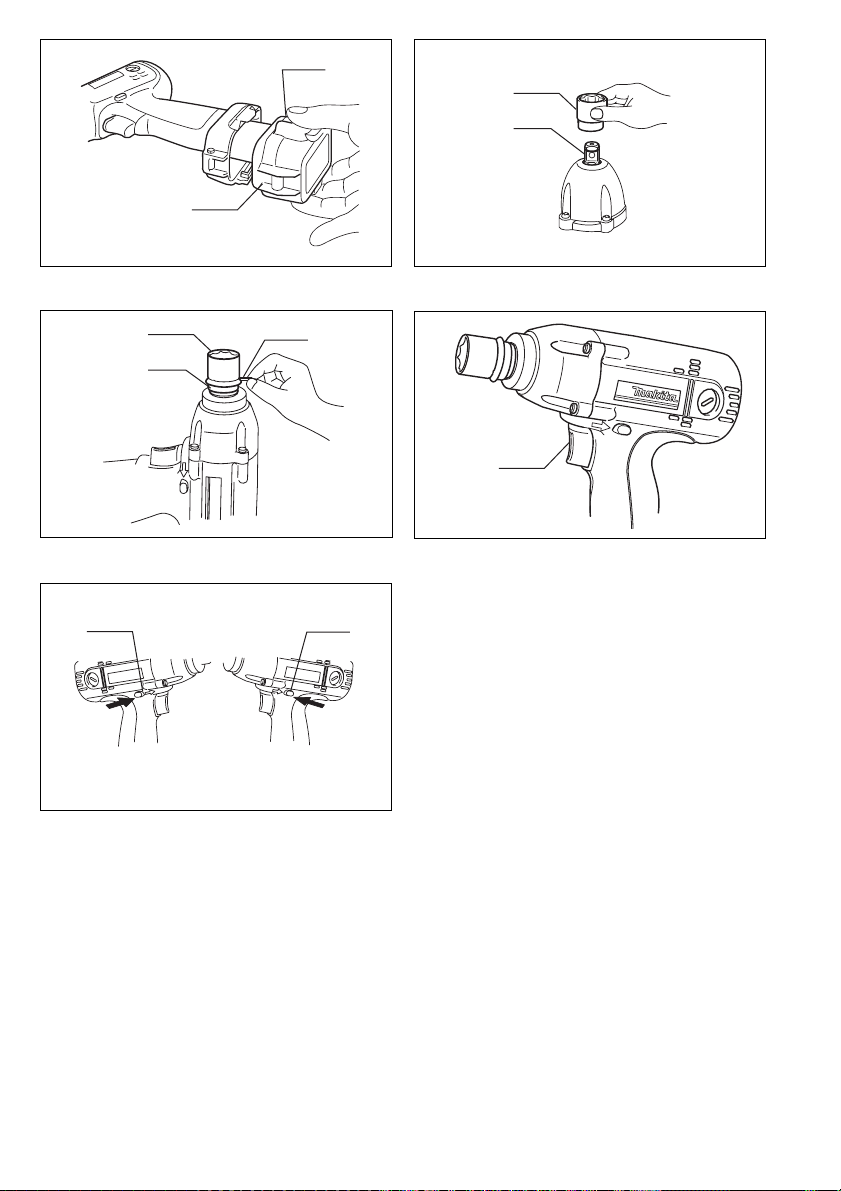
Installing or removing battery cartridge (Fig. 1)
• Always switch off the tool before insertion or removal of
the battery cartridge.
• To remove the battery cartridge, withdraw it from the
tool while pressing the push buttons on both sides of
the cartridge.
• To insert the battery cartridge, align the tongue on the
battery cartridge with the groove in the housing and slip
it into place. Always insert it all the way until it locks in
place with a little click. If not, it may accidentally fall out
of the tool, causing injury to you or someone around
you.
• Do not use force when inserting the battery cartridge. If
the cartridge does not slide in easily, it is not being
inserted correctly.
Selecting correct socket
Always use the correct size socket for bolts and nuts. An
incorrect size socket will result in inaccurate and inconsistent fastening torque and/or damage to the bolt or nut.
Installing or removing socket (Fig. 2 & 3)
CAUTION:
Always be sure that the tool is switched off and the battery cartridge is removed before installing or removing
the socket.
1. For socket without O-ring and pin
(Model 6991D & 6992D)
To install the socket, push it onto the anvil of the tool
until it locks into place.
To remove the socket, simply pull it off.
2. For socket with O-ring and pin (Model 6992D)
Move the O-ring out of the groove in the socket and
remove the pin from the socket. Fit the socket onto
the anvil of the tool so that the hole in the socket is
aligned with the hole in the anvil. Insert the pin
through the hole in the socket and anvil. Then return
the O-ring to the original position in the socket
groove to retain the pin. To remove the socket, follow the installation procedures in reverse.
Switch action (Fig. 4)
CAUTION:
Before inserting the battery cartridge into the tool, always
check to see that the switch trigger actuates properly and
returns to the “OFF” position when released.
To start the tool, simply pull the trigger. Tool speed is
increased by increasing pressure on the trigger. Release
the trigger to stop.
Reversing switch action (Fig. 5)
CAUTION:
• Always check the direction of rotation before operation.
• Use the reversing switch only after the tool comes to a
complete stop. Changing the direction of rotation
before the tool stops may damage the tool.
• When not operating the tool, always set the reversing
switch lever to the neutral position.
This tool has a reversing switch to change the direction
of rotation. Depress the reversing switch lever from the A
side for clockwise rotation or from the B side for counterclockwise rotation. When the switch lever is in the neutral
position, the switch trigger cannot be pulled.
Operation (Fig. 6 & 7)
The proper fastening torque may differ depending upon
the kind or size of the bolt. The relation between fastening torque and fastening time is shown in the figures.
Hold the tool firmly and place the socket over the bolt or
nut. Turn the tool on and fasten for the proper fastening
time.
NOTE:
• Hold the tool pointed straight at the bolt or nut without
applying excessive pressure on the tool.
• Excessive fastening torque may damage the bolt or
nut. Before starting your job, always perform a test
operation to verify the adequate fastening speed and
time for your bolt or nut.
The fastening torque is affected by a wide variety of factors including the following. After fastening, always check
the torque with a torque wrench.
1. When the battery cartridge is discharged almost
completely, voltage will drop and the fastening
torque will be reduced.
2. Socket
• Failure to use the correct size socket will cause a
reduction in the fastening torque.
• A worn socket (wear on the hex end or square
end) will cause a reduction in the fastening torque.
3. Bolt
• Even though the torque coefficient and the class of
bolt are the same, the proper fastening torque will
differ according to the diameter of the bolt.
• Even though the diameters of bolts are the same,
the proper fastening torque will differ according to
the torque coefficient, the class of bolt and the bolt
length.
4. The use of the universal joint or the extension bar
somewhat reduces the fastening force of the impact
wrench. Compensate by fastening for a longer
period of time.
5. Type of materials to be fastened, the manner of
holding the tool and the tool speed will affect the
torque.
CAUTION:
If the tool is operated continuously until the battery cartridge has discharged, allow the tool to rest for
15 minutes before proceeding with a fresh battery.
MAINTENANCE
CAUTION:
Always be sure that the tool is switched off and the battery cartridge is removed before carrying out any work on
the tool.
Replacement of carbon brushes (Fig. 8 & 9)
Replace carbon brushes when they are worn down to the
limit mark. Both identical carbon brushes should be
replaced at the same time.
To maintain product safety and reliability, repairs, maintenance or adjustment should be carried out by a Makita
Authorized Service Center.
5
 Loading...