

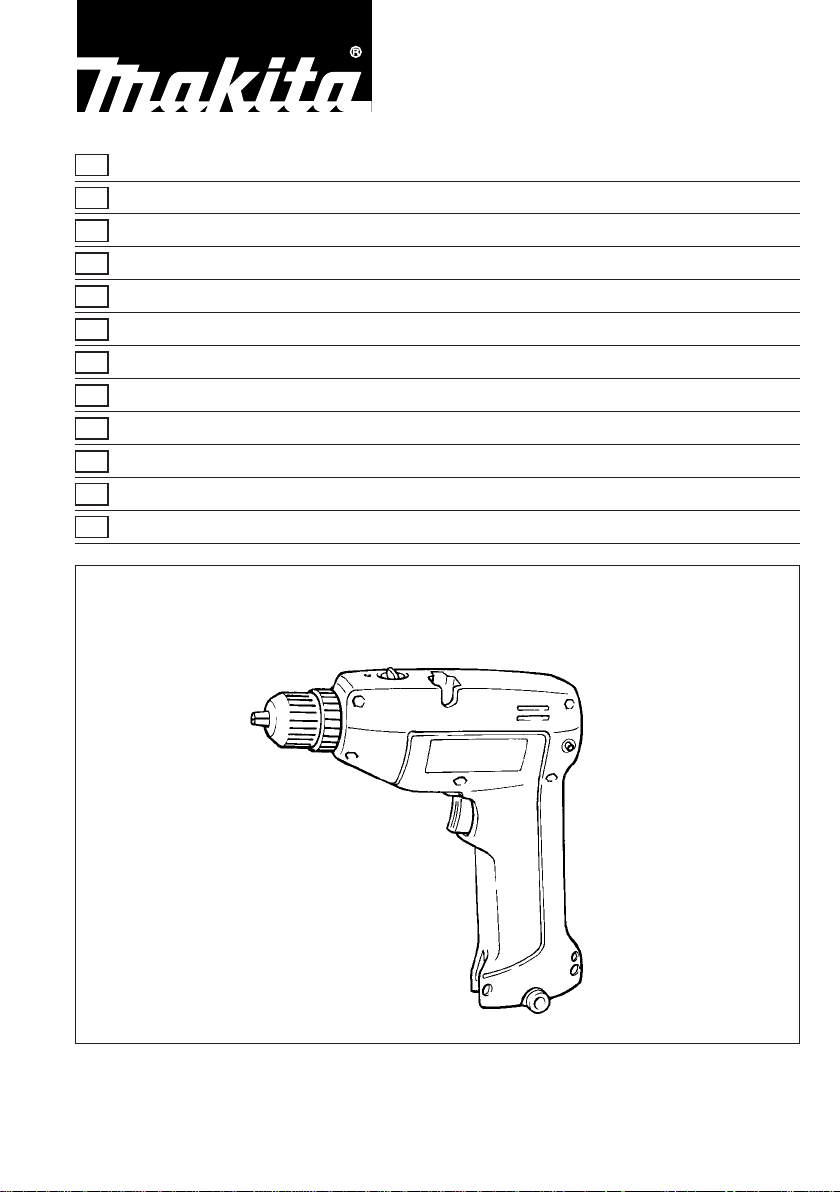
Makita 6015DWE User Manual
GB
Cordless Drill Instruction Manual
F
Perceuse à batterie Manuel d’instructions
D
Akku-Bohrschrauber Betriebsanleitung
I
Trapano a batteria Istruzioni d’uso
NL
Snoerloze boormachine Gebruiksaanwijzing
E
Taladro a batería Manual de instrucciones
P
Berbequim a bateria Manual de instruço˜es
DK
Akku bore-skruemaskine Brugsanvisning
S
Sladdlös borr Bruksanvisning
N
Bätteridrevent boremaskine Bruksanvisning
SF
Akkuporakone Käyttöohje
GR
∆Ú‡·ÓÔ Ì ̷ٷڛ· √‰ËÁ›Â˜ ¯Ú‹Ûˆ˜
10 mm 6015DWE
With battery charger Met acculader Inkl. batteriladdar
Avec chargeur Con cargador de batería Med batterilader
Mit Ladegerät Com carregador de bateria Akkulataaja
Con carica batteria Med akku-ladeaggregat ªВ ˇФЪЩИЫЩ‹˜ М·Щ·Ъ›·˜
2
3
1
1 2
4
5
6
3 4
0
9
q
w
5 6
7
8
e
7
2

ENGLISH
Explanation of general view
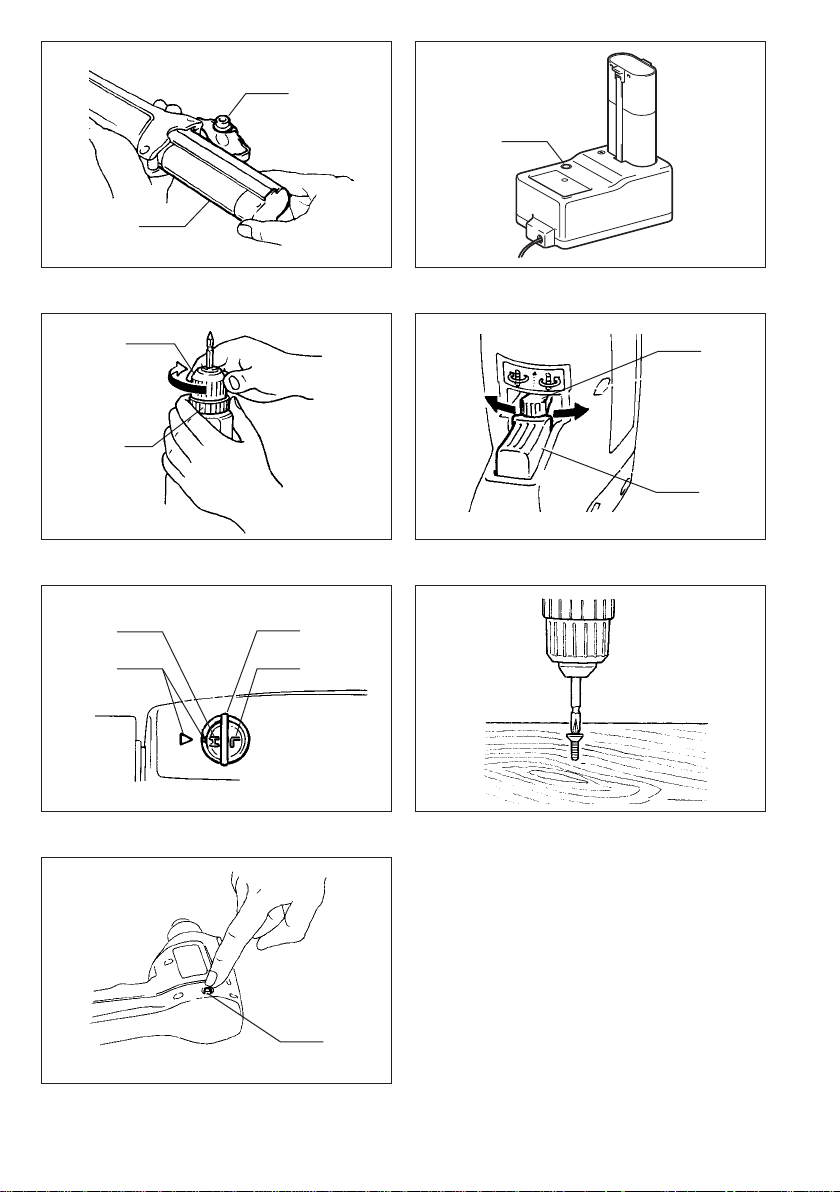
1 Battery cartridge
2 Set plate
3 Charging light
4 Sleeve
5 Tighten
6 Ring
7 Reversing switch lever
8 Switch trigger
9 Arrow
SPECIFICATIONS
Model 6015D
Capacities
Steel ............................................................ 10 mm
Wood ........................................................... 15 mm
Wood screw ................................ 5.1mm x 35 mm
No load speed (min
Overall length ............................................... 235 mm
Net weight ....................................................... 1.2 kg
Rated voltage ........................................... D.C. 7.2 V
•
Due to our continuing program of research and
development, the specifications herein are subject
to change without notice.
•
Note: Specifications may differ from country to
country.
Safety hints
For your own safety, please refer to enclosed safety
instructions.
-1
) .................................. 600/250
IMPORTANT SAFETY INSTRUCTIONS
FOR CHARGER & BATTERY
CARTRIDGE
1. SAVE THESE INSTRUCTIONS — This manual
contains important safety and operating
instructions for battery charger.
2. Before using battery charger, read all instruc-
tions and cautionary markings on (1) battery
charger, (2) battery, and (3) product using
battery.
3. CAUTION — To reduce risk of injury, charge
only MAKITA type rechargeable batteries.
Other types of batteries may burst causing
personal injury and damage.
4. Do not expose charger to rain or snow.
5. Use of an attachment not recommended or
sold by the battery charger manufacturer may
result in a risk of fire, electric shock, or injury
to persons.
6. To reduce risk of damage to electric plug and
cord, pull by plug rather than cord when disconnecting charger.
7. Make sure cord is located so that it will not be
stepped on, tripped over, or otherwise subjected to damage or stress.
0 600 R/min
q Speed change knob
w 250 R/min
e Restart button
8. Do not operate charger with damaged cord or
plug — replace them immediately.
9. Do not operate charger if it has received a
sharp blow, been dropped, or otherwise damaged in any way; take it to a qualified serviceman.
10. Do not disassemble charger or battery cartridge; take it to a qualified serviceman when
service or repair is required. Incorrect reassembly may result in a risk of electric shock or
fire.
11. To reduce risk of electric shock, unplug
charger from outlet before attempting any
maintenance or cleaning. Turning off controls
will not reduce this risk.
ADDITIONAL SAFETY RULES FOR
CHARGER & BATTERY CARTRIDGE
1. Do not charge battery cartridge when temperature is BELOW 10°C (50°F) or ABOVE 40°C
(104°F).
2. Do not attempt to use a step-up transformer,
an engine generator or DC power receptacle.
3. Do not allow anything to cover or clog the
charger vents.
4. Always cover the battery terminals with the
battery cover when the battery cartridge is not
used.
5. Do not short the battery cartridge:
(1) Do not touch the terminals with any con-
ductive material.
(2) Avoid storing battery cartridge in a con-
tainer with other metal objects such as
nails, coins, etc.
(3) Do not expose battery cartridge to water or
rain.
A battery short can cause a large current flow,
overheating, possible burns and even a breakdown.
6. Do not store the machine and battery cartridge
in locations where the temperature may reach
or exceed 50°C (122°F).
7. Do not incinerate the battery cartridge even if
it is severely damaged or is completely worn
out. The battery cartridge can explode in a fire.
8. Be careful not to drop, shake or strike battery.
9. Do not charge inside a box or container of any
kind. The battery must be placed in a well
ventilated area during charging.
3

ADDITIONAL SAFETY RULES
FOR MACHINE
1. Be aware that this machine is always in an
operating condition, because it does not have
to be plugged into an electrical outlet.
2. Always be sure you have a firm footing. Be
sure no one is below when using the machine
in high locations.
3. Hold the machine firmly.
4. Keep hands away from rotating parts.
5. When drilling into walls, floors or wherever
‘‘live’’electrical wires may be encountered, DO
NOT TOUCH ANY METAL PARTS OF THE
MACHINE! Hold the machine only by the insulated grasping surfaces to prevent electric
shock if you drill into a ‘‘live’’ wire.
6. Do not leave the machine running. Operate the
machine only when hand-held.
7. Do not touch the drill bit or the workpiece
immediately after operation; they may be
extremely hot and could burn your skin.
SAVE THESE INSTRUCTIONS.
OPERATING INSTRUCTIONS
Installing or removing battery cartridge
(Fig. 1)
•
Always switch off the machine before insertion or
removal of the battery cartridge.
•
To remove the battery cartridge, pull out the set
plate on the machine and grasp both sides of the
cartridge while withdrawing it from the machine.
•
To insert the battery cartridge, align the tongue on
the battery cartridge with the groove in the housing
and slip it into place. Snap the set plate back into
place. Be sure to close the set plate fully before
using the machine.
•
Do not use force when inserting the battery cartridge. If the cartridge does not slide in easily, it is
not being inserted correctly.
Charging (Fig. 2)
1. Plug the battery charger into your power source.
2. Insert the battery cartridge so that the plus and
minus terminals on the battery cartridge are on the
same sides as their respective markings on the
battery charger. Insert the cartridge fully into the
port so that it rests on the charger port floor.
3. When the battery cartridge is inserted, the charging light color will flash in red color and charging
will begin.
4. When charging is completed, the charging light
goes out. The charging time is as follows:
Battery 7000, 7100, 7120, 9000, 9100, 9100A,
9120: approx. 60 minutes.
5. If you leave the battery cartridge in the charger
after the charging cycle is complete, the charger
will switch into its ‘‘trickle charge (maintenance
charge)’’ mode.
6. After charging, remove the battery cartridge from
the charger and unplug the charger from the
power source.
Battery type
7000 1,300 6
CAUTION:
•
The battery charger is for charging Makita battery
cartridge. Never use it for other purposes or for
other manufacturer’s batteries.
•
When you charge a new battery cartridge or a
battery cartridge which has not been used for a long
period of time, it may not accept a full charge. This
is a normal condition and does not indicate a
problem. You can recharge the battery cartridge
fully after discharging itcompletely and recharging a
couple of times.
•
When you charge a battery cartridge from a justoperated machine or a battery cartridge which has
been left in a location exposed to direct sunlight or
heat for a long time, let it cool off. Then re-insert it
and try to charge it once more.
•
When you charge a new battery cartridge or a
battery cartridge which has not been used for a long
period, sometimes the charging light will go out
soon. If this occurs, remove the battery cartridge
and re-insert it. If the charging light goes out within
one minute even after repeating this procedure a
couple of times, the battery cartridge is dead.
Replace it with a new one.
Capacity
(mAH)
Number of
cells
Trickle charge (Maintenance charge)
If you leave the battery cartridge in the charger to
prevent spontaneous discharging after full charge,
the charger will switch into its ‘‘trickle charge (maintenance charge)’’ mode and keep the battery cartridge fresh and fully charged.
Tips for maintaining maximum battery life
1. Charge the battery cartridge before completely
discharged.
Always stop machine operation and charge the
battery cartridge when you notice less machine
power.
2. Never recharge a fully charged battery cartridge.
Overcharging shortens the battery service life.
3. Charge the battery cartridge with room temperature at 10°C – 40°C (50°F – 104°F).
Let a hot battery cartridge cool down before
charging it.
Installing or removing driver bit or drill bit
(Fig. 3)
Important:
Always be sure that the machine is switched off and
the battery cartridge is removed before installing or
removing the bit.
Hold the ring and turn the sleeve counterclockwise to
open the chuck jaws. Place the bit in the chuck as far
as it will go. Hold the ring firmly and turn the sleeve
clockwise to tighten the chuck. Toremove the bit, hold
the ring and turn the sleeve counterclockwise.
4
Switch action (Fig. 4)
Move the reversing switch lever to the position
for clockwise rotation or the
clockwise. To start the tool, simply pull the trigger.
Release the trigger to stop. When the reversing
switch lever is in the neutral positioin, the tool will not
start even if you pull the trigger.
CAUTION:
•
Before inserting the battery cartridge into the
machine, always check to see that the switch trigger
actuates properly and returns to the ‘‘OFF’’ position
when released.
•
Always check the directionof rotation before drilling.
•
Use the reversing switch lever only when the
machine comes to a complete stop. Changing the
direction of rotation before the tool stops may ruin
the tool.
•
When not operating the tool, keep the reversing
switch lever in the neutral position.
position for counter-
Speed change (Fig. 5)
To change the machine speed, turn the speed change
knob so that the arrow of the desired speed on the
knob is aligned with the reference arrow on the
machine body. If the speed change knob does not
turn easily, switch on the machine and turn the knob
again while the machine is running under no load.
Drilling operation
•
Drilling in wood
When drilling in wood, best results are obtained with
wood drills equipped with a guide screw. The guide
screw makes drilling easier by pulling the bit into the
workpiece.
•
Drilling in metal
To prevent the bit from slipping when starting a hole,
make an indentation with a center-punch and hammer at the point to be drilled. Place the point of the
bit in the indentation and start drilling.
Use a cutting lubricant when drilling metals. The
exceptions are iron and brass which should be
drilled dry.
CAUTION:
•
Pressing excessively on the machine will not speed
up the drilling. In fact, this excessive pressure will
only serve to damage the tip of your bit, decrease
the machine performance and shorten the service
life of the machine.
•
There is a tremendous force exerted on the
machine/bit at the time of hole breakthrough. Hold
the machine firmly and exert care when the bit
begins to break through the workpiece.
•
A stuck bit can be removed simply by setting the
reversing switch to reverse rotation in order to back
out. However, the machine may back out abruptly if
you do not hold it firmly.
•
Always secure small workpieces in a vise or similar
hold-down device.
Screwdriving operation (Fig. 6)
Place the point of the driver bit in the screw head and
apply pressure to the machine. Start the machine
slowly and then increase the speed gradually.
Release the trigger as soon as the clutch cuts in.
NOTE:
•
Make sure that the driver bit is inserted straight in
the screw head, or the screw and/or bit may be
damaged.
•
When driving wood screws, predrill pilot holes to
make driving easier and to prevent splitting of the
workpiece. See the chart.
Nominal diameter of
wood screw (mm)
3.1 2.0 – 2.2
3.5 2.2 – 2.5
3.8 2.5 – 2.8
4.5 2.9 – 3.2
4.8 3.1 – 3.4
5.1 3.3 – 3.6
Recommended size of
pilot hole (mm)
Overload protector
The overload protector automatically cuts out tobreak
the circuit and the button pops out, whenever heavy
work is prolonged. Wait 20 – 30 seconds before
pressing the restart button to resume operation. Your
finger should not be on the trigger when you press the
restart button, however.
MAINTENANCE
CAUTION:
Always be sure that the machine is switched off and
the battery cartridge is removed before carrying out
any work on the machine.
To maintain product safety and reliability, repairs,
maintenance or adjustment should be carried out by a
Makita Authorized Service Center.
5

NEDERLANDS
Verklaring van algemene gegevens
1 Batterijpak
2 Stelplaat
3 Oplaadlampje
4 Bus
5 Vastzetten
6 Ring
7 Omkeerschakelaar
8 Trekschakelaar
9 Pijltje
TECHNISCHE GEGEVENS
Model 6015D
Capaciteit
Staal ............................................................ 10 mm
Hout ............................................................. 15 mm
Houtschroeven ............................ 5,1 mm x 35 mm
Toerental. onbelast/tpm. (min
Totale lengte ................................................ 235 mm
Netto gewicht .................................................. 1,2 kg
Nominale spanning ........................................... 7,2 V
•
In verband met ononderbroken research en ontwik-
keling behouden wij ons het recht voor boven-
staande technische gegevens te wijzigen zonder
voorafgaande kennisgeving.
•
Opmerking: De technische gegevens kunnen van
land tot land verschillen.
Veiligheidswenken
Vooruw veiligheid dient u de bijgevoegde Veiligheidsvoorschriften nauwkeurig op te volgen.
-1
) ................... 600/250
BELANGRIJKE
VEILIGHEIDSVOORSCHRIFTEN VOOR
GEBRUIK VAN DE BATTERIJLADER EN
HET BATTERIJPAK
1. BEWAAR DEZE VOORSCHRIFTEN — In deze
gebruiksaanwijzing staan belangrijke
veiligheids- en bedieningsvoorschriften
betreffende de batterijlader (snellader).
2. Lees alle voorschriften en waarschuwingen
betreffende (1) de batterijlader, (2) het batterijpak en (3) het gereedschap aandachtig door
alvorens de batterijlader in gebruik te nemen.
3. LET OP — Om het gevaar voor ongelukken te
verminderen, dient u met de snellader uitsluitend MAKITA oplaadbare batterijen te laden.
Batterijen van andere merken kunnen gaan
barsten en hierdoor verwondingen of schade
veroorzaken.
4. Stel de batterijlader niet bloot aan regen of
sneeuw.
5. Het gebruik van accessoires die niet door de
fabrikant van de batterijlader worden verkocht
of aanbevolen, kan brandgevaar, elektrische
schok of verwondingen veroorzaken.
6. Om de stekker en het netsnoer niet te bescha-
digen, trekt u het netsnoer uit het stopkontakt
door de stekker vast te pakken.
7. Let op dat het snoer zodanig op de grond ligt,
dat niemand erop kan stappen of erover kan
struikelen en dat er niets op het snoer
geplaatst wordt.
0 600 tpm
q Toerentalregelknop
w 250 tpm
e Herstartknop
8. Gebruik in geen geval de batterijlader als het
netsnoer of de stekker beschadigd is. Vervang
deze onmiddellijk.
9. Gebruik de batterijlader ook niet als deze
gevallen is, aan een zware stoot heeft blootgestaan, of als u vermoedt dat hij beschadigd is.
Laat in deze gevallen de batterijlader eerst
nakijken.
10. Haal de batterijlader of het batterijpak niet uit
elkaar; laat eventuele servicebeurten of reparaties uitsluitend vakkundig uitvoeren. Het
onjuist opnieuw in elkaar zetten kan namelijk
elektrische schok of brandgevaar opleveren.
11. Om gevaar voor elektrische schok te verminderen, trekt u de stekker uit het stopkontakt
alvorens de batterijlader te reinigen of een
onderhoudsbeurt te geven. Door de batterijlader alleen maar uit te schakelen, vermindert u
dit gevaar niet.
BIJGEVOEGDE
VEILIGHEIDSVOORSCHRIFTEN VOOR
GEBRUIK VAN DE BATTERIJLADER EN
HET BATTERIJPAK
1. Laad het batterijpak niet op als de temperatuur
LAGER is dan 10°C of HOGER dan 40°C.
2. Gebruik voor het laden nooit een step-up
transformator, een dynamo of een
gelijkstroombron.
3. Zorg dat de ventilatiegaten van de batterijlader
niet afgesloten worden of verstopt raken.
4. Bedek altijd de polen van de accu met het
accudeksel wanneer u de accu niet gebruikt.
5. Voorkom kortsluiting van het batterijpak:
(1) Raak de aansluitklemmen nooit aan met
geleidend materiaal.
(2) Bewaar het batterijpak niet op een plaats
waar ook andere metalen voorwerpen
zoals spijkers, munten e.d. worden
bewaard.
(3) Stel het batterijpak niet bloot aan water of
regen.
Kortsluiting van het batterijpak kan leiden tot
een grote stroomafgifte, oververhitting, brandwonden of zelfs tot defecten.
6. Bewaar de batterijlader en het batterijpak niet
in plaatsen waar de temperatuur tot 50°C of
hoger kan op lopen.
7. Werp zwaar beschadigde of volledig uitgeputte batterijpakken niet in het vuur, omdat
een gevaarlijke explosie er het gevolg van kan
zijn.
18

8. Wees voorzichtig dat u het batterijpak niet laat
vallen en het niet aan schokken of stoten
blootstelt.
9. Laad het batterijpak niet op in een kist, een
container e.d. Om het batterijpak op te laden,
dient u dit in een goed geventileerde ruimte te
plaatsen.
BIJGEVOEGDE
VEILIGHEIDSVOORSCHRIFTEN
VOOR HET GEREEDSCHAP
1. Houd er rekening mee dat dit gereedschap
altijd in gebruiksklare conditie verkeert, aangezien het niet op een stopkontakt hoeft te
worden aangesloten.
2. Zorg altijd dat u stevig op uw voeten staat.
Zorg dat wanneer u op hooggelegen plaatsen
werkt, niemand onder u staat.
3. Houd het gereedschap stevig vast.
4. Houd uw handen uit de buurt van de draaiende
delen.
5. Bij het slopen van muren, vloeren en dergelijke bestaat de mogelijkheid op elektrische
kabels te stoten, die onder spanning staan.
KOM DERHALVE ONDER HET WERKEN NIET
AAN DE METALEN DELEN VANHET GEREEDSCHAP! Pak het gereedschap uitsluitend bij
de geïsoleerde plastic grepen vast, om het van
een elektrische schok te vermijden.
6. Schakel het gereedschap onmiddellijk uit wanneer u het niet meer gebruikt. Schakel slechts
in als u het vast houdt.
7. Raak het boorkop of het werkstuk onmiddellijk
na het boren niet aan, aangezien ze nog gloeiend heet zijn en derhalve brandwonden kunnen veroorzaken.
BEWAAR DEZE VOORSCHRIFTEN.
BEDIENINGSVOORSCHRIFTEN
Plaatsen en uithalen van batterij (Fig. 1)
•
Schakel het gereedschap altijd uit voordat een
batterij geplaatst of verwijdert wordt.
•
Om het batterijpak te verwijderen, trek eerst de
sluitplaat uit het gereedschap, pak dan het batterijpak aan beide zijden vast en verwijder het uit het
gereedschap.
•
Voor het plaatsen van de batterij zorgt u ervoor dat
de rug op de batterij in de groef van het batterijkompartiment komt, waarna u de batterij naar binnen
schuift. Klap alvorens hetgereedschap te gebruiken
de stelplaat oftewel deksel weer dicht, kontroleer of
de stelplaat goed vast geklemd zit en niet gemakkelijk opengaat.
•
Als het batterijpak moeilijk in de houder komt,
probeer het dan niet met geweld in te duwen. Indien
het batterijpak er niet gemakkelijk ingaat, dan houdt
u het verkeerd.
Opladen (Fig. 2)
1. Sluit de oplader aan op een stopcontact.
2. Plaats de batterij in de oplader zodat de plus en
min klemmen van de batterij overeenkomen met
de plus en min markeringen op de oplader. Schuif
de batterij zo ver mogelijk in de opening, zodat
deze op de bodem van de laderopening rust.
3. Eens de batterij erin zit, zal het oplaadlampje rood
knipperen en zal het opladen beginnen.
4. Nadat het opladen is voltooid, zal het oplaadlampje uitgaan. De oplaadtijd is als volgt:
Batterij 7000, 7100, 7120, 9000, 9100, 9100A,
9120: ca. 60 minuten
5. Indien u de batterij in de oplader laat zitten nadat
het opladen is voltooid, zal de oplader overschakelen naar de ‘‘bijladen (handhaven van de
lading)’’ stand.
6. Verwijder de batterij van de oplader en trek de
stekker van de oplader uit het stopcontact nadat
het opladen is voltooid.
Accu-model
7000 1 300 6
LET OP:
•
De oplader is uitsluitend bestemd voor het laden
van Makita batterijen. Gebruik deze nooit voor
andere doeleinden of voor het laden van batterijen
van andere fabrikanten.
•
Een nieuwe batterij of een batterij die gedurende
lange tijd niet werd gebruikt, kan soms niet volledig
worden geladen. Dit is normaal en wijst niet op een
defect. Nadat de batterij een paar keer volledig is
ontladen en herladen, kunt u deze weer volledig
laden.
•
Wanneer u de batterij van een zojuist gebruikt
gereedschap wilt laden, of een batterij die voor
langere tijd aan direct zonlicht of hitte werd blootgesteld, moet u deze eerst laten afkoelen. Steek
daarna de batterij erin en laad hem op.
•
Bij het laden van een nieuwe batterij of een batterij
die gedurende lange tijd niet werd gebruikt, gebeurt
het soms dat het oplaadlampje na korte tijd uitgaat.
Neem in zo’n geval de batterij eruit en steek deze
weer erin. Indien het oplaadlampje binnen één
minuut uitgaat zelfs nadat deze procedure een paar
malen werd herhaald, is de batterij versleten. Vervang deze door een nieuwe.
Capaciteit
(mAH)
Aantal cellen
Bijladen (Handhaven van de lading)
Wanneer u een volledig opgeladen batterij in de
oplader laat zitten om spontaan ontladen te voorkomen, zal de oplader overschakelen naar de ‘‘Bijladen
(Handhaven van de lading)’’ stand waardoor de batterij vers en in volledig opgeladen toestand wordt
gehouden.
19
 Loading...