

Page 1
T
ECHNICAL INFORMATION
Models No.
500
New Tool
Description
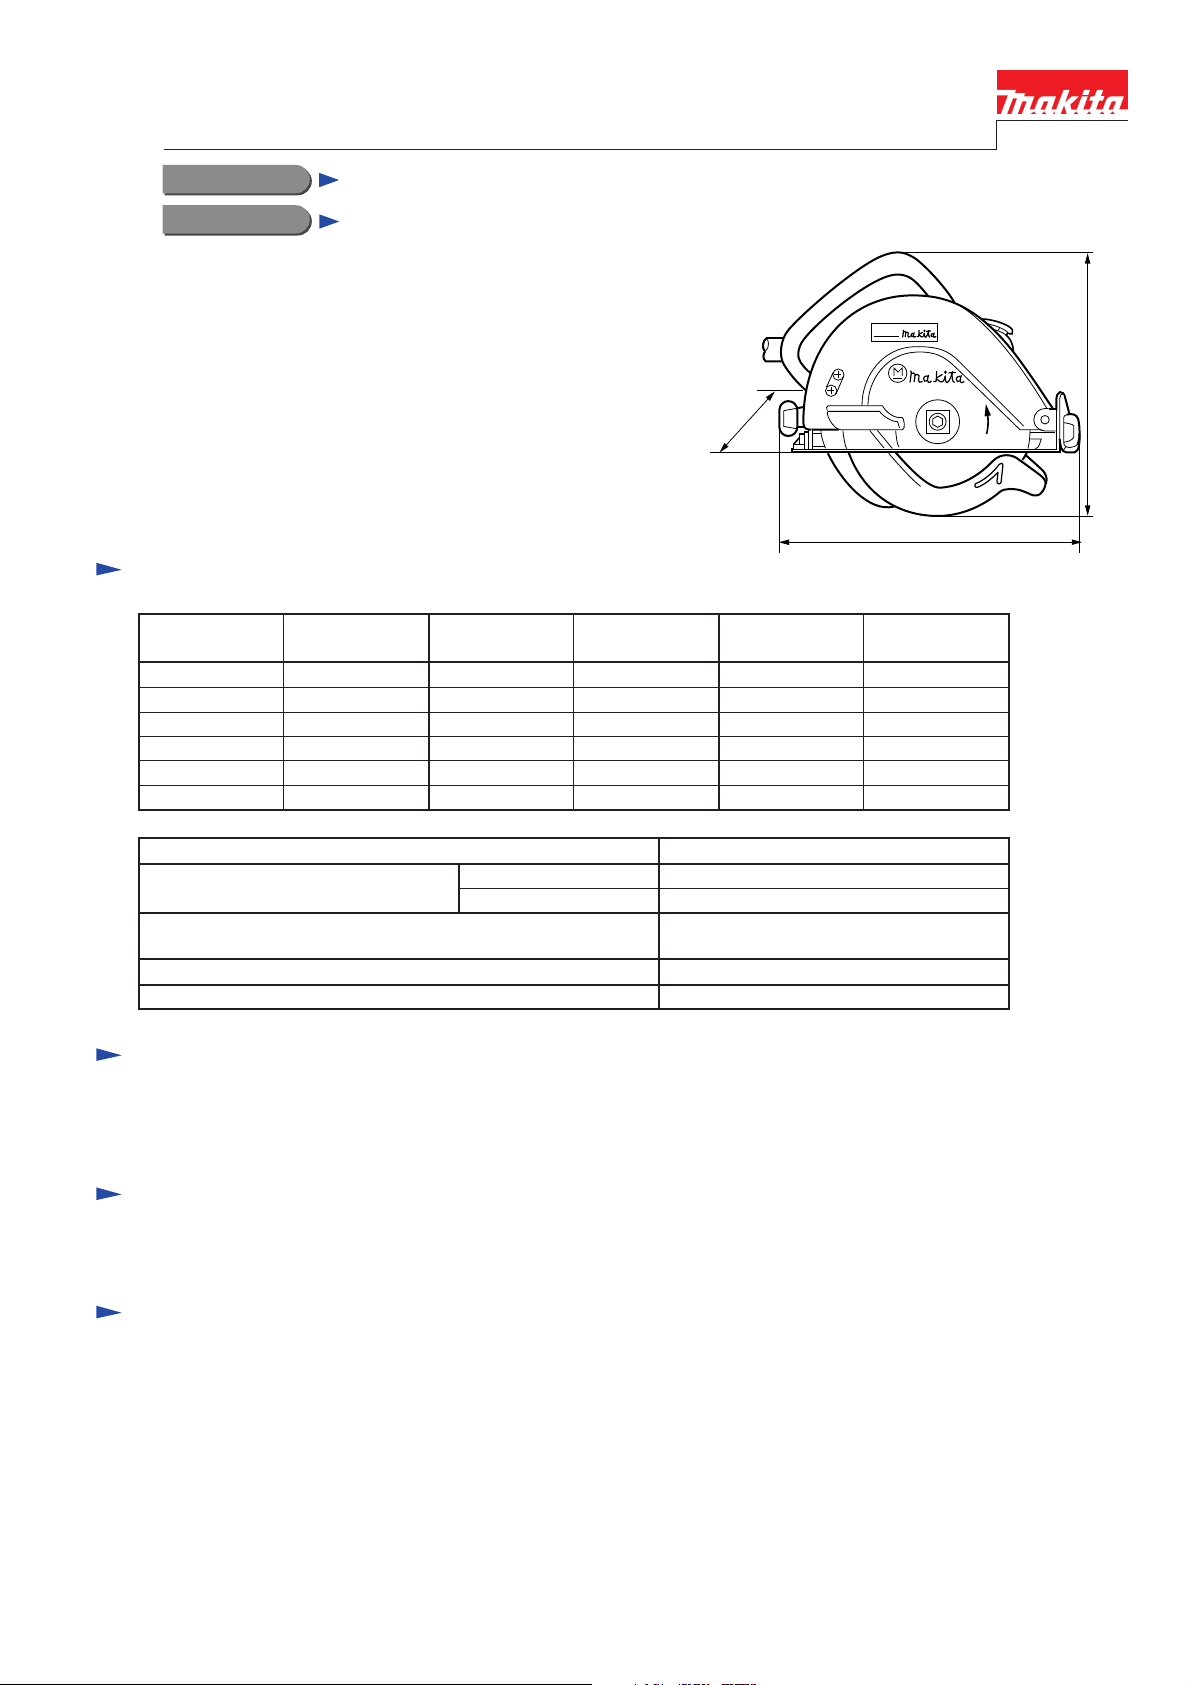
MAKITA 140mm Circular saw
CONCEPTION AND MAIN APPLICATIONS
This machine is the small type circular saw or the
reformed version of the 5000SB and 5000SBR, developed
according to the design of Giujiaro while focusing on the deign.
Compared with the conventional model, it has been developed
while attention is paid in more beautiful appearance and well
functionality.
Note that the M500 is for exclusive in export.
The difference between 500 and M500 is just the housing color.
500---green (standard), M500---red
Specifications
Voltage(V) Current(A)
100 5.8 50-60 550 260 440
115 5.0 50-60 550 260 440
200 2.9 50-60 550 260 440
220 2.6 50-60 550 260 440
230 2.5 50-60 550 260 440
240 2.4 50-60 550 260 440
Frequency
(Hz)
Consumed
power(W)
196 (7-3/4")
Rated
output(W)
208 (8-3/16")
240 (9-1/2")
Max.
output(W)
No load speed (/min.)
Saw blade(mm)
Cutting capacity
(When the saw with dia. 140 mm is used)
Weight(kg)
Cord length(m)
Inner dia.
Outer dia.
4000
16
130-140
0-45mm( 90 )
0-29mm( 45 )
2.5
2
Standard equipment
Parallel ruler
Box wrench 9(for loading/unloading the saw blade)
+ Screw driver (for adjusting the living knife)
Optional accessories
Saw blade 140 for both vertical/horizontal purposes
Saw blade 140 for horizontal sawing
Features and benefits
1. This is the circular saw which has been developed while seeking the functional beauty according to the
GiujiaroGiujiaro design.
2. Unintentionally touching the switch may not cause to start motion since the double action switch, which can be
operated by both hands, is built in.
3. The living knife is mounted for preventing from reaction of the saw blade caused in cutting.
4. In addition to the small and light weighing body, the handle and auxiliary grip, which can be easily gripped, are
built in, enabling the comfort operation.
5. The knob for adjusting the cutting depth and the angle has a well shape which makes soft touch on the fingers,
resulting in easy adjustment.
Giujiaro
The standard equipment for the tools shown may differ from country to country.
Page 2
Repair
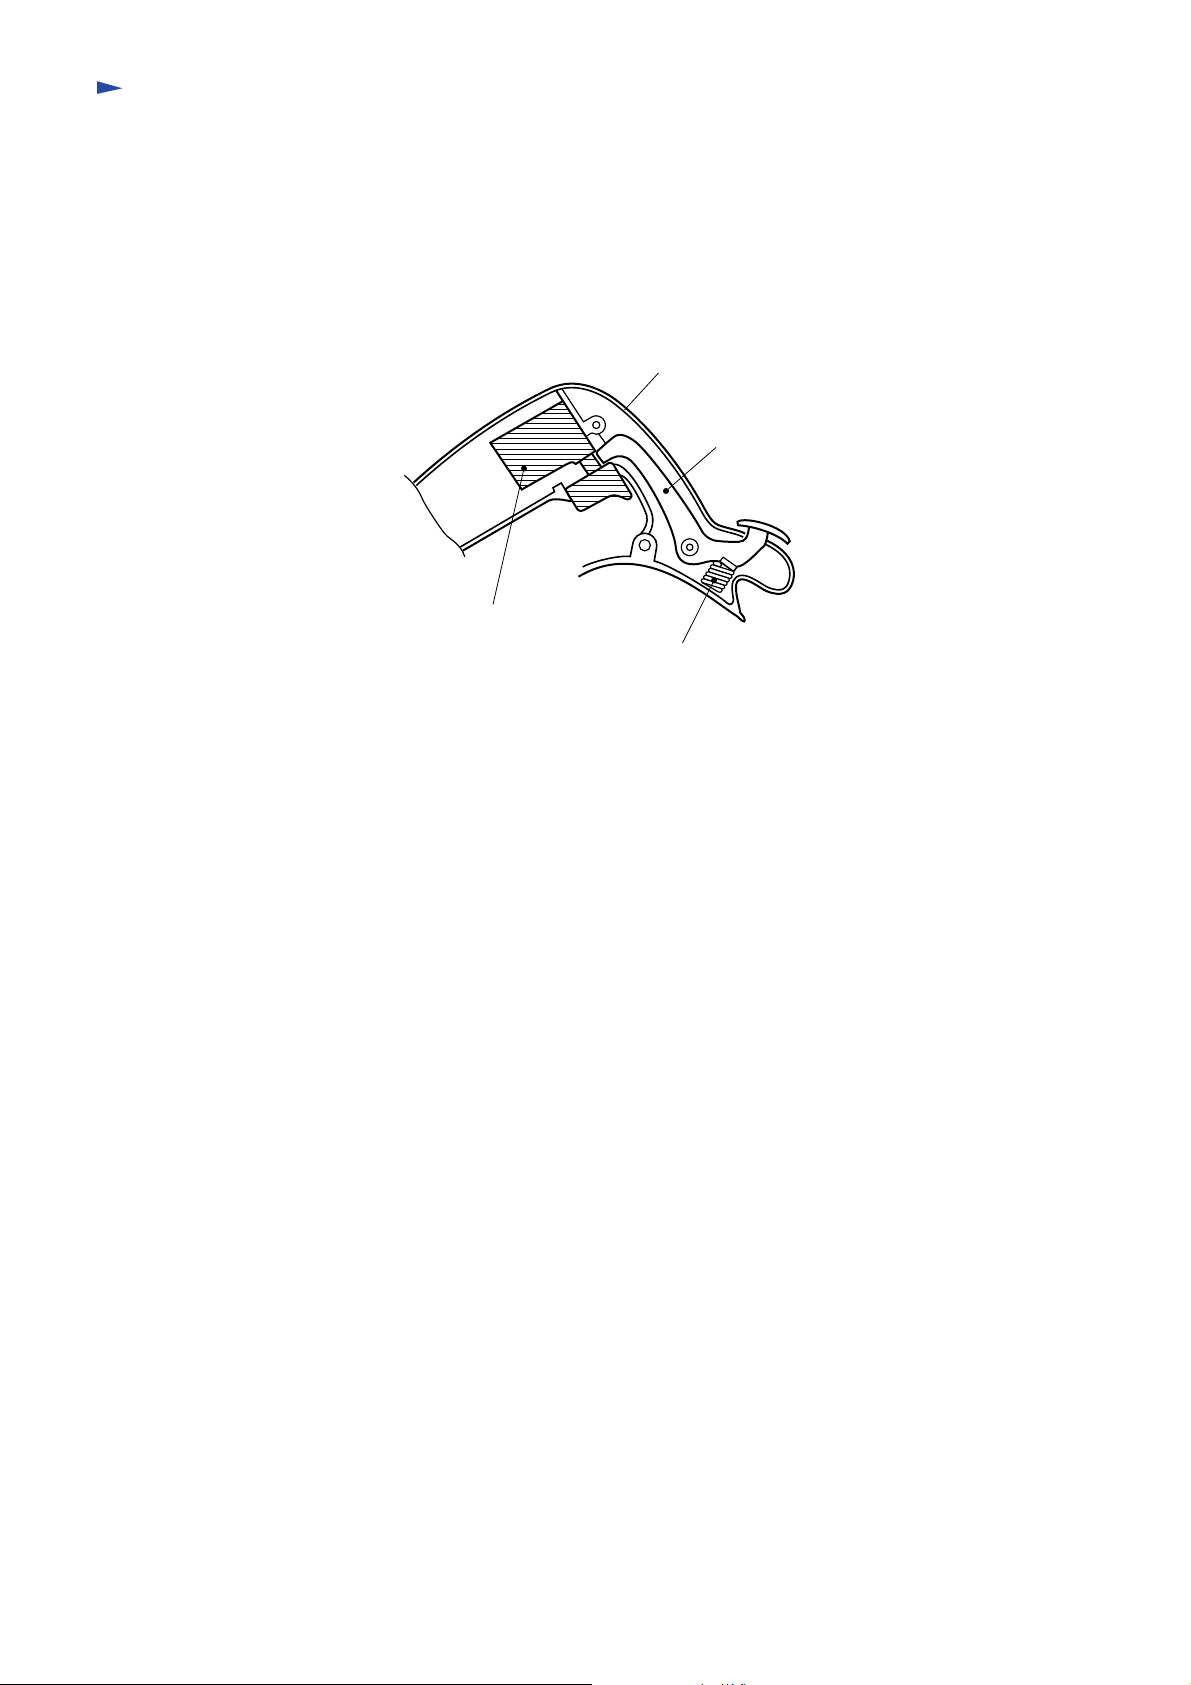
Assembling of the switch etc.
Set the switch, the lever, and the compression spring 4 at the positions on the motor housing as shown on the below
figure in a way that they may not float. Also when setting the handle cover to the motor housing, use care that the
parts shown above and the lead wire are not caught in each other.
Motor housing
Lever
Switch
Compression spring 4
 Loading...