

Page 1
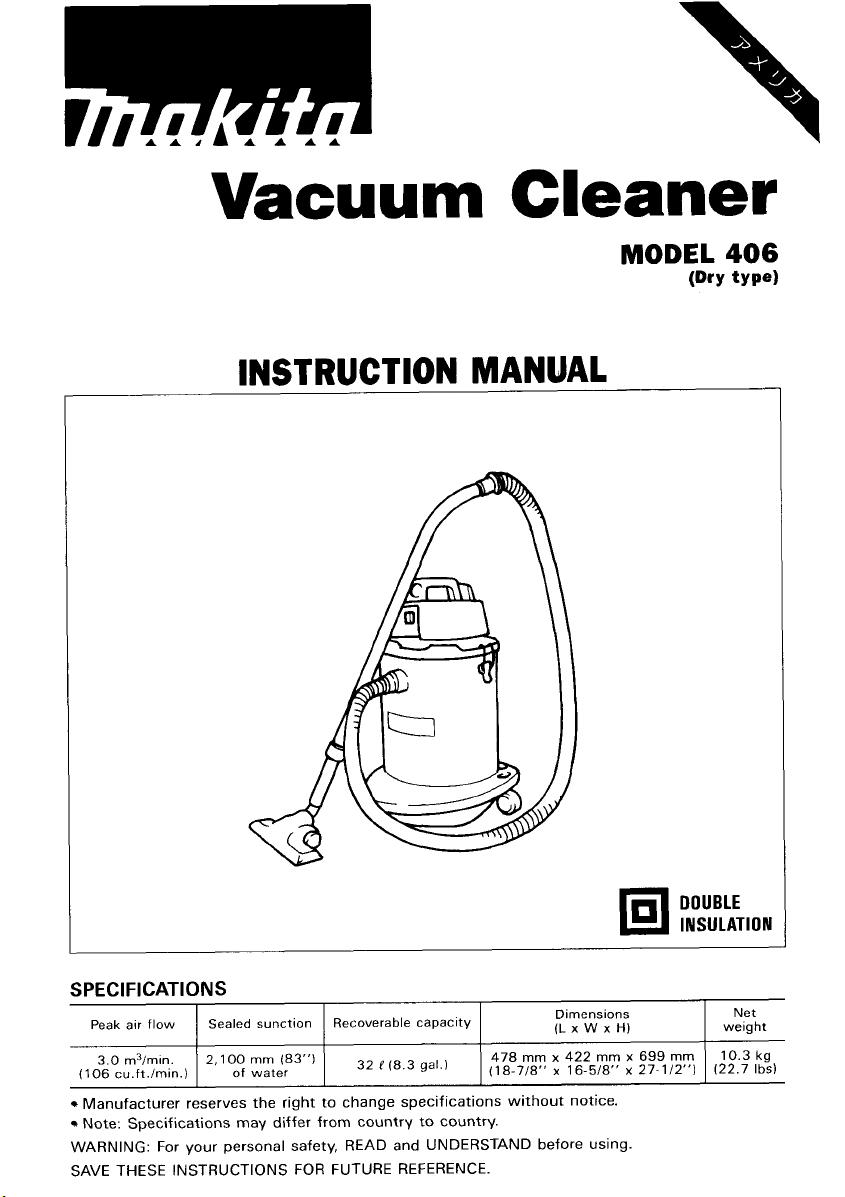
Vacuum
Cleaner
INSTRUCTION MANUAL
MODEL
(Dry
406
type)
Dimensions
(L x W
x
422
mm
16.5,8rr
H)
Peak air flow Sealed sunction Recoverable capacity
478
mm
3.0
m3”in.
(106
cu.ft./min.)
Manufacturer reserves the right to change specifications without notice.
Note: Specifications may differ from country to country.
WARNING: For your personal safety, READ and UNDERSTAND before using.
SAVE THESE INSTRUCTIONS
2,100mm
of
water
(83”)
FOR
32 P(8.3
FUTURE REFERENCE.
gal.)
(,8-,/8r,
x
x
699
27.112aa)
DOUBLE
INS
U
L
weight
10.3
mm
(22.7
AT
Net
I
0
kg
1bs)
N
Page 2
I
M
PO
RTANT
SAFETY INSTRUCTIONS
When using an electrical appliance, basic precautions should
always be followed, including the following:
READ
BEFORE
WARNING
ALL
INSTRUCTIONS
USING THIS APPLIANCE
-TO
reduce the risk of fire, electric shock, or
injury:
1.
Do
not leave appliance when plugged in. Unplug from outlet when not in
use and before servicing.
2.
Do
not use on wet surfaces.
3.
Do
not allow to be used as a toy. Close attention is necessary when used
by or near children.
4.
Use only as described
mended attachments.
5.
Do
not use with damaged cord or plug.
has been dropped, damaged, left outdoors, or dropped into water, return
to a service center.
6.
Do
not pull or carry by cord, use cord as a handle, close a door on cord, or
pull cord around sharp edges or corners.
Keep cord away from heated surfaces.
7.
Do
not unplug by pulling on cord.
8.
Do
not handle plug or appliance
9.
Do
not put any object into openings.
keep free of dust,
IO.
Keep hair, loose clothing, fingers, and all parts of body away from openings
and moving parts.
11.
Do
not pick up anything that is burning or smoking, such as cigarettes,
matches, or hot ashes.
12.
Do
not use without filters in place. Replace a damaged filter immediately.
13.
Turn off all controls before unplugging.
14.
Use extra care when cleaning on stairs.
15.
Do
not use to pick up flammable or combustible liquids such as gasoline or
use in areas where they may be present.
lint,
Do
not expose rain. Store indoors.
in
this manual. Use only manufacturer’s recom-
If
appliance is not working as
Do
not run appliance over cord.
To
unplug, grasp the plug, not the cord.
with
wet hands.
Do
not use with any opening blocked;
hair, and anything that may reduce air flow.
it
should,
it
2
Page 3
16.
AVOID UNINTENTIONAL STARTING. Be sure switch is OFF when plugging
17.
OUTDOOR USE EXTENSION CORDS. When tool is used outdoors, use only
extension cords intended for use outdoors and
18.
GUARD AGAINST ELECTRIC SHOCK. Prevent body contact with grounded
surfaces. For example; pipes, radiators, ranges, refrigerator enclosures.
This appliance is provided with double insulation. Use only identical replace-
19.
ment parts. See instructions for Servicing of Double-Insulated Appliances.
POLARIZED PLUGS. To reduce the risk of electric shock, this equipment has
20.
a polarized plug (one blade is wider than the other). This plug will fit
polarized outlet only one way.
the plug.
proper outlet. Do not change the plug
If
it
still does not fit, contact a qualified electrician to install
If
the plug does not fit fully in the outlet, reverse
in
so
any way.
marked.
in.
in
the
a
SERVICING
OF
DOUBLE=
INSULATED APPLIANCES
In a double-insulated appliance, two systems of insulation are provided instead
of
grounding. No grounding means is provided on a double-insulated appliance,
nor should a means for grounding be added to the appliance. Servicing a doubleinsulated appliance requires extreme care and knowledge of the system, and
should be done only by qualified service personnel. Replacement parts for a
double-insulated appliance must be identical to the parts they replace. A doubleinsulated appliance is marked with the words "DOUBLE INSULATION" or
"DOUBLE INSULATED." The symbol (square within a square)
marked on the appliance.
VOLTAGE WARNING: Before connecting the tool to a power source (receptacle,
outlet, etc.) be sure the voltage supplied is the same as that specified on the
nameplate of the tool. A power source with voltage greater than that specified
for the tool can result
the tool. If
voltage less than the nameplate rating is harmful to
in
doubt, DO NOT PLUG IN THE TOOL. Using a power source with
in
SERIOUS INJURY to the user - as well as damage to
the
motor.
0
may
also
be
3
Page 4
ADDITIONAL SAFETY RULES
1.
This
is
a dry type cleaner.
such as razors, needles, broken glass
2.
Do
not use close to heat sources (stoves, etc.).
3.
Do
not fold, tug nor step on the hose.
4.
Clean and service the cleaner immediately after each use to keep
operating condition.
5.
Be kind to your cleaner. Rough handling can cause breakage of even the most
sturdily
6.
Do
chemicals. Cracks and discoloration may be caused.
built
cleaner.
not attempt to clean the exterior or interior with benzine, thinner or cleaning
Do
not attempt to pick
or
the like.
up
liquids, sharp materials
it
in
SAVE THESE INSTRUCTIONS.
This cleaner is intended for commercial use.
tiptop
4
Page 5

Installing
Insert the hose into the hose inlet and turn
clockwise until fully secured.
Installing cloth filter
Install the cloth filter on the tank. Always
be sure that there is no gap between the
gasket on the cloth filter and the tank after
installing
hose
Hose
inlet
I
FT
Tank
-/
Switch action
To start the cleaner, press the "ON" side of
the switch.
of the switch.
CAUTION:
.Do
cleaner may thus result from overheating.
*Do
Air discharged from the cleaner may fan the flame, and the cleaner may be deformed.
To
stop, press the
not operate the cleaner for a long time with intake hole blocked. Deformation of the
not use the cleaner close to heat sources (stoves, etc.).
"OFF"
side
Switch
Cloth
filter
5
Page 6

Storage
A
the side
straight/bent wand (pipe) out
of
accessories
wand holder (pipe holder) is equipped on
of
the cleaner to keep the
of
the way
during vacuuming breaks.
Both the straight wand (straight pipe) and
bent wand (bent pipe) can be stored after
use just
by
inserting them
in
the holes in
the cleaner base.
6
Page 7

MAINTENANCE
CAUTION:
Always be sure that the tool is switched off and unplugged before attempting to perform
inspection or maintenance.
Cleaning
Clogged filters cause poor suction performance. Clean out the filters from time to time.
To
remove dust or particles adhering to the
cloth filter, shake the frame bottom quickly
several times.
Moreover, occasionally wash the cloth filter
in soapy water, rinse and dry thoroughly in
the shade before use. Never wash filters in
a
washing machine.
To
maintain product SAFETY and RELIABILITY, repairs, carbon brush inspection and
replacement, any other maintenance or adjustment should be performed by Makita
Authorized or Factory Service Centers, always using Makita replacement parts.
7
Page 8

ACCESSORIES
CAUTION:
These accessories or attachments are recommended for use with your Makita tool specified in this
manual. The use of any other accessories or attachments might present
The accessories or attachments should be used only in the proper and intended manner.
a
risk of injury to persons.
*Nozzle
Part
assembly
No.
12251 24
*Hose
Inner dia. 19 mm (3/4")
No.
Part
Inner dia. 28 mm (1-1/8")
Part
Part
Inner dia. 36 m (1-13/32")
Part
192108-5 (2.5 m: 8 ft.)
No.
192278-0 (1.5 m: 4.8 ft.)
No.
192279-8 (3 m: 9.6 ft.)
No.
192564-9 (2.5
*Corner nozzle
Part
No.
410306-2
m:8
ft.)
*Bending pipe
Part No. 192562-3
*Straight
Part
No.
pipe
192563-1
*Round brush
Part
No.
191 657-9
*Nozzle
Part
No.
8
assembly
122334-2
A
.Paper filter
Part
No.
192573-8
Page 9

The following joints are available for use with some type Makita planers, belt sanders, miter
routers, etc.
saws,
Applicable model
Concrete Planer
PC1100
Belt Sanders
9401, 9402
Miter Saws
24008,
LS
1400
Elbow
Joint name & configuration
Ass'y
Part
joint
32
No.
JPA
122273
m
Part
No.
JPA
+
+
122274
Joint
Part
Joint
Part
No.
No.
55
55
Ass'y
JPA
Ass'y
JPA
Planers
19008. N 19008. 1901
122275
122275
18058
Joint
40
Nozzle
Part
No. 191569-6
Nozzle
No.
Part
Ass'y
51 - 1
JPA
122276
Nozzle 70-4
Part
No.
JPA
Dust
nozzle
Ass'y
122279
Part
No.
+
Joint
Part
192035-6
70
No.
181 575-9
Routers
36008. 3600BR. 36088.
361 2BR. 3612BRA, 361
3620
2C.
9
Page 10

VACUUM CLEANER
Model
406
Aug.--23--'96 US
10
Note: The switch, noise suppressor and other part configurations
may differ from country to country.
Page 11

MODEL 406 Aug.-23-'96
';"OM
$fD
'LiM
$fb
DESCRIPTION
DESCRIPTION
US
MACHINE
~
11
21
31
41
61
71
81
91
10
11
12
13
14
15
16
17
18
19
20
21
22
23
24
25
26
27
28
29
30
31
32
33
Note: The switch and other
Name Plate
Cowling
Block
Filter
s
e p a r a
t
Switch Base
Switch
0"St
cover cap
Dust
Cover
1
Strain
2
1
1
1
1
1
2
4
2
2
1
1
1
1
1
1
1
1
1
1
1
1
1
Relief
Tapping
Cord
Cord Guard
Seal
Ring 70
Motor Cover
Fan 62
Tapping
Tapping Screw Bind CT 4x12
Plate
Carbon
End
Bell
Wave Washer
Ball
Bearing 6290DW
ARMATURE ASSEMBLY IWith Item 23
Band
Field
Ball
Bearing 6200DOW
Cussion Ring 11
Bare
Flsnge
Band Damper
Fan
125
SDacar
0
r
Screw
Screw
Brush
4x18
Bind CT 5x60
20
part
specifications
MACHINE
~
1
Return
34
1
35
1
36
1
37
1
38
1
39
1
40
1
41
42
3
43
1
1
44
1
45
1
46
47
1
48
6
3
49
1
50
1
51
1
52
53
1
2
54
4
55
2
country
to
56
57
58
59
60
61
62
63
64
country
1
1
1
1
1
2
1
1
&
271
8
may
differ from
Base
Fan
125
Flat
Washer 10
Hex
Nut M8
Fan
Cover
Ring
Support
Guard
Float
Tapping
Screw
Float
Cage
Frame
Tank Cover
Rubber Rtng 352
Cloth
Filter
Tappmg
Screw
Screw
Tapping
Holder
0
Ring
56
Inlet
Pipe Holder
Screw
Tapping
Pan Head
Screw
Hook
Tank
Makita Label
Rubber
Ring
370
Caster
Base
caste, 75
casts, 50
Earth Line 120
Pan Head
Screw
4x18
Flange PT 4x30
4x1 8
Flange 4x25
M4x8
M4x6
11
Page 12

MAKlTA
I
Every Makita tool is thoroughly inspected and tested before leaving the factory. It is warranted to
be free of defects from workmanship and materials for the period of ONE YEAR from the date of
original purchase. Should any trouble develop during this one-year period, return the COMPLETE
tool, freight prepaid, to one of Makita’s Factory or Authorized Service Centers. If inspection shows
the
trouble is caused by defective workmanship or material, Makita
replace) without charge.
This Warranty does not apply where:
repairs have been made or attempted by others:
repain
are required because of normal wear and tear:
The tool has been abused, misused or improperly maintained;
alterations have been made
IN
NO EVtNT SHALL MAKITA
SFQUENTIAL DAMAGES FROM THF SALF OR
APPLIES BOTH DURING AND AFTER THt
MAKITA DISCLAIMS LIABILITY FOR ANY IMPLIED WARRANTIES, INCLUDING IMPLIED
WARRANTIES OF “MERCHANTABILITY” AND “FITNESS FOR A SPECIFIC PURPOSE,”
AFTER THE ONE-YEAR TERM
This Warranty gives
state to state. Some states do not allow the exclusion or limitation of incidental or consequential
damages,
so
limitation on how long an implied warranty lasts,
the above limitation or exclusion may not apply to you. Some states do not allow
LIMITED
to
YOU
specific legal rights, and you may also have other rights which vary from
ONE YEAR WARRANTY
Warranty
the tool.
Bt
LlABLt I-OR
OF
THIS WARRANTY.
Policy
ANY
INDIRECT. INCIDFNTAL OR CON-
USt
OF
Tt
THE PRODUCT THIS DISCLAIMER
RM
OF
THIS WARRANTY
so
the above Limitation may not apply to you.
will
repair (or at our option,
i
Makita Corporation
3-11
-8,
Anjo, Aichi
Sumiyoshi-cho,
446
Japan
884063
-
064
PRINTED IN JAPAN
1996 - 10
-
N
 Loading...