

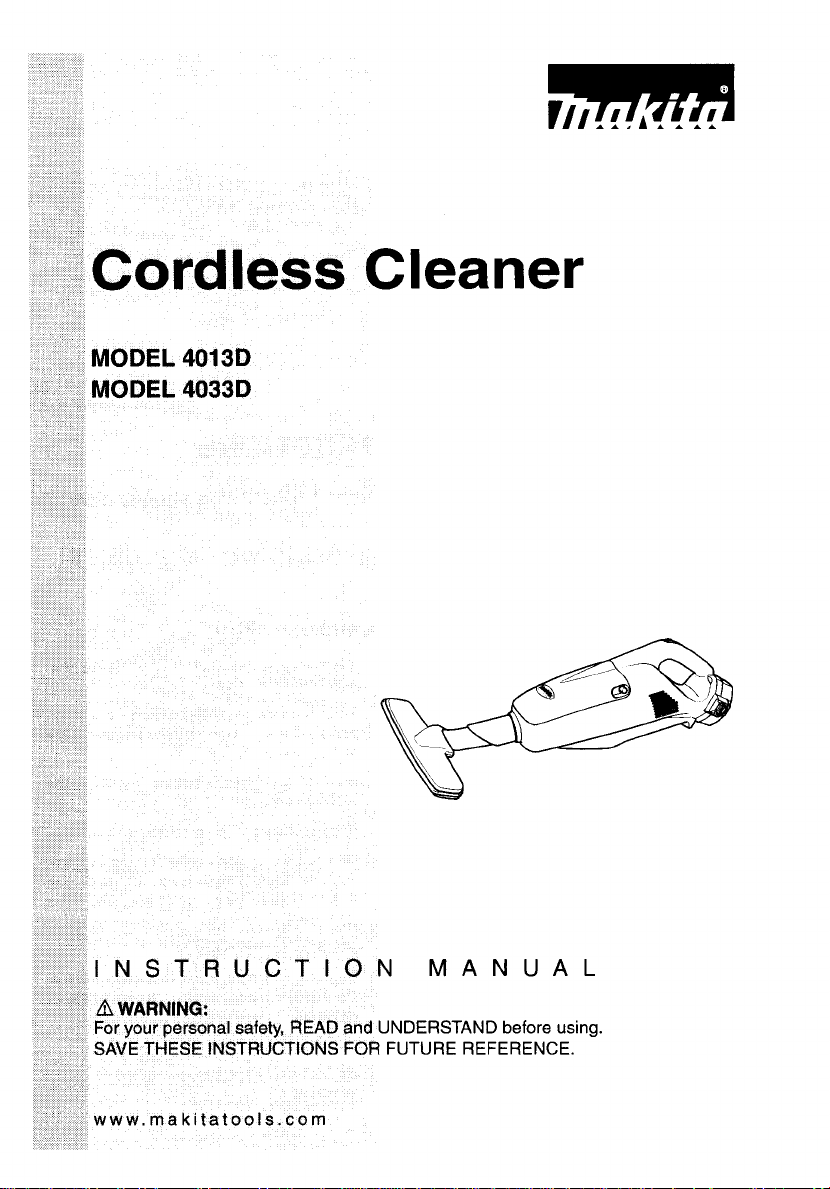
N MANUAL
.. .,....
...,h*%
SPECIFICATIONS
Model
Manufacturer reserves the right
Specifications may differ from country to country.
IMPORTANT SAFETY INSTRUCTIONS
I
Rated voltaae
I
Capacity
to
change specifications without notice.
1
Dimensions (L x W x
H)
I
Net weight
USAOlP-1
When using an electrical appliance, basic precautions should always
be followed, including the following:
READ
A
ALL
INSTRUCTIONS BEFORE USING THIS APPLIANCE
WARNING:
To reduce the risk of fire, electric shock or injury:
1.
Do
not leave appliance when battery fitted. Remove battery from appliance when
not
in
use and before servicing.
Do
not expose to rain. Store indoors.
2.
3.
Do
not allow to be used as a toy. Close
attention is necessary when used by or
near children.
Use only
4.
only manufacturer's recommended
attachments.
5.
Do
ance is not working as
dropped, damaged, left outdoors, or
dropped into water, return it to a service
center.
6.
Do
Do
7.
not use with any opening blocked; keep
as described
not use with damaged battery. If appli-
not handle appliance with wet hands.
not put any object into openings.
in
this manual. Use
it
should, has been
Do
free of dust, lint, hair, and anything that
may reduce air flow.
8.
Keep hair, loose clothing, fingers, and all
parts of body away from openings and
moving parts.
9.
Turn
off
battery cartridge.
10.
Use extra care when cleaning on stairs.
11.
Do
bustible liquids, such as gasoline, or use
in areas where they may be present.
12.
Use only the charger supplied by the man-
ufacturer to recharge.
13.
Do
smoking, such as cigarettes, matches, or
hot ashes.
14.
Do
15.
Do
all controls before removing the
not use to pick up flammable or com-
not pick up anything that is burning or
not use without filters
not charge the battery outdoors.
in
place.
2
SAVE THESE
INSTRUCTIONS
This appliance is intended
for
household use.
ADDITIONAL SAFETY RULES
Read this instruction manual and the
charger instruction manual carefully
before use.
Do
not pick up wet materials,
or the like.
Stop operation immediately if you notice
anything abnormal.
lit
cigarettes
If you drop or strike the cleaner, check
4.
carefully for cracks or damage before
operation.
Do
not bring close to stoves or other heat
5.
sources.
Do
not block the intake hole or vent holes.
6.
SAVE THESE INSTRUCTIONS
USEO62-1
it
3
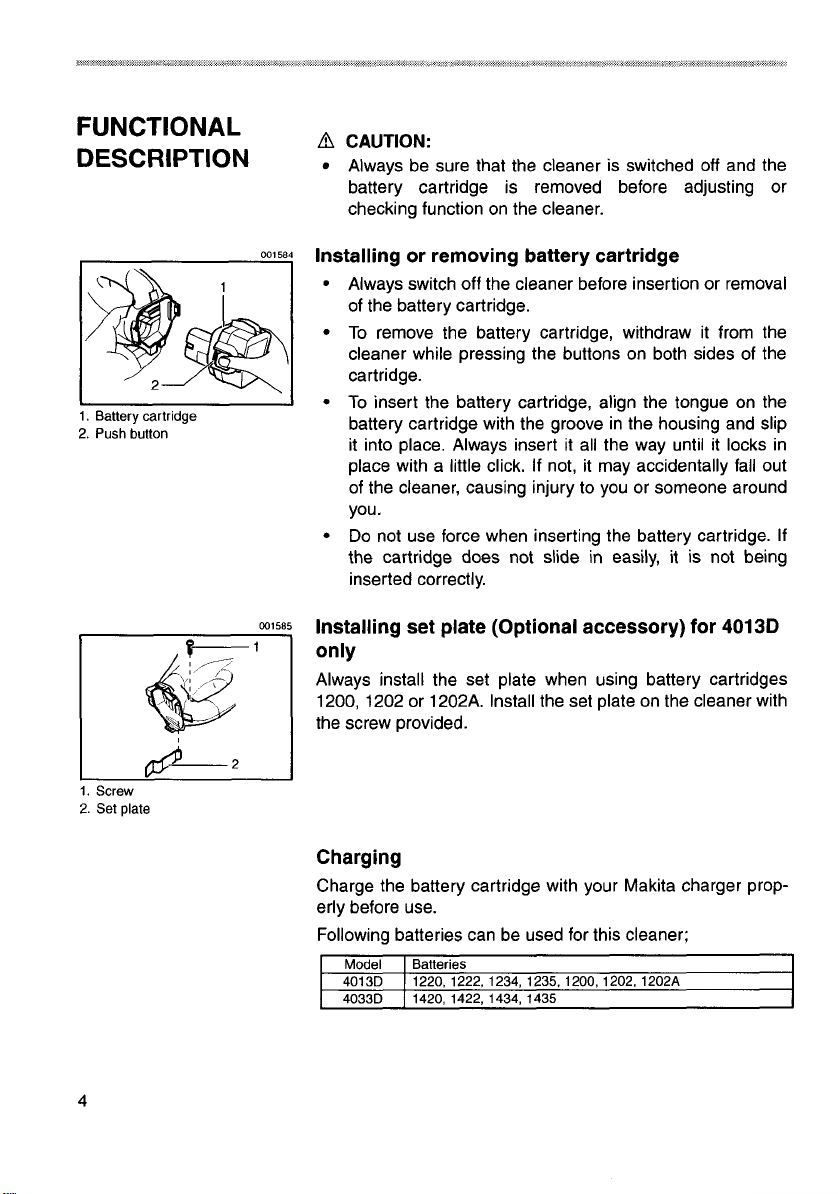
FUNCTIONAL
DESCRIPTION
1.
Battery cartridge
2.
Push button
A
CAUTION:
Always be sure that the cleaner is switched off and the
battery cartridge is removed before adjusting or
checking function on the cleaner.
Installing or removing battery cartridge
Always switch off the cleaner before insertion or removal
of the battery cartridge.
To
remove the battery cartridge, withdraw it from the
cleaner while pressing the buttons on both sides of the
cartridge.
To
insert the battery cartridge, align the tongue on the
battery cartridge with the groove in the housing and slip
it into place. Always insert
it
all the way until it locks in
place with a little click. If not, it may accidentally fall out
to
of the cleaner, causing injury
you or someone around
you.
Do not use force when inserting the battery cartridge. If
the cartridge does not slide in easily, it is not being
inserted correctly.
W1585
Installing set plate (Optional accessory)
only
Always install the set plate when using battery cartridges
1200, 1202 or 1202A. Install the set plate on the cleaner with
the screw provided.
for
4013D
1.
Screw
2. Set plate
4
Charging
Charge the battery cartridge with your Makita charger properly before use.
Following batteries can be used for this cleaner;
Model
4013D
4033D
Batteries
1220,1222,1234,1235,1200,1202,
1420,
1422,
1434, 1435
1202A
I
1.
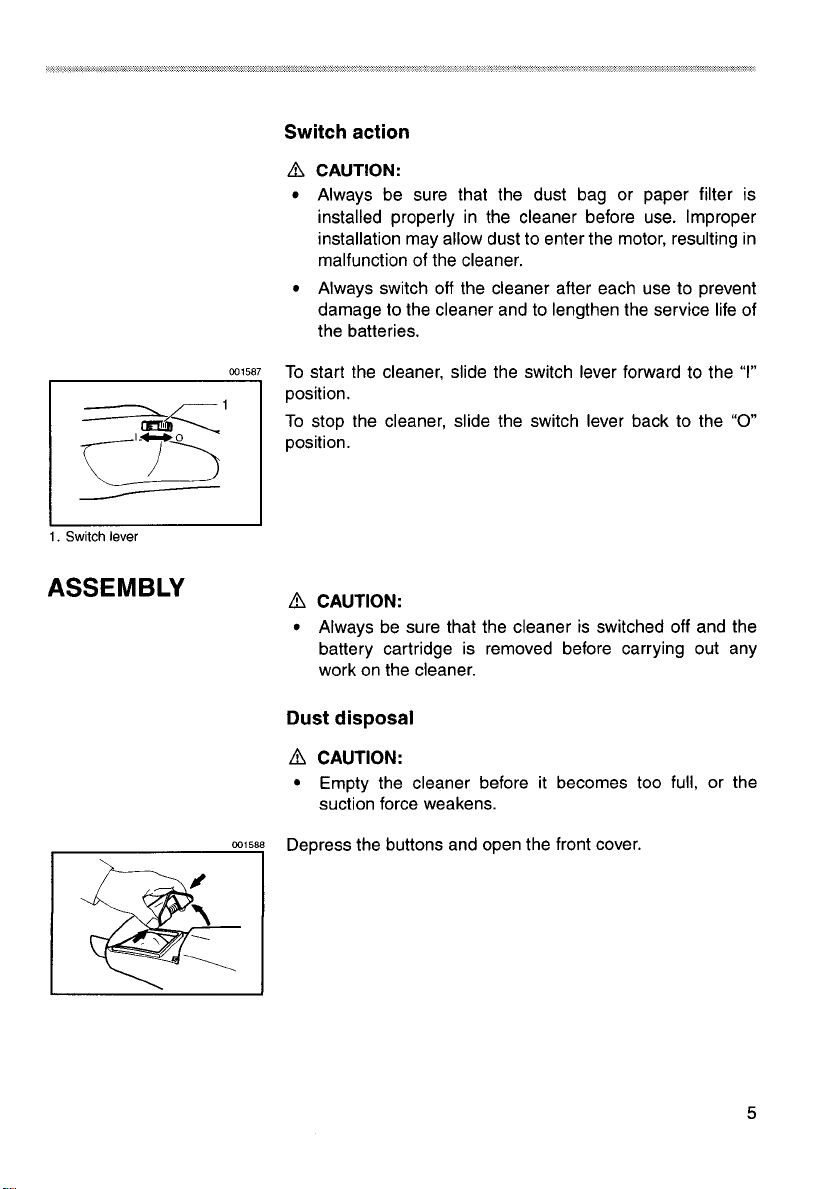
Switch
lever
Switch action
A
W15f
To
position.
To
position.
CAUTION:
Always be sure that the dust bag or paper filter
installed properly in the cleaner before use. Improper
installation may allow dust to enter the motor, resulting in
malfunction of the cleaner.
Always switch
damage
the batteries.
start the cleaner, slide the switch lever forward to the
stop the cleaner, slide the switch lever back to the
off
the cleaner after each use to prevent
to
the cleaner and to lengthen the service life of
is
“I”
“0
ASSEMBLY
A
CAUTION:
Always be sure that the cleaner is switched off and the
battery cartridge is removed before carrying
work on the cleaner.
Dust disposal
A
CAUTION:
Empty the cleaner before
suction force weakens.
0015
Depress the buttons and open the front cover.
out
it
becomes too full, or the
any
5

A
001%
Take the dust bag out of the cleaner carefully
tents will not spill out.
Empty the contents out of the dust bag.
Also
empty out the dust inside the cleaner itself. Failure
so
may cause the sponge filter
to
be clogged or the motor
be damaged.
Place the dust bag into the cleaner cavity.
M,
6'
Insert the holder of the dust bag all the way into the
the cleaner cavity.
so
that the con-
to
do
to
slots in
6
A
CAUTION:
Forgetting
to
install the dust bag, failure to insert the
holder of the dust bag all the way into the
broken
or
ripped bag, may allow dust to get into the
motor. This may result in motor failure.
slots or using a

1.
Hook
2.
Front
lio
1.
Cleaner
2.
Corner nozzle
body
~1593
Hook the front cover onto the front lip
of
the cleaner. Then
close the front cover.
NOTE:
When installing the paper filter, follow the same
procedures for the dust bag.
Always unfold a new paper filter before installing it on the
cleaner.
W1594
Corner nozzle storage
When not in use, the corner nozzle can be conveniently
stored in the cleaner body.
OPERATION
1
Nozzle
~1595
Cleaning (Suction) Nozzle
Attach the nozzle
Nozzle slips on easily.
to
clean off tables, desks, furniture etc.
7

I.
Cleaner body
2.
Extension wand
3.
Nozzle
1.
Cleaner body
2.
Corner nozzle
001596
Nozzle + Extension wand (Straight pipe)
The extension wand fits in between the nozzle and the
cleaner itself. This arrangement is convenient for cleaning a
floor while standing erect.
W159
Corner nozzle
Fit on the corner nozzle for cleaning corners and crevices of
a car or furniture.
001598
Corner nozzle + Extension wand (Straight pipe)
In tight quarters where the cleaner itself cannot squeeze in,
to
or in high places hard
reach, use this arrangement.
1.
Cleaner body
2.
Extension wand
3.
Corner nozzle
8
0015!
The cleaner is possible
to
suck
dust without nozzle,
too.

MAINTENANCE
Ni-Cd
A
CAUTION:
Always be sure that the cleaner is switched off and the
battery cartridge is removed before carrying out any
work on the cleaner.
001600
After use
When storing the cleaner, hang it from a nail using the convenient hanger in back.
001601
Cleaning
From time to time wipe off the outside (cleaner body) of the
cleaner using a cloth dampened in soapy water.
Never use gasoline, thinner or the like. Discoloration or
cracks may result.
Wash the dust bag in soapy water occasionally. Dry it out
thoroughly before use. An insufficiently dried bag may cause
poor suction and shorten the service life of the motor.
To maintain product SAFETY and RELIABILITY, repairs, any
other maintenance or adjustment should be performed by
Makita Authorized or Factory Service Centers, always using
Makita replacement parts.
Recycling the Battery
The only way
The law prohibits any other method of disposal.
To recycle the battery:
1.
Remove the battery from the
2.
a)
or
b)
Call your nearest Makita Service Center or Distributor to
determine the location that provides Makita battery recycling.
See your local Yellow Pages under “Tools-Electric”.
to
dispose of a Makita battery is to recycle it.
tool.
Take the battery to your nearest Makita Factory Service Center
Take the battery to your nearest Makita Authorized
Service Center or Distributor that has been designated as a Makita battery recycling location.
ENWOl
1
9

10
Model
401 3D
4033D
Battery cartridge Battery charger
1220/1200 DC1470
1202/1202N1222/
123411 235 DC1411 DC1422
1420 DC 1 470
1422/1434/1435

Memo
11

Memo
12
._.
...
.- .-
.........
.............. ....... ..... .... ......
.......
......
.................... ................ ....
..... ....
-
...................

I
I
I
I
+
2
0
I
I
I
I
I
I
I
I
I
I
I
I
I
I
I
I
I
I
I
I
I
I
I
I
I
I
I
I
I
I
I
I
I
I
I
I
1
I
I
I
I
Makita
U.S.A.,
Inc.
14930 Northam Street
La Mirada,
CA
90638-5753
IIIIIIIIIIIIIIIIIIIIIIIIIIIIIIIIIIIIIIIII,IIIIIIIIII
postage
Required
Post
not
wthoul
postage
MIlCe
deliver
Wlll
proper
I
I
I
I
I
I
I
I
I
I
I
I
I
I
I
I
I
I
I
I
I
I
I
I
I
I

MAIL
THIS
PORTION
Your answer
1.
This product
0
Home Center
0
Hardware/Lumber Store
0
Tool Distributor
0
Industrial Supply
Construction Supply
2.
Use of the product
0
Construction Trade
0
industrial Maintenance
0
Home Maintenance
0
Hobby
0
Other
(
5.
Any comments:
DATE PURCHASED
MONTH DAY YEAR
I
iNTL. LAST NAME / COMPANY NAME
to
was
purchased from:
is
intended for:
)
m
the
following
0
Other
(
I1
questions are appreciated.
3.
How
did you learn of about this product:
)
0
Magazine
0
From Dealer
0
Newspaper
0
Store Display
0
Catalog Other
4.
Most favored points are:
0
Design
0
Features
0
Size
0
Price
0
Makita Brand
MODEL NO.
I
SERIAL NO.
0
Radio
0
Exhibition
0
From Friend
0
Previous Usage
0
Repair Service
0
Durability
0
Power
0
Other
STATUS SEX
Married
Single
(
(
)
)
M F
IIlIllI1lIllIlII
ADRESS
STREET
CITY
AREA
STATE ZIP CODE PHONE
CODE
Ill/
AGE:
BE
SURE TO COMPLETE THE CUSTOMER'S PORTION OF
0
Under
19
0
20-29
0
30-39
Please return this portion
Facsimile
No:
(714)
522-8133
40-49
THIS
FORM AND RETAIN
by
facsimile or mail.
c]
50-60
FOR
YOUR
0
Over
RECORDS
60

FACTORY SERVICE CENTERS
1
-800-4-MAKITA
RETAIN THIS PORTION
ALABAMA
2361
Pelham
Paikway
AL
35124
Pelham
(2051620 1791
ARIZONA
3707
E
0roadw.y
Phuesix.
A2
85040
1802)
437
2850
ARKANSAS
Shacklelad
Shopping
240
South
Shacklelord
Sle
c
Little
Ruh
AR
7221
(501) 221 5733
CALIFORNIA
41850Ch,,SIy
SI
hemoN
CA94538
(5,01657
Yea1
1421 N Cio",sA"e
Fresno
CA
93721
15591
252 5166
14930
Nailham SI
La
Miiada
CA
HY%E
1714,522
8088
1970
Fullan
Avenue
Sa~rameillo
CA
95825
lY16)
482
5197
,440
saum
E
Stlee,
ban
Beindrdnu
CA911OR
(909)
885
1289
7614
Clairemont
Mesa
Sasi
Dieyo
CA
921
(858,278
4471
1/IIEM1FaddenAr*
Sanla
Alia
CA
92705
1114)6575066
1565
WinLhesfel
B
Campbell
CA
95011
1408) 379
0377
Rd
I
5107
Slr;
5753
1
I
Slr
Center
Rd
Blvd
6
112
IJnilM
COhlNECTlCUT
5oR
Spllng
SI
wlndsol
LOC*~
cr
18601
292 b405
FLORIDA
620
Dooglas Ave Suite
Allamoale
Spmgs.
1401)
774 6mu
1301 W Copans
Road
PomparioBeach
(954)970 4722
Thompbm Cantel
5501
lampa
(n~3188682~2
GEORGIA
4680
Diilulh
(7701
HAWAII
1510
Honolulu
I8081847
W
Walerr
FL 33634
Rlvel
GA
416
Salt
Gleen
20x5
891
Lake
HI
0038
1
96818
FL
Avo
BM
os096
1302
FL
37714
33061
Walrir
Sle
406
Parkway NW
SWc
A7
FOR
YOUR RECORDS
KENTUCKY
1215s
Hu!slburnr
KY
40222
JsHersw
Huy
LA
70123
133
1138
Riichia
Highway
Buriiie
MD
21061
Providence
Hwy
MA
o2nw
9754
Mri
Arbu
Tiail
MI
48150
1012
Pew
Ave
South
MN
55423
Road
MO83126
9w
9889
84thSI
NF68127
597
2YZ5
S
De~alor
Blvd
22
24
~~8~02
Parkway
222,
Louisville
15021 326 3740
LOUSIANA
5626
Harahaii
(504)
MARYLAND
7541 45
Glen
14,0)5moIw
MASSACHUSETTS
232
wrsiwoorl
16171461
MICHIGAN
37154
Lvoilia
13131432
MINNESOTA
6127
nichliald
(612)8695199
MISSOURI
9876Walsoon
st
LOUlS
(314)
NEBRASKA
4129s
Omaha
14021
NEVADA
3375
Soles
tasvqas
(102)hR4277
NEW JERSEY
NEW MEXICO
5805
Menaul
Blvd
Albiiqueiqiie NMBII
(5051sBl
4619
NEWVORK
491
7
Gene5S.m
sttee,
Cheeklowaga
NY
Ill61685
9503
131
3531sIAve
flushing
NY
I1354
1118)8860Y11
NORTH CAROLINA
3501
G
S
Tryos S1
NC28217
Chrilolla
[704)527
0611
OHIO
6253 E Main
SI
Cdombus OH
43213
lT.i418W
0222
6379
%ail
Road
Paima Heights
OH
(4401843 7555
1SIIE
KemperRd
Shalonullle
OH
15216
(5131 771 0788
OKLAHOMA
552
E
Memorial
Road
Oklahoma
cmIy
OKi3,
(105) 752 2655
OREGON
828
19th
Aveiiuo N W
billand
OR
972W
NE
11225
44130
PUERTO RlCO
1M
Guayama
SI
I4
HabRey PRW917
17871
250
6776
TENNESSEE
1655
Nolevrallr
Nashville
TN
3721
16151331
9922
TEXAS
stemmans
12801
FarmeisBiari~h
1972174J
It50
12701
Uiiectors
DI
siaiiord
rx77477
1281)
565
8665
34531H35Noifh
san~lliu~i~u
TX
IRZIQ
(210)228
0616
UTAH
145~
imns
ste
SallLaksCily
UT84115
(801135'33410
VIRGINIA
57W
Northampton
102
Vrginia
Beaih
VA
1757) 460
0280
WASHINETOH
22220
84th
Avs
bo
WA
98032
Ken1
1253) 395 8055
WISCONSIN
Lincoln
Plaza
Shopping
2215
S
lmlh
SI West Allis Wi
53227
14141541
4776
Rd
1
F~~
sie
TX 75234
3701
51
101
io1
Hlvd
23455
Bldg
808
5le
A
Ctr
10
CUSTOMER'S
When
complete tool (prepaid) to one
of
the Makita Factory Service
Centers listed
Makita Service Center Be sure
to attach a letter to the outside
the carton detailing the problem
with your tool
you
need
RECORD
SBNICB
or
to
an
Authorized
Send
Date Purchased
Dealer's Name 8 Address
01
Model
Serial No
No
I
I
I
15

MAKITA LIMITED ONE YEAR WARRANTY
Warranty Policy
Every Makita
defects from workmanship and materials for the period of ONE YEAR from the date of original purchase.
Should any trouble develop during this one-year period, return the COMPLETE
Makita's Factory or Authorized Service Centers.
workmanship or material, Makita will repair (or at our option, replace) without charge.
This Warranty does not apply where:
repairs have been made or attempted by others:
repairs are required because of normal wear and tear:
The
alterations have been made
IN NO EVENT SHALL MAKITA BE LIABLE FOR ANY INDIRECT, INCIDENTAL
DAMAGES FROM THE SALE OR USE OF THE PRODUCT. THIS DISCLAIMER APPLIES BOTH DURING
AND AFTER THE TERM OF THIS WARRANTY.
MAKITA DISCLAIMS LIABILITY FOR ANY IMPLIED WARRANTIES, INCLUDING IMPLIED WARRANTIES OF
"MERCHANTABILITY" AND "FITNESS FOR A SPECIFIC PURPOSE," AFTER THE ONE-YEAR TERM
THIS WARRANTY.
This Warranty gives you specific legal rights, and you may also have other rights which vary form state
Some states do not allow the exclusion or limitation of incidental or consequential damages,
limitation or exclusion may not apply
warranty lasts,
tool
is thoroughly inspected and tested before leaving the factory. It is warranted
If
inspection shows the trouble is caused by defective
tool
has been abused, misused or improperly maintained:
to
the tool.
to
so
the above limitation may not apply
you. Some states do not allow limitation on how long an implied
to
be free of
tool, freight prepaid,
OR
CONSEQUENTIAL
to
you.
so
the above
to
one of
to state.
OF
Makita Corporation
 Loading...