

1
Solar Light Instructions Manual
For DR-0433-G
READ THE INSTRUCTIONS CAREFULLY BEFORE ASSEMBLY AND INSTALLATION
FIRST TIME USE:
Remove the protective film (if have) from the solar panel before the first use
CHARGING: the product must be left to charge 2 sunny days on OFF position before best
results are achieved.
STEP1. Charge the solar product by placing it under direct sunshine for at least 8 hours.
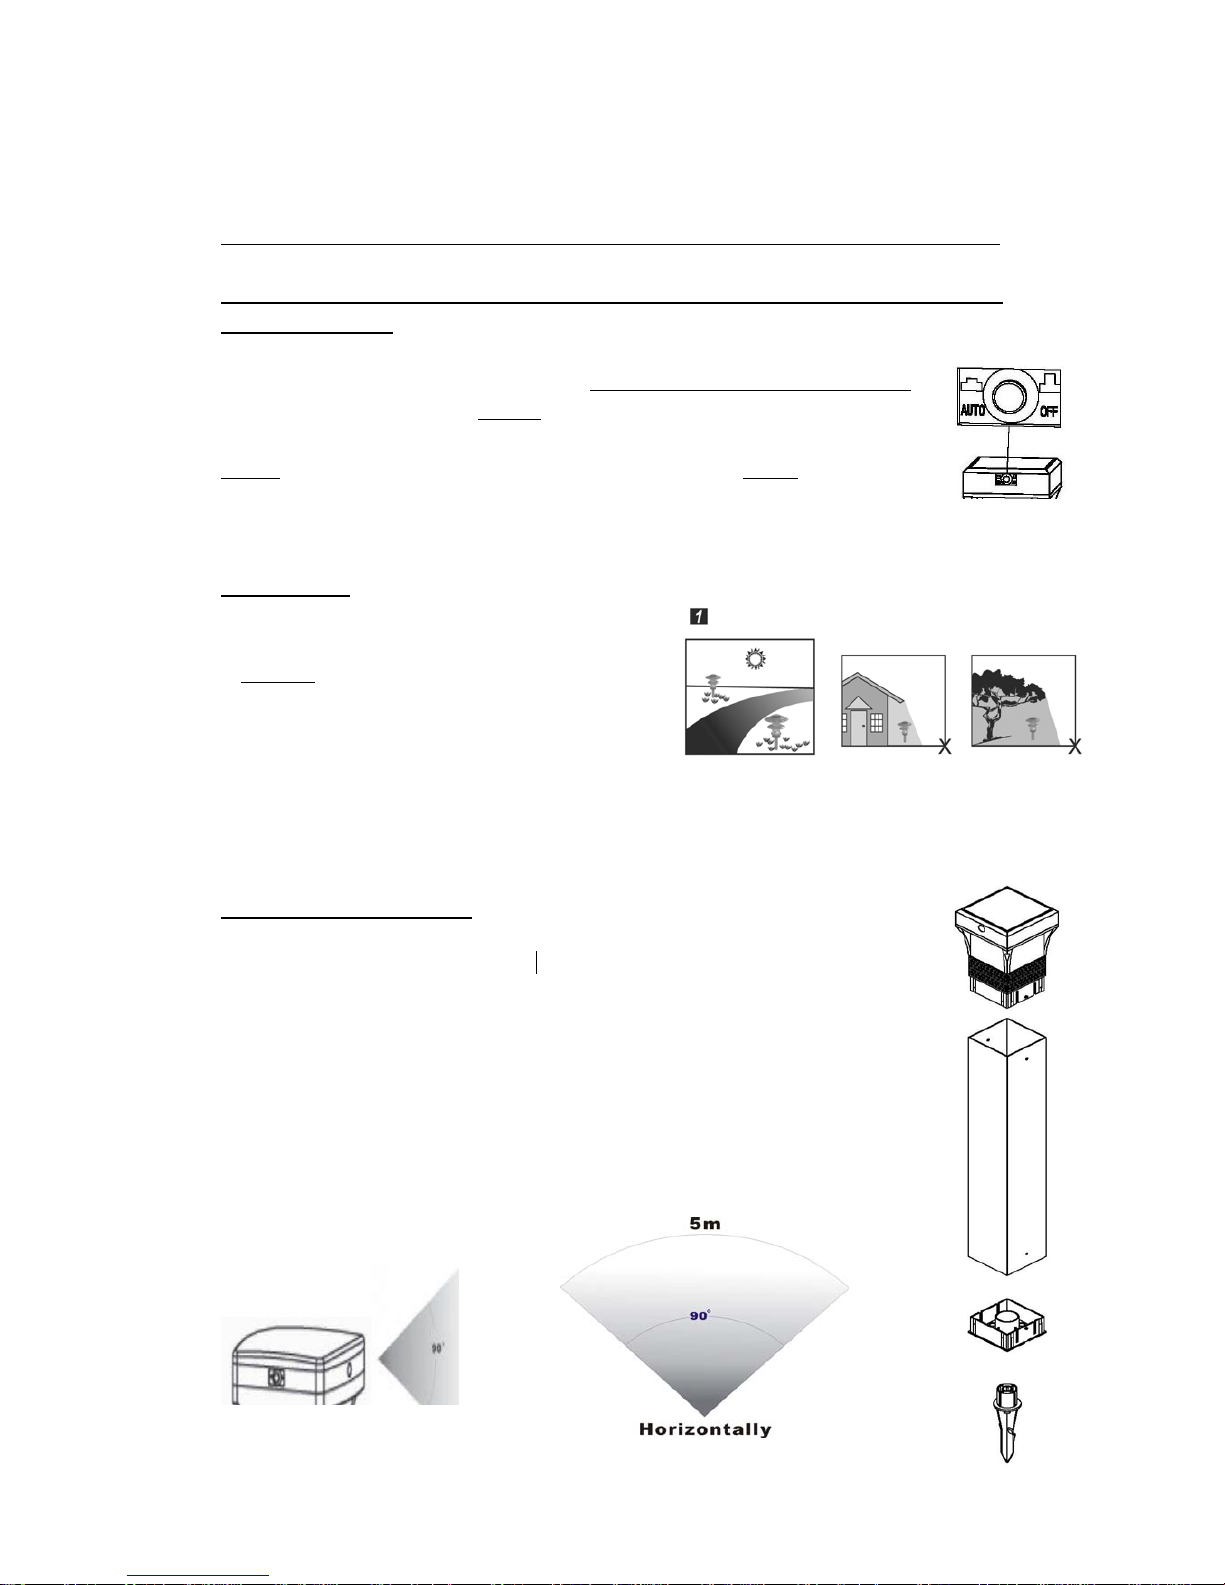
STEP2. Switch the knob to “AUTO
” position and solar product will now work
automatically, charge under direct sunshine in the day time and illuminate at night.
NOTE:
In order to verify that the knob is correctly switched to “AUTO” position, cover
the solar panel with your hand and light will turn on automatically.
MPORTANT:
1. Install the solar product in an area where it can get
direct sunshine free from cover or shade.
2. DO NOT
switch the knob to “OFF” anymore.
3. Select an outdoor location not near to night light
sources, such as street lights, which may cause the light
to turn “OFF” automatically.
4. Duration of light depends on solar product’s level of sunshine exposure, geographical
locations, weather conditions and the hours of daylight.
Assembly Instructions
Ground mounting (If stake provided)
1) Carefully remove the solar light and all the fittings out of the box.
2) Assemble the body and stakes by plastic joints and ; Push the stake directly into
the ground (DO NOT hammer the light or the stakes).
3) Slot the lamp head on the upper part of the mounting body carefully.
4) Sensor detection (If functioned): when the sensor detects movement, all LEDs
will be turned on and keep working for 10-30 seconds and turn off automatically;
the sensor detects an area of about 90 degrees vertically and about 90 degrees
horizontally, with a range about 5 meters.
2
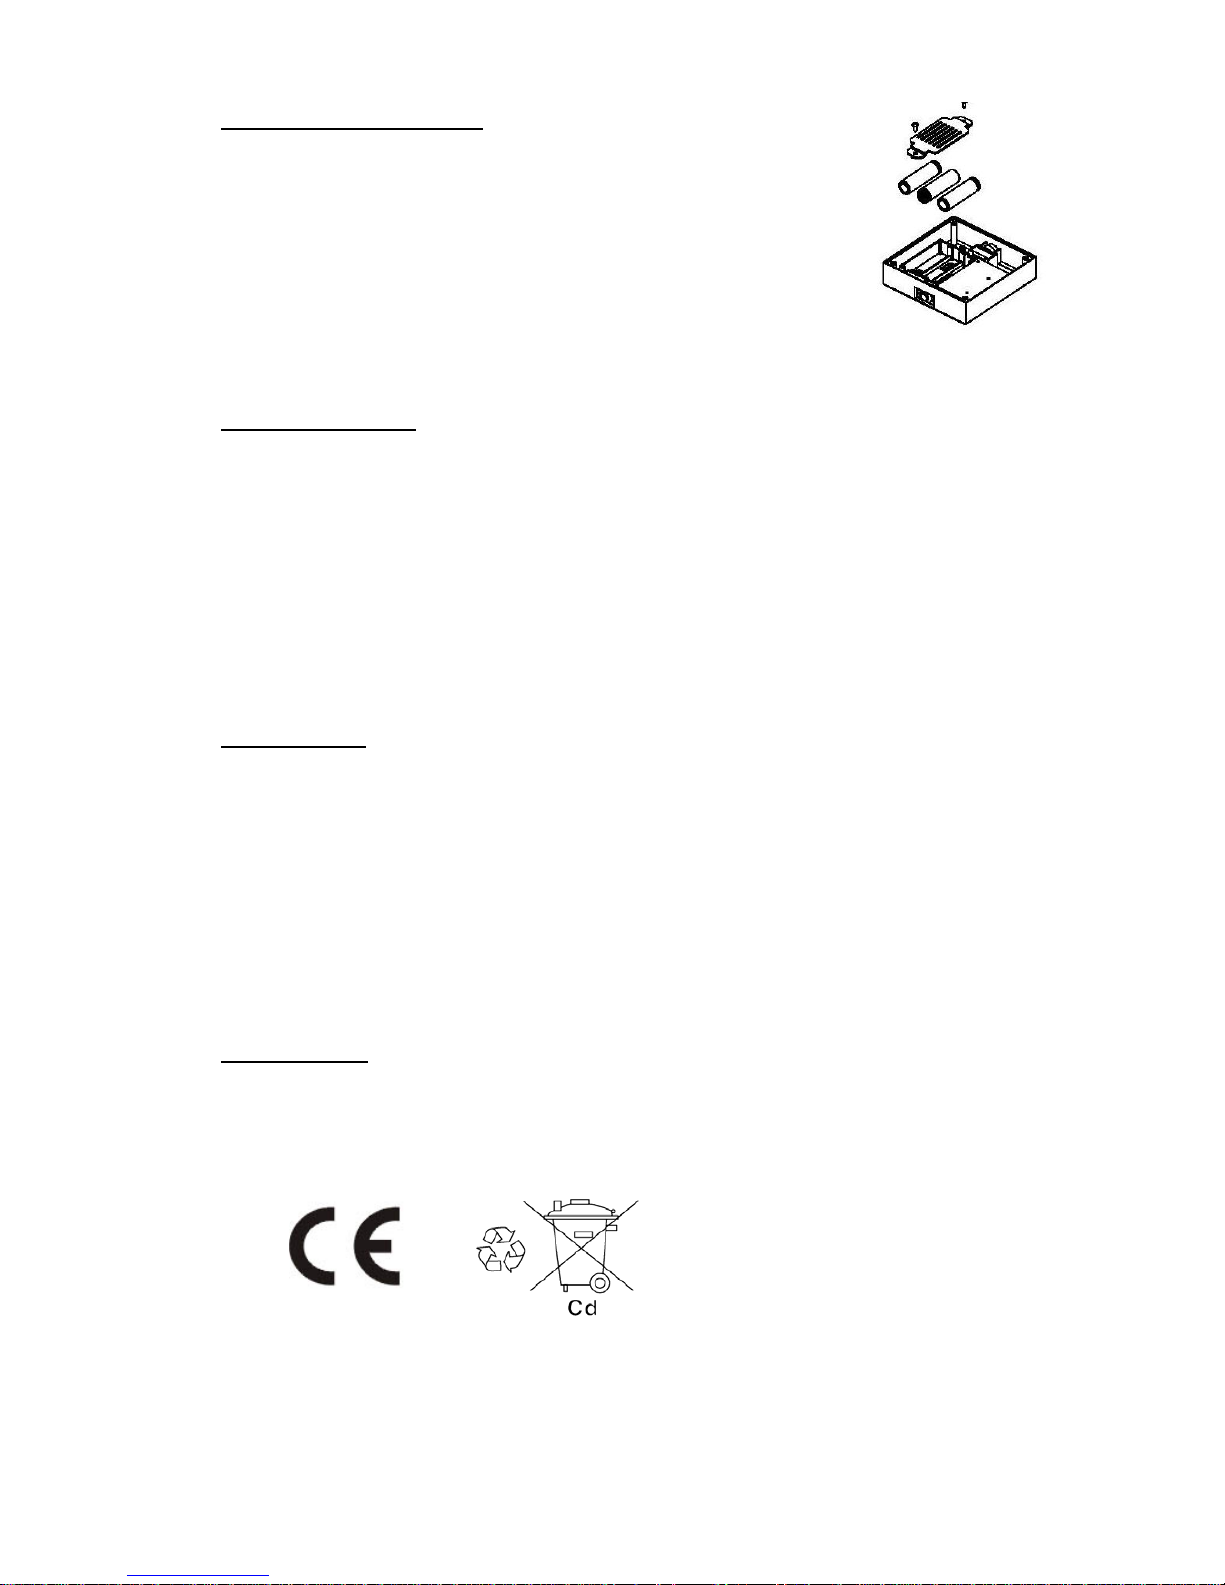
Replacing the Batteries
For best results the batteries should be replaced every 12 months.
1) Release the screws from the solar top head.
2) Remove the old batteries. Make sure the new batteries are rechargeable
batteries. (3Pcs AA Size 1000mAh 1.2V Ni-Cd)
3) Install the new batteries in to the battery compartment, ensuring the
correct polarity is observed.
4) Recover the battery compartment.
Trouble Shooting
If your SOLAR LIGHT does not lighting at dark despite observance of all the instructions,
please try the following steps:
1) Make sure that the SOLAR LIGHT is not being affected by any other light source.
2) Ensure the SOLAR LIGHT does not stand in the shade during the day.
3) Make sure the switch is in the auto position.
4) Check that the batteries are installed correctly.
Specification
Aluminum Alloy Construction
16Pcs White Color LED and 1Pc Colors Changing LED
Operating time: up to 8 hours run time with 6 hours of sun charging
No Mains Power or wiring required
Automatic sensor turns the light on at dark
3 x Solar Rechargeable AA Size 1000mAh 1.2V Ni-Cd batteries included.
Passive infrared motion detector functioned
Maintenance
Clean the solar module regularly with a damp towel to guarantee optimum performance of the
solar panel. Do not use any type of solvent for cleaning and be careful not to put too much
pressure on the module while cleaning.
 Loading...