

Page 1

Makeblock mElephant 3D Printer
mElephant 3D Printer
User Guide V1.0
Page 2

Makeblock mElephant 3D Printer
Contents
What is mElephant?
Package Content
Specifications
Before Use
Print with Micro SD card
Install Arduino Driver
Install Cura, and print with USB
3D Prints Show
Page 3

Makeblock mElephant 3D Printer
What is mElephant?
Makeblock mElephent 3D Printer is the new generation of Makeblock 3D printer, which is a 3D
printer based on an open source and aluminum frame.
Makeblock studied very hard on the 1st generation Constructor I 3D Printer, and made huge
improvement. With the most steady and concise Prusa i3 structure, delicate brand new designed
OLED screen, automatically print bed leveling module, and more powerful integrating control
panel, mElephant is the most powerful 3D printer in Makeblock ever!
mElephant matching with Electronics (RAMPS1.4 shield, Mega2560 compatible board) and
software (Crua,Printrun), you can get high-quality prints and extreme precision, XY Resolution:
0.1mm, Layer Resolution: 0.1-0.3mm. You can enjoy so much fun from your own 3D printer and
even use it for prototyping, printing art craft, models, sculptures or toys.
mElephant also can be extensioned to a 4-in-1 machine (3D printing, Laser Engraving, Drawing,
CNC) with additional parts.
No matter if you are students, office clerks, designers, engineers, educators or inventors, you can
always bring your ideas to life by printing out objects such as prototypes, various models,
homehold articles, phone cases, toys, and mechanical parts to build your robots.
Page 4

Makeblock mElephant 3D Printer
Package Content
Page 5

Makeblock mElephant 3D Printer
Specifications
Page 6

Makeblock mElephant 3D Printer
Before Use
1. Make sure all screws have been tightened.
2. Make sure the timing belts of both X-axis and Y-axis are tensioned.
Page 7

Makeblock mElephant 3D Printer
3. Stick a piece of paper tape on the platform, Place the paper tape
carefully and make sure no spare part.
Page 8

Makeblock mElephant 3D Printer
4. Plug in power, and press the knob to open the mElephant printer.
5. Rotate the knob clockwise, choose "Prepare", and then press the knob
again to confirm.
6. Rotate the knob clockwise, choose "Preheat PLA" and press the knob
to confirm preheating.
Page 9

Makeblock mElephant 3D Printer
7. Rotate the knob clockwise, choose "Preheat PLA1" and press the knob
to confirm
8. Go back to the main menu, and you will see the target temperature has
already changed to 180°and the temperature is going up continuously.
Page 10

Makeblock mElephant 3D Printer
9. When the temperature has already reached 179°, get ready to put the
filament into the nozzle.
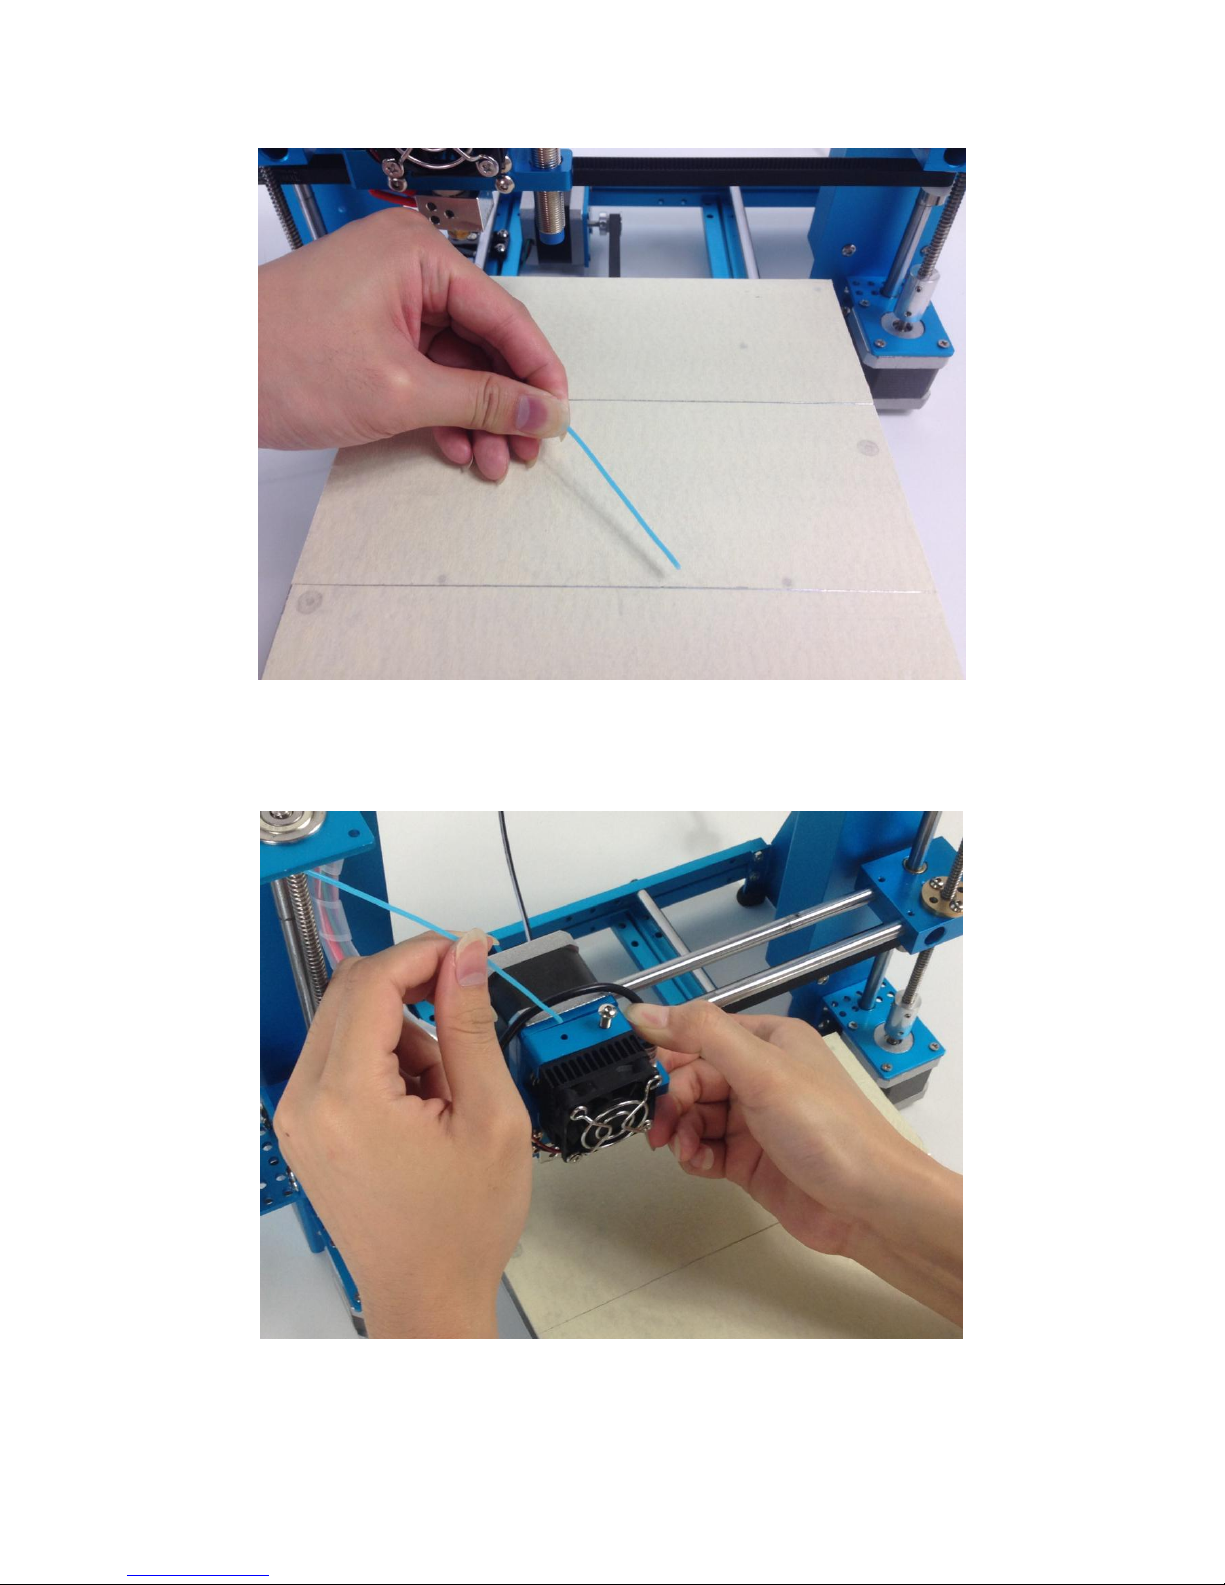
10. The filament will curve naturally , so make sure to straighten the
front-end of the filament in order to insert the filament into the extrusion
head smoothly.
Page 11
Makeblock mElephant 3D Printer
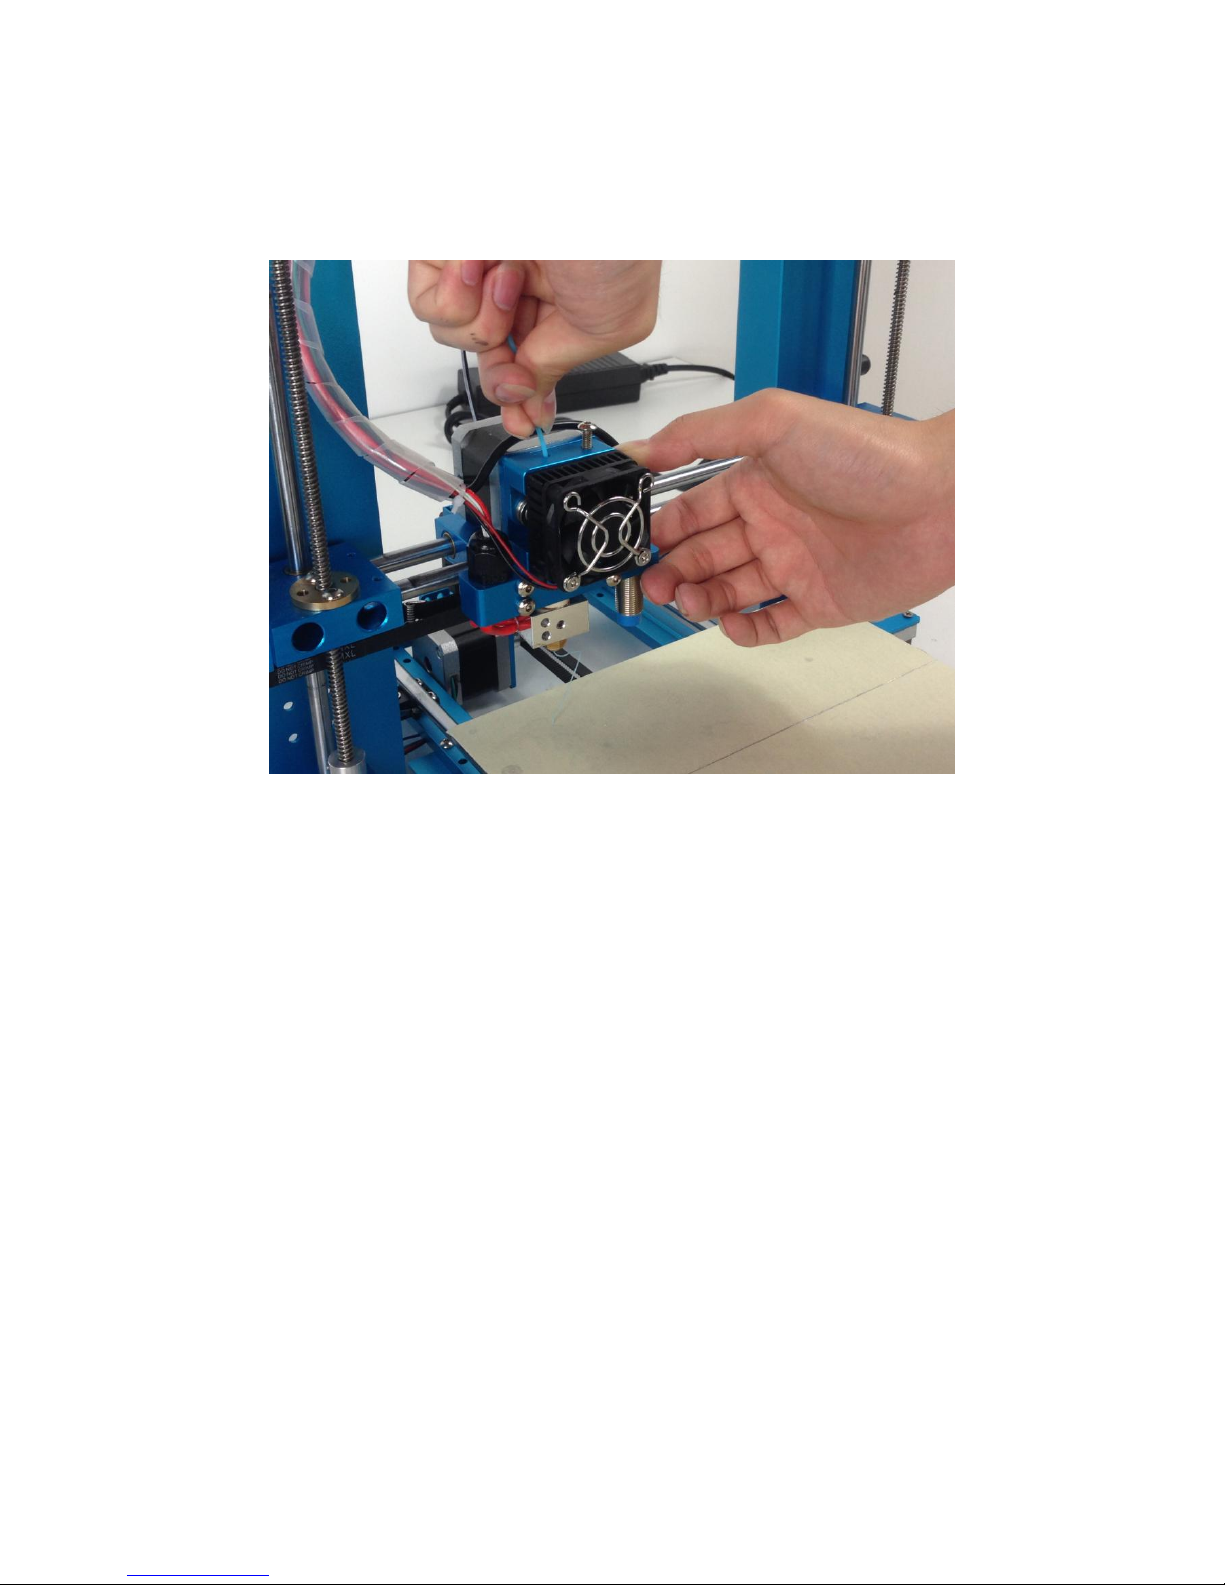
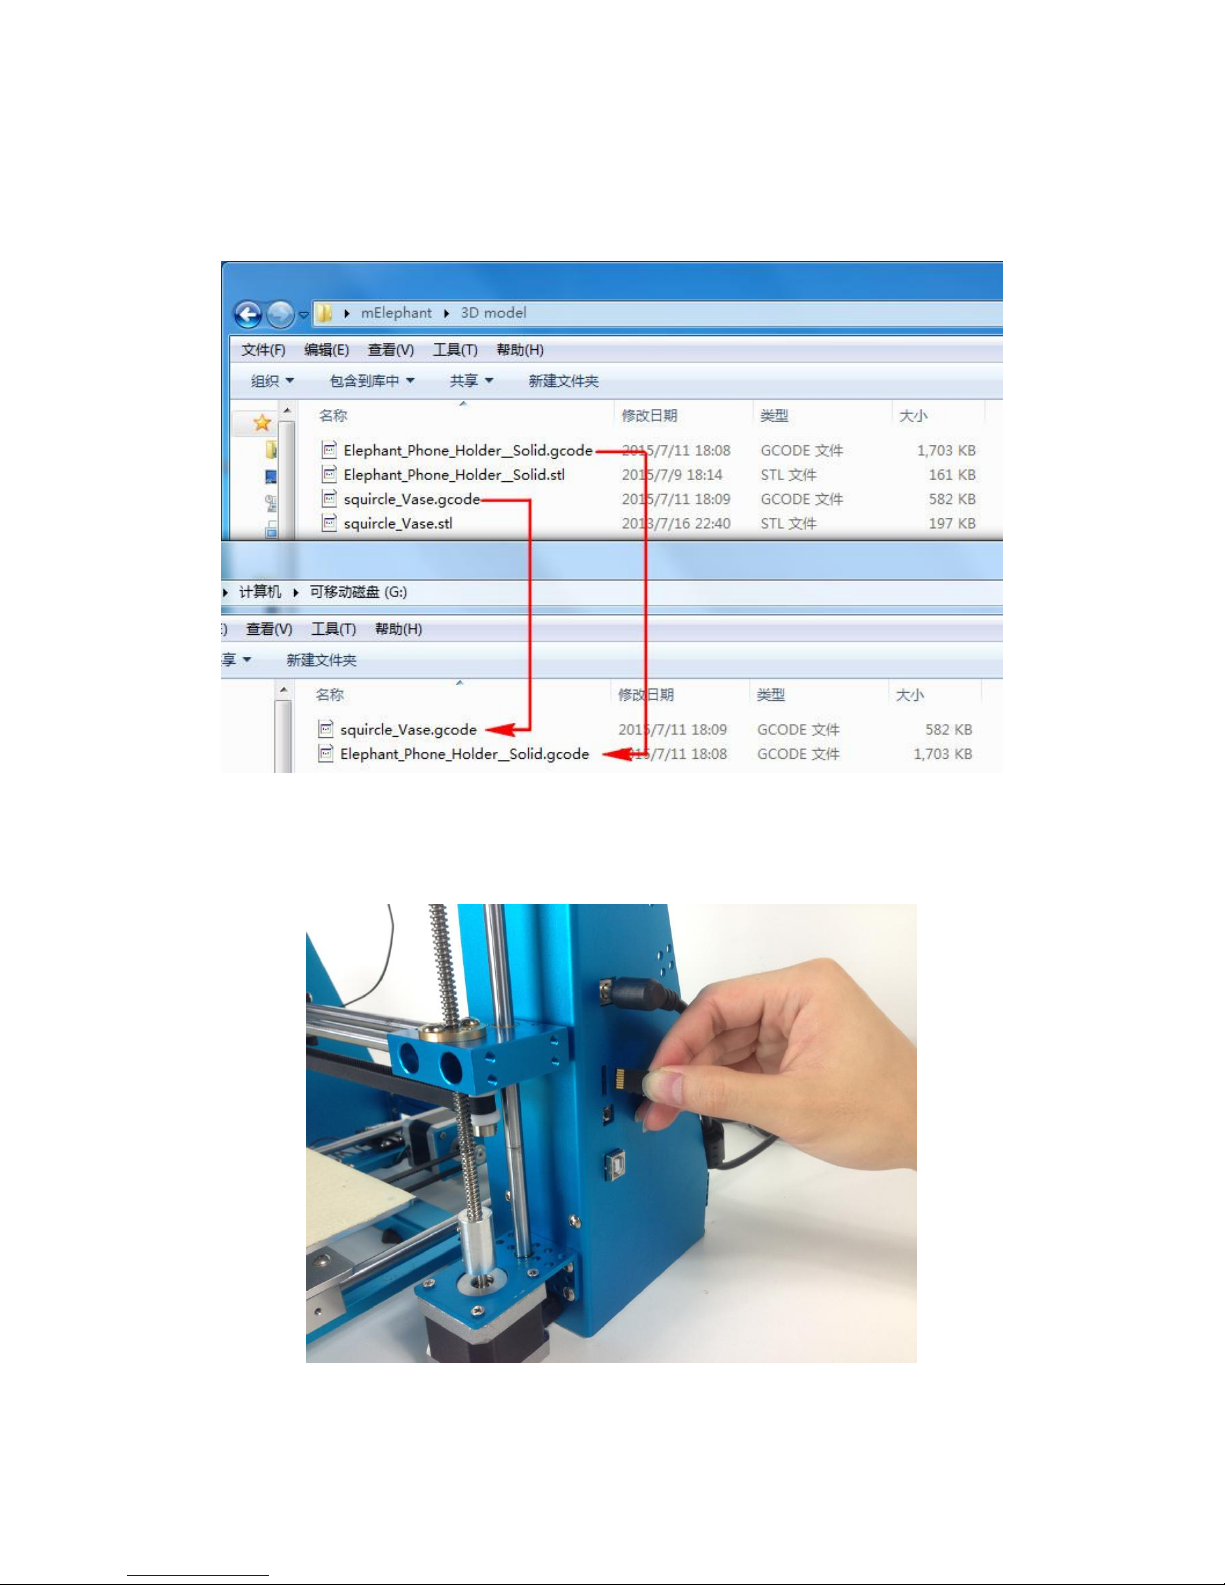
11. Press the active block to compress the spring, meanwhile use the
other hand to insert the filament perpendicularly into the hole till the end.
Page 12
Makeblock mElephant 3D Printer
12. When you see filament coming out from the nozzle, it means the PLA
filament has been completely inserted to the nozzle.
Page 13
Makeblock mElephant 3D Printer
Print with Micro SD card
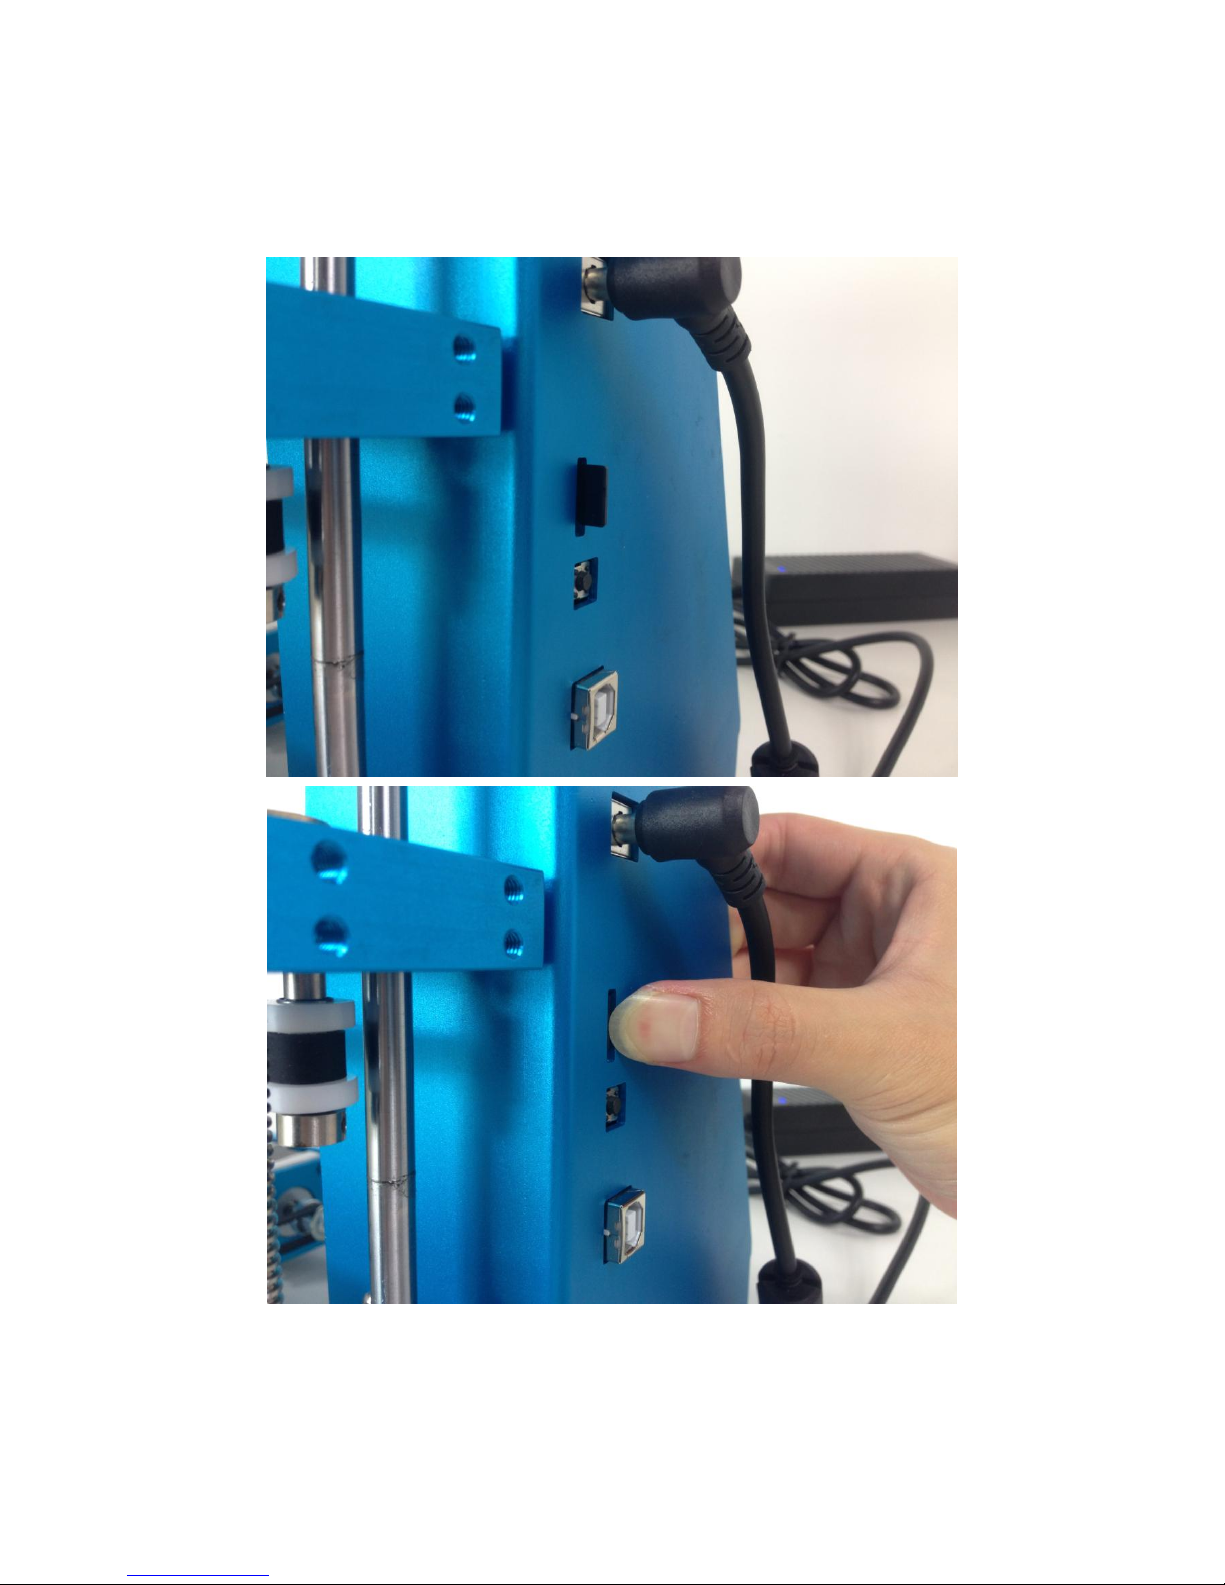
1. Copy the Gcode files to a Micro SD card
2. Insert the Micro SD card into the card slot of the 3D printer in correct
direction.
Page 14
Makeblock mElephant 3D Printer
3. Gently insert the card into the card slot, and Use a finger to press the
card into the slot until you hear a clicking sound.
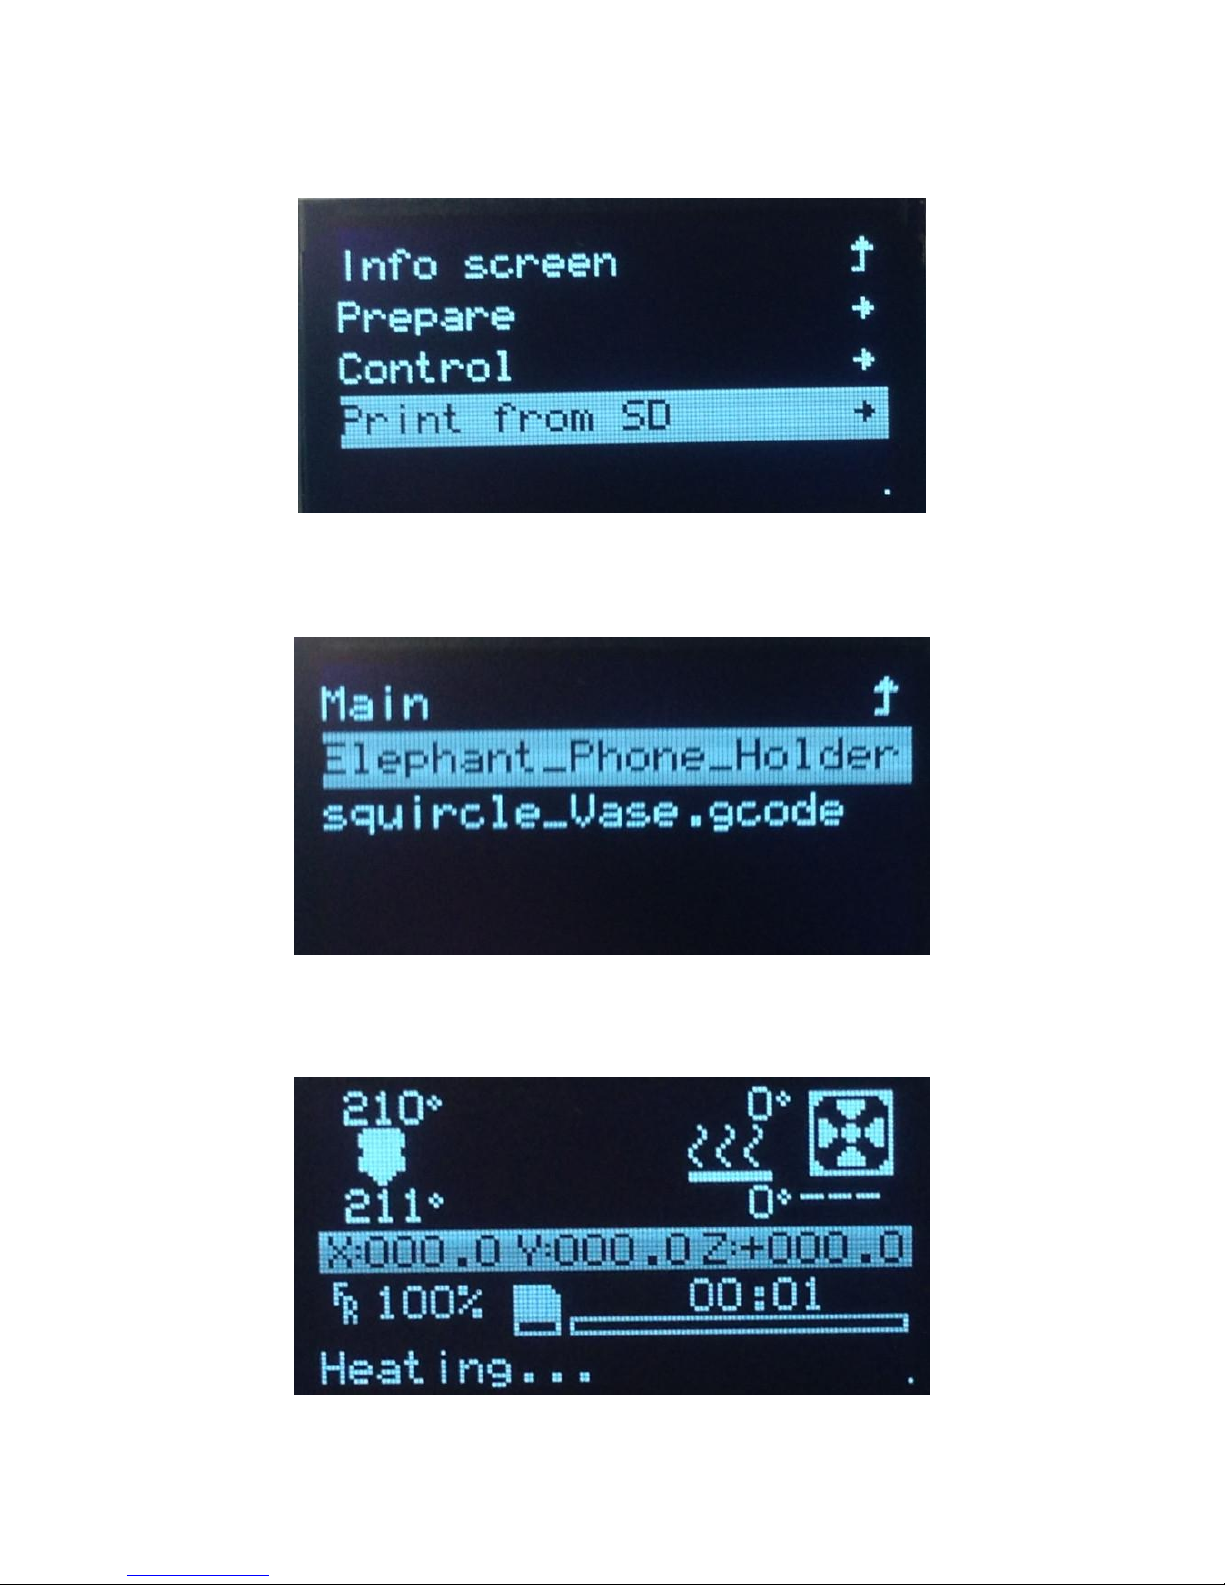
4. Operation Rotary Knob - Press the knob to turn on this 3D printer,
rotate the knob clockwise, choose "Print from SD", and then press the
Page 15
Makeblock mElephant 3D Printer
knob again to confirm.
5. Rotate the knob clockwise, choose the file you want to print, and press
the knob to confirm.
6. Go back to the main menu and wait for the temperature to reached the
target one.
Page 16
Makeblock mElephant 3D Printer
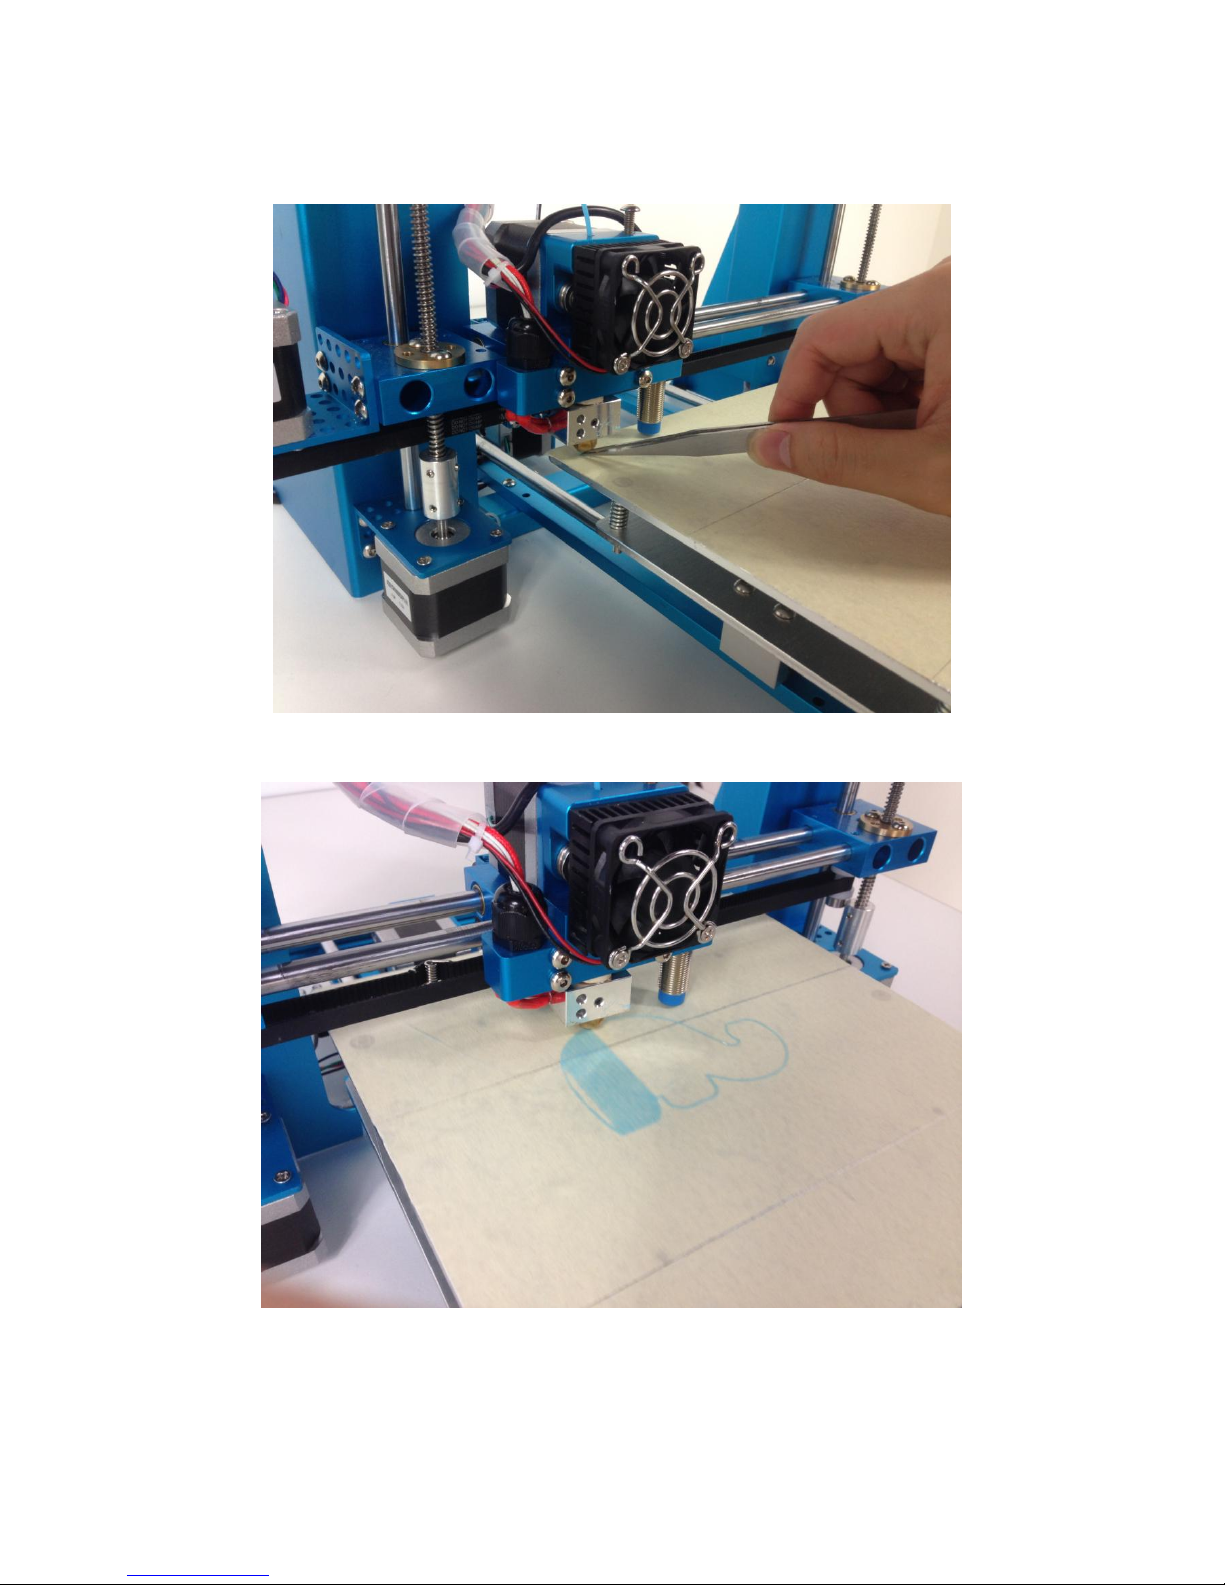
7. Clear the filament in nozzle before start printing.
8. The first layer
Page 17
Makeblock mElephant 3D Printer
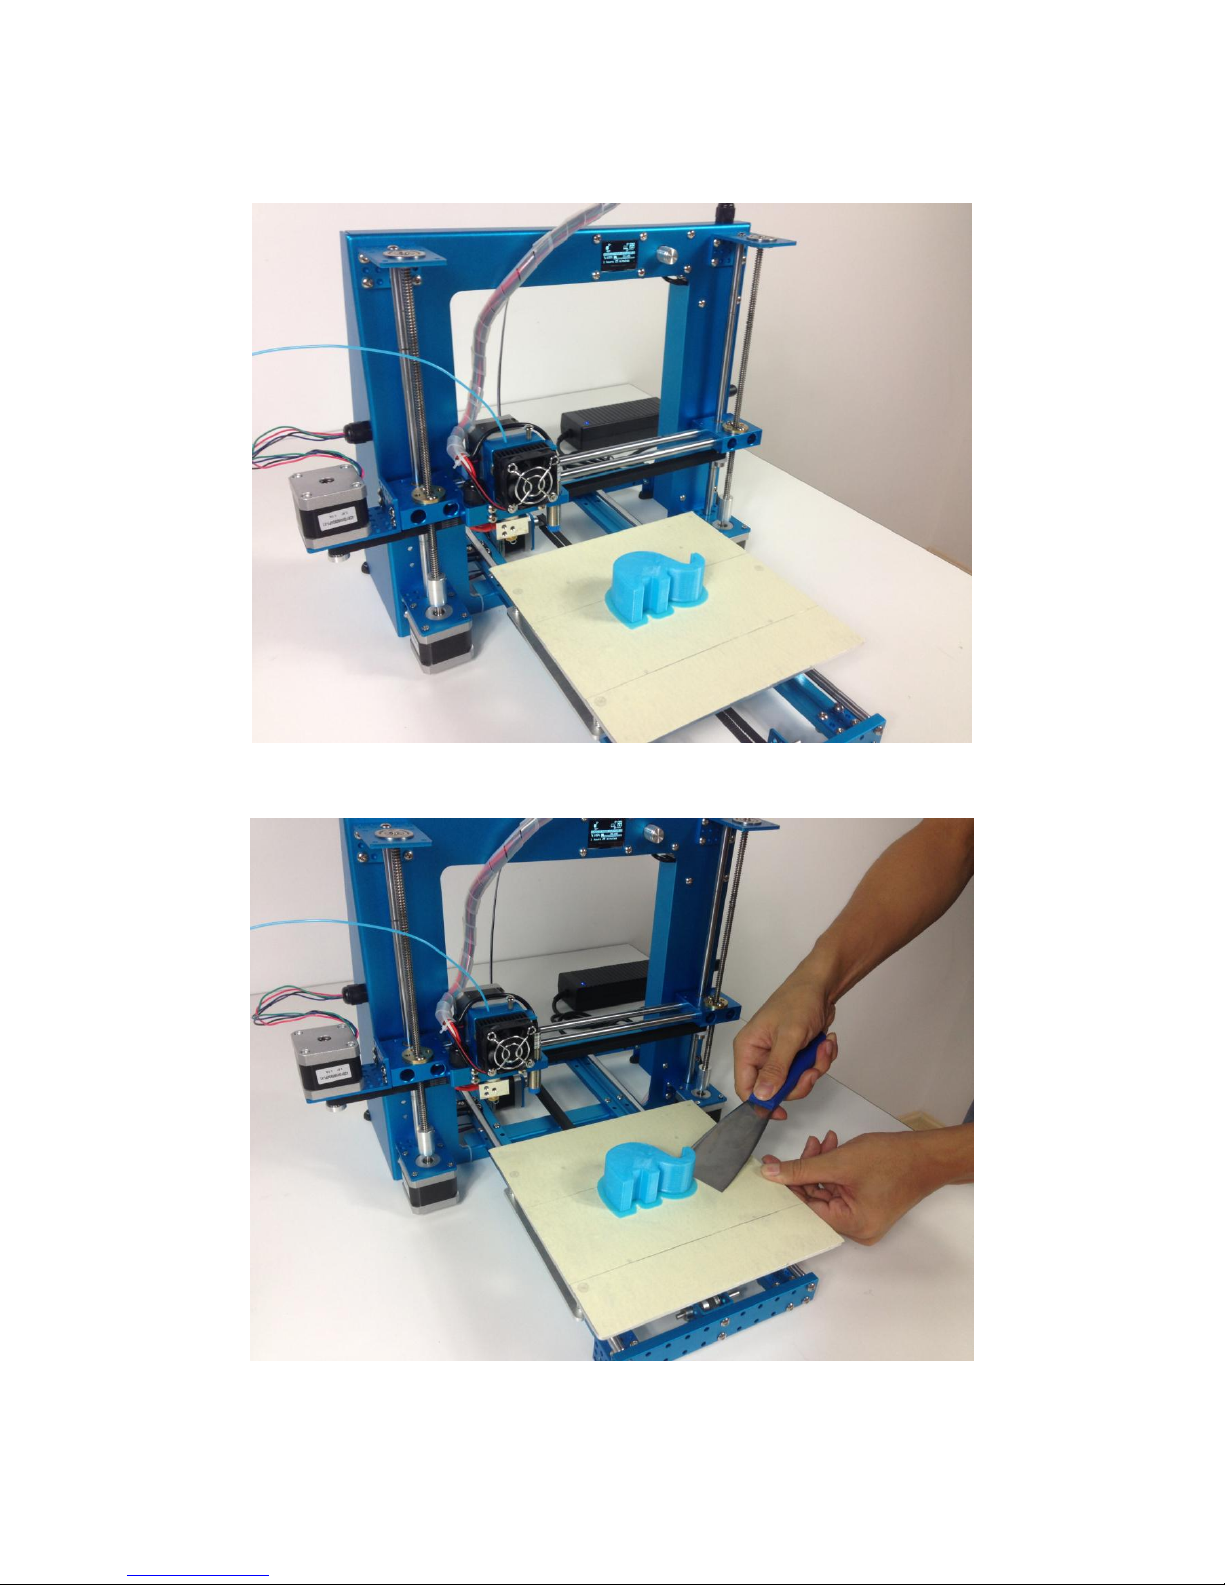
9. Now waiting for the printing
10. Gently remove the model from the platform with a shovel.
Page 18
Makeblock mElephant 3D Printer
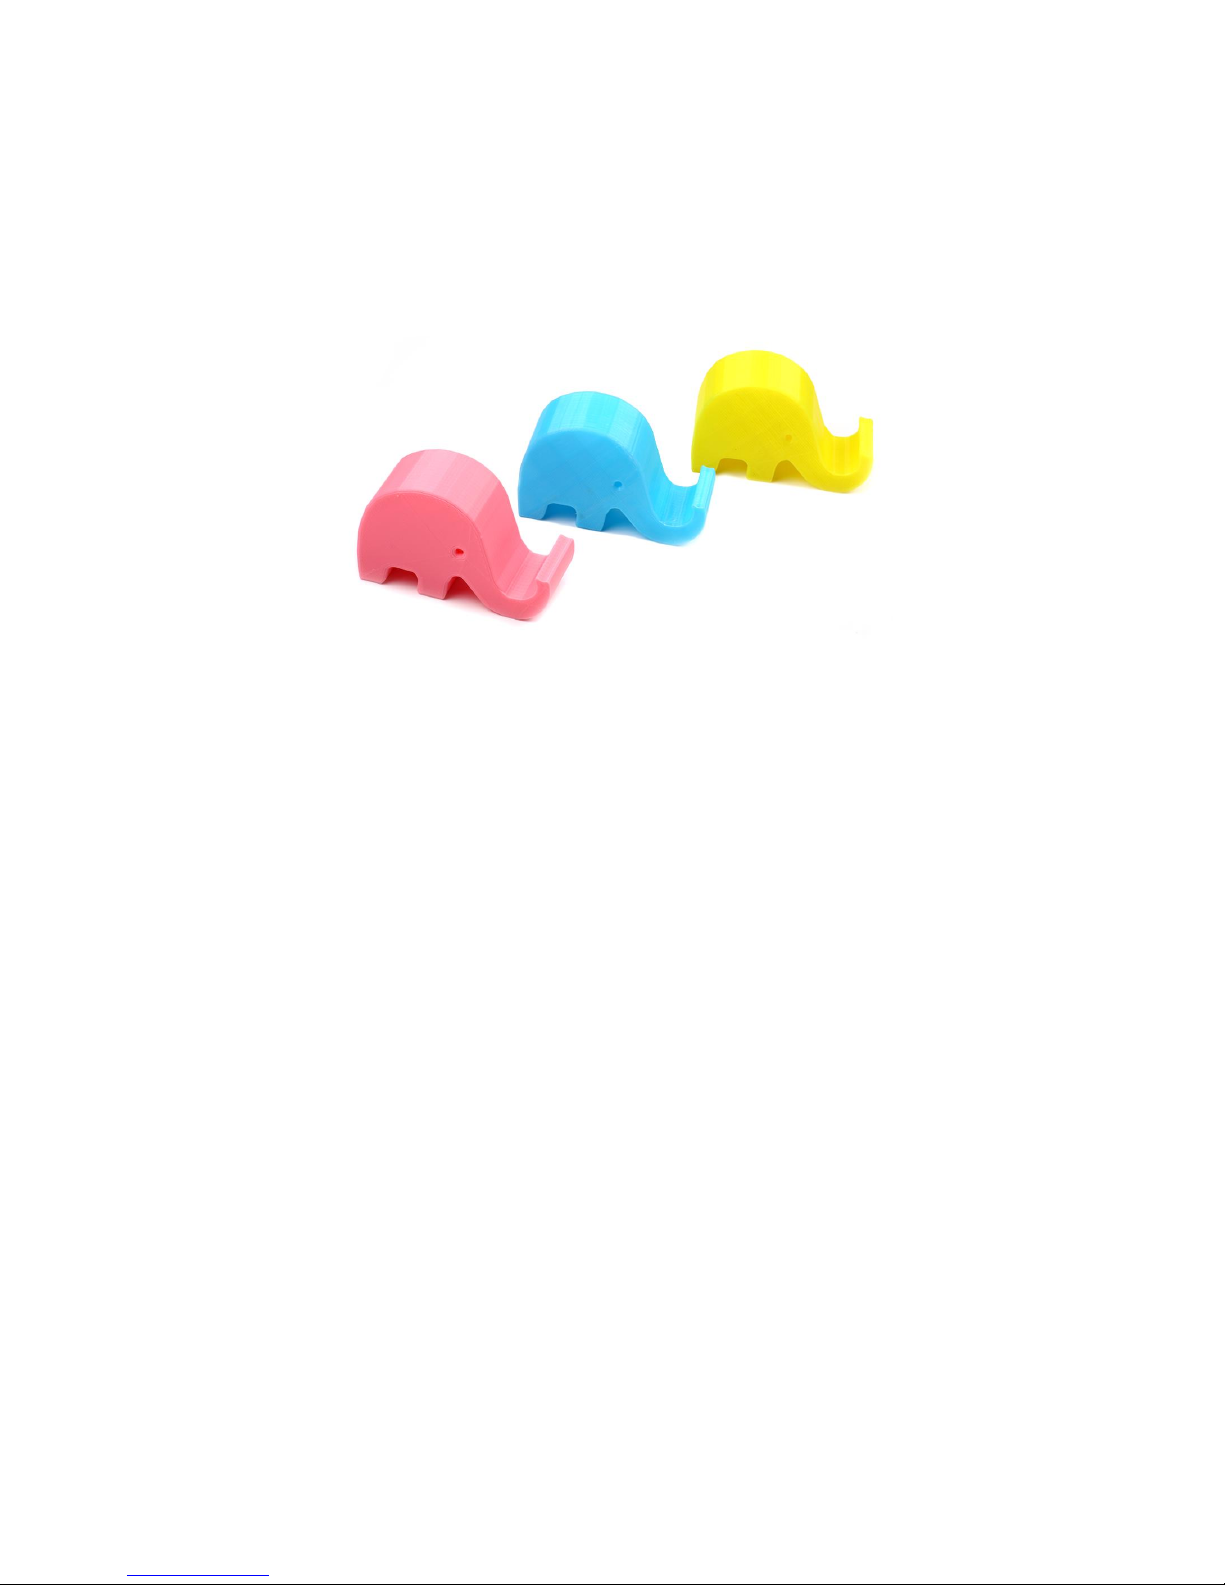
11. The printing is finished, Now enjoy your 3D printing journey.
Page 19
Makeblock mElephant 3D Printer
Install Arduino Driver
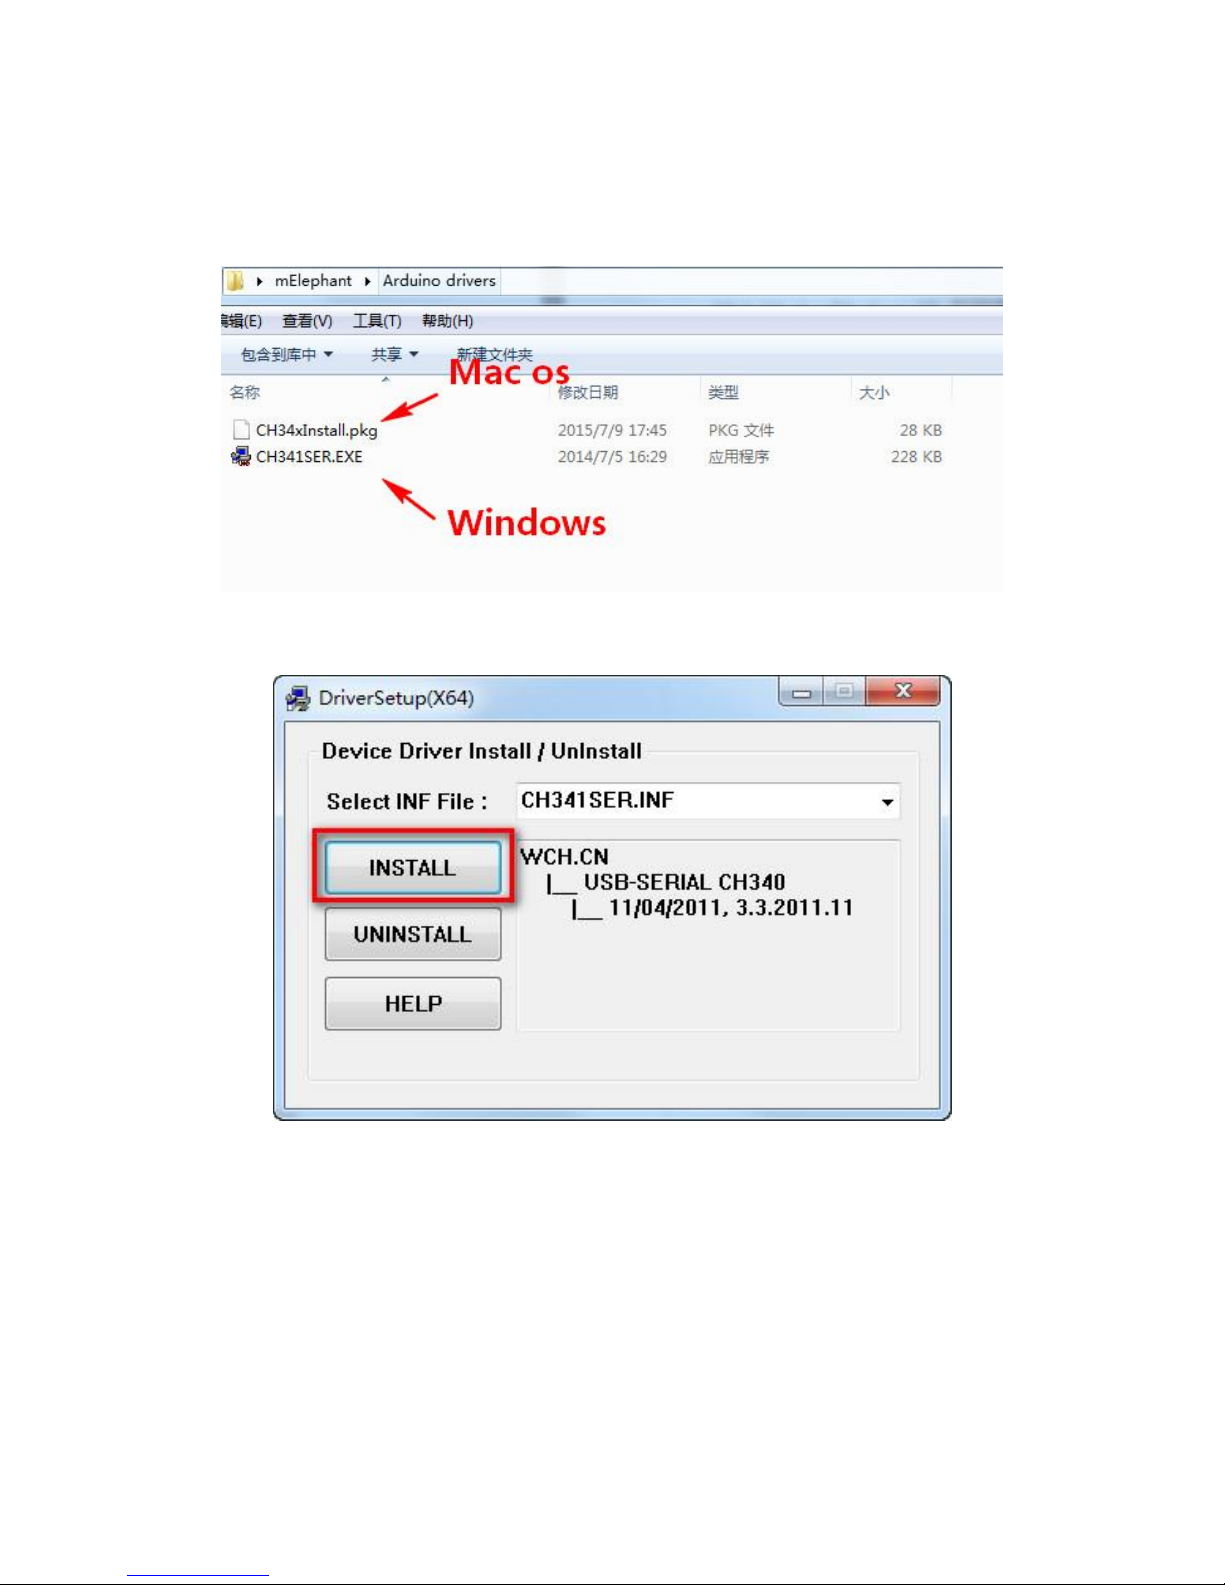
1. For Windows users, double click ”CH341SER.EXE”
2. Click "Install"
3. Click "OK"
Page 20
Makeblock mElephant 3D Printer
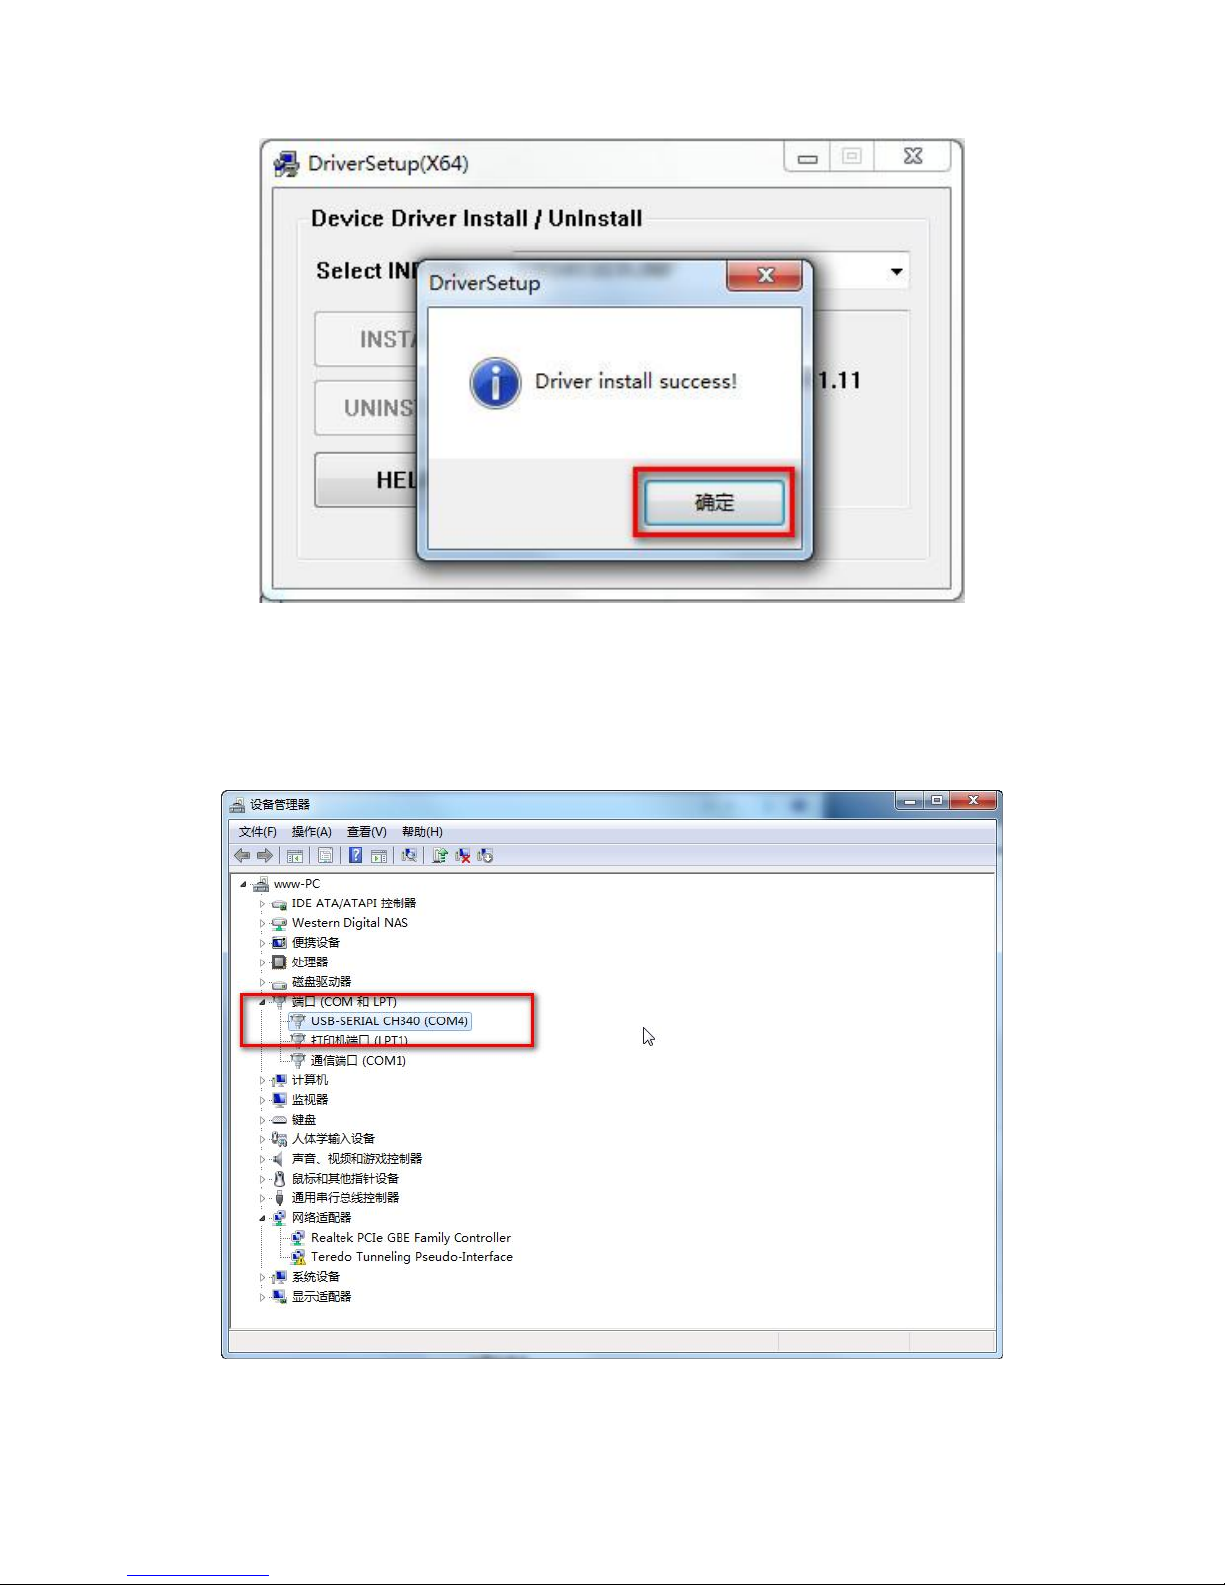
4. Connect the 3D printer to your PC via the USB cable and go to the
"Device Management", then you will find a hardware named "CH340".
Remember the serial port No.e. g. COM4.
Page 21
Makeblock mElephant 3D Printer
Install Cura, and print with USB
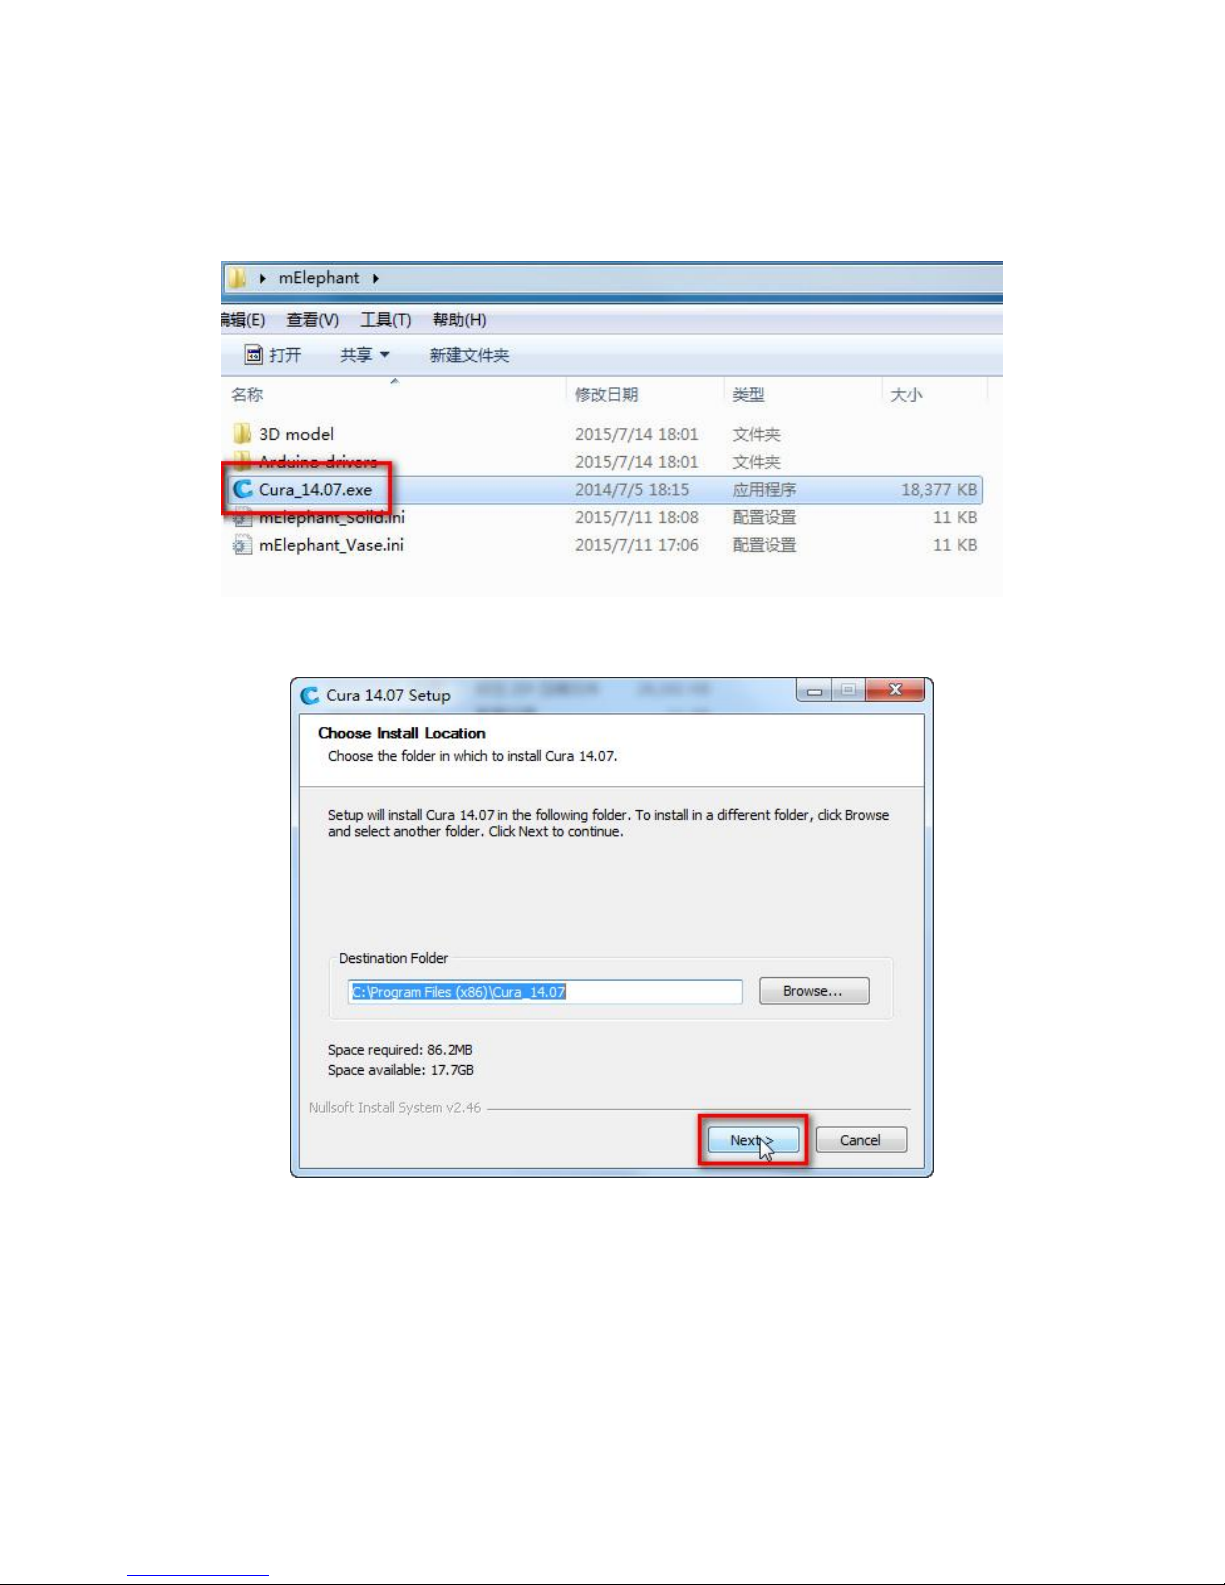
1. Double click " Cura_14.07.exe" to setup
2. Click "Next" to continue
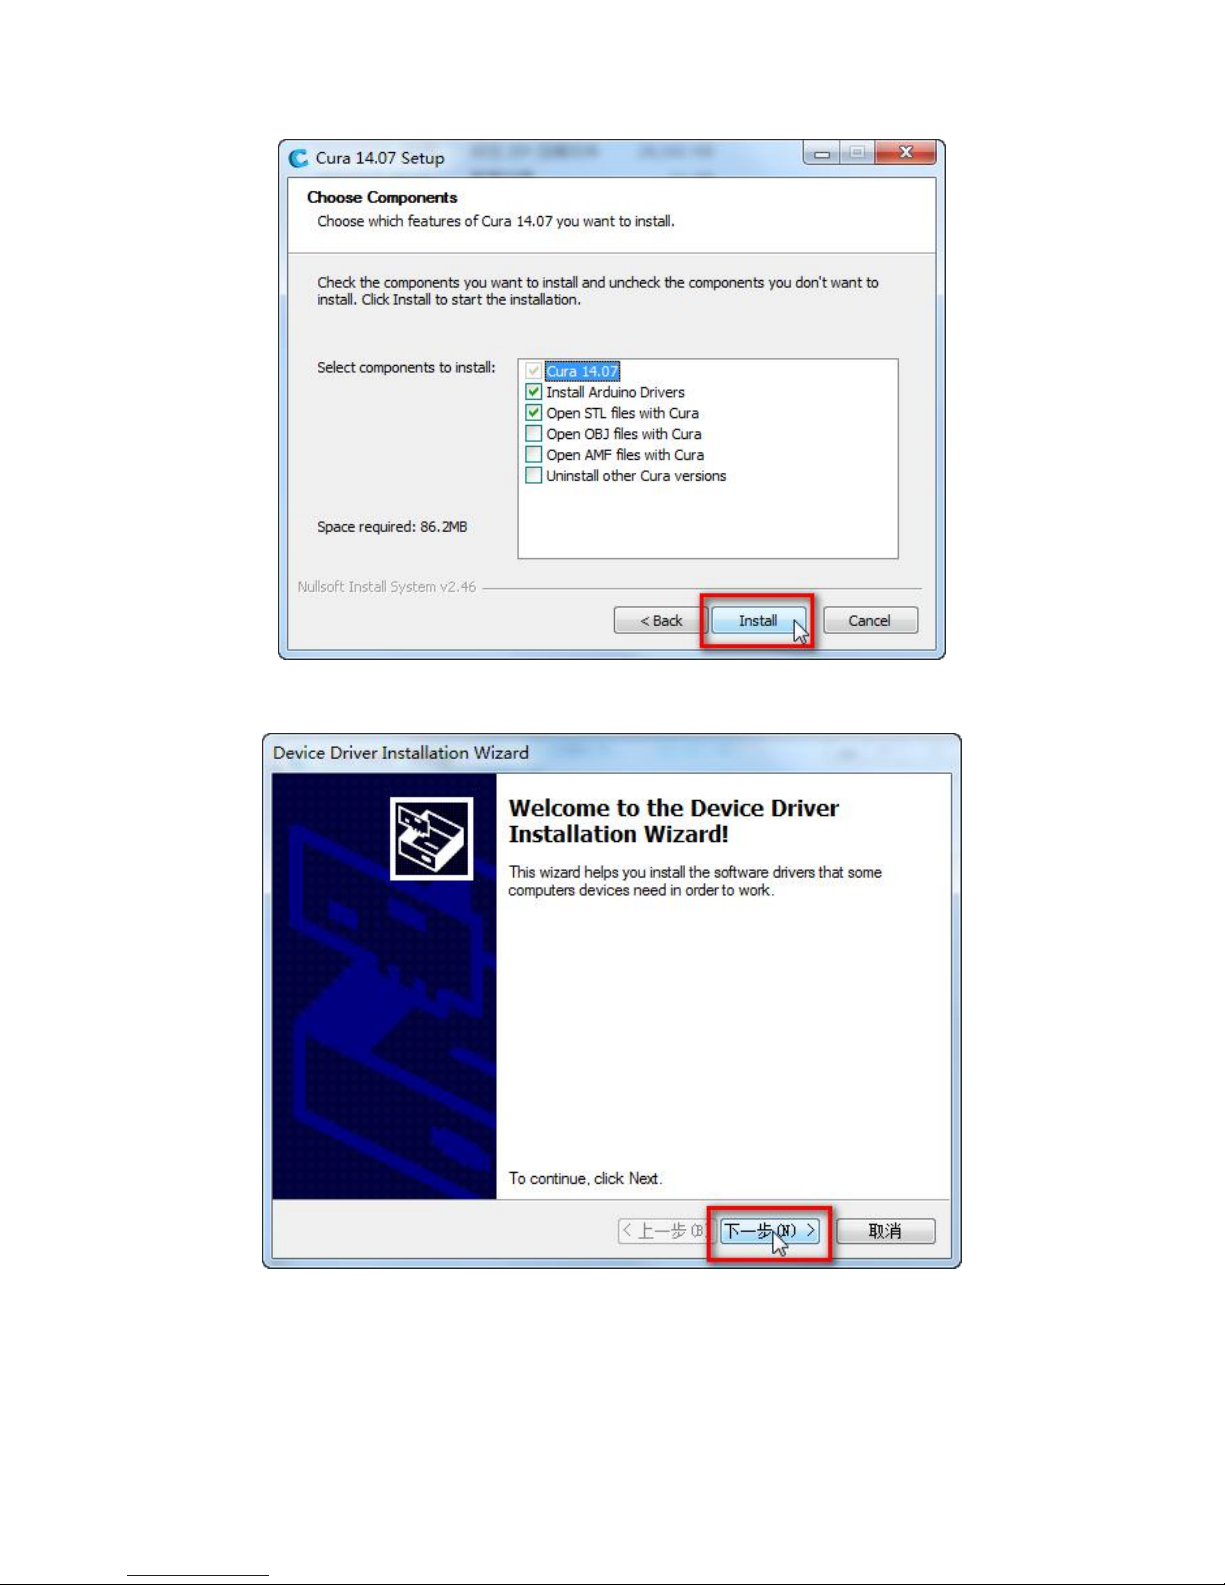
3. Click "Install"
Page 22
Makeblock mElephant 3D Printer
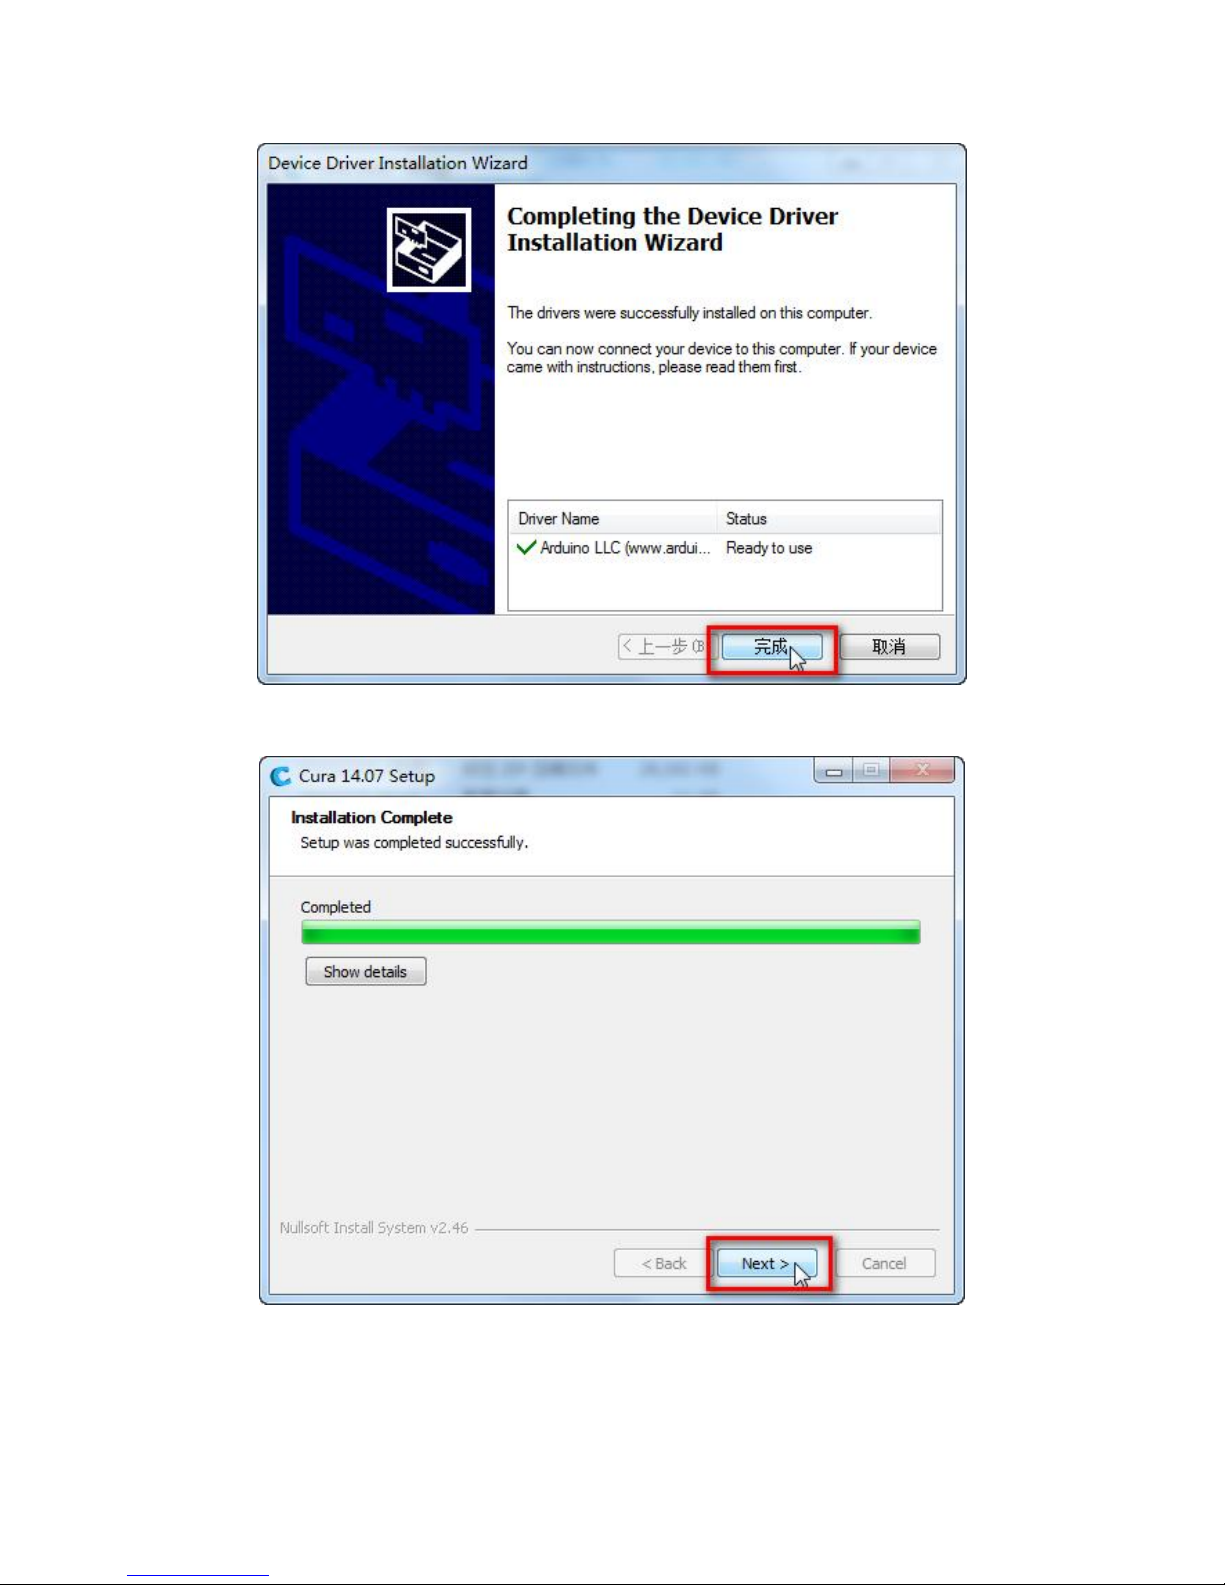
4. Click "Next"
5. Click "Finish"
Page 23
Makeblock mElephant 3D Printer
6. Click "Next"
Page 24
Makeblock mElephant 3D Printer
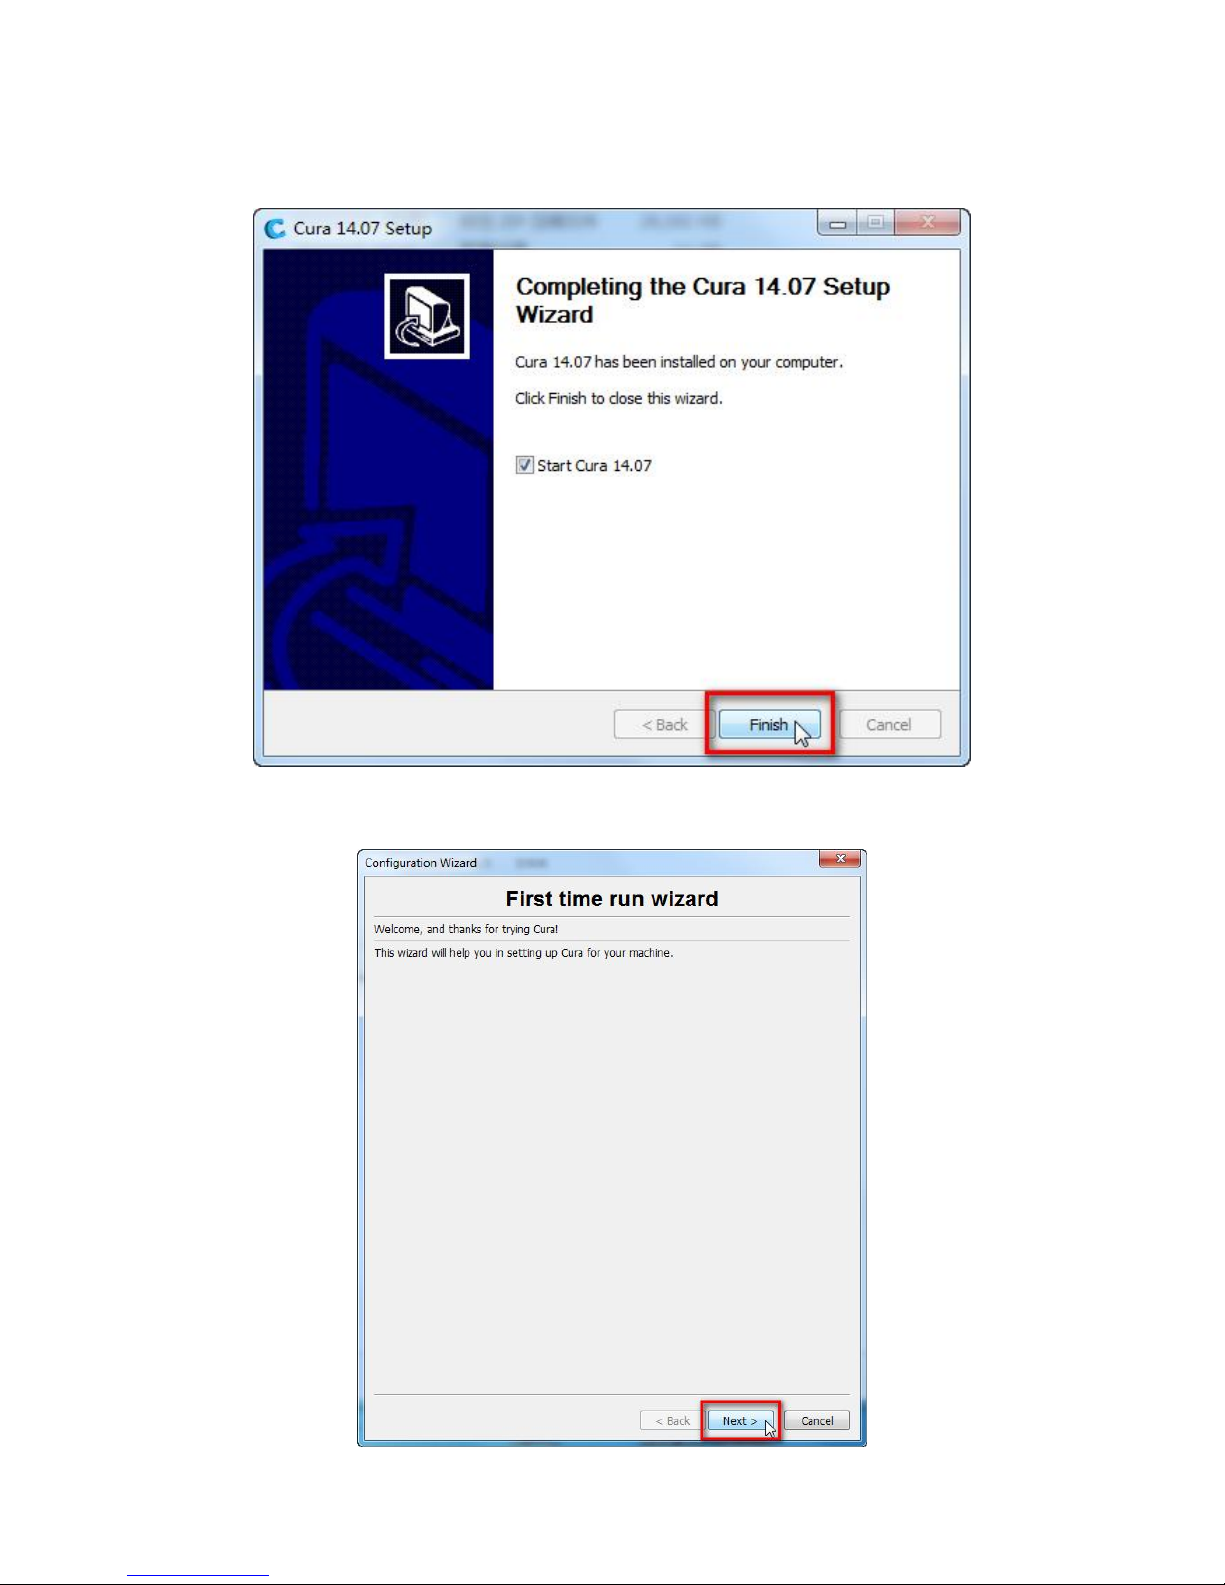
7. Click "Finish"
8. Click "Next"
Page 25
Makeblock mElephant 3D Printer
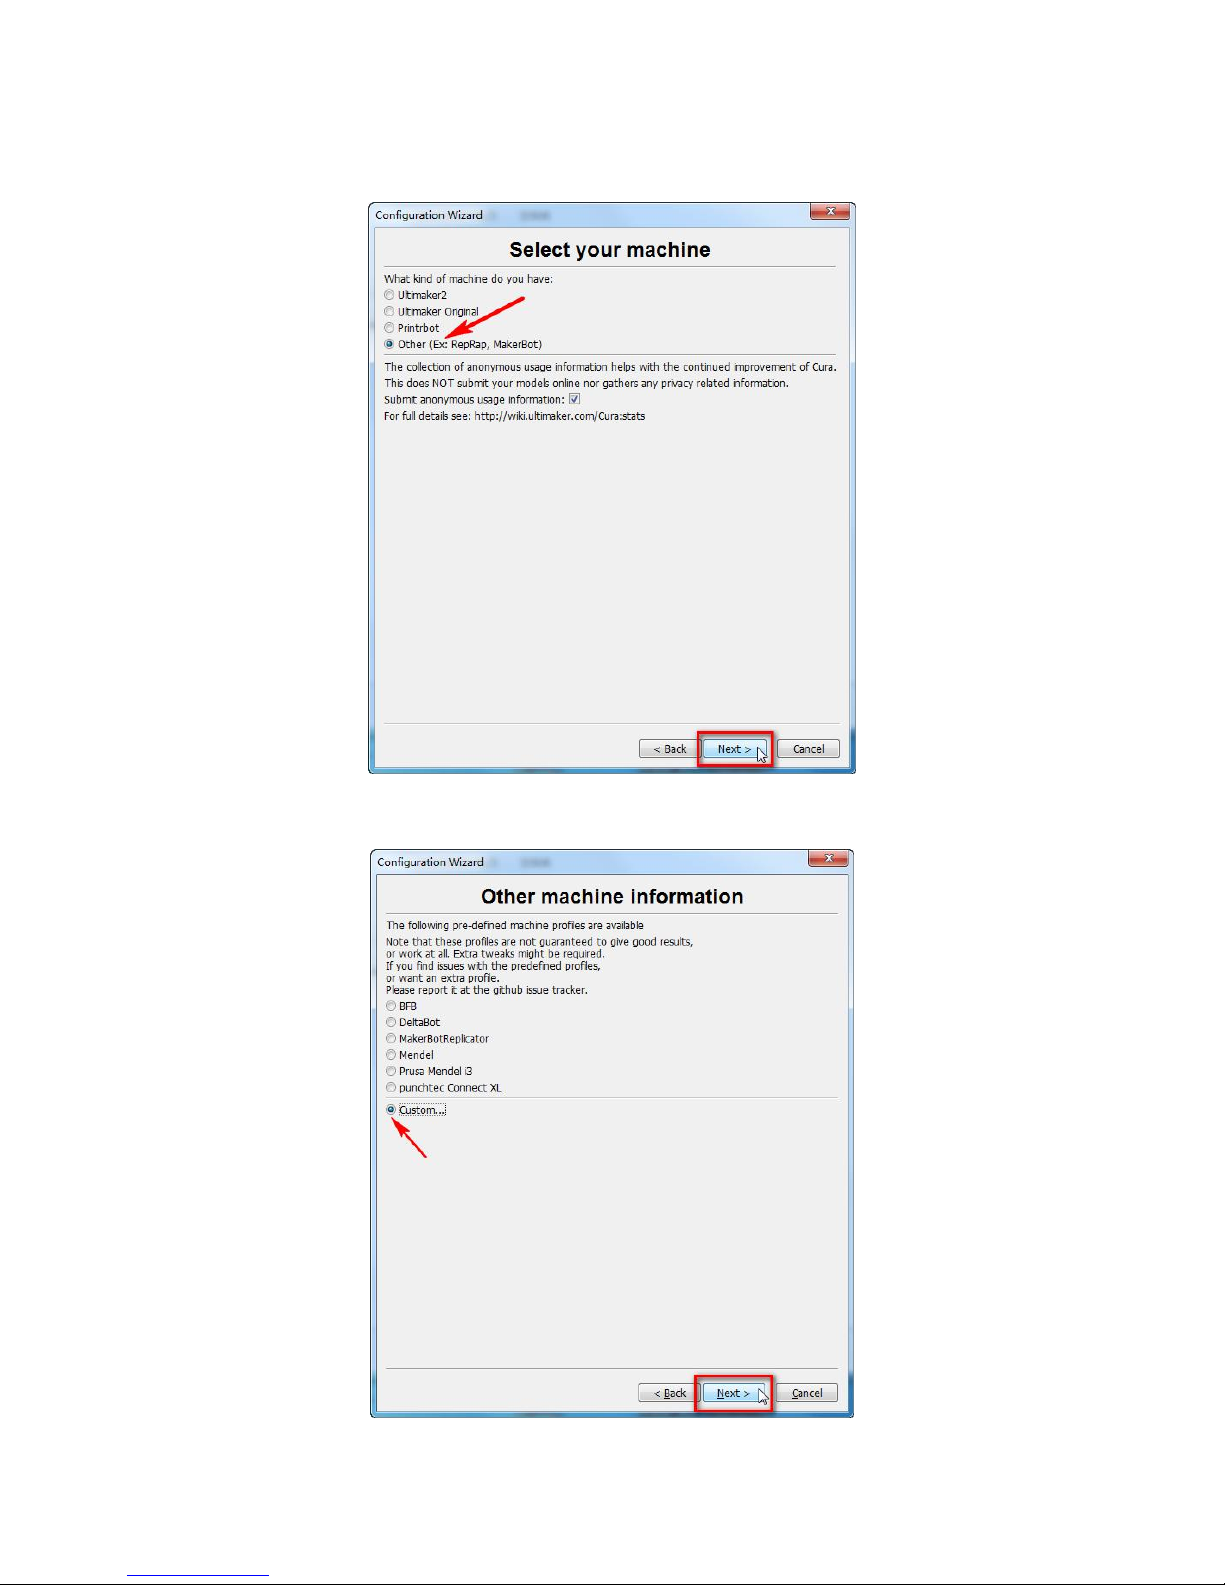
9. Click "Other" to select your machine, and then "Next"
10. Choose "Custom", and then "Next"
Page 26
Makeblock mElephant 3D Printer
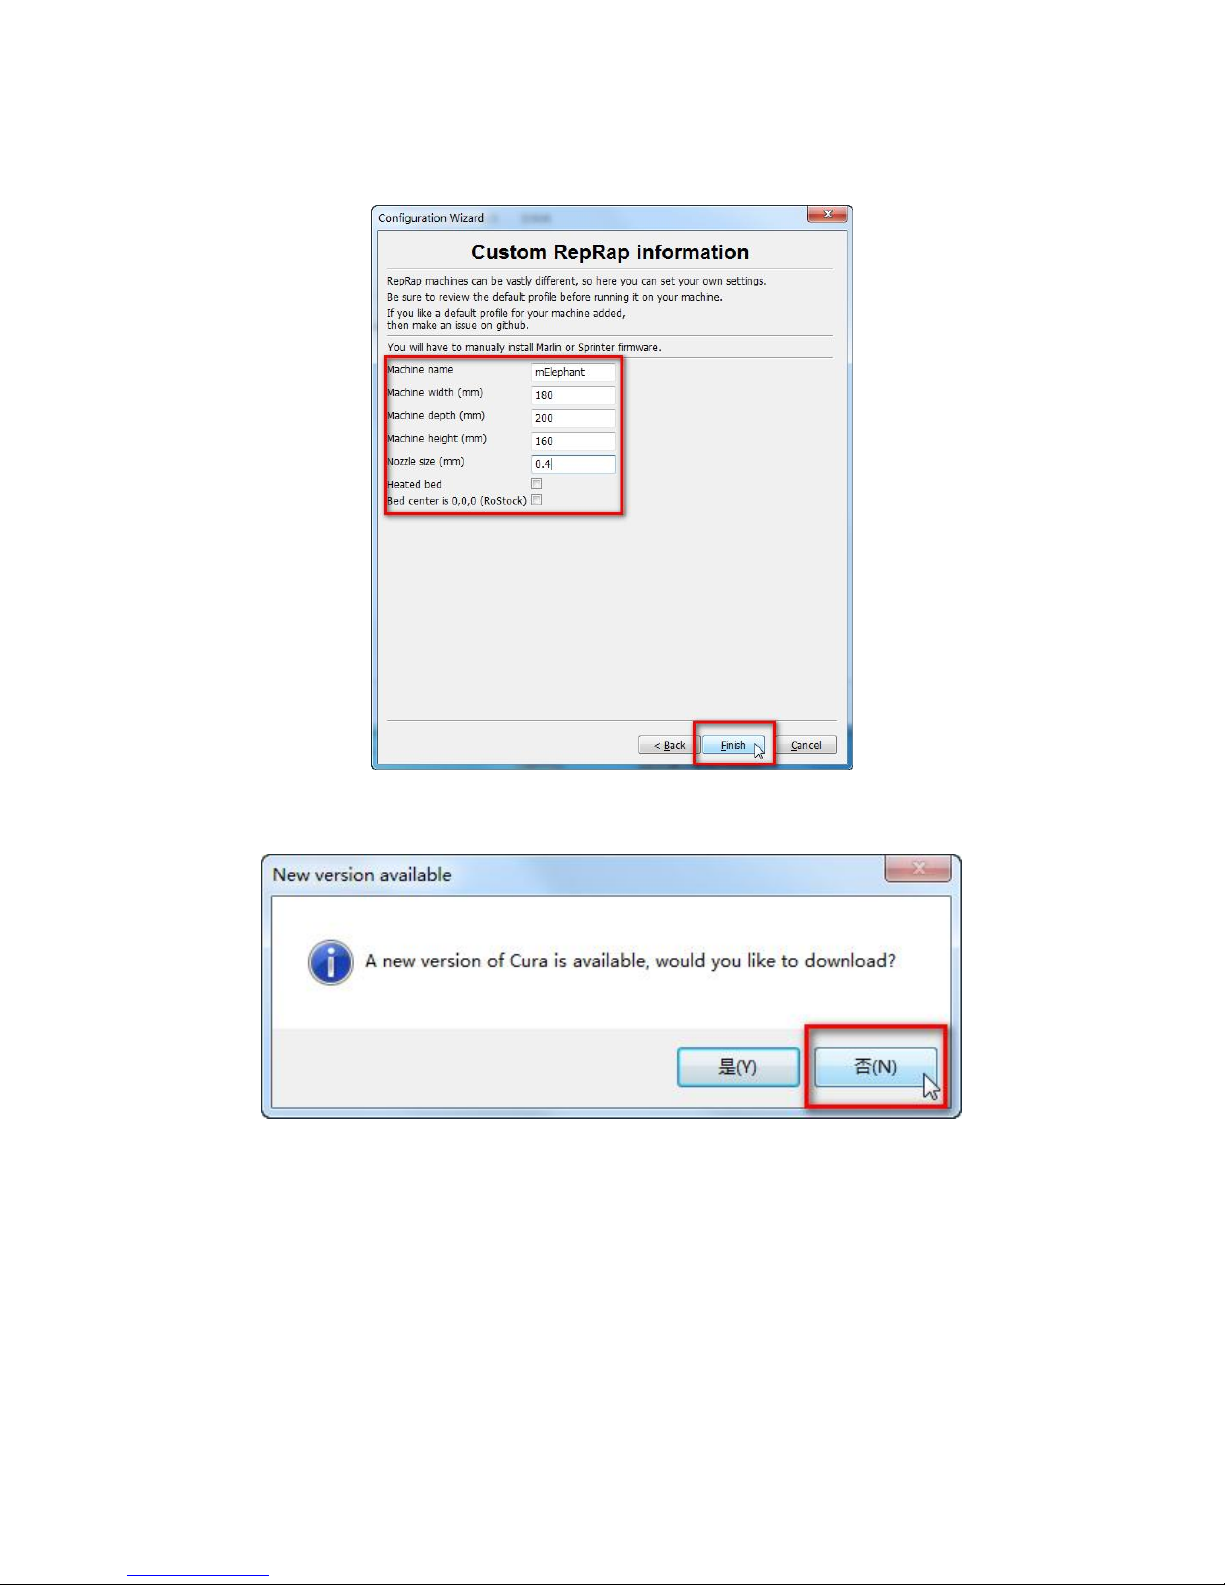
11. Fill in the parameters accordingly, and then "Finish".
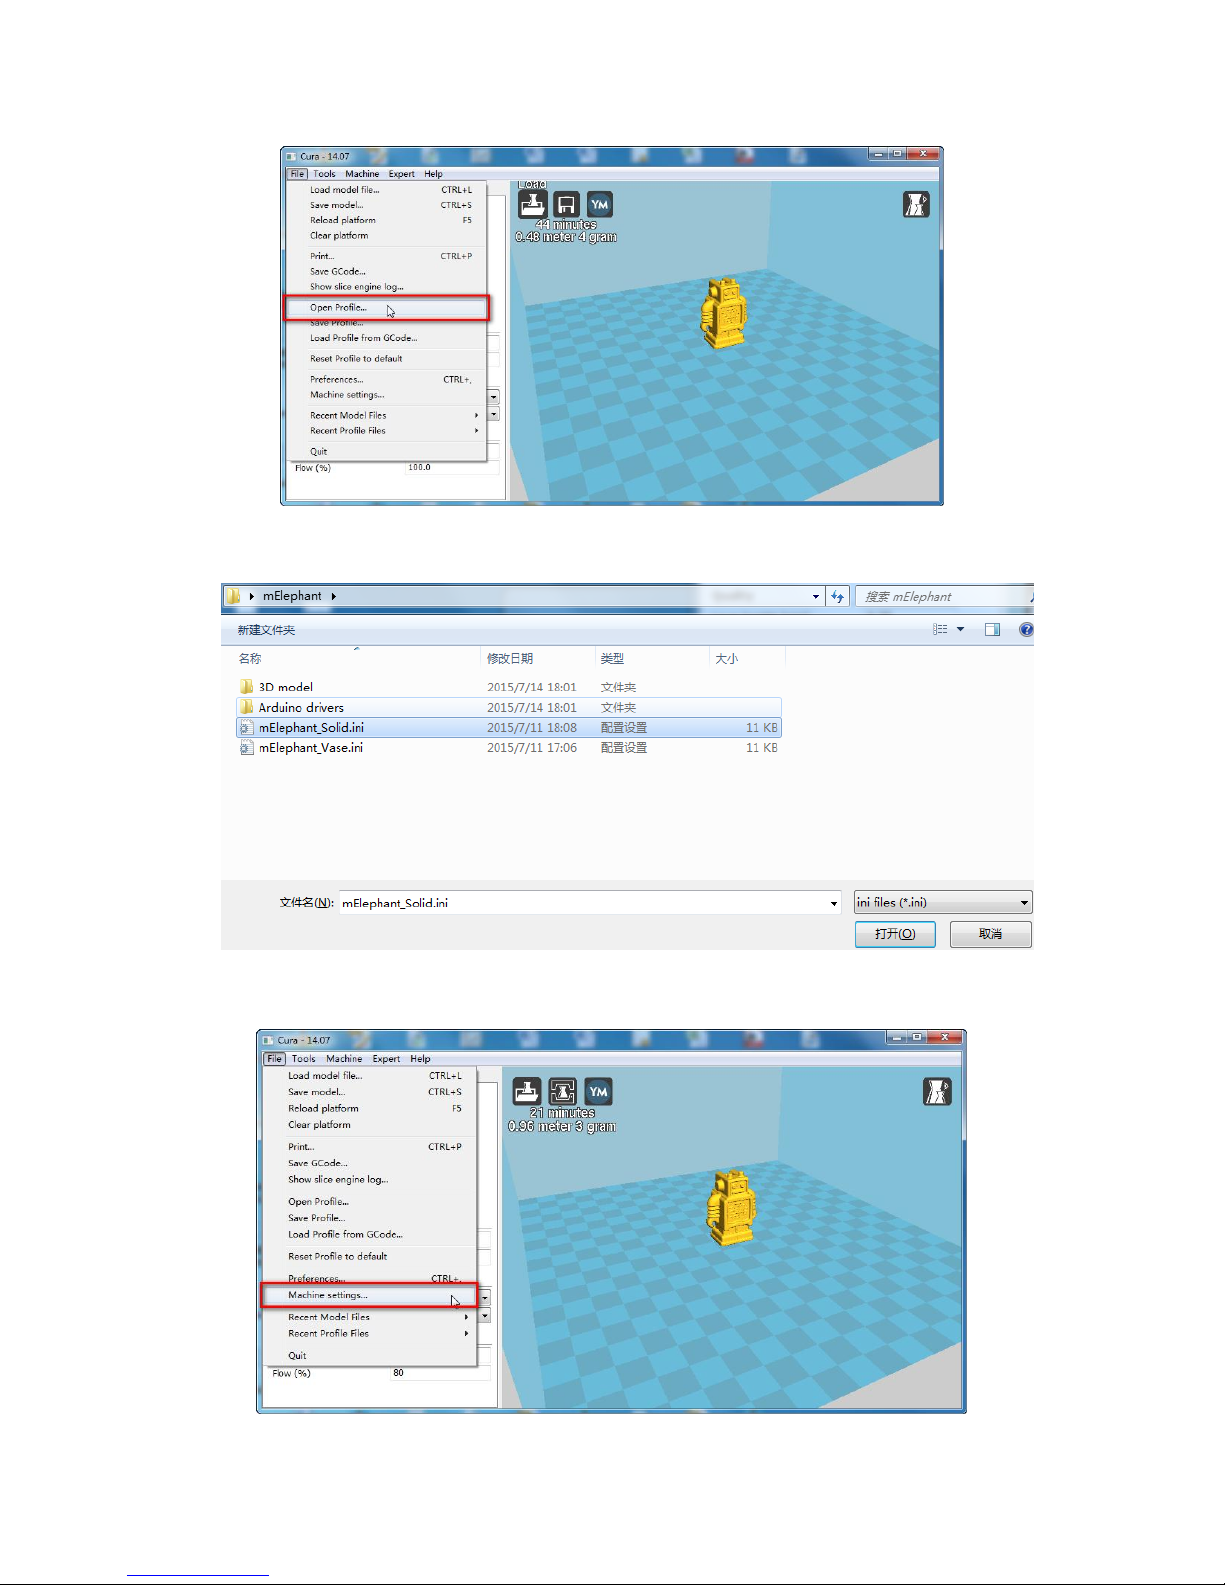
12. Click "No"
13. Choose to "Open Profiles"
Page 27
Makeblock mElephant 3D Printer
14. Find the corresponding configuration file, and open it.
15. Enter Machine Setting
Page 28
Makeblock mElephant 3D Printer
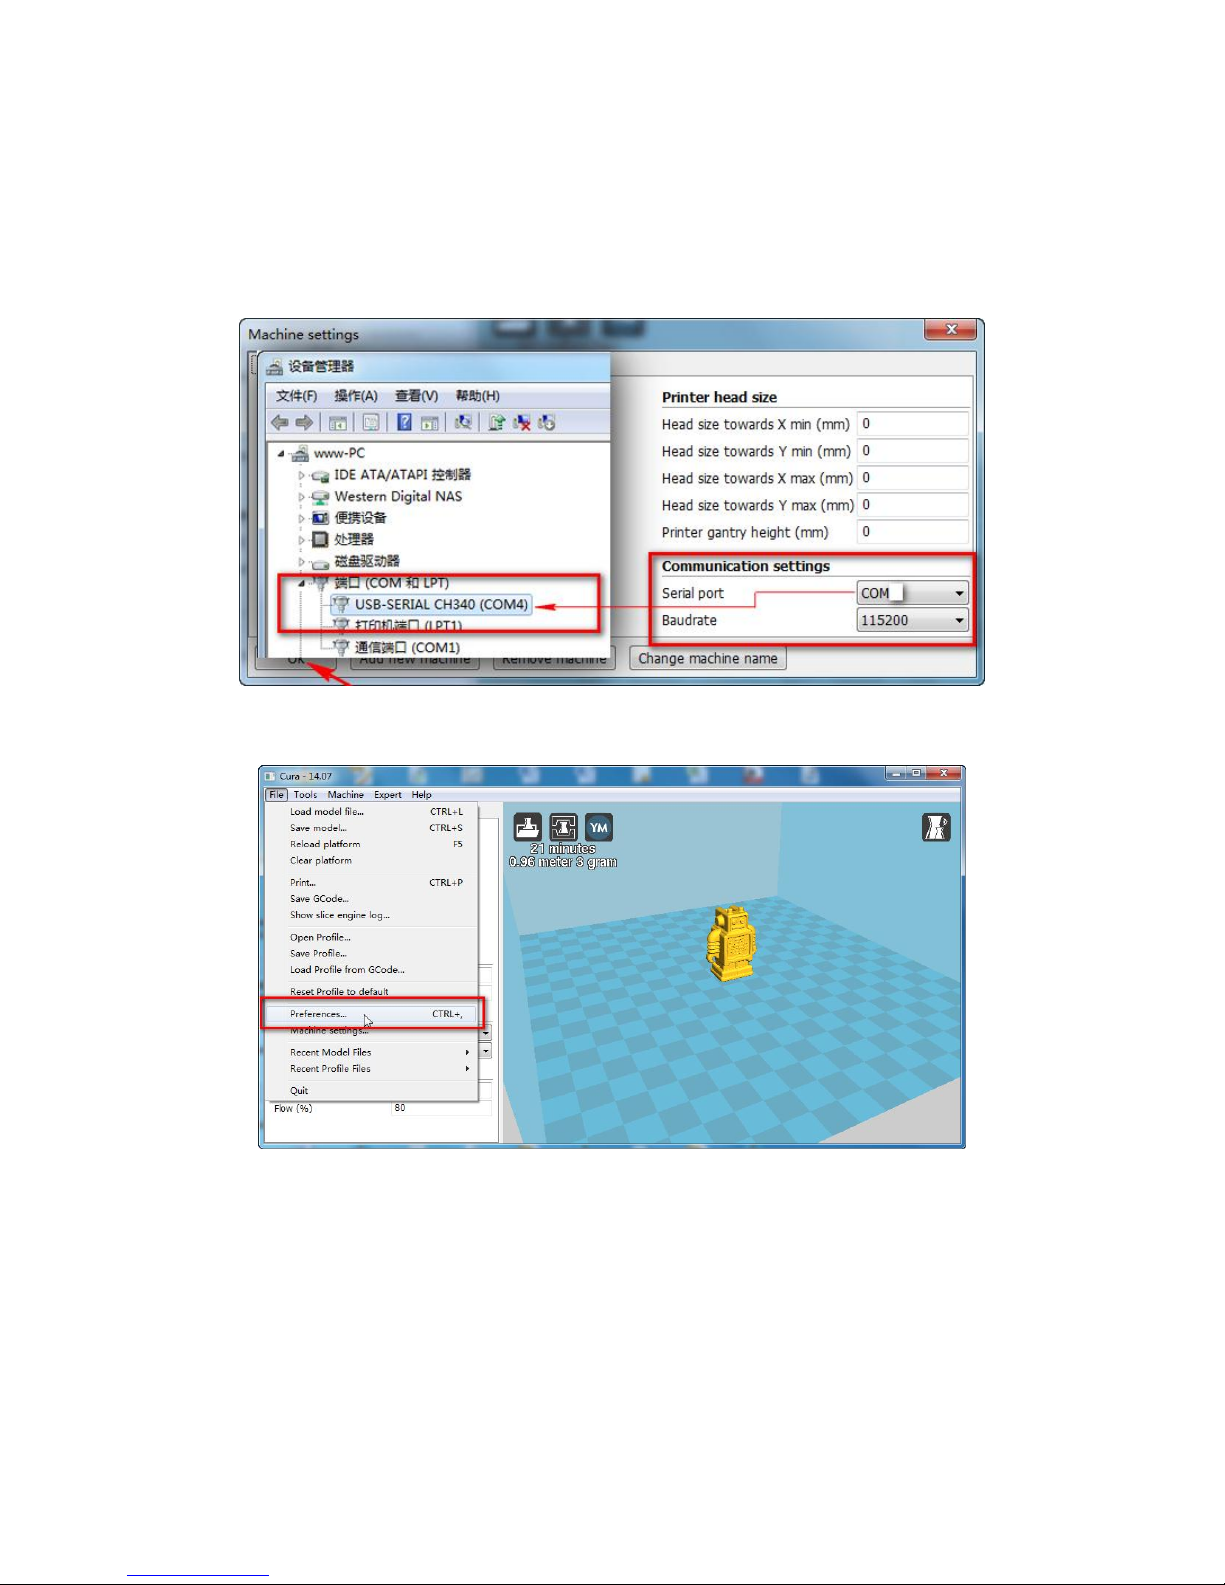
16. Select correct serial port (this port No. refers to the one you get from
the "Device Management" of your PC after installing the Arduino driver.
Please refer to "Install Arduino Driver" Section)
17. Enter advanced setting (Preferences)
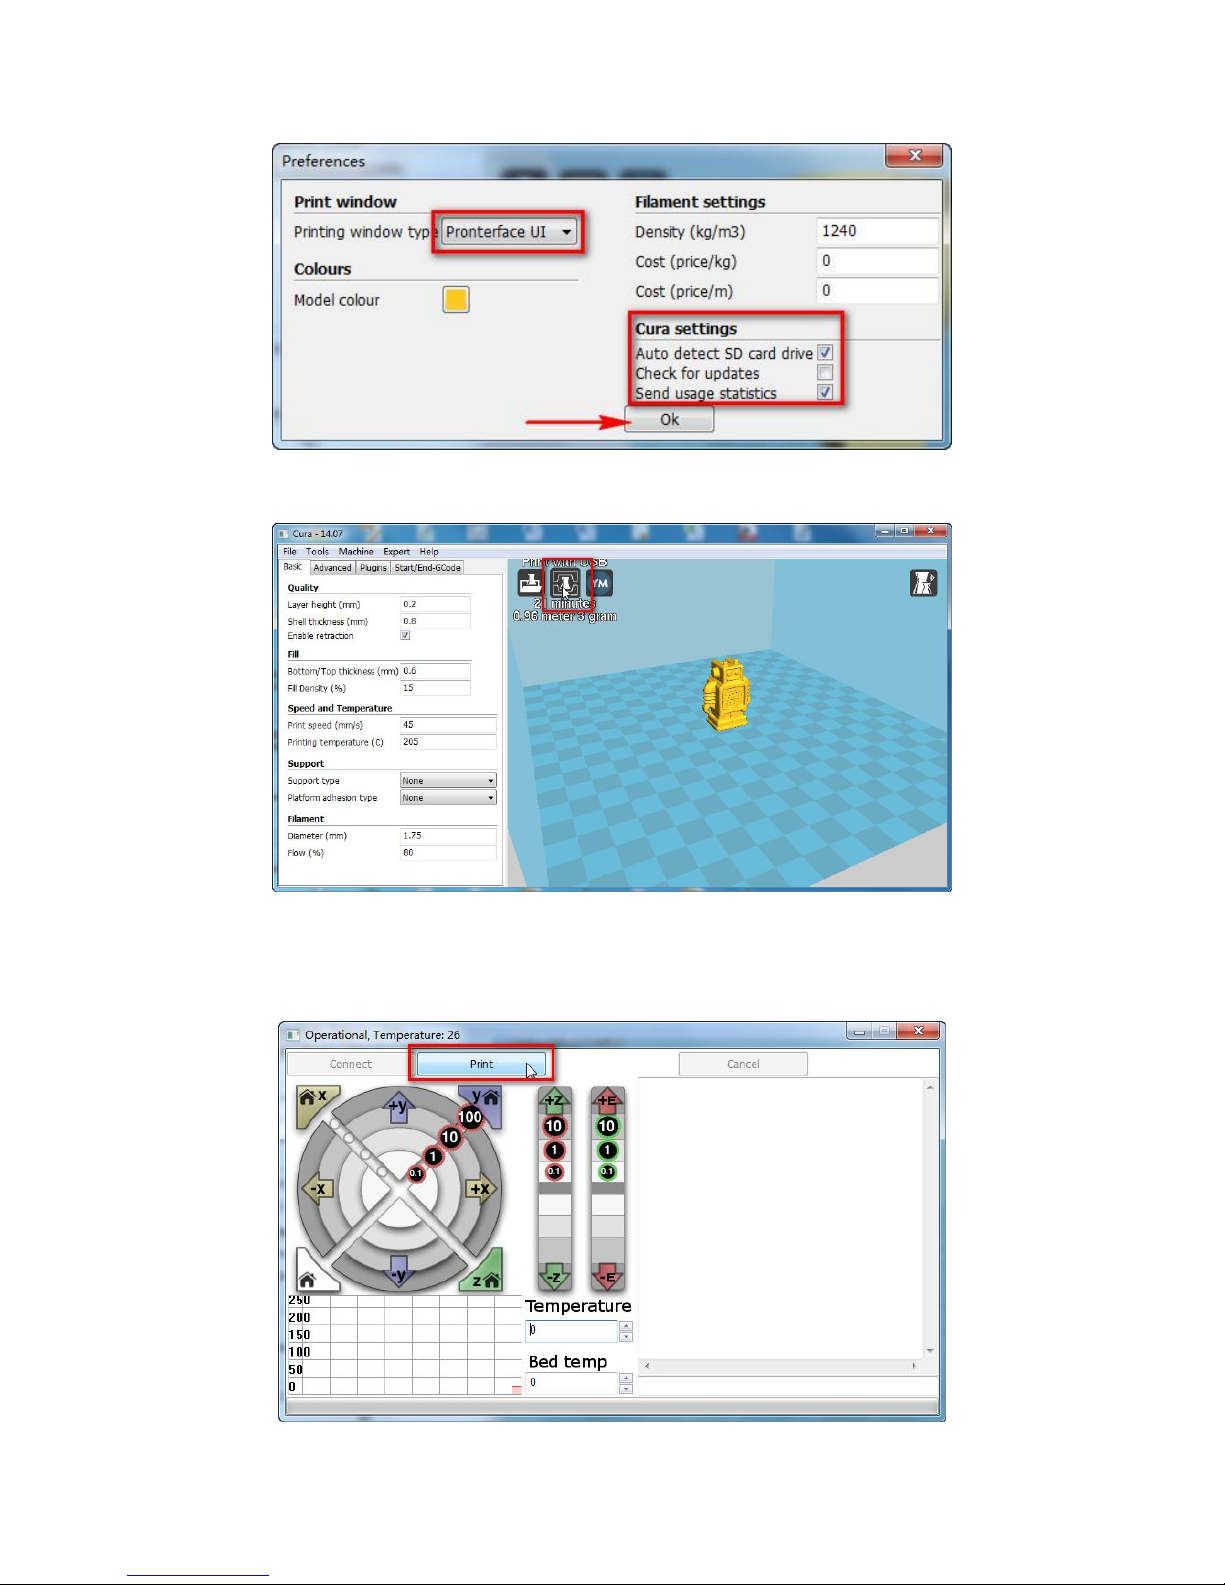
18. Choose "Pronterface UI", and uncheck the "Check for Updates".
Page 29
Makeblock mElephant 3D Printer
19. Click "Print with USB"
20. Click "Print", and then the printing will start,now waiting for
completed.
Page 30
Makeblock mElephant 3D Printer
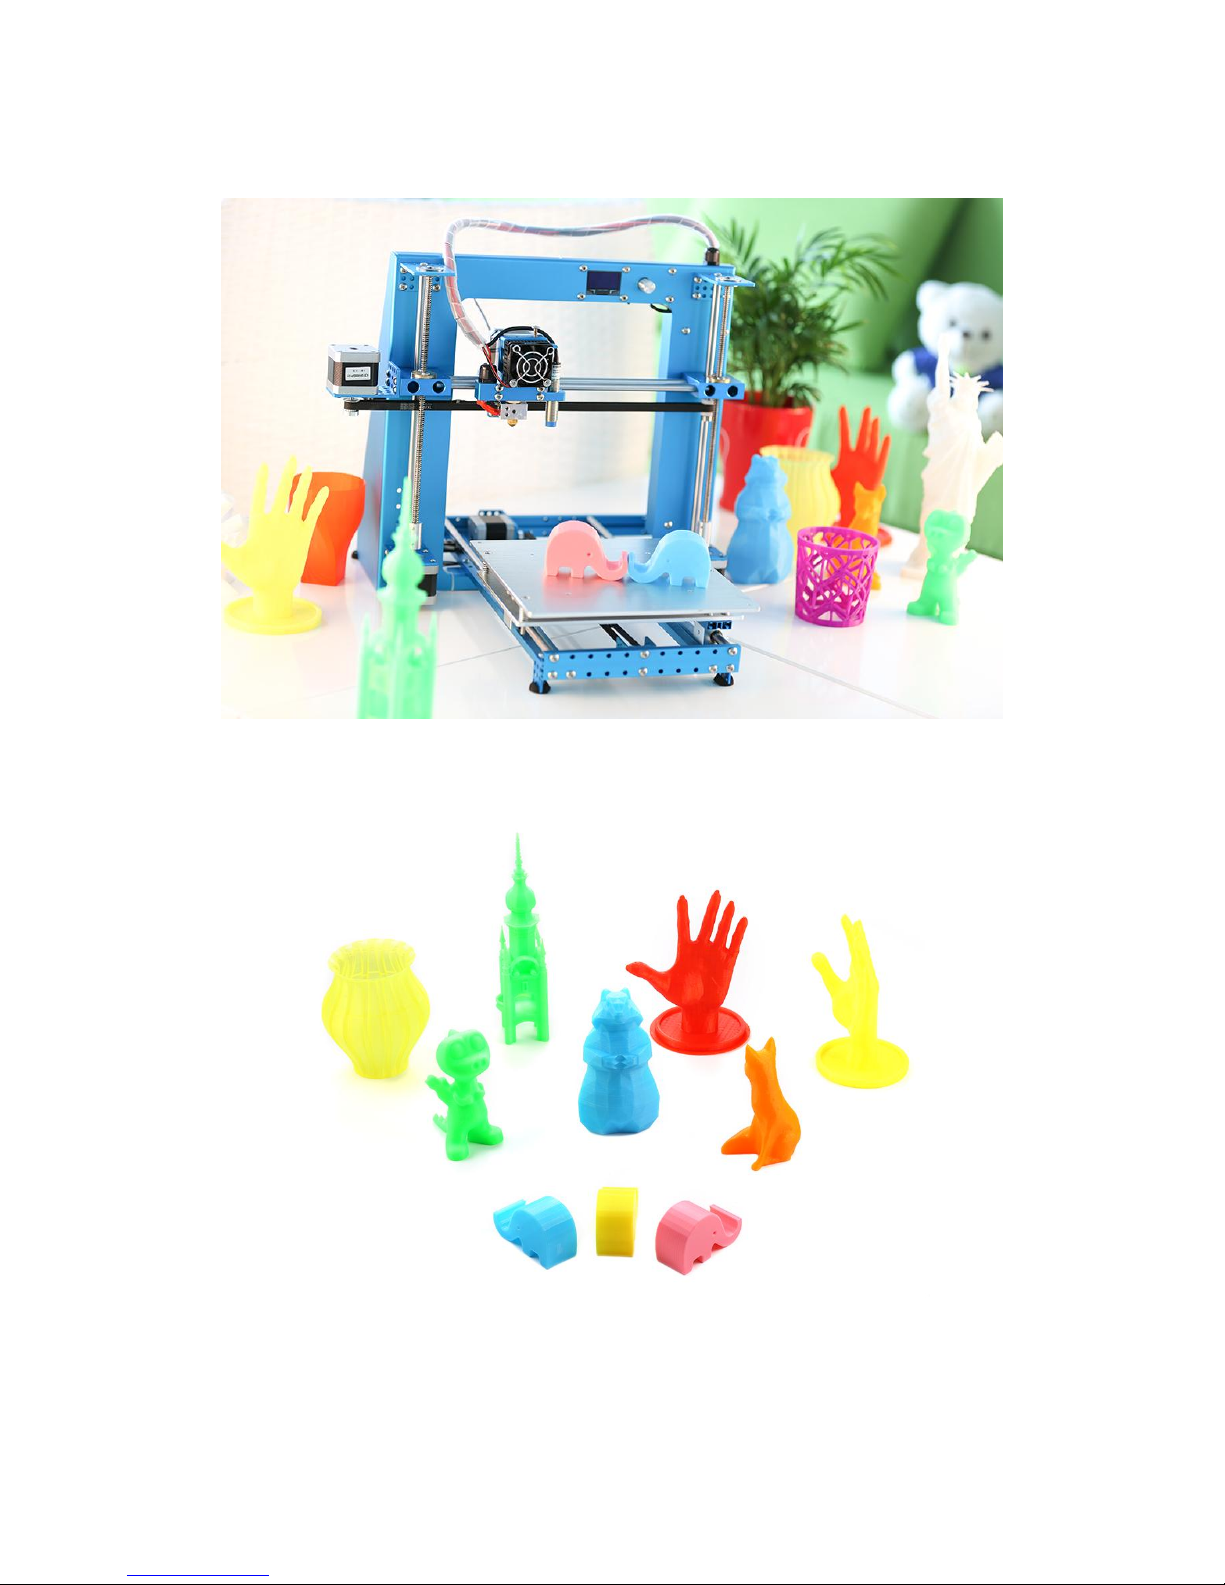
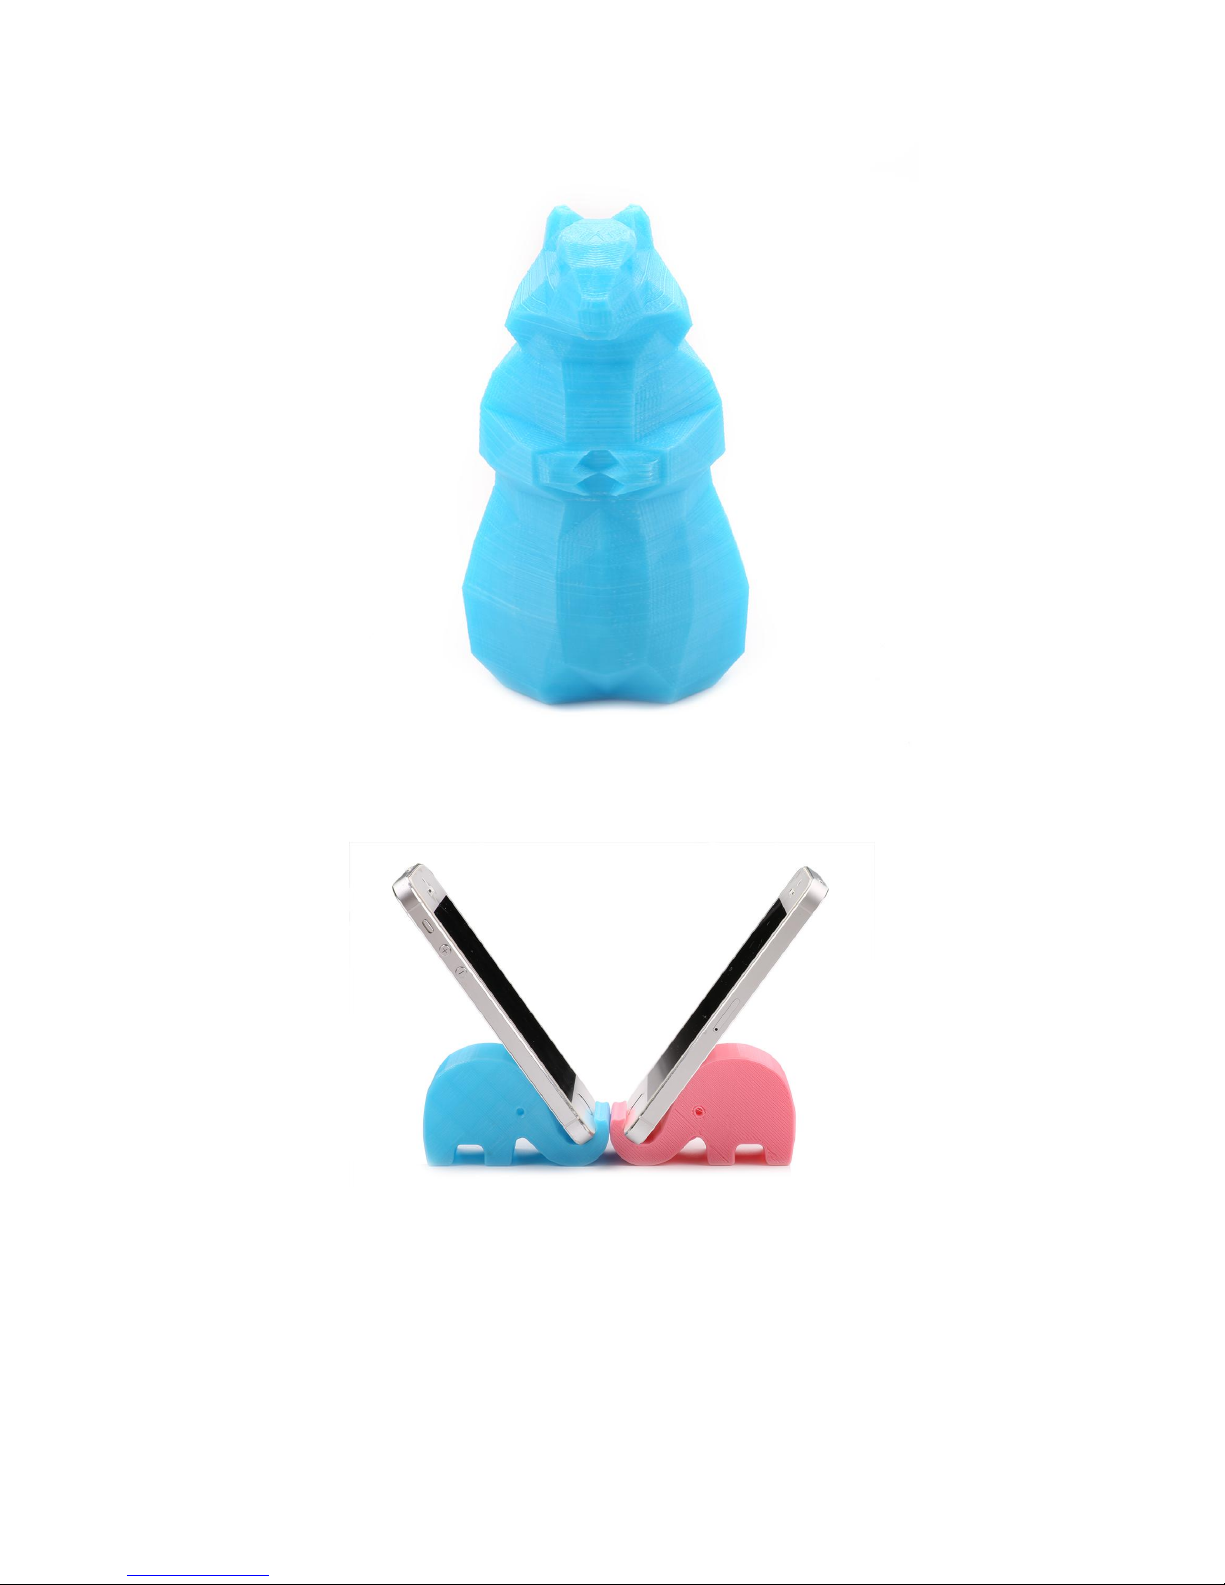
3D Prints Show
Page 31
Makeblock mElephant 3D Printer
 Loading...