

Page 1
Shenzhen Maker Works Technology Co., Ltd
Technical Support: [email protected]
www.makeblock.com
ONE ROBOT PER CHILD
: @Makeblock : +Makeblock: @Makeblock
M
ak
eb
lo
c
k
Page 2
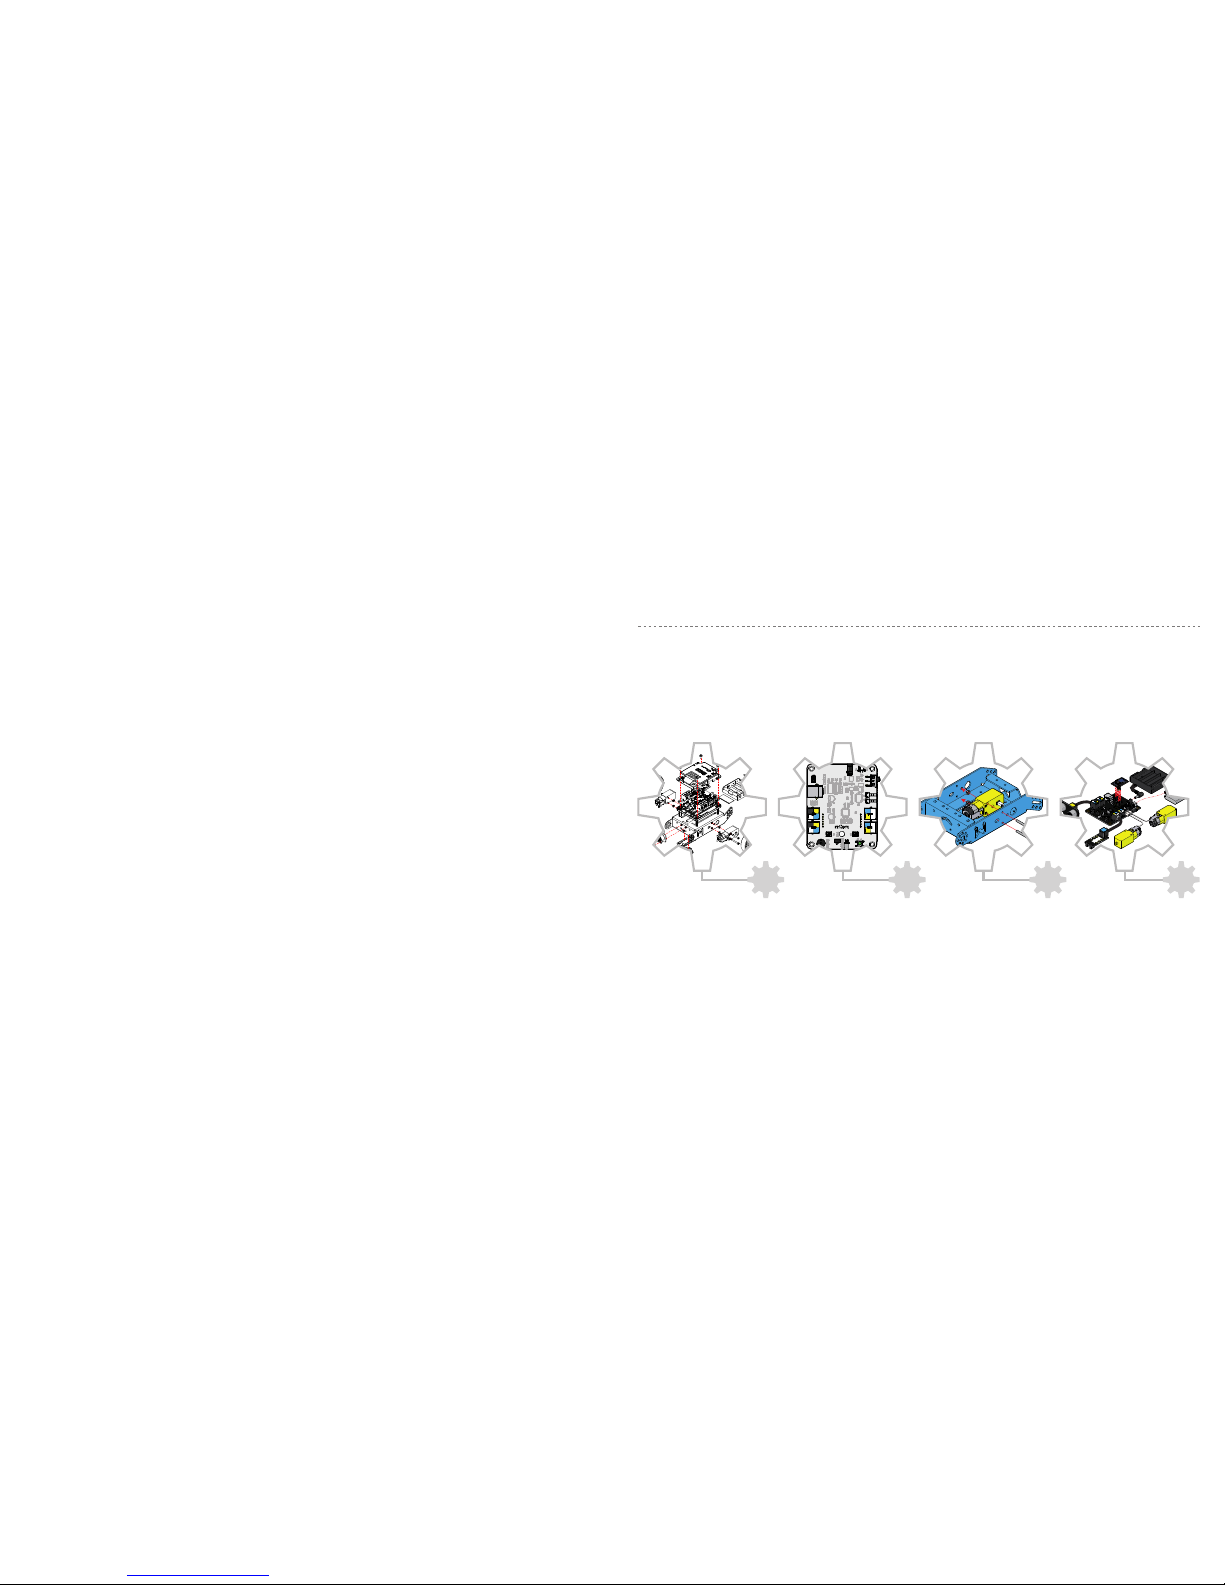
Contents
2
Part List
3
mCore
4
Assembly
9
Wiring
mBot is an educational robot for beginners to learn STEM (Science, Technology, Engineering, Mathematics) and experience the charms
of mechanics, electronics, control system and computer science.
Page 3
WARNING: CHOKING HAZARD - Small parts. Suggested for children over 12 yrs.
3
11
12 13
Wireless
Communication
14
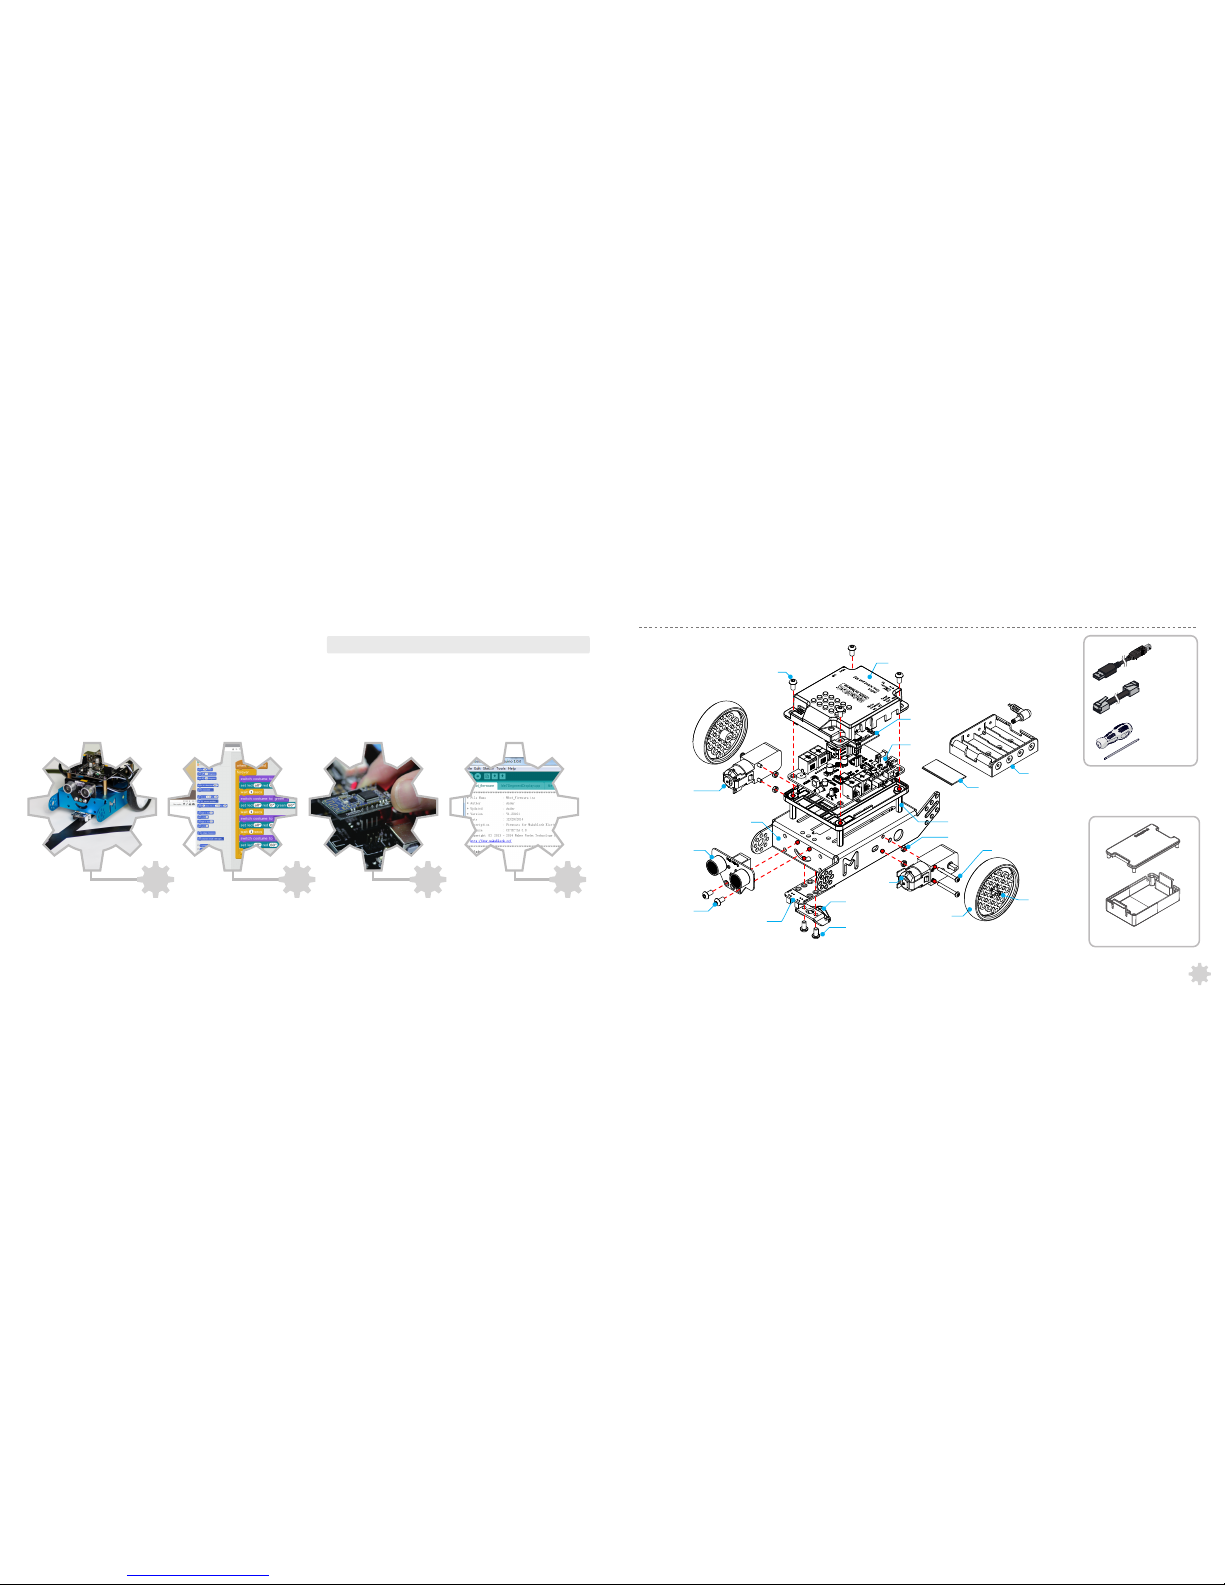
Graphical
Programming
Factory Setting
Part List
USB Cable
RJ25 Electronic
Cable
Dual-purpose
Screwdriver
Screw M4x8
Motor (Right)
Chassis
Me Ultrasonic
Sensor
Screw M4x8
Screw M4x8
mCore Casing
Wheel
Screw M3x25
Mini Caster Wheel
Line Follower Sensor
Self-drilling Screw
Brass Stud M4x25
AA Battery Holder
(This kit does not include AA batteries.)
Velcro
Bluetooth/2.4G
Module
Nut M3
Motor (Left)
3.7V Lithium Battery Holder
2
Arduino Programming
(C Language)
mCore
Page 4
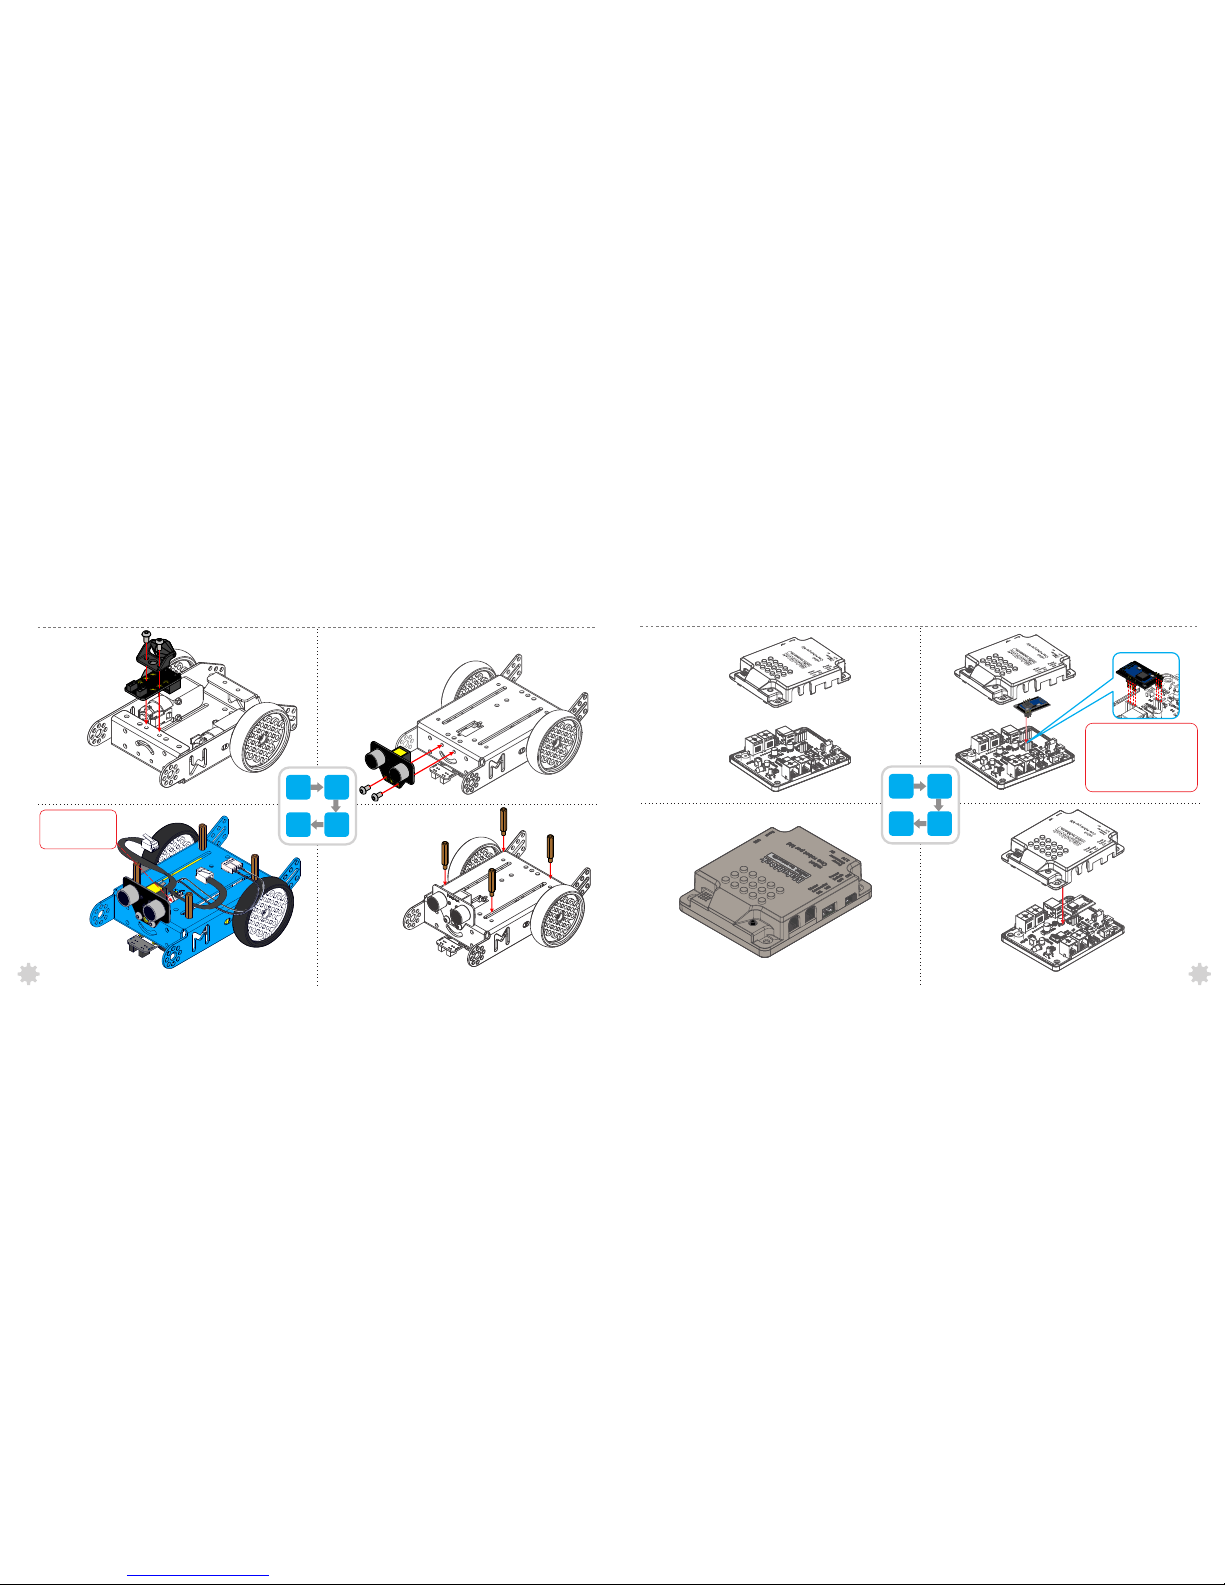
Assembly
Wheel
×2
Self-drilling Screw M2.2x9 x 2
4
3
1
2
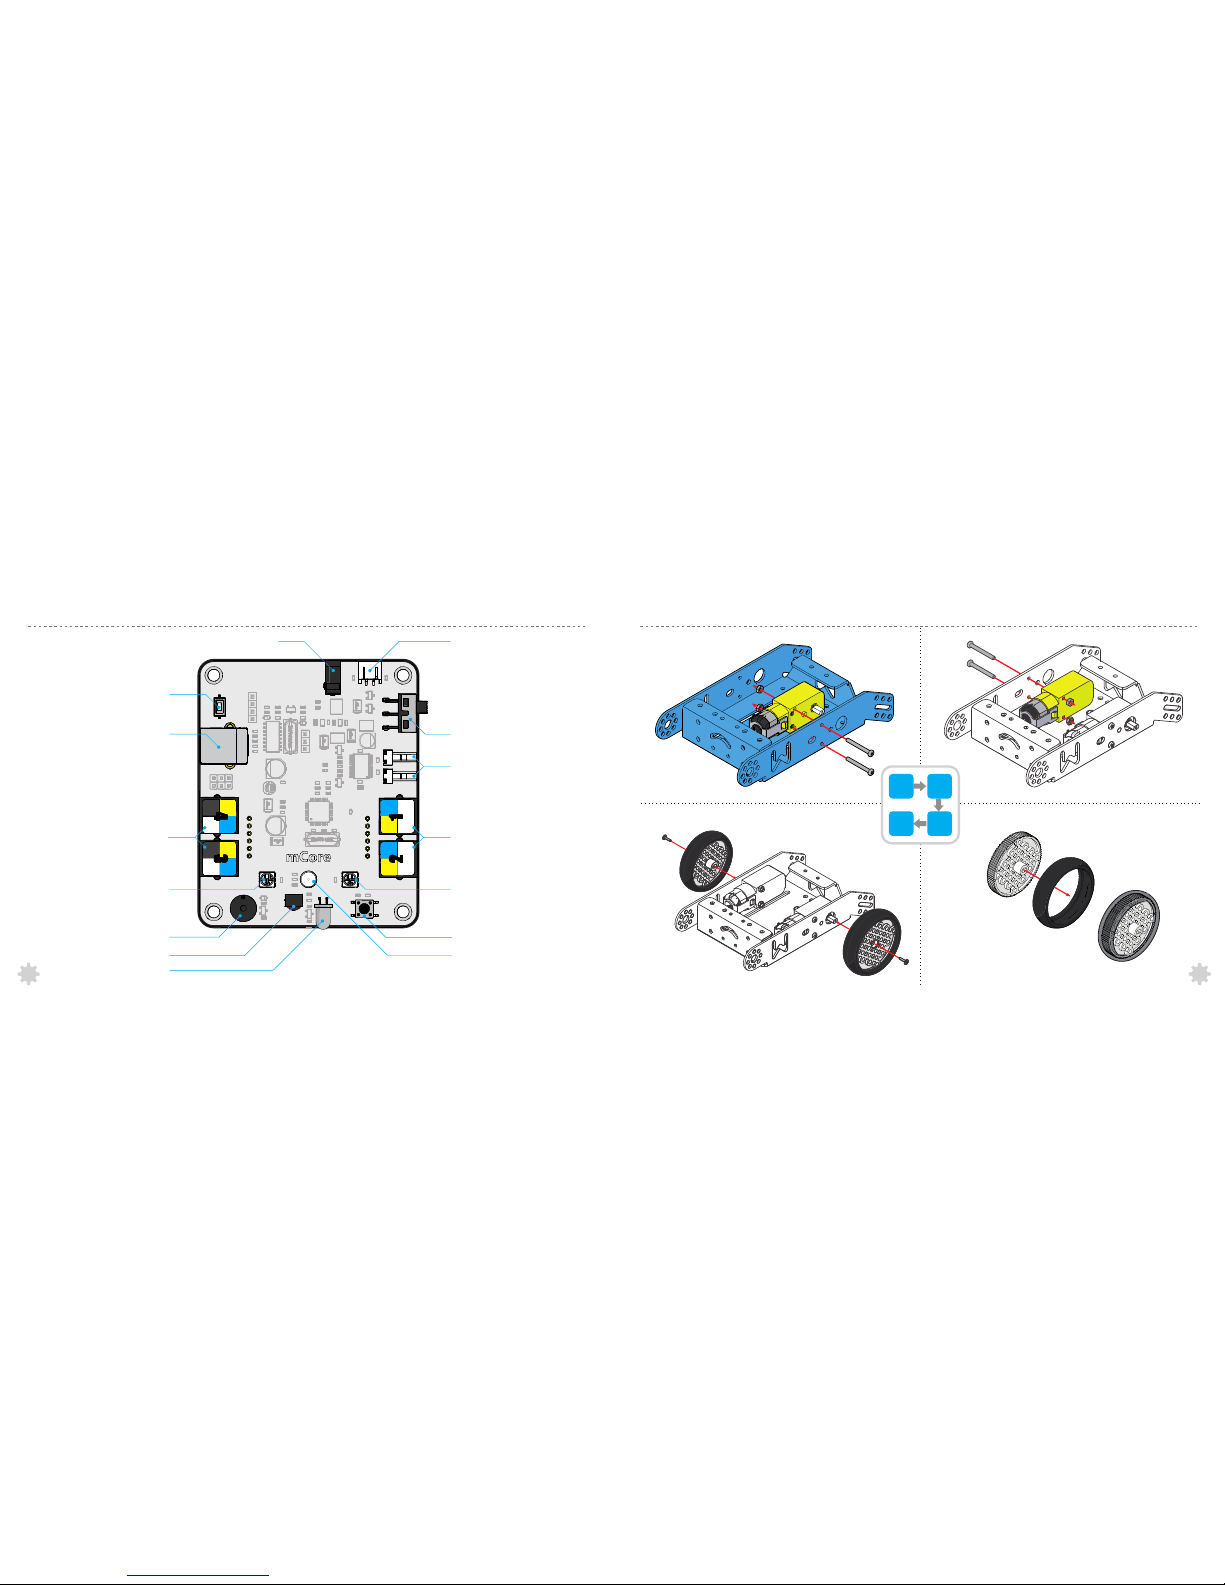
mCore
3.7V Lithium Battery Interface
AA Battery Holder Interface
Reset
USB Connector
RJ25 Port
RGB LED
Buzzer
IR Receiver
IR Transmitter
Power Switch
Motor Interface
RJ25 Port
RGB LED
Button
Me Light Sensor
3
4
Chassis x 1
Motor (Right) x 1
Nut M3 x 2
Screw M3x25 x 2
Motor (Left) x 1
Nut M3 x 2
Screw M3x25 x 2
Page 5
8
Ma
k
e
bloc
k
12
11
9
10
mCore Casing x 1
mCore x 1
Bluetooth/2.4G Module x1
Note:
Please check carefully if the pins
of the Bluetooth or 2.4G Module
are well installed, otherwise the
chip may be d amaged upon
power-on.
Screw M4x8 x 2
Me Ultrasonic Sensor x 1
Brass Stud M4x25 x 4
Screw M4x8 x 2
Mini Auxiliary Wheel x 1
Line Follower Sensor x 1
8
7
5
6
5
6
After assembly, make
sure to take out all the
wires through here.
M
akeb
l
o
c
k
Page 6
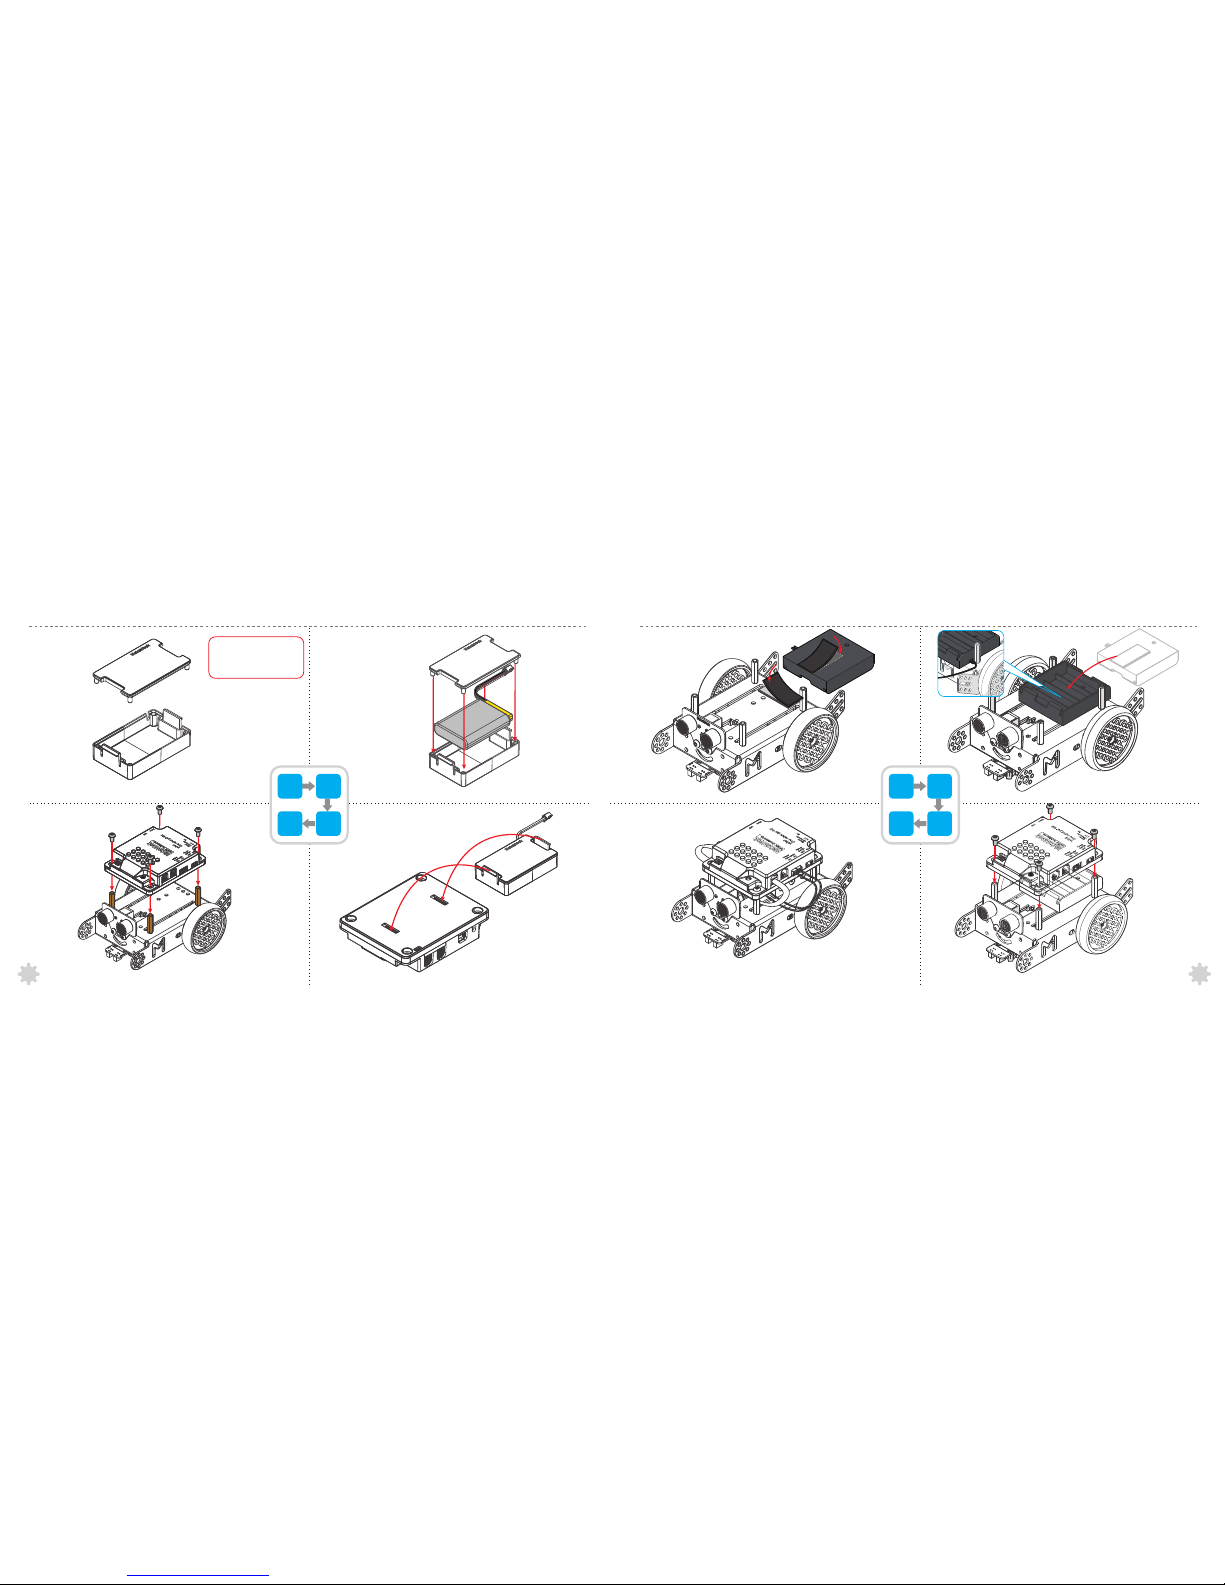
AA Bettery Holder x1
Velcro x1
Screw M4x8 x 4
20
19
17
18
16 15
13
14
3.7V Lithium Battery Casing x1 3.7V Lithium Battery x1
Screw M4x8 x 4
7
8
Note:
If you use AA battery holder,
please skip step 13, 14, 15,
and 16.
M
ak
eb
lo
ck
Ma
keb
lo
c
k
Plea se wire t he elec tronic m odule s afte r assem bly.
M
a
k
ebl
o
c
k
Page 7
11
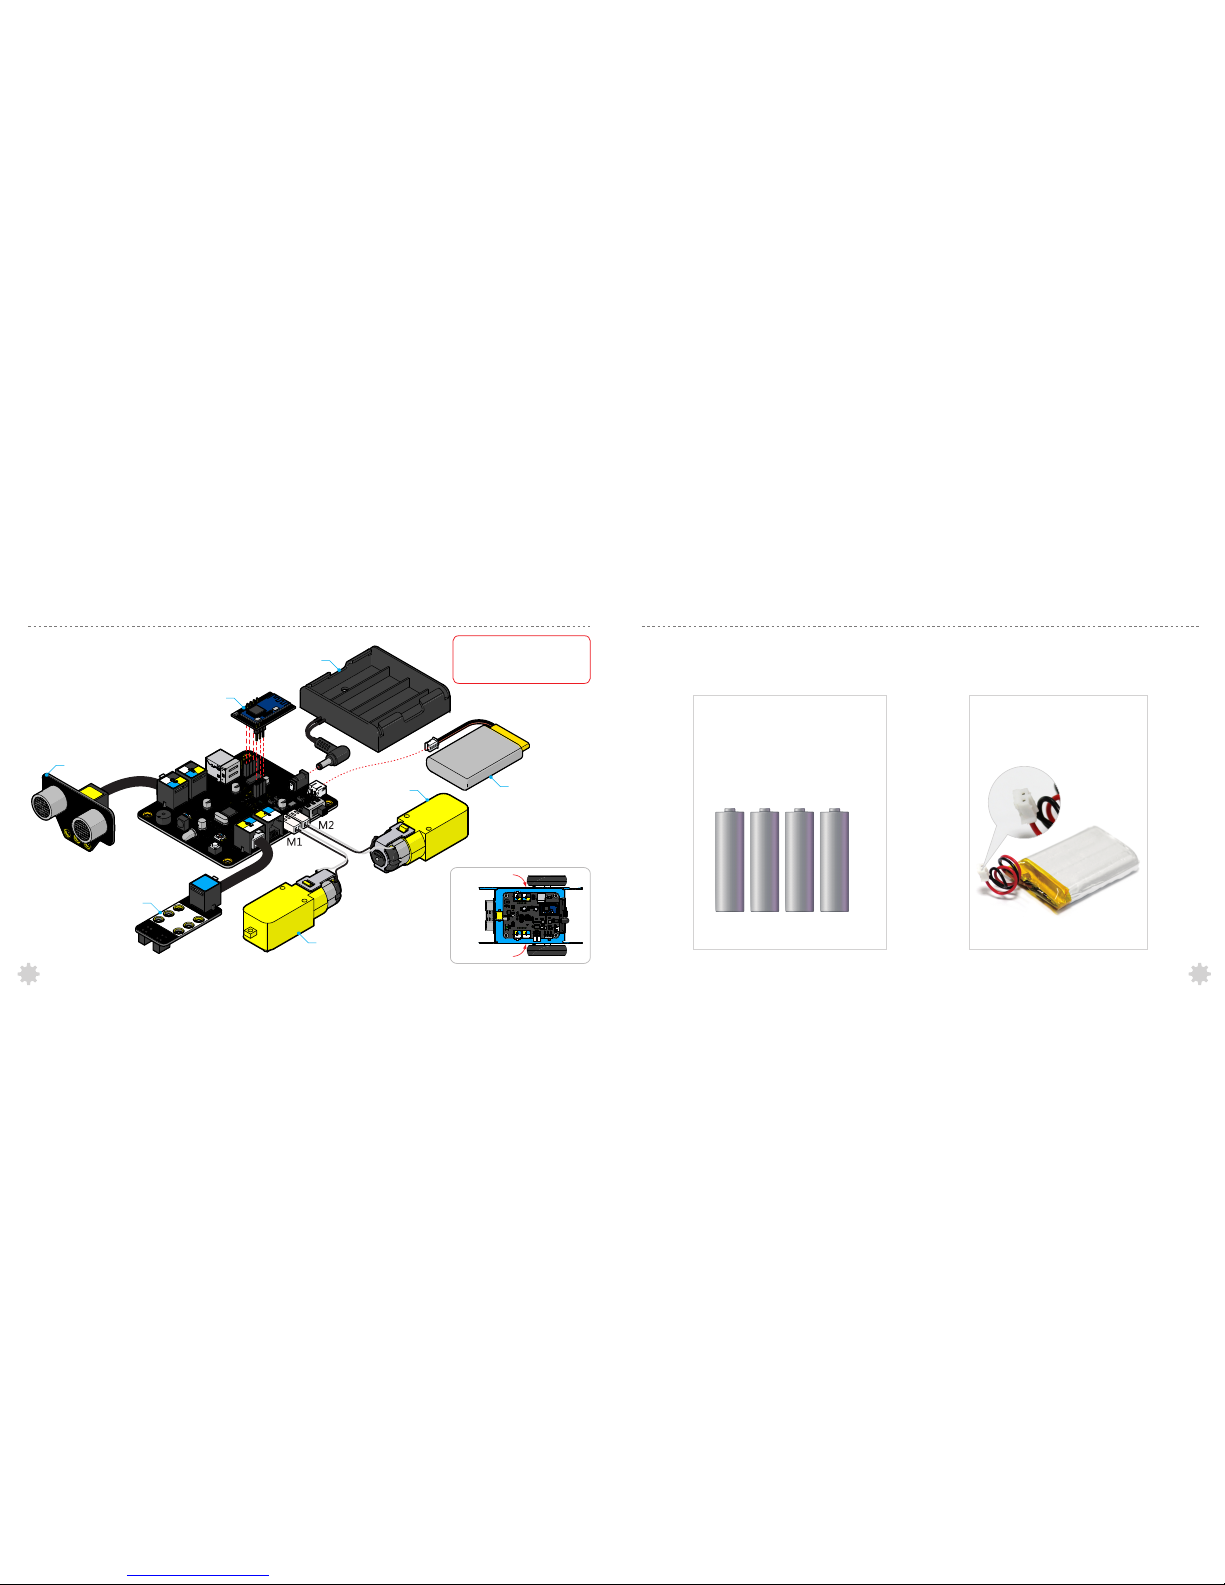
Batteries Suggestion
mCore Voltage Range: 3.7V DC-6V DC. There are two options for the power supply:
Option 1:
4 x AA batteries (Not included)
Wiring
Moto r (Left )
Moto r (Righ t)
Me Ult rason ic Sens or
Line F ollow er Sens or
Moto r (Left )
Blue tooth /2.4G M odule
AA Battery Holder
3.7V Lithium Battery
Moto r (Righ t)
You may need to switch the sequence
of two wires (M1, M2) to correct rotation
direction.
9
10
Option 2:
3.7V Lithium Battery (not included)
wit h s tand ard 2. 0 i nter face . I t
supports on-board charge via USB
cable.
Note:
M
a
keb
lo
c
k
Page 8
12
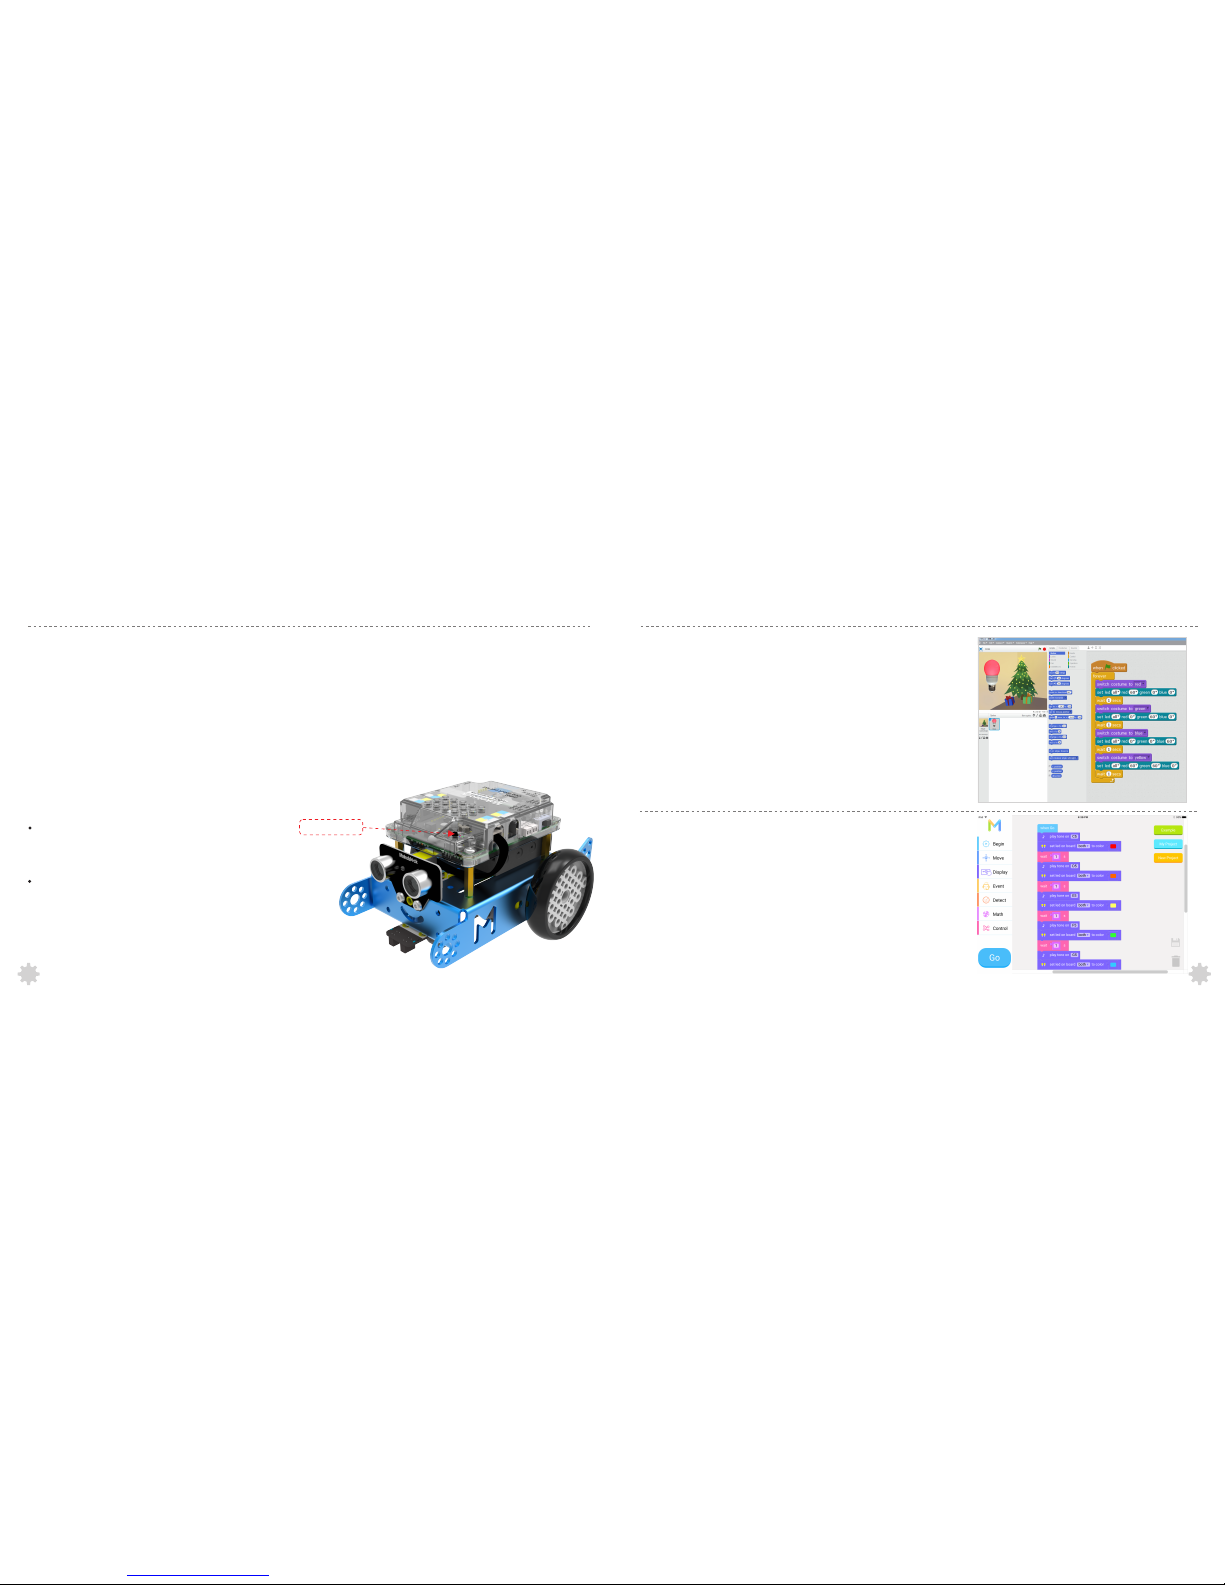
Graphical Programming
1. Introduction to mBlock
mBlock is a graphic programming software developed based on Scratch 2.0
for the hardware interactions, which can help you read the sensor's value,
control the output of hardware modules and program the robot in a quick way.
Download Link: http://learn.makeblock.com/mbot-resource-download/
Quick Guide for mBlock:
http://learn.makeblock.com/mbot-get-started/
2. Introduction to mBlockly
mBlockly is a graphic programming software designed for iPad users. With
mBlockly, you can easily realize many interesting interactions.
Download:
Search "mBlockly" in App Store and download it now!
Factory Setting
Now it’s time to test your mBot after fully assembled.
mBot has three pre-set modes: IR control mode, obstacle avoidance mode and line-following mode.
Without App or IR controller, you can also test mBot just by pressing the on-board button.
When pressing the on-board button:
Note: the IR controller is not included in this kit, you may need to buy it
on our website. It is suggested to play mBot on the flat ground for trial.
11
12
On-B oard But ton
When first power on mBot, it will be under IR control mode (default mode) and the on-board RGB LED display white. Now you can use
the IR controller to start controlling mBot. In addition, you can also download APP to control the Bluetooth version mBot.
If the RGB LED displays green, mBot will start obstacle
avoidance mode. Place mBot on a flat ground, it will avoid
walls and obstacles automatically when moving.
If the RGB LED displays red, mBot will start line-following mode.
Place mBot on a line-following map, it will move along with black
line automatically.
it’s
Page 9
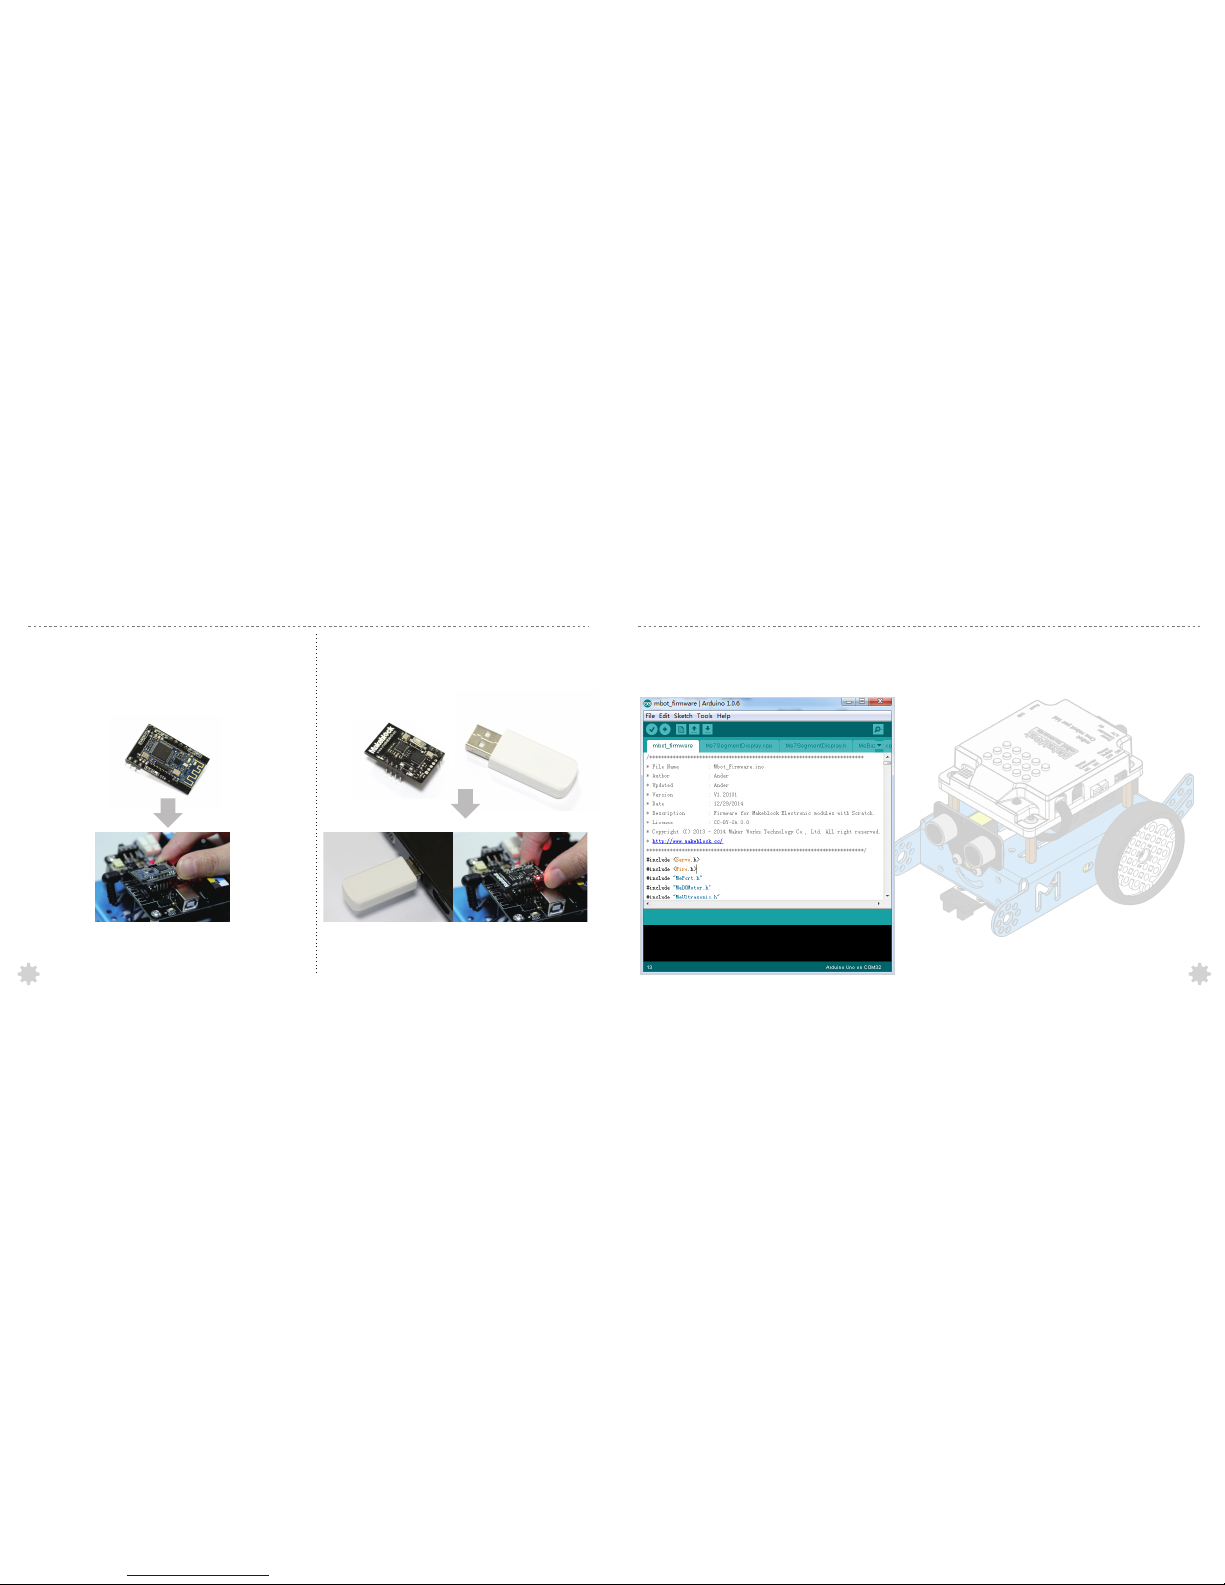
Arduino Programming (C Language)
For more information, please visit:
http://learn.makeblock.com
Wireless Communication
1. Introduction to Bluetooth Module 2. Introduction to 2.4G Module
More detailed tutorials:
http://learn.makeblock.com/mbot-get-started/
More detailed tutorials:
http://learn.makeblock.com/mbot-get-started/
13
14
The Bluetooth module is designed specially for mCore with the
support of Bluetooth 2.0 and 4.0. It is suitable for both individual
users and family. It can be matched with Android or iOS smartphone
to control mBot, and also can be matched with computers (support
Bluetooth communication) to realize wireless programming.
The 2.4G module is includes two parts: 2.4G wireless serial-USB
for computers, 2.4G wireless serial-module for mCore. It uses
the same technology as the wireless mouse and is very suitable
for classroom. No driver and pairing needed.
mBot also supports Arduino C language programming. Arduino is an open-source electronics prototyping platform based on flexible,
easy-to-use hardware and software.
The Arduino software consists of a development environment (IDE) and the core libraries.
Page 10
Electronic Modules on Makeblock--Further Exploration
http://learn.makeblock.cc/ultrasonic-sensor/
For more information, please visit .www.makeblock.com
-
+
X Y
Z
15
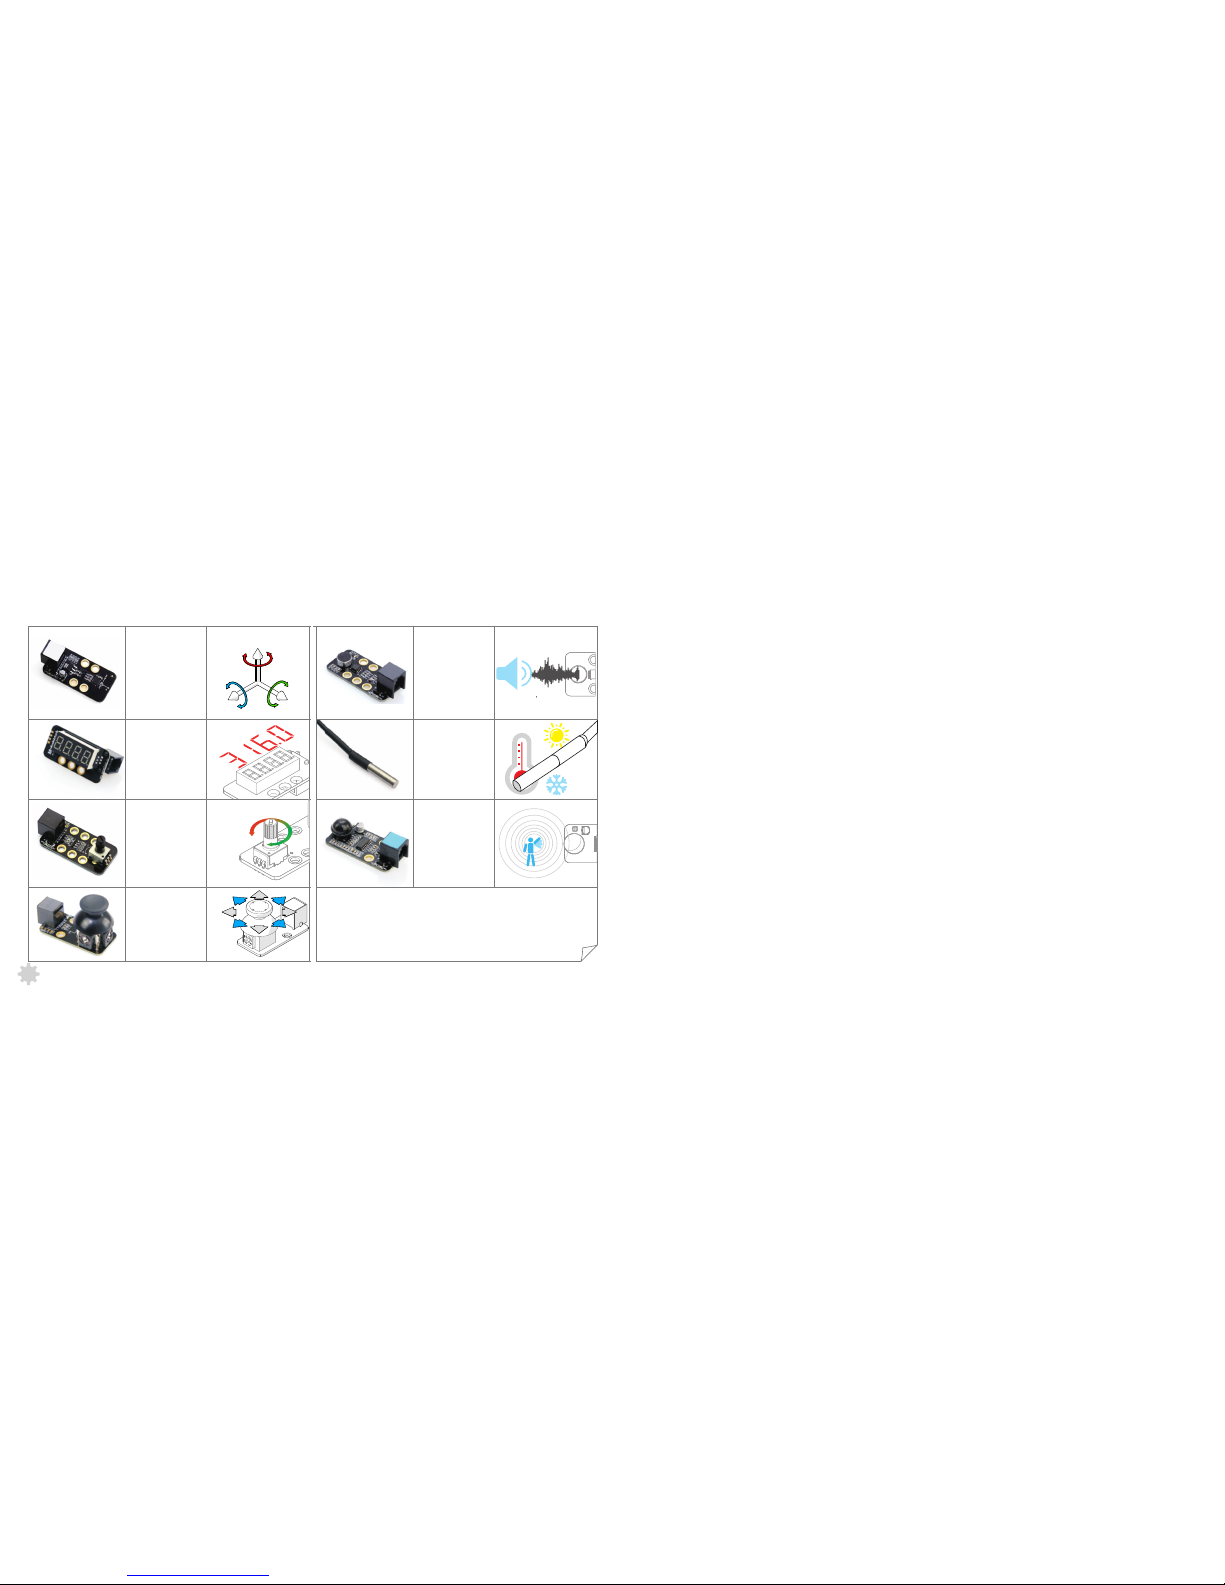
Me 3-Axis Accelerometer
and Gyro Sensor can
measure the moving
location of the objects,
e.g., detecting bumps for
sumo robots.
Me 7-segment Serial
Display includes a 4-digit
nixie tube to display data,
e.g. speed, time, score.
Me Potentiometer can
convert rotary motion
to an analog input
which can be used to
control the speed of a
mobile robot, the
brightness of RGB LEDs,
or others.
Me Joystick can control
the moving direction of
objects.
Me Sound Sensor can
measure the volume. It
can be used in some
sound interactive
projects, such as an
voice operated switch.
Me Temperature Sensor
Module can measure
the temperature, with
the measurement range
from -55℃ to 125℃.
Me Passive IR Detector
Module can detect the
infrared radiation from
human or animals
within 6 meters.
 Loading...