

Page 1
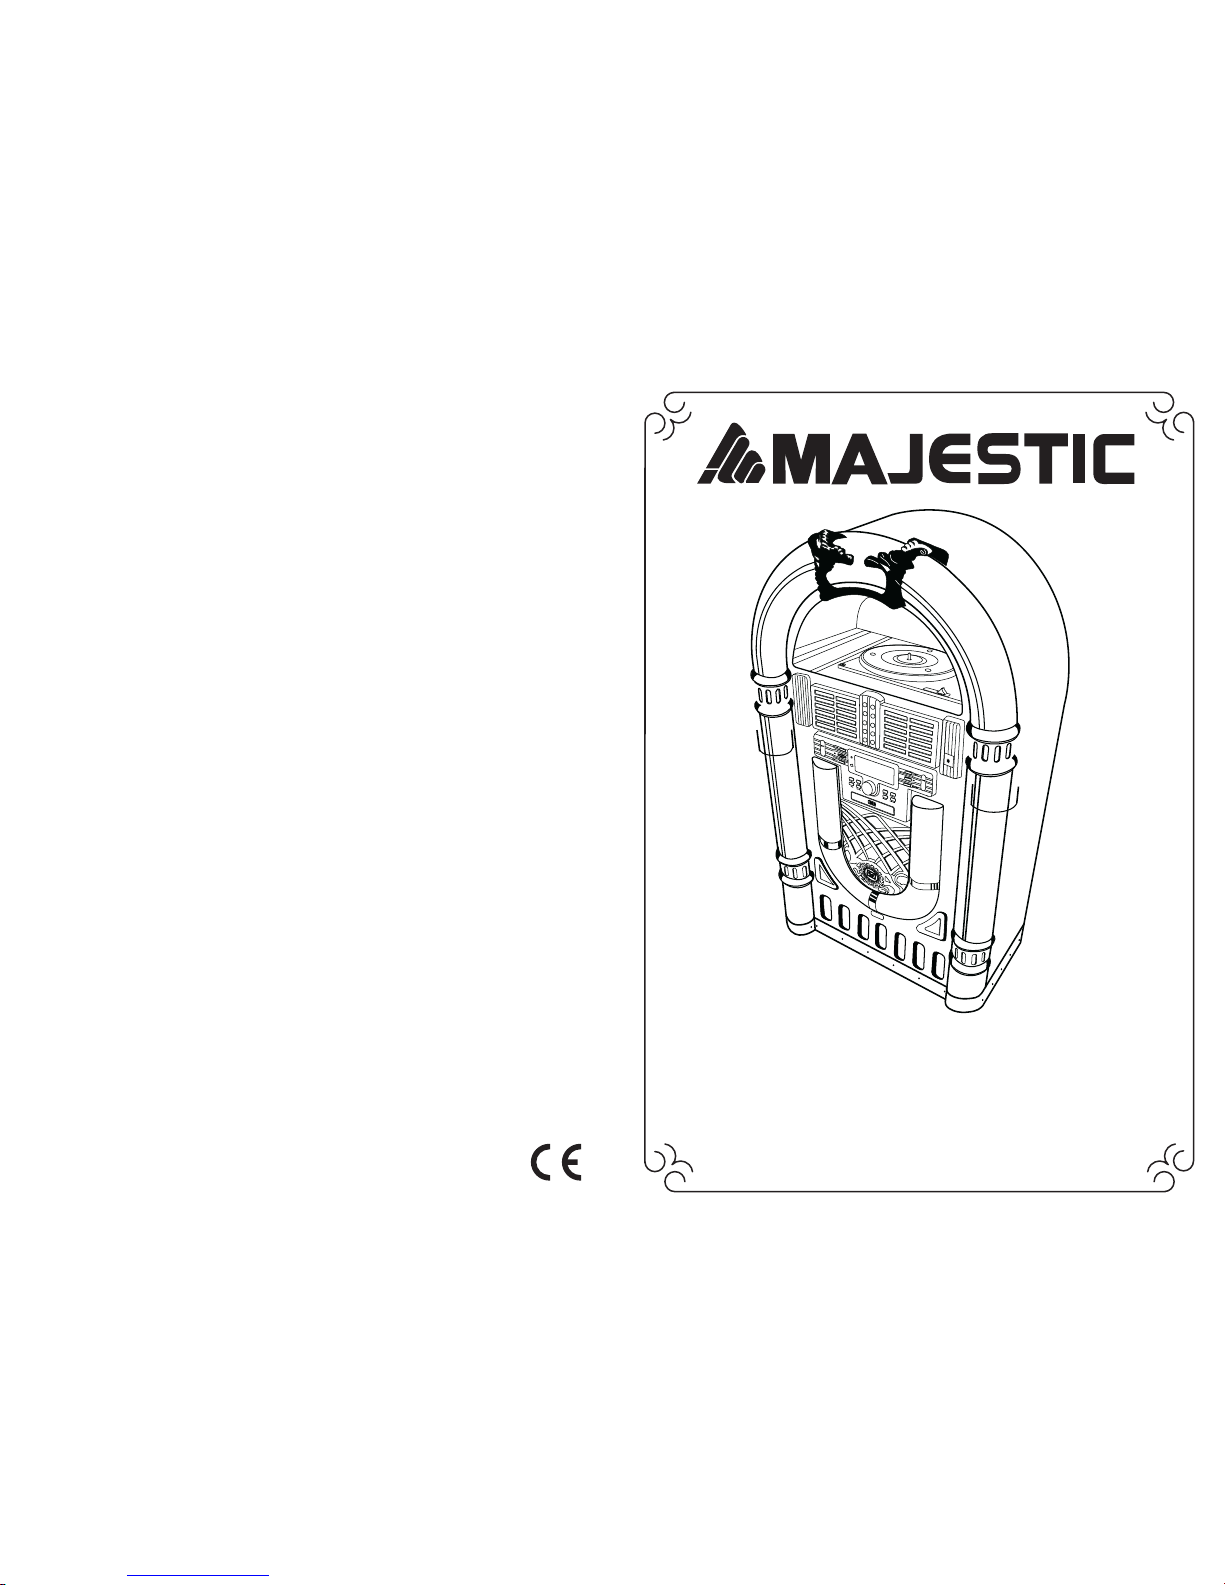
910-280900-0220-100
MODELLO: JB 3710TT/CD/USB/SD
MANUALE DISTRUZIONI
MODEL:JB 3710TT/CD/USB/SD
INSTRUCTION MANUAL
Page 2

CAUTION: TO REDUCE
THE RISK OF ELECTRIC
SHOCK, DO NOT REMOVE
COVER (OR BACK). NO
USER - SERVICEABLE
PARTS INSIDE. REFER
SERVICING TO QUALIFIED
SERVICE PERSONNEL.
The lighting flash with
arrowhead symbol, within
an equilateral triangle, is
intended to alert user to
the presence of uninsulated
"dangerous voltage" within
the product's enclosure
that may be of sufficient
magnitude to constitute
risk of electric shock
to persons.
The exclamation point
within an equilateral
triangle is intended to
alert user to the
presence of important
operating and
maintenance (servicing)
instruction in the
literature accompanying
the appliance.
RISK OF ELECTRIC SHOCK
RISK OF ELECTRIC SHOCK
DO NOT OPEN
CAUTION
WARNING:
TO PREVENT FIRE OR SHOCK HAZARD, DO NOT EXPOSE THIS APPLIANCE TO
RAIN OR MOISTURE. DO NOT REMOVE COVER. PILOT LAMPS SOLDERED IN
PLACE. NO USER SERVICEABLE PARTS INSIDE. REFER SERVICING TO QUALIFIED
SERVICE PERSONNEL.
Specification
Frequency Range : AM 522 - 1620 KHz
: FM 87.5 - 108 MHz
USB Port 2.0 : Full Speed 512MB - 4GB
(Support FAT16, FAT32)
SD CARD SLOT : 512MB 4GB
CD Player : CD/CD-R/CD-RW/MP3 CD
Turntable : Suitable for 33 1/2, 45 ,78 RPM Record
Power Consumption : 85W
Antennas : External FM antenna wire
: Built-in ferrite AM bar
Power Source : AC 230V ~ 50Hz
Speaker Size : 6 1/2 Dynamic type x 2
Speaker Ohm : 4 Ohm
Speaker Watt : 40W
Speaker Size : 2 1/2 Tweeter type x2
Speaker Ohm : 8 Ohm
Speaker Watt : 10W
Power Output : 13W x 2 RMS
*Note : AM = MW
*DESIGN AND SPECIFICATIONS SUBJECT TO CHANGE WITHOUT NOTICE.
1
SOLUZIONE DEI PROBLEMI
Non si accende.
1. Assicurarsi che lunità sia collegata alla presa di corrente correttamente.
2. Controllare che il led della modalità standby sia rosso.
3. Se rosso, premere il tasto
POWER /
per accendere lunità.
Nessun suono
1. Assicurarsi che la funzione mute sia disattivata.
2. Controllare il livello del volume premendo il tasto
VOLUME UP /
sul telecomando.
Note: Il livello del volume di alcuni apparati parte da 15 ed arriva a 40.
3. Assicurarsi che linterruttore INT./EXT sul retro della radio sia posizionato su INT. (A meno che utilizziate
altoparlanti esterni. In questo caso deve essere posizionato su EXT. )
4. Controllare che lunità sia accesa.
Il CD non funziona
1. Assicurarsi di aver inserito correttamente il CD (lato scritto verso lalto).
2. Controllare che non ci sia dello sporco sul CD.
3. Assicurarsi che lunità sia in modalità CD.
USB Non si sente nulla quando si preme il tasto PLAY/PAUSE (USB).
1. Assicurarsi che il dispositivo MP3 /Flash Drive abbia memorizzato dei file musicali.
2. Lunità legge Flash Drives da 512MB a 4GB
3. Resettare la modalità USB spegnendo lunità o passando ad unaltra modalità.
4. Controllare se il (i) file(s) è in formato WMA. Lunità legge file solo in formato MP3, non WMA.
Il telecomando non funziona
1. Sostituire la batteria.
2. Assicurarsi di puntare correttamente il telecomando verso il sensore.
3. Rimuovere gli ostacoli presenti nel percorso tra il telecomando e la radio.
Il giradischi non funziona
1. Controllare che il cavo di alimentazione sia collegato.
2. Premere il tasto
POWER /
/ (sul davanti dellunità o sul telecomando) per accendere lunità, il led
della modalità standby dovrebbe essere spento.
3. Controllare che lunità sia in modalità PHONO. Provare a muovere il braccio fino a sentire un click.
Nessun suono dallunità.
1. Il cappuccio bianco di protezione della puntina non è stato tolto
2. Il volume non è stato alzato
Il braccio non si muove
1. La fascetta nera non è stata tolta da sotto il braccio.
2. Non è stata tolta la molla che tiene il braccio
Marchi di fabbrica MPEG Layer-3 Tecnologia di codifica audio in licenza da Fraunhofer IIS e Thomson
24
Page 3

CONTROL LOCATORS
LIGHT
PRESET +
PRESET
STAND BY
INDICATOR
SENSOR
REC/
ERASE
FUNCTION
USB
PORT
PLAY/PAUSE
STOP/BAND
CD OPEN/CLOSE
REPEAT/ST
CD DOOR
DOWN / F.R.
TIMER
PROGRAM
SD
CARD
VOLUME
UP/DOWN
KNOB
LCD
DISPLAY
POWER
UP/ F.F.
SPEAKER
EARPHONE
JACK
33 45 78
TONE
ARM
TONE
ARM
REST
TURNTABLE
SPINDLE
ADAPTER FOR
45 RPM RECORDS
SPEED CONTROL SWITCH
( 33 1/3 , 45 , 78 RPM)
MEMORIZZARE BRANI
Potete memorizzare fino a 20 brani nella sequenza desiderata.
1. In posizione stop, premere il tasto
PROGRAM /
per iniziare la memorizzazione. Il simbolo MEMORY e P0-01 inizieranno
a lampeggiare.
2. Premere una volta o ripetutamente il tasto
FF / o FB /
fino a quando il numero del brano desiderato viene visualizzato
sul display. Per gli MP3: premere il tasto
PRESET + / or PRESET /
per selezionare lalbum desiderato.
3. Premere il tasto
PROGRAM /
per confermare, il display visualizzerà brano memorizzato nr. e la prossima posizione
libera.
4. Ripetere quanto descritto dai punti 2-3 per selezionare e memorizzare tutti i brani desiderati. Il display visualizzerà FULL
se cercherete di memorizzare più di 20 brani.
5. Premere il tasto
PLAY/PAUSE /
per riprodurre la sequenza memorizzata.
Cancellare la sequenza memorizzata
Potete cancellare la sequenza memorizzata nel seguente modo:
- una volta se siete in posizione stop, due volte durante la riproduzione;
- premere il tasto
POWER /
- selezionare unaltra fonte
- aprire lo sportello CD
REGISTRARE
Da CD a SD/USB
Il sistema è in grado di convertire un intero CD in formato MP3 e copiarlo su un dispositivo USB o su una Scheda-SD. E
possibile anche copiare un singolo brano MP3 da e su USB/ Scheda SD.
1. In modalità di riproduzione CD, premere il tasto
REC /
per iniziare la registrazione su USB/Scheda-SD (di default su
USB se entrambi i dispositivi sono rilevati), si interromperà la riproduzione è tornerà allinizio del brano in riproduzione, il
sistema leggerà il contenuto del dispositivo USB/Scheda-SD e creerà una cartella per memorizzare il brano MP3. Riprende
la riproduzione del CD e la registrazione. Inizierà a lampeggiare il corrispondente simbolo USB / CARD .
2. Premere il tasto
STOP/BAND /
per terminare la copia del CD.
Copiare un MP3
1. In modalità riproduzione CD-MP3, USB o Scheda-SD, premere il tasto
REC /
per iniziare la copia del MP3 da CD a
USB/ Scheda-SD, o da USB a Scheda-SD o vice versa. Si interromperà la riproduzione ed il sistema leggerà il contenuto
del dispositivo USB/Scheda-SD e creerà una cartella per memorizzare il brano MP3.
2. Verrà visualizzato il simbolo REC
3. Verrà visualizzato il messaggio COPY 01 e lavanzamento della copia in modo percentuale.
4. Il simbolo del dispositivo di destinazione, USB o CARD, inizierà a lampeggiare, la percentuale del copiato inizierà da
01 e si fermerà quando raggiungerà 100.
5. Lattuale MP3 può essere riprodotto dallinizio.
Registrare da Giradischi a SD / USB
Il sistema è in grado di convertire il segnale audio proveniente dal giradischi in formato MP3 e memorizzarlo in un dispositivo
USB o Scheda-SD (di default su USB se entrambi i dispositivi sono rilevati)
1. Premere il tasto
FUNCTION /
per impostare lunità in modalità PHONO.
2. Premere il tasto REC per iniziare la registrazione, il sistema leggerà automaticamente il contenuto del dispositivo USB/Scheda-
SD e creerà una cartella per memorizzare i brani MP3.
3. Verranno visualizzati il simbolo REC ed il messaggio RIPP TO, il simbolo PHONO inizierà a lampeggiare.
4. Il simbolo del dispositivo di destinazione, USB o CARD, inizierà a lampeggiare quando inizia la registrazione.
5. Premere il tasto
STOP/BAND /
per terminare la registrazione da PHONO
22 3
Page 4
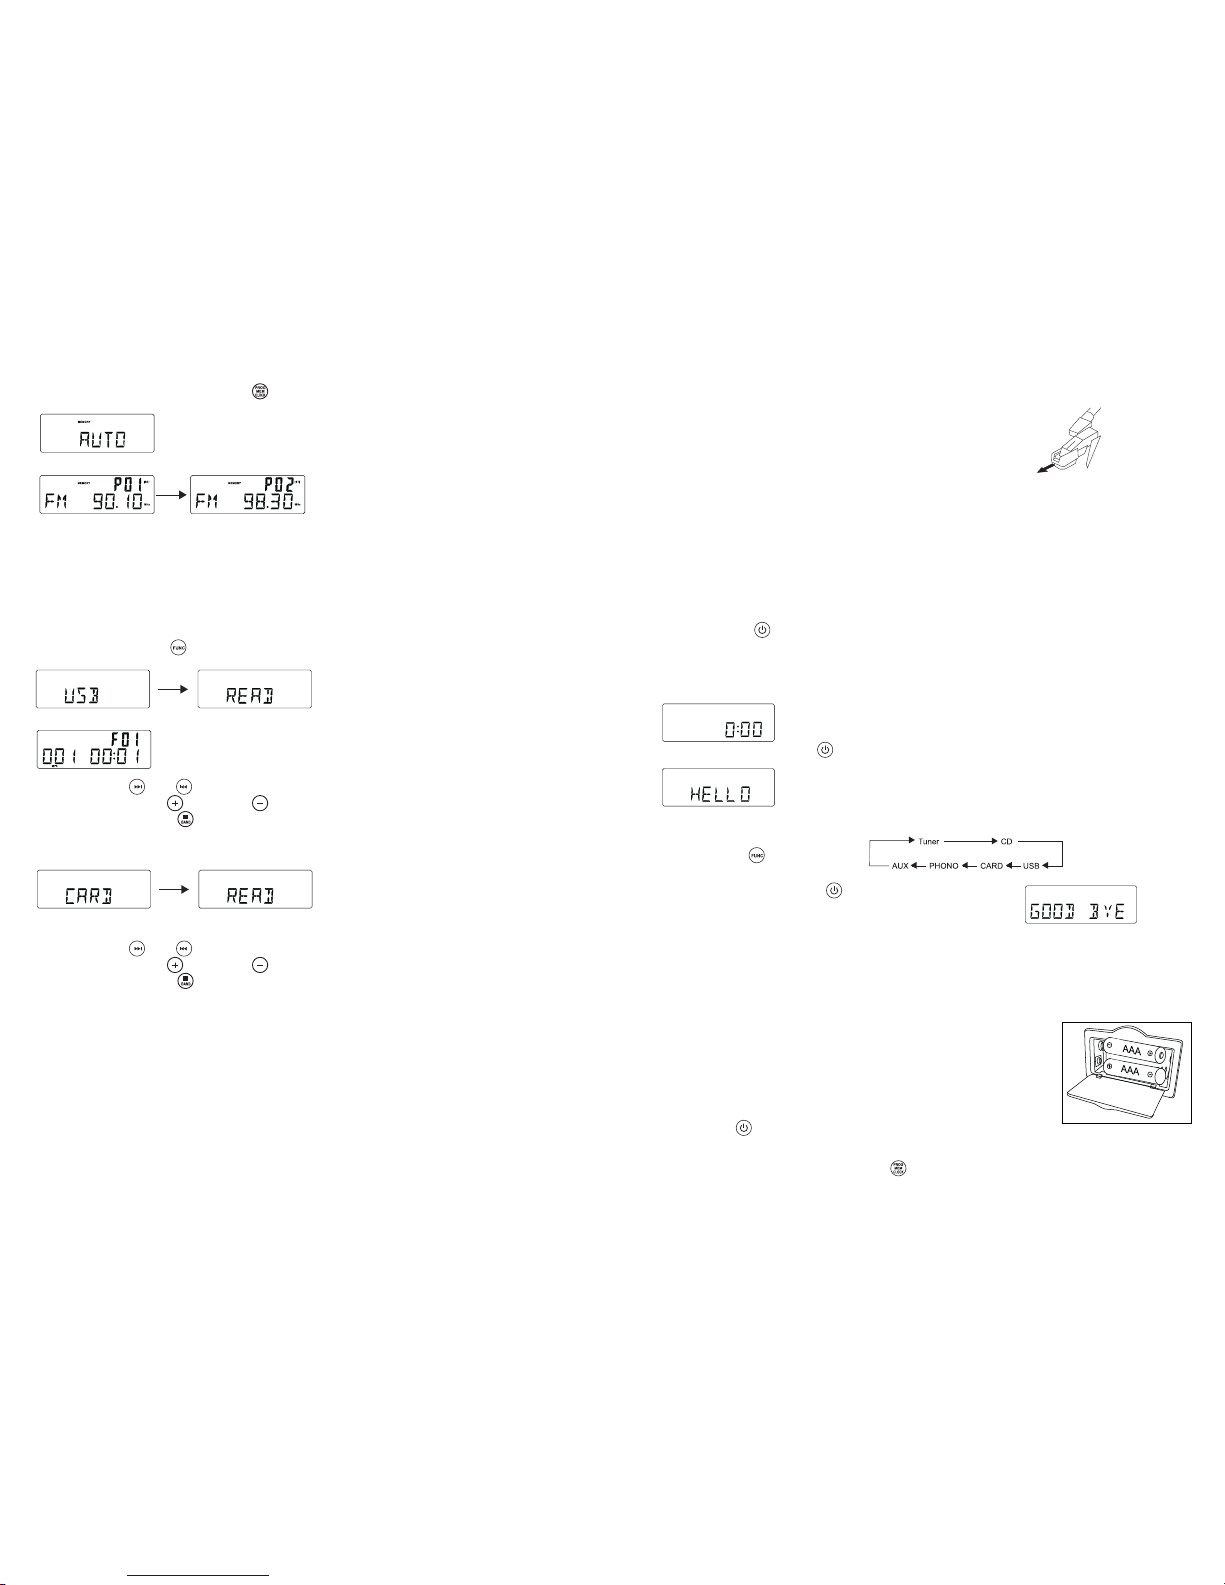
1. Premere e tenere premuto il tasto
PROGRAM /
fino a quando appare Auto
- Il simbolo memory inizierà a lampeggiare
- Le stazioni radio disponibili sono memorizzate
- Terminata la memorizzazione automatica, lunità si sintonizzerà sullultima stazione radio memorizzata
ANTENNA
Antenna: per la ricezione della banda FM lunità è dotata di unantenna FM a filo. Muovere lantenna fino a quando la ricezione
è buona e senza interferenze. Per la ricezione della banda AM, lunità è dotata di unantenna direzionale in ferrite. Ruotarla
fino ad ottenere la migliore ricezione. Non collegare lantenna esterna FM ad unaltra antenna esterna.
UTILIZZARE USB & SCHEDA SD
Utilizzare un dispositivo USB:
1. Premere il tasto
FUNCTION /
per impostare lunità in modalità USB.
2. Il dispositivo USB viene caricato. Viene visualizzato READ mentre il sistema legge il contenuto del dispositivo USB.
3. Il brano nr. 1 o la cartella nr. 1 saranno riprodotti automaticamente una volta letto tutto il contenuto del dispositivo USB.
4. Premere il tasto
FF / o FB /
una o più volte fino a visualizzare il brano desiderato.
5. Premere il tasto
PRESET + / o PRESET /
per selezionare lalbum desiderato.
6. Premere il tasto
STOP/BAND /
per interrompere la riproduzione.
Utilizzare una SCHEDA SD:
1. Premere il tasto FUNCTION per impostare lunità in modalità CARD.
2. Inserire la Scheda-SD nellalloggio. Viene visualizzato READ mentre il sistema legge il contenuto della Scheda-SD.
3. Il brano nr. 1 o la cartella nr. 1 saranno riprodotti automaticamente una volta letto tutto il contenuto della Scheda-SD.
4. Premere il tasto
FF / o FB /
una o più volte fino a visualizzare il numero del brano desiderato.
5. Premere il tasto
PRESET + / o PRESET /
per selezionare lalbum desiderato.
6. Premere il tasto
STOP/BAND /
per interrompere la riproduzione.
NOTE:
1) La porta USB non supporta la connessione con una prolunga USB.
2) Lunità non è progettata per essere collegato direttamente ad un computer.
3) Non si garantisce che tutti i dispositivi USB e tutte le Schede-SD funzionino correttamente.
IMPORTANTE:
Non scollegare il dispositivo USB in modalità USB, potrebbe danneggiarsi il dispositivo od il suo contenuto. Prima spegnere
o passare in unaltra modalità, poi scollegare il dispositivo USB.
Specifiche tecniche USB:
Interfaccia
- USB 2.0 Full speed, HOST (HUB USB non è supportata) Flash memory corrispondente
- Compatibile con Audio MPEG 1, 2, 2.5
- Compatibile con Layer 1, 2, 3
- Compatibile con Bit rate: 128 320 Kbps
- Ramo cartelle : 8 livelli
- Numero di brani / titoli max 999
GETTING STARTED
UNPACKING
1 Remove packing materials from unit.
Note: Save all packing materials
2 Remote control is located in the outside of the Styrofoam packaging
3 Remove plastic bag covering radio and remote control.
4 Untie antenna wire on back of radio.
5 Remove Styrofoam shipping material from turntable.
6 Remove black tie-wrap from under the TONE ARM .
7 Remove white protective needle cover by gently pulling towards the front of the unit.
Remarks:
a) ESD remark: In case of malfunction due to electrostatic discharge, just reset the product
(reconnect of power source may be required) to resume normal operation.
b) Electrical Fast Transient (Burst) Remark (I2): In case of malfunction due to electrical fast transient (Burst), just reset
the product. (reconnect of power source may be required) to resume normal operation.
SET UP
1 Untie the wire on the AC power cord .
2 Press the MAIN POWER button on the back of the unit to switch the main power on.
3 Press the POWER /
button on the front of the unit to switch the unit to Standby mode.
4 Untie the FM antenna and allow it to hang down in a straight line for optimum FM reception. If you have trouble tuning
in an FM station, move the external FM antenna for best reception. Do not connect FM antenna to outside antenna.
POWER UP YOUR UNIT
Connect the AC power cord to the wall socket. This system switches to Standby mode automatically and LCD would shown
as below
To switch the unit on, press POWER /
LCD backlight will be turned on.
STANDBY LED is turned off and displayed as below.
BASIC OPERATION
Function select
1. Press FUNCTION / to select among:
2. When the set is on, press POWER /
to switch the unit off. LCD
backlight will be turned off and shown messageGOOD BYE for 2 seconds,
then the STANDBY LED is turned on.
Note: In the standby mode, the tone, sound settings, tuner presets and the volume level (up to a maximum volume level
of 30) will be stored in the units memory.
BATTERY BACK UP
The battery backup system to maintain your clock and alarm settings during a power outage. In the event of a power outage,
the battery backup will save your time and alarm settings until power is restored. To utilize the battery backup, you must
install two AAA batteries. The battery backup will not operate unless batteries are installed. To install batteries, follow the
instructions below.
1 Remove the Battery Compartment cover from the back of the unit.
2 Install two new AAA batteries in the correct position as shown inside the battery cover.
3 Reinstall the Battery Compartment cover.
NOTE:
Do not use different batteries
Do not mix old and new batteries
Setting the clock
After connecting the system to power supply, set the clock first.
1. Press POWER /
to switch the unit to Standby mode
- The display shows the time
- 0:00 flashes by default if you have not set the clock
2 In the Standby mode, press and hold PROGRAM /
over 1 second.
- The hours digit starts flashing
5
20
Page 5
IMPORTANT SAFEGUARDS FOR AUDIO PRODUCTS
PLEASE READ CAREFULLY THE FOLLOWING IMPORTANT SAFEGUARDS THAT ARE APPLICABLE TO
YOUR EQUIPMENT.
1. Read Instructions - All the safety and operating instructions should be read before the
appliance is operated.
2. Retain Instructions - The safety and operating instructions should be retained for future
reference.
3. Heed Warnings - All warnings on the appliance and in the operating instructions should be
adhered to.
4. Follow Instructions - All operating and use instructions should be followed.
5. Water and Moisture - The appliance should not be used near
water-for example, near a bathtub, washbowl, kitchen sink, laundry tub,
in a wet basement, or near a swimming pool and the like.
6. Carts and Stands - The appliance should be used only with a cart or stand
that is recommended by the manufacturer.
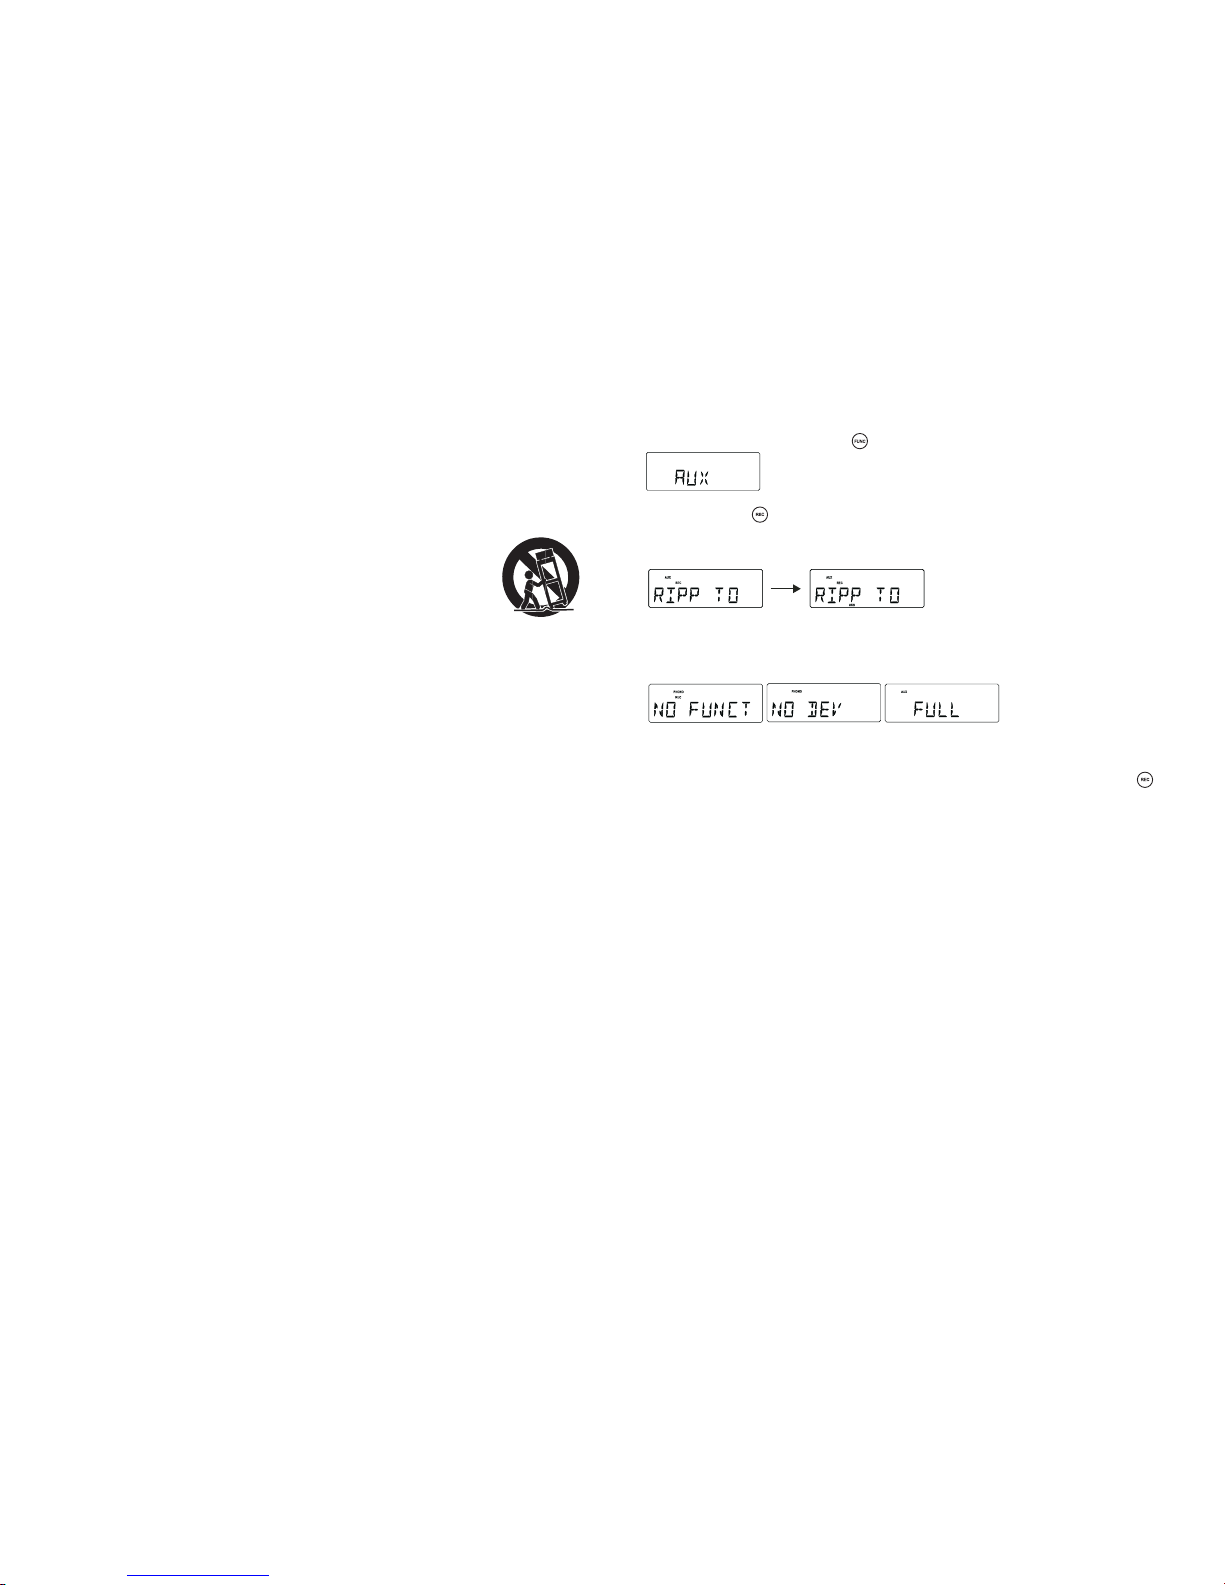
6A.An appliance and cart combination should be moved with care. Quick stops, excessive force,
and uneven surfaces may cause the appliance and cart combination to overturn.
7. Wall or Ceiling Mounting - The appliance should be mounted to a wall or ceiling only as
recommended by the manufacturer.
8. Ventilation - The appliance should be situated so that its location or position does not interfere
with-its proper ventilation. For example, the appliance should not be situated on a bed, sofa,
rug, or similar surface that may block the ventilation openings; or, placed in a built-in installation,
such as a bookcase or cabinet that may impede the flow of air through the ventilation openings.
9. Heat - The appliance should be situated away from heat sources such as radiators, heat
registers, stoves, or other appliances (including amplifiers) that produce heat.
10.Power Sources - The appliance should be connected to a power supply only of the type
described in the operating instructions or as marked on the appliance.
11.Grounding or Polarization - Precautions should be taken so that the grounding or polarization
means of an appliance is not impeded.
12.Power - Cord Protection - Power-supply cords should be routed so that they are not likely
to be walked on or pinched by items placed upon or against them, paying particular attention
to cords at plugs, and the point where they exit from the appliance.
13.Cleaning - The appliance should be cleaned only as recommended by the manufacturer.
14.This product is designed for use with the antenna attached and should not be connected to
any other external antennas.
15.Non-use Periods - The power cord of the appliance should be unplugged from the outlet
when left unused for a long period of time.
16.Object and Liquid Entry - Care should be taken so objects do not fall and liquids are not
spilled into the enclosure through openings
17.Damage Requiring Service - The appliance should be serviced by qualified service personnel
when:
A. The power-supply cord of the plug has been damaged; or
B. Objects have fallen, or liquid has been spilled into the appliance; or
C. The appliance has been exposed to rain; or
D. The appliance does not appear to operate normally or exhibits a marked change
inperformance; or
E. The appliance has been dropped, or the enclosure damaged.
18.Servicing - The user should not attempt to service the appliance beyond that described in
the operating instructions. All other servicing should be referred to qualified service personnel.
23
2
Da AUX a SD/USB
Il sistema è in grado di convertire il segnale audio proveniente da AUX in formato MP3 e memorizzarlo in un dispositivo USB
o Scheda-SD (di default su USB se entrambi i dispositivi sono rilevati)
1. Premere una o più volte il tasto
FUNCTION /
per selezionare AUX.
2. Premere il tasto
REC /
per iniziare la registrazione, il sistema leggerà automaticamente il contenuto del dispositivo
USB/Scheda-SD e creerà una cartella per memorizzare il brano MP3.
3. Verranno visualizzati il simbolo REC ed il messaggio RIPP TO, il simbolo AUX inizierà a lampeggiare.
4. Il simbolo del dispositivo di destinazione, USB o CARD, inizierà a lampeggiare quando inizia la registrazione.
5. Premere il tasto STOP/BAND per terminare la registrazione da AUX
Nota: Verrà visualizzato il messaggio NO FUNCT se si preme qualsiasi tasto durante la registrazione da AUX. Verrà
visualizzato il messaggio NO DEV se non vengono rilevati né dispositivi USB né Schede-SD. Verrà visualizzato il
messaggio FULL se non cè abbastanza memoria disponibile nel dispositivo selezionato.
Cancellare brani MP3
Il sistema è in grado di cancellare MP3 precedentemente registrati o file esistenti.
1. In modalità riproduzione USB o Scheda-SD, premere e tenere premuto per 2 secondi il tasto
REC/ERASE /
, il brano
in riproduzione sarà fermato e cancellato.
2. Verrà visualizzato il messaggio delete
ALTOPARLANTI ESTERNI OPZIONALI
1. Con la vostra nuova radio, avete la possibilità di collegare degli altoparlanti esterni.
2. Le prese per gli altoparlanti esterni è posizionata sul retro della radio.
A fianco delle prese per gli altoparlanti cè un interruttore con scritto Int./Ext.
Quando utilizzate altoparlanti esterni, linterruttore deve essere nella posizione EXT. In questo modo si disattivano gli
altoparlanti interni e la potenza di uscita viene indirizzata agli altoparlanti esterni.
3. Se si decide di non utilizzare altoparlanti esterni, assicurarsi che linterruttore sia nella posizione INT.
ILLUMINAZIONE A LED
Lilluminazione frontale a led (7 colori che si alternano) è regolata dall interruttore posto sul retro dellunità (LIGHTING SWITCH
(RELEASE/HOLD)).
Page 6
CONTROL LOCATORS
AUX IN JACK
MAIN POWER
LIGHTING SWITCH
(RELEASE/HOLD)
EXTERNAL
SPEAKER JACK
SPEAKER
INT. / EXT.
SWITCH
12V OUTPUT JACK
EXTERNAL
ANTENNA
AC POWER CORD
EQ MUTE
OPEN/
CLOSE
PROG
MEM
01
2
3
4
5
678
TIMER
9
ID3
MONO
STEREO
REPEAT
CLOCK
RANDOM
BAND
PRESET
REC
VOL
SLEEP
FUNC
POWER / STAND BY
EQ
PRESET +
PRESET -
PLAY / PAUSE
SKIP BACKWARD -
RANDOM
ID3
STOP / BAND
MONO/STEREO
TIMER
PROGRAM
SKIP FORWARD / +
VOLUME -
FUNCTION
VOLUME +
SLEEP
MUTE
CD OPEN / CLOSE
REC
REPEAT
0-9
BATTERY BACKUP
4
GIRADISCHI
OPERAZIONI INIZIALI
1. Rimuovere la fascetta nera di protezione e toglierla delicatamente dal braccio.
2. Rimuovere il cappuccio bianco di protezione della puntina tirando delicatamente in avanti.
3. Liberare il braccio e tenere premuta la molla spingendo con delicatezza verso destra. Questa operazione sbloccherà il
braccio dal suo alloggio.
Ribloccare quando si sposta lunità in un altro luogo.
UTILIZZARE IL GIRADISCHI
1. Premere il tasto
FUNCTION /
per impostare lunità in modalità PHONO.
2. Impostare linterruttore controllo velocità (SPEED CONTROL SWITCH) sulla corretta velocità (33 1/3, 45 o 78 giri) per il
disco selezionato.
3. Tirare il braccio leggermente verso destra fino a sentire un "click". Il giradischi si avvia.
4. Posizionare il braccio sul disco nella posizione dove si vuole inizi la riproduzione.
5. Alla fine del disco il braccio si arresta automaticamente. Il braccio deve essere posizionato nel suo alloggio a mano.
ACCESSORI FORNITI: Adattatore per dischi 45 giri (se richiesto)
Per riprodurre un disco 45 giri, prendere ladattatore con il pollice e lindice e tirarlo verso lalto.
Posizionarlo sul perno. Adesso si può mettere il disco sul giradischi.
UTILIZZARE LA PRESA AURICOLARI
Ascolto Con auricolari / cuffie (non inclusi)
UTILIZZARE IL LETTORE CD
Riprodurre un CD
1. Premere il tasto
FUNCTION /
per impostare lunità in modalità CD.
2. Premere il tasto
CD OPEN / CLOSE /
per aprire lo sportello CD
3. Inserire un disco con il lato critto vero lalto. Premere ancora il tasto
CD OPEN / CLOSE /
per chiudere lo sportello, il
display visualizzerà READ mentre il lettore legge il contenuto del disco.
4. Il brano nr. 1 sarà riprodotto automaticamente una volta letto tutto il contenuto del disco.
5. Premere una volta o ripetutamente il tasto
FF / o FB /
fino a quando non si visualizza sul display il numero del brano
desiderato.
Riprodurre un CD-MP3
1. Inserire il CD-MP3. Premere ancora il tasto
CD OPEN / CLOSE /
per chiudere lo sportello, il display visualizzerà READ
mentre il lettore legge il contenuto del disco.
2. Il brano nr. 1 o la cartella nr. 1 saranno riprodotti automaticamente una volta letto tutto il contenuto della CD-MP3.
3. Premere una volta o ripetutamente il tasto
FF / o FB /
fino a quando non si visualizza sul display il numero del
brano desiderato.
4. Premere il tasto
PRESET + / o PRESET /
per selezionare lalbum desiderato.
5. Premere il tasto
STOP/BAND /
per interrompere la riproduzione.
CUFFIE
Gli altoparlanti sono silenziati.
21
Page 7
Setting the timer
The unit can be used as an alarm clock, whereby the selected source (CD, TUNER, USB, SD CARD OR PHONO) to start
playback at a preset time. Make sure the clock is set before using the timer.
1. In the standby mode, press and hold TIMER /
on the remote over 1 second, icon " " and message TURN ON
start flashing. Press TIMER /
again on the remote to begin the SYSTEM POWER ON timer setting.
2. Press FF /
or FB / repeatedly to set hours.
3. Press TIMER /
on the remote to enter minutes setting mode.
4. Press FF /
or FB / repeatedly to set minutes.
5. Press TIMER /
on the remote again to begin SYSTEM POWER OFF timer setting.
Icon "
" and message TURN OFF start flashing. Press TIMER / on the remote again to begin timer setting.
6. Press FF /
or FB / repeatedly to set hours.
7. Press TIMER /
on the remote to enter minutes setting mode.
8. Press FF /
or FB / repeatedly to set minutes.
9. Press TIMER /
on the remote again to begin setting the source from wake up.
Default at TUNER mode. Message TUNER start flashing.
10. Press FUNCTION /
to select wake up source.
The unit will be waked up from last tuned station if TUNER mode is selected.
11. Press TIMER /
on the remote again to complete timer on/off setting. Icon " " will keep display on LCD if timer is
set.
Note: The wake up sound level will be increased gently to preset volume level.
12. Press TIMER /
on the remote control to turn on/off the timer. The icon " " will be on/off respectively.
Controllo volume
Premere il tasto
VOLUME UP / / VOLUME DOWN /
sul telecomando per regolare il volume.
MUTE
Potete spegnere temporaneamente il volume senza spegnere lunità.
1. Premere il tasto
MUTE /
sul telecomando per spegnere il volume, la riproduzione continuerà senza suono.
2. Per riattivare il suono, potete:
- premere ancora il tasto
MUTE /
;
- regolare il livello del volume;
- cambiare fonte
EQUALIZZATORE
Premere il tasto EQ sul telecomando per selezionare la modalità di equalizzatore desiderata.
5 modalità pre impostate:
RADIO
Sintonizzazione AM/FM
1. Premere il tasto
FUNCTION /
per mettere lunità in modalità TUNER.
2. Premere ripetutamente il tasto
STOP/BAND /
per selezione la desiderata banda di ricezione tra FM e AM
3. Sintonizzazione automatica Premere e tenere premuto il tasto
FF / o FB /
fino a quando lunità non inizia a scorrere
automaticamente le stazioni radio e si sintonizza su una stazione con un buon segnale. Se la stazione radio si riceve in
modalità stereo viene visualizzato il simbolo (ST). Ripetere, se necessario, quanto descritto al punto 3 fino alla sintonizzazione
della stazione radio desiderata.
4. Sintonizzazione manuale Premere brevemente e ripetutamente il tasto
FF / o FB /
fino alla sintonizzazione di una
stazione radio.
Memorizzare stazioni radio
Potete memorizzare fino a 40 stazioni radio (FM e AM), manualmente o automaticamente (Autostore)
1. Sintonizzate la stazione radio desiderata
2. Premere il tasto
PROGRAM /
per attivare la memorizzazione, il simbolo MEMORY e P01 inizieranno a lampeggiare.
3. Premere il tasto
PRESET + / o PRESET /
per assegnare un numero da 1 a 20 alla stazione radio.
4. Premere il tasto
PROGRAM /
per confermare, il display visualizzerà il numero assegnato, la banda di ricezione e la
frequenza della stazione radio memorizzata.
5. Ripetere quanto descritto dai punti 1 a 4 per memorizzare altre stazioni radio. Premere una o più volte il tasto
PRESET + / o PRESET /
fino a visualizzare la stazione radio memorizzata desiderata.
Per ascoltare una stazione radio memorizzata
Premere una o più volte il tasto
PRESET + / o PRESET /
fino a visualizzare la stazione radio memorizzata desiderata.
Memorizzazione automatica delle stazioni radio. Questa funzione cancellerà le stazioni radio precedentemente sintonizzate.
E visualizzato il livello di volume attuale
(compreso tra 00 e 40)
19
3. Press the FF / o FB / repeatedly to set the hours.
4. Press PROGRAM /
again to confirm.
The minutes digit starts flashing
5. Hold down FF /
o FB / repeatedly to set the minutes.
6. Press PROGRAM /
again to confirm.
The minutes digit stop flashing, the clock begins to run.
7. Press PROGRAM /
to select between 12 and 24 hours, shown as below
SLEEP
You can set a certain period of time after which the set will switch to standby.
On the remote control, press SLEEP /
repeatedly to select the desired time period options (in minutes):
- Display shows in sequence: SLEEP 90, 80, 70, 60, 50, 40, 30, 20, 10
- Display shows the selected option briefly and returns to its previous status.
To deactivate the sleep timer, press SLEEP /
again to 00 or Press POWER / to switch the unit into standby mode.
6
Page 8

3. Premere ripetutamente il tasto
FF / o FB /
per impostare le ore.
4. Premere il tasto
PROGRAM /
per confermare.
I minuti inizieranno a lampeggiare
5. Premere ripetutamente il tasto
FF / o FB /
per impostare i minuti.
6. Premere il tasto
PROGRAM /
per confermare.
I minuti non lampeggiano più e lora è impostata.
7. Premere il tasto
PROGRAM /
per selezionare tra 12 e 24 ore, visualizzato come segue
Impostare il timer
Lunità può essere utilizzata come sveglia: la fonte selezionata (CD, RADIO, USB, CARD SD O GIRADISCHI) inizierà la
riproduzione allora prestabilita. Assicurarsi che lora sia impostata prima di utilizzare la funzione timer.
1. In modalità standby, premere e tenere premuto il tasto
TIMER /
sul telecomando per più di 1 secondo, il simbolo
" "
ed il messaggio TURN ON inizieranno a lampeggiare. Premere ancora il tasto
TIMER /
sul telecomando per impostare
l accensione della funzione timer (SYSTEM POWER ON).
2. Premere ripetutamente il tasto
FF / o FB /
per impostare le ore.
3. Premere il tasto
TIMER /
sul telecomando per entrare nella modalità imposta minuti.
4. Premere ripetutamente il tasto
FF / o FB /
FF o FB per impostare i minuti.
5. Premere il tasto
TIMER /
sul telecomando per impostare lo spegnimento della funzione timer
(SYSTEM POWER OFF). Il simbolo
" "
ed il messaggio TURN OFF inizieranno a lampeggiare. Premere ancora il
tasto TIMER sul telecomando per iniziare limpostazione.
6. Premere ripetutamente il tasto
FF / o FB /
per impostare le ore.
7. Premere il tasto
TIMER /
sul telecomando per entrare nella modalità imposta minuti.
8. Premere ripetutamente il tasto
FF / o FB /
per impostare i minuti.
9. Premere ancora il tasto
TIMER /
sul telecomando per impostare la fonte che inizierà la riproduzione allora stabilita.
E pre impostata la modalità RADIO. Il messaggio TUNER inizierà a lampeggiare.
10. Premere il tasto
FUNCTION /
per selezionare la fonte.
Lunità inizierà a riprodurre lultima stazione radio ascoltata se viene selezionata la fonte RADIO.
11. Premere ancora il tasto
TIMER /
sul telecomando per completare le impostazioni del timer di accensione/spegnimento.
Il simbolo
" "
verrà visualizzato sul display se il timer è impostato.
Nota: Il livello del volume della sveglia sarà leggermente più alto di quello impostato.
12. Premere il tasto
TIMER /
sul telecomando per attivare/disattivare la funzione timer. Il simbolo " " apparirà/sparirà
rispettivamente.
SLEEP
Potete impostare un intervallo di tempo trascorso il quale lunità si metterà in modalità standby.
Premere ripetutamente il tasto
SLEEP /
sul telecomando per selezione le diverse opzioni di intervallo di tempo (in minuti):
- Il display visualizzerà in sequenza: SLEEP 90, 80, 70, 60, 50, 40, 30, 20, 10
- Il display visualizzerà brevemente lopzione selezionata è tornerà nella modalità precedente.
Per disattivare a funzione sleep, premere ripetutamente il tasto
SLEEP /
fino a 00 o premere il tasto
POWER /
per
posizionare lunità in modalità standby.
18
RADIO
AM/FM Tuning
1. Press the FUNCTION / to set the unit to TUNER mode.
2. Press STOP/BAND /
repeatedly to select your desired waveband. FM or AM
3. Auto Tuning Press and hold FF /
or FB / until frequency begins to scroll the radio automatically tunes to a
station with sufficient reception. If a station in received in stereo, (ST) is shown. Repeat step 3 if necessary until you
find the desired station.
4. Manual Tuning Press FF /
or FB / briefly and repeatedly until found a station.
Programming radio stations
You can store up to a total of 40 radio stations (FM and AM) in the memory, manually or automatically (Autostore)
1. Tune to your desired station
2. Press PROGRAM /
to activate programming, icon MEMORY and P01 will start flashing.
3. Press PRESET + /
or PRESET / to allocate a number from 1 to 20 stations.
4. Press PROGRAM /
to confirm, display shows the preset number waveband and the frequency of the preset station.
5. Repeat steps 1-4 to store other stations to listen to a preset station. Press PRESET + /
or PRESET / once
or more until the desired preset station in displayed.
To listen to a preset station
Press PRESET + / or PRESET / once or more until the desired preset station in displayed.
Automatic programming radio stations Automatic programming will station preset 1, from this preset number upwards,
former programmed tuner stations will be erased.
Volume control
Press VOLUME UP / / VOLUME DOWN / on the remote control to adjust the volume.
MUTE
You can temporarily switch off the sound without switching off the unit.
1. Press MUTE /
on the remote control to switch off the sound, playback continues without sound.
2. To switch on the sound , you can:
- press MUTE /
again;
- adjust the volume controls;
- change source
EQ
Press EQ / on the remote control to select desired EQ mode.
5 modes preset EQ:
7
Page 9
OPERAZIONI INIZIALI
DISIMBALLAGGIO
1 Togliere lunità dalla scatola.
Nota: Conservare la scatola ed il suo contenuto
2 Il telecomando è posizionato sulla parte esterna del polistirolo
3 Togliere la protezione di plastica che ricopre la radio ed il telecomando.
4 Slegare il cavo dellantenna situato sul retro della radio.
5 Togliere il polistirolo dal piatto girevole.
6 Togliere la fascetta nera sotto il braccio .
7 Rimuovere il cappuccio bianco di protezione della puntina tirando delicatamente in avanti.
Note:
a) In caso di malfunzionamento dovuto a scariche elettriche, resettare lunità scollegando il cavo di alimentazione dalla presa
di corrente. Lunità riprenderà a funzionare normalmente.
b) In caso di malfunzionamento dovuto a sbalzi di tensione, resettare lunità scollegando il cavo di alimentazione dalla presa
di corrente. Lunità riprenderà a funzionare normalmente.
SET UP
1 Slegare il cavo di alimentazione .
2 Premere il tasto MAIN POWER posizionato sul retro dellunità.
3 Premere il tasto
POWER /
sul davanti dellunità. Lunità è in modalità standby.
4 Slegare il filo dellantenna FM e farlo cadere perpendicolarmente verso il basso per unottima ricezione. Muovere con
delicatezza il filo se si hanno problemi di ricezione delle stazioni radio FM. Non collegare lantenna FM ad unantenna esterna.
ACCENDERE LUNITÀ
Collegare il cavo di alimentazione alla presa di corrente a muro. Lunità si posizionerà automaticamente in modalità standby
ed il display visualizzerà:
Per accendere lunità premere il tasto
POWER /
. Si accende la retroilluminazione del LCD ed il display visualizzerà:
.
OPERAZIONI DI BASE
Selezionare una funzione
1. Premere il tasto
FUNCTION /
per selezionare in successione:
2. Con lunità accesa, premere il tasto
POWER /
per spegnere. Si spegne la
retroilluminazione del LCD ed il display visualizzerà GOOD BYE per 2 secondi:
Si accenderà il led STANDBY.
Nota: In modalità standby, verranno memorizzati il tono, le impostazioni audio, le imp
ostazioni radio ed il livello del volume (fino ad un livello massimo di volume pari a 30) impostati al momento dello spegnimento.
BATTERIA DI BACK UP
La batteria di back up permette di mantenere tutte le impostazioni dellorologio (ora ed allarmi) in caso di mancanza di corrente,
salvandole fino al ripristino della corrente. Per utilizzare la batteria di back up bisogna inserire due pile AAA. In caso contrario
la batteria di back up non entrerà in funzione. Per inserire le batterie operare come descritto di seguito.
1 Togliere il coperchio del vano batteria posizionato sul retro dellunità.
2 Inserire due batterie AAA nuove nella posizione corretta, come indicato allinterno il coperchio del vano batteria.
3 Rimettere il coperchio del vano batteria.
NOTA:
Non utilizzare batterie differenti
Non utilizzare insieme batterie nuove ed usate.
IMPOSTARE LOROLOGIO
Collegato lunità alla corrente, per prima cosa impostare lorologio.
1. Premere il tasto
POWER /
per mettere lunità in modalità standby.
- Il display visualizza lora
- se lorologio non è impostato lampeggia 0:00
2 In modalità Standby, premere e tenere premuto per più di 1 secondo il tasto
PROGRAM /
.
- Le ore inizieranno a lampeggiare
AUX
RADIO
CD
USBCARDGIRADISCHI
17
1. Press and hold PROGRAM / button until Auto appears
- Icon memory will start flashing
- Available stations are programmed
- After all stations are stored, the last preset station will then be played
ANTENNA
Antenna: for FM reception, the unit is provided with a FM WIRE ANTENNA, move the wire until the reception is clear
and with no interferences. For AM reception, the unit is provided with a directional build-in ferrite antenna. Rotate the set
to find the position in which the best reception is obtained. Do not connect the EXTERNAL FM ANTENNA to any outside
antenna.
USB & SD-CARD OPERATION
USB operation:
1. Press the FUNCTION / to set the unit to USB mode.
2. Plug-in USB mass storage device. READ is displayed as the system scans the contents of USB device.
3. Track no. 1 of root folder (Folder 1) will be playback automatically after finish reading USB device contents.
4. Press FF / or FB / once or repeatedly until the desired track number appears in display.
5. Press PRESET + /
or PRESET / to select desired album.
6. Press STOP/BAND /
to stop playback.
SD-Card operation:
1. Press the FUNCTION / to set the unit to CARD mode.
2. Insert SD-Card into the card slot. READ is displayed as the system scans the contents of SD card.
3. Track no. 1 of root folder (Folder 1) will be playback automatically after finish reading SD card contents.
4. Press FF /
or FB / once or repeatedly until the desired track number appears in display.
5. Press PRESET + /
or PRESET / to select desired album.
6. Press STOP/BAND /
to stop playback.
Remarks:
1) USB connector does not support connection with USB extension cable .
2) This unit is not designed for communication with computer directly.
3) It is not guarantee that all USB memory devices and SD cards will work on this audio system
IMPORTANT:
Do not disconnect the USB device during USB mode, as this may damage the external device or its files. Please power
off first or press another Mode before safely disconnecting the USB device.
USB Specification:
Interface
- USB 2.0 Full speed, HOST (USB HUB is not supported) Corresponding Flash memory
- Compatible with MPEG Audio 1, 2, 2.5
- Compatible with Layer 1, 2, 3
- Compatible with Bit rate: 128 320 Kbps
- Subfolder nest : 8 levels
- Number of track / titles max 999
- Support ID3 tag V2.0
8
Page 10

BATTERIA DI BACKUP
ANTENNA
ESTENA
CAVO DI ALIMENTAZIONE
EQ MUTE
OPEN/
CLOSE
PROG
MEM
01
2
3
4
5
678
TIMER
9
ID3
MONO
STEREO
REPEAT
CLOCK
RANDOM
BAND
PRESET
REC
VOL
SLEEP
FUNC
TASTO POWER / STAND BY
TASTO EQ
TASTO PRESET +
TASTO PRESET
-
TASTO PLAY / PAUSE
TASTO
SALTA INDIETRO -
TASTO RANDOM
TASTO ID3
TASTO STOP / BAND
TASTO
MONO/STEREO
TASTO TIMER
TASTO PROGRAM
TASTO
SALTA AVANTI / +
TASTO VOLUME -
TASTO FUNCTION
TASTO VOLUME +
TASTO SLEEP
TASTO MUTE
TASTO APRI/CHIUDI
SPORTELLO CD
REC
TASTO REPEAT
TASTI NUMERICI 0-9
PRESA AUX IN
INTERRUTTORE PRINCIPALE (MAIN POWER)
INTERRUTTORE ILLUMINAZIONE
(RILASCIA/PREMI)
PRESA ALTOPARLANTE ESTERNO
INTERRUTTORE ALTOPARLANTE INT. / EST.
PRESA USCITA12V
DISPOSIZIONE COMANDI
16
TURNTABLE
PREPARING TO USE THE TURNTABLE
1. Remove black tie-wrap by untwisting and gently sliding out from TONE ARM .
2. Remove white protective needle cover by gently pulling towards front of unit.
3. Release TONE ARM and hold-down clip by gently pushing to the right. This will unlock tone arm from its ARM REST.
Re-lock the hold-down clip when moving the unit to another location.
TURNTABLE OPERATION
1. Press the FUNCTION / to set the unit to PHONO mode.
2. Set the SPEED CONTROL SWITCH to the correct speed (33 1/3, 45 or 78 rpm) for the selected record.
3. Pull the TONE ARM slightly to the right side until hear the "click" sound to activate the turntable.
4. Move the tone arm over the record and lower it to the point you want the record to start.
5. At the end of the record, the TONE ARM will stop automatically. You must return it to the TONE ARM REST by hand.
ACCESSORY SUPPLIED: Adaptor for 45 rpm records
(if required)
To play a 45 rpm record, remove the adaptor by placing thumb & forefinger in recesses
and pulling it upwards. Then placing it on the SPINDLE. The record can then be placed on the turntable.
EARPHONE JACK OPERATION
Listening through Earphones / Headphones (not included)
CD PLAYER
Playing a CD
1. Press the FUNCTION / to set the unit to CD mode.
2. Press CD OPEN / CLOSE /
to open the CD compartment
3. Insert a disc with the printed side facing up. Press CD OPEN / CLOSE /
. again to close the compartment, READ
is displayed as the CD player scans the contents of a disc.
4. Track no. 1 will be playback automatically after finish the reading CD disc contents.
5. Press FF /
or FB / once or repeatedly until the desired track number appears in display.
6. Press STOP/BAND /
to stop playback.
CD-MP3 disc playback
1. Insert CD-MP3 format disc. Press CD OPEN / CLOSE / again to close the compartment. READ is displayed as the
CD player scans the contents of a disc.
2. Track no. 1 of root folder (Folder 1) will be playback automatically after finish reading CD-MP3 disc contents.
3. Press FF /
or FB / once or repeatedly until the desired track number appears in display.
4. Press PRESET + /
or PRESET / to select desired album.
5. Press STOP/BAND /
to stop playback.
9
Page 11
ILLUMINAZIONE
PRESET +
PRESET
INDICATORE
STAND BY
TASTO
REC/ ERASE
TASTO
FUNCTION
PORTA
USB
TASTO PLAY/PAUSE
TASTO STOP/BAND
TASTO APRI/
CHIUDI SPORTELLO CD
REPEAT/ST
SPORTELLO CD
TASTO GIU / F.R.
(INDIETRO VELOCE PER CD-MP3)
TASTO
TIMER
TASTO
PROGRAM
SCHEDA SD
MANOPOLA VOLUME SU/GIU
DISPLAY
LCD
TASTO ACCENSIONE
TASTO SU/ F.F.
(AVANTI VELOCE
PER CD-MP3)
ALTOPARLANTE
PRESA AURICOLARE
33 45 78
BRACCIO
ALLOGGIO
BRACCIO
GIRADISCHI
PERNO
ADATTATORE PER DISCHI 45 GIRI
REGOLATORE DI VELOCITA
(33 1/3 , 45 , 78 GIRI)
DISPOSIZIONE COMANDI
SENSORE
15
PROGRAMMING TRACKS
You may store up to 20 tracks in the desired sequence.
1. In the stop position, press PROGRAM /
to start programming. Icon MEMORY and P0-01 start flashing.
2. Press FF /
or FB / once or repeatedly until the desired track number appears in the display. For MP3:
press PRESET + /
or PRESET / to select the desired album.
3. Press PROGRAM /
to confirm, display shown stored track no. and next store position.
4. Repeat step 2-3 to select and store all desired tracks. FULL is displayed if you attempt to program more than 20 tracks
5. Press PLAY/PAUSE /
to play the program.
Erasing the program
You can erase the contents of the memory by:
- once if in stop position, twice during playback;
- Press POWER /
- Select another sound source
- Open the CD door
RECORDING
From CD to SD/USB
The system is capable to convert whole CD disc to MP3 format and copy to USB mass storage device or SD card. And
also have the ability to copy one single MP3 track to and from on USB/SD card.
1. In CD playback mode, press REC /
to start ripping to USB/SD card (default USB if both device are detected),
playback will be stopped and skipped back to the beginning of current track, system will scan the contents of USB/SD
card and create folder to store MP3 track. Resume CD playback and start ripping from the moment. The corresponding
target device icon USB / CARD start flashing.
2. Press STOP/BAND /
to exit CD ripping.
MP3 copying
1. In CD-MP3, USB or SD card playback mode, press REC / to start MP3 copying from CD to USB/SD card, or USB
to SD card or vice versa. Playback will be stopped and system will scan the contents of USB/SD card and create
folder to store MP3 track.
2. icon REC displayed
3. Message COPY 01 will be displayed, the proportional copied percentage will be shown on the decimal number.
4. The target device icon USB or CARD start flashing, the decimal number will be increment from 01 as MP3 copying
starts, the process will stop as it reach 100
5. Current MP3 will be playback from beginning
From Phono to SD / USB
The system is capable to convert audio signal from PHONO input to MP3 format and store in USB mass storage device
or SD card (default USB if both devices are detected)
1. Press the FUNCTION /
to set the unit to PHONO mode.
2. Press REC /
to start ripping, the system will scan the contents of USB/SD card and create folder to store MP3
tracks.
3. Icon REC and message RIPP TO are displayed, icon PHONO start flashing.
4. The target device icon USB or CARD start flashing as ripping begins.
5. Press STOP/BAND /
to exit PHONO ripping
10
Page 12

IMPORTANTI AVVERTENZE PER PRODOTTI AUDIO
LEGGERE ATTENTAMENTE LE SEGUENTI IMPORTANTI AVVERTENZE APPLICABILI ALLA
VOSTRA UNITA
1. Leggere le istruzioni Tutte le istruzioni di sicurezza e di utilizzo devono essere lette prima
di utilizzare lunità.
2. Conservare le istruzioni Le istruzioni di sicurezza e di utilizzo devono essere conservate
per eventuali futuri riferimenti.
3. Rispettare le avvertenze Rispettare fedelmente tutte le avvertenze sullunità indicate nelle
istruzioni di utilizzo.
4. Seguire le istruzioni Seguire le istruzioni di uso e utilizzo dellunità.
5. Acqua e umidità Lunità non deve essere utilizzata vicino allacqua
(ad esempio vicino ad una vasca da bagno, un lavello, un lavandino da cucina,
vasche per il bucato, su pavimento bagnato) o vicino ad una piscina o simili.
6. Carrelli e Supporti Utilizzare solo carrelli e supporti consigliati dal produttore.
6A. Lunità ed il carrello devono essere spostati con cura. Brusche frenate, forza eccessiva o
superfici irregolari possono causare il rovesciamento dellunità e del carrello.
7. Ventilazione Lunità deve essere collocata in modo da permetterne la corretta ventilazione.
Non collocare lunità su un letto, un divano, un tappeto o altre superfici che possono ostruire
le bocche di aerazione. Non incassare lunità in una libreria o armadietto che impediscano il
corretto flusso daria.
8. Fonti di calore Lunità deve essere collocata lontano da fonti calore quali caloriferi, stufe
od altre apparecchiature(inclusi gli amplificatori) che producono calore.
9. Alimentazione Lunità deve essere collegata ad una presa elettrica del tipo indicato dal
manuale distruzioni od indicato sullunità stessa.
10. Messa a terra o Polarizzazione Accertarsi della corretta messa a terra o della polarizzazione
dellunità.
11. Protezione del cavo di alimentazione Accertarsi che il cavo di alimentazione sia posizionato
in modo da non essere calpestato o schiacciato da oggetti, prestando particolare attenzione
alla presa nel muro ed alluscita dallunità.
12. Pulizia Pulire lunità solo come consigliato dal produttore.
13. Lunità è progettata per essere utilizzato con la propria antenna e non deve essere collegato
ad antenne esterne.
14. Non utilizzo Scollegare il cavo di alimentazione quando non si utilizza lunità per lunghi
periodi.
15. Oggetti e liquidi Prestare attenzione che non cadano oggetti o liquidi sullunità.
16. Danni che richiedono assistenza Lunità deve essere riparata da personale qualificato
quando:
A. Il cavo di alimentazione è danneggiato; o
B. Sono caduti oggetti, o versati liquidi allinterno dellunità; o
C. Lunità è stato esposta alla pioggia; o
D. Lunità sembra non funzionare correttamente o evidenzia cambi di prestazione; o
E. Lapparecchio è caduto o è stato danneggiato.
17. Manutenzione Non riparare lunità da soli se non come indicato nel manuale distruzioni.
Per tutte le altre riparazioni rivolgersi a personale qualificato.
14
From AUX to SD/USB
The system is capable to convert audio signal from AUX input to MP3 format and store in USB mass storage device or
SD card (default USB if both devices are detected).
1. Press FUNCTION /
once or more to select AUX
2. Press REC /
to start ripping, the system will scan the contents of USB / SD card and create folder to store
MP3 track.
3. Icon REC and message RIPP TO are displayed, icon AUX start flashing.
4. The target device icon USB or CARD start flashing as ripping begins.
5. Press STOP/BAND /
to exit AUX ripping
Note: The message NO FUNCT will be displayed if any key pressed during AUX ripping process. The message
NO DEV will be shown if neither USB or SD card not detected. The message FULL will be displayed if not enough
memory in target device.
Delete MP3 tracks
The system support deleting previous recorded MP3 or existing files.
1. In USB or SD card playback mode, press and hold REC/ERASE /
for 2 seconds, current playback track is stopped
and will be deleted.
2. Message delete is displayed
OPTIONAL EXTERNAL SPEAKERS
1. With your new radio, you have the option of adding external speakers.
2. The speaker jacks for external speakers are located on the back of the radio.
Along with the speaker jacks is a switch labeled Int./Ext.
When using external speakers, this switch must be switched to the EXT. position. Doing this turns off the internal
speakers in the radio and redirects the power to the external speakers.
3. If you decide not to use the external speakers, be sure the switch is switch to INT.
LED LIGHTING
The 7-colour changing LED lights in the front tubes are controlled by the LIGHTING SWITCH (RELEASE/HOLD) on the
rear of the unit.
11
Page 13

AVVERTENZA:
PER PREVENIRE IL RISCHIO DI INCENDIO O DI SHOCK ELETTRICO, NON ESPORRE
LUNITÀ A PIOGGIA O UMIDITÀ. NON CERCARE DI APRIRE LA STRUTTURA,
ALLINTERNO È PRESENTE ALTO VOLTAGGIO PERICOLOSO. PER
LASSISTENZA/RIPARAZIONI RIVOLGERSI A PERSONALE QUALIFICATO
Il simbolo del fulmine con la
freccia allinterno di un triangolo
equilatero indica la presenza di
voltaggio pericoloso non
isolato allinterno del prodotto
che può avere abbastanza
potenza da causare rischio di
folgorazione
ATTENZIONE
ATTENZIONE: PER RIDURRE IL
RISCHIO DI SCHOCK ELETTRICO
NON RIMUOVERE LA COVER (O IL
PANNELLO POSTERIORE).
ALLINTERNO NON CI SONO PARTI
UTILIZZABILI. PER LA
MANUTENZIONE RIVOLGERSI A
PERSONALE QUALIFICATO.
Il punto esclamativo allinterno
di un triangolo equilatero
indica la presenza di
importanti istruzioni per il
funzionamento e la
manutenzione (riparazione)
nel manuale allegato allunità.
.
RISCHIO DI SHOCK ELETTRICO
NON APRIRE
Specifiche tecniche
Gamma di frequenza : AM 522 - 1620 kHz
: FM 87.5 - 108 MHz
Porta USB 2.0 : Full Speed 512MB - 4GB
(Supporta FAT16, FAT32)
Porta SD Card : Full Speed 512MB - 4GB
Alimentazione : AC 230V ~ 50Hz
Consumo : 85W
GIRADISCHI : Velocità 33/45/78
LETTORE CD :Riproduce dischi CD/DA-CDR-CDRW-MP3
RISPOSTA FREQUENZA :20Hz 20KHz
Antenne : Antenna esterna FM a filo
: Antenna AM in ferrite
Dimensioni altoparlante : 6 1/2 tipo dinamico x 2
Impedenza altoparlante : 4 Ohm
Potenza altoparlante : 40W
Dimensioni altoparlante : 2 1/2 tipo tweeter x2
Impedenza altoparlante : 8 Ohm
Potenza altoparlante : 10W
Potenza di uscita : 13W x 2 (RMS)
*Note : AM = MW
*IL DESIGN E LE SPECIFICHE TECNICHE POSSONO SUBIRE MODIFICHE SENZA PREAVVISO.
13
TROUBLESHOOTING
There is no power
1. Make sure radio is plugged in correctly.
2. Look at the STAND BY INDICATOR and check to see if it is red.
3. If the red light is on, press the POWER /
to turn the unit on.
There is no sound
1. Make sure the mute function is turned off.
2. Check that the volume is turned up by pressing VOLUME UP /
on the remote.
Note: Volume range on some units start at level 15 and ends at level 40.
3. Make sure INT./EXT. switch on back of radio is switched to INT. (Unless you are using external speakers,
in which case it should be on EXT. )
4. Check to make sure power is turned on.
CD does not play
1. Check to make sure CD is inserted correctly (label side facing up).
2. Check to see that surface of CD is clean.
3. Make sure function switch is set to CD mode.
USB - There is no music playing when PLAY/PAUSE (USB) is pressed.
1. Make sure the MP3 device/Flash Drive has stored music files.
2. The unit will only play Flash Drives up to 512MB 4GB
3. Reset USB by switching the unit Off or switching to another Mode.
4. Check if the file(s) is WMA file(s). The unit does not play WMA format, only MP3 format.
Remote not working
1. Replace battery.
2. Be sure to point the remote towards remote sensor when operating.
3. Remove obstacles in the path of the remote and radio so the remote signal has a straight path to the
radio.
Turntable will not work
1. Check it the AC Power source is connected.
2. Press the POWER /
(on front of unit or on RC) to turn the unit on, the STAND BY INDICATOR light
should be off.
3. Check that the unit is in PHONO Mode. Try moving the Tone Arm to the right until a click is heard.
No Sound is coming from the unit
1. The white protective needle cover has not been removed
2. The Volume is not turned up
The Tone Arm will not move
1. The black tie-wrap has not been removed from underneath Tone Arm.
2. Tone Arm hold down clip has not been released
Trademarks MPEG Layer-3 audio coding technology licensed from Fraunhofer IIS and Thomson
12
 Loading...