

Majella audio Velocity Voltage Controlled Amplifier Diy Manual

VVCA DIY MANUAL
Version 1.0
VVCA Velocity Voltage Controlled Amplifier
DIY Manual
©2018 Majella Audio
2
INTRODUCTION
1. The VVCA
The VVCA kit is a small DIY kit. This kit is
suitable for DIY’ers who have their basic
soldering skills under control. The kit is
designed to be as easy as possible.
2. Requirements
The Kit contains the PCB, Panel and all
electrical components to finish the module.
You will need (as a bear minimum): basic
soldering tools and a Digital multimeter to
finish this module.
Required tools:
• Soldering iron/station
• Soldering tin
• Wire cutter
• Multimeter
• Nut driver (plier, at own risk )
3. Bill of materials (BOM)
To start, it is good practice to check if the kit
is complete. We double check the kitbags,
but we are human (tududududuuuhduuh)
after all.

VVCA Velocity Voltage Controlled Amplifier
DIY Manual
©2018 Majella Audio
3
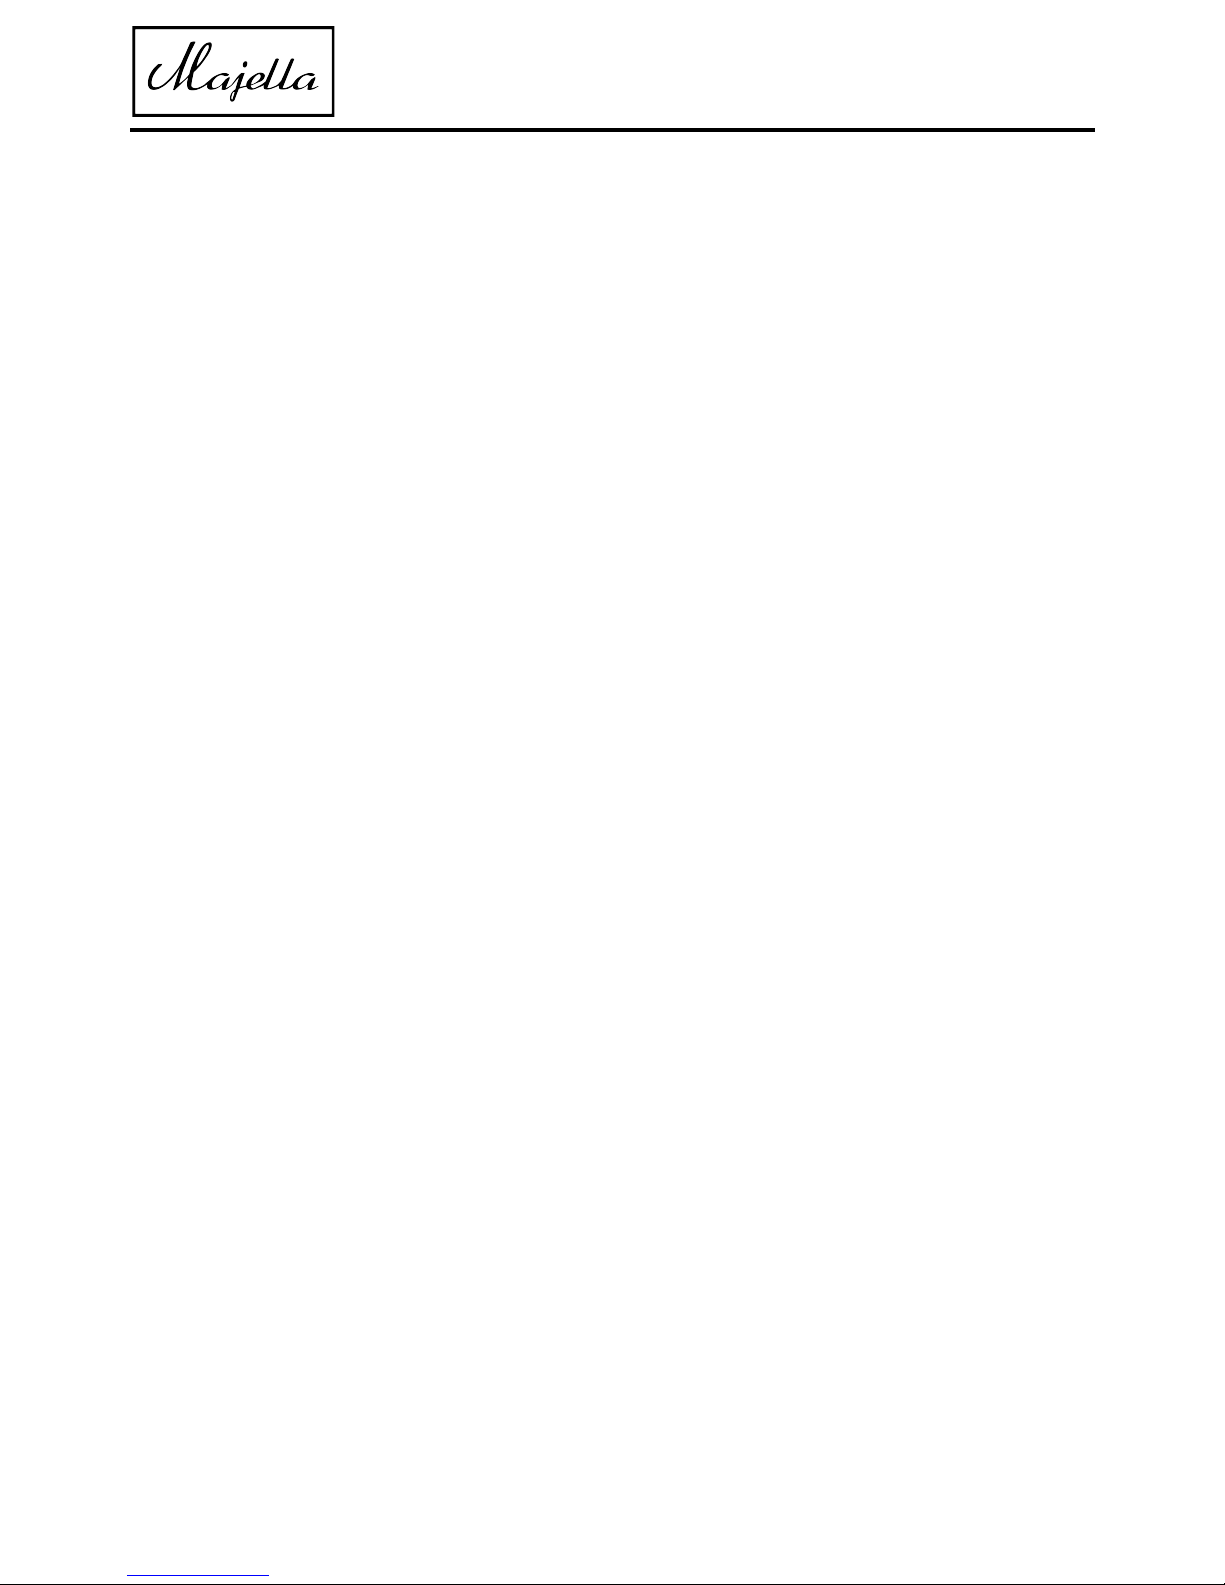
22R Resistors (2x)
First we start with the 22R restistors. There
are two of them (R49, R50). They are placed
on the yellow markings in the figure 1.
Figure 1: 22R resistor placement
(YELLOW)
VVCA Velocity Voltage Controlled Amplifier
DIY Manual
©2018 Majella Audio
4
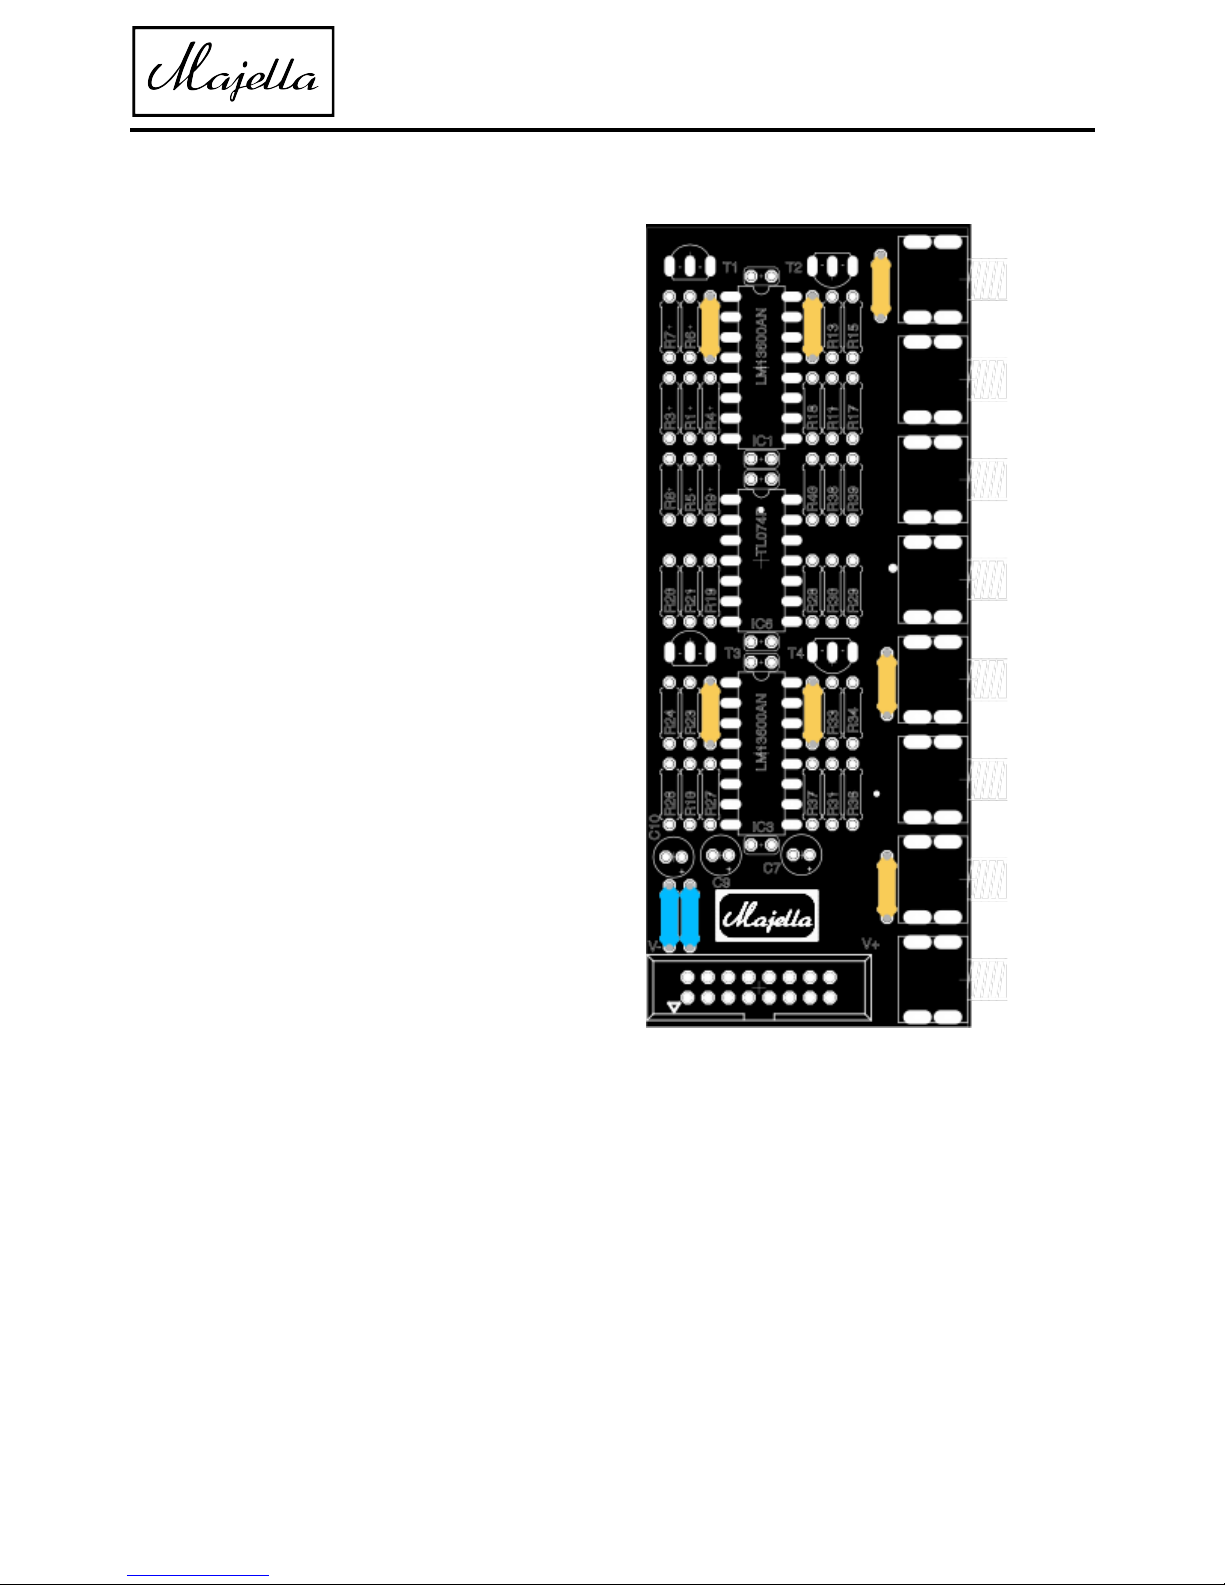
1K Resistors (7x)
Now that the 22R resistors are soldered we
can go on with the 1K resistors.
There are 7 resistors with a 1K value (R2, R12,
R14, R16, R22, R25, R32).
Their placement is shown in figure 2. They
are marked yellow. The blue resistors
represent the already soldered resistors:
Figure 2: 1K resistor placement.
(YELLOW)
VVCA Velocity Voltage Controlled Amplifier
DIY Manual
©2018 Majella Audio
5
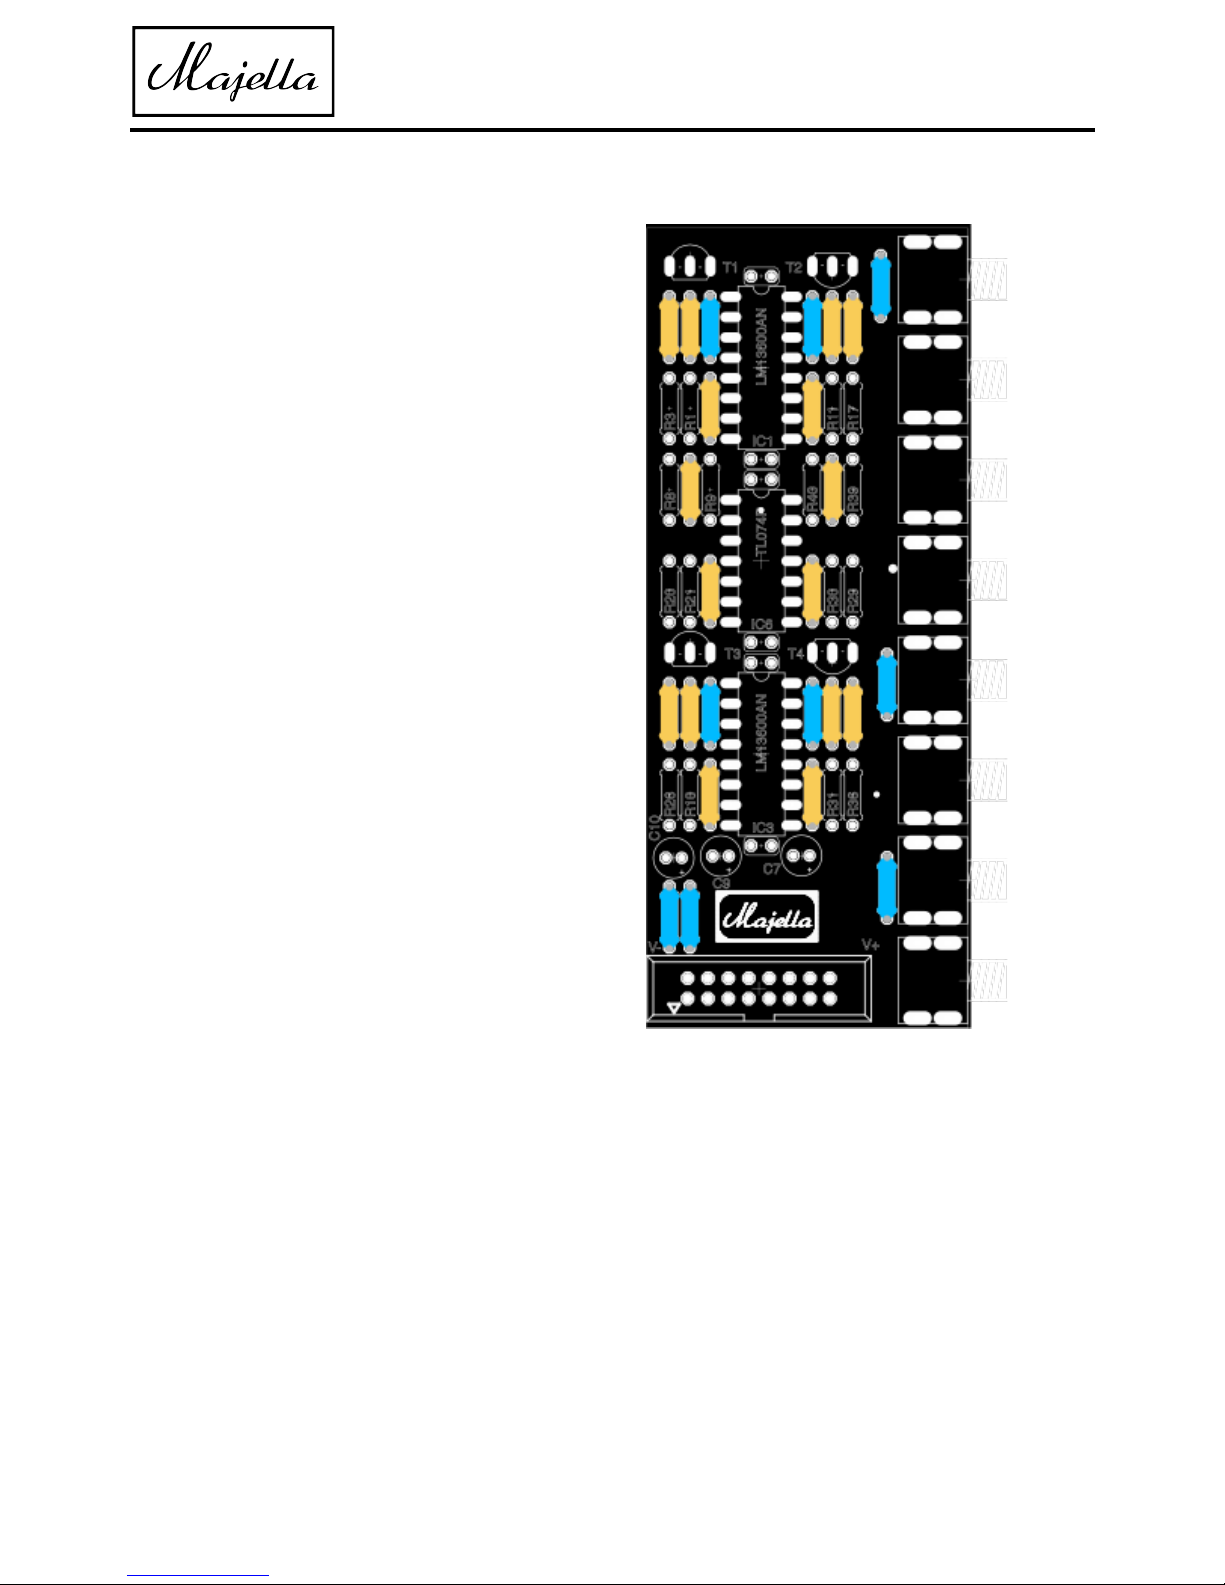
10K Resistors (16x)
The next resistors to solder are the 10K
resistors. There are 16 of them that need to
be soldered (R4, R5, R6, R7, R13, R15, R18,
R19, R23, R24, R27, R28, R33, R34, R37, R38).
Figure 3: 10K resistor Placement
(YELLOW)
VVCA Velocity Voltage Controlled Amplifier
DIY Manual
©2018 Majella Audio
6
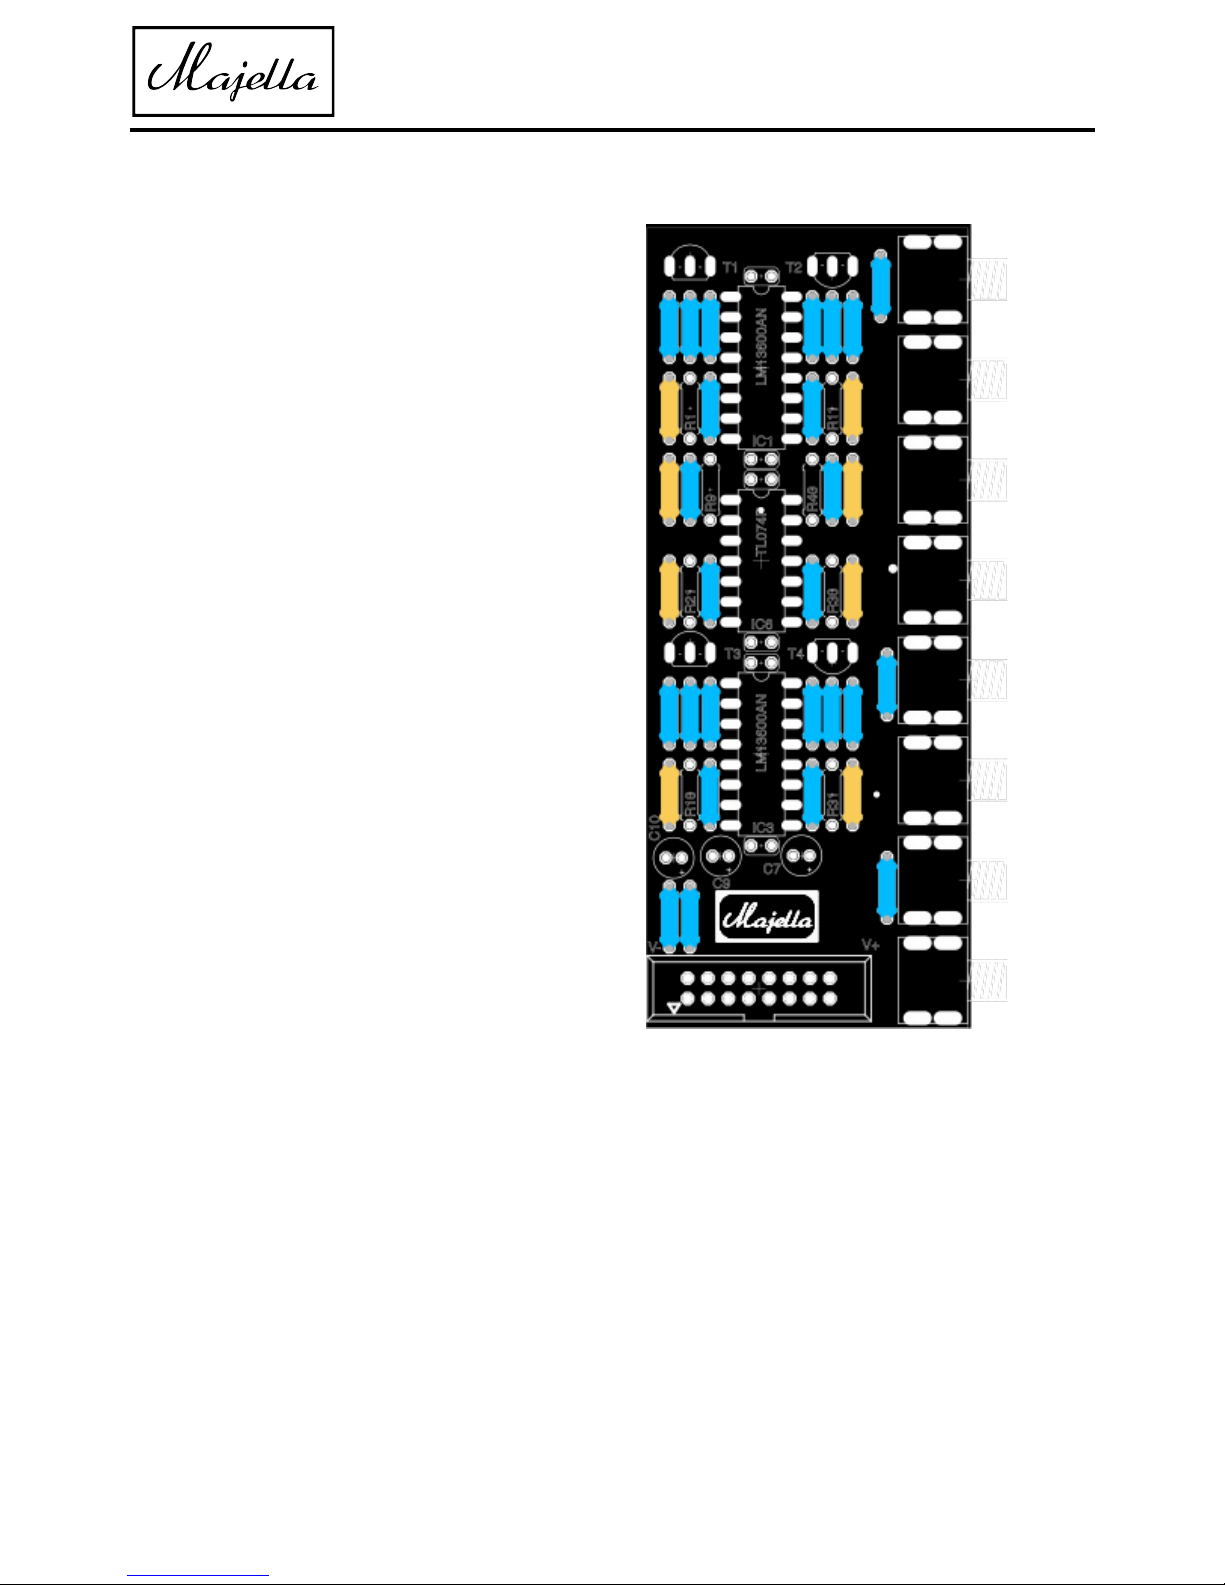
100K Resistors (8x)
Now we are going to do the 100K resistors.
There are 8 of them. (R3, R8, R17, R20, R26,
R29, R36, R39) Figure 4 shows their position
(yellow) on the PCB. Lets go champ!
Figure 4: 100K resistor placement
(YELLOW)
 Loading...