

Page 1
QUICK START GUIDE
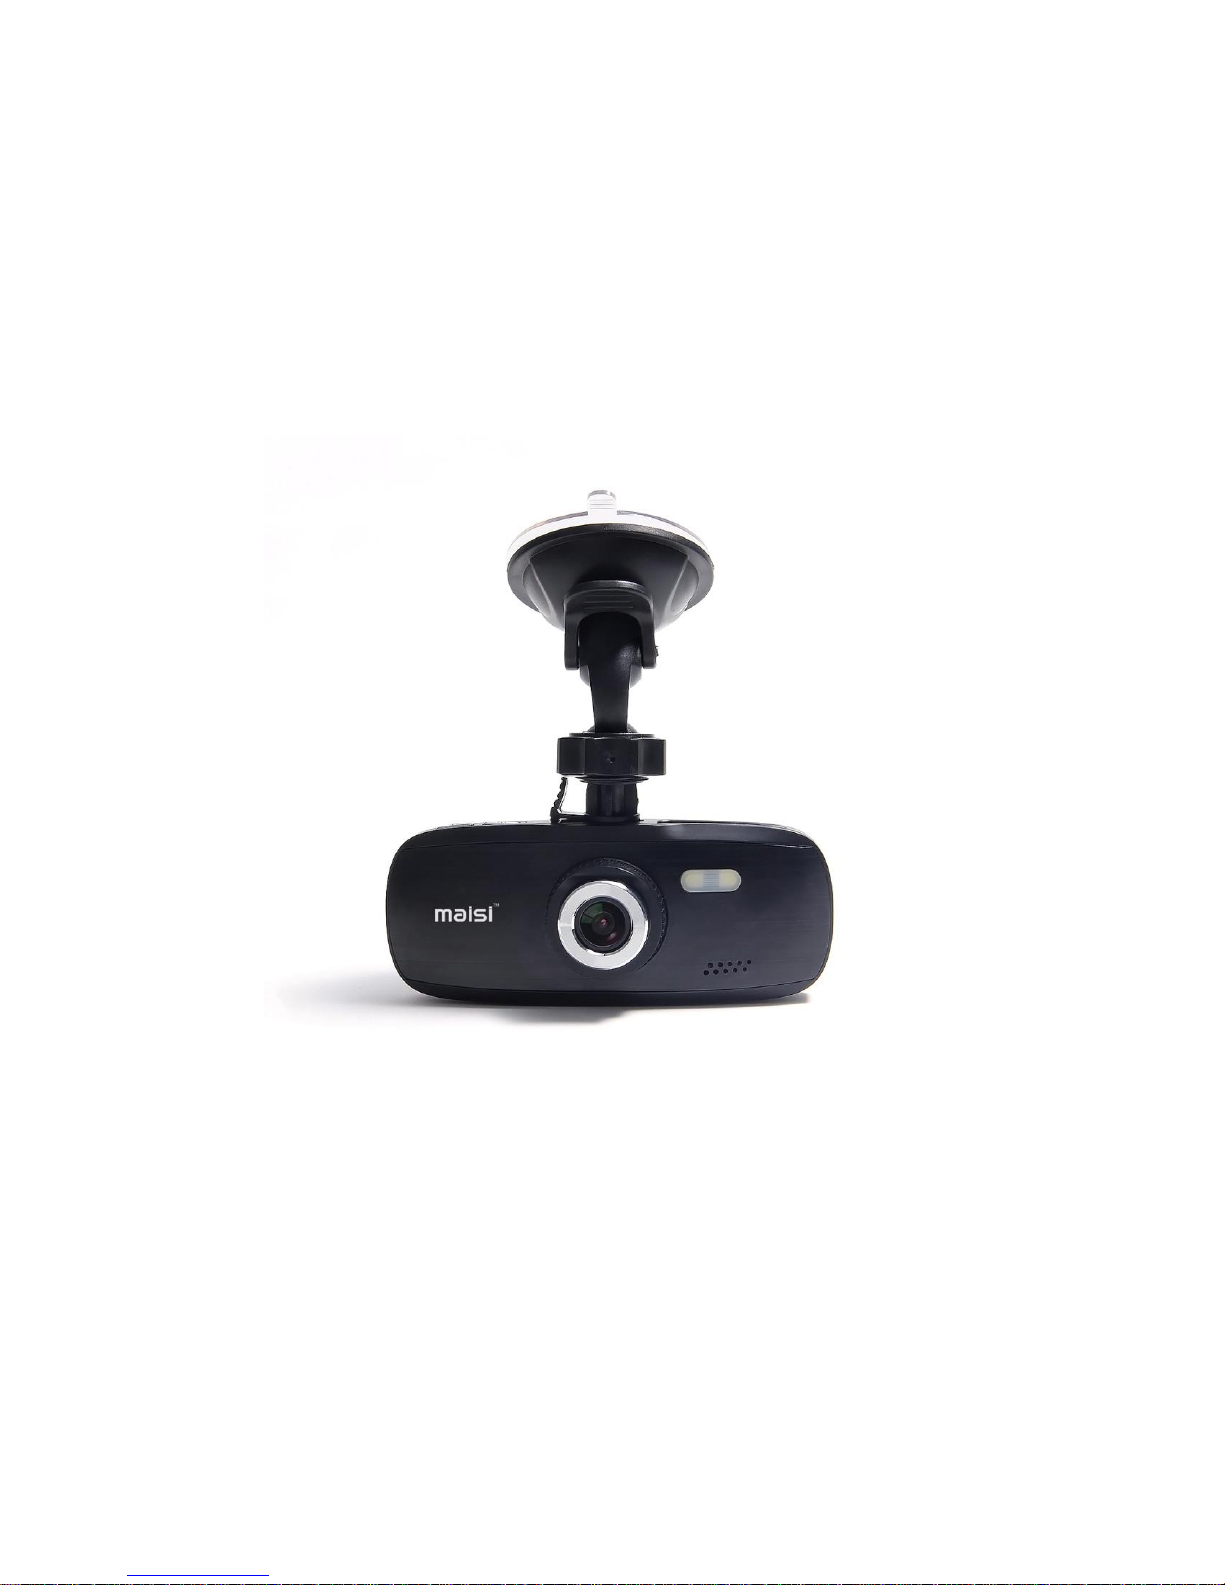
MAISI Smart Dashcam
Page 2

Page 1
PRIOR TO USE
Install the device near the rear-view mirror to obtain the best open-field view.
Do NOT install it in a location that will obstruct your required driving view.
* Make sure that the lens is within the wiping range of the windscreen wiper to
ensure a clear view even when it rains.
* Do not touch the lens with your fingers. Finger grease may be left on the
lens and will result in unclear videos or snapshots. Clean the lens on a
regular basis.
* Do not install on a tinted window. Doing so may damage the tint film.
* Make sure that the installation position is not hindered by the tinted window.
CAUTION
* Use the authorized car charger only.
* Never disassemble or attempt repair of this product. Doing so may damage
the camcorder, cause electric shock and void your product warranty.
* Never short-circuit the battery.
* Set up time and date accurately before you use this camcorder.
* Exposing the camcorder to open flames can cause explosion.
* Due to local laws and vehicles safety considerations, do not manually
operate the camcorder while driving.
* The supplier is NOT responsible for the loss of any data/content during
operation.
* Strictly observe relevant laws as this product cannot be used for any illegal
purpose. The user is responsible for any legal matters.
Before you start using the Car Camcorder it is assumed that you agree to the
above statements.
How to contact us?
If you come across any issue, please feel free to drop us a quick email at:
[email protected] (UK Customers) or [email protected] (US
Customers). We answer most emails within 12-24 hours. If you purchase
from Amazon, you can contact us via Amazon Message as well.
Page 3
Page 2
1 Introduction
Thank you for purchasing this MAISI camcorder. This camcorder is
specifically designed for real time video and audio recording when driving.
1.1 Features
* Wide Dynamic Range Imaging (WDR)
* HD Image 1920*1080
* Up to 150 Degree Wide Angle Glass Lens &IR-Filter
* Built-in G-sensor
* Collision Detection
* Emergency Recording File
1.2 Package Contents
The package contains the following items. In case there is any missing or
damaged item, contact us immediately.
* 1x Camcorder
* 1x Mounting Bracket
* 1x Power Charger
* 1x USB Cable
* 1x Quick Start Guide
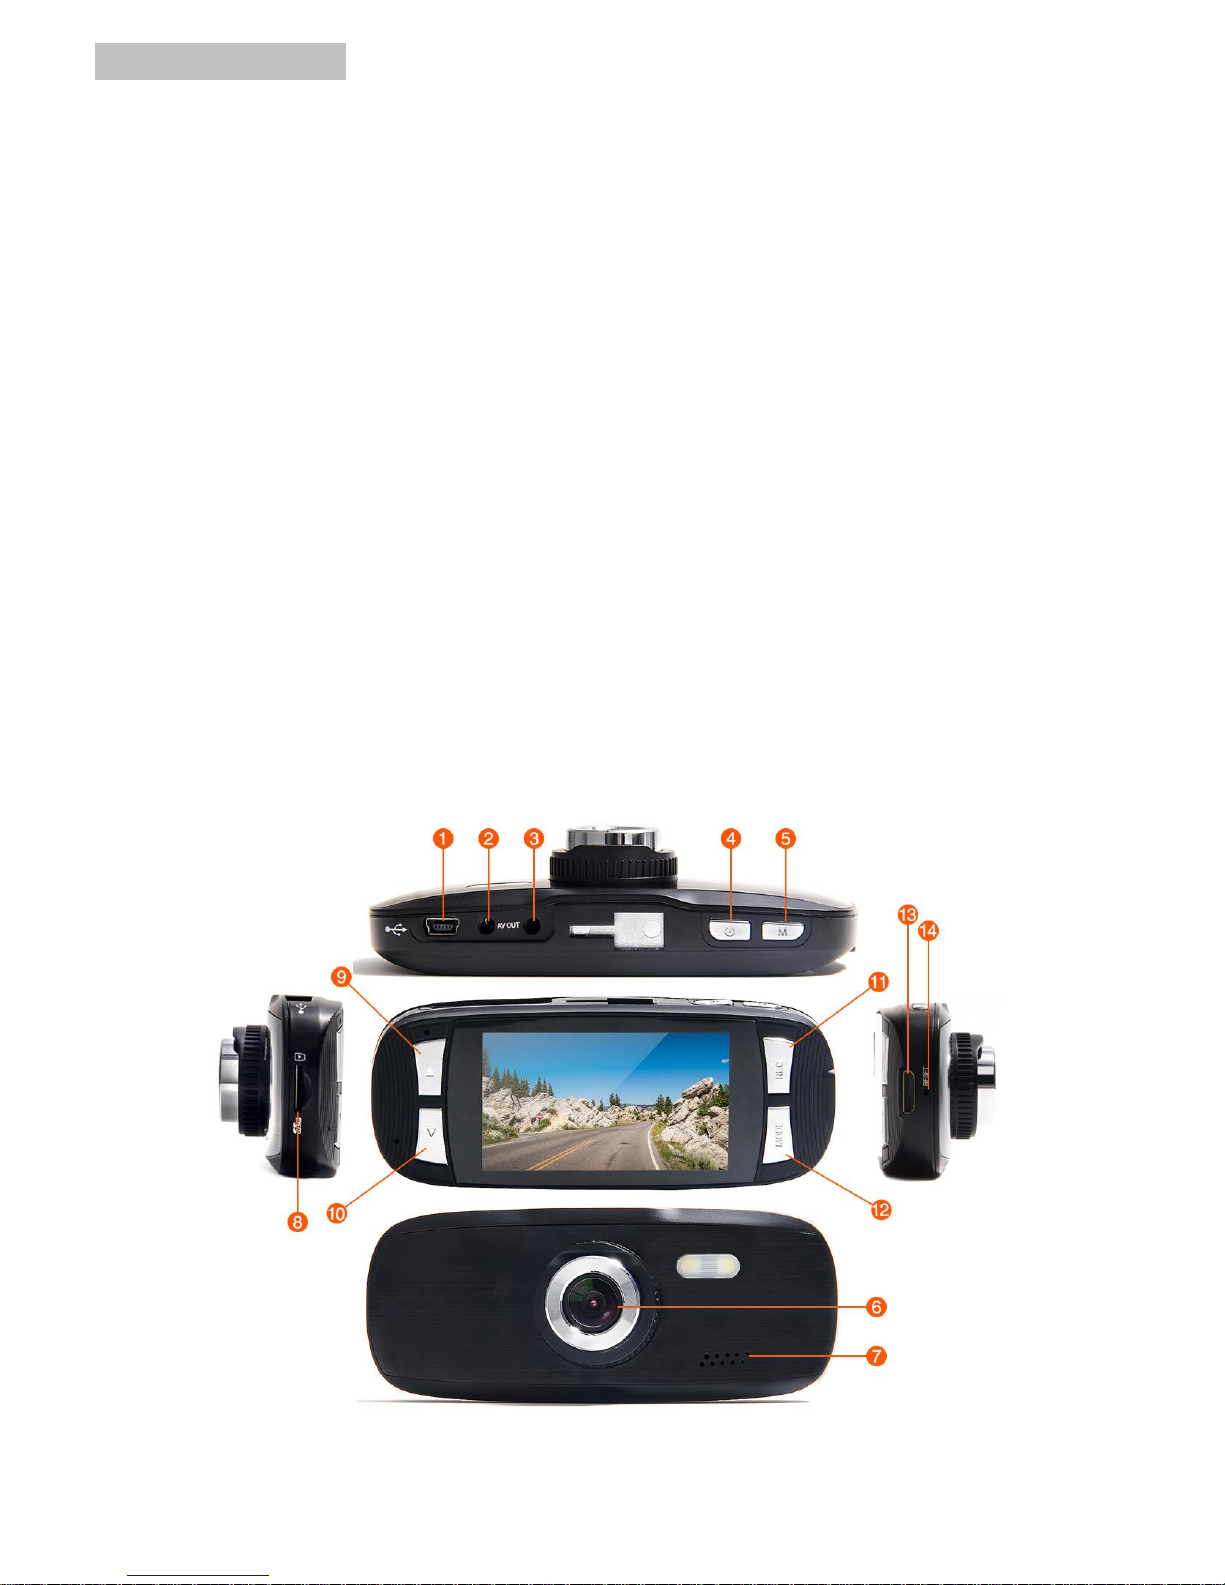
1.3 Product Overview
Page 4

Page 3
NO.
ITEM
NO.
ITEM
1
USB: Power/Mass Storage
8
TF Card Slot
2
AV Output: 3.5mm connector
9
Up Button ( )
3
GPS: NOT included
10
Down Button ( )
4
Power Button
11
: Record / Pause / OK
5
: Menu / emergency
recording Button
12
MODE:
Recording/Picture/Playback
6
Wide Angle Lens
13
HDMI Output
7
Speaker
14
Reset
Note:
* Power Button: Press it once to turn on the camera, hold the press (2-3s) to
turn off the camera, if the camera is in recording mode, press to turn on
the LED, press it again to turn it off.
* To go to Menu, make sure the camera is not recording. If the camera is
recording, press REC to stop the recording then press to go to Menu.
* Same rules apply (stop recording first) if you want to change the camera
from recording mode to Picture Mode or Playback Mode.
2 Getting Started
2.1 Inserting the Memory Card
Insert the memory card with the gold contacts facing the back of the
camcorder. Push the memory card until it clicks into place.
To remove the memory card: Push to eject the memory card out of the slot.
Note:
1. Do not remove or insert the memory card when the camcorder is turned on.
This may damage the memory card.
2. It is recommended to use a 32GB, Class 10 or above micro SD card.
3. Please format the micro SD card prior to the initial use.
4. If the screen shows “Low Speed Card” while recording, it means the writing
Page 5
Page 4
speed of the memory card is too slow. Please replace it with a higher-speed
memory card.
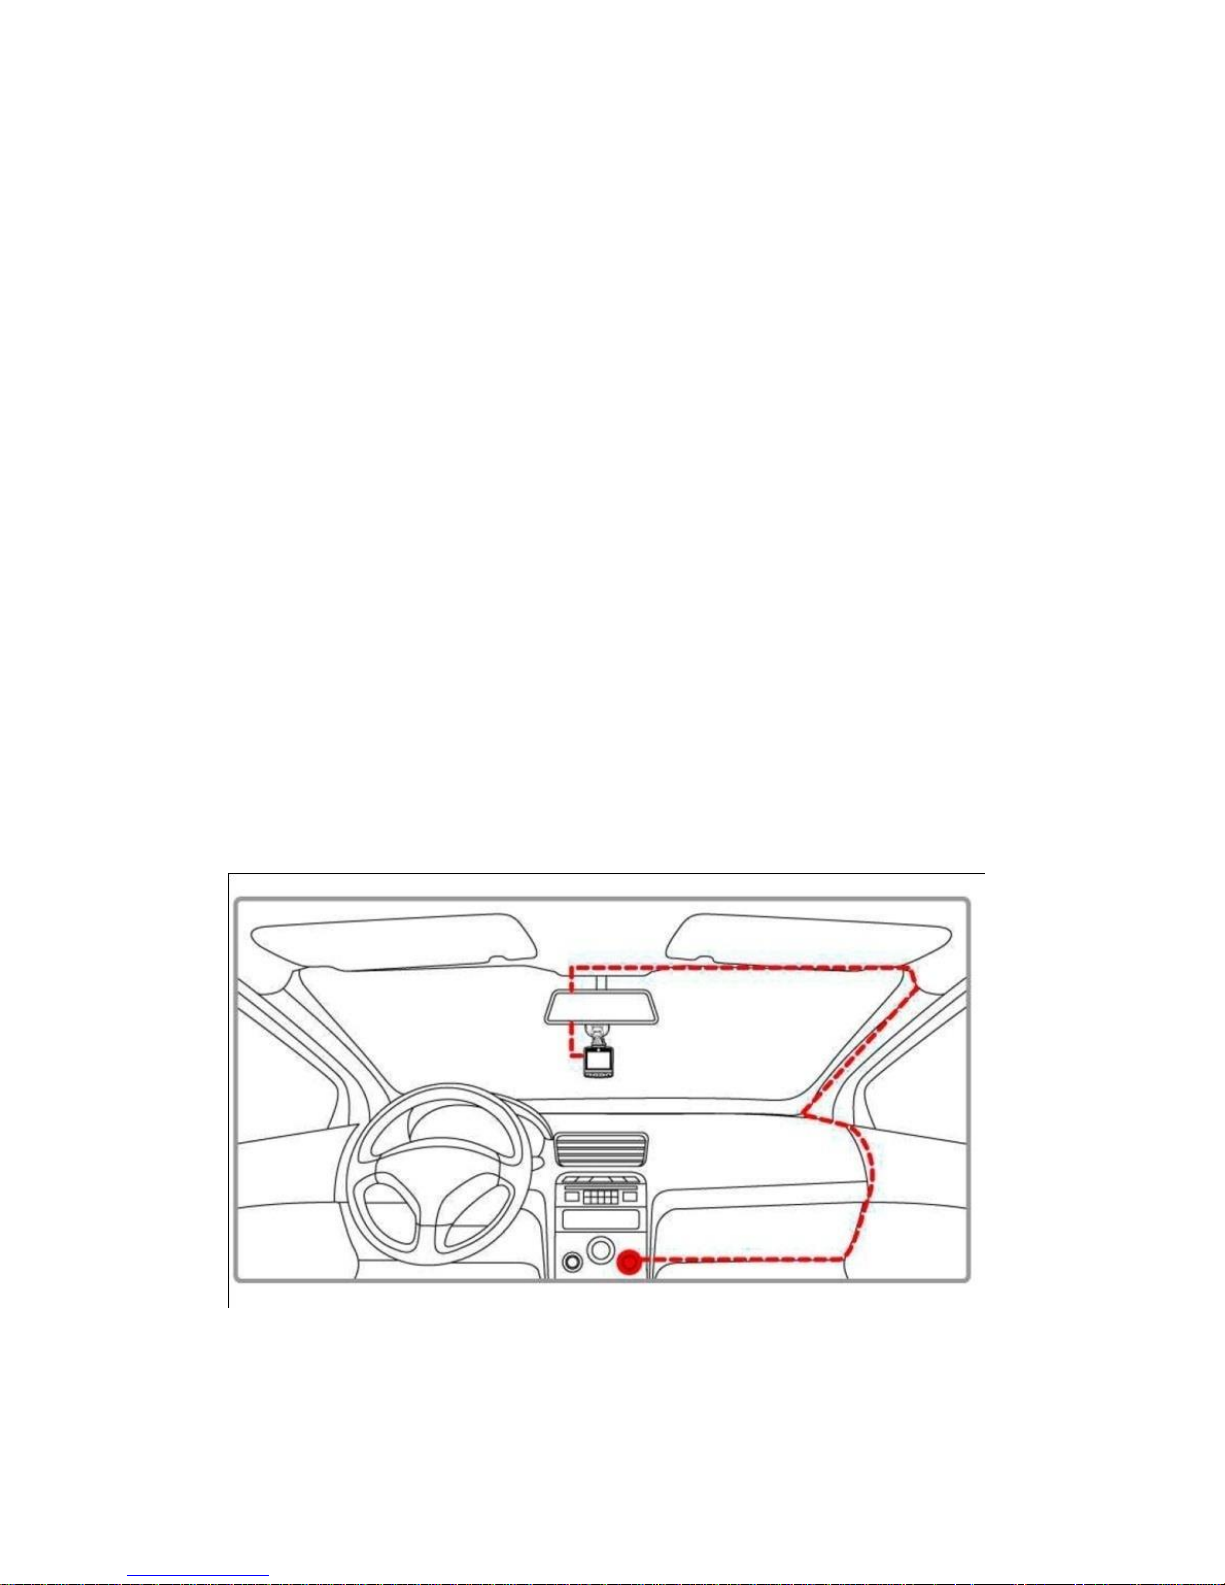
2.2 Installing in Vehicles
2.2.1 Mount to windshield
A. Attach the bracket to the camcorder. Slide it into the bracket holder.
B. Before installing the bracket, please use alcohol to clean the windshield
and suction cup of the bracket. Wait for dry and press suction-cup on the
windshield.
C. Hold the base firmly on the windshield and press down the clamp to mount
the car holder to the windshield. Make sure the base is securely locked in
place.
2.2.2 Adjust the camcorder position
A. Loose the knob to swivel the device vertically or horizontally.
B. Then tighten the knob to make sure the camcorder is securely locked in
place.
2.3 Connecting to Power
Use only the supplied car adapter to power up the camcorder and charge the
built-in battery.
A. Connect one end of the car adapter to the USB connector of the
camcorder. USB port input: DC 5V / 1A.
B. Plug the other end of the car charger to the cigarette lighter socket of your
Page 6

Page 5
vehicle. Once the vehicle engine is started, the camcorder automatically
turns on. Car charger input: DC 12 / 24V.
Note:
1. Use the product with the supplier charger only, please do not use other
power chargers to avoid camera burn or cause the battery explosion.
2. When use this camcorder for the first time, please charging to battery full.
3. Please note that if the ambient temperature reaches 45°C or above, the
car adapter may supply power to camcorder, but it will not charge the
Lithium-ion.
3 To Use the Device as a Video Recorder
To access the Video menus, if the device powers on and is not automatically
in Video mode, press MODE to the right of the screen until you are in Video
mode (This icon will show up on the top left corner of the screen) then
press (on top of the camera) for Setup.
Note: If camera is in Video Mode and it is recording (the red dot blinking
on top left corner), press REC to stop the recording first, and then press
to go to Menu. (Refer to Note on Page 3)
Resolution
After selecting the Resolution option, navigate among the list using and
buttons (located to the left of the screen). Select the desired resolution
from the list: 1080FHD, 720P, WVGA, VGA and press REC to confirm.
Loop Recording
Loop recording will allow continuous recording, as the camera records
continuously over the previous footage and overwrites itself. You may set
Loop recording to 2 Minutes, 3 Minutes or 5 Minutes.
Wide Dynamic Range (WDR)
Allowing the camera to use WDR technology automatically to adjust lighting
features to enhance clarity and reduce glare. To access WDR settings, select
the WDR option from the Menu and navigate using the and buttons to
select On or Off. Press REC to confirm.
Power On/Off Delay (Available for Some Models Only)
Page 7

Page 6
Power on delay: Off/10s/20s/30s. If it is set at 10s, the camera will power on
10 seconds after you connect it to the power charger.
Power off delay: Off/10s/20s/30s. If it is set at 10s, the camera will power off
10 seconds after you disconnect the power charger.
Record Audio
Under this setting, you can choose whether to record audio or not. If set it to
OFF, only video is recorded. If On, both audio and video are recorded. Press
or to choose and press REC to confirm.
Date Stamp
If you set “Date Stamp” to On, then the date will appears on your footage
when you are doing playback. Otherwise it will not show up on the playback.
G-Sensor
Under G-Sensor mode, when an impact is detected, the footage will be saved
anyways. The G-Sensor prevents any recorded footage (during collision)
from being lost or overwritten. To access G-Sensor settings, select G-Sensor
from the Menu and use the or button to navigate settings: Off, 2G, 4G,
8G. The High settings (2G) will detect slight physical disturbance whereas
Low (8G) will detect only major physical disturbance. Press REC to confirm
and exit.
Date/Time
To set the time and date, use and to select and adjust the value and
press REC to confirm. After setting the time and date, you can adjust the
Date Format as well. Currently it supports YY/MM/DD, MM/DD/YY and
DD/MM/YY.
Plate Number on Movie
To configure the license plate display to your journey, use and to
choose the appropriate letter/number and REC button to confirm. Same way
you set the date and time.
Auto Power Off
You can set the camera to automatically turn off after 3-5-10 minutes or you
can simply turn off this function if you prefer.
Beep Sound
Page 8

Page 7
This refers to the sound when you press the button (on the camera), or the
sound when the camera is powered up or shut down. You can turn them on or
off. When beep sound is turned on, you can adjust the volume as well.
Language
You can choose the language from English, French, Spanish, Portuguese,
German, Italian, Simplified Chinese, Traditional Chinese, Russian, or
Japanese, etc.
TV Mode
For playback purpose, you can use the AV Out port (on the camera) to
connect the camera with your TV via a HDMI cable. Depending on your
country, choose either NTSC (National Television System Committee) or PAL
(Phase Alternate Line). Press REC to save changes.
Frequency
Choose the correct frequency to avoid flickering. In United Kingdom, 50 Hz is
widely used. However, in the United States, 60Hz is more common.
Screen Saver
This is usually used when you do not want the camera to distract your driving.
The screen turns off but the recording continues. You can set the camera to
turn off the screen after 3 minutes, 5 minutes, or 10 minutes. You can also
choose to turn off this function as well, depending on your needs; in this case,
the camera screen will remain on throughout the journey.
Lamp Setting / IR LED
This refers to the night vision LED in front of the camera. You can set it to on
or off.
Note: if the camera is in recording mode (or Picture Mode , see
below), you can press to turn on/off the LED.
Exposure
Changing the exposure value will make sure your pictures/videos are always
correctly exposed. The bigger the value, the greater amount of light passes
through the lens, and, the smaller the value, the less amount of light. You
may set the exposure compensation to a higher value (i.e. +2.0) at nights and
a lower value during daytime (i.e. -2.0) to achieve better performance.
Page 9

Page 8
Note: we set each camera at its optimal value so you do not actually need to
adjust it unless otherwise advised.
White Balance
Auto, Daylight, Cloudy, Tungsten or Fluorescent.
In Auto mode, settings will adjust themselves to changes in lighting. In
Daylight mode, settings will allow greater clarity for footage taken in daylight
as with Cloudy settings for cloudy conditions. The Tungsten mode is best for
basic indoor use. The Fluorescent mode adds brightness and warmth to the
indoor image.
Format
This will completely erase the data on your memory card (so be aware of
that).
Note: Formation usually needs to be done when the card is not recording or
camera starts to freeze. Make sure you back up all the data (if needed)
before formation.
Default Setting
Be prepared to erase all settings back to default if you choose this function.
However, it will not result in any data loss on the memory card. Usually when
the camera is reset back to default, it is having all the same settings as a
brand new unit.
Version
This allows you to check the current firmware version of the device. You
should always check on this before you want to upgrade the firmware.
Page 10

Page 9
4 To Use the Camera for Taking Pictures ONLY
If you want to use the camera to take pictures only (not record), then you can
change it to the Picture Mode. To enter the Picture Mode, press MODE to
change, in Picture Mode, you can see a camera icon like this located to
the top left corner of the screen.
NOTE: If camera is in Video Mode and it is recording (the red dot blinking
on top left corner), press REC to stop the recording first, and then press
MODE to go to Picture Mode.
To access the menus for Picture Mode, press twice on the top of the
camera.
Picture Resolution:
This allows you to choose your desired resolution for the pictures taken. You
can move between the resolution options using and buttons, and
press REC to confirm.
Capture Mode: Single, 2S Timer, 5S Timer and 10S Timer
This setting allows you an extra amount of time (usually 2/5/10s) for taking
pictures after the REC button is pressed. You can also set it to Single, if you
wish to take pictures in real time manner. No need to wait.
Sequence:
The sequence function allows you to take 3 images within 1 second. Three
photos will be taken after you press the REC button.
Quality:
The quality settings allow you to adjust the picture quality by enabling a
certain amount of light to pass through a unit area of the lens. You can set it
to Fine, Normal or Economy.
Sharpness:
This feature enables the camera to take pictures with more or less sharpness.
In other words, the camera will increase or decrease pixel proximity
(compressing the image for clarity), depending on the settings you choose.
Page 11

Page 10
Color:
To change the color of images, use or button to choose among
Normal, Black & White, or Sepia (reddish brown effect), and press the REC
button to confirm.
Date Stamp: Off, Date, Date/Time
This function decides whether the date/time will show up on your pictures or
not. Off means nothing will show up on the pictures; Date means only date
will show up on the pictures; Date/Time means both date and time will show
up on the pictures.
Page 12

Page 11
5 Accessing, Lock, Unlock and Deleting Files
How to Access Files?
To view files on the camera, press MODE to enter the Playback Mode. Use
or button to navigate among videos and pictures, press REC to confirm.
Press it again to play the file.
How to delete a file?
Press REC to stop the playback first, and then Press to bring on the
Menu below:
1 Delete
2 Protect
3 Slide Show
Choose Delete and press REC to confirm. You should see this:
1 Delete Current
2 Delete All
Choose your desired option and press REC to see this:
Erase This? – Cancel, or OK?
You can choose OK and confirm the action. Press to exit.
Note: If a file is locked (protected), you will not be able to delete it unless you
unlock the file first.
How to lock a file?
Make sure the camera is in Playback Mode, use or button to choose
your desired file, then press REC to confirm, press to bring on the menu
below:
1 Delete 2 Protect 3 Slide Show
Choose Protect and press REC to confirm and bring on the options below:
1 Lock Current 2 Unlock Current 3Lock All 4 Unlock All
Choose Lock Current and press REC to confirm. Press to exit.
How to Use Slide Show?
Make sure the camera is in Playback Mode, use or button to choose
any of the files, then press REC to confirm, press to bring on the menu
Page 13

Page 12
below:
1 Delete 2 Protect 3 Slide Show
Choose Slide Show and press REC to confirm and bring on the next menu:
2 seconds, 5 seconds, 8 seconds
Choose any of the desired option above and press REC to confirm.
How to Access the Files on Computer?
To access the files through a computer, connect the Dash Camera to a
computer via a USB cable (provided in the package). Check on-screen
options on the camera (if prompt) and choose “Mass Storage”, press REC to
confirm. The device will then show up as a Removable Disk on your computer.
It normally contains folders in the names of Movie, Photo, etc. Each folder
contains files that were previously stored to the memory card. Those files
may be moved, deleted, copied/pasted as per your needs.
NOTE: If the file is locked (protected), you won’t be able to edit it on your
computer, you need to unlock the file first.
Page 14

Page 13
6 Specifications
Sensor: 3M CMOS Sensor
Solution: NOVATEK 96650
Lens: Fixed focus lens
Zoom: 4 x digital zoom
LCD Display: 2.7 inch 16:9 TFT LCD
Lens Angle: 150 degree wide angle lens
Night Video: Enhanced led lights
Video Output AV (SVBS):
1 Composite TV signal output NTSC/PAL. 2 High definition TV terminal
interface: HDMI output
Picture: JPG file format Maximum output pixel: 5.0 Mega Pixels
Video Resolution: 1920x1080, 30 fps 1280x720, 60 fps; 848 x 480, 30fps;
640x480p, 30fps
Audio: Built-in Microphone/Speaker (AAC)
Codec: MPEG4
G-Sensor: Support
Memory External Media: SDHC Supports 64 GB Max, micro SD card (NOT
Included)
Interface: Mini USB/HDMI/AV/Micro SD Card Slot
Motion Detection: Support
Shutter: Electronic shutter
Battery: 3.7V 300mAh Poly
Page 15

Page 14
7 Frequently Asked Questions (FAQs)
What is the maximum allowed memory capacity for the camera?
While up to 64GB may be functional, we guarantees only up to 32GB micro
SD Card “Class 10” rating as the maximum allowed capacity for the moment.
Why my camera freezes a lot?
If the camera freezes, you can use a pin to press on the reset button. You
may replace the memory card as in most cases it is related to the card. You
can contact us if the issue cannot be fixed at your end, we will seek possible
firmware update for you. If you received a faulty unit we can replace it for you.
How do I know the camera is recording?
You'll notice three changes when the camera is recording. 1) The blue light
on the top left of the unit will blink. 2) The round dot icon on the top left of the
display will flash red. 3) There is a counter on the top right of the display, and
the numbers will be increasing identifying how long the file has been
recording
Why isn’t the video/picture clear?
* Go to Resolution Setting and make sure you choose the highest resolution.
* Make sure the lens film is removed prior to use.
* Make sure there are no fingerprints, dirt, or water on the lens, and clear the
camera lens using a piece of wet cloth on regular basis.
I cannot get to the settings menu?
Make sure the camera is not recording and press the top right button ( ) to
get to the first setting screen. Repeat to get to the second screens.
What is “Loop Recording”?
All of our dash cams are currently utilizing the loop recording system. Loop
recording is when the camera automatically deletes the oldest dated files to
make room for new recordings i.e. the camera may be deleting recorded files
from last Tuesday when you’re driving on Sunday morning.
Why won’t the camera auto-start?
Page 16

Page 15
* Check if the Power On Delay is turned on, you should turn if off
* Disable the motion detection
Is there an “Emergency” button to start recording and save on demand
on the dash cam?
Yes. Just press once (when the camera is recording) to achieve this
function. A key icon will show up just next to the counter on the top right
corner. Press again to stop the emergency recording. This recording will
not be overwritten.
What is a "G-Sensor" feature on a dash camera?
A "G Sensor" is a feature / setting that allows a specific video file that is
actively being produced / recorded to be "locked" and protected from
becoming deleted as the camera continues to record video while in “loop".
Cameras have low, medium and high settings. If the setting is set too high
then the camera may "lock" files every time you come to a quick stop or run
over a pothole. The G-Sensor setting must be used cautiously and
experimented with for each driver and vehicle. It is suggested that a new
dash cam owner drive with it off or in the low setting in order to get a "feel" for
how it functions in a particular vehicle and driving style.
Under G-Sensor Setting, which one is more sensitive: 2G, 4G, or 8G?
2G is much more sensitive than 8G, you can set it at 8G when you start to
use it.
Why I was unable to delete video files on my computer?
Make sure those files are not protected. The following files are NOT
removable:
Videos footage that were recorded by G-Sensor
Video footage that were recorded by Emergency Recording
In order to delete those files, make sure to unlock them first.
 Loading...