

USER MANUAL
MAISI Car Dashboard Camera
Congratulations on your purchase!
Please read and u nd erstand all ins tr uc tion before usi ng t hi s camera.
If you do not use d ev ic e properly and fo ll ow a ll instructio ns , the warranty
may be voided.
Am bare lla A 7

01
PRIO R TO U SE
1. Ins tall the de vice near the rear-view mirror to obtain the
best open-field view. Do NOT in stall the c amcorde r in a
location that will obstruct your required driving view.
2. Mak e sure that t he lens is wi thin the wiping range of the
windscreen wiper to ensure a clear view even when it
rains.
3. Do not touch the l ens with your fingers. Finger grease
may be left on the le ns and will result in unclear videos or
snapshots. Clean the lens on a regular basis.
4. Do not install the device on a tinted window. Doing so
may damage the tint film.
5. Mak e sure that t he instal lation position is not hindered
by the t inted window.
CAUTION
* Use th e authorized car charger only.
* Never disassemble or attempt to repair this product.
Doing so may damage the camcorder, cause electric
shock and void your product warranty.
* Never short-circuit th e battery.
* Set up t ime and date accurately before you use this
camcorder.
* Exposing the camcorder to open flames can cause
explosion.
* Due to local laws and vehicles safety considerations, do
not ma nually operate the camcorder while driving.
* The supp lier is NOT responsible for the loss of any
data/content during operation.
* The fi rmware fu nction in camcorder is for refe rence only.
Before you start using the C ar Camcor der it is
assumed that yo u agree to th e above sta tements .
How to c ontact us ?
If you c ome acros s any issue , please fe el free to dr op us a
quick email at: maxtopuk@gmail.com. We answe r most
emails within 12-24 hours. If you purchase from Amazon,
you can contact us via Amazon Message as well.
02
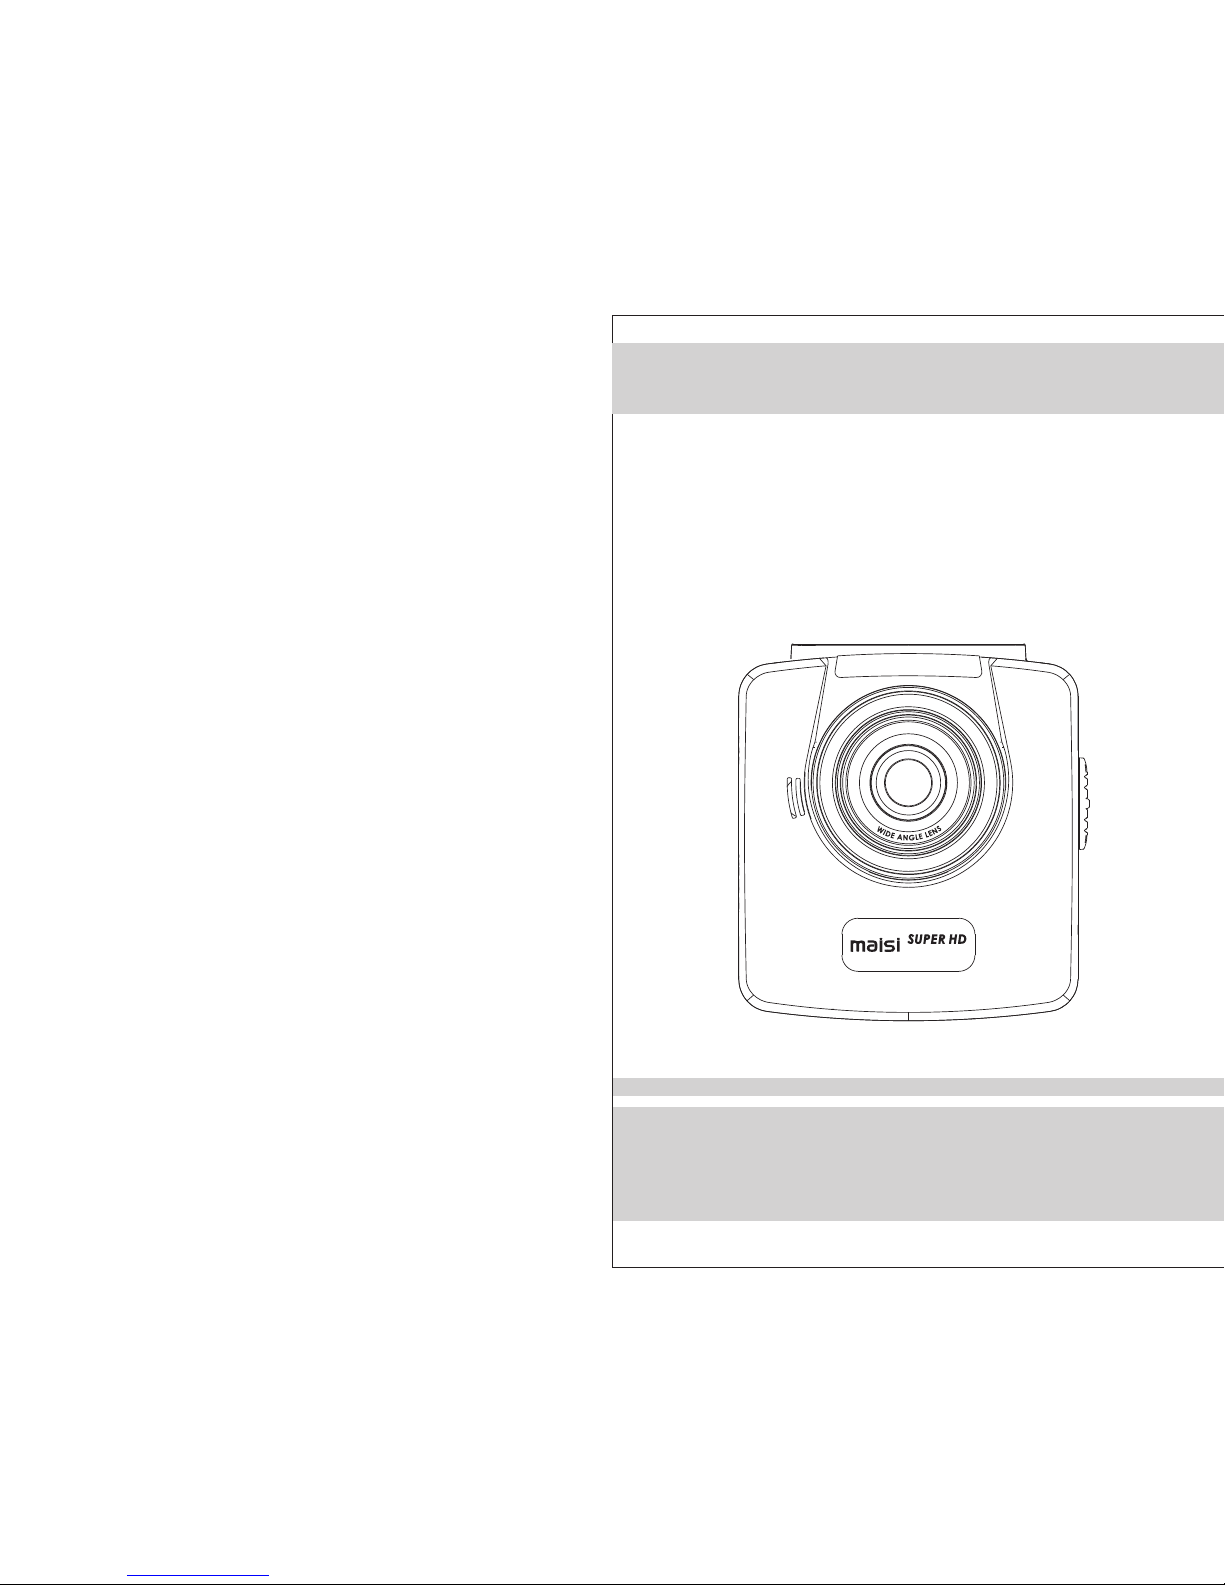
1 Introduction
Thank you for purchasing this advanced camcorder. This
camcorder is specifically designed for real time video and
audio recording when driving.
1.1 Fe atures
* High Dynamic Range Imaging (HDR)
* Super HD 2304*1296
* Up to 150 Degree Wide Angle Glass Lens &IR-Filter
* Built-in G-sensor
* Moti on Detection
* Collision Detection
* Emergency Recording File
* Advanced Driver Assistance Systems (ADAS)
1.2 Pa ckage Contents
The package contains the following items. In case there is
any missing or damaged item, contact us immediately.
Camcorder
Bracket
Car Charger
User Manual
03
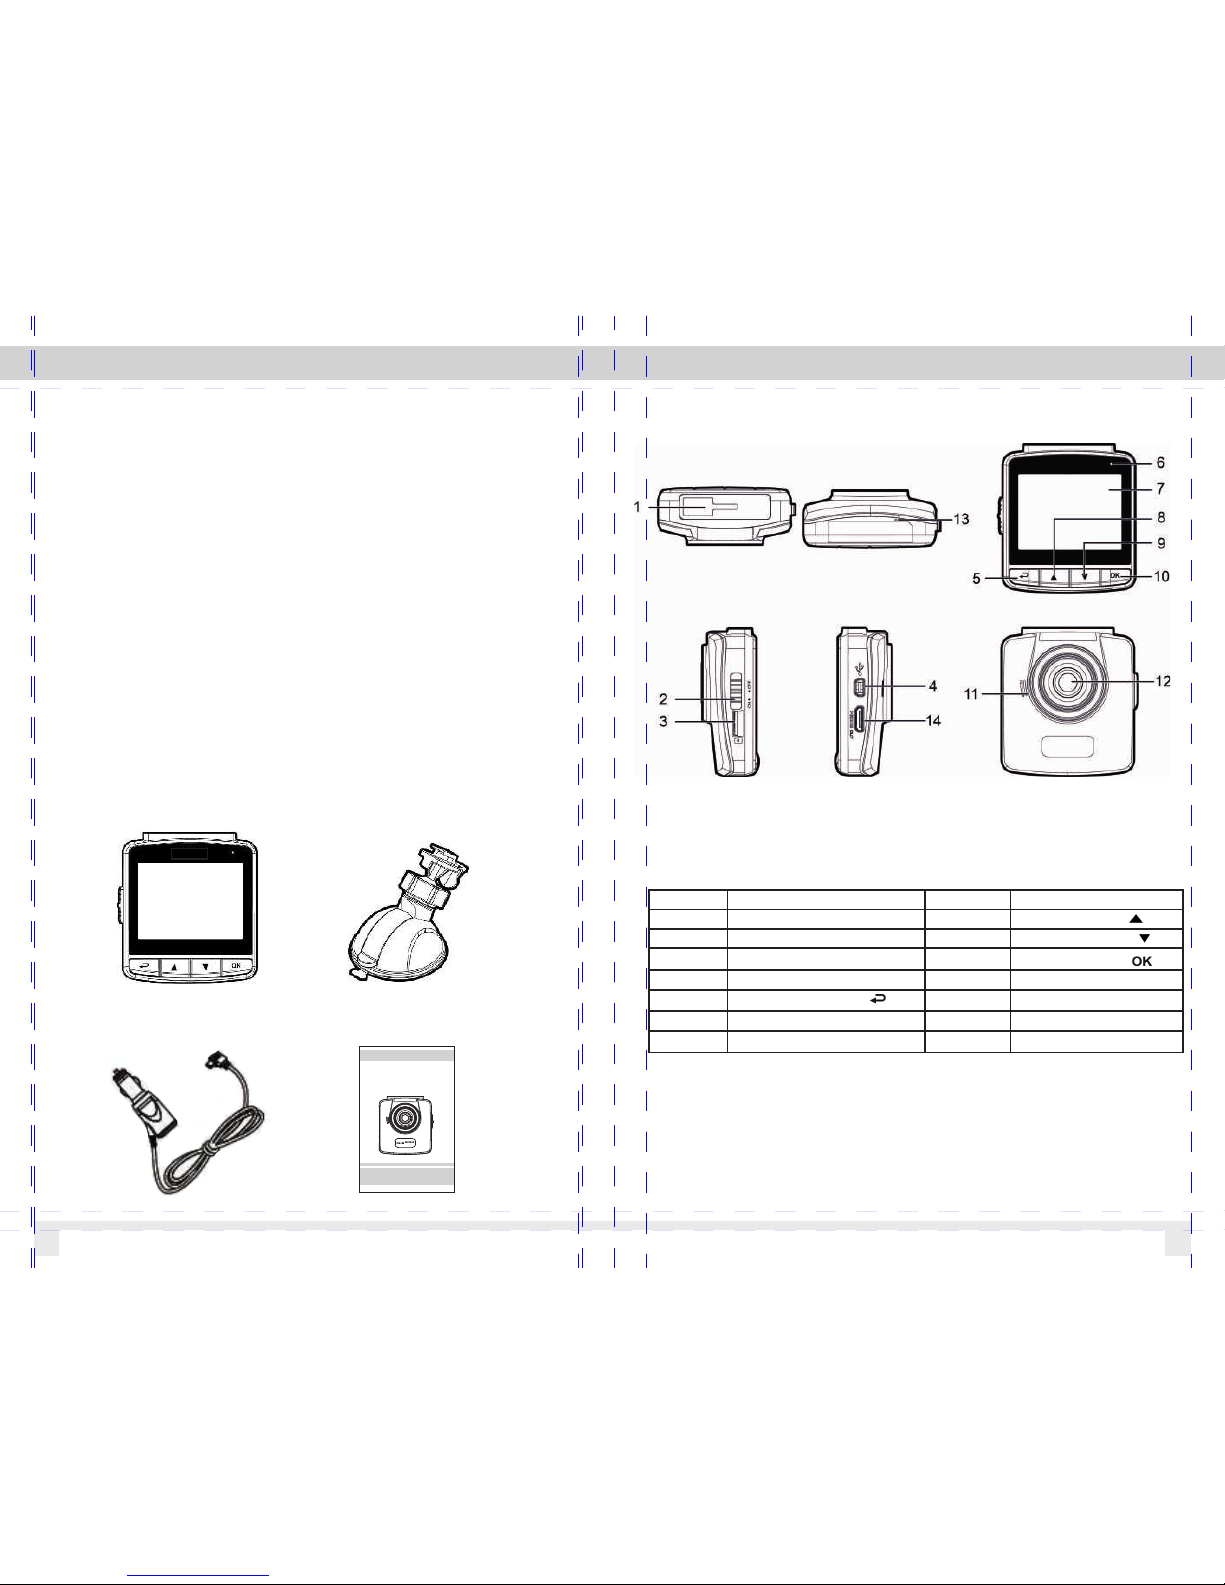
1.3 Pr oduct Ove rview
Note :
To operate the camcorder, press the corresponding bu ttons
(5, 8, 9 , 10) accor ding to guide icons shown on the screen.
Numbe r ITEM Numbe r
ITEM
1
Bracket S ocket
8
2
Power Swi tch
9
3
Memory Ca rd Slot
10
4 USB Conne ctor
11
Speaker
5
12
Wide Angle L ens
6
LED Ind ic ator
13
Micro ph one
7
LCD Panel
14
Mini HDMI
Up Button ( )
Down Butt on ( )
Enter But ton( )
Back Bu tt on ( )
Ambar ell a A7
USE R MANUA L
MAISI C ar Dash board C amera
Congratulations on your purchase!
Please read an d under stand a ll inst ructi on befo re usin g this ca mera.
If you do not use de vice pr operl y and fol low all i nstru ction s, the wa rrant y
may be voided.
Ambarella A7

04
2 Getting Started
2.1 In serting t he Memory C ard
Inse rt the memo ry card wit h the gold co ntacts fa cing the
back of the camco rder. Push the memory card until it clicks
into place.
To remove t he memory c ard
Push to eject the m emory car d out of the sl ot.
Note:
1. Do not remove or insert the memory card when the camcorder
is turned on. This may damage the memory card.
2. It is recommended to use a 32GB, Class 10 or above micro SD
card.
3. Please format the micro SD card prior to the initial use.
4. If the screen shows “Low Speed Card” while recording, it
means the writing speed of the memory card is too slow. Please
replace it with a higher-speed memory card.
5. If “Card is too fragmented” is displayed while recording, it
means the card is unable to save the recording. Please make a
copy of existing files in the card and then reformat it with this
camcorder.
2.2 In stallin g in Vehicle s
2.2.1 Mount to wi ndshiel d
1. Atta ch the brac ket to the ca mcorder.
Slide it into the bracket holder until you
hear a click.
2. Bef ore insta lling the bracket,
please use alcohol to clean the
windshield and suction cup of the
bracket. Wait for dry and press
suction-cup on the windshield
3. Hold the base firmly on the
windshield and press down the
clamp to mount th e car holder to
the windshield. Make sure the
base is securely locked in place.
05

2.2.2 Adjust the camcorder position
1. Loose the knob to swivel
the de vice vertically or
horizontally.
2. Then ti ghten the k nob to
make sure the camcorder
is securely locked in place.
2.3 Connectin g to Power
Use only the supplied car adapter to power up the
camcorder and charge the built-in battery.
1. Connect one end of the car adapter to the USB
connector of th e camcorder.
USB port input: DC 5V / 1A.
06
2. Plu g the other end of the car c harger to t he cigarette
lighter socket of your vehicle. Once the vehicle engine is
star ted, the ca mcorder a utomati cally tur ns on. Car ch arger
input: DC 12 / 24V.
Note:
1. Use the product with the supplier charger only, please do not
use other power chargers to avoid camera burn or cause the
battery explosion.
2. When use this camcorder for the first time, please charging to
battery full.
3. Please take note if the environment temperature reaches
45°C or above, the car adapter still can supply power to
camcorder, but it will not charge the Lithium-ion battery.
Battery Status Indicator
Icon Descriptio n
Fully charged
75% charged
50% charged
25% charged
Low battery
Connect the car adapter to charge the
battery, battery is fully charged.
07

2.4 LED Indicator
Status Ex plana ti on
LED Ind ic ator Co lo r
Green
LED Light O ff
Green
LED Light O ff
Blinkin g Red
Power off, batte ry chargi ng
Power off, batte ry full y Ch arged
Power on, b atter y ch arging
Power on, b atter y fu lly cha rg ed
Recordi ng/ Recor ding and sc reen off
2.5 Powering the Camcorder On / Off
2.5.1 Power On/ Off
2.5.1.1 Power O n
Slide the Power Switch down to the
ON position. This a ction wil l cover
part of the memor y card slot .
2.5.1.2 Power O ff
Slide the Power Switch up to the OFF
position. Before taking out memory
card, please wait until power-off
sequence completed and the screen
turn o ff . Do not take o ut memory c ard
during power-off sequenc e to preven t
recorded video loss or corruption.
2.5.1.3 Reset the camcorder
In rar e occasions, the cam corder may
experience an error for unknown
reasons. In thi s case, ple ase press
OK but ton for at le ast 8 secon ds to
turn o ff t he camcor der
08
2.5.2 Set the Dat e and Time
To set the c orrect da te and time , do the foll owing:
1. Pre ss the butt on to enter t he
on-screen display (OSD) menu.
2. Pre ss the butt on to selec t
Date / Time and press
the bu tton.
3. Pre ss the butt on to adjus t
the va lue and press the butt on
to mov e to anothe r field.
4. Repeat step 3 until the date and time setting is
complete.
3 Using the Car Recorder
3.1 Recording Vid eos
3.1.1 Record vi deos whil e driving
When the vehicle engine starts up and the Automatic
Record function is enabled, the camcorder automatically
turn s on and starts record ing. Recording will automatically
stop w hen the engine is switched off. Or, pr ess the but ton
to sto p recordi ng manually.
Note : On s ome cars, the recor di ng will continu e wh en the
engi ne i s switched off. If th is h appens, pleas e ma nually turn
off th e ci garette lighter o r re move the car adap te r from the
ciga re tte lighter.
3.1.2 Record al l other typ es of video s
1. Pre ss the butt on to start r ecordin g.
2. Pre ss the butt on to stop re cording .
Note :
1. It ca n be c onfigured to save a v id eo file for every 3 o r 5
minu te s of recording.
2. The c am corder saves the re co rding in the memo ry c ard.
If the m em ory card capacity i s fu ll, the oldest fi le i n the
memo ry c ard will be overwri tten.
09

3.1.3 Emergency Recording
During Video Reco rding, pr ess the
butt on to enter
emergency recording mode,
the “E mergenc y” message
will be shown immediately on
the upper left co rner of the s creen,
and the recorded file will
be protected. To stop t he recording, press the butto n.
Note :
1. If th e Co llision Detecti on f unction is enable d and a
coll is ion is detected, th e camcorder will au to matically trigg er
the em er gency recording . The recording wil l la st 20 seconds
afte r co llision.
2. The e me rgency recordin g file is created as a ne w fi le,
whic h wi ll be protected to av oid being overwri tt en by normal
cycl in g recording. 4G mem ory card can save up to 5
emer ge ncy video files, an d 8G (or above) memor y ca rd can
save u p to 1 0 emergency video f iles. The alert mes sa ge of
“Eme rg ency files are full ” wi ll pop up on the scre en w hen
the em er gency recording f iles are full. You will need to
manu al ly delete the emerg ency files in the mem or y card if
you wa nt t o record new emerge ncy files.
3.1.4 The Recor ding Scre en
10
3.1.5 Tak ing Snaps hot
You can also use this camcorder
to tak e snapshots of the cur rent
scene. From the s tandby sc reen,
press the butto n to take a
snapshot.
Note: If record ing is in progress,
press the butto n to stop the r ecordin g first.
3.2 Playback Videos and Photos
3.2.1 Playing Vid eos/ Viewing Photos
To play videos, do the following:
1. If re cording i s in progress, press
the bu tton to sto p recordi ng.
The st andby screen is displayed
2. Pre ss the butt on to enter t he
OSD me nu.
3. Pre ss the butt on to selec t
File P layback a nd press th e button.
4. Pre ss the butt on to selec t Vi deo or Emer gency
and press the but ton.
5. Pre ss the butt on to brows e for the des ired vide o file
and press the but ton to play t he video.
11
Num be r Ite m Descr ipt ion
1 Recor din g Dur ati on Ind ic ate s the reco rdi ng du rat ion.
2 Date an d Time
Ind ic ate s the c urr ent rec ord ing d ate a nd time .
3
Gui de I con ( Men u)
Pre ss t he butto n to en ter t he OS D men u.
4
Gui de I con
(Pl ay bac k)
Pre ss t he butto n to sw itc h to Pl ayb ac k mod e.
5
Batte ry Ind ic ate s the r ema ining ba tte ry powe r.
6
Gui de I con ( Sto p)
Pre ss t he butto n to st op th e rec ord in g.
7
Gui de I con
(Em er gen cy)
Pre ss t he bu tto n to c ont inu ous ly re co rd th e e mer gen cy
video i n one f ile u nti l the rec ord ing i s man ually s top ped .

Note : When the ca mcorder is recording, press ▼ button
to sto p recordi ng, then pr ess ▲ butto n, you can di rectly
enter Playback mode. The last recorded video is
displayed on the screen.
3.2.2 The Playb ack Scree n
Photo Playback Screen Vide o Playbac k Screen
6. Pre ss the butt on to pause t he
playback. Press it again to resume.
12
3.2.3 Deleting Files
To delete file(s), do the following:
1. If recording is in progress, press
the button to stop recording.
2. Press the button to enter the
OSD menu.
3. Press the button to select
File Deletion and press the button.
4. Press the button to select the
file category and press the button.
5. Press the button to select the
file that you want to delete and press
the button to enter the Delete menu.
6. Press the button to select an
option.
7. Pre ss the butt on to confi rm delete .
Note : De leted files canno t be recovered. Ens ur e the files have
back up b efore deletion.
13
Numbe r I tem Descr ipt ion
1 Date an d tim e Ind icate s the r eco rde d date an d tim e.
2 St amp P rin t Indic ate s the f ile n ame, da te an d tim e sta mp if it wa s
enabl ed in t he Se tti ngs men u.
3 Gu ide i con (Ba ck) Press t he butto n to re tur n to fi le sele ction
displ ay.
4 Gu ide i con ( Pre vi ous ) Press t he butto n to vi ew th e pre vious
video /ph oto .
5 Gu ide i con (Ne xt) Press t he butto n to vi ew th e nex t video /ph oto .
6 Gu ide i con (Pa use ) Press t he butto n to pa use t he vi deo pla yba ck.
7 Tota l rec orded t ime I ndica tes t ota l rec orded t ime
8 Cu rre nt Dura tio n Indic ate s the e lap sed tim e.
9 Ba tte ry Indic ate s the r ema ining b att ery p owe r.
item
Descr ip tion
Delet e On e
Delet e th e curre nt f ile.
Delet e All Delet e al l files .

4 Adjusting the Settings
4.1 Using the Men u
You can customize the video recording and other gener al
sett ings via th e on-screen display (OSD) menus.
1. If re cording i s in progress, press t he button t o stop
recording.
2. Pre ss the butt on to enter t he OSD menu .
3. Pre ss the butt on to selec t a menu opti on and pres s
the bu tton to ent er the sele cted menu .
4. Pre ss the butt on to selec t the desir ed settin g and
press the butto n to confir m the setti ng.
5. Pre ss the butt on to exit th e menu.
14
4.2 Menu Tree
Refer to the below table for details on menu items
and available menu options.
15
Menu It em Descr ip tion Ava ilabl e op ti on
File Pl ay back Selec t th e file ca tegor y th at y ou
want to v ie w.
Vid eo / E merge ncy
Date / Tim e Set the d at e and tim e. Press / bu tton to
adjus t th e value , press t he
butto n to s witch t he field a nd
confi rm
Tim e Stamp E nable /Disa bl e the dat e stamp .
On / Of f
Vid eo R esolu tion Se t the vid eo reso lu tion. 2560 X 10 80 p 30
2304 X 12 96 p 30
1920 X 10 80 p 30 HDR
1280 X 72 0 p6 0
Photo R es oluti on Set t he phot o resol ut ion. 13M (48 00 X 2 700)
9M (400 0 X 22 50)
4M (268 8 X 15 12)
Image Q ua lity Set dif feren t image q ua lity for
the rec or ding vi deos
S.Fin e/ F ine/ No rmal
EV Set the e xp osure c ompen sa tion. Press / bu tton to s et the
expos ur e level . You may
custo mi ze it bet ween -2.0 ~ +2 .0
ADAS De te ct E nable /Disa bl e
Drive r Fa tigue Al ert
On/Of f
LCD Set ti ng Set the du ratio n fo r the displ ay t o
autom at icall y turn off r ig ht afte r
video r ec ordin g start s.
On / Turn Of f After 30 s ec. /Tu rn
Off Af te r 3 min. / Of f
Voice Re co rd E nable /D isabl e the voi ce
recor di ng.
On / Of f
Beep Enabl e/ Disab le the be ep . P re ss / button t o set th e
volum e. You m ay c us tomiz e it
betwe en 0 ~ 5
Recor d In terva l Set the r ec ordin g durat io n for
each re co rded vi deo fil e.
3 min. / 5 mi n.

16 17
Specifications
Item
Description
Image s en sor
1/3” CM OS s ensor
Eff ec tive pi xe ls
2688 (H ) x 15 20 (V)
Stora ge m edia
Suppo rt M icro SD HC , up to 32G B class 10
or abov e
LCD dis pl ay
2.4” LC D co lor TFT (26 2K pixe ls )
Lens
Wide Ang le F ixed Fo cu s lens
F/2.0 , f= 2.6mm
Focus r an ge
0.5m~ In finit y
Vid eo ( Forma t: M OV)
Resol ut ion: WF HD ( 2560 x 10 80), 30fp s
Super H D (2 304 x 129 6) , 30fps
Full HD ( 19 20 x 1080 ), 3 0fps HD R
HD (128 0 x 72 0 ), 60fp s
Still i ma ge
(Phot og raph) ( Fo rmat: D CF
(JPEG ))
In Phot o mo de, ava il able re solutio ns are:
13 Mega pi xel (48 00 x 2 700)
9 Megap ix el (400 0 x 22 50)
4 Megap ix el (268 8 x 15 12)
Shutt er
Elect ro nic shu tt er
Auto: 1/ 2 ~1/20 00 s ec.
G
-
Senso r
3-Ax is G- For ce sens or
ISO Auto
White Bal an ce Auto
Micro ph one Yes
Speak er Yes
Conne ct ion Mini US B
Batte ry Built -in 470 mA H Li -
polym er r echar ge able (T his
batte ry i s NOT rep lacea ble)
Opera ti ng
Tempera tu re
0° ~ 50° C
Opera ti ng Humi di ty 20 ~ 70% RH
Stora ge
Tempera tu re
-20° ~ 8 0° C
Dimen si ons 65 x 70 x 27. 5 mm
Wei gh t Appr ox . 80g (wi th out mem ory card)
Collisi on D etection
The camco rd er will autom at ically
trigger e me rgency reco rd ing when
tremor of a c ol lision is det ec ted.
Off/L ow /Medium /H igh
Frequen cy Redu ce f licker on LCD . Auto/ 60H z/ 5 0Hz
Languag e Set the OSD me nu l anguage. Engli sh ,Deut sc h, França is ,
Italian o, E spañol,
Portugu ês ,Türkçe, Po ls ki
File Dele ti on Delete th e fi le(s). Vid eo / E mergenc y
Format th e me mory card ins er ted in
the devic e. Al l the files in th e ca rd will
be erased .
Yes / No
Reset all s et tings to fact or y default
setting s.
Yes / No
Firmwar e Ver sion
Format
Default
About
Motio n Det ec tio n I f Mot ion Det ect io n is a cti vated ,
the ca mcord er will automa tical ly
trigg errec ordin g whe n th e
camco rde r de tec ts any mot ion in
front . Whe n th e batter y is full y
charg ed an d is
in good c ond it ion , Motio n
Detec tio n ca n rec ord
conti nuo us ly
On / Off
 Loading...