

Page 1
1004 Jaycox Rd, Avon OH 44011
1-888-333-1134
www.GoMainAccess.com
(For use with Model #200700T Smart Choice Ladder)
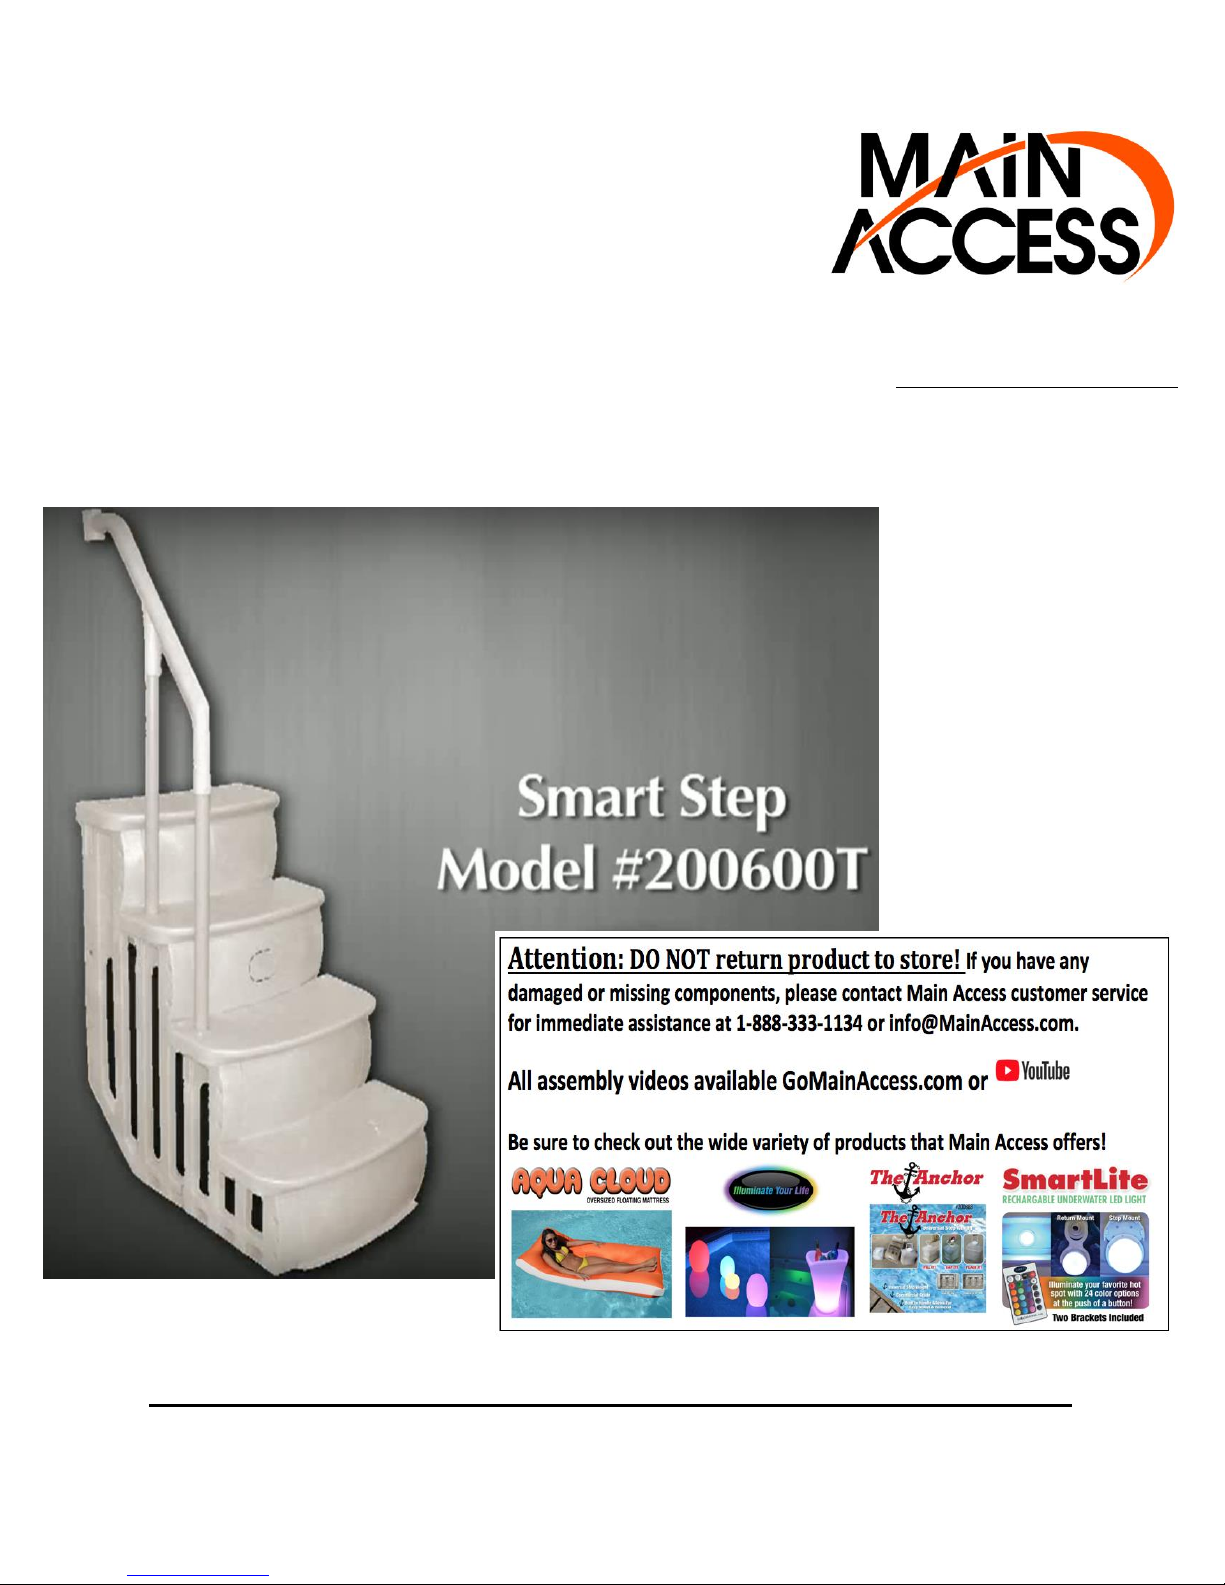
Assembly Instructions for Model #200600T Smart Step
Page 2
SMART STEP
Model #200600T Assembly Instructions
*For use with Model #200700T (Smart Choice Ladder) to create the Smart Step System*
Page 3
For Questions Regarding Installation, Please Contact Main Access Customer Service 1-888-333-1134
Step 3: Repeat steps 1 & 2 on the right side of the
step.
Step 4: Align the holes on the lower left riser with
the mushroom caps on the lower step tread.
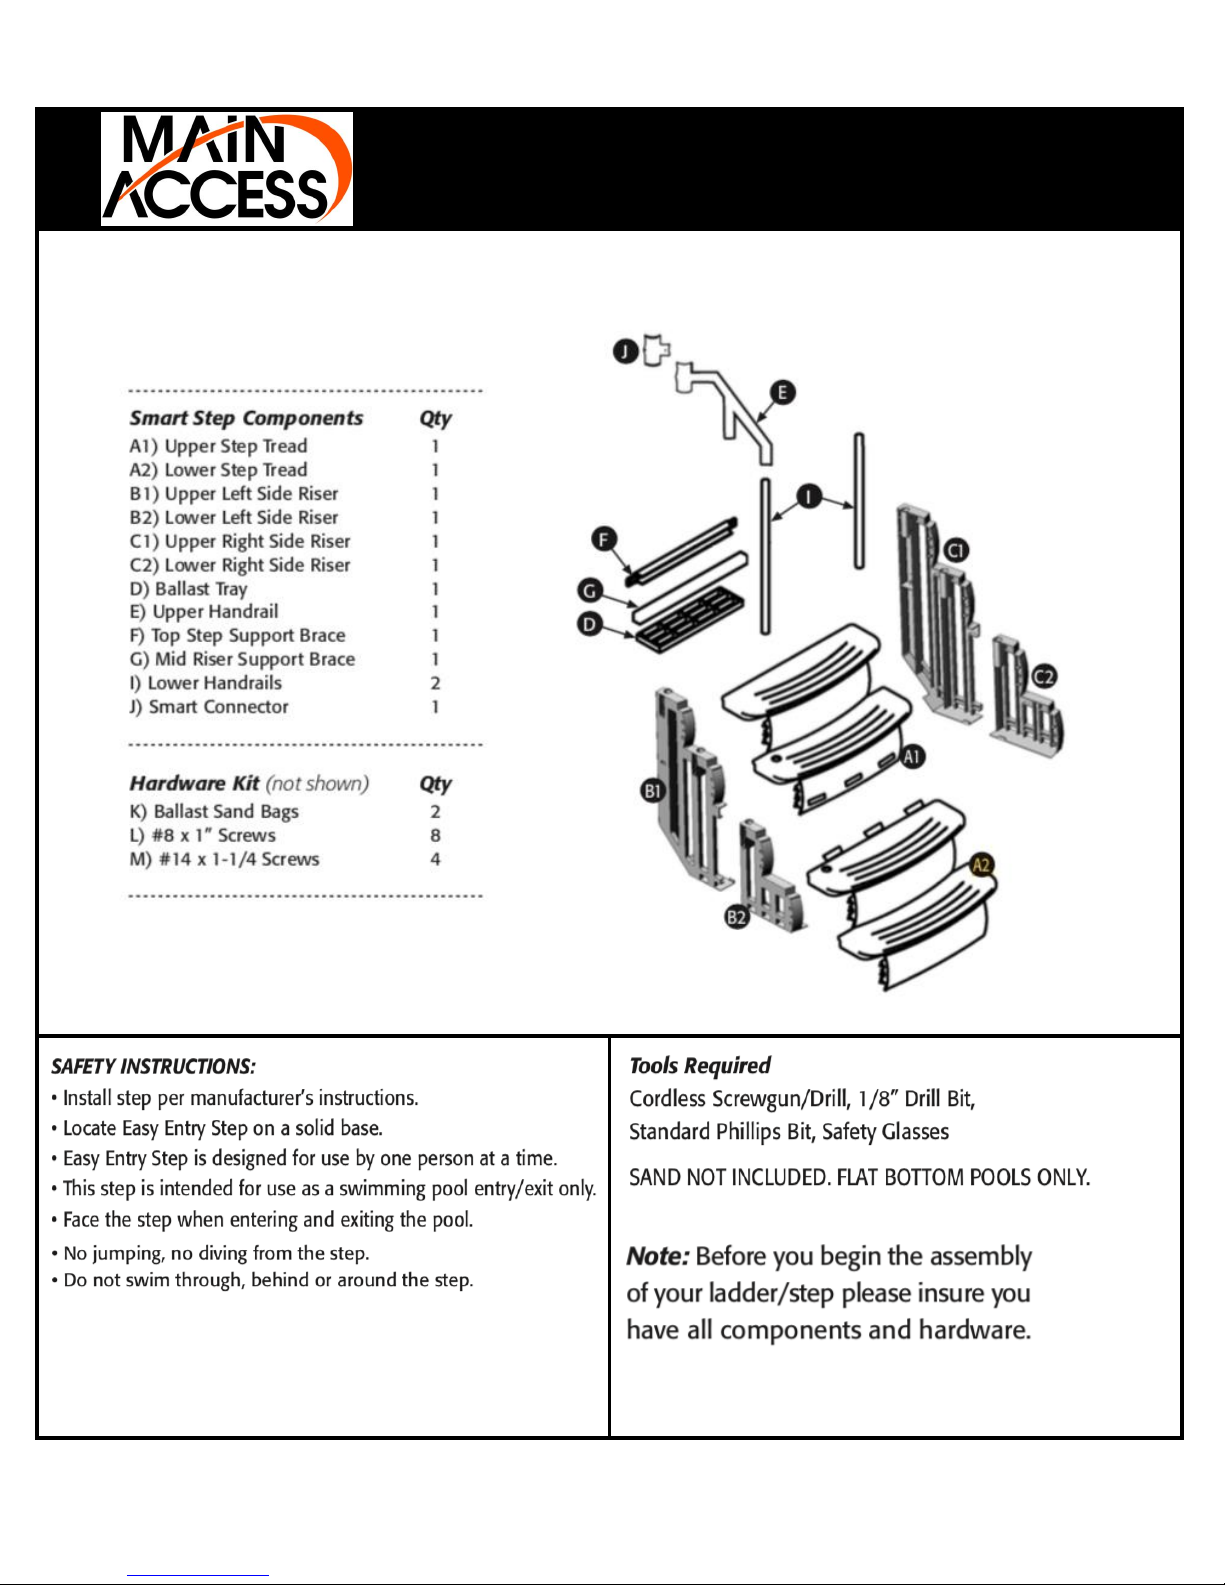
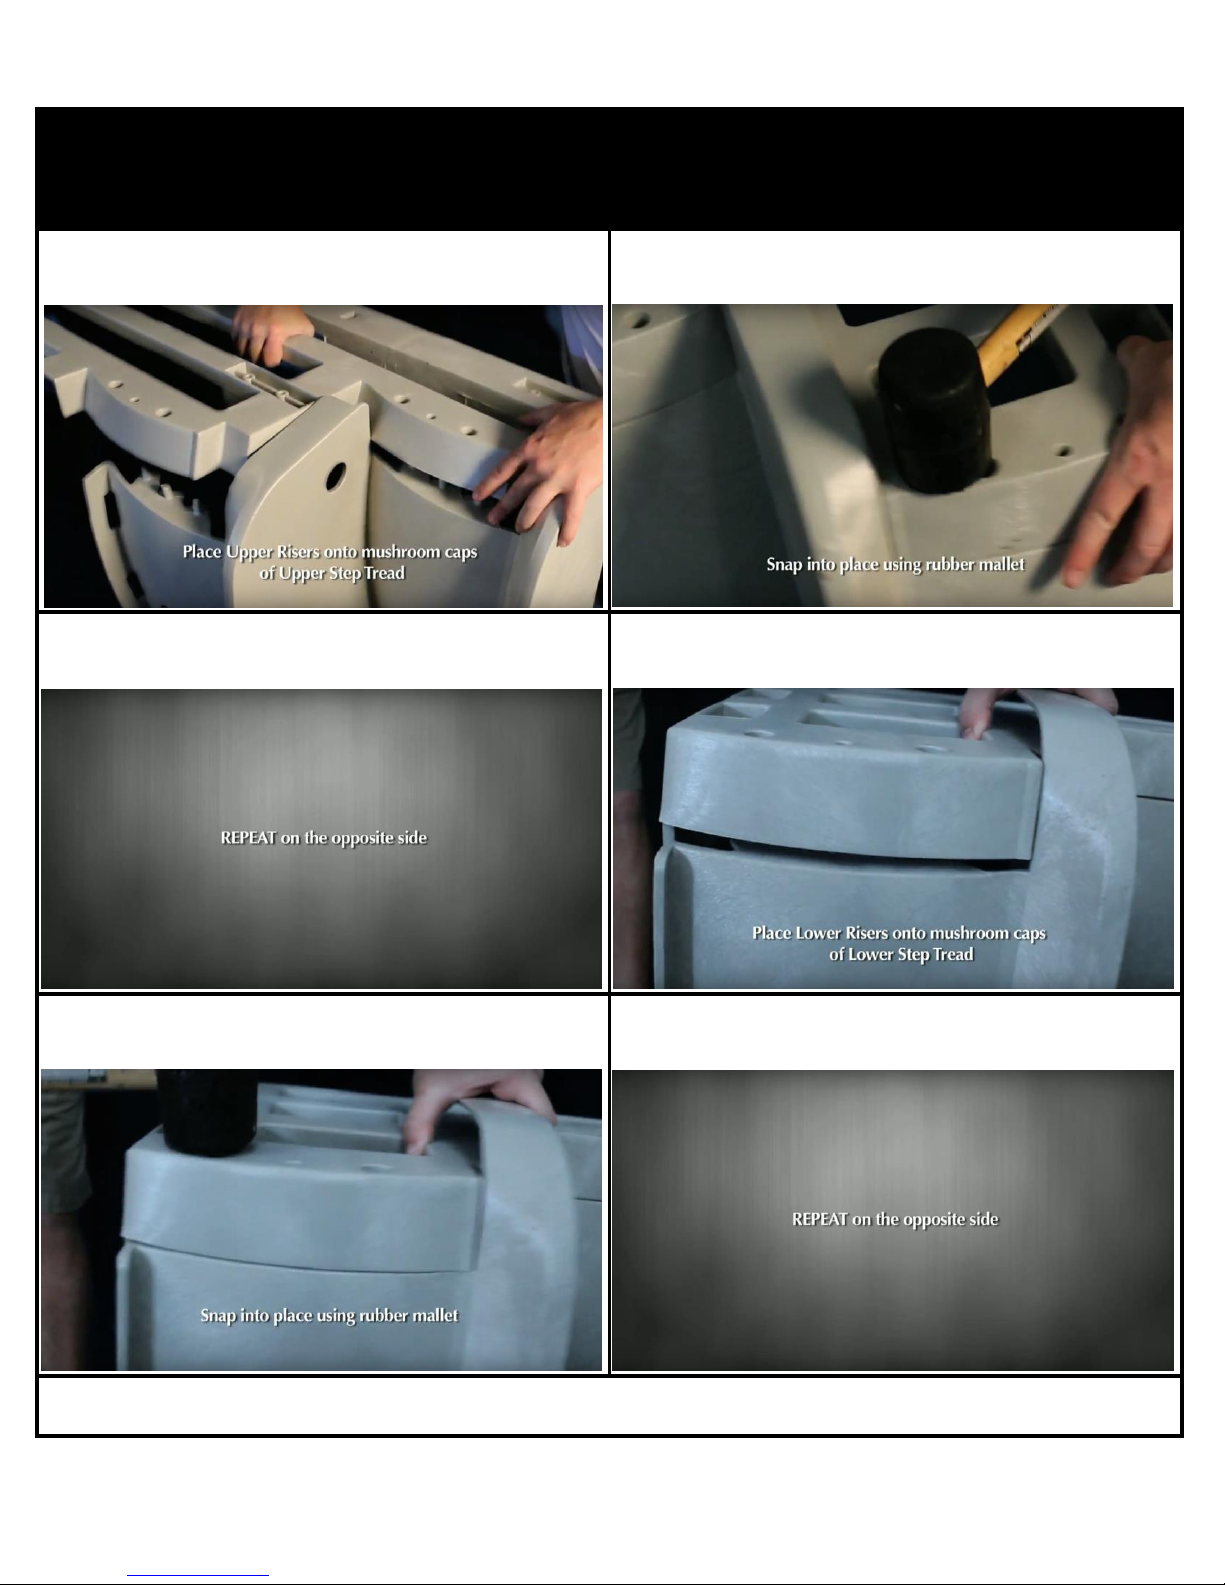
Model #200600T
Step 1: Align the holes on upper left riser with with
mushroom caps on the upper step tread.
Step 2: Snap into place with a rubber mallet.
Step 6: Repeat steps 4 & 5 on the right side of the
step.
Step 5: Snap mushroom caps into place using
rubber mallet.
Page 4

Step 11: Insert mid riser brace in between risers
and over the tabs.
Step 12: Insert a lower handrail into the hole on
the second step (lower step tread).
SMART STEP
Model #200600T Assmebly Instructions
Step 7: Insert the tabs from lower step assembly to
the slots of the upper step assembly.
Step 8: Align ballast tray between all four risers
under the step.
Step 9: Snap tabs from upper and lower risers into
the ballast tray with a rubber mallet.
Step 10: Insert top step support brace in between
uppers risers.
Page 5
Model #200600T
Step 13: Insert the second lower handrail into the
third step (lower hole on the upper step tread).
Step 14: Place upper handrail over both lower
handrails.
Step 15: Use the socket cap provided to plug the
unused hole in the upper step tread.
Step 16: Drill #14 x 1 1/4" screws into handrails
through all upper and lower risers.
Step 17: Drill #8 x 1" screws into four dimples on
step tread.
Step 18: Use the two 1" screws to secure the upper
handrail to the lower handrails.
For Questions Regarding Installation, Please Contact Main Access Customer Service 1-888-333-1134
Page 6

All Finished!
Step 19: Retrieve Smart Choice Ladder and center
Support Feet on top step. Secure feet using (8) 1"
screws through hash marks on Support Feet (C).
Step 20: Attach Upper Rail (E) to Smart Choice
Handrail (A) using Smart Connector (J) and (2) 1"
screws.
For Questions Regarding Installation, Please Contact Main Access Customer Service 1-888-333-1134
SMART STEP
Model #200600T Assmebly Instructions
Step 21: Pool Installation
*Optional* Purchase (2) Anchors (#200888) to weigh
down the Smart Step. Sand not inlcuded.
Note: Two people are required for installation.
A total weight of approximately 100 lbs. is
required to keep the step from moving once in
place under water. With the assistance of another
person, carefully place the step in the pool. Place
the two sealed bags of sand (not included) in
ballast bags (M) over the ballast tray (D) to hold
the step in place. Walk step back againast the pool
wall to prevent swim behind hazards.
Page 7

1004 Jaycox Road
Avon, OH 44011
1-888-333-1134
Info@MainAccess.com
www.GoMainAccess.com
Be sure to check out these other great products from Main Access!
Mount it to your step or hang it from the return!
Use them to easily weigh down your pool step!
Luxury Pool Floats!
Light-up Floating Globes and Furniture!
 Loading...