

Page 1
Page 2
bushing
Installation of Metro mailbox onto
a bevel sided/shingled exterior wall
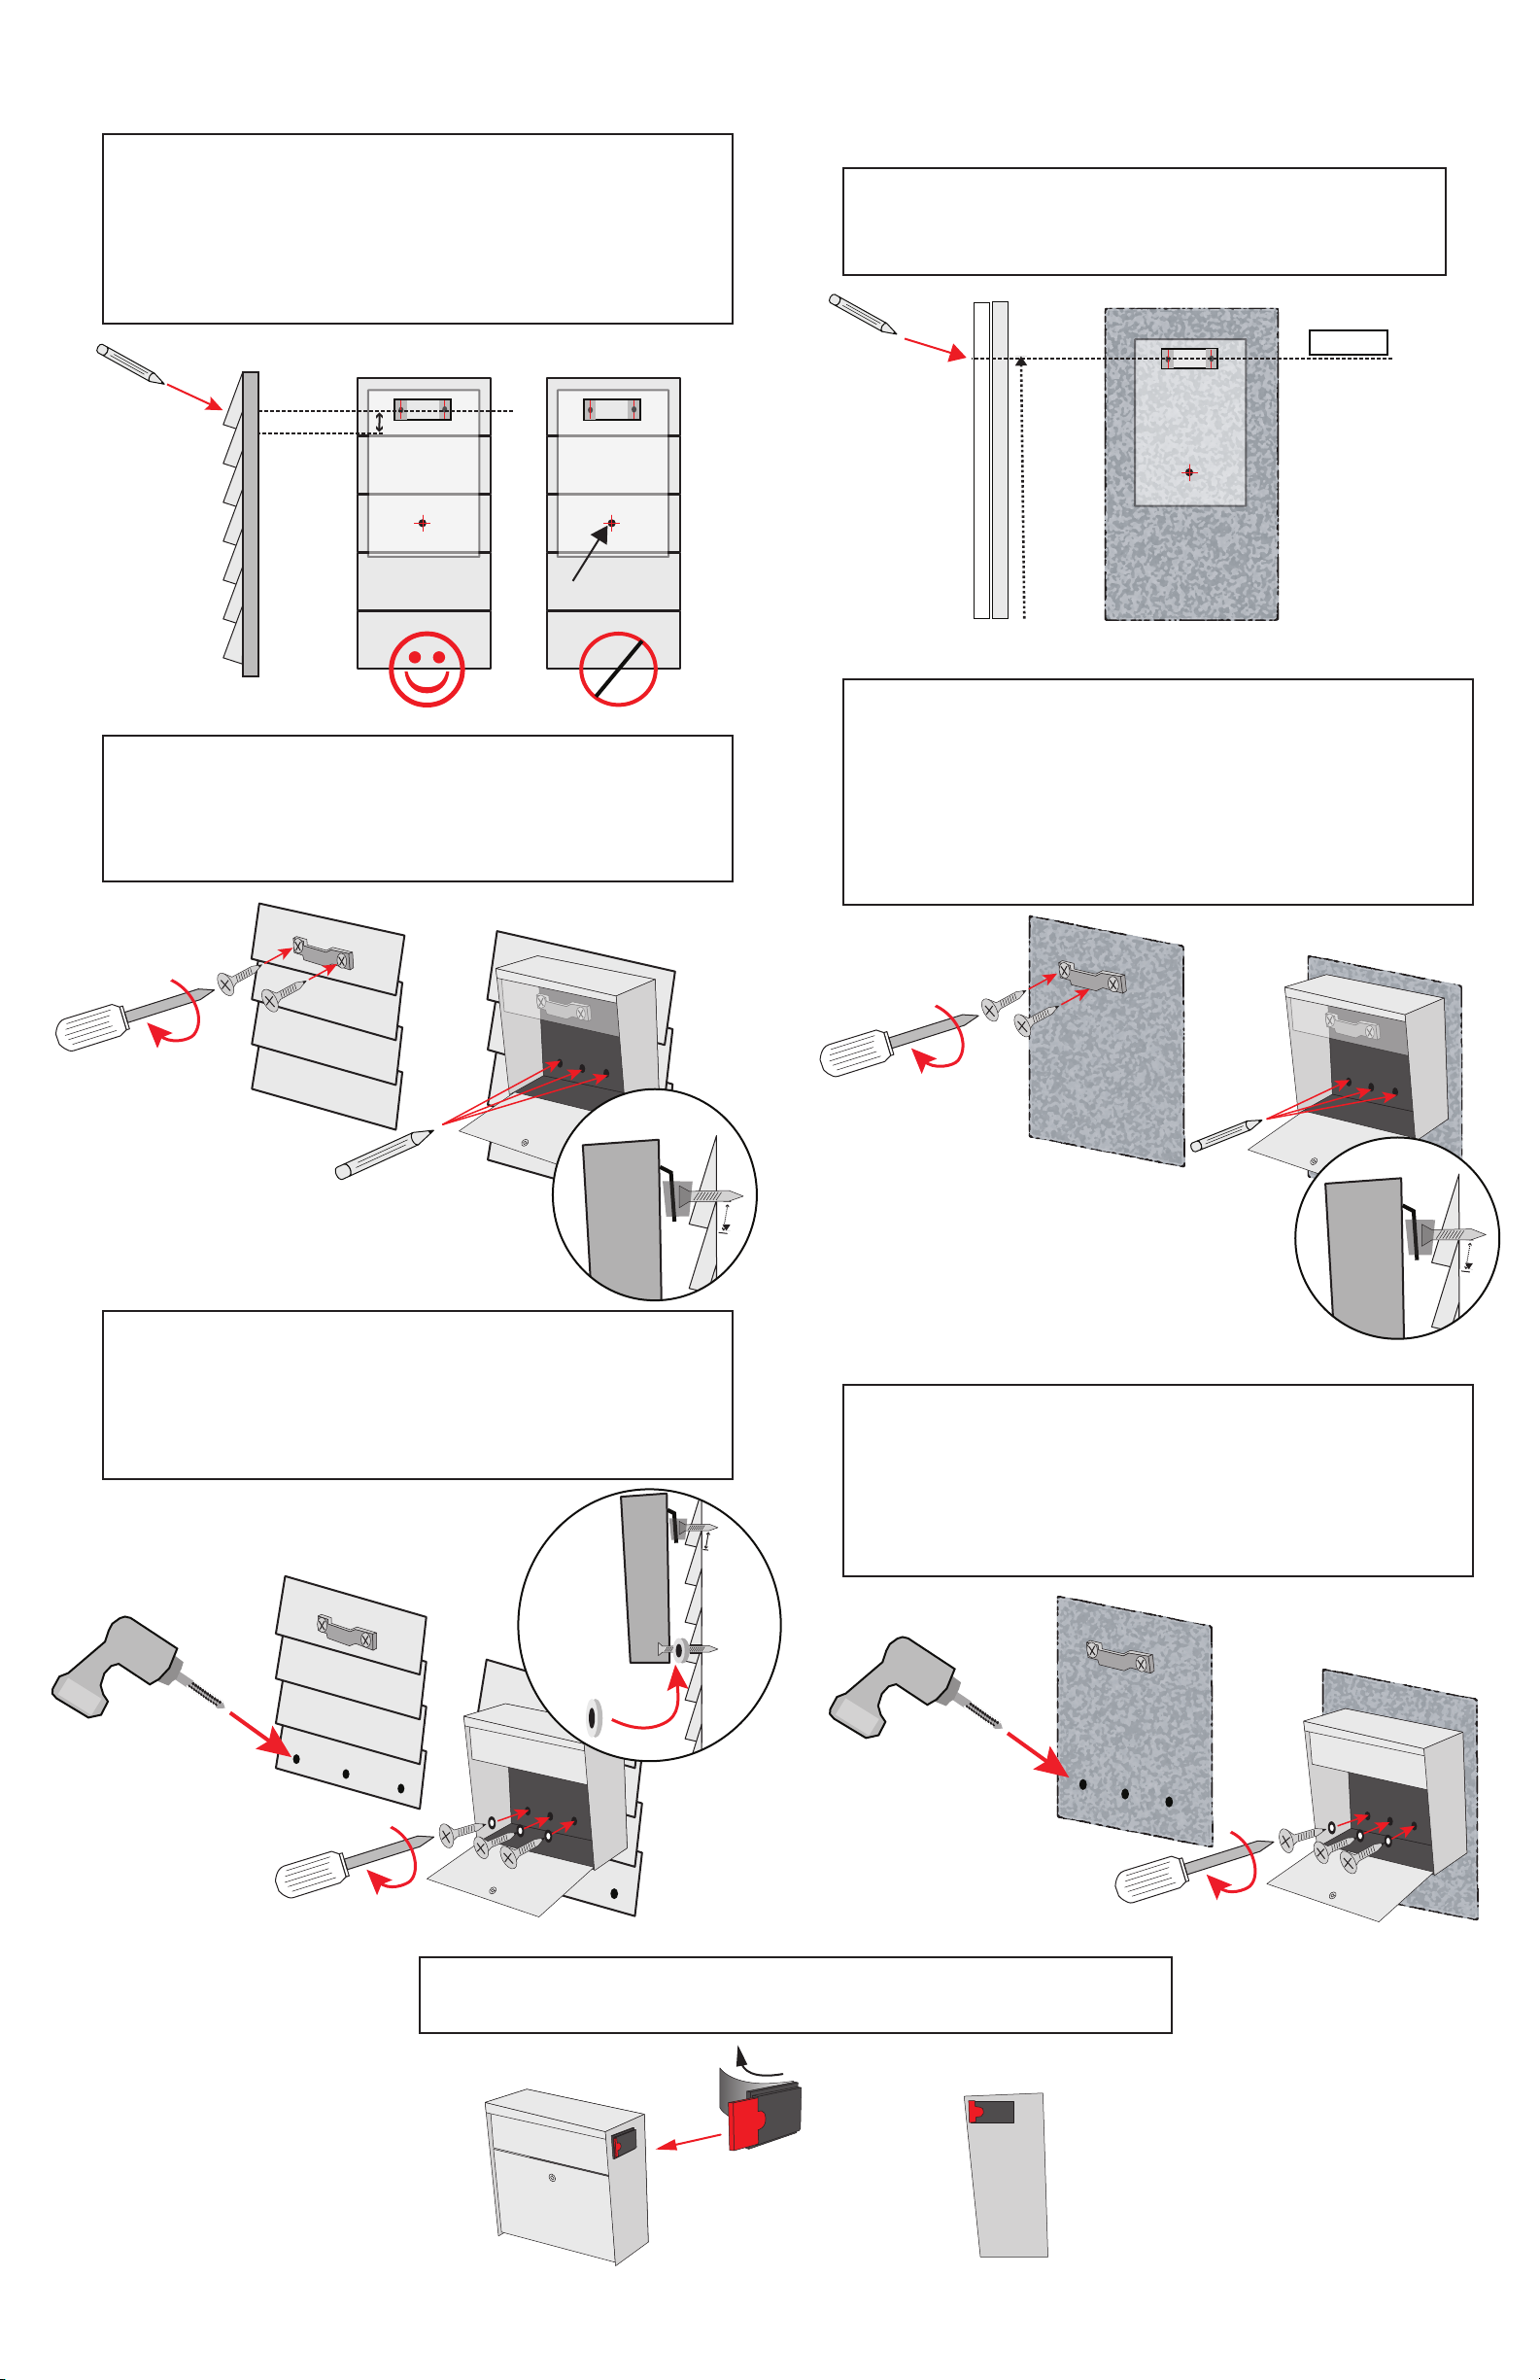
Using the hole template on this instruction sheet, lay out the
1
top two holes on the wall at about 55”to 65”high. You may
adjust the height up or down to your preference. If mounting
onto bevel siding, position the top holes about
away from the peak of the bevel so as not to split the wood.
Also adjust up or down a little to make sure bottom hole does
not line up on the edge of bevel. The top two holes should be
close to level. Mark the top hole locations.
LEVEL
3/4 to 11/2”
3
”
to 1
/4
Installation of Metro mailbox
onto stucco or masonry.
(
for EIFS “faux” stucco, consult EIFS manufacturer
Using the hole template on this instruction sheet, lay out
1
”
/2
1
the top two holes on the wall at about 55”to 65”high. You
may adjust up or down to your preference. Mark the top
hole locations. Make sure the two holes are level.
”
)
LEVEL
”
to 65
”
55
WALL
1
”
Using a
2
2”deep into the the wall material. Attach the mounting
bracket using the two 2
some water resistant caulk into the holes. Now hang the
Metro from the brackets shown and mark the bottom three
holes with a pencil.
drill bit, drill the top two pilot holes approximately
/8
1
”
screws provided. Be sure to put
/4
Hole too close to edge.
Adjust postion... a little.
to 65
sheathing
”
55
WALL
Using a masonry style drill bit(not provided), drill the top
2
two pilot holes approximately 2”deep into the wall material
and into the sheathing. Attach the mounting bracket using
the two 2
concrete, stucco, brick or some other system, you will
probably have to use masonry screws or anchors. Consult a contractor if necessary. Be sure to use a water
resistant caulk in the holes to keep moisture out. Hang the
Metro from the bracket as shown and mark the bottom
three holes with a pencil.
1
/4” screws provided. If the wall is a thick
3
Using a 1/8”drill bit, drill the bottom three pilot holes approximately 2
from the the mounting bracket. If there is a large gap
between the Metro and the wall insert a bushing on the screw.
Insert some water resistant caulk into the hole and secure to
bottom using the remaining three
”
deep into the wall material. Now hangy our Metro
1
2
/4”screws provided.
Using a masonry style drill bit(not provided), drill the
3
bottom three pilot holes approximately 2
wall material. Now hang the Metro from the mounting
bracket and secure to bottom using the three
”
deep into the
1
2
/4
provided. Be sure to put some weather resistant caulk
into the holes. If your wall is a thick brick, stucco or
concrete you may need masonry screws or anchors for
attachment. Consult a contractor if necessary.
”
screws
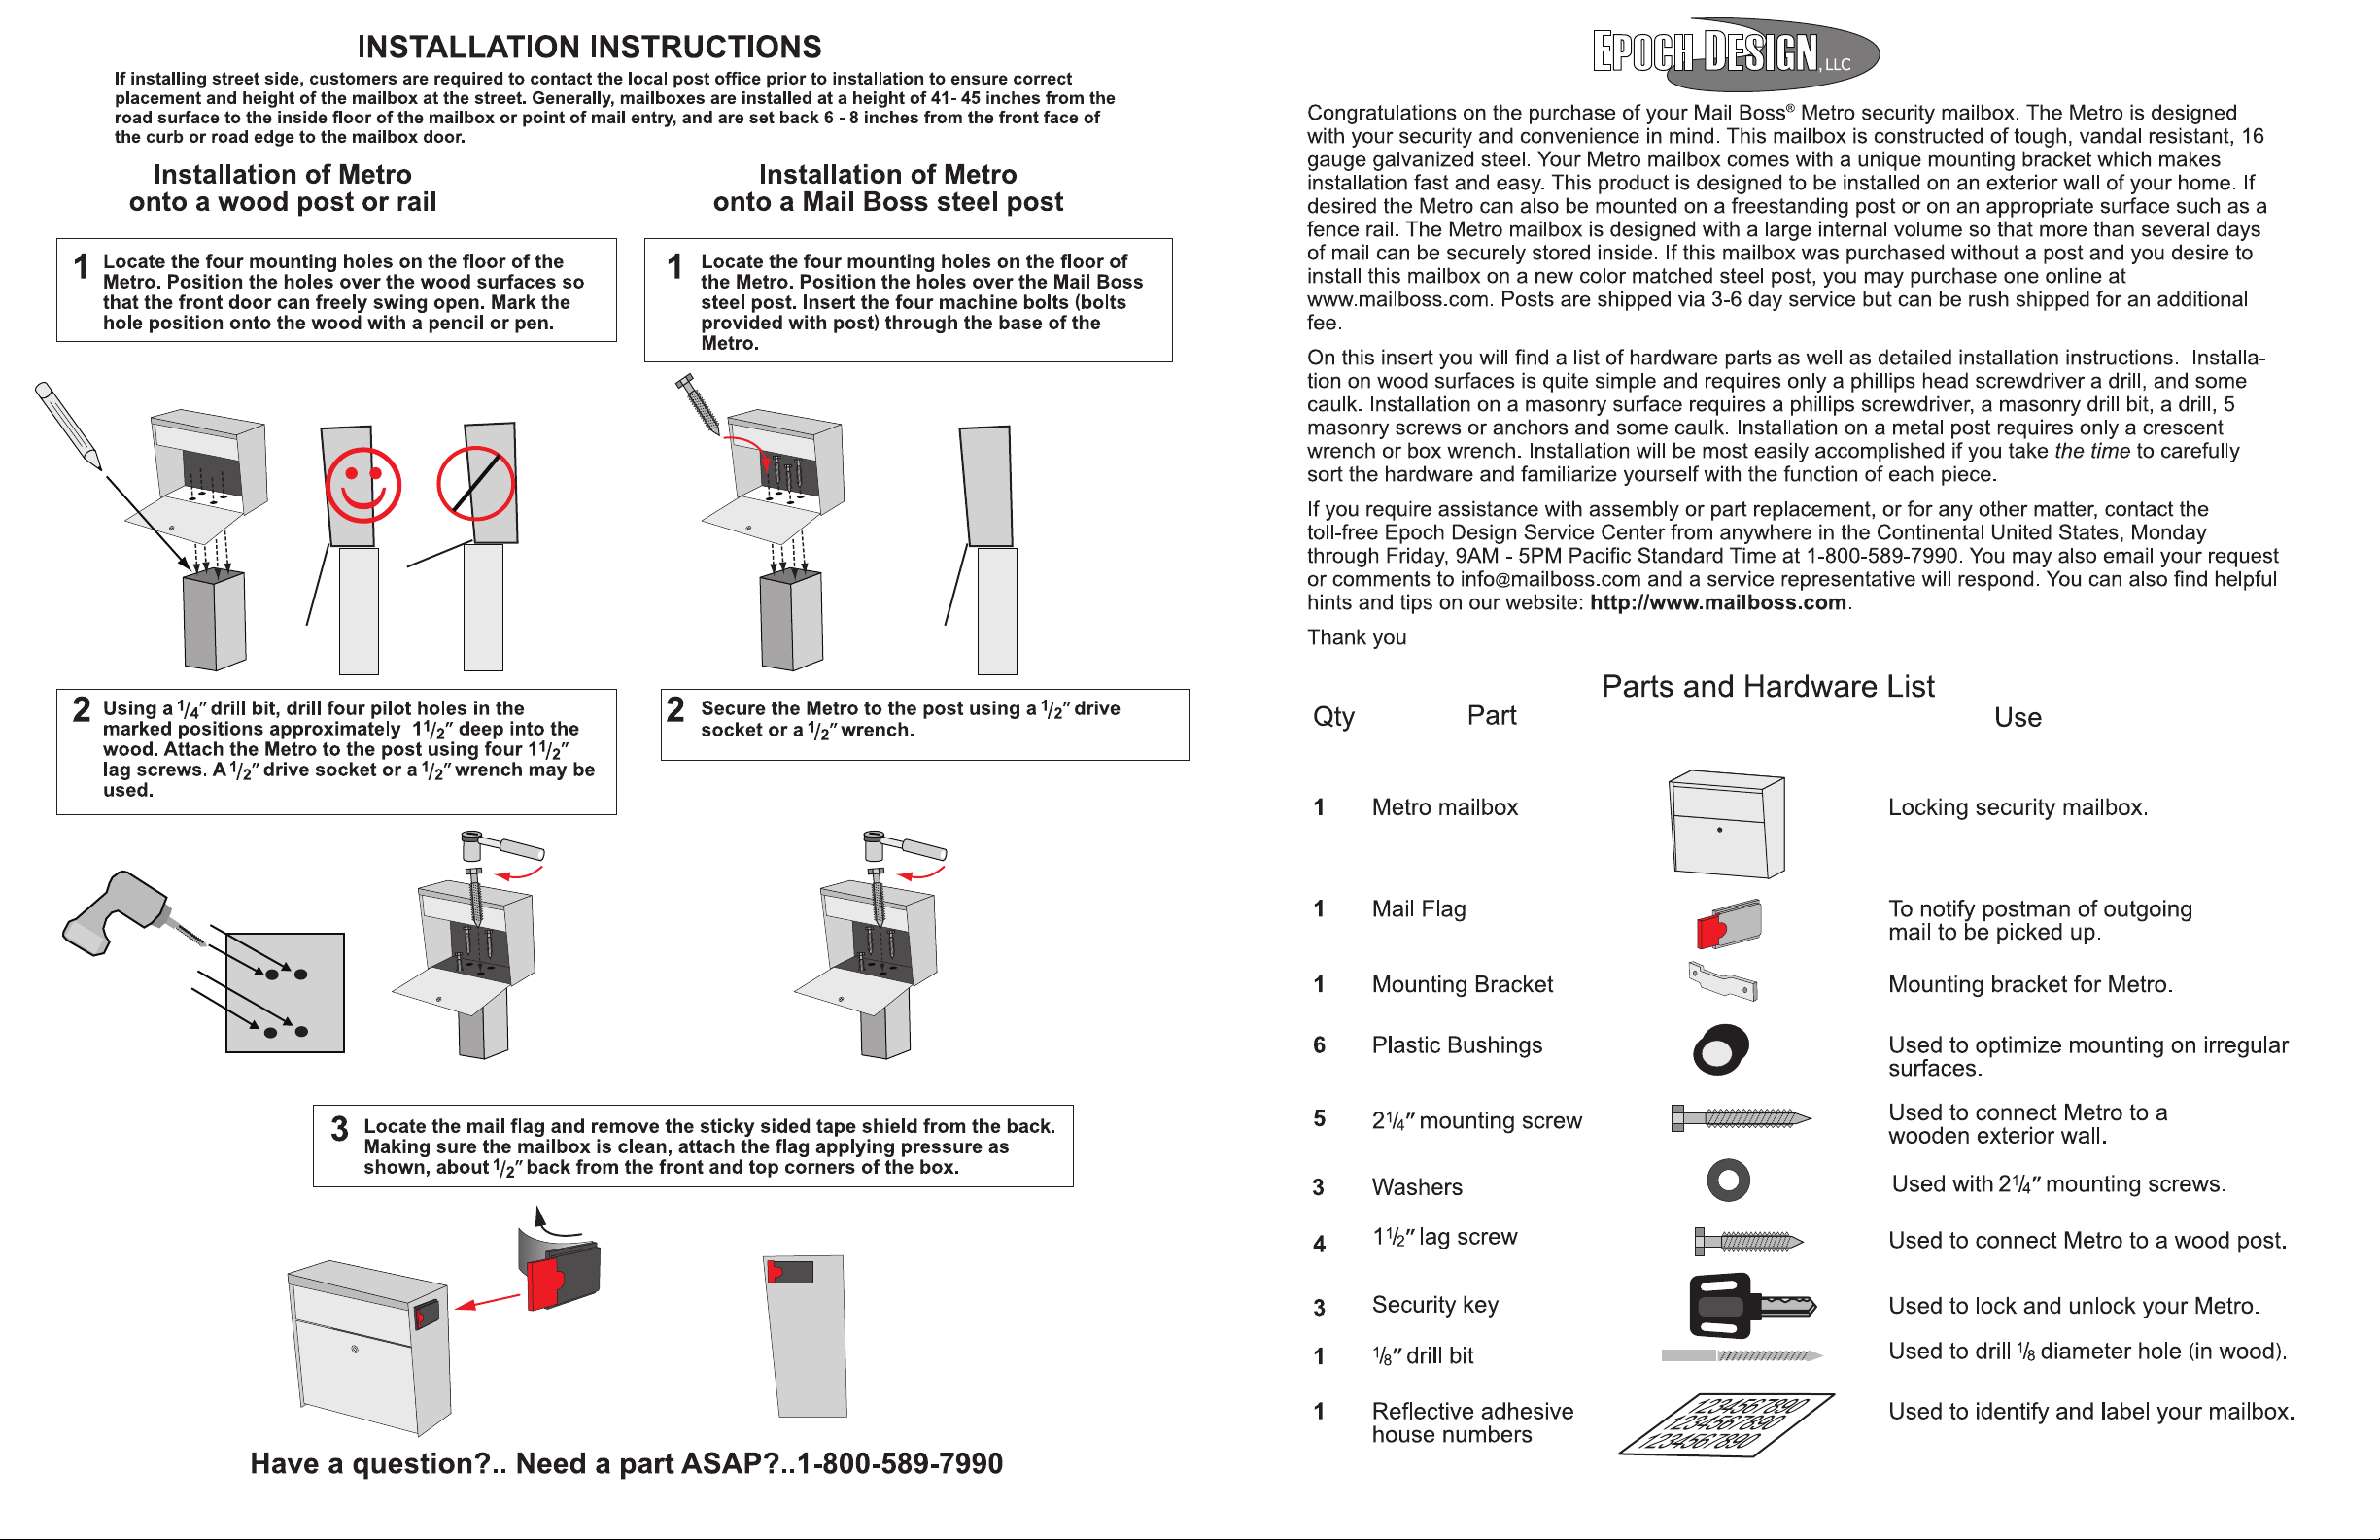
Locate the carrier flag and remove the sticky sided tape shield from the back.
4
Making sure the mailbox is clean, apply pressure while attaching the flag as
shown, about
1
/2”inch back from the front and top corners of the box.
Have a question?.. Need a part ASAP?..1-800-589-7990
 Loading...