

The Engine Shed
Top Station Road
Brackley
NN13 7UG
Tel: 0845 1308060
Fax: 01280 845345
Web: www.caterparts.com
All spares available from
Copyright Notice:
All rights reserved. No parts of this manual may be reproduced in any form without
express written permission of Maidaid-Halcyon(A trading name of Buttress Group Ltd)
Installation&User
Guide

INSTRUCTION MANUAL FOR DISHWASHERS
UK
CONTENTS
CHAP 1 PREFACE ..................................................................................................................... 2
CHAP 2 INSTALLATION ............................................................................................................ 2
2.1 U
NPACKING ........................................................................................................................ 2
2.2 P
OSITIONING ....................................................................................................................... 2
2.3 E
LECTRICAL CONNECTION ................................................................................................... 3
2.4 P
LUMBING CONNECTION ...................................................................................................... 3
2.5 C
ONNECTION TO THE DRAIN LINE ......................................................................................... 3
2.6 R
INSE AID AND DETERGENT ................................................................................................. 4
CHAP 3 RISKS AND IMPORTANT WARNINGS ....................................................................... 4
3.1 N
ORMAL SERVICE CONDITIONS ............................................................................................ 4
CHAP 4 MACHINE USE ............................................................................................................. 5
4.1 K
EY AND SYMBOLS .............................................................................................................. 5
4.2 S
WITCHING THE DISHWASHER ON ........................................................................................ 6
4.3 W
ASHING CYCLE ................................................................................................................. 6
4.4 C
YCLE SELECTION AND START-UP ........................................................................................ 6
4.5 S
ELECTING SPECIAL PROGRAMMES ...................................................................................... 7
4.6 D
ESCRIPTION OF SPECIAL PROGRAMMES ............................................................................. 7
4.7 A
UTOMATIC CYCLE START-UP .............................................................................................. 8
4.8 D
ISPLAYING INFORMATION ................................................................................................... 8
4.9 T
URNING THE DISHWASHER OFF .......................................................................................... 8
4.10 R
EMOVAL OF INTEGRAL FILTER ............................................................................................ 8
4.11 E
MPTYING THE DISHWASHER ............................................................................................... 9
4.12 R
ESIN REGENERATION ........................................................................................................ 9
4.12.1 Machine with external water softener ............................................................................ 9
4.13 E
ND OF SERVICE ................................................................................................................. 9
CHAP 5 MAINTENANCE .......................................................................................................... 10
5.1 C
LEANING AND HYGIENE .................................................................................................... 10
5.2 M
AINTENANCE OF FILTERING GROUP .................................................................................. 10
5.3 C
LEANING OF WASH ARMS ................................................................................................. 10
CHAP 6 SELF-DIAGNOSIS ...................................................................................................... 11
6.1 S
ETTINGS ......................................................................................................................... 12
CHAP 7 DISPOSAL .................................................................................................................. 13
7.1 I
NFORMATION FOR USERS .................................................................................................. 13
The manufacturer reserves legal rights to the property of this document. It is forbidden to reproduce it or distribute it by any means
without prior written authorisation.
The manufacturer reserves the right to introduce changes in order to achieve the improvements it deems necessary without prior notice.
442427 LCD REV00 05-04-2012 U UK
Page 1 of 14
INSTRUCTION MANUAL FOR DISHWASHERS
UK
Chap 1 PREFACE
Failure to follow the instructions provided in the attached documentation may jeopardize
safety of the appliance and immediately cancel the warranty.
The warnings contained in this manual provide important information regarding
safety during the various installation, operation and maintenance stages.
• Carefully store all documentation near the appliance; give it to the technicians and operators
who will be using it. It is the operator’s duty to read, understand and learn this manual
before starting any operation on the machine. The appliance is intended for the
professional washing of dishes for dining facilities. Therefore, installation, use and
maintenance must in all cases be performed by trained personnel who follow the
manufacturer’s instructions. Do not leave within the reach of children. The choice of
materials, construction in conformity with EC safety directives and complete testing ensure
the quality of this machine.
The manufacturer declines all responsibility for damage to property or injuries to persons
deriving from failure to comply with the instructions given or from improper use of the
machine.
Chap 2 INSTALLATION
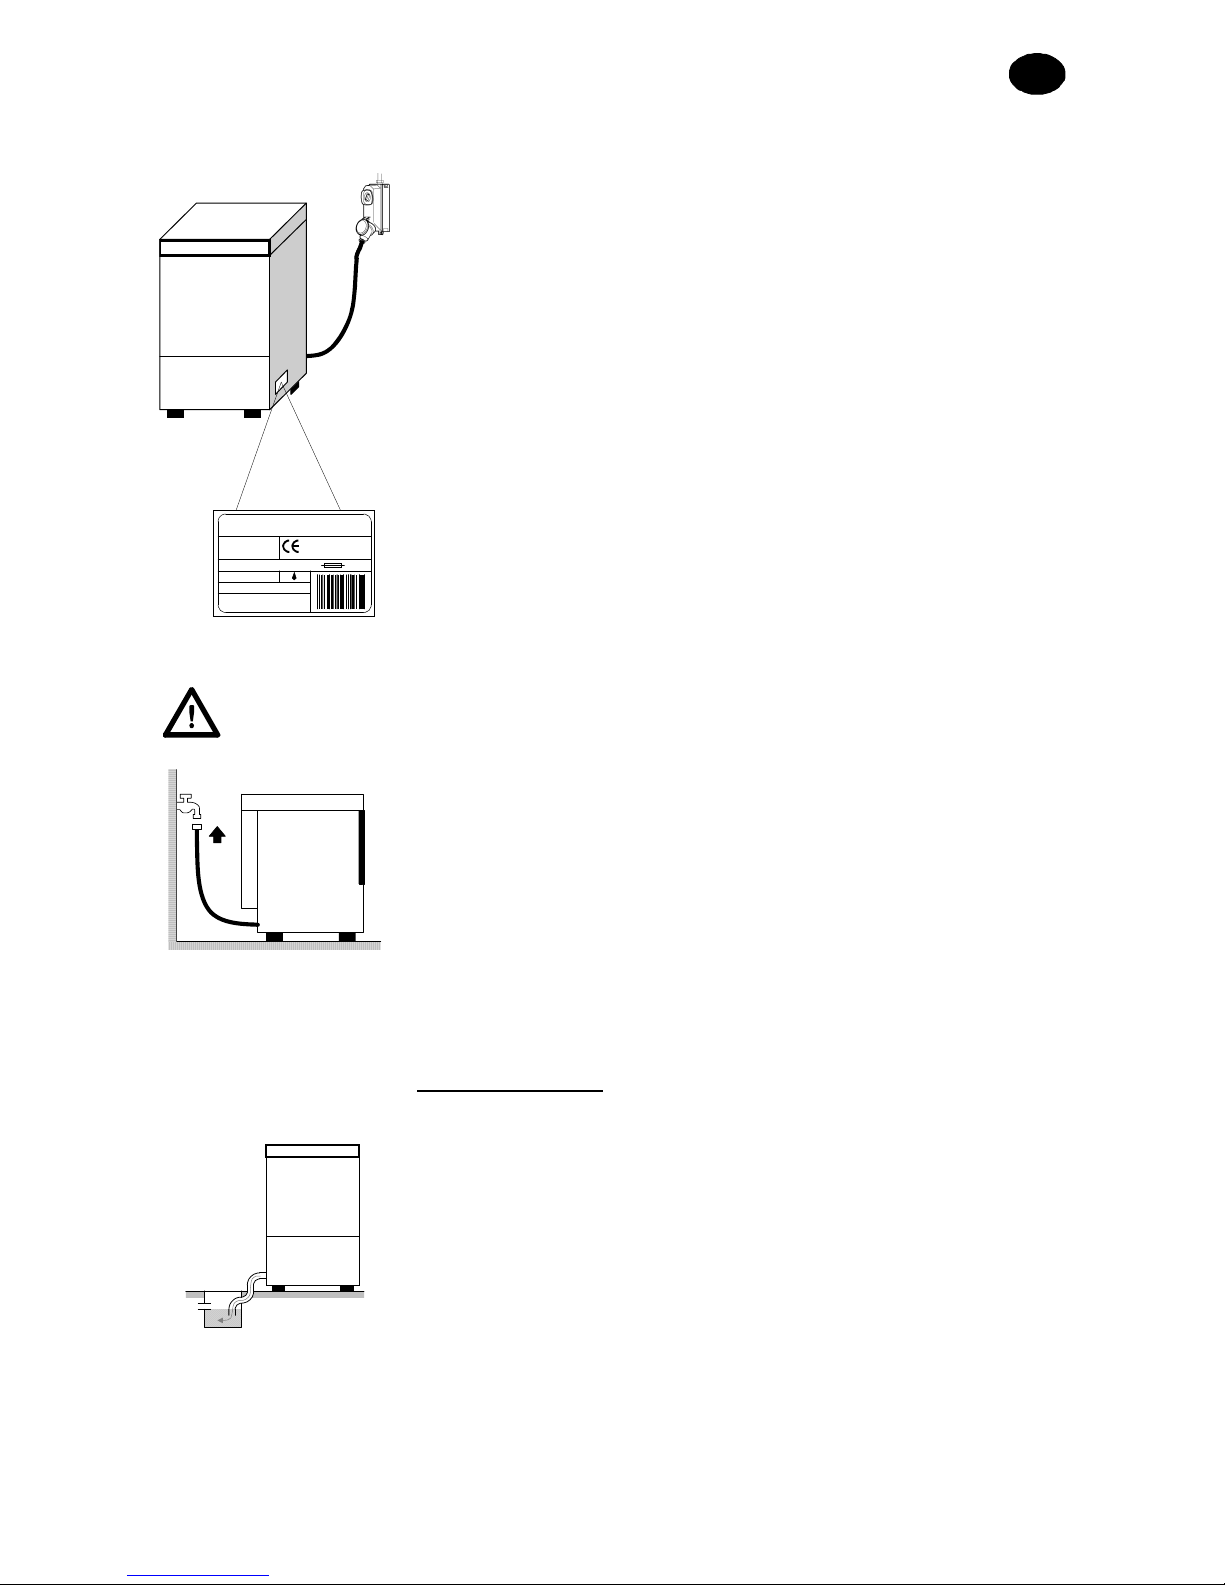
Proper installation is essential in order for the machine to operate well. Some of the data needed
for machine installation can be found on the data plate
placed on the right side of the machine and
in duplicate on the
cover of this manual.
Only qualified, authorised technicians must install the machine.
2.1 Unpacking
Check that the packing is in perfect condition and write down any damage found on the delivery
note. After you have removed the packing, make sure the appliance is intact
. If the machine is
damaged, immediately notify the dealer by fax or by registered letter with advice of receipt and the
haulage contractor that transported it. If the damage is such as to jeopardize machine safety, do
not install and/or use it until a qualified technician services it.
The packing components (plastic bags, foam polystyrene, nails, etc. ...) must not be
left within the reach of children and pets as they may be dangerous.
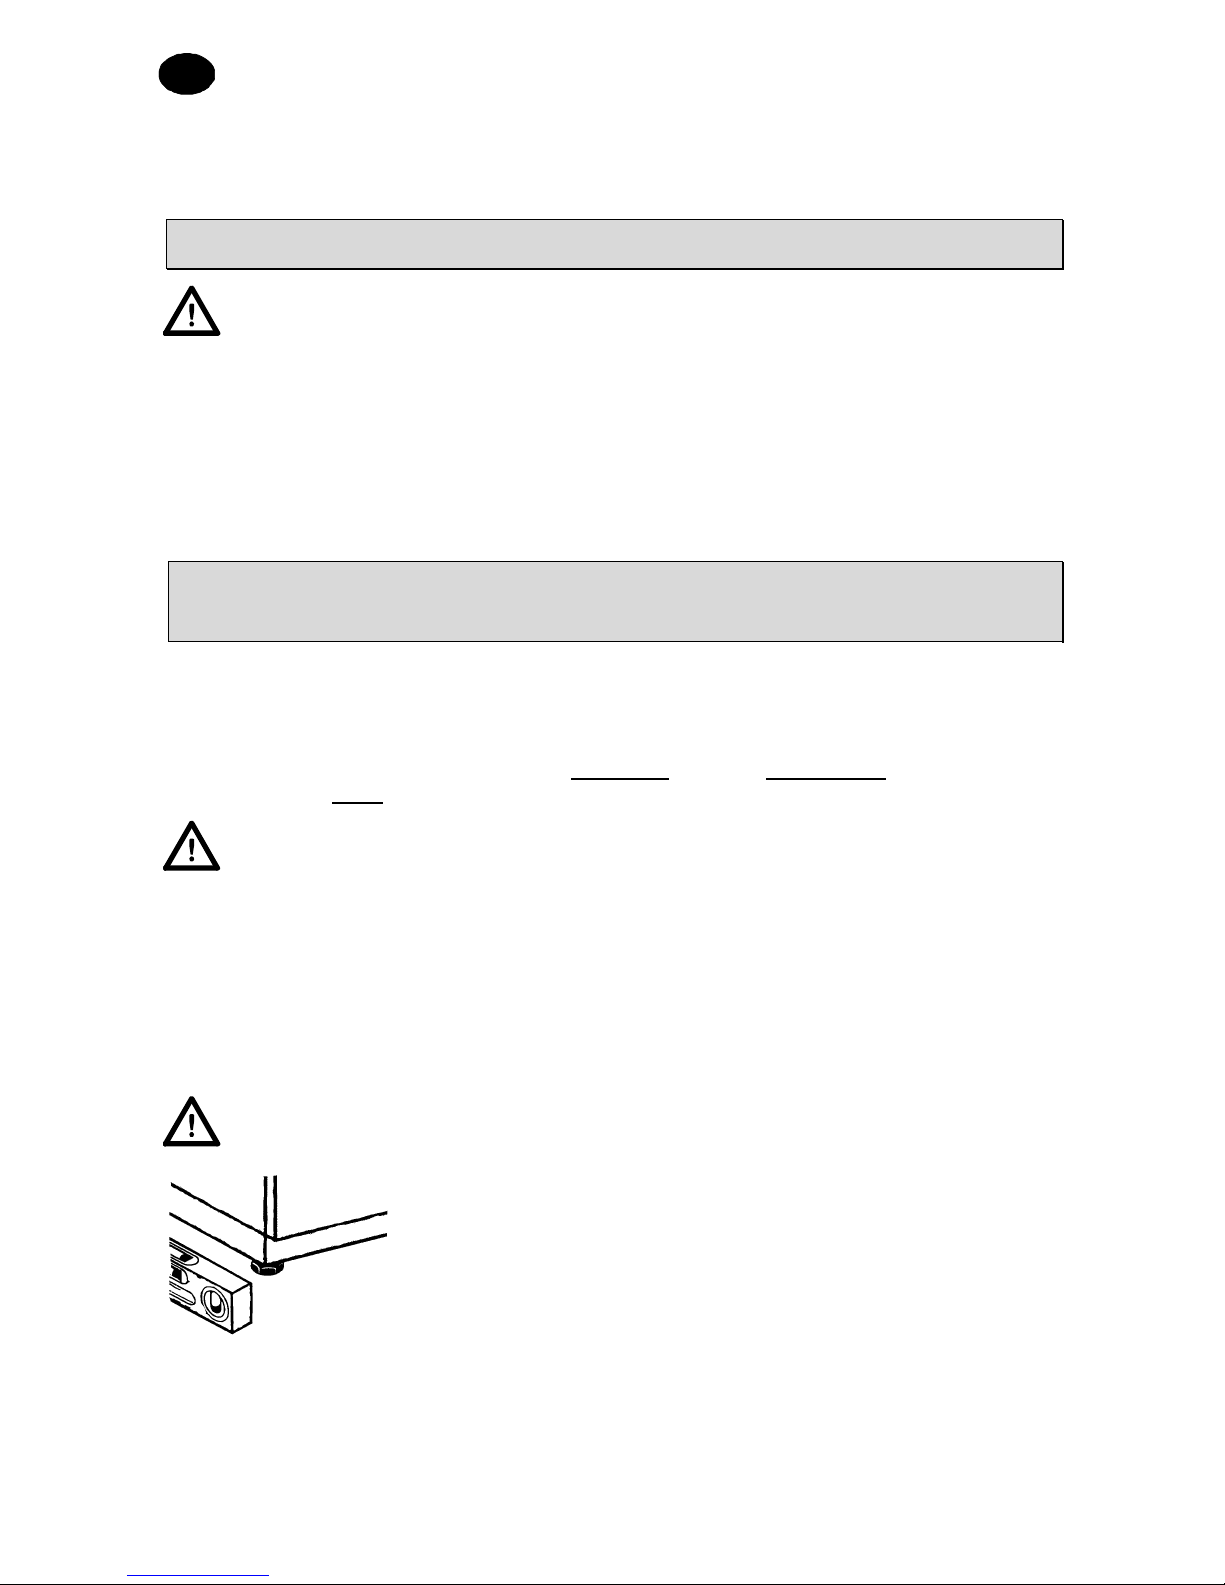
2.2 Positioning
• Check that there are no objects and materials in the installation area
that can be damaged by steam that may exit the machine during
operation, or at least that they are sufficiently protected.
• In order to ensure stability, install and balance the machine on its
four feet.
• Different installation solutions must be agreed upon and approved
by the manufacturer.
Page 2 of 14
INSTRUCTION MANUAL FOR DISHWASHERS
UK
Mod.
V~ Hz kW A
S/N
H2O
kPa °C
2.3 Electrical connection
• There must be an omnipolar type of main switch that
disconnects all contacts, including the neutral, with a distance
of at least 3 mm between the open contacts and with safety
circuit breaker tripping or connected with fuses, to be sized or
calibrated in conformity with the power indicated on the machine’s
data plate.
• The main switch must be located on the electric line close to the
place of installation, and it must serve only one appliance at a time.
• Electric network voltage and frequency must coincide with those
given on the data plate.
• There must be an effective earthing s ystem in conformity with
the prevention standards in force for operator and equipment
safety.
• The power supply cable (type H07RN-F only) must not be pulled or
crushed during normal operation or routine maintenance.
• The unipotential terminal fastened to the body must be connected to
a unipotential cable having a section suited to the application.
• Respect the polarities indicated in the wiring diagram.
• Consult that attached wiring diagram for additional information.
Do not use adaptors, multiple socket outlets or cables of inadequate type and
section or with extension connections not compliant with plant engineering
standards in force.
2.4 Plumbing connection
The appliance is to be connected to the water network with a hose.
There must be a slide on-off, ball or gate valve able to quickly and
completely turn off the water if necessary between the water network
and the appliance’s solenoid valve. The on-off valve must be on the line
near and just before the appliance.
• If the system is new or nearly so, let the water run a long time before making the connection.
• The water supply, temperature and pressure must be compatible with what is indicated on the
machine’s technical data plate.
• If the water’s hardness is greater than 14 F (8 dH), we recommend you use the machine with
internal water softener (available on request
). If the water’s hardness is greater than 35 F (19.5
dH), we recommend you install an external water softener upline of the solenoid valve.
Free drain
2.5 Connection to the drain line
• The drain line must be made up of a free water trap of a size
proportionate to the delivery of the drain pipe supplied with the
machine. The pipe must be able to reach the water trap without
being pulled, squeezed, bent, crushed, pressed or forced in any
way
.
• The tank empties by gravity, so the drain must be at a
lower level
than the base of the machine.
Page 3 of 14

INSTRUCTION MANUAL FOR DISHWASHERS
UK
Max.
1 m
With discharge pump (available
on request)
• If the drain is not at a lower level than the base of the machine, you
can use the version equipped with a discharge pump (available on
request).
• In this case the maximum drain height is 1 m.
• Always check that the drain works properly and that it is not clogged.
• All other solutions must be previously agreed upon and approved by
the manufacturer.
2.6 Rinse aid and detergent
• Rinse aid is dispensed by the hydraulic dispenser installed standard on the machine.
• Dispensing of detergent is manual, even if installation of an automatic dispenser is always
recommended.
• Dispensing is established based on water hardness by the installation technician, who will also calibrate
the dispensers.
• The level of liquids in the container must be high enough that it can be drawn. It must never empty
completely, or be topped off with corrosive or impure products.
NEVER use CHLORINE or HYPOCHLORITE based detergents.
Chap 3 RISKS AND IMPORTANT WARNINGS
• This appliance is to be used only for the use for which it was expressly designed. All other uses are to be
considered unfit and therefore dangerous.
• The specialised personnel who will install the machine are obliged to appropriately instruct the
user on the appliance’s operation and any safety measures that are to be complied with, also by
providing practical demonstrations.
• Any type of service done on the machine, also in case of failure, must be performed only by the
manufacturer or by an authorised service centre and by qualified personnel, using only original spare
parts.
• Always disconnect or separate the machine from the electric and water networks before performing
maintenance, repairs or cleaning.
• Untrained personnel must NOT use the machine.
• The machine must NOT remain powered on when it is not in use.
• NEVER open the machine door quickly if it has not finished the cycle.
• NEVER use the machine without the factory-installed safety attachments.
• NEVER use the machine for washing object of a type, shape, size or material not guaranteed for
machine washing or not perfectly intact.
• NEVER use the appliance or its parts as a ladder or support for people, things or animals.
• NEVER overload the open door of front-loading machines, which are sized to support only the rack
loaded with kitchenware.
• NEVER immerse bare hands in the washing solutions.
• NEVER turn the machine over after installation.
THE FOLLOWING IS ALSO IMPORTANT:
• Never start a wash programme without the overflow in the tub, where foreseen.
• Before you drain the tank, make sure you shut off the machine.
• Never place magnetic objects near the machine, it may start even when the door is open.
• Do not use the upper part of the machine as a support surface.
• The machine may not be used by persons who are unauthorized or who have not been properly trained.
•
The installation technician is required to check for proper earthing.
• When testing is complete, the installation technician must issue a written statement concerning correct
installation and testing in accordance with all standards and acceptable working practices.
3.1 Normal service conditions
Ambient Temperature : 40°Cmax /4°Cmin ( average 30°C)
Altitude : until 2000 metrical
Relative humidity : max 30% at 40°C / max 90% at 20°C
Transport and Storage : between 10°C and 55°C with peack u ntil 70°C ( max 24 hrs )
Page 4 of 14

INSTRUCTION MANUAL FOR DISHWASHERS
UK
Chap 4 MACHINE USE
To simplify the description of the various functions, the layout of the control panel is shown below,
with the name of each key or indicator light and the corresponding numbers. The figures to which
reference is made are included and the beginning of the manual. In the description of the operation
of the machine, reference is always made to these numbers or names.
4.1 Key and symbols
Fig.1
shows:
1 ON/OFF BUTTON 3
START BUTTON
2
SELECT PROGRAMME BUTTON
4
INFORMATION DISPLAY
Dishwasher in stand by
No detergent
Dishwasher loading
No rinse aid
Short wash programme
No salt
Medium wash programme
Regeneration system on
Long wash programme
Self-cleaning programme and drains
Glass wash programme
Self-diagnosis on
Intensive wash programme
Boiler rinse temperature.
Cutlery wash programme
Washing tub temperature
Economy wash programme
Safety system on
Sanitising wash programme
Wash programme with total change
of washing water
Fast wash programme
Correct wash temperature
If flashing: heating on
Page 5 of 14

INSTRUCTION MANUAL FOR DISHWASHERS
UK
4.2 Switching the dishwasher on
• Turn on the main power switch and open the external water tap.
• Check the presence of the overflow, where foreseen.
• Press ON/OFF (1).
• The machine runs a drain cycle even if the tub is empty.
• The START (3) button flashes green.
• The machine then starts to load water, the timer bar indicates
the residual loading time
• When the START (3) button is fixed and green, it indicates that the machine is ready for use,
the DISPLAY (4) shows the set programme, OK indicates that the washing temperature is
correct (
Fig. 2
) .
4.3 Washing cycle
With reference to
Fig.3
, for correct operation of the machine, it is advisable to follow these rules:
• Use a suitable rack, filling it without overloading it and without placing the dishes one on top of
the other.
• Always clean off the dishes beforehand,
and do not load dishes with dry or solid residue on
them.
• Place empty containers upside-down on the rack. Put the plates and similar kitchenware into
the special inclined rack, with the internal surface facing upwards. Put mixed silverware into
the special basket with the handles facing downwards.
• Wash the dishes immediately after use, in order to prevent any residuals from hardening and
sticking on them.
• Load the rack into the machine and close the door.
• To avoid breakage, use only dishes that are intact and guaranteed for machine washing.
• Do not place silver and stainless steel cutlery in the same basket, since this would cause the
silver to tarnish and the steel to corrode.
4.4 Cycle selection and start-up
• Select the wash cycle suited to the dishes to be washed by pressing SELECT PROGRAMMES
(2).
• To start the programme just press START (3): during the programme the timer bar will
progressively indicate the residual time (
Fig.5
).
• When the cycle has finished the display will show End.
• For rapid drying, take the rack out of the machine as soon as the cycle finishes.
• To stop a wash cycle early, press START (3).
Page 6 of 14

INSTRUCTION MANUAL FOR DISHWASHERS
UK
4.5 Selecting special programmes
This dishwasher has special wash programmes.
You can choose the most suitable programme and memorise it for future use.
• Using the SELECT PROGRAMMES (2) button, select the memorised special programme.
•
With the door open, select the required programme by pressing START (3).
• The chosen special programme will remain memorised and can be chosen simply by pressing
SELECT PROGRAMMES (2).
Warning: the special programmes available depend on the dishwasher model.
4.6
Description of special programmes
GLASSES (PLATES) wash programme.
The Glasses programme is suited for washing glasses of any shape or type.
This programme washes with a low rinse temperature and requires a long
drying time.
ATC wash programme.
The Intensive programme is suited for washing very dirty, even encrusted
dishes that have been left for some time. The programme includes 2 washes
and 2 rinses.
STEEL wash programme.
The cutlery wash programme is suited for washing forks, spoons, knives and all
sorts of other cutlery. This wash programme is longer than the others.
GREEN Wash programme.
The ECO wash programme reduces energy consumption by wash ing at lower
temperatures and with reduced water consumption than normal wash
programmes, a good washing result is achieved by a prolonged mechanical
washing action.
FAST wash programme.
The Fast wash programme is recommended when you need good results in a
short time. The programme exploits the good mechanical action and high
washing temperatures.
NEW wash programme.
The NEW programme is recommended when you wish to wash with a total
change of water in the washing tub, so for consecutive washes of particularly
greasy and dirty dishes.
The full change of the water in the tub requires a longer wash cycle.
SANITISER wash programme.
The Sanitiser programme is recommended when the dishes to be washed also
have to be sanitised.
This programme controls the wash temperature and time calculating the
constant A0. The programme ends when A0 is 30.
The length is variable, but is generally around 20 minutes and the wash
temperature reaches approximately 72 C°.
If you need an A0 value other than 30 contact an authorised technician, who
will modify the machine software for you.
Page 7 of 14

INSTRUCTION MANUAL FOR DISHWASHERS
UK
4.7 Automatic cycle start-up
This function lets you start a cycle by simply closing the door without pressing any buttons. To
enable the function, proceed as follows (
Fig.4
):
• With the machine on and the door open press
START (3) until the signal A appears on the display.
• To disable the function, press START (3) again for a few seconds with
the door open.
4.8 Displaying information
• If you press SELECT PROGRAMMES (2) for a few seconds you will access the information
menu.
• Press SELECT PROGRAMMES (2) repeatedly to view, in sequence:
Tub temperature, boiler temperature, total number of machine cycles, any alarms.
To exit the menu press SELECT PROGRAMME (2) for a few seconds.
4.9 Turning the dishwasher off
Press ON/OFF (1) on the DISPLAY (4) to view the dishwasher symbol in stand
by.
4.10 Removal of integral filter
1. Turn off the machine.
2. Place the wash and rinse arms at a right angle to the edge
of the door
(Fig.7
).
3. Raise each semi-filter, grasping it by the handle.
Page 8 of 14

INSTRUCTION MANUAL FOR DISHWASHERS
UK
4.11
Emptying the dishwasher
• With the machine on press SELECT PROGRAMMES (2) to select the programme Dr ain.
• Press START (3), to start the drain and self-clean programme.
• Once the tub has drained, the stand by symbol will appear on the display.
4.12
Resin regeneration
In machines with an incorporated water softener the “REGENERATION SYSTEM ON”
symbol indicates that the machine is running a resin regeneration cycle and that the
current wash programme could be longer.
N.B. Do not switch off the machine if a regeneration cycle is underway
In machines fitted with water softener, when the warning ‘NO SALT’ appears you should add salt to
the relative container; proceed as follows:
¾ Remove the basket from the machine.
¾ Remove the integral filter (
Fig. 7
).
¾ Unscrew the cap on the salt container (
Fig. 8
).
¾ Pour approx. 700g of regeneration salt (1or 2mm grain size kitchen salt with no
additives) into the container using the funnel supplied.
¾ Close the container firmly.
¾ After a few minutes the ‘NO SALT’ warning will disappear.
4.12.1
Machine with external water softener
In machines equipped with an external water softener, after a certain number of cycles, the display
will show the message ‘SERVICE’. This indicates that the resins of the external softener must be
regenerated.
This signal remains even when the machine is off. To eliminate it, press and hold, for at least five
seconds, with the machine off and the door open, the START
key (3).
4.13 End of service
• At the end of the day always drain the machine as described in the “Machine draining” section.
• Disconnect the pow er supply by means of the main switch and close the external water
cock.
• Perform rout ine maintenance and clean the machine as described in the “Maintenance”
section.
• If possible, leave the door ajar to prevent the formation of unpleasant smells inside.
Page 9 of 14

INSTRUCTION MANUAL FOR DISHWASHERS
UK
Chap 5 MAINTENANCE
Before performing any maintenance, drain all water, disconnect the electrical power
supply, and close the external water cock.
5.1 Cleaning and hygiene
To ensure machine hygiene, periodically perform the maintenance tasks listed below. Also carry
out a periodical sanitising treatment with suitable non-corrosive products available on the market.
5.2 Maintenance of filtering group
Carry out this procedure at the end of the day when you see residual dirt on the filters:
1. Remove and clean the baskets.
2. Remove the tub as per the instructions in the paragraph on draining the machine.
3. Carefully clean the integral filter.
4. Thoroughly clean the tank and machine with non-abrasive disinfectant products.
5. Remove the standard filter by pulling it upwards as shown and clean it carefully.
6. Do not use abrasive products or objects for cleaning the steel tank. Instead use a slightly
soapy damp cloth.
7. Do not use pressurised jets of water because they could damage the electric system.
8. When finished with the described tasks, carefully reposition each part.
5.3 Cleaning of wash arms
The wash and rinse arms can easily be removed to allow periodic cleaning of the nozzles so as to
prevent possible clogging and/or deposits.
Proceed as follows (
Fig.9
):
• Unscrew ring nut R and release the arms.
• Wash all parts with running water. Clean the nozzles carefully, using a toothpick or small tools if
necessary.
• Clean the arm rotation pins in the machine and the washing and rinsing water outlet area.
• Put the arms back in place and check that they rotate freely.
Page 10 of 14

INSTRUCTION MANUAL FOR DISHWASHERS
UK
Chap 6 SELF-DIAGNOSIS
The machine is equipped with a self-diagnosis system that can detect and signal a series of
malfunctions.
Anomaly Description and possible remedies
E01
No rinse.
The warning comes on at the end of the cycle, if the water level in the tub is not
correctly restored. Check that the hydraulic connections are correct and that the water
tap is open. If the problem persists contact a technical assistance centre.
E02
Water drainage anomaly.
Water does not drain or drains abnormally. Check to see if the overflow has been
removed. Check the drain tube is not bent or crushed, and that none of the filters are
clogged. Run another drain cycle.
E03
Boiler temperature reset anomaly.
The boiler temperature reset has not occurred within the time limits set forth in the
wash cycle. Turn the machine off and then back on and run another cycle.
E04
Water filling anomaly.
Check whether the plumbing connections are correct, and that the water supply cock is
open. Check the presence of the overflow.
E05
Tub thermometer anomaly. (Probe open)
The machine does not measure the temperature in the tub. Turn the machine off and
then back on.
E06
Tub thermometer anomaly. (Probe shorted out)
Interrupt the programme in progress, and shut off the dishwasher. Turn it back on after
a few minutes and start the cycle again.
E07
Boiler thermometer anomaly. (Probe open)
The machine does not measure the temperature in the boiler. Turn the machine off and
then back on.
E08
Boiler thermometer anomaly. (Probe shorted out)
Interrupt the programme in progress, and shut off the dishwasher. Turn it back on and
start the programme again.
E09
Boiler loading time out: boiler not filled. Impossible to carry out rinse cycle.
Check that the water tap is open.
Run a new complete cycle.
ESF
Electro-mechanical safety device: the boiler or tub safety thermostats have cut in, or
the tub safety pressure switch has been triggered. Contact a technical assistance
centre.
ESL
Incorrect tub level: the tub pressure switch has detected too much or too little water in
the tub. Contact a technical assistance centre.
E22
Tub heating time out: washing water heating error, switch the dishwasher off and
then on again.
CAUTION! Turning the machine off and then back on resets the notification. If, after
following the instructions provided, the problem reoccurs, contact an authorized service
centre.
Page 11 of 14

INSTRUCTION MANUAL FOR DISHWASHERS
UK
6.1 Settings
The following settings should only be configured by a qualified technician.
During installation or afterwards, a number of functions can be set in the dishwasher:
• Press buttons 3 and 4 together for a few seconds, with the machine off and the door open;
PASSWORD 00 will appear on the display.
• Press button 3 or 4 repeatedly until number “12” appears on the display.
• Press button 1 to enter the menu, then use 1 again to scroll through the items.
• Activate, deactivate or adjust the function using buttons 3 or 4.
“Language”: Choosing the display language.
“Termostop”: Enables termostop. This function guarantees the ideal rinse temperature.
“Energy Saving”: Enables Energy saving. This function allows energy-savings to be made when
the appliance is switched on but not in use.
“Pre-heating”: Enables or disables the Preheating function (fast loading).
“Detergent pump”: Enables the detergent pump.
“Rinse aid pump”: Enables the rinse aid pump.
“Dosage Detergent g/l”: Sets the concentration of detergent, grams/litre.
“Dosage Rinse aid ajustment g/l”: Sets the concentration of rinse aid, grams/litre.
“Drain pump”: Enables the electric drain pump.
“Water hardness”: Sets the water hardness according to
the following table (Only for versions with incorporated water softener):
Measured
hardness
Water hardness
DF DH n°
0 ÷ 20 0 ÷ 11
1
21 ÷ 30 12 ÷ 16
2
31 ÷ 40 17 ÷ 22
3
41 ÷ 60 23 ÷ 33
4
61 ÷ 70 34 ÷ 42
5
“Cycle for regeneration alarm with external softener”: Sets the number of regeneration cycles
for an external water softener.
“Cycle counter”: Resets cycle counter.
• To exit the menu and save the settings, press button 1 for a few seconds
Page 12 of 14
INSTRUCTION MANUAL FOR DISHWASHERS
UK
Chap 7 DISPOSAL
There are no materials on our machines that require special disposal procedures.
7.1 Information for users
in accordance with art. 13 of Legislative Decree dated 25 July 2005, no. 151
"Implementation of Directives 2002/95/EC, 2002/96/EC and 2003/108/EC, concerning
reduction of use of hazardous substances in electrical and electronic equipment, and
disposal of waste"
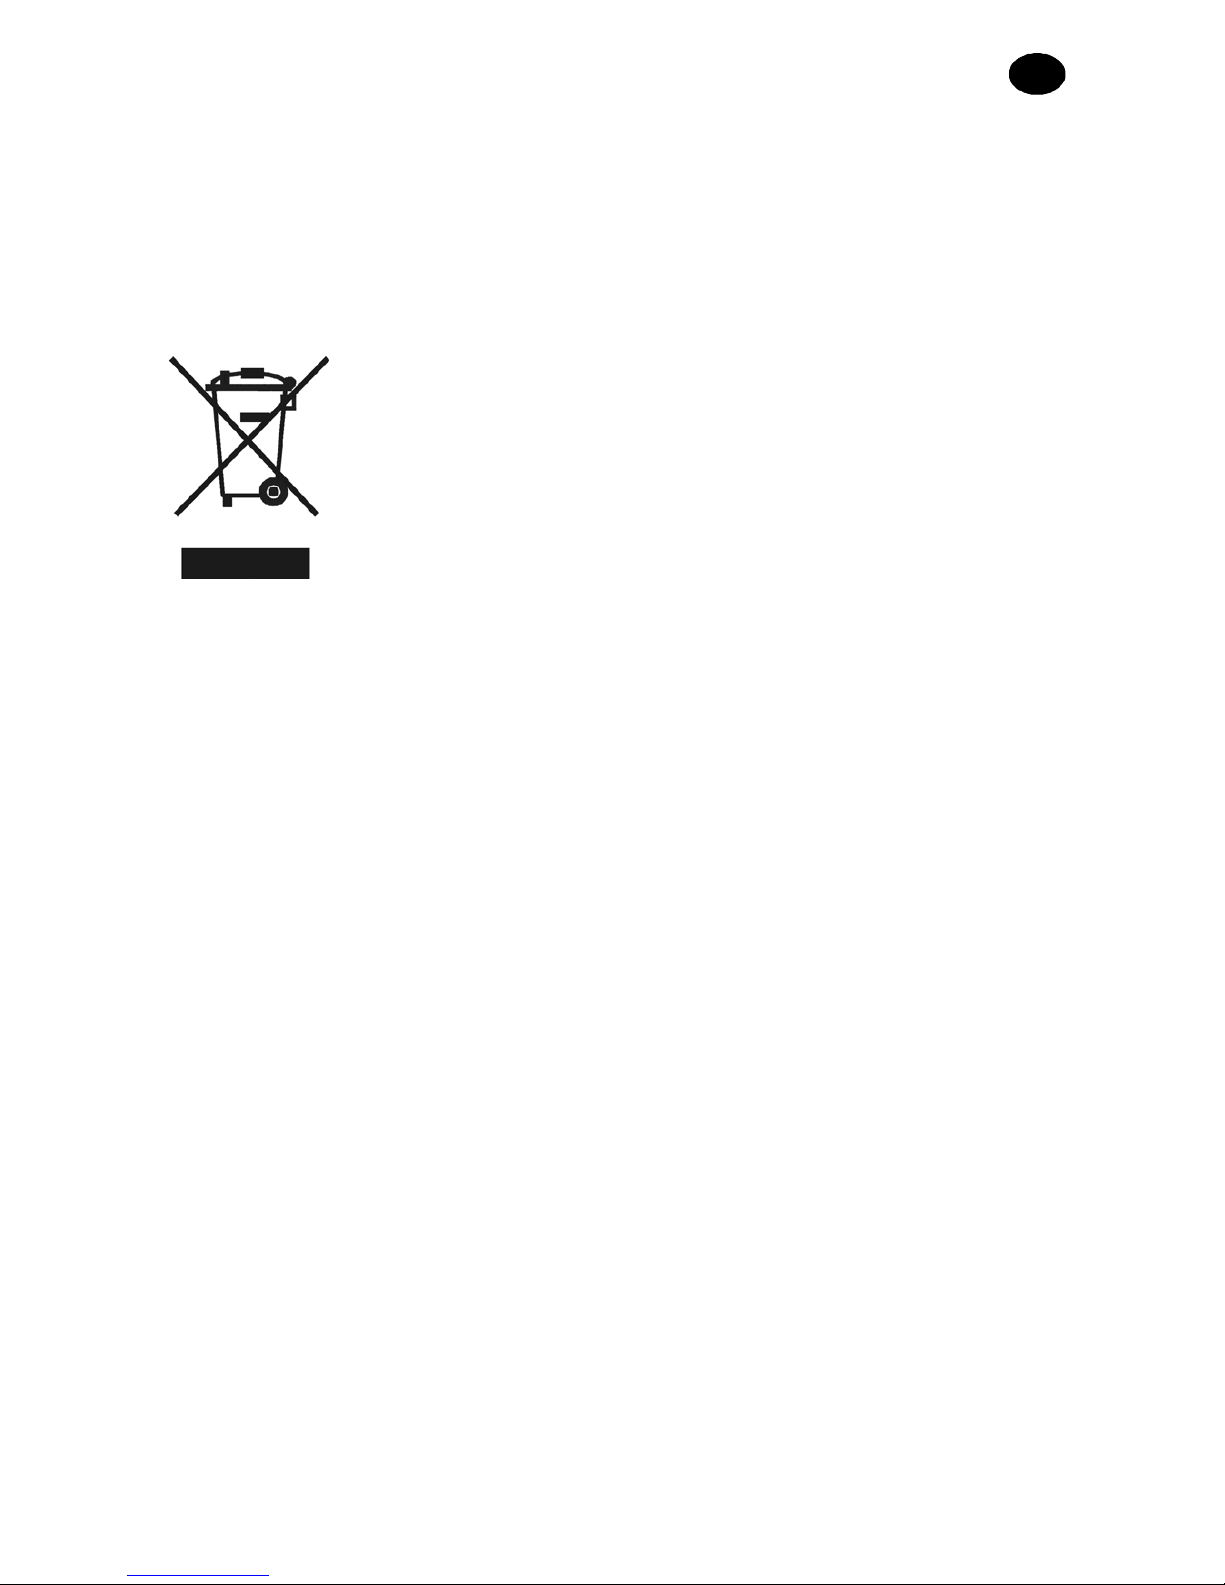
• The symbol showing a barred-out dustbin on the appliance or its packaging
indicates that, at the end of its life cycle, the product must be collected separately
from other waste.
• Separate waste collection of this appliance at the end of its life cycle is organized
and managed by the manufacturer. The user who wishes to dispose of this
appliance should therefore contact the manufacturer and comply with the
procedures established to allow separate collection of the appliance at the end of
its life cycle.
• Proper separate waste collection for subsequent recycling, handling and
ecologically friendly disposal helps to prevent possible negative effects on the
environment and on health and the favours the reuse or recycling of the materials
that the appliance is made of.
• Abusive disposal of the product by the owner may result in the application of
penalties as set forth by current law.
Page 13 of 14

INSTRUCTION MANUAL FOR DISHWASHERS
Page 14 of 14
UK
 Loading...