

Page 1

Page 2
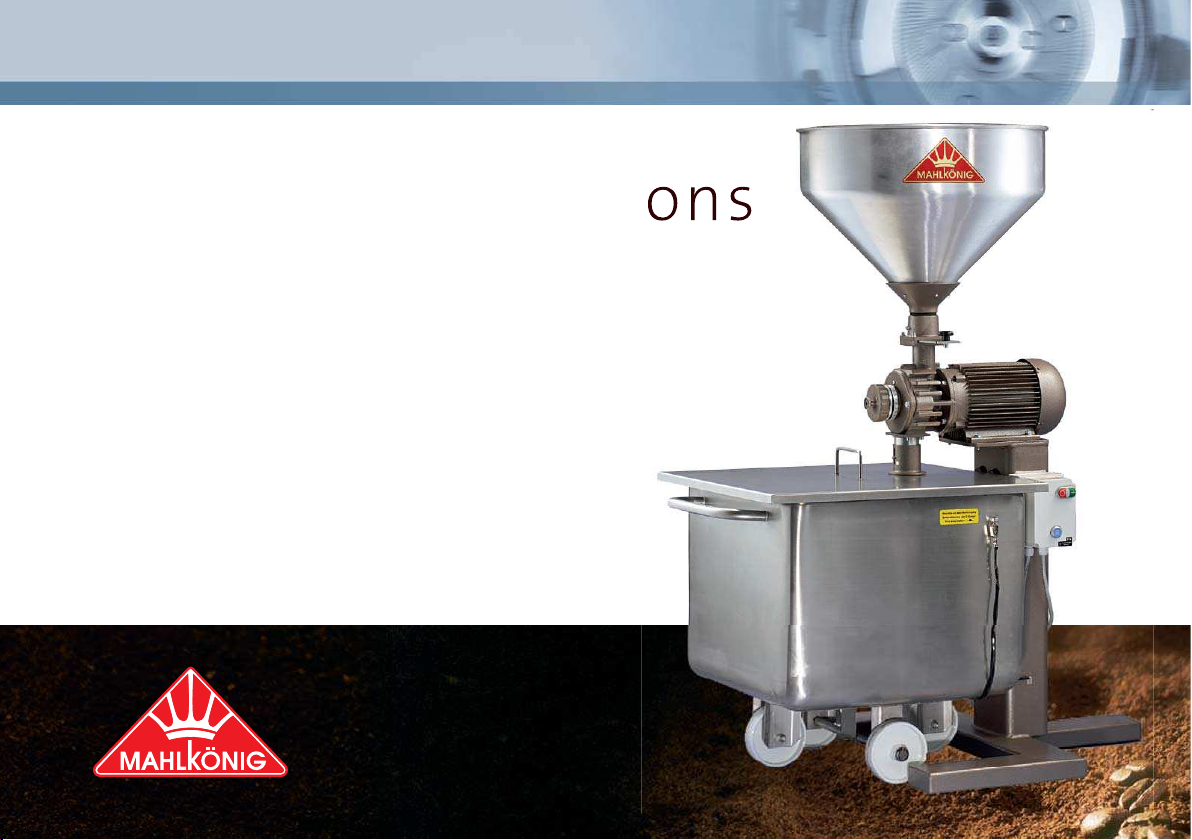
INDUSTRIEMÜHLEN | INDUSTRIAL GRINDER
Operating Instructions
DK15
DK15 L / LS / LH - (coffee)
DM15 LS - (poppy seed)
DG15 LS - (grain)
DP15 L - (spices)
The professional art of grinding
since 1924
Page 3

INDUSTRIEMÜHLEN | INDUSTRIAL GRINDER
Dear Customer,
with the “DK15“ you have purchased a grinder with an integrated
grater in the well-known MAHLKÖNIG quality.
Our over 80 years of experience in the production and development of
grinders have helped us to develop a new product in the MAHLKÖNIG
company.
As usual, this new product guarantees top-quality by grinding of all
types of coffee, spices and grains.
Before putting the device into service, please read these operating instructions including the safety instructions carefully and observe them
at all times. Also instruct your personnel accordingly.
Enclosed you will fi nd many useful tips that will make it easier for you
to use the grinder. Keep these operating instructions in a safe, easily accessible location. In case of any unclear points or additionally
required information, please contact your local dealer or us directly as
the manufacturer.
MAHLKÖNIG GmbH & Co. KG
2
Page 4

INDUSTRIEMÜHLEN | INDUSTRIAL GRINDER
Table of Contents
1. Safety 4
1.1 Symbols 4
1.2 Safety Instructions 4
1.3 Purpose of Use 5
1.4 User Requirements 5
1.5 What can be ground? 5
2. Technical Data 5
3. Description 6
4. Safety Devices 7
5. Setting Up and Basic Adjustment 7
5.1 Setting-up area 7
5.2 Installation 7
6. Operation 8
7. Operating Faults 8
8. Grind Adjustment 10
9. Cleaning 10
9.1 Cleaning of the grinder casing 10
9.2 Cleaning of the grinding mechanism 11
10. Grinding Disc Replacement 12
11. Maintenance and Repair 12
12. Spare Parts 12
13. Wiring Diagrams 13
14. Certifi cate 14
15. Warranty 14
3
Page 5

INDUSTRIEMÜHLEN | INDUSTRIAL GRINDER
1. Safety
Please read and observe the following operating instructions carefully. Non-observance can result in
damage to the device as well as in health-threatening risks for the user.
1.1 Symbols
The following two symbols are used in this manual of operating instructions:
Safety instruction:
In case of non-observance, extreme risk of accidents
exists.
General instruction:
In case of non-observance, the device can become
damaged or optimum operation not be guaranteed.
1.2 Safety Instructions
The grinder you have purchased is only allowed to be used to grind the
material to be ground for which the grinder has been designed. Please
compare the information on the rating plate with the title page. Ground
material is never allowed to be fi lled into the grinder container.
Do not carry out any modifi cations or changes on the grinder. In case of
non-observance, the manufacturer shall be liable for resulting damage
in no case whatsoever.
Never operate the grinder in moist or, even worse, in wet surroundings.
Never put your fi ngers or objects into the rotating grinding mechanism underneath the coffee bean container.
Always pull the power supply plug out of the outlet before carrying
out any maintenance or cleaning work on the device.
Never put the device into service with a defective power supply
cable. Check the device regularly for any signs of damage on the
power supply cable, plug, fi nger protector, etc.
Any repairs that may be required are only allowed to be carried out
by experts. Please contact an authorised customer service centre,
your local dealer or us directly as the manufacturer.
When unpacking the device, please check to determine whether
the power supply voltage (volts) corresponds to the device voltage
on the rating plate.
Children do not recognise the risks that may arise when handling
electrical devices; therefore never leave children alone with electrical devices without proper supervision.
Never immerse the device in water and do not
operate it with wet hands.
4
Page 6
INDUSTRIEMÜHLEN | INDUSTRIAL GRINDER
1.3 Purpose of Use
The coffee grinder you have purchased, “DK 27”, may only be used to
grind whole roasted coffee beans. Please make sure that only clean and
whole coffee beans are ground. Never use the grinder to grind any other
products or objects. As there are a number of grater baskets for the grater, only grate products for which the grater baskets have been designed.
There are grater baskets for all types of nuts and cheeses.
1.4 User Requirements
No special requirements are specifi ed for the users of this device. It is,
however, assumed that this manual of operating instructions has been
carefully read and understood and that all instructions provided in this
manual will be observed. In addition, working with the device on a safety-conscious basis is also expected.
1.5 What can be ground?
Grinder Products which can be ground
DK 15 L / LS / LH roasted coffee
DM 15 LS poppy seed
DG 15 LS grain
DP 15 L spices
2. Technical Data
Description DK15L/LS/LH
DM15LS
DG15LS
DP15L
Voltage / Frequency / Phases 400V / 50Hz / 3~
208-220V / 60Hz / 3~
Motor rotations
@ 60 Hz 1750 rpm
@ 50 Hz 1400 rpm
Sound Emission
Idle Operation 63 dB
Operation* 83 dB
Pre-fuse building 3 x 16A-slow
Safety switch / Overload protection
400 V adjusted: 6 A
208 - 220 V adjusted: 11A
Permissible max. Operating
time of the Grinder continuous operation
Dimensions in mm W 790, H 1550, D 1230
Net Weight 132 kg (291 lbs)
Hopper Capacity* appr. 20 kg
Container Capacity 200 l
* values depend on grinding material
(Please ask the manufacturer or dealer for technical data on other voltages and frequencies.)
5
Page 7

INDUSTRIEMÜHLEN | INDUSTRIAL GRINDER
3. Description
Main components and operating elements
The main components and operating elements are shown in the fi gure.
Pos. 1 Hopper
Pos. 2 Casing with motor and grinding mechanism
Pos. 3 Grind adjustment
Pos. 4 Container
Pos. 5 Hopper slide
Pos. 6 ON / OFF switch
Pos. 7 Reset button
Pos. 8 Ground cable
Pos. 9 Base
1
5
2
3
3
6
7
4
8
9
6
Page 8

INDUSTRIEMÜHLEN | INDUSTRIAL GRINDER
4. Safety Devices
Thermal overload circuit breaker
The motor of the grinder is protected by an overload circuit breaker,
which interrupts the electric circuit of the motor when the device is subjected to electric overloading. To be able to re-start the grinder, the reset
button (Pos.7) on the back side of the casing must be pressed.
The user has no infl uence whatsoever on this operation. In case of repeated tripping of the circuit breaker, an expert must be consulted since this could cause
damage to the motor winding.
Driver
The machine is protected against foreign objects in the grinder by
a driver which breaks if the machine is overloaded.
Finger protector / Magnet holder
A combined fi nger protector / magnet holder is fi tted in the hopper of
the grinder. It is supposed to prevent the user from reaching into the
running grinding mechanism. At the same time, it also prevents ferrous
foreign objects from getting into the grinding mechanism. Every now
and then you should clean the magnet since adhering foreign objects
could be hanging from the magnet.
Never remove the fi nger protection!
5. Setting-up and Basic Adjustment
A grinding test run is carried out on each grinder in the manufacturer‘s
factory. This is why you may fi nd ground material residue in the grinding
mechanism!
5.1 Setting-up Area
Place the grinder on a level surface free from vibration.
Never operate the grinder in moist, or even worse, in
wet surroundings.
5.2 Installation
You have received your grinder in operating condition. Now you only
need to connect it to a power supply system. Proceed as follows:
Protect your device with a separate pre-fuse (not included in the scope of supplies) according to the information provided under Item 2 „Technical data“.
Make sure that the pre-fuse is not overloaded by other consuming devices (e.g. fan-forced heaters, deep
freezers).
Determine whether the mains voltage and frequency
correspond to the information on the rating plate.
Insert the plug into the available grounded outlet.
7
Page 9

INDUSTRIEMÜHLEN | INDUSTRIAL GRINDER
After the grinder has been connected, you must check
the direction of rotation of the grinding disc (arrow
on the ventilator hood). If the grinder is rotating in
the wrong direction ask an electrician to reverse the
polarity of the socket in compliance with DIN standards.
6. Operation
1. By moving the rotary knob, set the required grind degree (to the left
for coarse coffee powder, to the right for fi ner coffee powder).
2. Place the receiving container under the grinder spout. Now connect
the grinder spout (by turning the spout slightly) with the transport
container.
3. Only fi ll whole coffee beans into the hopper.
Please do not forget to attach the ground cable to the
ground screw attached to the transport container.
4. Switch the grinder on and do not open the main slide until the
green indicator lights up. The grinding process starts.
5. Before switching off the grinder, close the main slide and allow the
grinder to grind the remaining beans.
7. Operating Faults
Defect
The grinder
hums but does
not grind.
Cause
The spout is
clogged.
Grinding is set too
fi ne.
A foreign object
is in the grinding
mechanism.
Remedy
Set grinding fi neness to „coarse“
and trigger the grinding process. The grinder will then grind
itself free. Afterwards, return
the setting to the desired grinding fi neness.
Turn the grinding fi neness setting to the right, to „coarse“, and
trigger the grinding process.
The grinder will then grind itself free. Afterwards, return the
setting to the desired grinding
fi neness.
Clean the grinding mechanism
as described and remove the
foreign object. Observe the safety instructions!
8
Page 10

INDUSTRIEMÜHLEN | INDUSTRIAL GRINDER
Defect
The grinder does
not start.
Cause
The power supply plug is not
inserted.
The overload
circuit breaker has
been tripped.
The pre-fuse was
tripped.
The motor
protector was
tripped.
Remedy
Insert the plug into the outlet.
Check to determine whether
the reset button of the circuit
breaker has jumped out. Press
the reset button in again if appropriate. In case of repeated
tripping of the circuit breaker,
contact your authorised customer service centre or dealer.
Check the pre-fuse. Restore the
pre-fuse to its initial state or
replace it. Determine whether
other consuming devices are
also connected to this fuse.
Give the grinder a cooling-off
break of approx. 1 hr.
Defect
Grinder rotates
but without
grinding.
Cause
Carrier breakage.
Incorrect sense of
rotation.
Metal parts on the
hopper magnet
obstruct the
incoming fl ow
of material to be
ground.
Remedy
Remove the grinder casing cover, take out the broken pieces
of the driver, insert a new driver
and then install the grinder casing cover again.
Have the polarity checked by
specialised personnel.
Clean the hopper magnet.
In case of other malfunctions or continued faults, please contact your dealer or your authorised customer service centre.
9
Page 11

INDUSTRIEMÜHLEN | INDUSTRIAL GRINDER
8. Grind Adjustment
The grinder has been precisely adjusted by the manufacturer. However,
if the ground material is no longer fi ne enough after a longer period, the
grinder must then be re-adjusted according to the following procedure:
1. Unscrew the attachment screw in the centre of the rotary knob and
remove it.
2. Now switch the grinder on.
3. Now turn the exposed adjusting spindle very carefully and slowly
to the right until you hear a light rattling sound (the grinding discs
are touching) and then turn it back again immediately by approx. 1
notch to the left. However, you must not be able to hear the grinding discs rattling together.
4. If you grind some beans now, you should get fi ne grains (in the case
of coffee). If the coffee beans have been ground too fi ne, the grinder
can stick together so that the coffee beans can no longer slide down
to be ground.
It is important to ensure that no „rattling“ noise of
the grinding disks can be heard! Their service life will
otherwise be signifi cantly reduced!
7. Replace the attachment screw into the centre of the rotary
knob and tighten it again.
9. Cleaning
Always pull the power supply plug out of the
outlet before carrying out any maintenance or
cleaning work on the device!
Observe the safety instructions under 1.2!
9.1 Cleaning the grinder casing
Clean the casing of your grinder every now and then with commercially available mild cleaning agents. In addition, you should also
clean the magnet in the hopper from time to time by removing any
foreign objects that may have become stuck because otherwise
this could result in clogging.
Do not let any foreign objects fall into the grinding mechanism!!
5. If the adjustment you have made does not come up to your expectations you can adjust the grind degree as described above.
6. Set the rotary knob on the adjusting spindle such that the marking
of the knob is positioned exactly on the right symbol „fi ne“. Now you
should no longer be able to turn it to the right.
10
Page 12

INDUSTRIEMÜHLEN | INDUSTRIAL GRINDER
9.2 Cleaning the grinding mechanism
9
10
12
11
13
1. Pull out the power supply plug !
2. Rotate the rotary knob (11) to „coarse“.
3. Unscrew the two screws (13) on the grinder casing cover (12) and
then remove this cover.
5. Pull the pre-crusher (9) off the motor shaft. Use a puller.
6. Clean the grinding mechanism with a fi ne brush and remove any
foreign objects.
7. Before pushing the pre-crusher (9) back onto the shaft again, lubricate the shaft with non-corrosive, resin-free and foodstuff-compatible grease (e.g. Vaseline).
8. After you have pushed the pre-crusher onto the shaft, line up the
two slots so that you can then easily re-insert the previously removed driver (10).
The rounded side of the driver must point toward the
motor.
9. Clean the contact surfaces of the grinder casing and grinder casing
cover (12) carefully in order to remove any form of soiling.
10. Screw the grinder casing cover (12) down tightly with the two
screws while changing the side (13) several times.
11. Rotate the rotary knob to the desired grind degree. The grinder is
now ready for operation again.
During re-assembly, no ground material is allowed to
be sticking to the surfaces where the grinder casing
and the grinder casing cover lie on top of one another.
4. Take the carrier (10) out of the slot of the pre-breaker.
11
Page 13

INDUSTRIEMÜHLEN | INDUSTRIAL GRINDER
10. Grinding Disc Replacement
If the grinding performance decreases and the ground products are hot
and irregular, you should change the grinding discs.
1. Take the grinder apart as described under “9” and remove the grinding discs from the grinder casing and the pre-breaker using a screwdriver.
2. Clean the surfaces of the new grinding discs thoroughly and screw
them in position tightly and evenly.
3. Close the grinder casing again as described under “9” and set the
grind degree again as described under “8”.
11. Maintenance and Repair
Always pull the power supply plug out of the outlet
before carrying out any maintenance or cleaning
work on the device!
Check the device regularly for any signs of damage
on the power supply cable, plug, fi nger protector, etc.
Any repairs that may be required are only allowed to
be carried out by authorised experts. Please contact
an authorised customer service centre or your local
dealer.
12. Spare Parts
Spare parts are usually ordered from your customer service centre or
your local dealer. To ensure quick, correct processing of your order, the
following information is absolutely required:
1. Type designation and serial number of the grinder (on the rating
plate on the rear side of the grinder).
2. Color of the grinder
12
Page 14

INDUSTRIEMÜHLEN | INDUSTRIAL GRINDER
13. Wiring Diagram DK15 208V 60Hz Wiring Diagram DK15 400V 50Hz
13
Page 15

INDUSTRIEMÜHLEN | INDUSTRIAL GRINDER
13. Certifi cate 14. Warranty Conditions
EC Declaration Conformity
As defi ned by EMC-directive 89/392/EWG
Name of the manufacturer or in the EU residential authorized person:
MAHLKÖNIG GmbH & Co. KG
Tilsiter Straße 142, 22047 Hamburg
Telefon : 040 - 69 69 40 - 0
Telefax : 040 - 69 39 721
MAHLKÖNIG GmbH & Co. KG
Address of the manufacturer or the authorized person:
Tilsiter Strasse 142, D-22047 Hamburg
announce, that the machine below
product type: commercial device for food processing
machine description: Coffee grinder
machine typ: DK 15 L / LS / LH, DM 15 LS, DG 15 LS, DP 15 L
is in compliance with the conditions of the Directive of Machines 98/37/EG and with
the main standards stipulated in the Directive concerning low tension 73/23/EWG and
applies to the national laws that transpose it.
Issued in Hamburg: 01.01.2008
Function of subscriber: Managing Director
Name of subscriber: Nils Erichsen
Signature
MAHLKÖNIG GmbH & Co. KG, Amtsgericht Hamburg HR A 85 074; Persönlich haftende Gesellschafterin:
Beteiligungsgesellschaft MAHLKÖNIG mbH, Eingetragen Amtsgericht Hamburg HR B 45 324, Geschäftsführer: Nils Erichsen
Dresdner Bank AG (BLZ 200 800 00) Kto. 383 780 400, Postbank Hamburg (BLZ 200 100 20) Kto. 253 89-203
Commerzbank AG (BLZ 200 400 00) Kto. 21 10 294, Ust. Id. Nr.: DE 118 37 22 65
1. The warranty period is 1 year from the date of purchase.
2. The warranty covers all damages that can be attributed to inferior
materials or defective workmanship. Corresponding grinders will be
repaired or replaced free-of-charge, with the exception of transport
or freight charges. Transport is the responsibility of the customer.
Therefore, avoid damages with all returns by correct packing.
3. The grinder may only be opened for cleaning purposes in accordance with the Operating Instructions.
4. This warranty does not cover damages which have occurred
through: Improper usage, improper maintenance, lack of servicing,
usage for purposes other than those intended, incorrect installation, incorrect voltage, breakage, natural wear or for reasons beyond
our sphere of infl uence.
5. In order to maintain the warranty, only original spare parts and accessory parts may be used.
6. Observe in addition our General Delivery Conditions in their respective current version.
7. The manufacturer is in no way liable for consecutive or secondary
damages.
8. The warranty does not cover costs emerging from repairs conducted
by non-authorized personnel.
14
Page 16

INDUSTRIEMÜHLEN | INDUSTRIAL GRINDER
Page 17

INDUSTRIEMÜHLEN | INDUSTRIAL GRINDER
MAHLKÖNIG GmbH & Co. KG
offi ce@mahlkoenig.de ; www.mahlkoenig.de
Tilsiter Straße 142
D- 22047 Hamburg, Germany
Tel.: +49 (0)40 / 69 69 40 - 0
Fax: +49 (0)40 / 69 39 721
November 2009
Subject to change without prior notice!!
The professional art of grinding
since 1924
Page 18

 Loading...