

Page 1
MH
-
C777 Universal Charger
Page
1
of 7MH-C777 Universal Charger Conditioner Instruction Manual
10/25/2009
http://www.bills2way.com/equip/c777manual.html
Conditioner Instruction Manual
Introduction
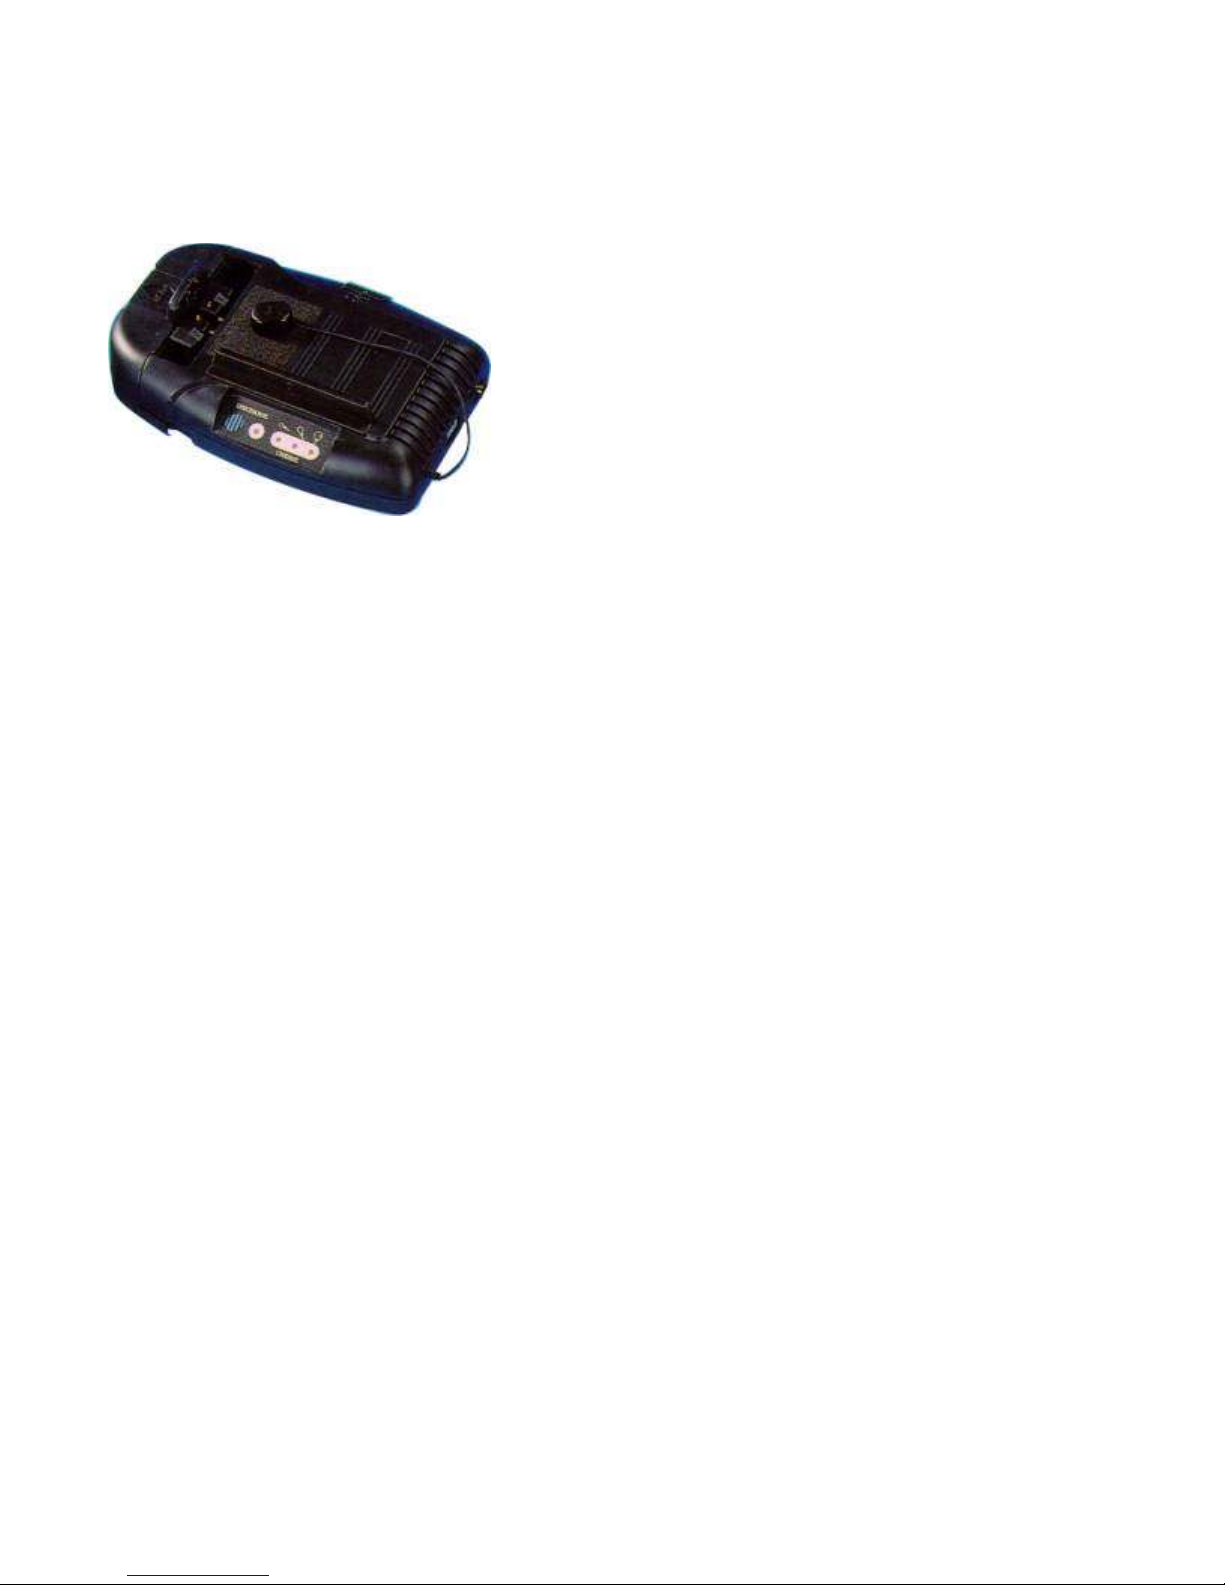
Thank you and congratulations for your purchase of the Maha MH-C777 Desktop Rapid Charger and
Conditioner! This innovative product simplifies charging of most rechargeable batteries either at home
or in the car. After reading the manual if you have any difficulties using your charger or understanding
this manual, please feel free to call tech support during business hours (8:00a.m.-5:00p.m.) pacific time
at 1-800-376-9992.
Safety Precautions
Use of this device is intended for charging and conditioning NiCD (Nickel Cadmium) and NiMH
(Nickel Metal Hydride) rechargeable batteries only.
Do not attempt to use product on non-rechargeable battery packs.
Check with the manufacturer of your rechargeable battery to see if the rapid charger rate is appropriate
(650mAh). Please follow the guidelines for your individual battery. Do not use device if not appropriate
for your battery!
Use only power adapters (wall and auto) supplied by Maha for your rapid charger.
Do not attempt to use rapid charger when starting your car. Unplug unit from cigarette lighter when
starting the vehicle.
Unit not intended for outdoor use. Use only in car or indoors.
Please familiarize yourself with the instructions and unit parts before first attempting to use. Also
familiarize yourself with your batteries' requirements.
Features and Benefits
Page 2
Charges almost any type of NiCD (Nickel Cadmium)and NiMH (Nickel Metal Hydride) battery within a
range of voltage from 4.8v-12v for home use and 4.8v-9.6v for auto, regardless of shape.
Can be used as a desktop charger at home and work, or as a mobile charger for vehicle use (12v negative
Can be used for batteries for communications (cellular phones and amateur radio), laptop computers R/C
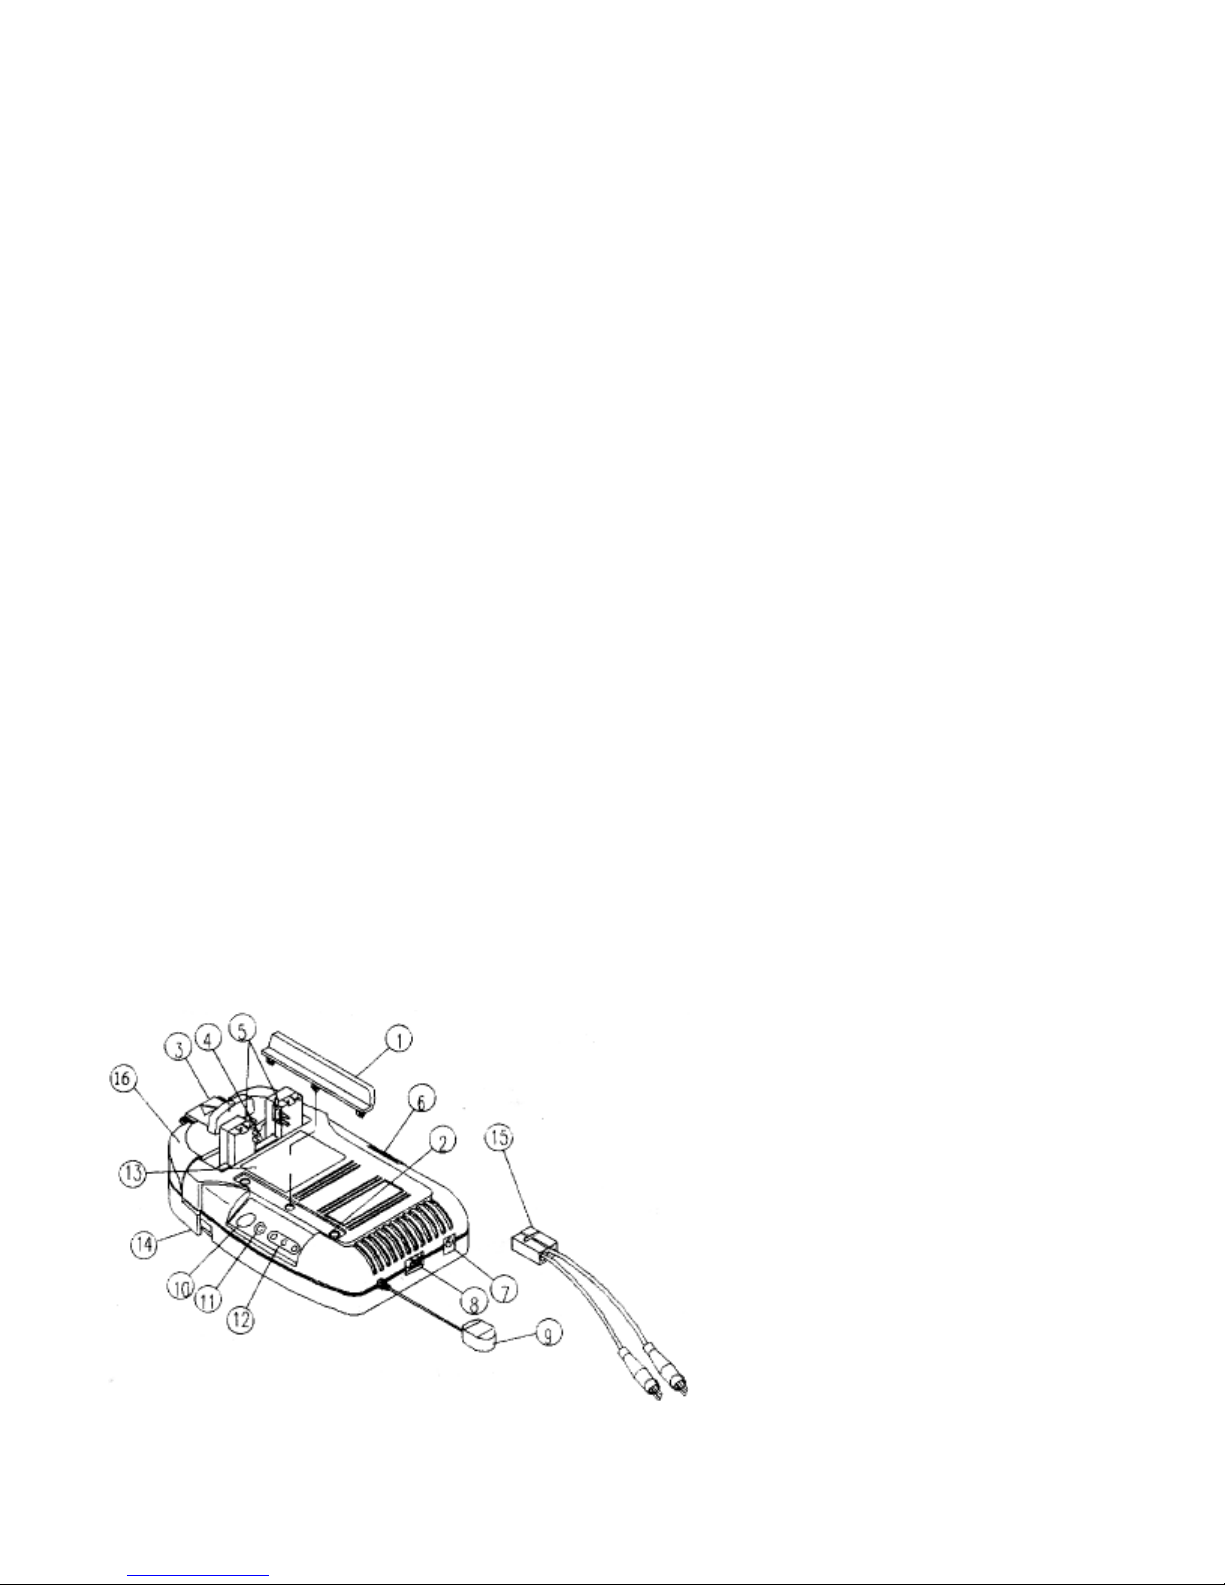
(1): Side positioning Aid (9): Magnetic temperature sensor
Page
2
of 7MH-C777 Universal Charger Conditioner Instruction Manual
10/25/2009
http://www.bills2way.com/equip/c777manual.html
Built-in conditioner, which when used to discharge battery to minimum voltage (recommended 1.0 volt
per cell), will extend the useful life of your rechargeable battery.
Reverse polarity protection and polarity switch for safety.
On board microprocessor to completely avoid over charging your battery pack. (detects -DV during
charge)
40mAh trickle charge mode after full charge.
Built-in light indicators that show approximate progress and completion of charge.
Magnetic temperature sensor when placed on battery, protects it from possible damage due to
overcharging.
ground systems only).
Both power connections (wall and auto) supplied by Maha.
Within adjustment chamber, pin connectors can be moved left, right, up and down for exact connection
with your battery pack.
and camcorders.
Diagram of Parts
Page 3

(2): Guide Displacement Hole (10): Discharge button
(3): Position Aid Stopper (11): Discharge indicator
battery. It is recommended to condition a NiCD battery before every charge, and periodically for NiMH,
Note: Many battery packs have more than two contacts (see on next page). The correct contacts to use
can be found in two ways: use of a digital multimeter or trial and error. It is most convenient if you have
Page
3
of 7MH-C777 Universal Charger Conditioner Instruction Manual
10/25/2009
http://www.bills2way.com/equip/c777manual.html
(4): Adjustment Bar (12): Charge status indicator
(5): Contact Adjustment Arm (13): Magnet (Position aid)
(6): Polarity switch (14): Adjustment chamber latch
(7): DC Power input (15): Clip lead accessory (optional)
(8): External clip power cord socket (16): Adjustment chamber
Quick Reference Guide
This section is a guideline to bring you through the process, if you have any problems, please refer to
First Time User Tips.
Conditioning
Also known as discharging a battery pack to one volt per cell (minimum voltage a single cell should be
discharged) to ensure battery pack will maintain its recommended capacity and extend the life of the
except when new. All new NiMH batteries need a "wake up" period. It is important to cycle (discharge
and charge) new packs 3-5 times so it can hold a full charge. Note that conditioning is not required, but
highly recommended for the life of your battery pack.
1) Supply power to unit with 18v wall adapter when 110v AC is available or 12v cigarette lighter
adapter for use in your vehicle.
2) Locate the charge contacts on the battery pack.
a digital multimeter that you can use to find the correct contacts (positive and negative). But if you do
not have a digital multimeter, you can use your rapid charger to find the correct positive and negative
contacts. The charger has built in protection and a reverse polarity switch so trial and error method will
not damage the battery pack or the rapid charger. Also note that some battery packs are equipped with
diode protection and make it impossible to discharge using charging contacts. In this situation it is
recommended to use the other contacts designed to power the electronic device. Please feel free to call
tech support for help if this is a problem.
Page 4

Trial and error method
Open adjustment chamber of the charger to allow for easy movement of the connector pins. The
ready to charge. If it is a continuous tone; contact is good, but polarity is reversed, which can be rectified
do not hear an audible tone, continue adjusting the pin adjustments to mate with the different contacts on
6) Once contact is good; the unit's light indicators have flashed and the audible tone has been heard, unit
will begin charging. Place the temperature sensor on battery pack.
Page
4
of 7MH-C777 Universal Charger Conditioner Instruction Manual
10/25/2009
http://www.bills2way.com/equip/c777manual.html
adjustment arms that the pins are connected to freely move left, right, up and down. Randomly align the
charger contacts with two of the battery pack pins; if unit's light indicators begin flashing and a brief
audible tone is heard, you found your contacts. If a continuous tone is heard, that means you have the
right contacts, but wrong polarity and that can be rectified by lifting the battery off the contacts, moving
the polarity switch over, and putting the battery back on the pins to rest. If no audible tone is heard,
continue testing other contact pairs.
Place temperature sensor on battery and press discharge button. The unit will discharge and then fully
charge the battery pack. The process should take from 1-5 hours to discharge depending on the capacity
of the battery.
Charging
This is the standard process for NiMH batteries that have been previously cycled through at least 3-5
times (if NiMH battery is new, please see section about Conditioning.
1) Supply power to unit with either wall adapter for home or cigarette lighter for auto.
2) Locate charge contact on battery pack. If the battery has more than two contacts and they are not
properly labeled positive and negative, see section on Conditioning under #3.
3) Align the charger contacts to the positive and negative terminals on your battery. Use adjustment
arms in open adjustment chamber to move pins onto the contacts.
4) If the connection between battery and charger is good, the unit's right red light indicator will begin to
flash. Depending on the voltage of the battery to be charged, the right red light will flash accordingly:
1 flash = 4.8v, 2 flashes = 6v, 3 flashes = 7.2v,
4 flashes = 9.6v, 5 flashes = 12v
5) After flashes cease, a audible tone will sound. If it is a short beep; contact is good and the unit is
by removing battery, moving polarity switch over and placing battery back on contact to charge. If you
your battery until you hear a beep or see the lights start the detection phase.
Page 5

7) As charging continues, the light indicators will display the relative progress of charge.
8) Charger will conclude the rapid charging process with an audible tone and the right red light will be
Note: When charging a 12v battery pack, the unit will flash the yellow light on the LED indicator. This
Page
5
of 7MH-C777 Universal Charger Conditioner Instruction Manual
10/25/2009
http://www.bills2way.com/equip/c777manual.html
the only light illuminated. Remove battery from unit; it is ready to use.
is normal and does not mean there is a problem.
Clip Lead Accessory
One item that may be purchased for the charger that could come in handy is the clip lead accessory
available from your local dealer. This accessory will allow you to charge batteries that do not line up
with the adjustable contacts on the charger. Or use the clip leads to attach the leads of your test
equipment. Another use is to install loose rechargeables in any battery holder that will place 4, 5, 6, 8 or
10 rechargeable cells in series. Then using the clip leads attach the charger to the holder to recharge the
all cells in the holder at once.
Tips for First Time User
· The most difficult part of the process for the first time user is making a good contact between the unit
and the battery pack. The following are some tips to help in that process.
· Use the side positioning aid (1) to align the battery pack onto the magnetic charging stage. If your
battery pack is too large, remove side positioning aid.
· Open adjustment chamber by pulling on the adjustment chamber latch (14).
· Within the adjustment chamber are the contact alignment arms (5) and the adjustment bar (4) that can
be moved left and right (contact alignment arms) and up and down (adjustment bar). Carefully move
these parts to align the pins on the contact alignment arms to contact with the contacts on the battery
packs.
· To simplify the alignment process, Maha has designed a scale system beneath the adjustment arms
which are marked with measurements. These markings can be used in conjunctions with a chart
provided in this manual.
· When contact is made, close the adjustment chamber to it's original position.
· The positioning aid stopper (3) can be used as a mechanism to help align your battery.
Scale System Diagram
Locate the pin contacts that point directly at the ruler, located inside the adjustment chamber. We have
made a list of some common battery packs for your convenience, to aid in finding the correct contact
settings.
Page 6

Model
Page
6
of 7MH-C777 Universal Charger Conditioner Instruction Manual
10/25/2009
http://www.bills2way.com/equip/c777manual.html
Charge Contacts
Radio Contacts
Flashes
MH-FNB-12
MH-FNB-17
MH-FNB-27
MH-FNG-31
MH-FNB-38
MH-FNB-40A
MH-FNB-41
MH-FNB-V47
MH-BP-7 *
MH-BP-8 *
MH-BP-8H *
A= 1 8/16 B= 2 3/16
A=2 B=2 4/16
A=1 8/16 B= 2 4/16
A=1 3/16 B=1 10/16
A=1 3/16 B=1 10/16
A=1 8/16 B= 2 6/16
A=1 8/16 B=2 1/16
A=1 8/16 B= 2 6/16
B=8/16 A=2 13/16
B=8/16 A=2 13/16
B=8/16 A=2 13/16
A= 2 B= 2 5/16
A= 2 B=2 5/16
Don’t Use
Don’t Use
Don’t Use
5
3
5
1
4
3
4
3
5
4
4
MH-BP-83
MH-BP-132B
MH-BP-132G
MH-BP-173
MH-BP-180
MH-PB-8 **
MH-PB-32
MH-PB-34
MH-CNB-152
MH-CNB-153
* Pins must be reversed on slide bar
A=1 11/16 B=2 4/16
A= 1 6/16 B= 2
A= 1 6/16 B= 2
A= 1 6/16 B= 2
A= 1 6/16 B= 2
A= 1 12/16 B= 2 2/16
A=10/16 B=2 6/16
A=10/16 B=2 6/16
A=1 6/16 B= 2
A=1 6/16 B= 2
A= 1 5/16 B= 1 10/16
A=1 2/16 B=1 6/16
A=1 2/16 B=1 6/16
A= 2 B= 2 5/16
A= 2 B= 2 5/16
** Battery pack does not line up with slide positioning aid
3
5
5
4
3
5
2
4
5
3
Specifications
Page 7

Input Power: 12V~18V DC 800mAh
Rapid Charge Current: 650mA
mailto:tech@maha
-
comm.com
Page
7
of 7MH-C777 Universal Charger Conditioner Instruction Manual
10/25/2009
http://www.bills2way.com/equip/c777manual.html
Trickle Charge Current: 40mA
Discharge Current: 400-450mA
Primary Detection Sensor: Negative Delta V
Secondary Detection Sensor: Delta T
Acceptable Battery Voltage: 4.8V~12V (wall); 4.8V~9.6V (car)
Dimension: 180mm X 120mm X 45mm
Maha Communications, Inc.
Value , Quality , Service
2841-B Saturn St.
Brea, CA 92821
Tel: 1-800-376-9992 o (714)985-9132
http://www.mahaenergy.com
 Loading...