

Page 1

Copyright© 2002
MagTek®, Inc.
Printed in the United States of America
Information in this document is subject to change without notice. No
part of this document may be reproduced or transmitted in any form or
by any means, electronic or mechanical, for any purpose, without the
express written permission of MagTek, Inc.
MagTek and MICRImage are registered trademarks of MagTek, Inc.
REVISIONS
Rev Number Date Notes
1 05 Sep 02 Initial Release
2 13 Jun 03 Front Matter: added ISO line
to logo, changed Tech
Support phone number.
MICRIMAGE
INSTALLATION AND OPERATION
SUMMARY
RS232 - PC
Part Number 99875246-2
JUNE 2003
REGISTERED TO ISO 9001:2000
1710 Apollo Court
Seal Beach, CA 90740
Phone: (562) 546-6400
FAX: (562) 546-6301
Technical Support: (651) 415-6800
www.magtek.com
Page 2
The following is required for installation:
• MICRImage Unit
• Interface Cable
• Power Adapter
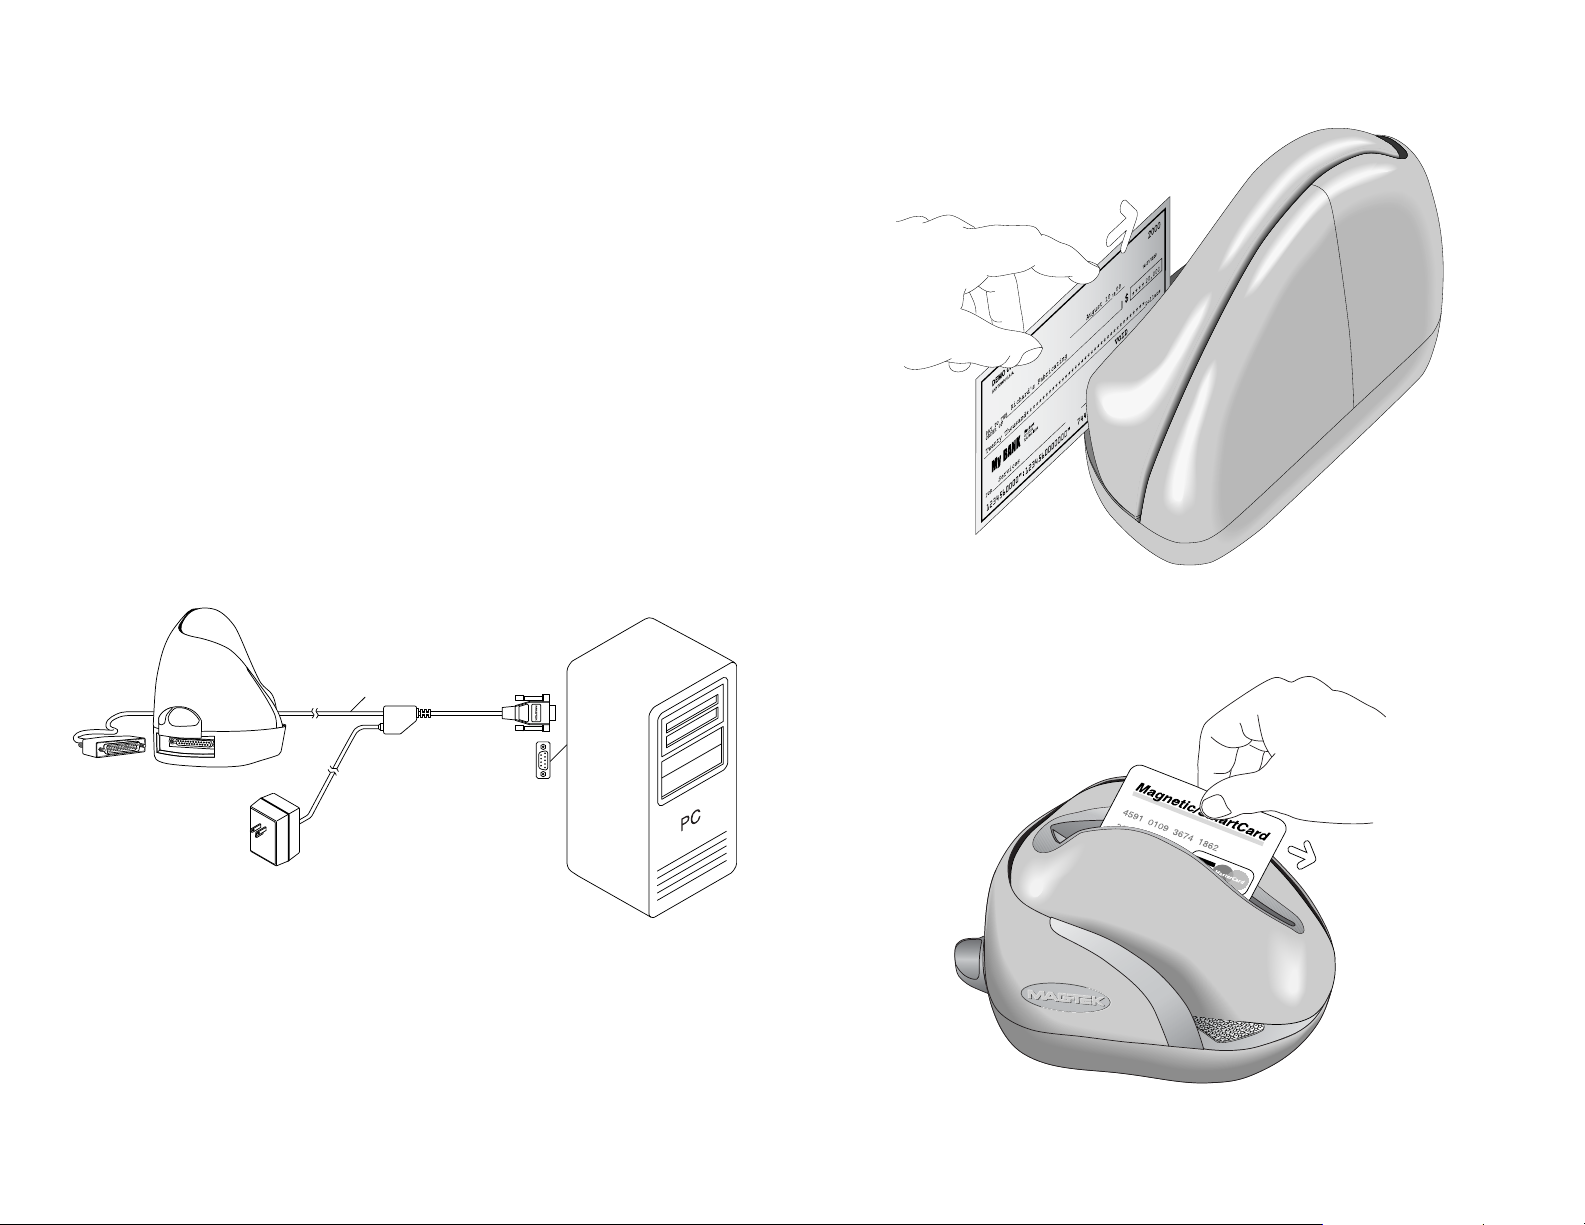
INSTALLATION
• Connect the DB25 cable to the MICRImage Unit.
• Connect the DB9 cable to the serial port on the PC.
• Connect the power supply to the MICRImage cable.
For a single PC, install the MICRImage cables shown as follows:
P/N 22410302
CHECK READING
Slowly Slide Check Forward
2
Until Reader Pulls Check In
Place Check Flush
Onto Entry Slot
1
MAGNETIC STRIPE CARD READING
MICRImage
12 VDC
Power
Adapter
Caution
Do not place the MICRImage Reader within 6 inches of a computer
monitor or power supply. These devices may cause undesirable
interference with the check reading operation.
 Loading...