

Page 1

IntelliCAT
Migration to Windows 7
User Support Document
March 21, 2014
Manual Part Number:
99875658-1.01
REGISTERED TO ISO 9001:2008
MagTek I 1710 Apollo Court I Seal Beach, CA 90740 I Phone: (562) 546-6400 I Technical Support: (888) 624-8350
www.magtek.com
Page 2

Copyright © 2014 MagTek, Inc.
Rev Number
Date
Notes
1.01
March 21, 2014
Preliminary Release
Printed in the United States of America
Information in this publication is subject to change without notice and may contain technical inaccuracies or
graphical discrepancies. Changes or improvements made to this product will be updated in the next
publication release. No part of this document may be reproduced or transmitted in any form or by any
means, electronic or mechanical, for any purpose, without the express written permission of MagTek, Inc.
MagTek® is a registered trademark of MagTek, Inc.
ExpressCard 2000 is a trademark of MagTek, Inc.
MagnePrint® is a registered trademark of MagTek, Inc.
Microsoft® and Windows® are registered trademarks of Microsoft Corporation.
All other system names and product names are the property of their respective owners.
Table 0.1 - Revisions
<IntelliCAT>| <Migration to Windows 7> | <User Support Document>
Page 2
Page 3

1. Detailed Steps for migrating to Windows 7, 32/64bit
Using MtAdmIn.MDB local and networked including reference to SQL
Before you begin the new install, open DATA ENTRY on the old PC, click on HELP ABOUT. If the
Version is 1.8.XX or lower, the IntelliCAT setup is referred to as a 1.XX install. New IntelliCAT
Software is required. Contact your MagTek Representative at 562-546-6400 to order new Software.
If the Version 2.XX is present, the current setup is using updated IntelliCAT and you may use the
current ASM IntelliCAT software disk for the new installation.
Login to the PC as an Administrator will full rights. Turn off UAC during the installation. Go to Control
Panel, Folder Options and uncheck “Hide Extensions for known file types” and install all drivers and
software by right clicking and “Run As Administrator”. Turn UAC back on if required by your institution
after the IntelliCAT is setup and working correctly.
Do not shut down the old PC until you collect specific files as directed below.
<IntelliCAT>| <Migration to Windows 7> | <User Support Document>
Page 3
Page 4
Step 1 Copy Old INTCAT.INI file
=============================DO NOT MODIFY===============================
DBpwd=7E2421A8FA55150D5347CB3B76973622DBA73ECE5168CE87771F7843E8A8AB2287859D
=============================DO NOT MODIFY===============================
[ODBC]
CardHistConnect="File Name=C:\Program Files\MagTek\IntelliCAT\IntelliCAT.UDL"
HistConnect="File Name=C:\Program Files\MagTek\IntelliCAT\IntelliCAT.UDL"
ReportConnect="File Name=C:\Program Files\MagTek\IntelliCAT\IntelliCAT.UDL"
UserConnect="File Name=C:\Program Files\MagTek\IntelliCAT\IntelliCAT.UDL"
WorkQConnect="File Name=C:\Program Files\MagTek\IntelliCAT\IntelliCAT.UDL"
COPY the INTCAT.INI located in C:\Windows\ from the Old PC and PASTE it to the desktop on the
new PC for review and use with the new installation.
Step 2 – Verify IntellICAT version
Open the INTCAT.INI file on the desktop of the new PC. Review the old INTCAT.INI file, if the DO NOT
MODIFY section is present, the IntelliCAT setup is already using 2.XX IntelliCAT, skip Steps 3 and 4. If
the DO NOT MODIFY section is not present, follow Steps 3 and 4
Step 3 – Add the “DO NOT MODIFY” to the desktop INTCAT.INI
COPY the DO NOT MODIFY info below in its entirety and PASTE it after the last line after the [Startup]
section. These three lines of code need to be added:
=============================DO NOT MODIFY===============================
DBpwd=7E2421A8FA55150D5347CB3B76973622DBA73ECE5168CE87771F7843E8A8AB2287859D
=============================DO NOT MODIFY===============================
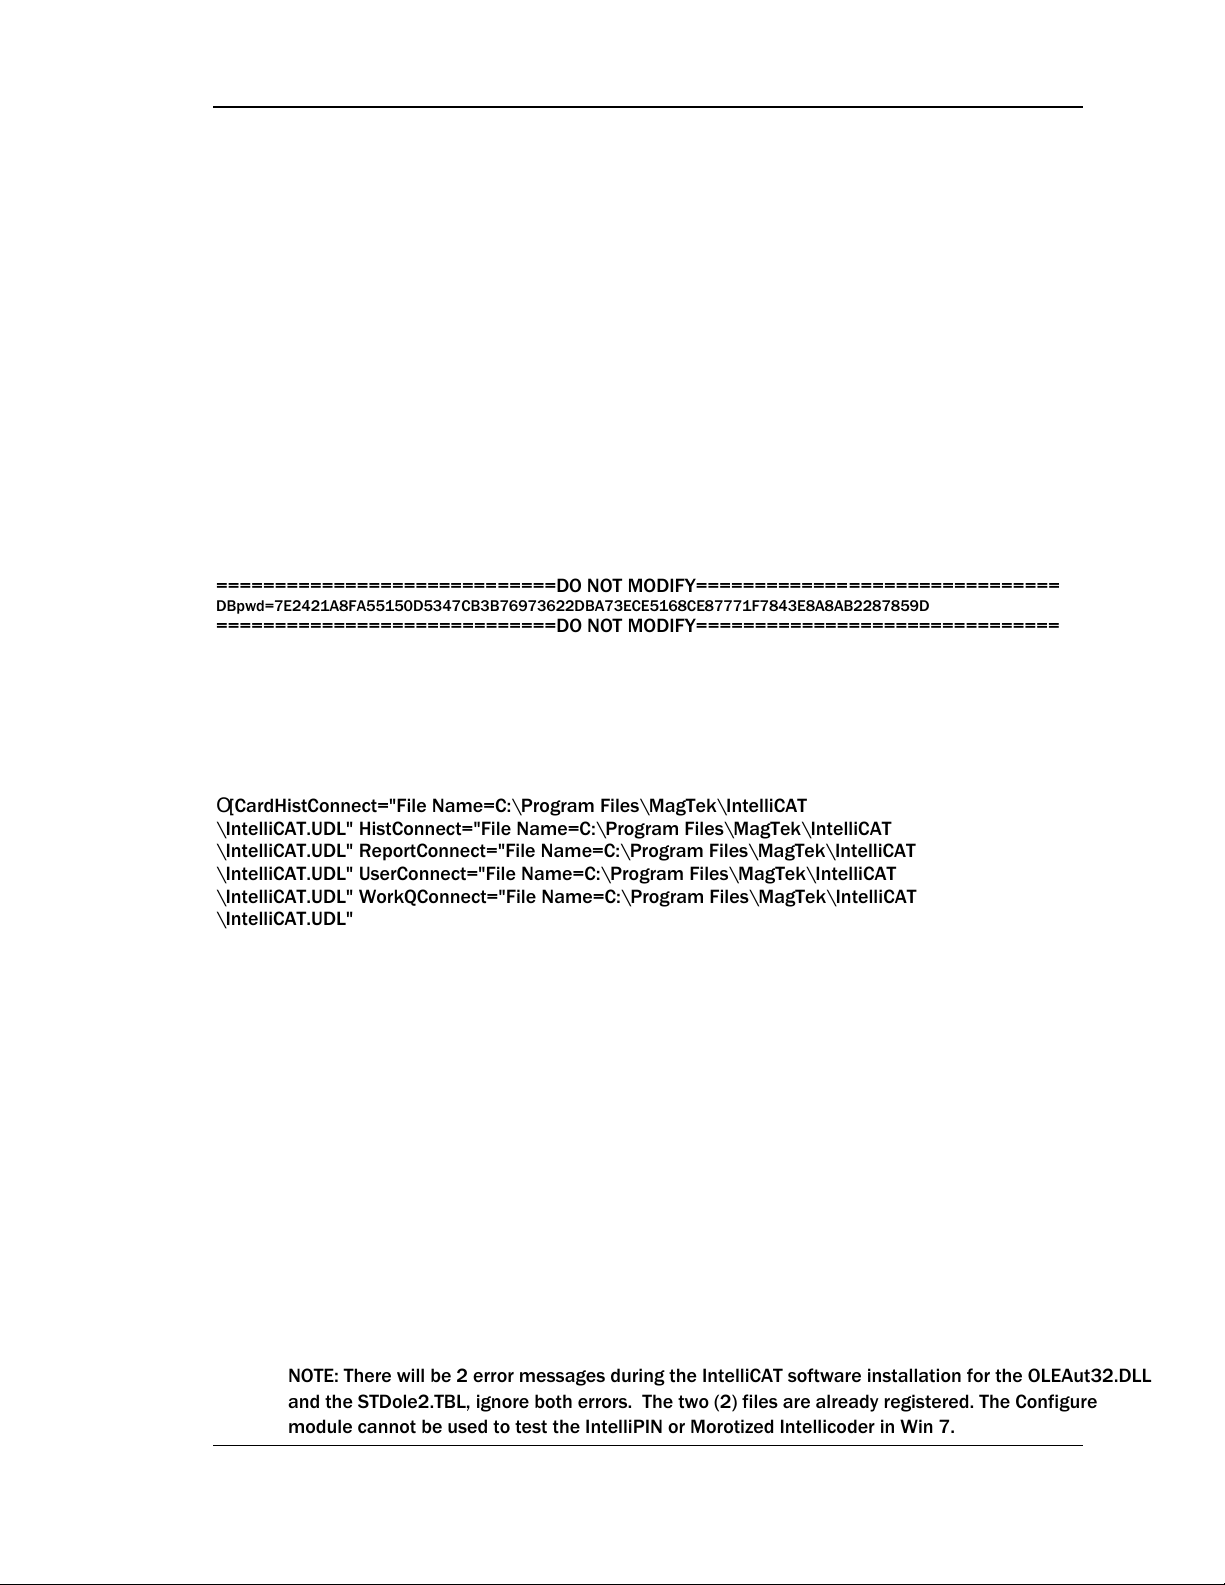
Step 4 – Add the [ODBC] section to the desktop INTCAT.INI
COPY the [ODBC] section below and PASTE it under the last line of the [Motorized Intellicoder]
section.
[ODBC]
2[CardHistConnect="File Name=C:\Program Files\MagTek\IntelliCAT
\IntelliCAT.UDL" HistConnect="File Name=C:\Program Files\MagTek\IntelliCAT
\IntelliCAT.UDL" ReportConnect="File Name=C:\Program Files\MagTek\IntelliCAT
\IntelliCAT.UDL" UserConnect="File Name=C:\Program Files\MagTek\IntelliCAT
\IntelliCAT.UDL" WorkQConnect="File Name=C:\Program Files\MagTek\IntelliCAT
\IntelliCAT.UDL"
Step 5 – Skip Step 5 if installing on a 32bit PC
On the desktop INTCAT.INI file, if installing on a 64bit PC click on EDIT, REPLACE.
FIND WHAT TYPE: Program Files
REPLACE WITH TYPE: Program Files (x86)
Keep case sensitivity. Click REPLACE ALL
Step 6 – Installing drivers and software
USB driver, then plug in the IntelliPIN. Wait for the driver to install.
IntelliCAT software suite. During the install, with Version Conflicts, always keep the newer file.
MCP driver. After the PC is rebooted, plug in the Motorized IntelliCoder. Wait for the driver
to install.
Go to DEVICE MANAGER, under PORTS and make a note of each port assignment.
In 32bit PC note the Port settings for the IntelliPIN
In 64bit PC note the Port settings for the Motorized IntelliCoder (IntelliStripe 380) and the
IntelliPIN
NOTE: There will be 2 error messages during the IntelliCAT software installation for the OLEAut32.DLL
and the STDole2.TBL, ignore both errors. The two (2) files are already registered. The Configure
module cannot be used to test the IntelliPIN or Morotized Intellicoder in Win 7.
<IntelliCAT>| <Migration to Windows 7> | <User Support Document>
Page 4
Page 5

Step 7 – Setting Commports
Path
Definition
If all paths point to the local PC:
If some paths point to a mapped drive or UNC path:
On the desktop INTCAT.INI file, Change the ICCommPort (Motorized IntelliCoder) under the [ADMIN]
section and change the ICCommPort and IPCommport (IntelliPIN) under the [COMMUNICATION]
section to match the PORT settings defined in DEVICE MANAGER, and noted after the driver install
was completed.
IntelliPIN: Set device to match what is in DEVICE MANAGER under PORTS
64 bit PC only: IntelliStripe 380 - set the device to match what is in DEVICE MANAGER
under PORTS.
Step 8 - Changing device name (64bit only)
If installing on a 64 bit PC: on the desktop INTCAT.INI file change the DEVICENAME defined under the
[Motorized Intellicoder] section to DEVICENAME="IntelliStripe 64"
Step 9 - Adding an OrgLocation name
Under the [Organization] section:
Add a Branch Name to i.e. OrgLocation= "Main_Branch" for proper reporting.
Click FILE and SAVE, then close the desktop INTCAT.INI file.
Get to know
REOPEN the desktop INTCAT.INI to review the setup and follow the instructions noted below.
When reopened, the INTCAT.INI file paths will point to the local PC or a mapped drive or UNC paths
may be present as well.
the IntelliCA
T Setup
The Old XP 1.XX or XP 2.XX is a local setup, and
the new WIN 7 32/64bit 2.XX setup is Local install.
The Old XP install is a combination local/network
install and the new Win7 32/64bit setup is
Local/Network install.
Step 10 – Saving files from old PC
SAVE files from the old PC to a network location or thumb drive for continuing with the setup but
only SAVE the files listed below if they are all mapped to the local PC at C:\Program
Files\MagTek\IntelliCAT\(32bit) or C:\Program Files (x86)\MagTek\IntelliCAT\(64bit). These files
will be copied into each PC as the migration to Win 7 continues.
If the files noted below are all pointing to a network location, DO NOT SAVE copies for either
Step 10 A or Step 10 B. The NETWORKED files will work in the new installation with no changes
required. Some additional Networked folders and UDL files will need to be created depending
upon the O.S. during the migration. This is detailed later in this document. Follow instructions
accordingly.
Mandatory - Create a folder for each branch for saving the local old files noted below.
<IntelliCAT>| <Migration to Windows 7> | <User Support Document>
Page 5
Page 6

Step 10 A - SAVE Old XP 1.XX Local Install Files -
...\IntelliCAT\BinList.TXT
...\IntelliCAT\MtAdmin.MDB
1.X_MtAdmin.MDB after saving
...\IntelliCAT\Operator(s)\MtAdmin.MDB
Copy, if present – Save, Mandatory - rename MtAdmin.MDB to
1.X_OperatorMtAdmin.MDB after saving
...\InteliCAT\MTControllers.DAT
...\IntelliCAT\Card Layouts\
Old Files from 2.XX Local Install
Mandatory Action – Save Files below
...\IntelliCAT\BinList.TXT
Copy, Save
...\IntelliCAT\Operators\MTAdmin.MDB
Copy, Save the Operators folder if present
...\InteliCAT\MTControllers.DAT
...\IntelliCAT\Card Layouts\
Copy, Save the entire folder
...\IntelliCAT\*.UDL's
If the [ODBC] section is referencing a
UNC or Mapped Drive Path structure
i.e. \\server1\MagTek\MagTekUDL\...
DO NOT copy the *.UDL's from the local folder.
And DO NOT TOUCH the networked UDL files.
If Step 3 and 4 were performed, SAVE the files below.
This was an old XP 1.XX original install. Save files to a thumb drive or network folder.
First SAVE, then EDIT and RENAME where it states Mandatory. If the renaming is not completed as
required, the new installation will fail to work as the MtAdmin.MDB file
between versions 1.XX is not
compatible with the 2.XX MtAdmin.MDB file. This is a critical Step as highlighted below
Old Files From 1.XX Install
Mandatory action - Save Files below
32bit just Copy and Save. 64bit Copy, Save, then edit the file
to add (x86) to Program Files path. Click File, Save, Close
Copy, Save, Mandatory - rename MtAdmin.MDB to
32bit just Copy and Save. 64bit, Copy, Save, then edit the file
to add (x86) to Program Files path. Click File, Save then close.
Copy, Save the entire folder
Step 10 B - SAVE Old XP 2.XX Local Install Files -
If Steps 3 and 4 were NOT performed, COPY, SAVE the files below. This was an old XP 2.XX original
install. Save files to a thumb drive or network folder.
32bit just Copy and Save. 64bit Copy, Save, then edit the file
to add (x86) to Program Files path. Click File, Save and close.
...\IntelliCAT\MTAdmin.MDB
32bit just Copy and Save. 64bit Copy, Save, then edit the file
to add (x86) to Program Files path. Click File, Save and close.
Copy, Save all the UDL's only if the [ODBC] path structure
is referencing the local PC, i.e.
C:\Program Files\MagTek\IntelliCAT\IntelliCAT.UDL
Step 11 - Copying old files
Copy all of the old files and folders noted above in Step 10 to their respective locations:
32bit copy to C:\Program Files\MagTek\IntelliCAT\... --- Step 10 A
64bit copy to C:\Program Files (x86)\MagTek\IntelliCAT\... --- Step 10 B
Click YES to REPLACE ALL when copying.
<IntelliCAT>| <Migration to Windows 7> | <User Support Document>
Page 6
Page 7

Step 12 - Local UDL Customization/Creation – O.S. Dependent
If the [ODBC] section is networked, SKIP THIS STEP.
If the [ODBC] section was present in the old INTCAT.INI file, all of the UDL’s were copied in Step 11
and will need to be copied into each new PC as the migration takes place. No changes are required
to the UDL’s unless Win 7, 64bit is being implemented. See changes below regarding Win 7, 64bit.
12 A - Migrating XP 1.XX to 2.XX Local Install (Win 7 32bit PC):
Creating UDL’s – Follow the instructions using the document entitled “32bit Unencrypted UDL file
MTADMIN.MDB”
XP 1.XX to 2.XX (Win 7, 32bit PC): Use the Installed IntelliCAT.UDL - do not configure this UDL.
The connection path is defaulted to use C:\Program Files\MagTek\IntelliCAT\MtAdmin.MDB.
If an Operator’s folder exists, Create a Local Operator.UDL
Create an Operator.UDL if there is an Operator(s) folder from the old setup. Make a copy of
the IntelliCAT.UDL referenced above. RIGHT CLICK and RENAME the file to Operator.UDL.
.. 2SHQWKH2SHUDWRU8'/SURSHUWLHV
The connection path will be C:\Program Files\MagTek\IntelliCAT\Operators\ MtAdmin.MDB
On the Desktop INTCAT.INI file - Change the [ODBC] section to reflect the new UDL
Change the [ODBC] section to reflect the newly created Operator.UDL. Specifically change:
UserConnect="File Name=C:\Program Files\MagTek\IntelliCAT\Operator.UDL"
If Controller is used - Create a local Controller.UDL
Create a Controller.UDL, if Controller is being used. Make a copy of the
IntelliCAT.UDL that was customized above. RIGHT CLICK and RENAME the file to
Controller.UDL.
Open the Controller.UDL properties. The connection path will be C:\Program
Files\MagTek\IntelliCAT\MtAdmin.mdb.
On the Desktop INTCAT.INI file - Change the [ODBC] section to reflect the new UDL
Change the [ODBC] section to reflect the newly created Controller.UDL. Specifically change:
WorkQConnect="File Name=C:\Program Files\MagTek\IntelliCAT\Controller.UDL"
<IntelliCAT>| <Migration to Windows 7> | <User Support Document>
Page 7
Page 8

12 B - Migrating from XP 1.XX to 2.XX (Win 7, 64bit)
Create an IntelliCAT64.UDL, Operator64.UDL (Optional) and a Controller64.UDL (Optional)
XP 1.XX to 2.XX (Win 7, 64 bit) - Create a local IntelliCAT64.UDL, a local Operator64.UDL (if present
in old PC setup) and a local Controller64.UDL (if using Controller) following the instruction in the
document entitled (Creating 64bit UDL for 64bit PC for MtAdmin.MDB)
On the Desktop INTCAT.INI file - Change the [ODBC] section to reflect the new UDL's
In the [ODBC] section, RENAME the IntelliCAT.UDL to IntelliCAT64.UDL where applicable.
Under UserConnect, change the path as noted below:
o UserConnect="File Name=C:\Program Files (x86)\MagTek\IntelliCAT\Operator64.UDL"
Under WorkQConnect, change the path as noted below:
o WorkQConnect="File Name=C:\Program Files[?0DJ7HN?,QWHOOL&$7?&RQWUROOHU8'/
Typical Connection strings in the UDL's
The UDL connections will reference the local Database(s):
IntelliCAT64.UDL connection will use
o C:\Program Files (x86)\MagTek\IntelliCAT\MtAdmin.MDB
Operator64.UDL connection path will use
o C:\Program Files (x86)\MagTek\IntelliCAT\Operators\MtAdmin.MDB
Controller64.UDL connection will use
o C:\Program Files (x86)\MagTek\IntelliCAT\MtAdmin.MDB
12 C - No Changes are required to the UDL’s if migrating from XP 2.XX to 2.XX (Win 7,
32bit PC)
XP 2.XX to 2.XX (Win 7, 32 bit PC) - The UDL's were copied into the appropriate location in Step 11.
No changes are required to the UDL's or to the [ODBC] section. The [ODBC] section may reference
either a local setup or a network path structure.
12 D - 64bit PC users ONLY
Determine if the UDL's connection strings are local or networked (VERY IMPORTANT STEP)
XP 2.XX to 2.XX (Win 7, 64bit PC) - The UDL's were copied into the appropriate location in Step 11.
However, changes may be required to the UDL's to point to the appropriate Databases depending on
the connection string to the databases. Review the old MtAdmin.MDB which was copied and is now
located in C:\Program Files (x86)\MagTek\IntelliCAT\...
Review the file size of the local MtAdmin.MDB or the Server MtAdmin.MDB
If the Local MtAdmin.MDB is relatively small, IntelliCAT is reporting to a network location.
No changes are required.
If the Local MtAdmin.MDB file in C:\Program Files (x86)\MagTek\IntelliCAT is relatively
large, the UDL's are reporting to the local PC. Create new UDL's by following the same steps
as referenced in Step 12B.
<IntelliCAT>| <Migration to Windows 7> | <User Support Document>
Page 8
Page 9

12 E - Controller UDL's, if in use, may have different names
Local
Controller UDL’s local path structure
Action Required
(32 bit)
WorkQConnect="File Name=C:\Program
Files\MagTek\IntelliCAT\Controller.UDL"
No change required.
(64 bit) –
WorkQConnect="File Name=C:\Program Files
(x86)\MagTek\IntelliCAT\Controller64.UDL"
Create a new Controller64.UDLfollowing the
Change the name in the path structure in the
[ODBC] section of the Desktop INTCAT.INI file to
reference the new Local Controller64.UDL
Networked
Controller UDL’s Networked Path Structure
Action Required
(32 bit)
WorkQConnect="File
Name=\\server1\MagTek\IntelliCAT\Controller.UDL"
No change required.
(64 bit)
WorkQConnect="File
Create a new Controller64.UDL for the Network
Change the name in the path structure in the
[ODBC] section of the Desktop INTCAT.INI file to
reference the Network Controller64.UDL. In this
environment, the old Controller.UDL will be used
during the migration process.
UDL's for WorkQConnect - examples are Controller.UDL, Work.UDL, Production.UDL, etc. and are only
required in a Networked Environment.
Typical examples of the path structure to the WorkQConnect as located in the [ODBC] section are:
same steps as referenced in Step 12B.
following the same steps as referenced in Step 12B.
Name=\\server1\MagTek\IntelliCAT\Controller64.UDL
Typical connections strings for most Controller UDL's when using MtAdmin.MDB
For the Controller.UDL, it will point to:
C:\Program Files\MagTek\IntelliCAT\MtAdmin.MDB(32bit)
For the Controller64.UDL, it will point to:
C:\Program Files (x86)\MagTek\IntelliCAT\MtAdmin.MDB (64bit)
Note: A Controller.UDL may be in use if a SQL Server is being used but it not required as long as
each Controller PC has, as an example, a unique CGSName=”Branch1” in the [Startup] Section
and it also have a ServerName=”Branch1” in the [Controller] section. If the Default Controller is
used for the CGSName and ServerName respectively, then a Controller.UDL and a
Controller64.UDL is mandatory and the connection string must point to the appropriate database
as noted above. (O.S. dependent).
<IntelliCAT>| <Migration to Windows 7> | <User Support Document>
Page 9
Page 10

SQL Users Only
Action required
If a SQL database is being used in an old XP 2.XX and
you are migrating to a Win 7 32bit environment, a
Controller.UDL is not required but one may be in use.
32bit PC - Controller.UDL, if in use
No change is required to the current *.UDL's
including the Controller.UDL
64bit PC - Controller64 UDL, create new UDL Complete Step 12B as referenced above (create a
new Controller64.UDL only and change the
connection string to reflect Program Files (x86) in
the path structure and change the [ODBC]
WorkQConnect path to reflect Controller64.UDL
Note: Both the Controller.UDL and the Controller64.UDL will be used during the migration process from old
XP 2.XX 32bit to the new Win 7 64bit install.
Important Note: If migrating from a local XP 1.XX to a local 2.XX using a Win 7 32/64bit PC – and all paths
point to the local PC and all modification have been made to the desktop INTCAT.INI file, Click File, Save
and Close. Copy the Desktop INTCAT.INI file to C:\Windows and overwrite the existing file.
Go to Step 13 to Import Operators from a 1.XX install only and Skip Steps 14 thru 17
Step 13 – Importing Operators Local Install only
ICAT Utility is only required when migrating from 1.XX to 2.XX regardless of O.S.
If migrating from XP 1.XX IntelliCAT: Use ICAT Utility to import old operators. Instructions are in a
separate document named ICAT Utility Instructions.
Note - If migrating from XP 2.XX to Win 7, the old Databases will still be in use, copied in Step 11, so there
is no need to import operators. Do not continue with STEP 13 A or Step 13 B
Use the copy of the Old \IntelliCAT\1.X_MTAdmin.mdb, previously saved and renamed.
o If an Operator(s) folder is not present, follow Step 13 A only.
o If an Operator(s) folder exists, skip Step 13 A and go directly to Step 13 B.
13 A - Import Operators from Old 1.X_MtAdmin.mdb
into the new \IntelliCAT\MTAdmin.mdb database.
In either a 32 bit/64 bit PC, when using ICAT Utility, Utilize the copy of the 1.X_MtAdmin.MDB to
import Operators using the new C:\...\IntelliCAT\MtAdmin.MDB via the newly created IntelliCAT.UDL
or IntelliCAT64.UDL file (O.S. Dependent).
13 B - Import Operators from Local Old 1.X_OperatorMtAdmin
into the new …\Operators\MtAdmin.mdb database
If an Operator(s) folder is present in either 32bit/64bit PC, navigate to the appropriate folder: i.e.
C:\....\IntelliCAT\Operators\ O.S dependent.
Make a Copy of the NEWLY INSTALLED MtAdmin.MDB located in C:\.....\Magtek\IntelliCAT\ and
paste the copy into the local Operator(s) folder. Using ICAT Utility, Utilize the copy of
1.X_OperatorMtAdmin.MDB to import Operators into the New MtAdmin.MDB via the newly created
Operator.UDL or Operator64.UDL. (O.S dependent).
<IntelliCAT>| <Migration to Windows 7> | <User Support Document>
Page 10
Page 11

Step 14 - Local/Network Setup
If the desktp INTCAT.INI file also includes some Mapped Drives or UNC paths, this means
that the old IntelliCAT Setup is a partial local/network setup
Review the Networked Location of the IntelliCAT install by following the mapped drive or UNC path.
14 A - Locate the old MTAdmin.MDB that is in use
Example of current 1.X setup = \\server1\Magtek\IntelliCAT\MTAdmin.mdb..........
The file will continue to be used during the migration - DO NOT TOUCH this file.
14 B - Locate the old \Operators\MTAdmin.MDB - if present - Example of current 1.X
setup using an Operator folder =
\\server1\MagTek\IntelliCAT\Operators\MtAdmin.mdb..........
The file will continue to be used during the migration - DO NOT TOUCH this file
Important Note: DO NOT TOUCH THE FILES referenced above
Note: The above examples may also point to a mapped drive. The same actions will apply for Step 14
regardless of whether a UNC or mapped drive is being used.
Note: The old 1.XX networked Database(s) will continue to work as the migration takes place, one branch
at a time, AND they will also be used to import the old operators into the new installation with no need to
recreate all of the operator cards currently in use.
Step 15 - Create new folder(s) - Critical Step Must Be Performed for a Network
Installation
Create a new network folder named 2.X_IntelliCAT
On the Network
Create one new folder named 2.X_IntelliCAT if only 14A is present above and then,
If an Operators folder is present create a second folder named 2.X_Operators if 14B is
present.
o If 14B is not present, do not create the second folder.
15 A. Example 1 = new 2.X setup = \\server1\Magtek\2.X_IntelliCAT\.......
15 B. Example 2 = new 2.X setup = \\server1\Magtek\IntelliCAT\2.X_Operators\......
Note: The same instructions apply if the drive is mapped.
Step 16 - Copying the new 2.XX MtAdmin.MDB and IntelliCAT.MDW to new folder(s)
O.S Dependent
If 15A IS TRUE in a 32 bit/64 PC - NAVIGATE to C:\...\MagTek\IntelliCAT\
o LOCATE THE MtAdmin.MDB and IntelliCAT.MDW on the new PC,
o COPY and PASTE both new files to the new 2.X_IntelliCAT NETWORK folder,
i.e. \\server1\Magtek\2.X_IntelliCAT\
If 15B IS TRUE in a 32bit/64bit PC, an Operator(s) folder is present, navigate to
C:\....\MagTek\IntelliCAT\
o LOCATE MtAdmin.MDB on the new PC and
o COPY and PASTE the new MtAdmin.MDB to the new 2.X_Operators NETWORK
folder.
i.e. \\server1\Magtek\IntelliCAT\2.X_Operators\
<IntelliCAT>| <Migration to Windows 7> | <User Support Document>
Page 11
Page 12

Step 17 - Network UDL customization/creation - 1.XX conversion to 32/64bit
17A - 32bit - Customize IntelliCAT.UDL and create an Operator.UDL and a
Controller.UDL if present for a networked install
XP 1.XX to 2.XX (Win 7 32bit) - Follow the instructions in Step 12 A. The [ODBC] section will
reference a mapped drive or UNC path structure as in the example below
Change the [ODBC] to reflect new UDL's (32bit) PC
[ODBC]
CardHistConnect="File Name=\\server1\MagTek\IntelliCAT\IntelliCAT.UDL\"
HistConnect="File Name=\\server1\MagTek\IntelliCAT\IntelliCAT.UDL\"
ReportConnect="File Name=\\server1\MagTek\IntelliCAT\IntelliCAT.UDL\"
UserConnect="File Name=\\server1\MagTek\IntelliCAT\Operator.UDL\", if required
WorkQConnect="File Name=\\server1\MagTek\IntelliCAT\Controller.UDL", if required
Example of Connection Strings
The UDL connections will reference the networked Database(s):
IntelliCAT.UDL connection will use \\server1\MagTek\2.X_IntelliCAT\MtAdmin.MDB
Operator.UDL connection path will use \\server1\magTek\2.X_Operators\MtAdmin.MDB
Controller.UDL connection path will use C:\Program Files\MagTek\IntelliCAT\MtAdmin.MDB
17 B - XP 1.XX to 2.XX (Win 7 64bit)
Follow the instructions in Step 12 B. The [ODBC] section will reference a mapped drive or UNC path
structure as in the example below. Create an IntelliCAT64.UDL, Operator64.UDL (if present) and a
Controller64.UDL if required.
On the desktop INTCAT.INI file - Change the [ODBC] section to reflect new UDL's (64bit) PC
[ODBC] -
CardHistConnect="File Name=\\server1\MagTek\IntelliCAT\IntelliCAT64.UDL\"
HistConnect="File Name=\\server1\MagTek\IntelliCAT\IntelliCAT64.UDL\"
ReportConnect="File Name=\\server1\MagTek\IntelliCAT\IntelliCAT64.UDL\"
UserConnect="File Name=\\server1\MagTek\IntelliCAT\Operator64.UDL\", if required
WorkQConnect="File Name=\\server1\MagTek\IntelliCAT\Controller64.UDL", if required
Examples of Connection Strings
The UDL connections will reference the networked Database(s):
IntelliCAT64.UDL connection will use \\server1\MagTek\2.X_IntelliCAT\MTAdmin.MDB
Operator64.UDL connection path will use \\server1\magTek\2.X_Operators\MTAdmin.MDB
Controller64.UDL connection path will use
C:\Program Files(x86)\MagTek\IntelliCAT\MTAdmin.MDB
17 C - XP 2.XX to Win 7 32bit
XP 2.XX to Win 7 32bit - no changes are required to the networked UDL's in use.
17 D. XP 2.XX to Win 7 64bit
Create a Controller64.UDL if a Controller.UDL is currently referenced in the [ODBC] section
XP 2.XX to Win 7, 64bit - if a Controller.UDL is being used, leave this UDL alone. Create a new
Controller64.UDL as referenced in Step 12 B. The connection string will be changed to C:
\Program Files (x86)\MagTek\IntelliCAT\MTAdmin.MDB. The path structure in the [ODBC] section
will need to be changed to reference the newly created Controller64.UDL. All other UDL's require
no changes. During the migration, IntelliCAT will utilize the old Controller.UDL and as the migration
continues, it will utilize the new Controller64.UDL. When the migration of all XP PC's has been
completed, the Controller.UDL will no longer be used.
<IntelliCAT>| <Migration to Windows 7> | <User Support Document>
Page 12
Page 13

Win 7 64BIT and SQL
Action Required
If a Controller.UDL is present and using SQL
Make one change. For (Win 7 64bit only),
Note: If a SQL database is being used in XP 2.XX and
you are migrating to a Win 7 64bit environment, a
Controller. UDL is not required but one may be in use.
If in use, follow this step.
Complete Step 12 B as referenced above (create a
Both the Controller.UDL and the Controller64.UDL will
be utilized during the PC migration
new Controller64.UDL and change the connection
string to reflect Program Files (x86) in the path
structure and change the [ODBC] WorkQConnect
string to reflect Controller64.UDL
Step 18 - Import Operators into new Network folder(s)
Import Operators, using ICAT utility into the appropriate database examples in Step 15 above using
14 A if an operator’s folder is not utilized or use 14 B if an operator folder is in use.
15 A - Use the networked MtAdmin.MDB located in \\server1\MagTek\IntelliCAT\ to import
the Operators into \\server1\MagTek\2.X_IntelliCAT\ via the newly created IntelliCAT.UDL
or IntelliCAT64.UDL path referenced in the [ODBC] section.
15 B - Use the networked MtAdmin.MDB located in \\server1\MagTek\IntelliCAT\Operators\
to import the Operators into \\server1\MagTek\2.X_Operators\ via the newly created
Operator.UDL or Operator64.UDL path referenced in the [ODBC] sec tion.
Step 19 - Win 7, 64bit only – Mandatory Step
If Controller is being used, under the [Controller] section on the Desktop INTCAT.INI file CHANGE the
WorkLocation from:
WorkLocation="C:\Program Files (x86)\MagTek\IntelliCAT\" to
WorkLocation="C:\MagTekWork\"
then NAVIGATE to C:\ and create a subfolder called MagTekWork.
Set the permissions to this folder as noted in Step 21.
Step 20 - File and Save INTCAT.INI to C:\Windows
If the INTCAT.INI file is open and the customization has been completed, click, file, SAVE and CLOSE.
Then take a copy of the desktop INTCAT.INI file and COPY and PASTE it to C:\Windows.
Overwrite the existing INTCAT.INI.
Step 21 - Set Permissions
1. NAVIGATE to C:\Program Files or Program Files (x86)\MagTek. RIGHT CLICK on the MagTek
folder and go to Properties, Security. CREATE a MagTek User group or use Domain Users and
give full control to this folder and its child objects.
2. If networked folders are in use as well, GO TO the i.e \\server1\MagTek\ folder, RIGHT
CLICK Properties, Security and give full permissions to this folder and its child objects
using the same MagTek User group or Domain Users.
3. NAVIGATE to C:\Windows – locate INTCAT.INI, RIGHT CLICK and go to Properties, Security
and grant read (minimum) and write permissions to this file using the same group.
4. In Win 7, 64bit, NAVIGATE to C:\MagTekWork, RIGHT CLICK and go to Properties, Security
and give full control to this folder using the MagTek User group or Domain Users group. The
same permissions apply as in #1 above.
Important Note: User Switching is not recommended, especially if Controller is used.
Step 22 - Create shortcuts
NAVIGATE to C:\Program Files or C:\Program Files (x86)\MagTek\IntelliCAT\
Select each Executable that should be on the Desktop.
Create the appropriate shortcuts,
Highlight all, then click on CUT, then NAVIGATE to C:\Users\Public\Desktop
And PASTE the shortcuts to the desktop.
<IntelliCAT>| <Migration to Windows 7> | <User Support Document>
Page 13
Page 14

Step 23 - Activation
Open Data Entry on the Desktop and email support@magtek.com with the 8 digit challenge number
or call 888-624-8350 for the Activation codes.
Do not close Data Entry until you receive the activation codes or you will have to reopen Data Entry
and provide MagTek with a new 8 digit challenge number.
Step 24 - Log off as Administrator.
Log off as Administrator and have a regular user log in. Test Data Entry and/or Controller to assure
that the Motorized IntelliCoder (if used) turns solid Green. If the LED light turns solid green, IntelliCAT
is ready for use.
Step 25 - Turn UAC back on, if required by your institution, using the Administrator
login.
<IntelliCAT>| <Migration to Windows 7> | <User Support Document>
Page 14
 Loading...