

Page 1
High Volume
Modular System
MAGNUM VENUS PRODUCTS Part No. 90079-1
Operations Manual
Page 2

This page intentionally blank
Page 1 of 25
Page 3

Table of Contents
High Volume Modular System Manual
CHAPTER 1 - OPERATIONAL DATA
CHAPTER 2 - MATERIALS
Resin
Catalyst
Glass-Fiber Roving
Solvent
Air
CHAPTER 3 - START-UP, RUNNING AND SHUT-DOWN PROCEDURE
Start-Up
Priming Procedure (Resin)
Priming Procedure (Catalyst)
Shut-down Procedure
Removing Materials from System
CHAPTER 4 - PARTS DRAWINGS
Page 2 of 25
Page 4

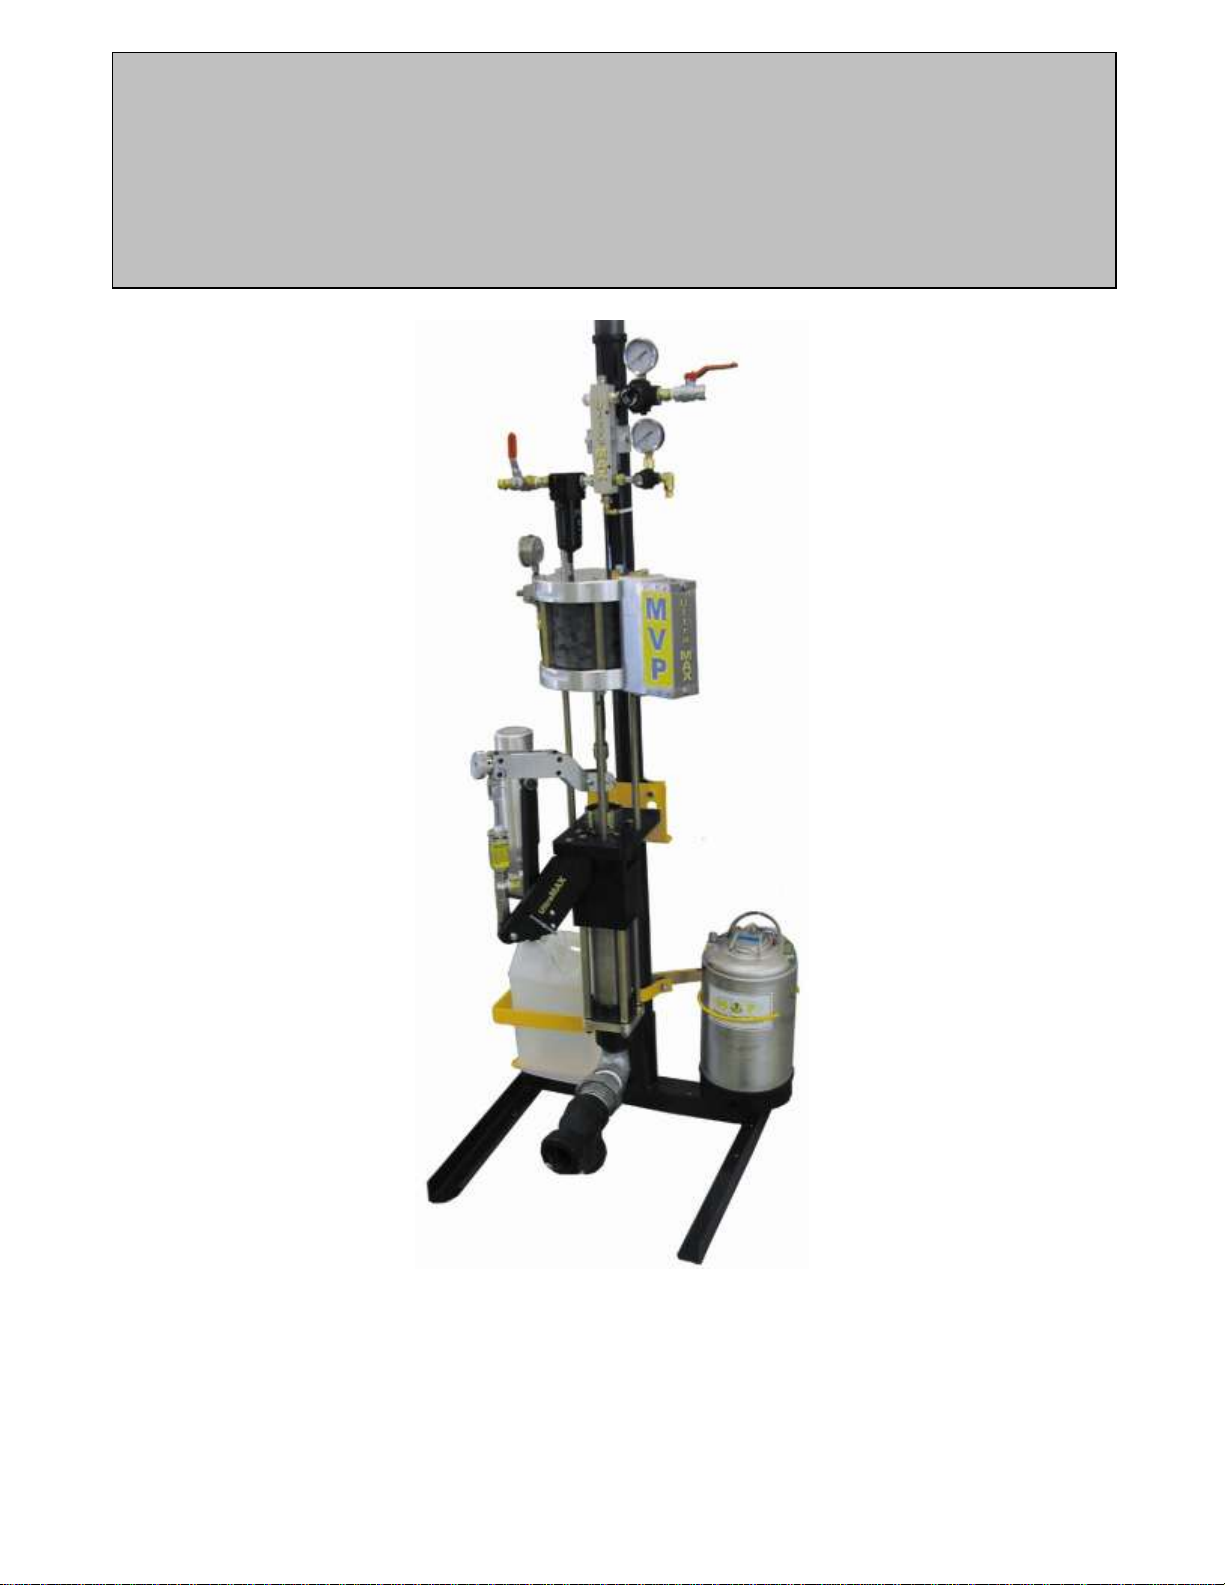
CHAPTER 1
OPERATIONAL DATA
In order to function at maximum performance level, the High Volume Modular system requires
an air source capable of providing 35 CFM of clean, dry air, at 100 PSI. The air supply hose to
the unit must be kept as short as practical and be no less than ½” inner diameter to assure an
adequate air supply. Clean, dry air is essential to give the best service life of the power head
and chopper motor. Consult your local representative or Magnum Venus Products directly for
air requirements if you feel your operation may need more detailed information.
Page 3 of 25
Page 5

CHAPTER 2
MATERIALS
Selection of proper materials and the use of them can make the difference between success
and failure, with this or any other equipment. Your local distributor can assist in proper
selection for the best results. The following generalities should be followed.
RESIN should be formulated for gun use with proper promoters for MEKP. Also, with
Thixotropic characteristics and relatively low viscosity for fast impregnating. Resin should be
stored at about 70 to 75 degrees Fahrenheit (21 – 30 degrees C) before using. Resin at 85
degrees F (30 deg. C) will allow the equipment to perform better, minimize the variations and
control problems, speed up impregnation, and improve quality of products. Solid additives
which are introduced into resin for any purpose (such as flame retardation or thixotropic
properties) invariably increase the wear factor on internal moving parts in the resin pump.
More frequent replacement of these parts must be considered as part of the cost of using such
additives. It may be necessary to use special parts in the system such as carbide needles and
seats or heat-treated pump cylinders with modifications of the piston area to help lengthen the
life of the parts.
CATALYST should be Methyl Ethyl Keytone Peroxide of strength to give proper gel times for
products made with percentages of ¾ to 3% on standard equipment. This range is ½ to 1 ¼ %
on high volume units. A factory-tinted catalyst, for visual control purposes, is recommended.
This can be obtained from the peroxide manufacturer. Failure of the equipment (unless other
problems) is generally the result of trying to add tinting materials. Never use solvents to
clean the catalyst system as it forms unstable peroxides. Use only clear water.
GLASS FIBER ROVING should be made for spray-up roving cutters and with a soft, non-static
treatment. The Magnum Venus Hydraulic systems do not have a high pressure air blast that
causes the fibers to tumble and float all over, as with air aspirated guns, hence the softer the
treatment, the better the glass pattern. If treatment is too hard, fibers lay in clumps, the pattern
is narrow and it is difficult to attain uniformity and good impregnation.
SOLVENT The High Volume Modular unit is composed of parts and material lines compatible
to Acetone and solvent replacements . NOTE: Certain reclaimed solvents could affect
systems in such a way as to nullify the warranty.
AIR must be clean and dry. Moisture or oils in air supply may damage various components of
this system as they would any other machinery.
Page 4 of 25
Page 6

CHAPTER 3
START-UP, RUNNING AND SHUT DOWN PROCEDURE
The Magnum Venus Products High Volume Modular System is the ultimate in spray-up
equipment. This instruction manual, the Trouble-Shooting guide and the Parts Drawing
Package should be read thoroughly and used as a reference when working with your Magnum
Venus System. We have tried to note when differences occur, but suggest you contact
Magnum Venus Products or it’s nearest representative if performance of your particular
Magnum Venus Products system is not satisfactory following these instructions.
START-UP
These steps should be followed when unit is new, recently repaired, or has no material in
system:
1. Read and become familiar with Manual, Trouble-shooting Guide and drawings for
your particular unit, and all other operational aids provided with unit.
2. Check all fittings for proper connection.
3. Fill resin pump cavity (center section) approximately 1/3 full using Throat
Seal/Lubricant (TSL-XX).
4. Turn all regulators counter-clockwise so gauges will read 0 (zero) when air is
connected to system.
5. Open catalyst Recirculation valve on the Catalyst Manifold.
6. Pull bottom quick pin from Pivot Link Assembly (part number UPS-3104-01).
NOTE: This will allow resin pump to stroke but prevent catalyst pump from pumping
during start-up procedure. It should be general procedure to never have the catalyst
pump connected except when spraying a laminate.
7. Attach air source to manifold fitting. Open main air inlet ball valve.
NOTE: ½” diameter (minimum) air hose should be used for maximum efficiency.
8. Remove top from flush tank and fill with clean suitable solvent. Replace tank top.
9. Slowly bring flush regulator up to 40 PSI (turn clockwise).
NOTE: Flush tank pressure should never be higher than 60 PSI.
10. Open flush air control valve.
11. Remove nozzle, nozzle cap, turbulent mixer and mix chamber from gun.
12. Push solvent button on gun until solvent exits gun nozzle.
13. Open gun by pulling gun trigger. Aim gun into suitable container and keep gun open
during priming procedure.
PRIMING PROCEDURE (RESIN)
NOTE: The High Volume system should be connected to a Bulk Feed Resin System. MVP
Recommends a 2” Y-filter and ball valve on the Resin Inlet.
1. Open resin pump air valve and slowly turn resin pump regulator clockwise until resin
pump is stroking slow, even strokes (approximately 1 to 10 PSI). On systems with
Page 5 of 25
Page 7

air supply override valves you must press and hold the priming button before the
pump will move.
NOTE: as resin enters pump you may have to increase PSI slightly in order to maintain
even pump stroke. Observe gun to make sure resin is exiting evenly with no air
inclusion.
2. Shut off air to resin pump by either turning regulator to zero or turning pump air
control valve to off position.
3. Close gun and flush into appropriate container for approximately 2 seconds.
NOTE: Flush by pushing solvent button on side of gun.
4. Repeat opening of gun and aim into appropriate container for catalyst priming. Keep
gun open during priming procedure.
PRIMING PROCEDURE (CATALYST)
1. Slowly fill 2-gallon catalyst jug with MEKP (never dilute catalyst for Magnum Venus
system).
NOTE: See catalyst manufacturer for proper MEKP formulation for your particular
operation.
2. Check to make sure catalyst recirculation valve is open. Open if needed.
3. Remove quick pin from pivot link assembly.
4. Loosen catalyst packing nut slightly to hand prime.
5. Slowly with steady, even strokes, hand pump catalyst pump using rail assembly.
Stop hand priming when steady stream of catalyst exits gun. Close gun and flush
for approximately 2 seconds.
6. Reinstall quick pin into pivot link assembly.
7. Close catalyst recirculation valve on the catalyst manifold.
8. Retighten packing nut. Snug tight only.
9. Slowly open resin pump air valve and slowly turn pump regulator to 15-20 PSI.
Resin and catalyst pump will stroke until system is full. On systems with air supply
override valves you must press and hold the priming button before the pump will
move. Check all fittings for leaks.
10. System is ready for use.
NOTE: Always remember to turn off regulator and slowly open gun trigger to bleed
system fluid pressure before any disassembly or repair takes place.
SHUTDOWN PROCEDURE
1. Turn resin pump and chopper regulators to zero. Turn resin pump air valve to off
position.
2. Open catalyst recirculation valve on the catalyst manifold.
3. Pull quick pin from pivot link assembly.
4. Remove nozzle, nozzle cap, turbulent mixer and mix housing and injector assembly
from gun head. Clean parts and set aside. Inspect for wear.
5. Aim gun into container and pull trigger until flow of material becomes small trickle.
Release trigger.
6. Push flush button to flush gun head.
7. Check water trap.
8. Check pump packings for leaks. Resin leaking into oil reservoir in center section
cavity indicates packings need tightening or replacement.
Page 6 of 25
Page 8

9. Turn main air valve off.
10. Relieve flush tank pressure until all air has exhausted from flush tank.
REMOVING MATERIALS FROM SYSTEM
NOTE: Remove fluid pressure before performing maintenance or disassembly.
1. Disconnect resin pump from bulk resin system and allow to drain. Place inlet in
solvent or fill bulk system with solvent.
2. Aim gun into container and open gun by pulling trigger. Keep trigger open.
3. Open resin pump air valve and turn regulator until pump begins to stroke even, slow
strokes.
4. When clean solvent exits gun, shut off regulator.
5. Place container under resin pump accumulator and slowly unscrew the accumulator.
6. Clean resin accumulator with solvent.
7. Reinstall accumulator.
8. Resin system can now be broken down for maintenance. Refer to Manual, Troubleshooting Guide and Parts Drawings for proper maintenance. Refer to page 30 of
Trouble Shooting Guide for filled system procedure and pages13 & 14 for long
period shutdown procedure.
Page 7 of 25
Page 9

CHAPTER 6
PARTS DRAWINGS
Page 8 of 25
Page 10

1
35
38
33
3
32
55
6
34
35
5
10
30
8
46
13
31
44
45
7
12
2
34
9
28
30
22
28
45
37
31
46
8
44
13
30
12
11
30
9
15
30
29
56
28
14
29
30
42
28
56
19
57
58
58
21
21
L
59
USE REMOVABLE LOCTITE ON THESE THREADS AT ASSEMBLY
L
TM
61
60
37
11
62
26
3
57
65
66
63
G = ADDED ITEMS FOR MPH-2542 RESET ASSY 3/25/03 JEM
63
H = REMOVED APP-9096, APP-9109, & APP-9102 FROM ASSY 6/10/03 JEM
L
L
23
18
23
J = ITEM 18 WAS 3 PIECES, (2) MPH-2519, & MPH2408 11/24/03 JEM
L
L
SHOWS ORIENTATION OF ITEM 11, (MPH-2512), SEAL GUIDE.
Assembly - 7" Power Head 4" Stroke
MAGNUM VENUS PRODUCTS
REV.
VPH-7000
41
4
41
26
16
24
19
39
40
20
47
43
24
16
42
62
27
39
47
25
20
40
25
42
48
51
49
50
36
36
Page 9 of 25
Page 11

56
O-B-011 2
O-RING
57
PF-AP-02-SS 2
PIPE PLUG
58
F-FW-04 2
FLAT WASHER
MPH-7000-SK
REPAIR KITS
PART NO.
*
SEAL KIT
DESCRIPTION
*
COMPONENTS INCLUDED WITH SEAL KIT.
*
*
*
*
*
*
*
*
*
*
*
*
*
*
*
59
PF-HN-08-08S
1
ADAPTER
62
MPH-3262 2
PISTON STOP
60
2104-4-1
4
TIE ROD
61
F-HB-06C-24-GR8
4
GR 8 HEX BOLT
PARTS LIST
ITEM
PART NO. QTY
DESCRIPTION
63
00276 1
TEE FITTING
64
MPH-2546-01
1
VALVE STEM ASSY
65
MPH-2545 1
SEAL
66
MPH-2542 1
RESET BUTTON ASSY
OPTIONAL PARTS AND ASSEMBLIES
PARTS LIST
ITEM
PART NO. QTY
DESCRIPTION
DESCRIPTION
PART NO.
ITEM
PARTS LIST
QTY
Assembly - 7" Power Head 4" Stroke VPH-7000
FIGURE 1-1
1
MPH-7004 1
PISTON - 7" PUMP
2
VPH-7001 1
CYLINDER - 7" PUMP X 4" STROKE
3
VPH-4259 1
PISTON ROD
4
VPH-5004-01
1
MUFFLER ASSY - 4" STROKE PUMP
5
VPH-4254 1
PISTON ROD BUSHING
6
MPH-7002
1
LOWER ENDCAP - 7" PUMP
7
MPH-7001
1
UPPER ENDCAP - 7" PUMP
8
MPH-2541
2
INLET SPRING HOUSING - PILOT VALVE
9
MPH-2511-01
2
ASSY - STEM SEAL
10
O-B-121 1
O-RING
11
MPH-2512 2 SEAL GUIDE
12
MPH-2513 2
VALVE STEM - PILOT VALVE
13
MPH-2540 2 INLET ROD - PILOT VALVE
14
VPH-5001 1
UPPER VALVE BLOCK - 4" STROKE PUMP
15
MPH-5001 1
LOWER VALVE BLOCK
16
MPH-2517 2
VALVE PISTON
18
MPH-5005
1
VALVE POPPET
19
MPH-2521
2
VALVE END CAP
20
MPH-5009
2
VALVE EXHAUST
21
O-B-019
2
O-RING
22
VPH-5003 5 TIE ROD 4" STROKE PUMP
23
O-U-206-90
2
O-RING
24
O-B-116 2
O-RING
25
O-B-026 2 O-RING
26
O-D-010-90 2
O-RING
27
O-B-125 1
O-RING
28
O-B-008 4
O-RING
29
O-B-O14 4
O-RING
30
O-B-012
6
O-RING
31
O-U-006 2
O-RING
32
O-B-118
1
O-RING
33
O-B-439 1 O-RING
34
O-B-167
2
O-RING
35
O-B-431 2 O-RING
36
F-HB-04C-56-SS 2 HEX HEAD CAP SCREW
37
F-HN-06F 10 HEX NUT
38
F-HBFT-08C-20-GR5 1
HEX HEAD CAP SCREW
39
F-CS-04C-40-SS 4 SOCKET HEAD CAP SCREW
40
F-CS-04C-08-SS 4
SOCKET HEAD CAP SCREW
41
F-SW-04-SS 2
LOCK WASHER
42
F-SS-832-02-SS 4
CUP POINT SET SCREW
43
F-BHCS-04C-16-SS
1
BUTTON HEAD CAP SCREW
44
MPH-2526 2
SPRING
45
MPH-2528
2
SPRING
46
MPH-2533
2
SPRING
47
MPH-5010 2 DIAPHRAM
48
PF-AP-04-SS
1
PIPE PLUG
49
MPH-2539 1
PUSH POLY FITTING - MALE ELBOW
50
MPH-2538 1 PUSH POLY FITTING - MALE TEE
51
01417 .56ft
Ø1/4 x 6-3/4 POLY TUBING - NATURAL
55
MPH-3261 1
SNAP - RING
Page 10 of 25
Page 12

Modular HV Fluid Section Assy
MAGNUM VENUS PRODUCTS
REV. A = ITEM 21 WAS 68310-1, ITEM 27 WAS 86520-1 5/2/03 JEM
HVLS-1000
2
1
3
12
5
6
7
8
10 (REQ)
10
9
9
9
9
25
24
11
11
17
16
15
23
29
29
29
29
4
26
15
22
14
21
27
14
28
20
13
30
19
19
19
18
B = ADDED OPTIONSL ITEMS AND SEAL KIT 7/3/03 JEM
Page 11 of 25
Page 13

86530-1
28
PISTON NUT
1
86520-3
27
SPACER RING
1
86510-1
26
PISTON ADAPTER
1
86420-1
25
FOOT VALVE COLLAR
1
86400-1
24
CYLINDER
1
86390-1
23
PISTON BODY
1
68310-3
22
BACK UP RING
1
67110-1
21
FEMALE PACKING RING
1
7101-2-12
20
HEX CAP SCREW
4
3101-8-1
19
PISTON ROD ADAPTER
1
04309-1
18
BALL STOP
1
04072-1
17
PISTON BALL SPRING
1
03604
16
BALL
2
02181-1
15
PISTON CUP
2
02158-4
14
PACKING SET
1
01621
13
O-RING
1
01611
12
O-RING
2
00714
11
ELBOW
1
7201-6-8
10
HEX NUT
4
HVLS-1009
9
WAVE SPRING
10
8
HVLS-1007
7
BALL GUIDE
1
HVLS-1006
6
GUIDE BEARING
1
HVLS-1005
5
SPRING SUPPORT RING
1
HVLS-1004
4
DISPLACEMENT ROD
1
HVLS-1003
3
PACKING NUT
1
HVLS-1002
2
PUMP MOUNT PLATE
1
HVLS-1001
1
OUTLET BODY
1
DESCRIPTION
PART NO.
ITEM
PARTS LIST
QTY
Modular HV Fluid Section Assy HVLS-1000
TIE ROD
86540-1
29
4
MALE PACKING RING
1
87090-1
86370-1
1
FOOT VALVE BODY
30
21A
68310-1
1
HARDENED BACK-UP RING
OPTIONAL PARTS AND ASSEMBLIES
PART NO.
ITEM
DESCRIPTION
QTY
HVLS-1000-SK
SEAL KIT
DESCRIPTION
REPAIR KITS
PART NO.
*
*
*
*
*
ITEMS INCLUDED IN SEAL KIT
24A
86401-1 1
HARDENED CYLINDER
27A
86520-1 1
HARDENED SPACER RING
Page 12 of 25
Page 14

Page 13 of 25
Page 15

Page 14 of 25
Page 16

MAGNUM VENUS PRODUCTS
A = CHECK VALVE ASSY WAS OMITTED FROM DWG, VHPC-4200 & VHPC-4200-RV 8/14/02 JEMREV.
2
3
5
6
7
8
9
8
11
12
13
14
15
16
17
1
18
17
10
4
Assy - C42 Catalyst Pump
VHPC-4200-C-3J
19
21
22
23
17
11
20
24
Page 15 of 25
Page 17

ASSY - C42 CATALYST PUMP VHPC-4200-C-3J
Note:
figure 1-1
one flat on hex as shown in
Offset intake and outlet ports
FIGURE 1-1
VHPC-4200-SK
PART NO.
COMMON ASSY PARTS LIST
DESCRIPTION
PART NO.
ITEM
QTY
DESCRIPTION
SEAL KIT
REPAIR KITS
INLET TUBE FITTING
PACKING SET ASSY
PISTON ROD SLEEVE
PISTON ROD SPRING
10
18
16
17
13
14
15
12
11
7
9
8
6
5
2
4
3
104013-1
6701-24-EN
O-S-013
4101-8-1
51050-1
1
1
3
1
9201-1-7
02014
50530-1
03072
50440-1
1
1
1
2
1
INLET BODY
O-RING
SEAL RETAINER
PISTON SEAL
PISTON BODY
7/32" SS BALL
9/16" SS BALL
7301-9-016
50820-1
50940-1
50730-1
02022-5
1
1
2
1
1
50360-1
50591-3
50630-1
1
1
1
CYLINDER
O-RING
LOCK NUT
OUTLET BODY
PISTON ROD
PACKING NUT
PUMP SEAL WARNING DECAL (NOT SHOWN)
CLEVIS
1VHPC-4201
19
9202-1-1
1
1
SPHERICAL BEARING
JAM NUT
SPRING RETAINER
CHECK VALVE BODY
COMPRESSION SPRING
4101-18-1
4101-17-1
4101-15-1
4101-16-1
24
20
23
22
21
1
1
2
1
25
VHPC-1001-3J 1
OUTLET FITTING
Page 16 of 25
Page 18

MAGNUM VENUS PRODUCTS
Ultra - Proportioner System
REV.
UPS-3100
2
RESIN
FLUID
SECTION
(REF)
4
7
10
11
12
14
15
17
18
19
20
20
21
22
26
24
25
25
27
28
28
29
29
30
31
32
33
34
35
35
35
36
37
36
38
23
16
B = ITEM 37 WAS F-BHCS-1024-06 11/18/02 JEM
C = ITEM 30 WAS F-LN-04C LOCK NUT 6/3/023 JEM
39
D = REPLACED 7203-8-1 QUICK PIN WITH NUT AND BOLT 10/28/03 JEM
Page 17 of 25
Page 19

OPTIONAL PARTS AND ASSEMBLIES
PART NO.
ITEM
DESCRIPTION
QTY
PARTS LIST
Ultra - Proportioner System UPS-3100
PART NO.
ITEM
QTY
DESCRIPTION
2
UPS-3102
1
MOUNT BAR
4
UPS-3103-01 1
CLEVIS BLOCK ASSY
7
UPS-3104-01 1
PIVOT LINK ASSY
14
UPS-3108 1
SPACER
11
UPS-3106-01 1
RH SIDE RAIL ASSY
17
UPS-3110 1
BACK END PIECE
15
UPS-3109-01 1
FRONT END PIECE ASSY
12
UPS-3106-02 1
LH SIDE RAIL ASSY
10
UPS-3105 1
CATALYST STUD BOLT
24
7203-1-1 1 HAIRPIN COTTER
23
9202-1-1 1
SPHERICAL BEARING
22
DUAL-2012 1 ADJUSTMENT KNOB
21
UPS-3114 1 TOP PLATE
20
UPS-3113 1 ADJUSTMENT SCREW
19
UPS-3112 1 ADJUSTMENT NUT
18
UPS-3111-01 1 PIN ASSY
25
APS-1016 2 QUICK PIN
26
UPS-3115 1
HAIRPIN COTTER
27
F-SB-08-20 1
SHOULDER BOLT
28
APS-1015 2
EXTERNAL SNAP RING
29
F-LN-06C 2 NYLOCK NUT
30
F-HN-04C 1 HEX NUT
31
F-CS-1024-06 1 SOCKET HEAD CAP SCREW
32
7101-2-12
2
HEX CAP SCREW
33
02885-12
1
SPRING PIN
34
F-CS-04C-32
1
SOCKET HEAD CAP SCREW
35
F-BHCS-04C-12
8
BUTTON HEAD CAP SCREW
36
F-BHCS-04C-06
2
BUTTON HEAD CAP SCREW
37
01218-4
1
BUTTON HEAD CAP SCREW
38
F-CS-06C-40
2
SOCKET HEAD CAP SCREW
16
F-AB-04F-19 1
AIRCRAFT BOLT
39 F-LN-04F
1
LOCK NUT
24
UPS-3101
1
RESIN DECAL
25
UPS-3116
1
GELCOAT DECAL
26
UPS-3117 1 HV DECAL
Page 18 of 25
Page 20

Page 19 of 25
Page 21

Page 20 of 25
Page 22

MAGNUM VENUS PRODUCTS
HV CHOPPER MANIFOLD ASSY
87014-1
1
2
3
4
5
6
8 9
8
9
10
11
12
12 12
12
13
13
22
22
15
23
16
24
24
17
18
21
26
14
14
REV. A = UPDATED FORM, ADDED ITEM 1, REMOVED ONE ITEM 17
AIR IN
12
14
16
16
7
19
20
25
27
24
B = REMOVED ON ITEM 14 1/28/05 JEM
Page 21 of 25
Page 23

23
8405-2-1 1 MINI REGULATOR
22
8405-1-1
2
REGULATOR
21
8404-1-1 1
FILTER
17
7701-3-12 1
NIPPLE
14
PF-HN-04-04S 2 ADAPTER
12
7701-3-1 5
HEX NIPPLE
4
6302-1-1 1
MANIFOLD BLOCK
3
09350 1 BALL VALVLE
1
00817
1
PIPE NIPPLE
8
7101-1-16 2 HEX CAP SCREW
7
6504-17-03.3
1
AIR HOSE ASSY
6
6504-16-04 1
AIR HOSE ASSY
5
6504-1-05 1
AIR HOSE ASSY
19
7701-7-1 1
FEMALE QUICK CONNECT
20
7702-2-2 1
BALL VALVE
13
7701-3-2
2
BUSHING
16
7701-3-7
3
ADAPTER
18
7701-4-3 1
PLUG
15
7701-3-5 1
BUSHING
24
8702-2-1 3 PRESSURE GAUGE
10
7701-1-1 1
ELBOW
PARTS LIST
HV CHOPPER MANIFOLD ASSY 87014-1
9
7201-6-4 2 HEX NUT
2
05819 1
BALL VALVE
11
7701-1-9 1
ELBOW
25
6701-7-EN 1
PUMP GAUGE DECAL
26
6701-8-EN 1
GUN GAUGE DECAL
27
6701-9-EN 1
FLUSH GAUGE DECAL
Page 22 of 25
Page 24

Page 23 of 25
Page 25

Page 24 of 25
Page 26

This page intentionally blank.
Page 25 of 25
Page 27

E-mail: info@mvpind.com Web: www.mvpind.com
Corporate Headquarters/Manufacturing
5148 113th Ave.
Clearwater, FL 33760 USA
Ph: (727) 573-2955
Fax: (727) 571-3636
Manufacturing/Sales
1862 Ives Ave.
Kent, WA 98032 USA
Ph: (253) 854-2660
Fax: (253) 854-1666
Page 26 of 25
 Loading...