

Magnum research DESERT EAGLE MARK I, DESERT EAGLE MARK XIX, 44 MAGNUM, 41 MAGNUM, 50 ACTION EXPRESS User Manual
...
Desert Eagle
TM
Pistols
Mark XIX, Mark VII, Mark I
OPERATOR’S MANUAL
CAUTION: READ AND UNDERSTAND THE INSTRUCTIONS AND WARNINGS IN THIS MANUAL
BEFORE HANDLING OR USING THIS PISTOL
u
o
y
e
v
a
H
.
.
.
W
O
N
Y
L
T
S
E
N
O
H
.440 Cor®Bon Magnum
Gas Operated Semi-Automatic Pistols
Manufactured by Israel Weapons Industries
For Magnum Research, Inc.
.357 Magnum
.41 Magnum
.44 Magnum
.50 Action Express
s
i
h
t
d
a
e
r
Desert Eagle
Gas Operated
Semi-Automatic Pistol
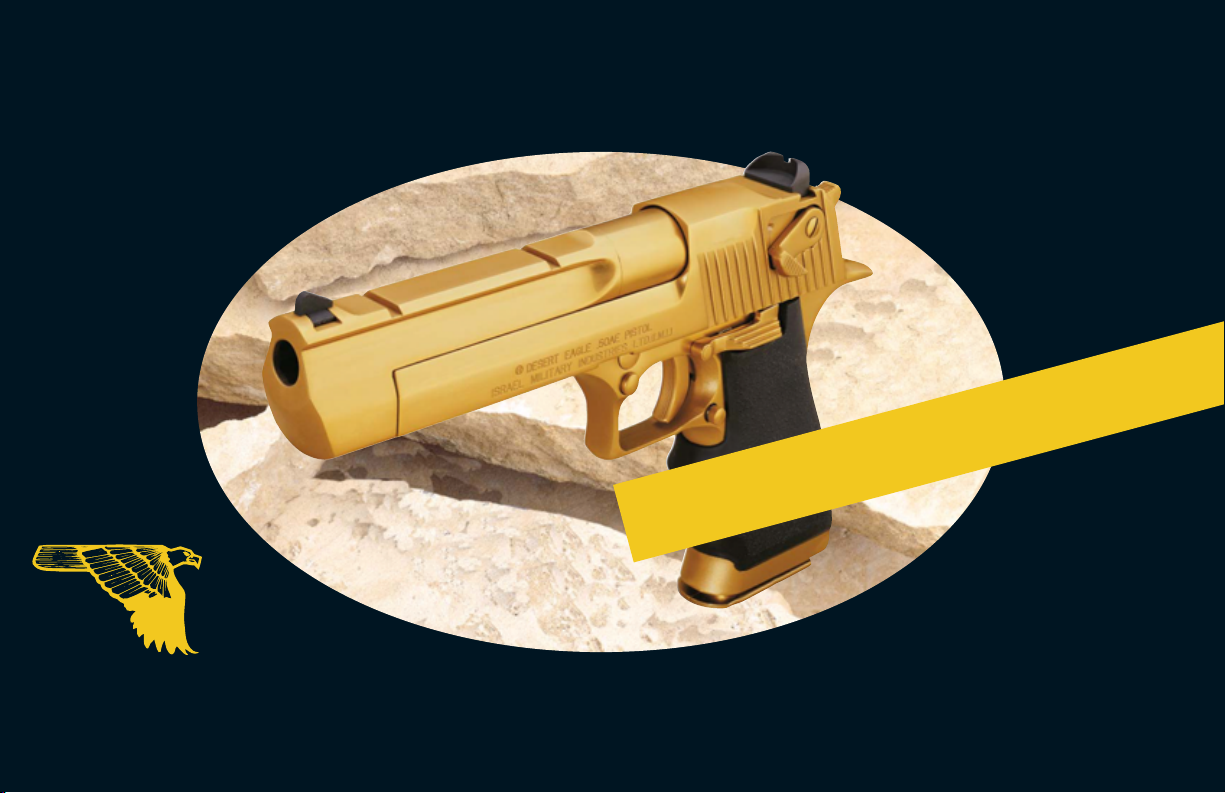
The Desert Eagle Pistol — U.S. Patent — 4,563,937
Magnum Research, Inc. 1986
Fig. 1

State by State Warnings . . . . . . . . . . . . . . . . . . . . . . . . . . . . . . . . . . .4
Basic Rules of Firearm Safety . . . . . . . . . . . . . . . . . . . . . . . . . . . . . . .6
Safety Rules and Precautions . . . . . . . . . . . . . . . . . . . . . . . . . . . . . . .9
General Information/5 in 1 Tool Usage . . . . . . . . . . . . . . . . . . . . . . .14
General Characteristics . . . . . . . . . . . . . . . . . . . . . . . . . . . . . . . . . . .15
Specifications . . . . . . . . . . . . . . . . . . . . . . . . . . . . . . . . . . . . . . . . . . .16
Operating Principles . . . . . . . . . . . . . . . . . . . . . . . . . . . . . . . . . . . . .17
Operating Instructions . . . . . . . . . . . . . . . . . . . . . . . . . . . . . . . . . . . .20
Sights and Zeroing . . . . . . . . . . . . . . . . . . . . . . . . . . . . . . . . . . . . . .22
Loading and Firing . . . . . . . . . . . . . . . . . . . . . . . . . . . . . . . . . . . . . .23
Disassembly and Assembly . . . . . . . . . . . . . . . . . . . . . . . . . . . . . . . . .26
Care and Cleaning . . . . . . . . . . . . . . . . . . . . . . . . . . . . . . . . . . . . . .36
Trouble Shooting . . . . . . . . . . . . . . . . . . . . . . . . . . . . . . . . . . . . . . . .37
List of Parts and Exploded View . . . . . . . . . . . . . . . . . . . . . . . . . . . . .39
3

STATE-BY-STATE WARNINGS
CERTAIN STATES REQUIRE BY LAW THAT THEIR OWN SPECIFIED WARNING NOTICES IN LARGER-THAN-NORMAL TYPE
BE CONSPICUOUSLY INCLUDED BY THE MANUFACTURER,
DISTRIBUTOR, OR RETAIL DEALER WITH FIREARMS SOLD IN
THAT STATE. MAGNUM RESEARCH, INC. SELLS ITS PRODUCTS IN COMPLIANCE WITH APPLICABLE LAWS AND REGULATIONS. BECAUSE OUR PRODUCTS MAY BE SOLD IN
THESE STATES, WE INCLUDE THE FOLLOWING:
CALIFORNIA:
WARNING: CHILDREN ARE ATTRACTED TO AND
CAN OPERATE FIREARMS THAT CAN CAUSE SEVERE
INJURIES OR DEATH. PREVENT CHILD ACCESS BY
ALWAYS KEEPING GUNS LOCKED AWAY AND
UNLOADED WHEN NOT IN USE. IF YOU KEEP A
LOADED FIREARM WHERE A CHILD OBTAINS AND
IMPROPERLY USES IT, YOU MAY BE FINED OR SENT
TO PRISON.
CONNECTICUT:
"UNLAWFUL STORAGE OF A LOADED FIREARM MAY RESULT
IN IMPRISONMENT OR FINE."
FLORIDA:
"IT IS UNLAWFUL, AND PUNISHABLE BY IMPRISONMENT
AND FINE, FOR ANY ADULT TO STORE OR LEAVE A
FIREARM IN ANY PLACE WITHIN THE REACH OR EASY
ACCESS OF A MINOR UNDER 18 YEARS OF AGE OR TO
KNOWINGLY SELL OR OTHERWISE TRANSFER OWNERSHIP
OR POSSESSION OF A FIREARM TO A MINOR OR A PERSON
OF UNSOUND MIND."
MAINE:
"ENDANGERING THE WELFARE OF A CHILD IS A CRIME. IF
YOU LEAVE A FIREARM AND AMMUNITION WITHIN EASY
ACCESS OF A CHILD, YOU MAY BE SUBJECT TO FINE,
IMPRISONMENT OR BOTH. KEEP FIREARMS AND AMMUNITION SEPARATE. KEEP FIREARMS AND AMMUNITION
LOCKED UP. USE TRIGGER LOCKS."
MARYLAND:
"WARNING: CHILDREN CAN OPERATE FIREARMS WHICH
MAY CAUSE DEATH OR SERIOUS INJURY. IT IS A CRIME TO
STORE OR LEAVE A LOADED FIREARM IN ANY LOCATION
WHERE AN INDIVIDUAL KNEW OR SHOULD HAVE KNOWN
THAT AN UNSUPERVISED MINOR WOULD GAIN ACCESS TO
THE FIREARM. STORE YOUR FIREARM RESPONSIBLY!"
4

MASSACHUSETTS:
"WARNING FROM THE MASSACHUSETTS ATTORNEY GENERAL: THIS HANDGUN IS NOT EQUIPPED WITH A DEVICE
THAT FULLY BLOCKS USE BY UNAUTHORIZED USERS. MORE
THAN 200,000 FIREARMS LIKE THIS ONE ARE STOLEN
FROM THEIR OWNERS EVERY YEAR IN THE UNITED STATES.
IN ADDITION, THERE ARE MORE THAN A THOUSAND SUICIDES EACH YEAR BY YOUNGER CHILDREN AND
TEENAGERS WHO GET ACCESS TO FIREARMS. HUNDREDS
MORE DIE FROM ACCIDENTAL DISCHARGE. IT IS LIKELY
THAT MANY MORE CHILDREN SUSTAIN SERIOUS WOUNDS,
OR INFLICT SUCH WOUNDS ACCIDENTALLY ON OTHERS.
IN ORDER TO LIMIT THE CHANCE OF SUCH MISUSE, IT IS
IMPERATIVE THAT YOU KEEP THIS WEAPON LOCKED IN A
SECURE PLACE AND TAKE OTHER STEPS NECESSARY TO
LIMIT THE POSSIBILITY OF THEFT OR ACCIDENT. FAILURE TO
TAKE REASONABLE PREVENTIVE STEPS MAY RESULT IN
INNOCENT LIVES BEING LOST, AND IN SOME CIRCUMSTANCES MAY RESULT IN YOUR LIABILITY FOR THESE
DEATHS."
"IT IS UNLAWFUL TO STORE OR KEEP A FIREARM, RIFLE,
SHOTGUN OR MACHINE GUN IN ANY PLACE UNLESS THAT
WEAPON IS EQUIPPED WITH A TAMPER-RESISTANT SAFETY
DEVICE OR IS STORED OR KEPT IN A SECURELY LOCKED
CONTAINER."
NEW JERSEY:
"IT IS A CRIMINAL OFFENSE TO LEAVE A LOADED FIREARM
WITHIN EASY ACCESS OF A MINOR."
NEW YORK CITY:
"THE USE OF A LOCKING DEVICE OR SAFETY LOCK IS ONLY
ONE ASPECT OF RESPONSIBLE FIREARM STORAGE. FOR
INCREASED SAFETY, FIREARMS SHOULD BE STORED
UNLOADED AND LOCKED IN A LOCATION THAT IS BOTH
SEPARATE FROM THEIR AMMUNITION AND INACCESSIBLE
TO CHILDREN AND OTHER UNAUTHORIZED PERSONS."
NORTH CAROLINA:
"IT IS UNLAWFUL TO STORE OR LEAVE A FIREARM THAT
CAN BE DISCHARGED IN A MANNER THAT A REASONABLE
PERSON SHOULD KNOW IS ACCESSIBLE TO A MINOR."
TEXAS:
"IT IS UNLAWFUL TO STORE, TRANSPORT, OR ABANDON
AN UNSECURED FIREARM IN A PLACE WHERE CHILDREN
ARE LIKELY TO BE AND CAN OBTAIN ACCESS TO THE
FIREARM."
5

WISCONSIN:
"IF YOU LEAVE A LOADED FIREARM WITHIN THE REACH OR
EASY ACCESS OF A CHILD YOU MAY BE FINED OR IMPRISONED OR BOTH IF THE CHILD IMPROPERLY DISCHARGES,
POSSESSES, OR EXHIBITS THE FIREARM.
PLEASE CHECK WITH YOUR FIREARMS RETAILER
OR STATE POLICE FOR ADDITIONAL REQUIREMENTS
UNDER STATE OR LOCAL LAWS OR REGULATIONS.
SUCH LAWS AND REGULATIONS CHANGE
CONSTANTLY, AND LOCAL AUTHORITIES ARE IN
THE BEST POSITION TO ADVISE YOU ON SUCH
CHANGES.
BASIC RULES OF FIREARMS SAFETY
1. TREAT ALL FIREARMS AS IF THEY WERE LOADED, AT ALL
TIMES. MANY ACCIDENTS OCCUR WITH FIREARMS THAT
ARE HANDLED CARELESSLY, BECAUSE THEY ARE BELIEVED
TO BE “UNLOADED”. THESE ACCIDENTS CAN BE AVOIDED
BY HANDLING ALL FIREARMS THE SAME WAY YOU WOULD
HANDLE A LOADED FIREARM, AT ALL TIMES. EVEN AFTER
YOU VERIFY THAT A GUN IS UNLOADED, YOU SHOULD
CONTINUE HANDLING IT AS YOU WOULD A LOADED
GUN, AND MAKE SURE THAT OTHERS AROUND YOU DO
THE SAME.
2. POINT THE MUZZLE IN A SAFE DIRECTION AT ALL TIMES.
A “SAFE DIRECTION” IS ONE IN WHICH, IF THE FIREARM
WERE TO DISCHARGE, THERE WOULD BE NO INJURY TO
ANYONE. NEVER POINT A GUN (WHETHER YOU THINK IT
IS LOADED OR UNLOADED - SEE RULE #1 ABOVE) DIRECTLY
AT ANOTHER PERSON OR AT YOURSELF. CONSIDER THAT A
BULLET CAN RICOCHET (GLANCE OFF) PAVEMENT,
FLOORS, WALLS, ROCKS, THE GROUND, WATER, ICE OR
ALMOST ANY OTHER OBJECT IT STRIKES. ALSO, BULLETS
CAN PENETRATE WALLS, CEILINGS, FLOORS, DOORS, WINDOWS, AND MANY OTHER MATERIALS TO KILL OR INJURE
SOMEONE ON THE OPPOSITE SIDE.
3. KEEP YOUR FINGER OFF THE TRIGGER AND OUTSIDE
THE TRIGGER GUARD UNTIL YOU ARE AIMED AT A PROPER
TARGET AND HAVE DECIDED TO FIRE. IF YOUR FINGER IS
INSIDE THE TRIGGER GUARD, YOU COULD FIRE YOUR
GUN WITHOUT INTENDING TO - FOR INSTANCE, IF YOU
WERE STARTLED, OR IF YOU SLIPPED OR LOST YOUR
BALANCE. BY KEEPING YOUR FINGER OUTSIDE THE TRIGGER GUARD UNTIL YOU ARE ON TARGET AND INTEND TO
FIRE, YOU ENSURE THAT YOU WILL NEVER HIT ANYTHING
YOU DO NOT INTEND TO.
4. BE SURE OF YOUR TARGET, AND WHAT IS AROUND
AND BEYOND IT. THE BULLET FIRED FROM YOUR PISTOL
CAN TRAVEL OVER A MILE, AND HAS THE POTENTIAL TO
KILL OR SERIOUSLY INJURE SOMEONE AT THAT DISTANCE!
6

ONCE YOU PULL THE TRIGGER, YOU CANNOT CALL THE
BULLET BACK, SO YOU MUST POSITIVELY IDENTIFY YOUR
TARGET BEFORE YOU FIRE. NEVER FIRE (FOR INSTANCE, AT
A NOISE, A MOVEMENT, A RUSTLING BUSH, OR A SHAPE
IN THE DARK) UNTIL YOU HAVE POSITIVELY IDENTIFIED
YOUR TARGET AS SOMETHING YOU INTEND TO SHOOT.
FIRE ONLY WITH A SAFE BACKSTOP BEHIND YOUR TARGET
- SOMETHING THAT WILL STOP AND CONTAIN THE
PROJECTILES YOU FIRE, EVEN IF YOU MISS THE TARGET OR
YOUR BULLET PASSES THROUGH IT.
5. WHENEVER YOU HANDLE A FIREARM THAT, EVEN
MOMENTARILY, HAS BEEN OUT OF YOUR DIRECT CONTROL, START BY CHECKING ITS CONDITION TO DETERMINE
WHETHER OR NOT IT IS LOADED. A FIREARM IN YOUR
HANDS IS A LETHAL WEAPON WHICH IS YOUR
RESPONSIBILITY, SO YOU MUST CHECK IT YOURSELF, NOW,
NOT LATER. DO NOT RELY ON SOMEONE ELSE TO CHECK
IT. DO NOT TAKE SOMEONE ELSE’S WORD FOR THE
FIREARM’S CONDITION. DO NOT RELY ON YOUR MEMORY
OF HAVING CHECKED THE FIREARM PREVIOUSLY, OR ON
YOUR BELIEF THAT YOU LEFT IT UNLOADED THE LAST TIME
YOU USED OR HANDLED IT. CHECK IT AGAIN YOURSELF
NOW.
6. NEVER GIVE A FIREARM TO ANYONE, OR TAKE A
FIREARM FROM ANYONE, UNLESS IT IS UNLOADED AND
THE ACTION IS OPEN. IF SOMEONE TRIES TO HAND YOU A
FIREARM WITH THE ACTION CLOSED, POLITELY ASK THEM
TO OPEN IT BEFORE YOU TAKE IT FROM THEM. IF YOU
NEED TO OPEN THE ACTION OF A FIREARM WITH WHICH
YOU ARE NOT FAMILIAR, DON’T EXPERIMENT, LEST YOU
MAKE A FATAL MISTAKE! INSTEAD, ASK SOMEONE WHO
KNOWS HOW TO HANDLE THE FIREARM TO OPEN THE
ACTION AND ALLOW YOU TO VERIFY THAT IT IS
UNLOADED. IF YOU CAN’T FIND SOMEONE WHO KNOWS
HOW TO HANDLE THE FIREARM, LEAVE IT ALONE!
7. FIREARMS SHOULD BE UNLOADED WHEN NOT ACTUALLY
IN USE. LOAD YOUR FIREARM ONLY WHEN YOU ARE ON
THE TARGET RANGE OR IN THE FIELD AND READY TO
BEGIN USING IT. UNLOAD YOUR GUN AS SOON AS YOU
ARE FINISHED SHOOTING. UNLOAD YOUR GUN BEFORE
YOU BRING IT BACK INTO YOUR CAR, CAMP OR HOME.
NEVER LEAVE A LOADED GUN UNATTENDED, EVEN FOR A
MOMENT.
8. THOROUGHLY READ AND UNDERSTAND THE OWNER’S
MANUAL AND OTHER LITERATURE SUPPLIED WITH THIS
PISTOL. NEVER USE ANY FIREARM UNLESS YOU COMPLETELY UNDERSTAND HOW IT OPERATES AND HOW ITS SAFETY
FEATURES WORK. CONTACT MAGNUM RESEARCH, INC. IF
YOU HAVE ANY QUESTIONS OR CONCERNS, OR IF YOU
ARE NOT CERTAIN YOU HAVE ALL THE LITERATURE SUPPLIED
WITH THE FIREARM AT THE TIME IT WAS FIRST SOLD. EVEN
IF YOU UNDERSTAND EVERYTHING IN THIS MANUAL, NO
MANUAL CAN PROVIDE YOU WITH THE BENEFITS OF
HANDS-ON FIREARMS INSTRUCTION. IF YOU ARE NOT
7

ALREADY AN EXPERIENCED FIREARMS USER, YOU SHOULD
OBTAIN TRAINING IN THE SAFE AND PROPER USE OF
FIREARMS BY ATTENDING ONE OF THE MANY FIREARMS
SAFETY AND SHOOTING COURSES OFFERED IN ALL PARTS
OF THE COUNTRY BY THE NATIONAL RIFLE ASSOCIATION
(TELEPHONE 703-267-1000), GUN CLUBS AND RANGES,
GUN SHOPS, SHOOTING SCHOOLS AND OTHER QUALIFIED
SOURCES OF INSTRUCTION.
9. BEFORE FIRING ANY FIREARM, BE SURE IT IS IN GOOD
WORKING ORDER AND THAT THE BARREL IS CLEAR OF
DIRT, GREASE, WATER, EXCESS OIL, RUST, CORROSION OR
ANY OTHER OBSTRUCTION.
10. ALWAYS WEAR HIGH-QUALITY EAR AND EYE PROTECTION
WHEN SHOOTING OR OBSERVING, AND BE SURE THAT
OTHERS WHO ARE PRESENT DO THE SAME. EXPOSURE TO
GUNFIRE NOISE WILL CAUSE PERMANENT HEARING LOSS
(DEAFNESS) IF GOOD EAR PROTECTION (EITHER COMMERCIALLY MANUFACTURED EAR PLUGS, EARMUFF-TYPE
HEARING PROTECTORS, OR BOTH) IS NOT WORN.
CLOSE-FITTING, IMPACT-RESISTANT SHOOTING GLASSES
OR SAFETY GLASSES OF WRAPAROUND OR SIDE-PANEL
DESIGN HELP TO GUARD AGAINST POTENTIALLY BLINDING
EYE INJURIES CAUSED BY GRANULES OF POWDER,
SPLASHBACK OF FRAGMENTS FROM THE TARGET OR
BACKSTOP, METAL FRAGMENTS WHICH CAN RESULT FROM
A BURST PRIMER, ETC. NEVER SHOOT A FIREARM, OR
ALLOW YOURSELF OR OTHERS TO BE PRESENT WHERE
SHOOTING IS IN PROGRESS, WITHOUT BOTH EYE AND EAR
PROTECTION IN PLACE. EYE PROTECTION CAN ALSO
PROVIDE IMPORTANT PROTECTION WHILE YOU ARE
DISASSEMBLING AND CLEANING YOUR FIREARMS, BOTH
FROM FLYING FIREARMS PARTS, AND FROM AEROSOLS
AND OTHER SOLVENTS AND CLEANING FLUIDS THAT CAN
SPRAY OR SPLASH INTO YOUR EYES, CAUSING SERIOUS
EYE INJURY.
11. FIREARMS, DRUGS AND ALCOHOL DON’T MIX! NEVER
HANDLE FIREARMS WHILE UNDER THE INFLUENCE OF
ALCOHOL OR DRUGS (INCLUDING PRESCRIPTION
MEDICATIONS) THAT CAN IMPAIR YOUR NORMAL SENSES,
ABILITIES, ALERTNESS, REFLEXES, PERCEPTION OR JUDGMENT.
MAKE SURE EVERYONE IN YOUR PRESENCE FOLLOWS THE
SAME RULE. ALSO, AVOID HANDLING FIREARMS WHEN
YOU ARE ILL, EXHAUSTED, UPSET OR PREOCCUPIED WITH
OTHER CONCERNS - SAFE FIREARMS HANDLING REQUIRES
YOUR FULL ATTENTION, AND ALL OF YOUR ABILITIES,
UNIMPAIRED BY OTHER FACTORS.
12. ANY FIREARM WHICH IS NOT UNDER YOUR DIRECT
CONTROL SHOULD BE STORED SO IT IS INOPERABLE OR
INACCESSIBLE TO CHILDREN AND OTHER UNAUTHORIZED
USERS. CHILDREN ARE ATTRACTED TO, AND CAN FIND,
LOAD AND OPERATE FIREARMS, CAUSING SERIOUS INJURY
OR DEATH TO THEMSELVES AND OTHERS. PREVENTING
CHILD ACCESS AND TRAGIC, AVOIDABLE ACCIDENTS IS
YOUR RESPONSIBILITY, AS AN ADULT GUN OWNER. THE
SAFEST WAY TO STORE FIREARMS IS UNLOADED, LOCKED
IN A GUN SAFE OR VAULT.
8

13. USE ONLY PROPER AMMUNITION RECOMMENDED
FOR THIS PISTOL, AND BE SURE THE AMMUNITION IS THE
CORRECT CALIBER FOR YOUR GUN. MOST MODERN
FIREARMS HAVE THEIR CALIBER DESIGNATION STAMPED
INTO THE FIREARM’S BARREL OR RECEIVER. YOUR
AMMUNITION BOX AND CARTRIDGE HEAD STAMP SHOULD
BEAR THE EXACT SAME CARTRIDGE DESIGNATION. JUST
BECAUSE A CARTRIDGE FITS INTO THE GUN DOESN’T
MEAN IT IS SAFE TO FIRE. NEVER FIRE AMMUNITION
WHICH IS DAMAGED, CORRODED, OR OF QUESTIONABLE
ORIGIN OR CONDITION. FIRING EVEN A SINGLE DEFECTIVE
CARTRIDGE CAN DESTROY YOUR DESERT EAGLE PISTOL
AND CAUSE SERIOUS INJURY OR DEATH.
SAFETY RULES AND PRECAUTIONS
FOR FIRING AND USE OF YOUR
DESERT EAGLE
ARNING! KEEP THE SAFETY ENGAGED IN THE “SAFE”
WWARNING!
POSITION UNTIL YOU ARE AIMED AT A PROPER TARGET
AND HAVE DECIDED TO FIRE. FAILURE TO DO SO COULD
CAUSE SERIOUS INJURY OR DEATH.
WARNING! USE THE SAFETY ON THIS PISTOL, BUT DON’T
TRUST OR RELY ON IT AS A SUBSTITUTE FOR SAFE GUN
HANDLING PRACTICES. THE SAFETY IS A MECHANICAL
DEVICE WHICH COULD FAIL. OR, BY MISTAKE, YOU MAY
THINK THE SAFETY IS ON WHEN IT IS NOT. OR THE SAFETY
MAY BECOME DISENGAGED WITHOUT YOUR KNOWLEDGE.
OR YOU COULD THINK YOUR GUN IS UNLOADED WHEN
IT IS LOADED. ALWAYS FOLLOW THE SAFE GUN HANDLING
RULES AND PROCEDURES IN THIS MANUAL, WHETHER
YOU THINK THE SAFETY IS ON OR OFF, AND WHETHER
YOU THINK THE PISTOL IS LOADED OR UNLOADED. DON’T
PULL THE TRIGGER WHEN THE SAFETY IS ENGAGED, OR
WHEN IT IS POSITIONED PART WAY BETWEEN SAFE AND
FIRE. DON’T USE OR RELY ON THE SAFETY LEVER TO TRY
TO “CHILDPROOF’ YOUR PISTOL OR KEEP IT SAFE FROM
UNTRAINED PERSONS - INSTEAD, YOUR PISTOL SHOULD
BE UNLOADED AND SECURELY LOCKED UP, AWAY FROM
ACCESS OF CHILDREN AND OTHER UNAUTHORIZED
USERS.
WARNING! THE DESERT EAGLE PISTOL WILL FIRE
WHETHER OR NOT A MAGAZINE IS IN THE GUN IF A
CARTRIDGE IS IN THE CHAMBER. REMOVING THE
MAGAZINE DOES NOT UNLOAD THE PISTOL, AND DOES
NOT PREVENT THE PISTOL FROM FIRING! A CARTRIDGE
LEFT IN THE CHAMBER AFTER THE MAGAZINE IS REMOVED
CAN CAUSE SERIOUS INJURY OR DEATH IF THE TRIGGER
IS PULLED! UNLOAD YOUR DESERT EAGLE PROPERLY,
INCLUDING CHECKING THE CHAMBER BOTH VISUALLY
AND PHYSICALLY.
WARNING! KEEP YOUR FINGER OFF THE TRIGGER AND
OUTSIDE THE TRIGGER GUARD UNTIL YOU ARE AIMED AT
A PROPER TARGET AND HAVE DECIDED TO FIRE. FAILURE
TO DO SO COULD CAUSE SERIOUS INJURY OR DEATH.
9

WARNING! KEEP HANDS, FINGERS AND OTHER BODY
PARTS FROM TOUCHING THE MUZZLE, BARREL OR
CHAMBER AFTER FIRING, AS THEY COULD BE BURNED BY
HOT METAL.
WARNING! IF DROPPED OR STRUCK, WHETHER THE
SAFETY IS "ON" OR "OFF," ANY FIREARM MAY FIRE, CAUSING SERIOUS INJURY OR DEATH. KEEP THE PISTOL CHAMBER UNLOADED UNLESS ACTUALLY FIRING! KEEP THE SAFETY "ON" UNLESS ACTUALLY FIRING! WHEN CARRYING OR
HANDLING THE DESERT EAGLE, KEEP IT POINTED IN A
SAFE DIRECTION, AND CARRY IT IN SUCH A WAY THAT YOU
CAN SAFELY CONTROL THE DIRECTION IN WHICH THE
MUZZLE POINTS EVEN IF YOU SHOULD SLIP, STUMBLE OR
FALL.
WARNING!
ANY FIREARM MAY FIRE IF DROPPED.
WARNING! FIRED CARTRIDGE CASES EJECTED FROM THE
DESERT EAGLE ARE EXTREMELY HOT, AND CAN CAUSE
SERIOUS BURNS. IN ADDITION, THE PAINFUL BURN FROM
A HOT CARTRIDGE CASE CAN DISTRACT A SHOOTER FROM
KEEPING HIS FIREARM POINTED SAFELY AND FROM OTHER
SAFE HANDLING PRACTICES, CAUSING A DANGEROUS
SITUATION OR AN ACCIDENT. WHEN FIRING, STAY CLEAR,
AND KEEP OTHERS CLEAR, OF THE RIGHT SIDE OF THE
PISTOL, FROM WHICH THE HOT CARTRIDGE CASES ARE
EJECTED. WEAR CLOSE-FITTING CLOTHING, AVOIDING
CLOTHING WITH OPEN COLLARS AND NECKLINES INTO
WHICH HOT CARTRIDGE CASES CAN FALL. A BASEBALL CAP
OR OTHER BRIMMED HAT OR VISOR WORN SO THE BRIM
COVERS THE TOP OF THE WEARER’S SAFETY GLASSES CAN
OFFER ADDITIONAL PROTECTION TO THE WEARER’S FACE
AND EYES, PREVENTING HOT CASES FROM FALLING INTO
ANY GAP BETWEEN THE TOP OF THE SAFETY GLASSES
AND THE WEARER’S FOREHEAD, POSSIBLY CAUSING A
SERIOUS BURN TO THE EYE.
WARNING! CHILDREN ARE ATTRACTED TO, AND CAN
FIND, LOAD AND OPERATE FIREARMS, CAUSING SERIOUS
INJURY OR DEATH TO THEMSELVES AND OTHERS. PREVENT
CHILD ACCESS BY ALWAYS KEEPING GUNS LOCKED AWAY
AND UNLOADED WHEN NOT IN USE. IF YOU LEAVE A
GUN LOADED OR UNLOADED WHERE A CHILD OBTAINS
AND IMPROPERLY USES IT, YOU MAY BE FINED OR SENT TO
PRISON OR BOTH.
WARNING! NEVER TRANSPORT OR CARRY A LOADED
FIREARM IN A VEHICLE OR OTHERWISE. ALWAYS TRANSPORT
OR CARRY YOUR PISTOL UNLOADED, WITH THE SAFETY
ENGAGED AND THE ACTION LOCKED OPEN. A SUITABLE
CARRYING CASE SHOULD BE USED TO TRANSPORT OR
CARRY YOUR UNLOADED PISTOL TO AND FROM THE RANGE
10

OR OTHER SAFE SHOOTING AREA. CHECK THE LAWS TO
DETERMINE AND FOLLOW LEGAL REQUIREMENTS IN TRANSPORTING A FIREARM IN YOUR JURISDICTION. CLOSE THE
PISTOL’S ACTION AND LOAD THE PISTOL ONLY WHEN YOU
ARE AT THE RANGE OR OTHER SAFE SHOOTING AREA, READY
TO BEGIN SHOOTING.
WARNING! NEVER CLIMB A FENCE, LADDER, TREE OR
OTHER OBJECT, JUMP ACROSS A BROOK OR DITCH, CRAWL
UNDER A FENCE OR OTHER OBSTACLE, WALK ACROSS AN ICY
SURFACE, STEEP SLOPE OR OTHER AREA WITH POOR
FOOTING, OR CROSS OTHER SLIPPERY OR PRECARIOUS TERRAIN OR OBSTACLES WITH A LOADED FIREARM. INSTEAD,
UNLOAD THE CHAMBER OF YOUR FIREARM FIRST. WHEN
CARRYING YOUR DESERT EAGLE IN THE FIELD, KEEP THE
MUZZLE POINTED IN A SAFE DIRECTION AND CARRY THE
PISTOL SO YOU CAN SAFELY CONTROL THE DIRECTION IN
WHICH IT POINTS IN THE EVENT YOU STUMBLE, SLIP OR FALL.
WARNING! NEVER SHOOT AT A HARD SURFACE (ROCK,
PAVEMENT, METAL, ICE, ETC.) OR AT THE SURFACE OF WATER,
AS THE BULLET MAY RICOCHET (GLANCE OFF) THE SURFACE
AND TRAVEL IN ANY DIRECTION, CAUSING SERIOUS INJURY
OR DEATH TO SOMEONE YOU CANNOT SEE. SHOOT ONLY
WHERE THERE IS A SAFE BACKSTOP (ONE WHICH WILL
SAFELY STOP AND CONTAIN THE FIRED PROJECTILES), FREE
FROM ROCKS, HARD OBJECTS AND OBSTRUCTIONS THAT
COULD CAUSE RICOCHETS OR SPLASH-BACK OF PROJECTILES,
FRAGMENTS, PEBBLES OR ROCK PARTICLES. CHECK LOCAL
AND STATE LAWS TO BE SURE SHOOTING IS PERMITTED AT
THE PLACE YOU INTEND TO SHOOT.
WARNING! USE ONLY APPROPRIATE ACCESSORIES FOR
YOUR DESERT EAGLE PISTOL. BE SURE ALL ACCESSORIES,
INCLUDING HOLSTERS, SIGHTS AND SIGHT MOUNTS,
LIGHTING DEVICES, ETC. ARE COMPATIBLE WITH THE
FIREARM AND DO NOT INTERFERE WITH ITS SAFE
OPERATION. IF IN DOUBT, CONSULT MAGNUM RESEARCH,
INC. THE MANUFACTURER IS NOT RESPONSIBLE FOR ANY
DAMAGE OR INJURY CAUSED BY THE USE OF IMPROPER
ACCESSORIES.
WARNING! WHEN SHOOTING, BE ALERT TO BE SURE NO
ONE COMES INTO THE LINE OF FIRE. CHECK THE BACKSTOP
AND TARGET AREA CAREFULLY TO BE SURE IT IS FREE OF
PEOPLE EACH TIME BEFORE YOU BEGIN TO FIRE.
WARNING! WHEN FIRING WITH A GROUP OF PEOPLE, PUT
A RESPONSIBLE PERSON IN CHARGE TO MAINTAIN SAFETY,
DISCIPLINE AND CONTROL. TO REDUCE THE CHANCE OF
ACCIDENTS ON A FIRING RANGE, BE ALERT TO THE
COMMANDS OF THE RANGE OFFICER, AND FOLLOW THEM
PRECISELY AND IMMEDIATELY.
WARNING! DO NOT HANDLE A FIREARM WHEN ANYONE
IS FORWARD OF THE FIRING POSITION. BEFORE ANYONE
MOVES DOWNRANGE TO POST OR CHECK TARGETS OR FOR
ANY OTHER PURPOSE, ALL FIREARMS SHOULD BE UNLOADED,
WITH SAFETIES ENGAGED AND ACTIONS LOCKED OPEN,
AND PLACED SAFELY ON THE BENCH WHERE THEY SHOULD
NOT BE TOUCHED OR HANDLED UNTIL EVERYONE
RETURNS FROM DOWNRANGE.
11

WARNING! DO NOT HANDLE FIREARMS WHEN YOU ARE
TIRED, COLD OR IMPAIRED PHYSICALLY OR MENTALLY, IN
ANY WAY.
WARNING! NEVER FIRE YOUR DESERT EAGLE NEAR AN
ANIMAL, UNLESS IT IS TRAINED TO ACCEPT THE NOISE OF
GUNFIRE. AN ANIMAL’S STARTLED REACTION TO THE
SOUND OF GUNFIRE COULD INJURE IT OR COULD CAUSE
AN ACCIDENT.
WARNING! NEVER CONTINUE TO USE YOUR DESERT
EAGLE IF IT IS NOT FUNCTIONING PROPERLY. NEVER
FORCE A JAMMED ACTION, AS THE JAMMED CARTRIDGE
MAY EXPLODE IF THE PRIMER IS CRUSHED OR PRESSED
AGAINST ANY METAL PART OF THE PISTOL.
WARNING! IF YOUR DESERT EAGLE FAILS TO DISCHARGE
("MISFIRE"), REMOVE YOUR FINGER FROM THE TRIGGER.
KEEP THE PISTOL POINTED IN A SAFE DIRECTION FOR 30
SECONDS. REMOVE THE CARTRIDGE FROM THE CHAMBER
AND DISPOSE OF IT PROPERLY.
WARNING! IF THE SOUND FROM YOUR AMMUNITION
DOES NOT SOUND NORMAL, A LOW POWERED ("SQUIB")
LOAD MAY HAVE LEFT A BULLET IN THE BARREL. IF THIS
OCCURS, DO NOT FIRE ANOTHER CARTRIDGE! INSTEAD
UNLOAD THE PISTOL AND REMOVE THE BARREL AND
CHECK FOR A BARREL OBSTRUCTION. FIRING A CARTRIDGE
WITH A BORE OBSTRUCTION CAN RESULT IN DESTRUCTION
OF YOUR DESERT EAGLE AND POTENTIAL INJURY OR
DEATH TO YOU OR SOMEONE NEARBY.
12

WARNING: AMMUNITION
NEVER USE AMMUNITION NOT SPECIFICALLY DESIGNATED FOR
USE IN YOUR FIREARM. PROPER AMMUNITION FOR YOUR DESERT
EAGLE WILL BE DESIGNATED ON THE LEFT SIDE OF THE BARREL.
FAILURE TO USE THE CORRECT TYPE OR CALIBER OF AMMUNITION MAY CAUSE THE FIREARM TO JAM, FAIL TO FIRE, CAUSE A
BORE OBSTRUCTION OR MAY GENERATE EXCESSIVE PRESSURE
WHICH CAN DESTROY THE PISTOL AND CAUSE PERSONAL INJURY
OR DEATH.
NEVER USE NON-STANDARD, RELOADED OR "HANDLOADED"
SHELLS. AMMUNITION THAT IS IMPROPERLY MANUFACTURED
MAY FAIL TO FIRE, MAY RESULT IN A "SQUIB" LOAD RESULTING IN
A BORE OBSTRUCTION OR MAY GENERATE EXCESSIVE PRESSURES
WHICH CAN DESTROY THE PISTOL AND CAUSE PERSONAL INJURY
OR DEATH.
SEMI-JACKETED BULLETS PROVIDE BEST FUNCTION AND
RELIABILITY. DO NOT USE UNJACKETED LEAD BULLETS. FULL
METAL JACKET BULLETS MAY BE USED IF THEY HAVE A FULLY
ENCAPSULATED BASE (NO OPEN LEAD CORE BASE).THE DESERT
EAGLE PISTOLS ARE DESIGNED FOR: .357 MAGNUM AMMUNITION (158 GRAINS) /.41 MAGNUM AMMUNITION (210 GRAINS)
/.44 MAGNUM AMMUNITION (240 GRAINS) /.50 ACTION EXPRESS
AMMUNITION (300 GRAINS) /.440 COR
AND 305 GRAINS) IN ACCORDANCE WITH INDUSTRY STANDARDS
(SAAMI STD); USE OF NON-STANDARD OR RELOADED AMMUNITION NULLIFIES THE FACTORY WARRANTY. FOR MORE INFORMATION ABOUT OTHER COMMERCIAL LOADS WHICH WORK IN THE
DESERT EAGLE PISTOL, WRITE TO MAGNUM RESEARCH, 7110
UNIVERSITY AVENUE NE, MINNEAPOLIS, MN 55432.
®
BON MAGNUM(240, 260
WARNING: RECOIL SPRING
ASSEMBLY INSTALLATION
TO PREVENT DAMAGE TO YOUR PISTOL BE SURE,BEFORE
FIRING, TO INSPECT THE RECOIL SPRING INSTALLATION FOR
PROPER ARRANGEMENT (SEE PAGES 28 & 29 FOR DETAILS).
FAILURE TO DO SO MAY RESULT IN A BROKEN PISTOL.
Initial Cleaning
1. Upon receipt of the pistol, disassemble (see page 26)
and inspect it.
2. Clean pistol as per periodic maintenance procedure.
3. Any heavy or sticky deposits of protective material may
be removed, using very light rust-preventive oil. After
cleaning, wipe dry and coat lightly with gun oil.
4. Never use abrasive or metallic objects, synthetic cloth,
dry cleaning fluids,detergents, acids, lye, water or
steam for cleaning.
5. Reassemble pistol (see page 28) and make sure it is
functioning properly.
13

WARNING
ALL FIREARMS ARE DANGEROUS OBJECTS - PISTOLS INCLUDED.
ALWAYS CONSIDER THE PISTOL LOADED. TO RENDER IT SAFE,
FIRST PLACE THE SAFETY IN THE “ON” POSI TION, THEN REMOVE
THE MAGAZINE, AND EJECT ANY REMAINING ROUND BY
PULLING THE SLIDE TO THE REAR. IT IS DANGEROUS TO ALTER
OR MODIFY THIS FIREARM IN ANY WAY. ANY ALTERATIONS OR
MODIFICATIONS OF THE FIRING MECHANISM MAY RESULT IN
THIS FIREARM BECOMING UNSAFE AND NULLIFIES THE FACTORY
WARRANTY. USER IS ADVISED TO READ THE ENTIRE MANUAL
PRIOR TO HANDLING THE PISTOL FOR THE FIRST TIME.
WARNING: LEAD EXPOSURE
DISCHARGING FIREARMS IN POORLY VENTILATED AREAS,
CLEANING FIREARMS, OR HANDLING AMMUNITION MAY RESULT
IN EXPOSURE TO LEAD AND OTHER SUBSTANCES KNOWN TO
CAUSE BIRTH DEFECTS, REPRODUCTIVE HARM, AND OTHER
SERIOUS PHYSICAL INJURY. HAVE ADEQUATE VENTILATION AT ALL
TIMES. WASH HANDS THOROUGHLY AFTER EXPOSURE.
AVOID EATING, HANDLING FOOD AND TOUCHING YOUR FACE
AND EYES WHILE HANDLING OR CLEANING FIREARMS.
GENERAL INFORMATION
THE .357, .41, .44, .50 AE AND THE .440 COR®BON DESERT
EAGLE ARE GAS-OPERATED, SEMI-AUTOMATIC PISTOLS.
THE DESERT EAGLE IS UNIQUE IN ITS CLASS AND REPRESENTS A
NEW FUNCTIONAL APPROACH IN HANDGUNS. IN ADDITION TO
ITS HIGH ACCURACY, IT OFFERS THE CONVENIENCE OF FIRING
STANDARD RIMMED .357, .41, .44, .440 COR
CARTRIDGES, WHICH ARE WIDELY AVAILABLE.
®
BON OR .50 AE
5 IN 1 DISASSEMBLY TOOL
1. Reamer Head - used to clean lead deposits from the
gas cylinder. Remove barrel from pistol (Pg 26-23), place
reamer head in cylinder and work back and forth to remove
lead deposit.
2. Firing Pin Tool - used to push in the firing pin, to
allow removal of firing pin stop, to allow removal of
firing pin.
3. Bolt Guide Pin Tool - used to pull the bolt guide pin,
from the bottom of the slide to remove bolt from
slide. NOTE: Firing pin must be removed first.
4. Grip Pin Tool - used to push in grip pin, to allow
removal of handgrips.
5. Magazine Disassembly Tool - used to push in the
magazine base catch pin on the bottom of the
magazine to allow removal of base and disassembly
of magazine. (WARNING: Wear safety glasses when
disassembling the magazine — the magazine spring
is under tension and could cause serious eye injury
if released suddenly.)
14

GENERAL CHARACTERISTICS
• A safety catch, operable from either side,
blocks the firing pin and at the same time
disconnects the trigger from the firing
mechanism. When the safety is on in the "ON"
position.
• The pistol chamber is chrome plated to
facilitate easier cartridge case extraction.
• The polygonal rifling reduces barrel wear
and enhances the seal between the
bullet and the bore, thus increasing
accuracy.
• Field stripping is simple since the pistol has
only six main parts, including the magazine.
• The rotating bolt interlocks with the barrel
during firing.
• The barrel assembly contains the gas
operating system.
• Anatomically formed grip, ideal hand seating
angle and comfortable grip dimensions
permit rapid, accurate, instinctive shooting.
• The combat-type trigger guard is designed for
two-handed shooting.
• Closed construction gives adequate protection
against dirt.
• Most parts are manufactured by precision casting
and machining to strict military standards and
with the ‘traditional Israel Weapons Industries’
dedication to quality and durability.
• The pistol comes equipped with standard
combat sights. In addition, the following sights
may be used:
— Fully adjustable rear sight with target-type
front sight. (Optional)
15

Desert Eagle Pistol Specifications
Mark VII Mark XIX Mark XIX
Length, with 6-inch barrel 10.48 inches (266 mm) 10.75 inches (27.3 cm) 10.75 inches (27.3 cm)
Length, with 10-inch barrel 14.75 inches (375mm) 14.75 inches (37.5 cm) 14.75 inches (37.5 cm)
Height 6.1 inches (155 mm) 6.25 inches (15.9 cm) 6.25 inches (15.9 cm)
Width 1.25 inches (32 mm) 1.25 inches (32 mm) 1.25 inches (32 mm)
Trigger reach 2.75 inches (70 mm) 2.75 inches (70 mm) 2.75 inches (70 mm)
Sight radius (with 6-inch barrel) 8.5 inches (215 mm) 8.5 inches (215 mm) 8.5 inches (215 mm)
Weight w/empty magazine (6--inch) 1783.19 grams (3 lbs. 14.9 oz.) 1990.14 grams (4lbs. 6.2 oz.) 1990.14 grams (4lbs. 6.2 oz.)
Polygonal rifling (right-hand twist) 1 turn in 14 inches 1 turn in 14 inches (355mm) 1 turn in 19 inches (48.3 cm)
Magazine capacity 9 rounds 9 rounds 7 rounds
Bore diameter .357” (9.1 mm) .357” (9.1 mm) .429” (10.9 mm)
Length, with 6-inch barrel 10.48 inches (266 mm) 10.75 inches (27.3 cm) 10.75 inches (27.3 cm)
Length, with 10-inch barrel 14.75 inches (375 mm) 14.75 inches (37.5 cm) 14.75 inches (37.5 cm)
Height 6.1 inches (155 mm) 6.25 inches (15.9 cm) 6.25 inches (159 mm)
Width 1.25 inches (32 mm) 1.25 inches (32 mm) 1.25 inches (32 mm)
Trigger reach 2.75 inches (70 mm) 2.75 inches (70 mm) 2.75 inches (70 mm)
Sight radius (with 6-inch barrel) 8.5 inches (215 mm) 8.5 inches (215 mm) 8.5 inches (215 mm)
Weight w/ empty magazine (6-inch) 1899.42 grams (4lbs. 3oz.) 1990.14 grams (4 lbs. 6.2 oz.) 1990.14 grams (4 lbs. 6.2 oz.)
Polygonal rifling (right-hand twist) 1 turn in 18 inches (457 mm) 1 turn in 18 inches (457 mm) 1 turn in 19 inches (48.3 cm)
Magazine capacity 8 rounds 8 rounds 7 rounds
Bore diameter .429” (10.9 mm) .429” (10.9 mm) .495” (12.6 mm)
Technical data may not be exact due to production/model/specification changes.
Mechanical Features
Rifling Type: R.H. 6-Rib polygon barrel
Method of operation Gas
Method of locking Rotating Bolt
Sights
Combat sights Sight line radius, 215mm (8.5")
(6-inch barrel)
.357 Magnum .357 Magnum .440 CorBon
Mark VII Mark XIX Mark XIX
.44 Magnum .44 Magnum .50 AE
16

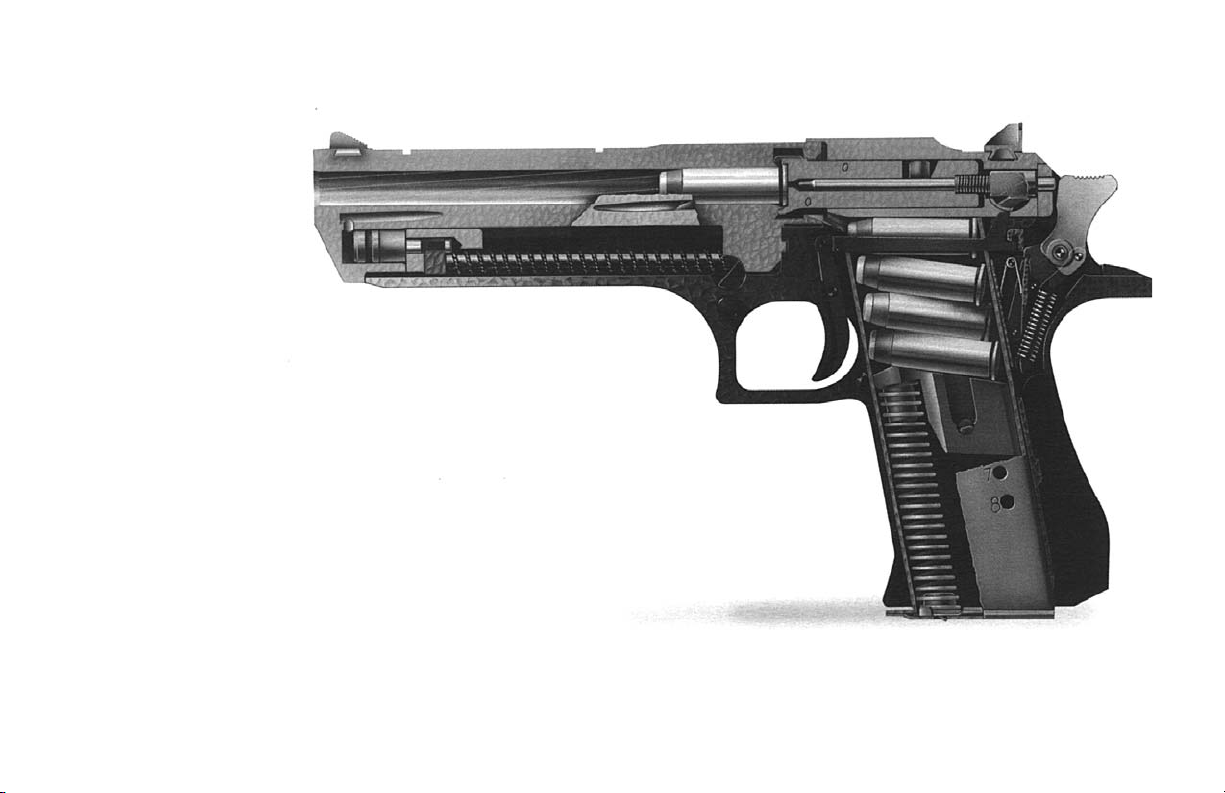
OPERATING PRINCIPLES
Prior to firing the pistol, the bolt is locked by
three lugs in the barrel assembly. Upon firing the
pistol, propellant gases pass through a
hole underneath the bore of the barrel into
the gas cylinder and push the piston, which
in turn moves the slide backwards. During
this movement the bolt is unlocked and
carried to the rear by the slide, but not before,
the pressure in the chamber is reduced.
When the bullet has left the barrel the empty
cartridge case is extracted and ejected by the
continuing movement of the slide and the
bolt to the rear. At the same time, the slide
pushes the hammer downward into the
cocked position, where it is retained by the
sear. The recoil springs are compressed.
17
fig. 2
.357/.41/.44 Magnum
.50 Action Express
.440 Cor
The Desert Eagle Pistol—U.S. Patent—4,563,937
Magnum Research, Inc. 1986
®
Bon

Forward Movement
When the recoil springs expand, they drive
the slide and bolt forward. During this
movement the bolt cannot rotate due to
the stabilizer pin which retains it. When the
bolt scoops another round from the magazine
and inserts it into the chamber, the locking
lugs on the bolt come into contact with
the recesses in the barrel and the bolt
is rotated thus locking the cartridge in the
chamber. Now the trigger bar is opposite
the recess in the safety and can move
upward, thus engaging the sear. When pulling
the trigger, the sear releases the
hammer which in turn hits the firing pin
thus firing the chambered cartridge. (fig. 3)
When the last cartridge is fired and the
empty case is ejected, the slide is retained
in its rear position by the slide catch. The
slide catch is actuated by the magazine
follower. The catch releases the slide when
depressed by hand or when the slide is
pulled slightly to the rear.
fig. 3
18

Safety Features
The safety catch levers are located at the
rear of the slide, just below the rear sight.
They are accessible from either side of the
pistol. When pushing the front end of the
safety catch lever downward, the safety
catch is engaged. In this position the firing
pin movement is closed by the safety
catch and the trigger bar, which is
pushed down, cannot engage the sear,
thus neutralizing the trigger (fig. 4).
It should be noted that due to the above
features, it is not possible to engage the
sear when the bolt is not locking properly.
Due to the unique blocking of the firing
pin by the safety, the pistol will not
fire when dropped accidentally on its
hammer or on its muzzle when the safety
is properly engaged (on “SAFE”).
fig. 4
19

OPERATING INSTRUCTIONS
Safety Checks
1. Pull hammer slightly to the rear until a click is
heard; the hammer is now in semi-cocked
position.
2. Move the front end of the safety catch lever
down into the “SAFE” position.
3. Press the magazine release button on the left
hand side of the pistol and remove the
magazine (fig. 5).
4. Draw the slide to the rear, check the chamber
visually to ensure that the pistol is unloaded
and release the slide.
5. Point the pistol in safe direction and pull the
trigger to check whether the safety is working
properly (the hammer should not move).
6. Move the safety lever up into the “FIRE”
position; a red dot will be visible.
7. Pull hammer back slightly and pull the trigger
to release the hammer.
fig. 5
8. Pull the hammer into semi-cocked position and
move the safety catch lever into the “SAFE”
position.
20

Filling and Emptying the Magazine
Filling:
1. With the magazine in an upright position,
place the cartridge rim on the magazine
follower, in front of the magazine lips
(fig. 6).
2. Press the cartridge down and under the
magazine lips to the rear.
3. Repeat until loaded (9 cartridges .357; 8
cartridges .41/.44; 7 cartridges .440/.50AE).
Note: Number of cartridges in the magazine can be
verified by the indicator holes in the side of
the magazine.
Emptying:
1. Push the cartridge forward with the
thumb.
2. Repeat until the magazine is empty.
fig. 6
21

SIGHTS AND ZEROING
6 O’Clock
Fixed sights (Standard)
The standard sights consist of a rear sight
and a front sight. Both are combat type.
They are designed to ensure rapid and
accurate aiming. The square notch on
the rear sight is 3 mm wide. The sight
line radius is 210 mm.
Adjustable sights
The existing dovetail slots are designed
to accommodate front target type sights
and rear adjustable sights, available as an
accessory option.
Telescopic sight
(Mark XIX,.357, .44, .440 & .50)
The 7/8" rib has cross-slots to allow installation of Weaver
Telescopic sight
(Mark I, VII, .357, .41, .44)
The existing 3/8” dovetail rib on the
barrel is designed to accommodate
a telescopic sight mount which is
available as an option (#DEP350B).
TM
style rings.
Zeroing
DESERT EAGLE PISTOL combat sights
designed for
6 o'clock hold, with top of front
sight level with top of rear sight.
Windage
Adjust by shifting the rear sight (or
the front sight) left or right as
required.
fig. 7
(Mark I pictured)
22

LOADING AND FIRING
Pre-loading and Pre-firing checks:
1. Perform safety checks (see page 20) to
ensure that the pistol is not loaded.
2. Make sure the barrel is clean and free of
obstruction.
3. Check that the magazines are clean and
properly loaded.
4. Always wear ear and eye protection when
firing the pistol.
Cocking the pistol:
1. Never chamber a round unless you are
ready to fire.
2. Insert the magazine. The magazine will
have about 1/16 inch play when seated
properly. Do not push up on magazine
when firing or jamming will occur.
3. Grasp the slide, pull it all the way back and
release it (fig. 8). This operation cocks the
hammer and chambers a cartridge.
fig. 8
WARNING:
This pistol is now loaded, cocked with the safety catch
lever in the “SAFE” position; therefore, make sure that
the barrel is pointed in a safe direction.
23

Firing the pistol:
With the pistol pointed at the target, move the
safety catch lever up to “FIRE” position (red dot
will be visible) (fig. 9) and pull the trigger.
Reloading during firing:
The slide remains in the rearward position when
the magazine is empty.
1. Move safety catch lever to down “SAFE”
position.
2. Remove the empty magazine.
3. Insert a full magazine.
4. Release the slide by depressing the slide
catch or by pulling the slide slightly to
the rear and releasing it (fig. 10).
5. Move safety catch to “FIRE” position.
NOTE:
The pistol is now loaded and cocked
with the safety catch lever in the “FIRE”
position.
fig. 9 (Mark I pictured)
24

fig. 10
Unloading the pistol
1. Place the safety catch lever in the “SAFE”
position.
2. Press the magazine release button and
remove the magazine.
3. Pull the slide to the rear and eject the
chambered cartridge. Check visually that
the chamber is empty.
4. Place the safety catch lever in the “FIRE”
position, point the pistol in a safe direction
and lower the hammer with your thumb
while pulling the trigger.
5. Pull the hammer back into its semi-cocked
position and place the safety catch lever in
the “SAFE” position.
If slide is difficult to release in this manner, proceed as follows: hold
pistol with both hands, place left thumb on slide catch, place right
thumb on top of left thumb, then push straight down.
25
6. Empty the magazine (see page 21).

DISASSEMBLY AND ASSEMBLY
General
This chapter deals with those disassembling operations and
assembling operations which the
user should carry out for routine
maintenance of the pistol.
Disassembling or assembling of
any other parts is not recommended
and will void all warranties.
WARNING: SAFETY CYLINDER
IT IS POSSIBLE TO ASSEMBLE THE
SAFETY CYLINDER IN A BACKWARD/REVERSE ORDER. IF THIS
HAPPENS, THE SAFETY AND FIRE
FUNCTION INDICATORS WILL ALSO
BE REVERSED. THE GUN WILL THEN
FIRE WHEN ON SAFE. DO NOT
DISASSEMBLE THE SAFETY. FOR SERVICE
ON SAFETY CONTACT MAGNUM
RESEARCH, INC. CUSTOMER SERVICE.
Disassembly should be carried
out on a clean surface and the disassembled parts should be
placed in order of their removal.
FIELD STRIPPING
Carry out the following operations before disassembling:
1. Remove the magazine (fig. 5)
and engage safety “ON”.
2. Pull the slide back and check
the chamber visually and
physically to make sure it is
empty.
3. Place the safety catch lever in
the “FIRE” position, point the
pistol in a safe direction and
lower the hammer with your
thumb while pulling the
trigger.
26
Disassembly
1. Pull the hammer slightly to the
rear until a click is heard; the
hammer is now in semicocked position.
2. Move the front end of the
safety catch lever down into
its “SAFE” position.
3. Press the barrel lock pin in on
the left side of the pistol and
at the same time swing the
barrel lock on the other side
of the pistol counter clockwise
(fig. 11).
4. Pull the barrel slightly forward
to release it and lift it out.
5. Draw the slide forward and
remove it (fig. 12). This allows
the recoil springs assembly to
be pulled forward and easily
removed (.357). On .41,
.44, .440 and .50 the recoil
spring comes out with slide
assembly.

fig. 11
fig. 12
27

ASSEMBLY (.357, .41, .44, .440 & .50)
1. Turn the slide upside down and place it on a
level surface.
2. Insert the piston into place (fig. 14). Make sure
the piston shaft recess is facing the slide recess.
The other piston shaft recess will face up.
3. Engage piston shaft with recoil spring plate lug
and the slide.
4. Use your thumb to push the base of the spring
plate assembly against the slide, supporting the
slide all the way to align the spring assembly in
parallel with the slide.
5. Keeping the spring assembly parallel to the
slide, draw the frame all the way into the slide
(do not compress the spring).
Mark VII .41, .44
Mark XIX .357, .44,
.440, .50
6. Stand the pistol upright and verify that the
spring ends are correctly positioned in place
(2 holes) within the frame (above the trigger).
WARNING: Make sure that the gas piston is in place
and cannot be pulled out.
7. Insert barrel lock lug into frame recess through
the slide.
8. Push against the barrel from the muzzle end and
hold the barrel assembly against the frame
(fig. 15). Now swing the barrel lock clockwise
into closed position.
9. Check correct pistol operation by cocking and
releasing the hammer and verify that the safety
is functioning properly and safely.
fig. 14
fig. 15
28

ASSEMBLY (.357 Magnum Mark I & VII)
1. Insert recoil spring assembly into frame from its
front end, open end first with the sharp
corner of the spring plate down
(rounded forward edge of spring plate
up) (fig. 15a). Now push the recoil spring
assembly fully home into its recesses in the
frame. It is important to have the spring plate in
the proper position.
2. Mount the slide onto the frame and draw it to
the rear.
3. Hold the slide back against slight spring tension
and place the barrel lock lug in the slide recess.
4. Push against the barrel from the muzzle end
and hold the barrel assembly against the frame.
Now swing the barrel lock clockwise into its
closed position.
5. Insert the magazine.
Mark I & VII .357
fig. 15a
Additional Disassembly and Cleaning Instructions for
the Return/Recoil Springs Assembly
NOTE: Because of the spring tension, be sure to wear safety
glasses to prevent possible eye injury. Always work in a
clean area to prevent loss of small parts.
1. Disassemble and clean one side at a time.
2. Place the return springs on end with the crossplate
down.
3. Pull down on one return/recoil spring and hold down.
4. Pry C-clip from end of spring rod (C-clip is under tension
and will “fly” off if not held under control while
moving).
5. Slowly release tension on return/recoil spring and
remove. Remove spring rod from crossplate.
6. Clean rod and crossplate of carbon/lead buildup with
steel wire brush or steel wool. Soak return/recoil springs
in bore solvent and brush with bronze phosphor brush
to remove carbon buildup. Spray with cleaner/
degreaser and lubricate.
7. Reassemble by reversing disassembly instructions.
29

ADDITIONAL ASSEMBLY
Disassembly of the magazine
1. Before disassembly, remove all
cartridges from the magazine.
2. Hold magazine with base
facing upward.
3. With the combination tool,
push base catch inward.
4. With catch depressed, slide
magazine base carefully
forward.
5. Keep thumb pressed on magazine
base and lift it up slowly to
release the magazine spring
pressure and remove the
magazine base.
6. Remove magazine base catch
and spring.
7. Press follower plunger in with
the combination tool and push
the follower from the magazine
with the cleaning rod.
WARNING:
The magazine spring is under
pressure and may be released
accidentally, causing injury if not
held in place during disassembly
or assembly. Do not point magazine
base toward face or other
person. Base catch is not
attached to spring.
Assembly of the magazine
1. Hold magazine with lips
downward and partly insert
the follower with its flat face
downward.
2. Press the follower plunger in
with combination tool and
slide follower into magazine
all the way.
3. Insert magazine spring.
4. Place base catch on spring
with small tip pointing up.
5. Push magazine base to rear
until the base catch engages
the base.
30
Disassembly of the slide
1. Make sure the safety catch
lever is in the “FIRE” position.
2. Push the rear end of the firing
pin in with the combination
tool and slide the firing pin
stop down (fig. 16). The firing
pin is now free to be pushed
out by its spring.
3. Remove the firing pin and its
spring.
4. Hold the slide upside down
and push back with your
thumb. Now remove the bolt
guide pin with the combination
tool (fig. 17).
5. Release the bolt slowly and
remove the bolt assembly,
bolt stabilizer pin, spring and
pin.

fig. 16
fig. 17
31

Assembly of the slide
1. Insert the bolt stabilizer - guide pin first.
Make sure that its concave part coincides
with the bolt housing in the side.
2. Insert the bolt into its housing in the slide
and compress the stabilizer spring with it.
3. Insert the bolt guide pin. (fig. 18).
4. Make sure the safety catch is in the “FIRE”
position.
5. Install the firing pin spring and the firing pin,
with its “narrow” section facing down
(fig. 19).
6. Insert the firing pin stop (semicircle part
up.) Push the firing pin in with the combination tool and slide the stop further in until
the firing pin engages the hole in the stop.
fig. 18
fig. 19
32

fig. 20 Mark I/VII/XIX fig. 21 Mark I/VII/XIX
Disassembly of the trigger
mechanism assembly
1. Lean the frame on the
hammer and horn. Push the
grip pin in with the combination tool through the small
hole in the bottom of the grip
and push the grip cover
downward to release it (fig. 20).
2. With both thumbs on the
projection at the top of the
butt, pull the front edges of
the grip backward to remove
it from the butt (fig. 21).
33
3. Remove the hammer pin and
the sear pin with the appropriate punch (fig. 22).
4. Lift the trigger mechanism
assembly from the frame.

fig. 22
Assembly of the hammer / sear
mechanism
1. Hook the sear onto the trigger bar and
press the hammer mechanism
assembly down; make sure that the
pointed bottom ends of the hammer
mechanism assembly engage the rear
of the frame.
2. Insert the hammer pin and the sear pin
into their respective holes.
3. Replace the grip partly over the butt
and then squeeze the grip home with
your hand.
fig. 23
34

ADJUSTABLE TRIGGER
MECHANISM (ATM)
Standard on Mark VII & Mark XIX
It enables adjustment of trigger travel to achieve
higher accuracy and greater comfort when firing
the pistol.
Characteristics
1. Trigger travel consists of two stages. In
the first stage of travel, trigger force is
low. In the second stage, pull force
increases until the hammer is released.
The location of the transition between
stages may be adjusted to be at any
point within the trigger travel, by
trigger travel adjustment.
2. The ATM may be mounted in any
DESERT EAGLE pistol frame.
Adjustment (fig. 24)
1. The ATM is adjusted after the DESERT
EAGLE has been field stripped (see page 27).
fig. 24
2. The ATM setting may be tested by
cocking the hammer manually and
squeezing the trigger.
3. Trigger travel adjustment: Insert a screwdriver through the magazine housing
opening to turn the ATM adjustment.
35

CARE AND CLEANING
General
Comprehensive knowledge of how to service and
handle the pistol is of great importance.
Experience has shown that most failures
which occur while operating the pistol are
due to negligence in maintenance. Special
attention must be paid to cleaning, lubricating and
inspecting the pistol; this will determine whether or
not the pistol will function properly when you need it.
In order to maintain accuracy, the barrel must be
serviced thoroughly. The slide, the bolt and other
moving parts of the pistol must be kept clean and
lightly lubricated to ensure proper operation. Care and
cleaning includes the magazines, which must be kept
free from rust, grit, etc. in order to function properly.
At regular intervals, or whenever your pistol has been
exposed to sand, dust, extreme humidity, water or
other adverse conditions, it must be cleaned and
lubricated.
Before re-assembling the Desert Eagle, make sure that
nothing from the cleaning process is left in the bore.
Discharging the pistol with anything in the bore can
result in destruction of the firearm and injury or death
to you or bystanders.
Wipe the exterior of the pistol with powder solvent.
Dry the exterior of the Desert Eagle and then apply a
thin coat of lubricant to the exterior of the firearm. Use
of excess lubricant or grease on your pistol can attract
dust or dirt which can interfere with the safe and
reliable function of the firearm.
Before firing remove all excess lubricant from the bore
of the pistol.
Initial Cleaning
1. Upon receipt of the pistol, disassemble (see page 26) and inspect it.
2. Clean pistol as per periodic maintenance procedure.
3. Any heavy or sticky deposits of protective material may be removed,
using very light rust-preventive oil. After cleaning, wipe dry and coat
lightly with gun oil.
4. Never use abrasive or metallic objects, synthetic cloth, dry cleaning fluids,
detergents, acids, lye, water or steam for cleaning.
5. Reassemble pistol (see page 28) and make sure it is functioning properly.
Periodic Maintenance
1. Field strip the pistol (see page 26)
2. Clean all stripped parts with a lightly oiled soft cloth.
3. Attach the patch holder to the cleaning rod; slip a dry patch into the
patch holder and clean the bore.
4. Clean the bore and chamber of the barrel with an oiled patch slipped
through the patch holder.
5. Clean the gas cylinder.
6. While cleaning, inspect all parts for wear and damage; make sure the
bore and chamber are free from rust.
7. Assemble the pistol (see page 28) and make sure it functions properly.
Cleaning prior to firing
1. Field strip the pistol (see page 26).
2. Using the cleaning rod and patch holder, dry the chamber and bore with a
clean patch.
3. Make sure that all moving parts are lightly oiled.
4. Assemble the pistol (see page 28) and make sure it functions properly.
36

Cleaning and firing
1. Field strip the pistol (see page 26).
2. Disassemble the slide (see page 30).
3. Attach the brass wire brush to the cleaning rod,
run the brush completely through the chamber
and bore until it protrudes completely from the
other end. Now pull the wire brush in the opposite direction and remove it from the barrel.
Repeat this operation several times.
4. Wipe the cleaning rod dry, remove the wire
brush and attach the patch holder.
5. Attach a clean patch and clean the bore; repeat
this operation using clean patches until the bore
is clean.
6. Oil chamber and bore with a clean oiled patch.
7. Clean the gas cylinder.
8. Oil lightly all other parts of the pistol, reassemble
it (see page 28) and make sure it functions
properly.
NOTE: After firing, use the gas cylinder cleaning
tool to remove deposits from gas cylinder underneath the barrel assembly.
The cleaning tool should rotate freely from side to
side in the gas cylinder when clean. DO NOT use
any other tool for this operation since this may
damage the cylinder. Make sure gas piston,
springs, guides, plates, recoil spring, and channel
of frame are free of lead deposits.
TROUBLESHOOTING
Failure to feed - pistol jams or bolt closes on
empty chamber.
Cause Remedy
1. Magazine improperly Push magazine home to
seated engage catch.
2. Magazine improperly filled Remove cartridges and refill.
3. Dirty magazine Disassemble, clean and
reassemble.
4. Damaged Magazine Replace.
5. Short recoil Clear jam. Check chamber
for cleanliness. Check if
return spring is correctly
assembled and free of lead
deposits. Check type of
ammunition (maybe
underpowered).
6. Double feed Inspect for stuck case or
cartridge (see Pg 38).
7. Incorrect ammunition Change ammunition.
8. Pistol jams shut Release barrel lock; if
barrel does not move
forward from slide,
call service department.
37

Failure to chamber - Bolt does not close
fully and gun will not fire.
Cause Remedy
1. Dirty Chamber Clean.
2. Defective ammunition Check for damaged
cartridges.
3. Very dirty pistol Check for sluggish bolt.
Disassemble, clean, oil
and reassemble.
4. Defective or dirty Field-strip, inspect, clean
recoil spring or replace if necessary.
Failure to fire - Hammer snaps home but
gun will not fire.
Cause Remedy
1. Defective cartridge Inspect primer, if indented
discard safely. If not
indented, inspect firing
pin for defects.
Failure to extract or eject - Pistol will not
eject case or jams.
Cause Remedy
1. Underpowered or Inspect ammunition and
defective change if necessary.
2. Dirty or damaged Inspect, clean, replace barrel
barrel chamber in necessary.
3. Fouled or broken Clean or replace extractor
extractor or or extractor spring.
extractor spring
4. Fouled or broken Clean or replace ejector
ejector or ejector spring
5. Lead-fouled or broken Clean or replace. Failure
return spring cross bar to do so can lead to a
broken slide.
6. Piston and gas cylinder Clean cylinder with tool
or recoil spring channel reamer head. Clean piston
in frame lead-fouled and channel with wire brush.
2. Obstructed firing pin. Disassemble bolt from
slide and inspect firing
pin hole for obstructions.
Spent case stuck in chamber.
1. Field-strip.
2. Insert cleaning rod from muzzle end and tap gently
to remove case.
3. If case cannot be removed, contact service department.
38

fig. 24
DESERT EAGLE
.357 MAGNUM PISTOL
* See page 44 for breakdown
EXPLODED VIEW
Mark VII
39
PARTS LIST
Desert Eagle .357 Magnum Pistol Mark I/VII/XIX
VIEW
NO. DESCRIPTION PART NO.
1 Barrel 6” .357 - MK I/VII” DEP406
1-A Barrel 6” .357 - MK XIX” BAR3576
2 Front Sight 00024-1101-5
3 Gas Piston - MK I/VII 00024-1214
3-A Gas Piston - MK XIX 00025-0214
4 Bolt Stabilizer Pin 00024-1211
5 Bolt Stabilizer Spring 00024-1213
6 Bolt Stabilizer Guide Pin 00024-1212
7 Ejector - MK I/VII 00024-1253
7-A Ejector - MK XIX 04011-0253
8 Gas Piston Pin - MK I/VII 00024-1215
9 Slide - MK I/VII 00024-1201
9-A Slide - MK XIX 04007-0201
10 Ejector Spring - MK I/VII 00024-1252
10-A Ejector Spring - MK XIX 00025-0252
11 Extractor Pin - MK I/VII 00024-1255
11-A Extractor Pin - MK XIX 00025-0255
12 Ejector Pin - MK I/VII 00024-1254
12-A Ejector Pin - MK XIX 00025-0254
13 Extractor - MK I/VII 00024-1261
13-A Extractor - MK XIX 04011-0261
14 Extractor Spring 00024-1262
15 Bolt - MK I/VII 00024-1251
15-A Bolt - MK XIX 04011-0251
16 Rear Sight 00024-1241
17 Safety Screw - MK I/VII 00024-1209
17-A Safety Screw - MK XIX 04007-0209
18 Right Safety Lever - MK VII/XIX 04024-1207
19 Safety Spring 00024-1208
20 Safety - MK I/VII 00024-1206
20-A Right Safety - MK XIX (Not Pictured) 04007-0216
20-B Left Safety - MK XIX (Not Pictured) 04007-0206
21 Firing Pin 00024-1202
22 Firing Pin Spring 00024-1203
23 Bolt Guide Pin - MK I/VII 00024-1205
23-A Bolt Guide Pin - MK XIX 00025-0205
24 Firing Pin Stop - MK I/VII 00024-1204
24-A Firing Pin Stop - MK XIX 00025-0204
25* Recoil Spring Assembly - MK I/VII 00024-1160
25-A* Recoil Spring Assembly - MK XIX 00025-0160
26* Trigger Assembly 00024-1340
27 Barrel Lock 00024-1302
28 Barrel Lock Spring 00024-1304
29 Barrel Lock Pin 00024-1303
30 Hammer Pin 00024-1312
31 Sear Pin 00024-1311
32* Adjustable Trigger Assembly - MK VII/XIX DEP200
33 Magazine Catch 00024-1307
34 Frame N/A
35 Magazine Catch Spring 00024-1309
36 Magazine Catch Pin 00024-1308
37 Slide Catch Spring 00024-1313
38 Slide Catch Assembly - MK VII/XIX 04024-1330
39 Magazine Assembly MAG357
40 IMI Grip 00024-1305
41 Grip Pin Spring 00024-1314
42 Grip Pin 00024-1320
43 Retaining Ring (C-CLIP) - MK I/VII 00024-1164
43-A Retaining Ring (C-CLIP) - MK XIX 00025-0164
44 Left Safety Lever - MK VII/XIX 04024-1217

DESERT EAGLE
.41 MAGNUM PISTOL
EXPLODED VIEW
Mark VII
PARTS LIST
Desert Eagle .41 Magnum Pistol, Mark VII
VIEW
NO. DESCRIPTION PART NO.
1 Barrel 6" .41- MK I/VII DEP606
2 Front Sight 00024-1101-5
3 Gas Piston 00025-0214
4 Bolt Stabilizer Pin 00024-1211
5 Bolt Stabilizer Spring 00024-1213
6 Bolt Stabilizer Guide Pin 00024-1212
7 Ejector 00025-0253
8 Slide 00025-0201
9 Ejector Spring 00025-0252
10 Extractor Pin 00025-0255
11 Ejector Pin 00025-0254
12 Extractor 00028-0261
13 Extractor Spring 00024-1262
14 Bolt 00028-0251
15 Rear Sight 00024-1241
16 Safety Screw 00024-1209
17 Right Safety Lever 04024-1207
18 Safety Spring 00024-1208
19 Safety 00025-0206
20 Firing Pin 00024-1202
21 Firing Pin Spring 00024-1203
22 Left Safety Lever 04024-1217
23 Bolt Guide Pin 00025-0205
24 Firing Pin Stop 00025-0204
25* Recoil Spring Assembly 00025-0160
26* Trigger Assembly 00024-1340
27 Barrel Lock 00024-1302
28 Barrel Lock Spring 00024-1304
29 Barrel Lock Pin 00024-1303
30 Hammer Pin 00024-1312
31 Sear Pin 00024-1311
32* Adjustable Trigger Assembly - MK VII DEP 200
33 Magazine Catch 00024-1307
34 Frame N/A
35 Magazine Catch Spring 00024-1309
36 Magazine Catch Pin 00024-1308
37 Slide Catch Spring 00024-1313
38 Slide Catch Assembly 04024-1330
39 Magazine Assembly DEP141BL
40 IMI Grip 00024-1305
41 Grip Pin Spring 00024-1314
42 Grip Pin 00024-1320
43 Retaining Ring (C-CLIP) 00025-0164
40
* See page 44 for breakdown

DESERT EAGLE
.44 MAGNUM PISTOL
EXPLODED VIEW
Mark VII
41
PARTS LIST
Desert Eagle .44 Magnum Pistol, Mark I/VII/XIX
VIEW
NO. DESCRIPTION PART. NO.
1 Barrel 6" .44 - MK VII DEP506
1-A Barrel 6" .44 - MK XIX BAR446
2 Front Sight 00024-1101-5
3 Gas Piston 00025-0214
4 Bolt Stabilizer Pin 00024-1211
5 Bolt Stabilizer Spring 00024-1213
6 Bolt Stabilizer Guide Pin 00024-1212
7 Ejector 00025-0253
8 Slide - MK I/VII 00025-0201
8-A Slide - MK XIX 04007-0201
9 Ejector Spring 00025-0252
10 Extractor Pin 00025-0255
11 Ejector Pin 00025-0254
12 Extractor 00025-0261
13 Extractor Spring 00024-1262
14 Bolt 00025-0251
15 Rear Sight 00024-1241
16 Safety Screw - MK I/VII 00024-1209
16-A Safety Screw - MK XIX 04007-0209
17 Right Safety Lever 04024-1207
18 Safety Spring 00024-1208
19 Safety - MK I/VII 00025-0206
19-A Left Safety - MK XIX (Not Pictured) 04007-0206
19-B Right Safety - MK XIX (Not Pictured) 04007-0216
20 Firing Pin 00024-1202
21 Firing Pin Spring 00024-1203
22 Left Safety Lever 04024-1217
23 Bolt Guide Pin 00025-0205
24 Firing Pin Stop 00025-0204
25* Recoil Spring Assembly 00025-0160
26* Trigger Assembly 00024-1340
27 Barrel Lock 00024-1302
28 Barrel Lock Spring 00024-1304
29 Barrel Lock Pin 00024-1303
30 Hammer Pin 00024-1312
31 Sear Pin 00024-1311
32* Adjustable Trigger Assembly - MK VI/XIX DEP200
33 Magazine Catch 00024-1307
34 Frame N/A
35 Magazine Catch Spring 00024-1309
36 Magazine Catch Pin 00024-1308
37 Slide Catch Spring 00024-1313
38 Slide Catch Assembly 04024-1330
39 Magazine Assembly MAG44
40 IMI Grip 00024-1305
41 Grip Pin Spring 00024-1314
42 Grip Pin 00024-1320
43 Retaining Ring (C-CLIP) 00025-0164
* See page 44 for breakdown

DESERT EAGLE
.440 Cor®Bon PISTOL
EXPLODED VIEW
Mark XIX
PARTS LIST
Desert Eagle .44O COR-BON Pistol, Mark XIX
VIEW
NO. DESCRIPTION PART NO.
1 Barrel 6" .440 - MK XIX N/A
2 Front Sight 00024-1101-5
3 Gas Piston 00025-0214
4 Bolt Stabilizer Pin 00024-1211
5 Bolt Stabilizer Spring 00024-1213
6 Bolt Stabilizer Guide Pin 00024-1212
7 Ejector 00025-0253
8 Slide 04007-0201
9 Ejector Spring 00025-0252
10 Extractor Pin 00025-0255
11 Ejector Pin 00025-0254
12 Extractor 00025-0261
13 Extractor Spring 00024-1262
14 Bolt 00025-0251
15 Rear Sight 00024-1241
16 Safety Screw 04007-0209
17 Right Safety Lever 04024-1207
18 Safety Spring 00024-1208
19 Right Safety 04007-0216
19-A Left Safety 04007-0206
20 Firing Pin 00024-1202
21 Firing Pin Spring 00024-1203
22 Left Safety Lever 04024-1217
23 Bolt Guide Pin 00025-0205
24 Firing Pin Stop 00025-0204
25* Recoil Spring Assembly 00025-0160
26* Trigger Assembly 00024-1340
27 Barrel Lock 00024-1302
28 Barrel Lock Spring 00024-1304
29 Barrel Lock Pin 00024-1303
30 Hammer Pin 00024-1312
31 Sear Pin 00024-1311
32* Adjustable Trigger Assembly DEP200
33 Magazine Catch 00024-1307
34 Frame N/A
35 Magazine Catch Spring 00024-1309
36 Magazine Catch Pin 00024-1308
37 Slide Catch Spring 00024-1313
38 Slide Catch Assembly 04024-1330
39 Magazine Assembly .50/.440 MAG50
40 IMI Grip 00024-1305
41 Grip Pin Spring 00024-1314
42 Grip Pin 00024-1320
43 Retaining Ring (C-CLIP) 00025-0164
42
* See page 44 for breakdown

DESERT EAGLE
.50 AE PISTOL
EXPLODED VIEW
Mark XIX
PARTS LIST
Desert Eagle .50 AE Pistol, Mark XIX
VIEW
NO DESCRIPTION PART NO.
1 Barrel 6" .50AE - MK XIX BAR506
2 Front Sight 00024-1101-5
3 Gas Piston 00025-0214
4 Bolt Stabilizer Pin 00024-1211
5 Bolt Stabilizer Spring 00024-1213
6 Bolt Stabilizer Guide Pin 00024-1212
7 Ejector 00025-0253
8 Slide 04007-0201
9 Ejector Spring 00025-0252
10 Extractor Pin 00025-0255
11 Ejector Pin 00025-0254
12 Extractor 00025-0261
13 Extractor Spring 00024-1262
14 Bolt 00025-0251
15 Rear Sight 00024-1241
16 Safety Screw 04007-0209
17 Right Safety Lever 04024-1207
18 Safety Spring 00024-1208
19 Right Safety 04007-0216
19-A Left Safety 04007-0206
20 Firing Pin 00024-1202
21 Firing Pin Spring 00024-1203
22 Left Safety Lever 04024-1217
23 Bolt Guide Pin 00025-0205
24 Firing Pin Stop 00025-0204
25* Recoil Spring Assembly 00025-0160
26* Trigger Assembly 00024-1340
27 Barrel Lock 00024-1302
28 Barrel Lock Spring 00024-1304
29 Barrel Lock Pin 00024-1303
30 Hammer Pin 00024-1312
31 Sear Pin 00024-1311
32* Adjustable Trigger Assembly DEP200
33 Magazine Catch 00024-1307
34 Frame N/A
35 Magazine Catch Spring 00024-1309
36 Magazine Catch Pin 00024-1308
37 Slide Catch Spring 00024-1313
38 Slide Catch Assembly 04024-1330
39 Magazine Assembly MAG50
40 IMI Grip 00024-1305
41 Grip Pin Spring 00024-1314
42 Grip Pin 00024-1320
43 Retaining Ring (C-CLIP) 00025-0164
43
* See page 44 for breakdown

EXPLODED VIEW
DESERT EAGLE ADJUSTABLE TRIGGER ASSEMBLY
44
PARTS LIST
Desert Eagle Adjustable Trigger Assembly
VIEW
NO. DESCRIPTION PART NO.
32 ADJUSTABLE TRIGGER ASSEMBLY DEP200
1 Hammer Housing 00024-1351
2 Hammer Spring 00024-1352
3 Hammer Spring Retainer 00024-1353
4 Sear 00024-1354
5 Sear Insert 00024-1355
6 Sear Spring 00029-1856
7 Sear Pin 00024-1357
8 Mechanism Housing 00029-1861
9 Hammer Insert 00024-1362
10 Hammer Assembly Cover 00024-1363
11 Mechanism Housing Pin 00024-1364
12 Hammer 00024-1381
13 Hammer Bar 00024-1382
14 Hammer Bar Pin 00024-1383
15 Adjustable Spring Assembly 00029-1865
16 Set Screw 00029-1867
- includes the following parts:
Desert Eagle Trigger Assembly
VIEW
NO. DESCRIPTION PART NO.
26 TRIGGER ASSEMBLY 00024-1340
- includes the following parts:
Trigger 00024-1341
Trigger Pin 00024-1342
Trigger Spring 00024-1343
Trigger Bar 00024-1344
Desert Eagle Recoil Spring Assembly
VIEW
NO. DESCRIPTION PART NO.
25 RECOIL SPRING ASSEMBLY - MK I/VII (.357) 00024-1160
RECOIL SPRING ASSEMBLY - MK XIX (.357) 00025-0160
- includes the following parts:
Recoil Spring Outer 00024-1161
Recoil Spring Plate (Cross piece) - MK I/VII 00024-1162
Recoil Spring Plate (Cross piece) - MK XIX 00025-0162
Recoil Spring Rod - MK I/VII 00024-1163
Recoil Spring Rod - MK XIX 00025-0163
Retaining Ring (C-CLIP) - MK I/VII 00024-1164
Retaining Ring (C-CLIP) - MK XIX 00025-0164
Recoil Spring Inner - MK XIX (ONLY) 00025-0165
25 RECOIL SPRING ASSEMBLY (.41/.44/.440/.50) 00025-0160
includes the following parts:
Recoil Spring Outer 00024-1161
Recoil Spring Plate (Cross piece) 00025-0162
Recoil Spring Rod 00025-0163
Retaining Ring (C-CLIP) 00025-0164
Recoil Spring Inner 00025-0165

DISCLAIMER OF WARRANTY
The Magnuson-Moss Act (Public Law 93-637) does
not require a seller or manufacturer of a consumer
product to give a written warranty. It does provide
that if a written warranty is given, it must be designated as “limited” or as “full” and sets minimum standards
for a “full” warranty. Magnum Research, Inc. has
elected not to provide any written warranties, either
“limited” or “full,” rather than to attempt to comply
with the provisions of the Magnuson-Moss Act and
the regulations issued thereunder.
There are certain implied warranties under state law
with respect to sales of consumer goods. As the
extent and interpretation of these implied warranties
varies from state to state, you should refer to your
state statutes.
45

Notes


Tips for the Care and Cleaning of your Desert Eagle
TM
.357, .41, .44, .440 & .50 AE Pistols
Keep It Clean!
1. Be sure to prevent lead build-up in the cylinder and on the piston of your pistol’s gas system. This
includes the area on the front of the slide around the base of the piston. Use your cylinder lead reamer
every time you clean (approximately 100-200 rounds).
2. Be sure to prevent lead build up on the end of the recoil springs. This includes the surfaces on the
guide rods, on the crossplate, and on the frame itself in the area around the end of the recoil springs.
3. If you should experience trouble with feeding, check inside of the magazine for burrs around
the viewing ports. File off any burrs.
4. If you should experience extraction problems after shooting a number of rounds, check the chamber
for powder residue and brass particle build-up. Swab your barrel and chamber periodically. The
exclusive quick barrel removal feature of the Desert Eagle Pistol makes it easier to clean the barrel.
5. Remember, all ammunition is not made equally! If you should experience consistent failure to feed, but
the pistol works otherwise, change ammo brands.
Magnum Research, Inc.
7110 University Avenue NE
Minneapolis, MN 55432
(763) 574-1868 • (763) 574-0109
www.magnumresearch.com
Revised 08/06
MRI reserves the right to change specifications.
3
 Loading...