

Page 1
MPX-CB
Conduit Box
Magnum Energy, Inc.
2211 West Casino Rd.
Everett, WA 98204
Phone: 425-353-8833
Fax: 425-353-8390
Web:
www.magnumenergy.com
Installation Guide
Page 2
Introduction
Introduction
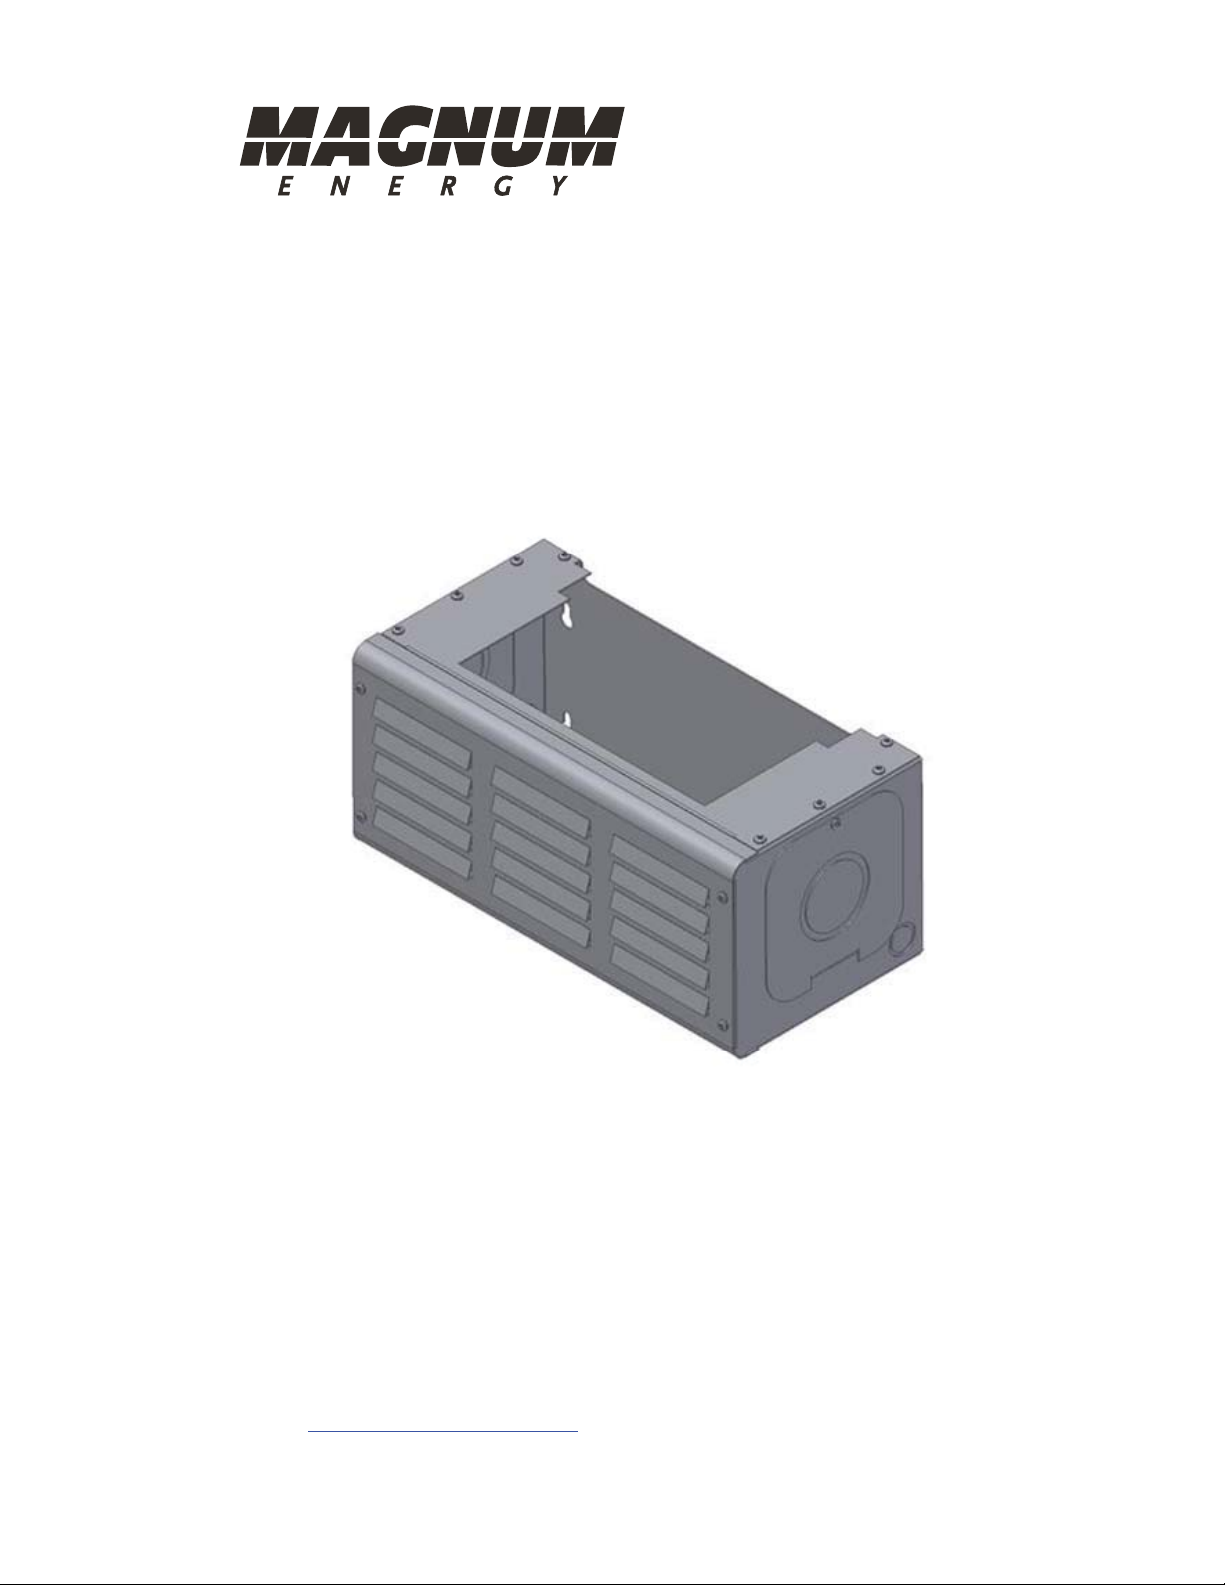
The MPX-CB conduit box fi ts on the bottom of the larger Magnum Energy
inverters (i.e., ME, MS, RD, etc.,), and provides knockouts to accommodate
installations that require the AC and/or DC wiring to be enclosed/protected
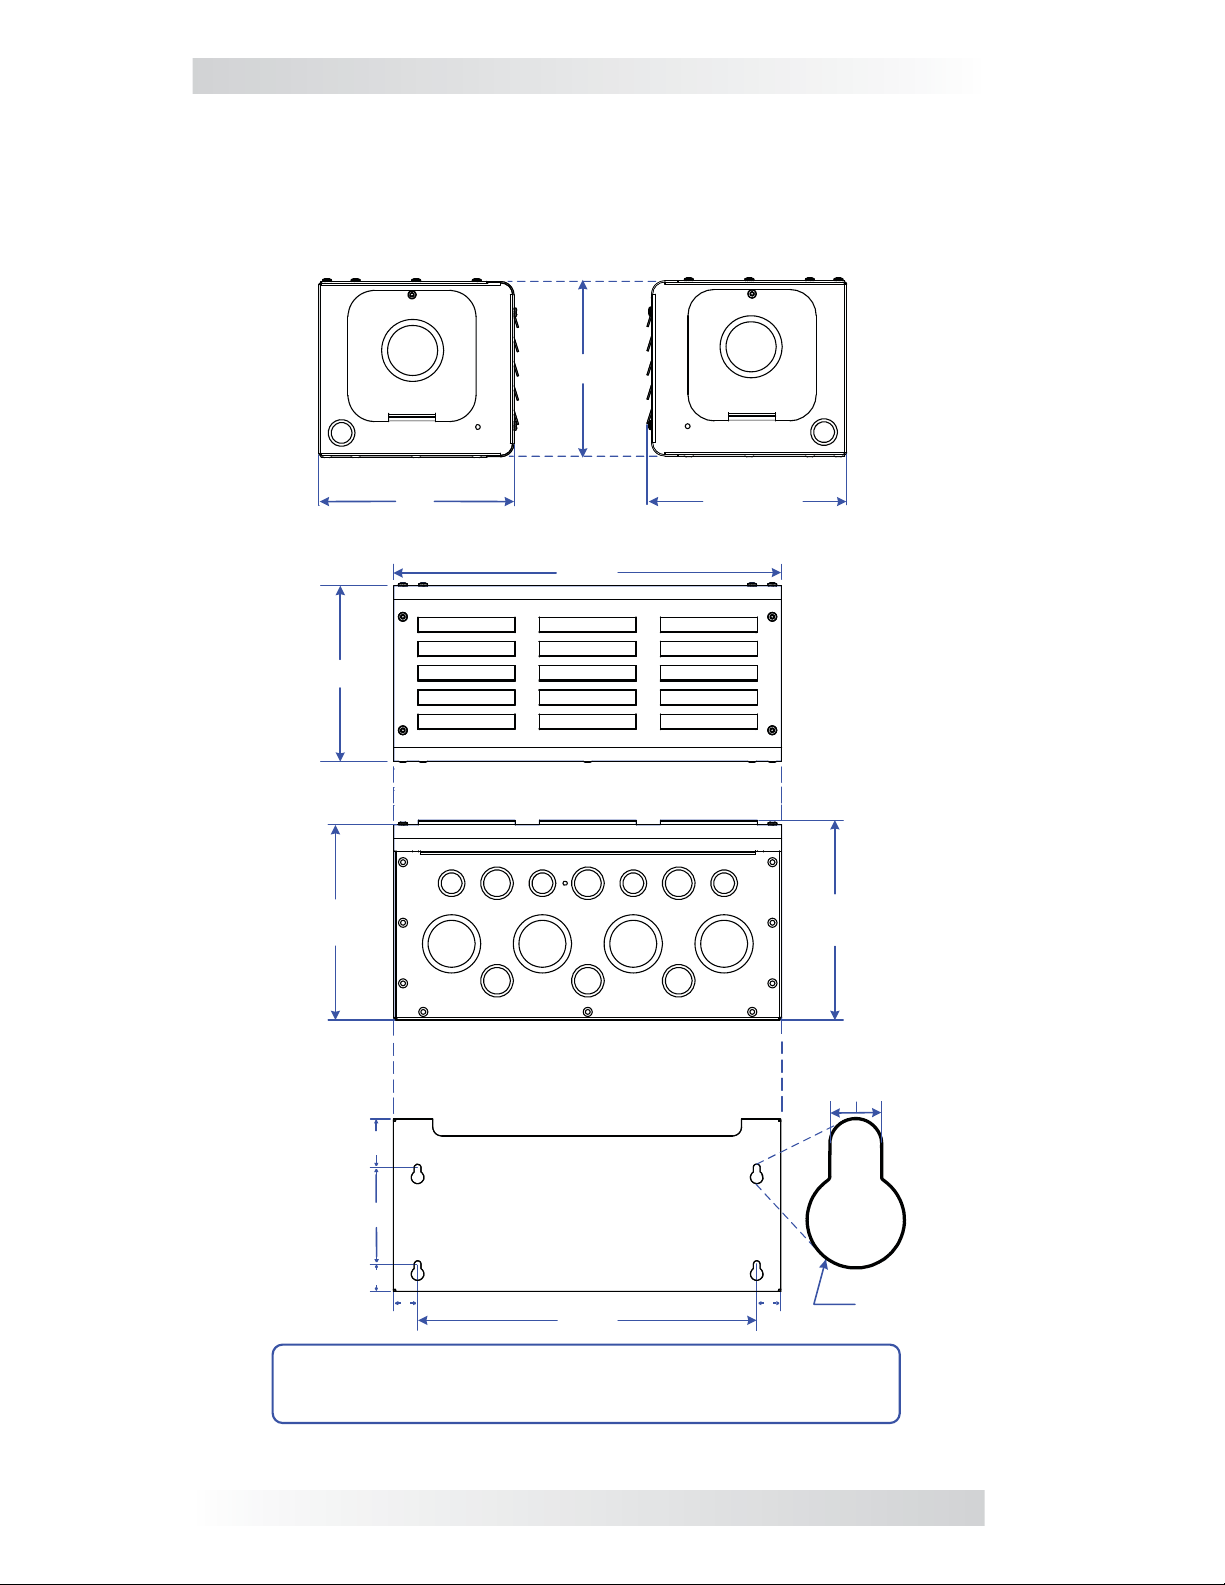
by conduit. See Figure 1 for MPX dimensions and knockout locations/sizes.
LEFT
SIDE
VIEW
A
7¼"
C
8"
FRONT VIEW
BOTTOM VIEW
AA
BBB
7¼"
16"
A
C
8¼"
A
RIGHT
SIDE
VIEW
A
8Ɨ"
CC
BB
B
A
C
2
"
4
"
1
Ɨ
1
1
K
C
V
I
W
E
4
"
C
B
8¼"
O
H
K
Y
E
D
A
T
E
0
.
1
L
E
I
L
(
4
)
x
8
"
2
0
.
5
2
5
CONDUIT KNOCKOUTS: A = ½" and ¾" (x6);
B = ¾" and 1" (x6); C = 1½" and 2" (x4)
Figure 1, MPX-CB Dimensions and Knockout Locations/Sizes
"
1 © 2012 Magnum Energy, Inc.
Page 3

Installation
Installation
WARNING: The inv erter uses power from both AC and DC sources.
Before beginning the installation, ensure all AC power (utility/
generator) and any negative
disconnected from the inverter.
Refer to Figure 2 below for the following steps:
1. Determine the AC and DC wiring routes through the MPX conduit box,
identify and remove the appropriate knockouts, and then attach the
corresponding conduit.
2. Remove the four screws (#10-32 Phillips head) and washers to take off
the front cover of the MPX conduit box.
3. Attach the MPX conduit box to the selected surface using the appropriate mounting hardware. Ensure the surface and hardware can hold the
inverter’s weight (~70 lbs).
Info: Refer to your inverter’s owner’s manual for guidelines on selecting a proper location and mounting surface. A Magnum backplate
(PN: BP-S single plate, BP-D dual plate) is highly recommended as
a mounting surface. (These backplates provide a non-combustible
surface and have pre-drilled holes that allow for easy mounting of
the inverter and the MPX.)
and positive battery cables are safely
4. Once the MPX conduit box is securely mounted, carefully place the inverter
on top of the MPX, ensuring the inverter sits fl ush on the conduit box.
5. Secure the inverter to the mounting surface using appropriate hardw are.
6. Route the AC and DC wiring through the appropriate knockouts/conduits
on the MPX, and then connect per the inverter’s installation procedure.
Ensure all electrical and hardware connections are correct and secure.
7. Apply power to the inverter and test for proper operation.
8. Replace and secure the front cover of the MPX conduit box.
Larger
Magnum
inverter
Remove screws/
washers x4 to detach
front cover
Figure 2, MPX-CB with Magnum Inverter Installed
© 2012 Magnum Energy, Inc. 2
Page 4

Warranty and Service
Limited Warranty
Magnum Energy, Inc. warrants the MPX-CB conduit box for a maximum of
12 months from the product’s original date of purchase according to the following terms and conditions:
1. The limited warranty extends to the original purchaser of the product and
is not assignable or transferable to any subsequent purchaser.
2. During the limited warranty period, Magnum Energy will repair or replace
at Magnum Energy’s option any defective parts, or any parts that will not
properly operate for their intended use with factory new or remanufactured replacement items—if such repair or replacement is needed because
of product malfunction or failure during normal usage. The limited warranty does not cover defects in cosmetic appearance, or any decor ative,
structural, or non-operative parts. Magnum Energy’ s limit of liability under
the warranty shall be the actual cash value of the product at the time
the original purchaser returns the product for repair—determined by the
price paid by the original purchaser. Magnum Energy shall not be liable
for any other losses or damages.
3. Upon request from Magnum Energy, the original purchaser must prove
the product’s original date of purchase by providing a dated bill of sale
or itemized receipt.
4. The original purchaser shall return the product prepaid to Magnum Energy in Everett, WA. After the completion of service under this limited
warranty, Magnum Energy will return the product prepaid to the original
purchaser via a Magnum selected non-expedited surface freight within the
contiguous United States and Canada; this excludes Alaska and Hawaii.
5. This limited warranty is voided if:
• the product has been modifi ed without authorization;
• the product has been damaged through abuse, neglect, accident, or
corrosion;
• the product was not installed according to this installation guide.
How to Receive Repair Service
If your product requires warranty service or repair, contact either:
1. An authorized service center listed on the Magnum Energy website at
http://www.magnumenergy.com/Service/ServiceCenters-US.htm ; or
2. Magnum Energy, Inc. at:
Telephone: 425-353-8833
Fax: 425-353-8390
Email:
If returning the product directly to Magnum Energy for repair, you must:
• return the unit in the original, or equivalent, shipping container;
• receive a Return Materials Authorization (RMA) number from the
factory prior to the return of the product to Magnum Energy;
• place the RMA numbers clearly on the shipping container or on the
packing slip.
warranty@magnumenergy.com
BEFORE RETURNING ANY UNIT, CONTACT MAGNUM ENERGY FOR A RETURN
MATERIAL AUTHORIZATION (RMA) NUMBER
3
PN: 64-0061 Rev A
 Loading...