

Page 1
- 1 -
Magnum Dynalab MD 806 T
Internet Media Tuner
INSTRUCTION MANUAL
Page 2
BEFORE DOING THIS PLEASE START
READING AT PAGE 4 FOR SETUP OF
UNIT
QUICKSTART:
TURN ON UNIT WITH MAIN POWER
SWITCH ON FRONT OF UNIT
Hooking up to the WIRELESS Internet
service
1. Tap the Settings Menu
2. go to Network Settings
3. go to network wizard, go to wireless
, a list of routers will be shown
4 go to the name of your service
provider or name of the router
5 it will ask for your password or
security code which if you have not
set one up it will be the key number
or the number by the wireless
symbol on your router. You must
use your password if you have set
one up, if you can not find it , call
your service provider.
6 the screen will then say connected
7 go back to the main screen ( push
the X on the main screen) and
choose what menu you want to work
with ie: internet radio, FM
Trouble Shooting:
1. If the wizard does not give you a list of
routers go back to the Network
- 2 -
2. Settings and tap on the manual menu
then tap on add wireless network , it
will show DHCP yes and no , tap on yes,
enter the password for your router or
the security code
See step 5 above, the screen will
show connected
3. go back to the main screen (push the X
on the main screen ) and choose the
menu you want to work with, ie:
internet radio, Fm
LAN HOOKUP ( hard wire hookup )
1. Run a cable form the router to the
back of the unit and under settings go to
Network Wizzard ,go to wired network, go
to step 5 above
Page 3

- 3 -
TABLE OF CONTENTS
TABLE OF CONTENTS ........................... 3
DEAR VALUED CUSTOMER ................. 4
UNPACKING YOUR MD TUNER ......... 5
SETTING UP THE MD INTERNET
MEDIA TUNER ....................................... 6
FEATURES OF THE MD 806 ................ 7
DISPLAY FUNCTIONS AND .................. 8
USAGE ................................................... 8
MENU SCREEN OPERATION ................ 9
SHARING MEDIA WITH WINDOWS
MEDIA PLAYER ................................... 14
MUSIC PLAYER MODE (NETWORK
AND USB) ........................................... 15
SHARED MEDIA (FROM UPnP MEDIA SERVER)
........................................................... 15
DAB RADIO MODE .............................. 17
FM RADIO MODE ................................ 18
IMAGE/FUNCTIONS OF RF-20
REMOTE ............................................... 20
NOW PLAYING INFORMATION .......... 10
INTERNET TUNER MODE ................... 11
INTERNET TUNER CONNECTION SETUP ..... 11
INTERNET RADIO PORTAL
REGISTRATION .................................... 12
FAVORITES .......................................... 13
SETTING UP A MUSIC SERVER ......... 14
USER INFORMATION .......................... 22
DIGITAL OUT HOOKUP ..................... 23
TROUBLE SHOOTING .......................... 24
DIAGRAM OF MD 806 INTERNET
MEDIA TUNER .................................... 20
DIAGRAM OF MD 806 INTERNET
MEDIA TUNER .................................... 21
SAFETY SHEET .................................... 25
LIMITED WARRANTY ......................... 27
SPECIFICATIONS MD 806 T ......... 28
Page 4

- 4 -
Dear Valued Customer
Thank you for choosing the Magnum Dynalab Internet Media Tuner. Great care has
been given to the design, manufacturing and selection of components for the
Internet Media Tuner.
for many years.
When using these high grade components, a considerable length of time is required
for the
continuously for 3 days in order to fully warm up its components.
Once again, thank you for including a MAGNUM DYNALAB product in your
entertainment system. We are sure that you will have years of listening pleasure
from your
at www.magnumdynalab.com, and if there is anything else we can do, please call us
on our toll free number, 1-800-551-4130, or contact us via email:
info@magnumdynalab.com.
Respectfully yours,
Larry Zurowski
President
MD 806 Internet Media Tuner
MD 806 Internet Media Tuner
This complete process ensures optimum listening enjoyment
to reach its full potential. Have the tuner run
. Please be sure to register your product
MD
Page 5

- 5 -
UNPACKING YOUR MD Tuner
Carefully inspect all sides of the
shipping carton for damage. If there
are marks or holes in the carton make
note of the location in relation to the
unit inside. Any obvious dents or scuff
marks should alert you to the
possibility of damage. Carefully remove
the MD Wi Fi Tuner Plus from the end
caps and wrapping, inspect all sides.
Pay special attention to the
corresponding areas on the unit where
damage was found to the shipping
carton. If damage is evident, document
the type and extent of the damage,
then repack the unit and call the
dealer.
KINDLY DO NOT SEND THE UNIT
BACK TO THE SHIPPER UNTIL YOU
HAVE BEEN ASKED TO DO SO.
DO NOT DISCARD THE PACKING
MATERIALS AND CARTONS. Should
there be a necessity to return the unit
for any reason, it must arrive safely
and suitably packaged in order for our
receiver to accept it from the carrier.
If the unit has incurred damage as a
result of improper packaging, it is not
likely that a claim for the damage
against the carrier will be successful.
Likewise, we will ship your unit back to
you only in factory-approved packaging,
however, if the unit were to arrive at
the factory on anything other than
factory approved packaging, we
reserve the right to return the unit in
factory-approved packaging and charge
the cost of the packaging to the
shipper. This is the only way we can
assure you of a safe return (damage
by carrier excepted).
External resources
To operate the MD 806, the following
external resources are needed:
• a power source (100-240 V mains
supply),
• a wired (Ethernet) or wireless (Wi-
Fi) network (provided through a
router) with appropriate
permissions and password if
necessary (for Internet Tuner and
Network Music player modes),
• broadband Internet access (for
Internet Tuner mode and Internet
Software Update),
• a music library stored on the
network or on a USB mass storage
device (for Music player modes),
• an external audio source (for Aux in
mode).
Page 6

- 6 -
SETTING UP THE MD Internet
Media Tuner
1. Position the tuner away from any
spot which may have extremes in
temperatures.
2. Place the tuner on a very rigid
surface capable of holding 75
pounds (34 KG).
3. It is important that the tuner is not
covered and it is not installed in a
closed area where there is little air
circulation. Ensure at least 2” of
clearance on the left and right of
the device, and 5” of clearance
above the unit to allow for proper
ventilation.
4. Connect the tuner to your
preamplifier or integrated amplifier
using a set of cables consistent
with the caliber of your system.
Select the input you chose on your
preamplifier/Integrated. Note: Be
sure that the preamplifier volume is
set to zero.
5. If hardwiring your Wi Fi Tuner Plus,
connect the Ethernet cable to the
Ethernet port, and the FM antenna
cable to the RF input, on the back
of the unit.
6. Unwrap the EIA AC cord and plug
the EIA end into the rear socket
marked
end of the AC cord into a
120/220/230/240 volt
continuous AC power supply. Be
sure that the voltage marked on
Power Input
. Plug the other
the rear of the unit is the same as
the AC source that you are using.
7. Press the power button on the
front panel of the unit to the ON
position, you can touch the screen
with the styles provided , do not
use a sharp point to touch the
screen as it may damage the
surface. The screen will turn on
displaying the Magnum Dynalab
Logo as the MD 806 is warming
up.
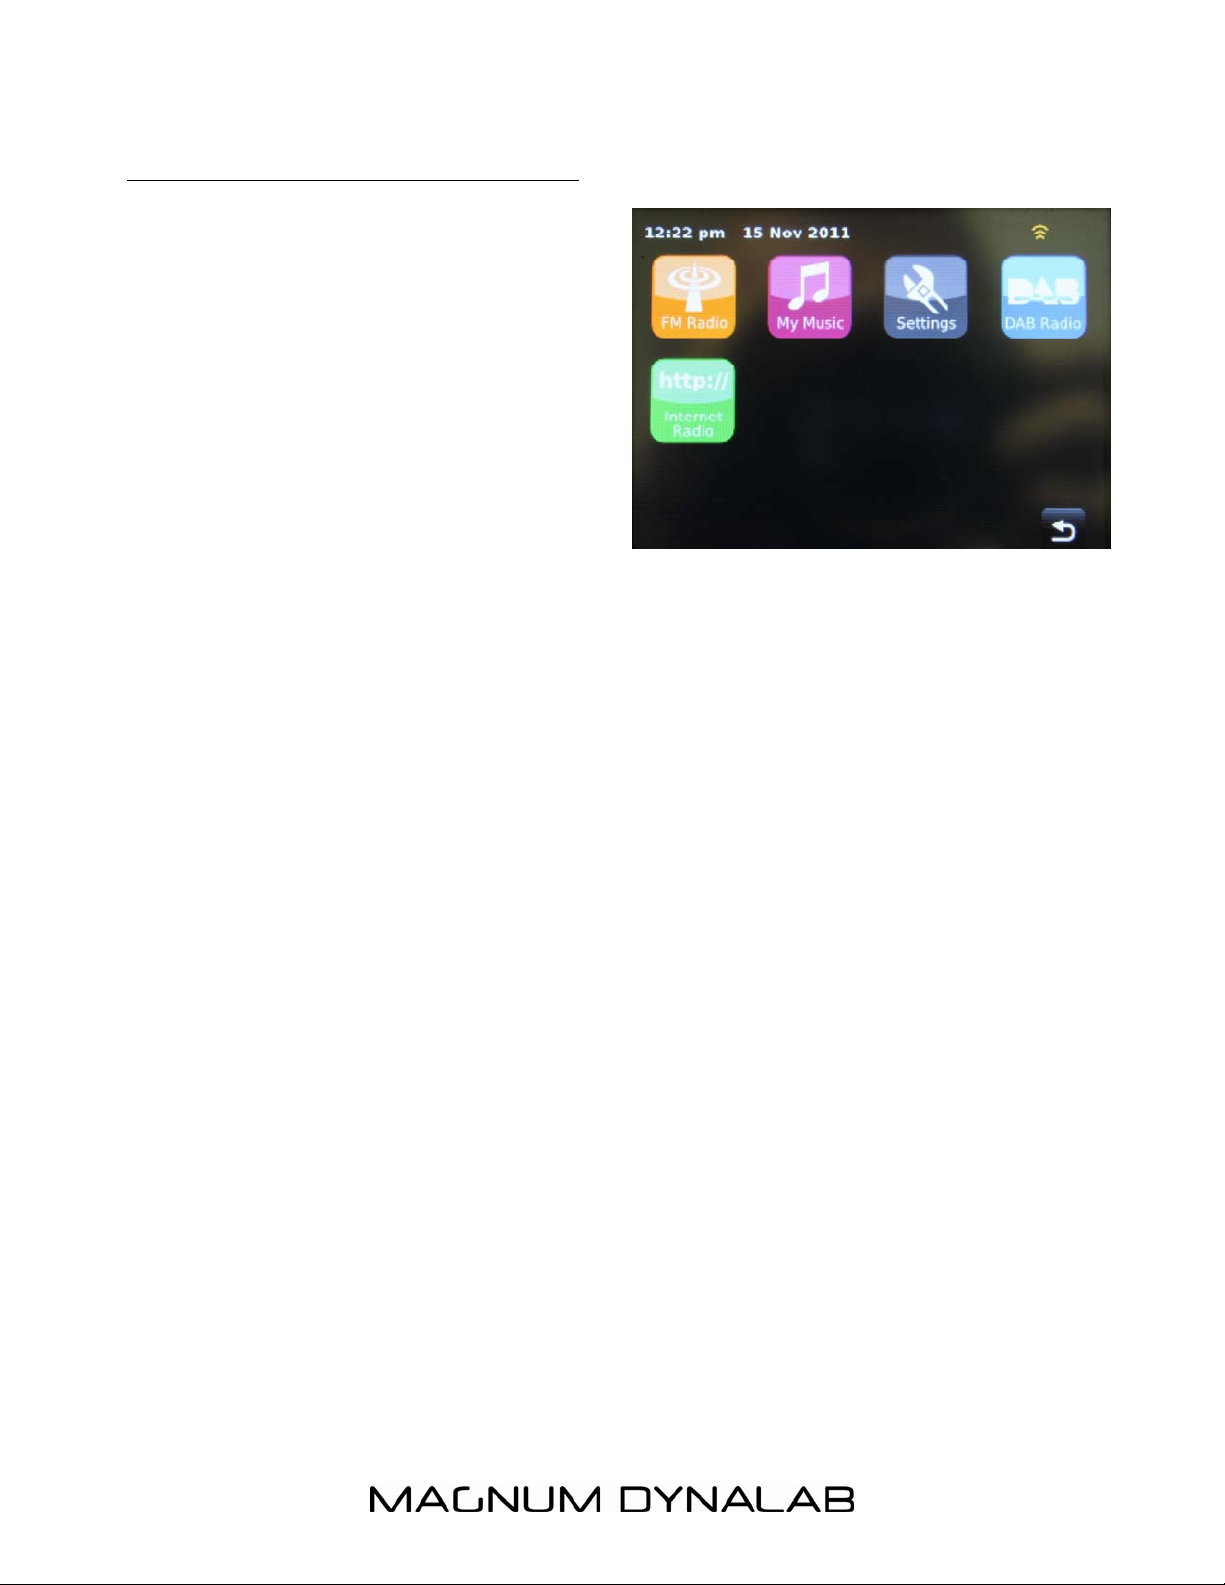
The unit will then display the different
modes that are available to you, push
the logo of the mode you wish to
operate in.
Go to the settings mode and follow the
instructions on page 11
** CHECK TO MAKE SURE THE UNIT
IS SET UP FOR THE PROPER VOLTAGE
**
(Check for unit’s voltage marked on
rear panel) then plug the tuner’s AC
power cord into an AC power source.
Be sure to use a continuous power
source so as to allow the stand-by
mode feature to function properly.
The tuner’s audio output is muted in
the stand-by mode.
Page 7

- 7 -
FEATURES OF THE MD 806
Magnum Dynalab has worked hard to create the perfect addition to your home
listening system while maintaining the impossibly high standards of quality Magnum
Dynalab is known for around the world. The MD 806 combines the engineering from
our flagship MD 109 World Source Platform with the audio board design of our new
MD 309 Hybrid Integrated Amplifier allowing you, our customer to enjoy over
20,000 Tuner stations worldwide, and for the first time with the Magnum Dynalab
performance our listeners have come to expect.
FEATURES/FUNCTIONS & APPLICATIONS
o Internet Tuner with access to over 15,000 stations worldwide, “listen again”
broadcasts and podcasts
o Music player allowing easy navigation and playback through a USB or networkstored library of music files including AAC+, Real, MP3 and WMA
o DAB/DAB+ digital Tuner with a wide choice of channels and digital quality sound
broadcast free-to-air
o FM with RDS (Tuner Data System)
o Large 3.5 inch display for easy control and clear information display plus status
icons
o Remote control giving you remote access from anywhere in your room
o Multiple network profiles for easy setup and portability
o Multiple languages
Page 8
- 8 -
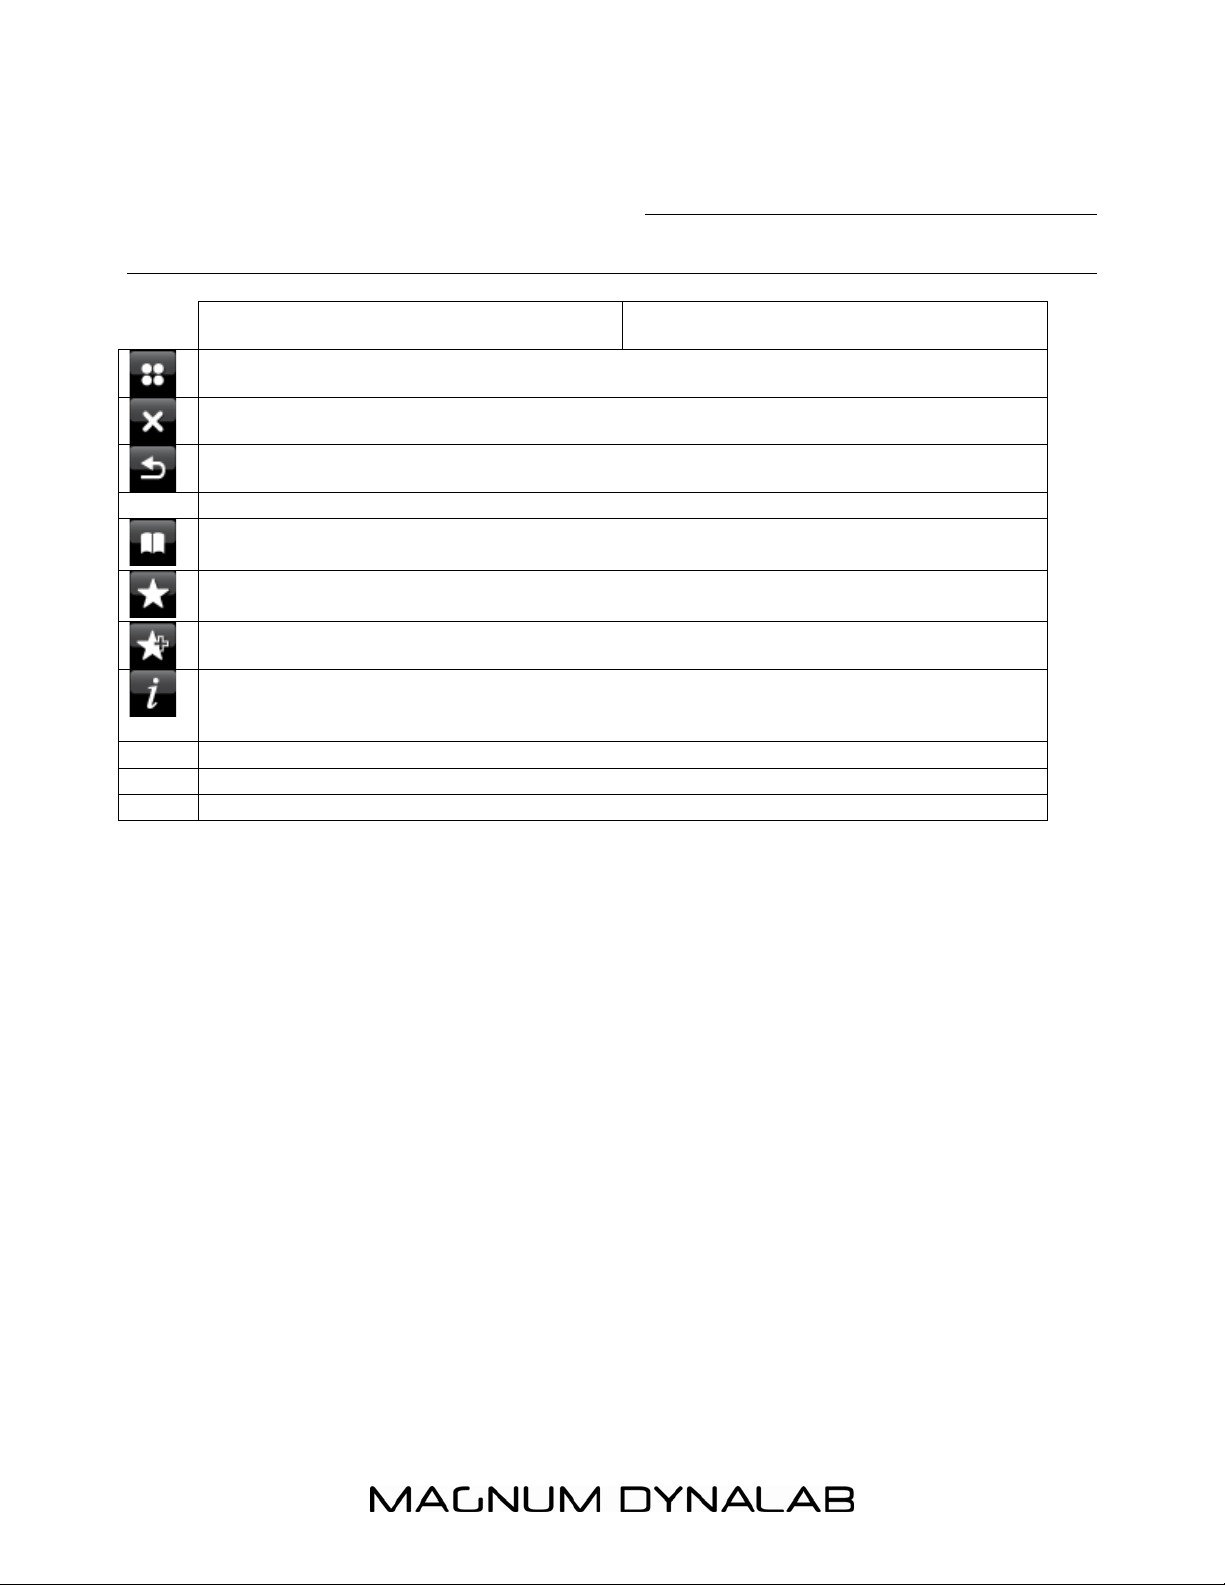
UI Screen Buttons Function/usage
Home: takes you back to main menu icon screen.
Close
Back: Return to previous screen.
Directory: In play mode, this button may be used to return to the last track list or
station list.
Preset: Radio modes: Press to select; There are 10 presets each for DAB and FM
modes.
Add to presets
Information: View more information about the station or track playing. Touch button
to show a separate information screen covering the whole play screen area.
DISPLAY FUNCTIONS AND
USAGE
Page 9
MENU SCREEN OPERATION
The MD 806 has three types of menu:
The Main menu allows access to all
modes and settings functions.
Each mode has a menu, with options
specific to that mode. For example, the
DAB Tuner mode menu has five options:
Scan, Edit favorites, DRC, manual tune
and Prune invalid stations.
- 9 -
The system Settings menu allows access
to system settings and information such
as time, equalizer, network, backlight
settings and miscellaneous settings.
Menus with more options than will fit on
one screen have a scroll bar. The scroll
bar to the right of the screen shows if
there are further options above or below
those visible.
Some menus, for example the Settings
menu, have several submenus.
Page 10

- 10 -
NOW PLAYING INFORMATION
While
the MD
806 is
playing,
the
screen
shows
the
track
name and progress bar with figures
for elapsed and total track time. To
view further information, touch the
information icon. There are at
least 2 additional information screens
displaying information such as song
genre, location, bit rate, codec and
sampling rate.
Bit Rate: The number of bits per
second (bps) transmitted, or
data/information transfer rate from
the station you are listening to, to your
MD 806 Wi Fi Tuner Plus. The higher
the better.
Codec: A description of the
compression, or decompression
program for the song you are listening
to. Most common today are : MP3,
MP4, MPEG, WAV
Sampling Rate: The sampling rate,
sample rate, or sampling frequency
defines the number of samples per
unit of time (usually seconds) taken
from a continuous signal to make a
discrete signal.
touch the Directory icon
list > then either Stations > or
Podcasts >.
Browse through the menus to find
broadcasts, stations or songs.
> Stations
Searching
You can also search through Internet
broadcasts for stations or podcasts
with particular keywords in their title.
To search, touch the Directory icon >
Stations or Podcasts.
Enter a keyword by selecting
characters then Search. The search
entry screen is similar in operation to
the Wi-Fi password entry screen.
Select a broadcast from the list.
*NOTE*: Each operating mode, and
function can be operated by touching
the screen directly on the unit or using
the Directional Pad and select button
on the remote control (pg 20).
Browsing
You are able to browse stations and
songs with the MD 806 in Internet
Tuner, FM, DAB and in Music Player
Mode. To browse Internet broadcasts,
Page 11

- 11 -
Internet Tuner Mode
The MD 806 can play thousands of
radio stations and podcasts from
around the world though a broadband
Internet connection.
To enter Internet Tuner mode touch
the Internet Tuner icon from the main
menu and this will take you to the
Internet Tuner playing screen.
INTERNET TUNER CONNECTION
SETUP
During initial setup of your internet
tuner, the MD 806 will search your
home for an available Wi Fi network. If
multiple networks are found, select the
network that you have bought from
your Internet Service Provider (ISP). (If
you do not know which network is your
home then contact your ISP or chose
the only option).
If your network is secured via
password the MD 806 will ask for the
“key” after attempting to connect to
your network; this key, or password
was given to you (or changed by you)
when your internet connection was
installed, if you do not have this please
contact your ISP to change your
network password/key.
recommend a “secured network” for
optimal operating conditions for MD
Internet Media Tuner products
When you select Internet Tuner mode,
MD 806 contacts the Frontier Silicon
Internet Tuner portal to get a list of
stations, organized into different
categories like source Country, Artist
and Genre. Once you select a station,
We
.
MD 806 connects directly to that
station.
The portal also enables multiple lists of
favorite stations that you can
personalize, for example Andy’s
stations, Jo’s favorites, or Talk shows.
To use the favorites feature, register
your Tuner with the portal website as
described on page 12. If you have
several Tuners, you can register them
all on the same account so that each
Tuner has access to your “favorites”
lists. It is possible to add favorites
either directly through MD 806 or
through any computer with a web
browser.
Note: The station list menu is provided
from the Internet Tuner portal, so it is
only accessible when MD 806 is
connected to the Internet. Station lists
and submenus may change from time
to time.
There are a few ways of selecting
stations:
Directly from the Tuner by touching the
Internet Radio icon:
• Return to playing screen,
Page 12

- 12 -
• Browse station list,
• Last Listened.
From the portal through the Directory
icon > Stations > menu:
• Favorites lists,
• Browse by Country, Genre, Most
popular, Newest,
• Search by keyword,
• My added stations.
Last listened
When entering Internet Radio mode,
the last-listened to station is
automatically selected. To select
another recently used station, touch
the Internet Tuner bar > Last listened
then one of the stations listed. Most
recent stations appear at the top of
the list.
INTERNET RADIO PORTAL
REGISTRATION
With your MD 806 Wi Fi Tuner Plus
you are able to create and organize
your favorite lists of stations via an
Internet Radio Portal website. This will
allow you to have a full list of the
stations you listen to regularly on one
page instead of having to search each
time. We recommend using the
Frontier Silicon radio portal website for
this function.
Visit the portal website at
www.wifiradio-frontier.com.
If this is your first visit to the portal,
register for a new account, entering
the following information:
• Access code,*
• Your e-mail address,
• Password,
• Tuner model
(MD 806).
*To register your
MD 806 with the
portal, first get your
radio’s unique portal
access code by
touching the Internet Radio icon from
the main menu > Directory icon
Help > Get access code
Write down the access code.
>
If you already have an account and
wish to add an additional radio, log in
to your account and select My
preferences > Add another Wi-Fi
radio.
Once your radio is registered with the
portal, you can immediately set up
your favorites.
Page 13

- 13 -
FAVORITES
Favorites are stored with the Internet
Tuner portal, and are available through
all Internet Tuners registered on the
same account. Before favorites can be
used, the Tuner has to be registered
with the Internet Tuner portal (see
page 12).
To create and store a “favorites” list
within the portal simply follow the
To select a favorite, touch the Directory icon > My Favorites > Stations
[Favorites list].
steps on the webpage; once you have
saved the list you created the
information is immediately transferred
to the registered MD 806 (via the
access code entered during
registration).
To store a playing station as a favorite,
touch the “add to presets” icon
until the display shows “Favorite
added”. The station appears in the
default favorites list Stations.
My added stations
Even though the Internet radio portal contains thousands of stations, you may want
to listen to stations not listed. You can add your own stations via the portal. These
added stations are accessible from the tuner by touching the Internet Radio icon
from the main menu > Directory icon > My Added Stations > [Station].
Page 14

- 14 -
SETTING UP A MUSIC SERVER
In order for the MD 806 to play music files from a computer, the computer must be
set up to share files or media.
UPnP (Universal Plug ‘n’ Play) media sharing allows devices like MD 801 to play
music from a shared media library, navigating through tag menus such as Artist,
Album or Genre. If you are running a suitable server system such as a PC with
Windows Media Player 10 or later (WMP), and your music library is well-tagged,
then it is recommended to use media sharing. Only the UPnP server needs to be set
up.
Note: iTunes does not currently work as a UPnP media server, but there are addons available to work with an iTunes library.
SHARING MEDIA WITH Windows Media Player
The most common UPnP server is Windows Media Player (10 or later).
Alternatively, other UPnP platforms and servers may be used. To set up WMP for
media sharing, perform the following steps:
1. Ensure that the PC is connected to the network.
2. Ensure that the Tuner is powered on and connected to the same network.
3. In WMP, add to the media library the audio files and folders you want to share
with MD 806 (Library > Add to Library…).
4. In WMP, enable media sharing (Library > Media sharing…).
-> This is done differently for MAC and PC users as well as different operating
systems, please use the computer “Help” tab for assistance or call us directly.
Make sure that your tuner has access to the shared media by selecting it and
clicking Allow. You can also set a name for the shared media in Settings… Click OK
to close the dialogue boxes.
The PC is now ready to stream the music to the Tuner. The WMP UPnP service
runs in the background; there is no need to start WMP explicitly.
Page 15

- 15 -
MUSIC PLAYER MODE (network and USB)
Music player mode plays audio files such as MP3s,
AACs, WMAs or FLACs from a computer on the local
network or from a USB Flash stick/hard drive.
To enter Music player mode, touch the My Music icon
on the main menu and the display shows the
Select Music Source screen.
Once in the Select Music Source screen, touch either
Shared Media, USB Playback or My Playlist.
If you are already playing a music file, you can
press the Directory icon rather than the
menu icon to quickly return to the last visited
branch of the menu tree. For example,
suppose you were listening to the track Heat
by the artist 50 Cent through browsing
shared media as described in the section
below. Pressing back would return you to the
track listing for the album Get Rich or Die
Tryin’. Pressing back again would list all 50
Cent albums. Pressing back again would list
all album artists, and so on.
You can use and to move through tracks. Press and hold to rewind or fast
forward and press quickly to select previous or next track.
SHARED MEDIA (FROM UPnP MEDIA SERVER)
Select My Music > Shared media >
If you have set up shared media (as described on
page 14), you should see an entry consisting of
<computer name>: <Shared media name>, for
example JB-Laptop: Audio. If you have more than
one computer sharing media, the alternatives are
listed. Select the shared media you want to play.
From this point on, the menus are generated from
the shared media server (typically Windows Media
Player). The first menu shows a list of media types,
for example Music, Video, Pictures and Playlists. The
MD 801 can only play music and playlists.
There is also a search function, which finds tracks in a similar way to Internet radio
search, as described on page 12.
Page 16

- 16 -
From Music, there are numerous ways of selecting tracks, including:
o By Music,
o By Genre,
o By Artist,
o All Music,
o <Search>.
Once you have found a track you want to play, touch the track title. A short press
plays the track immediately and a long press changes the list to Edit mode with an
add to presets icon allowing you to add the selected track or folder. You can also
add entire albums to the playlist.
USB playback
Each first time you connect a USB drive to the MD 806 a window will pop up on the
display asking if you wish to open its contents, to open the USB folders press the
select button while ”YES” is highlighted on the screen.
To play audio from a USB mass-storage device such as a USB Flash stick or USB
hard drive
already connected to the Tuner
, select USB playback from the Select
Music Source screen.
Browsing folders
From this point on, menus are generated from the folders on the USB device.
Browse folders by touching the directories shown and the scroll bar. The display
shows folder and file names (not necessarily track names).
Once you have found a track you want to play, touch the name of the track. A short
press plays the track immediately. You can also add entire folders to the playlist.
The MD 806 plays either the selected track or the playlist entered from the music
source menu.
Repeat/shuffle
You can repeat tracks or play them in random order by touching the repeat icon or
the shuffle icon.
Now playing information
While a track is playing, the screen shows its track, artist and album if provided,
(UPnP) or file name (USB). There is also a progress bar with figures for elapsed and
total track time. To view further information, touch the information icon.
A screen will appear displaying information such as bit rate, codec and sampling
rate.
My playlist
My Playlist is a collection of songs added by the user from either UPnP or USB.
Page 17

- 17 -
DAB RADIO MODE
DAB radio mode receives DAB/DAB+ digital radio and displays information about
the station, stream and track playing.
To enter DAB radio mode, touch the DAB icon on the main menu screen until the
display shows DAB Radio.
When entering DAB radio mode, the last station
listened to is automatically selected.
Scanning for stations
The first time you select DAB radio mode, or if the
station list is empty, The MD 801 automatically
performs a full scan to see what stations are
available. You may also need to start a scan
manually to update the list of stations for one of the
following reasons:
o Available stations change from time to time.
o If reception was not good for the original scan (for example the antenna was not
up), this may result in an empty or incomplete list of available stations.
o If you have poor reception of some stations (burbling), you may wish to list only
stations with good signal strength.
To start a scan manually, touch the DAB menu bar > Scan.
To scan only stations with a good signal strength, touch the DAB menu bar >
Manual tune.
Once the scan is complete, the radio shows a list of available stations.
To remove stations that are listed but unavailable, touch the DAB menu bar > Prune
invalid stations.
Selecting stations
To listen to or change a station, touch the Select control to view a list of stations
and press to select. Once selected, the station plays and the screen shows
information about the station, track or show as broadcast.
Now playing information
While the stream is playing, the screen shows its name and DLS (Dynamic Label
Segment) information broadcast by the station giving real-time information such as
programme name, track title and contact details. Stereo broadcasts are indicated
with an icon at the top of the screen. To view further information, touch the
information icon.
A screen will appear displaying information such as station ensemble, frequency,
error rate, signal strength, codec, bit rate and sampling rate.
Page 18

Presets
- 18 -
To store a DAB preset, touch the
icon until the display shows Favourite added.
Select one of the 10 presets to save the currently playing station.
To select a preset, touch the preset icon, and then select one of the listed preset
stations.
Settings
Dynamic range compression (DRC)
If you are listening to music with a high dynamic range in a noisy environment (for
example classical music while cooking), you may wish to compress the audio
dynamic range. This makes quiet sounds louder and loud sounds quieter. To change
DRC, touch the DAB menu bar > DRC > then DRC Off, Low or High.
Station order
You can choose the order of the DAB station list to be either Alphanumeric,
Ensemble or Valid. Ensemble lists groups of stations that are broadcast together on
the same ensemble, for example BBC or South Wales local. Valid lists valid stations
first, alphanumerically, then off-air stations.
To change station order, touch the DAB menu bar > Station order > then
Alphanumeric, Ensemble or Valid.
FM RADIO MODE
FM radio mode receives analogue radio from the FM band and displays RDS (Radio
Data System) information about the station and show (where broadcast).
To enter FM mode, press the FM icon on the Main menu until the display shows the
FM Radio playing screen.
Selecting stations
To find a station, touch the button and you can scan up or down the FM
band by pressing the “<<” or “>>” icons. The frequency display starts to run up or
down as the tuner scans the FM band and stops when it finds an FM radio station.
It can also be tuned manually by deselecting the icon and pressing the << or >>
icons.
Presets
To store an FM preset, touch the add to presets icon until the display shows the
Favourite added screen. Select one of the 10 presets to save the currently playing
station.
To select a preset, touch the preset icon briefly, then select one of the listed preset
stations displayed in My Favourites.
Page 19

- 19 -
Now playing information
While the stream is playing, the screen shows its frequency, or if RDS information is
available, station name and any further RDS information such as programme name,
track title and contact details. If no information is available, just the frequency is
shown. Stereo broadcasts are indicated with an icon at the top of the screen.
Settings
Scan settings
By default, FM scans stop at any available station. This may result in a poor signalto-noise ratio (hiss) from weak stations. To change the scan settings to stop only at
stations with good signal strength, change the Stop on stations value from All to
Strong via the FM menu.
Audio settings
By default, all stereo stations are reproduced in stereo. For weak stations, this may
result in a poor signal-to-noise ratio (hiss). To play weak stations in mono, touch the
FM menu bar > Force mono > Yes.
Page 20

- 20 -
IMAGE/FUNCTIONS OF RF-20 REMOTE
To use the remote control for your MD 806 you must first turn the unit ON with the
main power switch on the front of the unit. Next put the remote into its proper
mode to communicate with the Internet MediaTuner. Push the button next to MD
806 . Your remote is now in the proper operating mode.
1. ON BUTTON- Turns the touch screen on
2. OFF BUTTON-Turns the touch screen off , when not using the unit turn off the
main power with the power switch on the front off the unit.
GUIDE –allows access to all modes
3. INFO – Display’s additional information about the station and song
4. DIRECTIONAL PAD – Use this to navigate through the menu’s of your MD 806
Wi Fi Tuner (up/down/forward/back)
5. STORING PRESETS.
FM /DAB
Tune to the station: for preset positions from 1-5 push on the number you
wish to store the station at , the unit will tell you that the station has been stored
For positions from 6-10 you must push the large right arrow button under the
directional pad and the corresponding number 1-5, 1 being position 6 and 5
being position 10. To recall the station just push the number 1-5 or the large
right arrow button and the number 1-5
6. navigating in each mode:
Once you have chosen the mode the directional pad and the select button will
give you access to all the functions.
Page 21

- 21 -
DIAGRAM OF MD 806 Internet Media Tuner
Page 22

- 22 -
USER INFORMATION
Ownership of the intellectual property rights in the software in this product remains
in the ownership of the party who provided it (or the respective licensor) and all of
their respective rights are reserved. Its components and software are the
intellectual property of Magnum Dynalab and Frontier Silicon and cannot be copied in
any way.
If you download a software upgrade to your Tuner, additional licence terms may
apply; these are available at http://www.frontier-silicon.com/audio/eula.htm. The
information at this address may be updated without notice
MPEG Layer-3 audio coding technology licensed from Fraunhofer IIS and Thomson.
MPEG-4 HE-AAC audio coding technology licensed by Fraunhofer IIS.
http://www.iis.fraunhofer.de/amm/.
Portions of software used on this device are included under license from
RealNetworks, Inc. Copyright 1995-2007, RealNetworks, Inc. All rights reserved.
RealAudio is a registered trademark of RealNetworks, Inc.
This product contains software. You have the non-exclusive, non-transferable right to
use the software in object code form only, solely to operate this product.
Ownership of the intellectual property rights in the software in this product remains
in the ownership of the party who provided it (or the respective licensor) and all of
their respective rights are reserved.
You are strictly forbidden from modifying, translating, reverse engineering,
decompiling, disassembling or using other means to discover the source code of the
software in this product or otherwise replicate the functionality of the software in
this product except to the extent that this restriction is expressly prohibited by
applicable law.
Except where this is not possible in the territory where you purchased this product,
we do not give any warranties in relation to the operation or performance of the
software and neither we nor any of our suppliers or licensors shall be liable to you
for indirect, special, incidental and consequential losses such as loss of profits
arising out of your use of the software in this product.
Content owners use Windows Media digital rights management technology
(WMDRM) to protect their intellectual property, including copyrights. This device
uses WMDRM software to access WMDRM-protected content. If the WMDRM
software fails to protect the content, content owners may ask Microsoft to revoke
the software's ability to use WMDRM to play or copy protected content. Revocation
does not affect unprotected content. When you download licenses for protected
Page 23

- 23 -
content, you agree that Microsoft may include a revocation list with the licenses.
Content owners may require you to upgrade WMDRM to access their content. If
you decline an upgrade, you will not be able to access content that requires the
upgrade.
DIGITAL OUT HOOKUP
Using a good quality digital cable connect the cable from the back of the MD 806 T labeled Co-Ax
or optical to the DAC
Page 24

- 24 -
•
•
•
•
•
•
•
TROUBLE SHOOTING
PROBLEM POSSIBLE CAUSE POSSIBLE SOLUTION
No sound –
Display on
No Sound –
Display dark
FM Signal
Distorted
Unit continues
to try and load
Clock appears
in right hand
corner
Unit will not
stream on
shared media
DAB reception
poor
• Make sure unit is streaming
• Unit source incorrect
• Interconnect not properly installed
• Preamp set to wrong source
• Power amp off
• Power cord disconnected
• Power off at source
• Fuse blown
• Antenna not connected
• Antenna placed in poor location
• Weak Wi-Fi signal
• Software fault
• Computer not setup for sharing
• Music files not in play file
• Antenna not connected
• Poor antenna
Press “info” while on a station and
check bit rate, if 0 then station is
not playing (unit is fine)
• Go to main menu and select source
again
• Check installation of interconnects
• Turn preamp to other input
• Turn on amp
Connect power cord
• Check AC source
• Check rear panel fuse
Check antenna terminals
• Experiment with location
•
Add signal booster
• Use hard wire connection
Push on clock, push on alarm 1,
push on internet location, with
remote push the on button, make
sure the remote control is set to
Internet unit
Go to media player on your
computer and set it up for sharing
of other devices, add music to file
• Restart the unit
Check antenna connection
• Change to a better antenna
Page 25

- 25 -
SAFETY SHEET
IMPORTANT SAFETY INSTRUCTIONS
1. KEEP THESE INSTRUCTIONS
2. HEED ALL WARNINGS
3. FOLLOW ALL INSTRUCTIONS
4. DO NOT USE THIS APPARATUS IN WATER
5. CLEAN ONLY WITH DRY CLOTH
6. DO NOT BLOCK ANY VENTILATION OPENINGS, INSTALL IN ACCORDANCE
WITH THE MANUFACTURER’S INSTRUCTIONS.
7. DO NOT INSTALL NEAR ANY HEAT SOURCES SUCH AS RADIATORS, HEAT
REGISTERS, STOVES, OR OTHER APPARATUS (INCLUDING AMPLIFIERS) THAT
PRODUCE HEAT.
8. DO NOT DEFEAT THE SAFETY PURPOSE OF THE GROUNDING TYPE PLUG.
THE GROUNDING PLUG HAS TWO BLADES AND A THIRD GROUNDING
PRONG. THE THIRD PRONG IS PROVIDED FOR YOUR SAFETY. IF THE
PROVIDED PLUG DOES NOT FIT INTO YOUR OUTLET, CONSULT AN
ELECTRICIAN FOR REPLACEMENT OF THE OBSOLETE OUTLET.
9. PROTECT THE POWER CORD FROM BEING WALKED ON OR PINCHED
PARTICULARLY AT PLUGS, CONVENIENCE RECEPTACLES, AND THE POINT
WHERE THEY EXIT FROM THE APPARATUS.
10. ONLY USE ATTACHMENTS/ACCESSORIES SPECIFIED BY THE
MANUFACTURER.
11. UNPLUG THIS APPARATUS DURING LIGHTNING STORMS OR WHEN
UNUSED FOR LONG PERIODS OF TIME.
12. REFER ALL SERVICING TO QUALIFIED PERSONNEL. SERVICING IS REQUIRED
WHEN THE APPARATUS HAS BEEN DAMAGED IN ANY WAY, SUCH AS THE
Page 26

- 26 -
POWER SUPPLY CORD OR PLUG IS DAMAGED, LIQUID HAS BEEN SPILLED
OR OBJECTS HAVE FALLEN INTO THE APPARATUS, THE APPARATUS HAS
BEEN EXPOSED TO RAIN OR MOISTURE, DOES NOT OPERATE NORMALLY,
OR HAS BEEN DROPPED.
13. THE EQUIPMENT REQUIRES A GROUNDED POWER OUTLET TO OPERATE
SAFELY.
14. THE POWER SUPPLY CORD IS THE MAIN DISCONNECT AND SHALL BE
READILY OPERABLE.
“WARNING” TO REDUCE THE RISK OF FIRE OR ELECTRIC SHOCK, DO
NOT EXPOSE THIS APPARATUS TO RAIN OR MOISTURE.
Page 27

- 27 -
Y
LIMITED WARRANTY
Register your product at www.magnumdynalab.com
Magnum Dynalab Ltd. herein referred to as the “manufacturer” guarantees this
product to be free of defect in both material and workmanship and agrees to
remedy any such defect or replace any defective component at no charge for a
period of two years from date of sale to the first end user. This warranty is void if
the product has been found to be subjected to misuse, abuse, lightning strike,
unauthorized service, damaged in transit or has been altered or repaired in such a
way as to detract from its performance, reliability or its safe operation.
Should such defect be discovered and it falls within the terms of this guarantee,
the manufacturer will correct the defect in workmanship and/or replace any
defective component with a new one of same or better capability and value. This
warranty does not apply to the cabinet or appearance items such as the faceplate,
control knobs or meter lenses nor does it cover any expenses in shipping the unit to
the appropriate service depot.
The foregoing is in lieu of any other warranties expressed, implied or statutory
and the manufacturer neither assumes nor authorizes any person to assume for it
any other obligation or liability in the connection with the sale of this product. This
warranty is not transferable except by written authorization from the manufacturer.
In order to qualify under the terms of the above warranty, all items must be
returned to the appropriate factory service depot with all shipping charges prepaid
in lieu of having previously registered the purchase of the unit by completing and
returning the attached
from an authorized Magnum Dynalab Ltd. dealer.
*All tubes are covered for 12 months. Touchscreen is covered for 2 years.
OUR LOCATION RETURN SHIPPING ADDRESS
Within the USA Magnum Dynalab C/o Trans American
Within Canada Magnum Dynalab Ltd.
Other Countries Contact selling dealer
TO PREVENT FIRE SHOCK OR HAZARD, DO NOT EXPOSE THIS APPLIANCE TO RAIN
OR MOISTURE. TO REDUCE THE RISK OF ELECTRIC SHOCK, DO NOT REMOVE
Registration Card
, the unit must be accompanied by proof
2775 Broadway
Buffalo, NY
14227-1043
1-800-551-4130
8 Strathearn Avenue, Unit # 9
Brampton, ON, Canada
L6T 4L9
PHONE: 1-800-551-4130
Page 28

- 28 -
COVER OR FACEPLATE, NO USER SERVICEABLE PARTS INSIDE. REFER SERVICING
TO QUALIFIED SERVICE PERSONNEL.
SPECIFICATIONS MD 806 T
AUDIO SPECIFICATIONS
1. audio frequency response ( +/- 1 dB) 15 Hz-17KHz
2. balanced audio output ( 600 ohms) 2.2 volts
3. line audio output 1.0 volt
4. power consumption (typ/max) 50w/100w
5. line power ( must be specified) 110/120/230/240
TUBE SPECIFICATIONS
1. tube position 1 - 6922 MagnumDynalab Reference
2. tube position 2 - 6922 MagnumDynalab Reference
3. filament current max-33o mA min 270 mA
4. anode current max -1.07 mA min 0.92 mA
5. total harmonic distortion < 1.8 %
PHYSICAL DIMENSIONS
Depth 27.94cm/11in.
Height 11.43 cm/4.5 in.
Width 44.45 cm/17.5 in.
WEIGHT 4.9 Kg/ 11 pounds
 Loading...