

Page 1

Electric vacuum cleaner/Пылесос электрический
RMV-1931
Instruction manual Инструкция по эксплуатации
/
EN
RUS
Page 2

Page 3

DEAR CUSTOMER!
We congratulate you on purchasing home appliance of “MAGNIT” trademark. We
are sure that this unit will correspond to the highest requests for the quality and will
become the real reliable support in your home cares. Before starting using this
appliance, please carefully read the instruction manual and follow the rules of using.
In this case the trademark “MAGNIT” will assure the long life of the equipment you
have bought.
Thank you for choosing us!
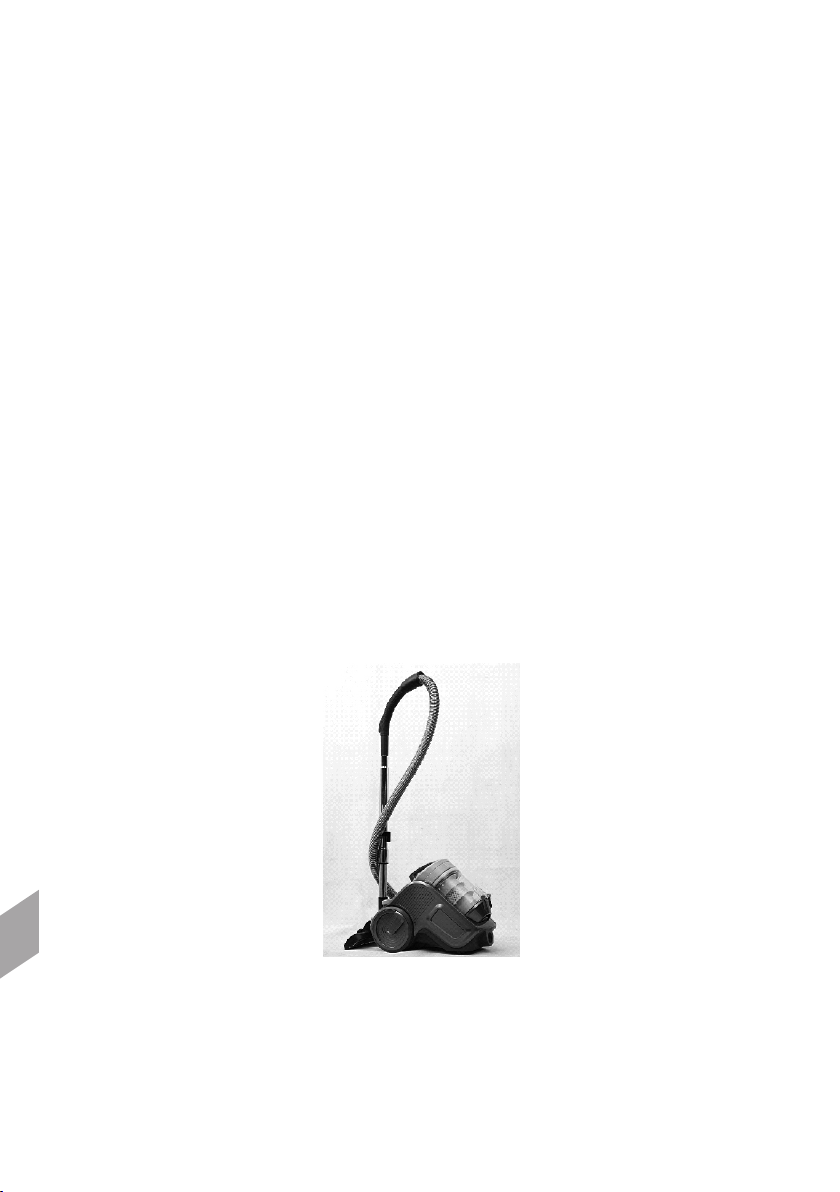
DESCRIPTION
1
2
3
4
5
6
Accessories:
1. Flat nozzle
2. Combination brush
1. Handle
2. Stainless steel telescopic tube
3. Hose
4. Switch Pedal
5. Air outlet grid
6. Metal floor brush
7. Cyclone dust barrel
7
EN
3
Page 4

EN
SAFETY WARNING
1. Be sure to use the cleaner in compliance with the contents of this manual,
and use the fittings designated by the manufacturer.
2. Please do not leave the cleaner when it is powered on. Turn off the power
switch and pull out the power plug when not using or before maintenance.
3. Please do not pull or carry the cleaner by the power cord, or nip it when
closing a door; keep the cord free from the press of the cleaner.
4. Please do not let children take the cleaner as a toy, and close attention is
necessary when the cleaner approaches children.
5. Please do not use the cleaner when its power cord or plug is damaged.
Send it to the appointed service center. Please do not unplug by pulling the
cord or plug. To unplug, grasp the plug, not the cord.
6. Never pull the power plug or use the cleaner with wet hands.
7. When using the cleaner, pay attention to prevent any hair roll or other
rubbish block up the air inlet (including the hose and the spile), otherwise
motor failure and housing distortion may be caused. If the matters
absorbed in forms a blockage, stop the cleaner by pulling out the power
plug immediately to clean the blockage.
8. When using the cleaner, don’t plug up the air outlet by towel or other
matters, otherwise the efficiency of dust absorbance will be influenced,
and the motor will be at high risk of being burnt out.
9. Never use the cleaner at uneven floor or ground; and be very careful when
cleaning stairs to prevent the cleaner from falling down.
10.Never absorb live stumps with the cleaner, otherwise the motor may be
damaged.
11.The cleaner should be kept far away from heat sources (such as central
heating, oven, etc) to avoid the distortion of plastic parts as well as the
influence caused by such distortion.
12. Before using the cleaner, please remove big and sharp matters on the floor
to avoid damaging the plastic parts, filter gauzes and motor.
13. Never absorb water or other liquid with this cleaner, otherwise, the motor
will be damaged.
4
Page 5
ASSEMBLY INSTRUCTIONS
1. Before assembling the vacuum cleaner, please confirm all parts and
components for the cleaner are received by referring to Parts and Components
List.
2. Please remember to cut off the power supply before assembly.
Assembly of hose
1. As it is shown in Figure (3), insert the hose into the duct inlet of the
machine body in horizontal direction. Please pay attention to the alignment
of two projecting parts. Turn the hose right when it is pushed into the
bottom, a click of inserting sound may be heard, i.e. the hose is assembled
into the machine body completely.
Figure (3)
2. Assembly and Removal of dust barrel
As it is shown in Figure (4), place the bottom of the dust barrel on the
projecting part at the front end of the machine body, and press down the dust
barrel. When the front-end hook is entered into the corresponding part of the
machine body completely, and a click of inserting sound is heard, which
indicate that the dust barrel is assembled in place. To remove the dust barrel,
press down the handle of the dust barrel; when the handle is pressed down to
the bottom, the dust barrel can be lifted to remove.
Figure (4)
EN
5
Page 6
ASSEMBLY OF ACCESSORIES
1. Figure (5) is the accessory bracket. Get the flat nozzle and the combination
brush stuck in the corresponding clips according to the accessory
installation indication shown on the accessory bracket.
Figure (5)
ASSEMBLY OF STAINLESS STEEL TELESCOPIC TUBE AND FLOOR BRUSH
Insert the front end of the hose handle into the telescopic tube according to
Figure (6); then insert the other end of the telescopic tube into the rounded
inlet of the floor brush, and adjust to the proper direction. At this time, the
assembly of the whole machine is completed.
EN
Figure (6)
6
Page 7

OPERATION INSTRUCTIONS
How to start
1. First of all, pull out the power cord from the cord reel to the needed
length; insert the power cord plug into the power socket, and press down
the power switch button with finger or step on it with foot; then you can
control the start and stop of the cleaner.
2. The yellow mark on the power cord indicates its desired length. Never
pull out the power cord to the length exceeding the red mark.
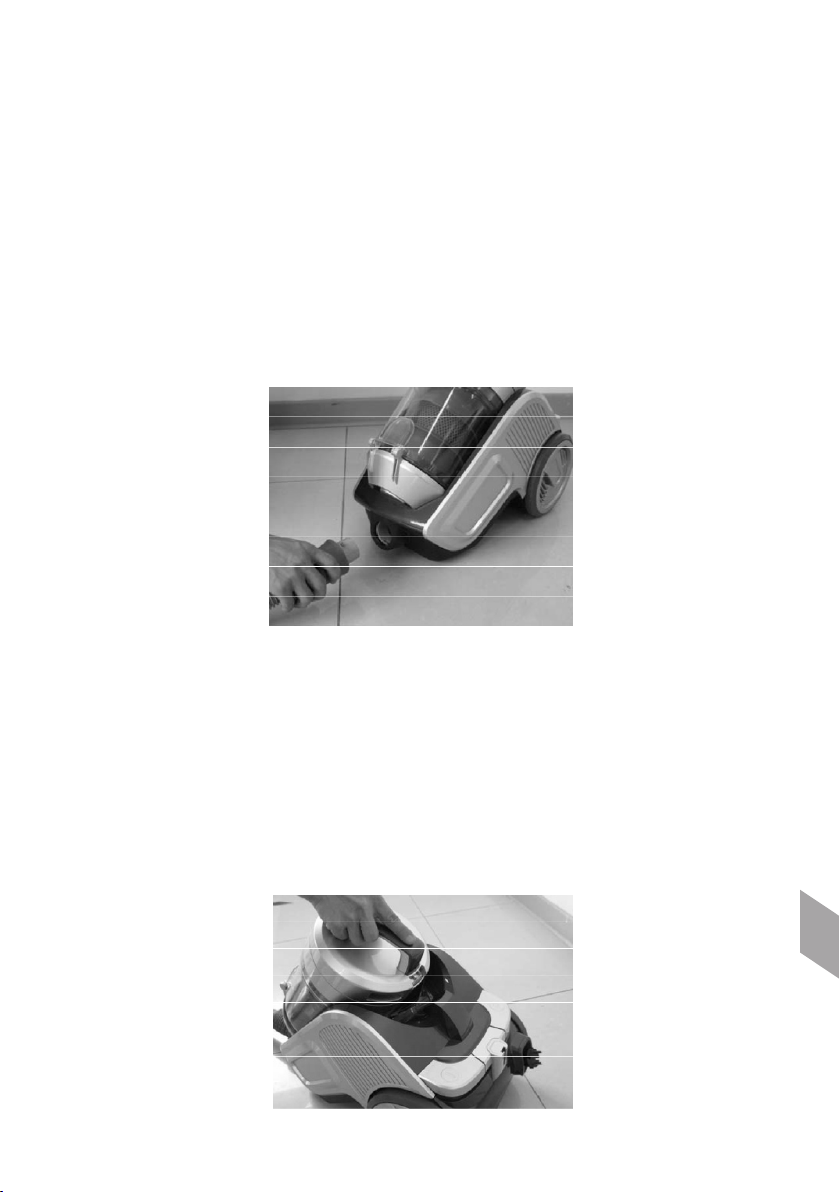
CONTROL OF SUCTION FORCE
When the suction inlet is jammed by some cloth due to the over-large suction
force, you can adjust the air escape pushbutton on the hose handle to control
Operation Instructions
the suction force at the suction inlet, as is shown in Figure (7).
Figure (7)
PROTECTIVE DEVICES OF MOTOR
1. There is a temperature controller designed in the body of cleaner motor,
which can automatically cut off the power supply of motor to prevent
overheating. When the air-inlet or air-outlet pipe is overloaded or blocked, the
temperature of motor rises, then the temperature controller cuts off the power
supply of motor automatically to make the motor cool, preventing the cleaner
from being damaged.
2. If the temperature controller is cut off, stop the cleaner immediately and
pull out the power plug to make the cleaner cool, and check and remove the
hair roll or other roll-like rubbish blocking the air inlet (including the hose
and the spile), and replace the filter HEPA or filter gauze when necessary.
3. After cooling the motor for 30mins, plug in the power plug and check
whether the temperature controller has been reset. If the power supply of the
cleaner hasn’t been cut off, the temperature controller of the motor won’t be
reset even when the motor has become cool.
EN
7
Page 8

MAINTENANCE OF THE CLEANER
1. All the day-to-day maintenance and repair jobs should be done after the
power plug has been pulled out.
2. Frequently remove the rubbish from the dust barrel, so as to avoid the
failure of the cleaner.
3. Never wipe the surface of the cleaner with gasoline or oily liquid. Wipe it
with water or neutral detergent. Caution: be sure to wring out the wiping cloth
dry for wiping, it is prohibited for water to infiltrate into electrical elements of
the cleaner.
4. When the cleaner is placed idle not in use, it should not be put directly
under the sun or in a damp place.
STORAGE OF THE CLEANER
1. Upon the completion of the operation of the cleaner, turn off its power
supply, and pull the power plug out of the power socket, then step on the
cord reeling button to reel in the power cord fully. Hang the floor brush onto
the floor brush hook, as is shown in Figure (8).
2. Place the cleaner in the dry indoor environment.
EN
8
Figure (8)
Page 9

CLEANING OF THE DUST BARREL
Remove the rubbish in the dust barrel frequently to avoid the failure of the
cleaner.
1. Clean the dust barrel only after the power plug of the cleaner has been
pulled out;
2. Put the dust barrel over the rubbish bin (bag), press down the releasing
button of the dust barrel, the bottom cover of the dust barrel will
automatically fall down, and clear and empty the dust barrel, as is shown
in Figure (9).
Figure (9)
Cleaning of front filter for motor:
Warning: please make sure the power supply of the cleaner has been cut off
before carrying out the following steps:
1. Pull out the power cord plug of the cleaner from the power socket.
2. Press down the handle of the dust barrel to remove the dust barrel, and
remove the cover of the front filter for motor, and then use the brush to
Cleaning of the Dust Barrel
Figure (8)
clean the filter (sponge and filter gauze with composite coating) or place it
under the cock to clean, as is shown in Figure (10).
Figure (10)
EN
9
Page 10

Caution:
It is normal that the white central filter in the dust barrel may change color,
which cannot affect its filtration performance. If the hose and the central filter
are difficult to clean, we recommend that you use water to flush them;
however, please be sure to place them in the dry air for at least 24 hours after
they are flushed by water.
Key Points:
Please note: when the dust collecting barrel or the filter cover is not installed
in place, the operation status will be invalid, and the cleaner will have no dust
absorption capacity. At this time, you need to check carefully whether the dust
collecting barrel and the filter cover have been installed in place.
Caution: please keep the suction passage unobstructed, otherwise the motor
may become overheating or even be damaged.
REPLACEMENT OF REAR FILTER FOR MOTOR
The rear filter for motor is installed behind the air outlet grid, which cannot be
washed due to the materials used. When the surface is jammed seriously by
dust, the filter should be replaced by a new one to maintain enough suction
force. (Figure 11)
Figure 11
It is usually necessary to clean and replace the filters for motor only
after they have been used for 6 months to 12 months. Please
remember to confirm that all filters have been correctly installed
into the machine before turning on the cleaner to use.
Key Points:
The power supply of the cleaner must be cut off before replacing any filter!
EN
Faults and repair
In case of abnormality with this product, please treat it in the way as stated
hereinafter; if the cleaner still refuses to work normally, please contact the
stop from where this product was bought or with the appointed service point.
The life-time of the product is 2 years.
You can find full information about the appliances of “MAGNIT” trademark on
www.magnit.net
10
Page 11

УВАЖАЕМЫЙ ПОКУПАТЕЛЬ!
Поздравляем Вас с приобретением техники торговой марки «MAGNIT». Мы
уверены, что приобретенный товар будет соответствовать самым высоким
запросам, предъявляемым Вами к бытовой технике и станет настоящим
надежным помощником в Ваших домашних хлопотах. Перед началом
эксплуатации, пожалуйста, внимательно ознакомьтесь с инструкцией и
соблюдайте правила эксплуатации. В этом случае торговая марка«MAGNIT»
гарантирует продолжительное бесперебойное функционирование
приобретенной Вами бытовой техники.
Спасибо за Ваш выбор!
ОПИСАНИЕ
1
2
3
4
5
6
Аксессуары:
1. Насадка для мебели
2. Щелевая насадка
Ручка
1.
2. Телескопическая трубка из
нержавеющей стали
3. Шланг
4. Кнопка включения
5. Отверстие для выпуска воздуха
6. Универсальная щетка
7. Резервуар для пыли
7
RUS
11
Page 12

МЕРЫ ПРЕДОСТОРОЖНОСТИ
1. Перед началом эксплуатации внимательно ознакомьтесь с настоящей
инструкцией.
2. Всегда отсоединяйте вилку от розетки, когда не используете прибор. а
также при очистке, при проведении каких-либо ремонтных работ или если
Вам необходимо открыть крышку на приборе .
3. Перед первым использованием проверьте, соответствует ли напряжение
Вашей электросети номинальному напряжению электроприбора.
4. Питающая розетка должна иметь заземление.
5. Не используйте органические растворители, в т.ч. содержащие спирт, для
очистки поверхности.
6. Не используйте прибор для сбора воды и иных жидкостей.
7. Никогда не оставляйте прибор работающим без присмотра.
8. Не допускайте использования прибора детьми.
9. Прибор предназначен только для бытового использования.
10.Используйте насадки и аксессуары, входящие в комплект поставки
прибора.
11.Не погружайте шланг, трубки и другие части прибора в воду.
12. Регулярно проверяйте состояние шланга и других аксессуаров к прибору.
13. Не включайте прибор в электросеть, если вы обнаружили какие-либо
неисправности.
14. Не ремонтируйте прибор самостоятельно. Для устранения неполадок
обращайтесь в авторизованный сервисный центр.
RUS
12
Page 13

ИНСТРУКЦИИ ПО СБОРКЕ
1. Перед сборкой пылесоса, убедитесь, что комплектация прибора
соотвествует списку, приведенному в конце настоящей инструкции.
Отсоедините вилку от электросети перед началом сборки.
Присоединение шланга
1.
Вставьте шланг в гнездо на корпусе пылесоса, как это показано на рис. 3.
После того, как Вы вставите шланг, поверните его вправо до щелчка. Теперь
корпус и шланг плотно соединены друг с другом. Помните, что от
герметичности соединений зависит мощность всасывания пылесоса.
Рис. (3)
2. Установка и снятие контейнера для пыли
Установите контейнер для пыли на корпусе изделия как это показано на
рисунке 4 и нажмите на контейнер. Вы услышите щелчок, что означает, что
контейнер встал на место. Чтобы снять контейнер для пыли, нажмите на
ручку контейнера. Когда она будет полностью нажата, Вы сможете снять
контейнер для пыли.
Рис. (4)
RUS
13
Page 14

СБОРКА НЕРЖАВЕЮЩЕЙ ТЕЛЕСКОПИЧЕСКОЙ ТРУБКИ И
УНИВЕРСАЛЬНОЙ ЩЕТКИ
Вставьте передний конец ручки в металлическую телескопическую трубку,
как показано на рис. 5, затем вставьте трубку в отверстие на универсальной
щетке. Поверните щетку так, чтобы чистить пол было удобно.
RUS
Рис. (5)
14
Page 15

ЭКСПЛУАТАЦИЯ
Начало работы:
1. Перед использованием прибора вытяните шнур на необходимую длину и
вставьте вилку в розетку. Затем нажмите кнопку включения.
2. Рекомендованная длина шнура отмечена ЖЕЛТОЙ отметкой. Не
вытягивайте шнур за КРАСНУЮ отметку, означающую максимально
допустимую длину шнура.
УПРАВЛЕНИЕ СИЛОЙ ВСАСЫВАНИЯ
Во время очистки гладких полов, Вы можете управлять силой всасывания с
помощью специального отверстия на ручке. Открывайте или закрывайте
крышку на отверстии, чтобы управлять силой всасывания.
ЗАЩИТНОЕ УСТРОЙСТВО НА МОТОРЕ
1. Мотор прибора снабжен температурным датчиком, который автоматически
отключает мотор в случае перегрева. Перегрев может произойти, если
выходное или входное отверстие прибора заблокировано препятствием, или
температура в помещении очень высока.
2. Если температурный датчик отключил двигатель, немедленно выключите
прибор, вытащите вилку из розетки, проверьте входное и выходное
отверстия прибора, возможно понадобится очистить резервуар для пыли или
НЕРА-фильтр. Помните, что если Вы не вытащите вилку из розетки, датчик
будет блокировать запуск двигателя.
3. Дайте прибору остыть 30 минут, вставьте вилку в розетку и включите
прибор.
15
RUS
Page 16

ОБСЛУЖИВАНИЕ ПРИБОРА
1. Все работы по обслуживанию и чистке необходимо выполнять после того,
как Вы вытащите вилку из розетки.
2. Очищайте контейнер для пыли как можно чаще.
3. Не используйте бензин и другие органические растворители для очистки
прибора. Для чистки используйте воду или нейтральный очиститель.
ВНИМАНИЕ: перед началом очистки тщательно выжмите влажную тряпку,
попадание воды в электрическую цепь может привести к повреждению
прибора или пожару.
4. Храните прибор в сухом месте, вдали от прямых солнечных лучей.
ХРАНЕНИЕ ПРИБОРА
1. После окончания уборки, выньте вилку из розетки, нажмите на кнопку
смотки шнура и дождитесь, пока весь шнур питания скроется в корпусе
прибора. Поместите трубку на парковочное устройство, как это показано на
рис. 6.
Рис. (6)
2. Уберите прибор в сухое помещение, подальше от прямых солнечных
лучей.
RUS
16
Page 17

ОЧИСТКА КОНТЕЙНЕРА ДЛЯ ПЫЛИ
Очищайте .
контейнер для пыли как можно чаще
1. Очищайте контейнер для пыли только после того, как вытащите вилку из
розетки.
2. Поставьте контейнер для пыли на мусорное ведро и нажмите кнопку на
контейнере. Дно контейнера откинется и пыль упадетв ведро как это
показано на Рис. 7.
Рис. (7)
ОЧИСТКА ВПУСКНОГО ФИЛЬТРА МОТОРА
ВНИМАНИЕ: перед началом очистки убедитесь, что пылесос выключен и
вилка вынута из розетки.
1. Вытащите вилку из розетки.
2. Выньте контейнер для пыли из пылесоса. Затем выньте входной фильтр
мотора и очистите его с помощью щетки или потока воды, как это показано
на рис. 8.
Рис. (8)
RUS
17
Page 18

ВНИМАНИЕ:
Большой пластиковый фильтр в центре контейнера для пыли может менять
цвет от пыли. Это нормально для данной модели пылесоса и не влияет на
силу всасывания и тщательность фильтрации. Вы можете мыть фильтр и
шланг водой, но внимательно следите за тем, чтобы перед установкой в
пылесос и шланг и фильтр были полностью сухими.
Примечание:
Если контейнер для пыли или впускной фильтр мотора не установлены на
место, прибор потеряет эффективность. Пожалуйста, проверьте, установлен
ли контейнер для пыли и впускной фильтр перед началом уборки.
ЗАМЕНА ВЫПУСКНОГО ФИЛЬТРА
Выпускной фильтр мотора установлен за решеткой в колесе прибора. Этот
фильтр нельзя мыть из-за используемых материалов. Поэтому, когда фильтр
становится грязным от набившейся в него пыли, его необходимо заменить,
как это показано на рис. 9.
Рис. 9
Обычно фильтры необходимо чистить или менять через 6-12 месяцев
эксплуатации, в зависимости от интенсивности использования.
Примечание:
Фильры можно чистить или менять только при выключенном приборе!
РЕМОНТ
В случае возникновения неполадок, обратитесь к продавцу прибора, чтобы
он указал Вам авторизованный сервисный центр, способный
отремонтировать прибор.
RUS
18
Page 19

КОМПЛЕКТНОСТЬ:
1. Пылесос со шнуром питания в сборе - 1 шт.
2. Телескопическая металлическая трубка - 1 шт.
3. Контейнер для пыли - 1 шт.
4. Гибкий шланг - 1 шт.
5. Ручка шланга - 1 шт.
6. Универсальная насадка “пол/ковер” - 1 шт.
7. Насадка для чистки мебели - 1 шт.
8. Щелевая насадка - 1 шт.
9. Сменный фильтр - 1 шт.
10. Инструкция по эксплуатации - 1 шт.
11. Цветная упаковка - 1 шт.
Внимание: прибор предназначен для эксплуатации в сетях переменного тока с
напряжением 220 В, 50 Гц
Максимальная мощность - 2300 Вт
Объем контейнера для пыли - 3 л
Длина шнура питания - 5 м
Срок службы товара: 2 года.
Самую полную информацию о товарах торговой марки «MAGNIT» Вы всегда
сможете найти на веб-сайте: www.magnit.net
Фирма-производитель оставляет за собой право вносить изменения в дизайн, конструкцию и комплектность поставки
продукции без дополнительного уведомления.
RUS
19
Page 20

УСЛОВИЯ ГАРАНТИЙНОГО ОБСЛУЖИВАНИЯ
1. Настоящая гарантия имеет силу при соблюдении следующих условий:
- правильное и четкое заполнение гарантийного талона с указанием
наименования модели, ее серийного номера, даты продажи и печати
фирмы-продавца в гарантийном талоне и отрывных купонах;
- наличие оригинала квитанции (чека), содержащего дату покупки.
2. Фирма «MAGNIT» оставляет за собой право на отказ в гарантийном
обслуживании в случае непредоставления вышеуказанных документов,
или если информация в них будет неполной, неразборчивой,
противоречивой.
3. Гарантия не включает в себя периодическое обслуживание, установку,
настройку изделия на дому у владельца.
4. Не подлежат гарантийному ремонту изделия с дефектами, возникшими
вследствие:
- механических повреждений;
- несоблюдения условий эксплуатации или ошибочных действий владельца;
- неправильной установки, транспортировки;
- стихийных бедствий (молния, пожар, наводнение и т. п.), а также других
причин, находящихся вне контроля продавца и изготовителя;
- попадания внутрь изделия посторонних предметов, жидкостей, насекомых;
- ремонта или внесения конструктивных изменений неуполномоченными
лицами;
- использования аппаратуры в профессиональных целях;
- отклонений от Государственных Технических Стандартов
питающих, телекоммуникационных и кабельных сетей;
- при выходе из строя деталей, обладающих ограниченным сроком службы.
5. Настоящая гарантия не ущемляет законных прав потребителя,
предоставленных ему действующим законодательством.
Page 21

Гарантийный талон
на электрические изделия
Наименование изделия:________________________________________
Модель: _____________________________________________________
Серийный №: ________________________________________________
Наименование продавца: ______________________________________
Подпись продавца: ____________________________________________
Сделано в Суджоу, КНР
Гарантийный срок на данное изделия составляет:
Гарантийный срок не предоставляется на расходные части изделия
Товар мною осмотрен, претензий по качеству и комплектации не имею.
Инструкцию по эксплуатации на русском языке получил.
«___»_______________________г. ___________________________
дата продажи подпись покупателя
12
_______ месяцев
М.П.
Page 22

Page 23

КУПОН №5
М.П.
М.П.
М.П.
КУПОН №1 КУПОН №2 КУПОН №3 КУПОН №4
М.П.
М.П.
Page 24

 Loading...