

Magnit RMS-1600 User Manual [ru]


Description
PRODUCT SPECIFICATION
Water Tank Capacity: 2.4L
Steam Output Time: 45 seconds
Input Voltage: 220V, ~50Hz
Output Power: 1750W
Only for 4 power programs
1 for silk,
2 for fibre,
1.
2.
3 for cotton
4 for Jean
3.
4.
5.
Accessories
13.
14.
10.
7.
12.
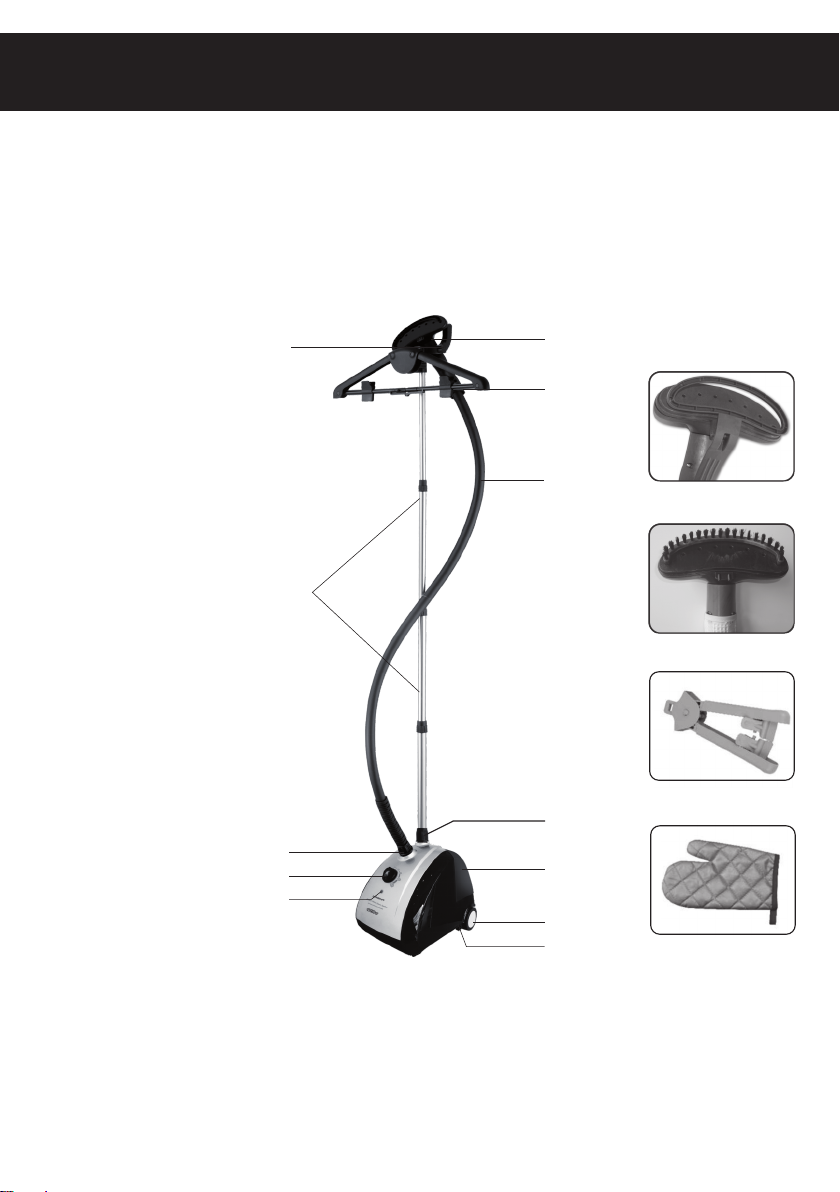
1. Hanger
Telescopic Pole
2.
3. Steam spout
4. Handle
5. Hose
6. Water Tank
7. Switch
8. Rolling Casters
9. Drain Plug
10.Hose Nut
11.Pole Nut
12.Indicating Lamps
13.Pants Clamp
14.Fabric Brush
15.Folding rack
16.Handle Jacket
11.
15.
6.
8.
9.
16.
3
Notices
Noties
Plug the power plug in thoroughly to avoid electric
shock, as well as open circuit, short circuit, smoking
and flammation caused by over heat of plug.
No watering: danger of short circuit and electric
shock.
Do not use broken or loose socket in respect of
electric shock, short circuit and flammation.
Do not intend to refit, remove or repair the
product in respect of fire, electric shock or other
injuries.
Do not insert the metal needle into heat
dissipation hole or clearance in respect of injury
caused by electric shock.
Do not put the product in water or damp
environment or close to other heat sources, and
do not put the inner boiler on the naked fire.
Hold the plug rather than haul the power cord to
pull out the power plug.
Do not operate on the unstable platform or
cushions which could not receive heat in respect
of injury or fire caused by fallen ironing brush.
Use the socket with rated voltage of 110V 120V
separately from other electric appliances,
otherwise, fire may occur due to heat.
Do not pull or plug the plug with wet hand in
respect of electric shock.
Keep away from the steam hole to avoid burn.
Keep it away from the children or others unable
to operate.
Remove the dust on power plug at regular
intervals, otherwise, fire accident may occur due
to poor insulation.
Do not touch the hot part, especially the surface
of steam jet of ironing brush during or after the
operation.
Do use the attached power cord which shall not
be used for other equipment.
If not in use, pull the power plug out of the socket
to avoid electric shock, creepage and fire arising
from damages and insulation ageing.
Wash the ironing brush after totally cooling down
to avoid scald.
4
Do not put it close to wall or furniture in case the
steam leads to color change or distortion of which.
Keep it over 30cm away from the wall and furniture.

Installation instructions
3. Рull and open the folding rack, push bar from left to right and fix the crossbar;
4. When finish Ironing, push Bar from right to left and fold rack;
Pul l out
↓
↓
↓
↓
↓
↓
↓
1
↓
4
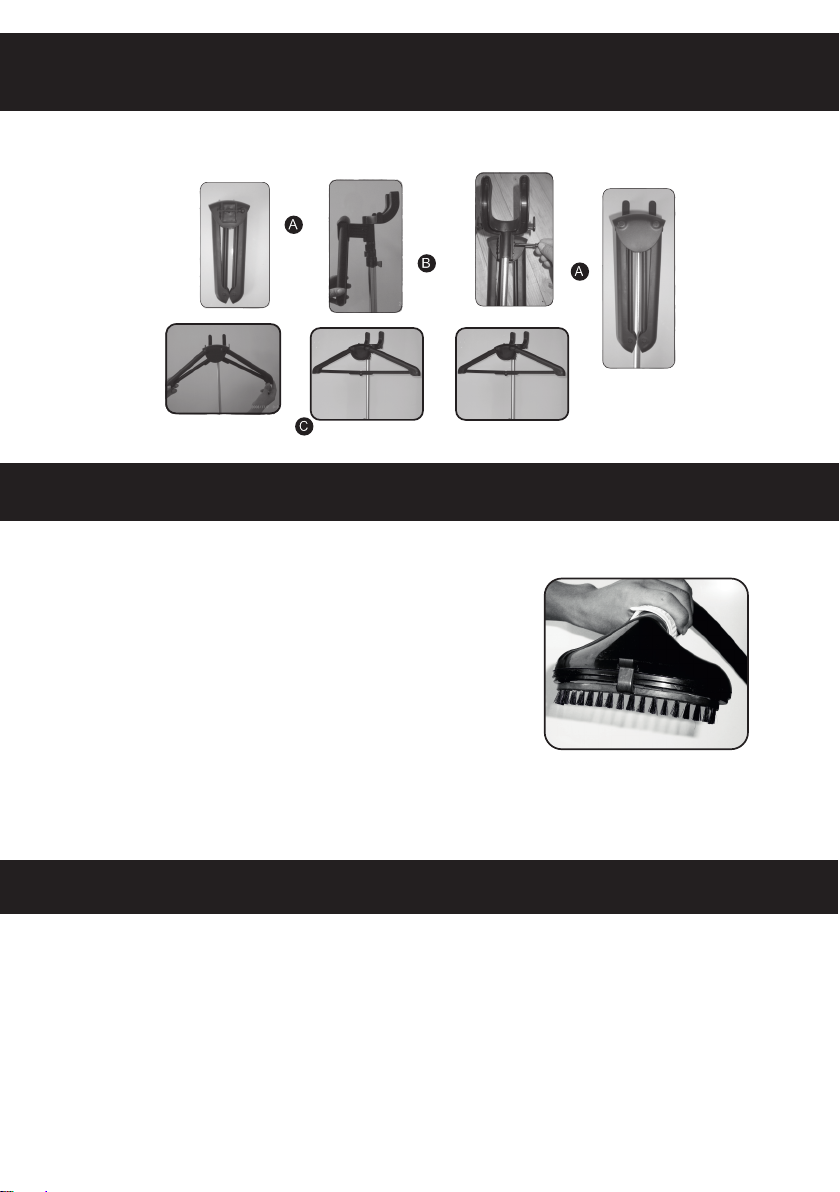
Accessory assembly
The garment steamer comes with a practical
accessory, Fabric Brush, to attach this accessory to
the Steam spout;
1.Turn off the steamer and wait until no steam
emits from the Steam spout.
2.Fabric brush’s pegs aim and insert the holes
on the Steam spout. See Figure 5.
3.Push the brush and firm it in place.
CAUTION:
Do not install the accessory while steam emitting from the Steam spout and avoid burns
Instruction for use
↓
↓
2
↓
↓
PUS H
5
↓
↓
3
Pre ss
↓
↓
7
6
Figu re 5
1.Unplug the Power Cord, and turn the Switch to the “Off” or “0” position.
2.Remove the Water Tank, turn it upside down, and unscrew the Valve Cap. Fill the Water
Tank with cool water, and replace the Valve Cap. hot water is forbidden. To prolong the lifetime
of your steamer, we recommend using distilled or de-mineralized water. Place the water tank
back into the unit and make sure it is sitting properly and securely in the flume. Do not let the
steamer working with a dry water tank or else you can damage the unit.
3. Plug the unit into an electrical outlet.
6
 Loading...