

MagniSight Journey MSJ-17 User Manual

MSJ-17
User's Manual

Table of Contents
SECTION 1: Unpacking and Set-Up of System...................................2
SECTION 2: Features and Operating Instructions..............................4
Turning ON the System.................................................................4
Selecting Viewing Mode................................................................4
Adjusting Magnification................................................................6
Adjusting Brightness....................................................................7
Adjusting LED Lights....................................................................7
Using the Viewing Table...............................................................8
SECTION 3: Service and Safety Information......................................9
FCC Information:
This equipment has been tested and found to comply with the limits for a Class B digital
device, pursuant to part 15 of the FCC Rules. These limits are designed to provide
reasonable protection against harmful interference when the equipment is operated in its
installation. This equipment generates, uses, and can radiate radio frequency energy
and, if not installed and used in accordance with the instruction manual, may cause
harmful interference to radio communications. If this equipment does cause harmful
interference, the user will be required to correct the interference.
1

Section 1: Unpacking & Set-Up
1. Remove User’s Manual and power adapter from top foam
compartments.
2. Next, pull UP on the rear portion of the foam, and then remove foam
packing sleeve by sliding it off of the LCD Monitor.
3. Gently tilt LCD monitor back to its original position. Reach below
sides of LCD monitor and firmly grab hold of each side of camera
unit and l (
NOT pull up on LCD monitor).
IMPORTANT: DO NOT DISCARD packing carton and materials.
These should be kept in the event service or return of the
!
unit is required.
ift unit out of foam packing in bottom of the carton DO
4. Place Unit on sturdy desk, table or
stand where it will be used. Avoid
places near any heat source or
direct sunlight. Using hand holds
on either side of the base platform,
position unit on desk surface to
your preferred location. The
bottom of the unit is equipped with
rubber pads to protect the table
surface and to prevent the unit
from sliding.
5. Next, connect the power adapter to the
camera unit by inserting the DC power
plug (small metal tip) into the Power
Jack on the rear of the camera unit.
Plug one end of the AC power cord
securely into the power adapter and
the other end into a surge-protected
power strip (recommended) or a
standard wall outlet.
Power Jack
2
Set-Up (cont’d)
F the system
or best performance and optimal image quality,
should be at normal room temperature b
system ON (see Page 4).
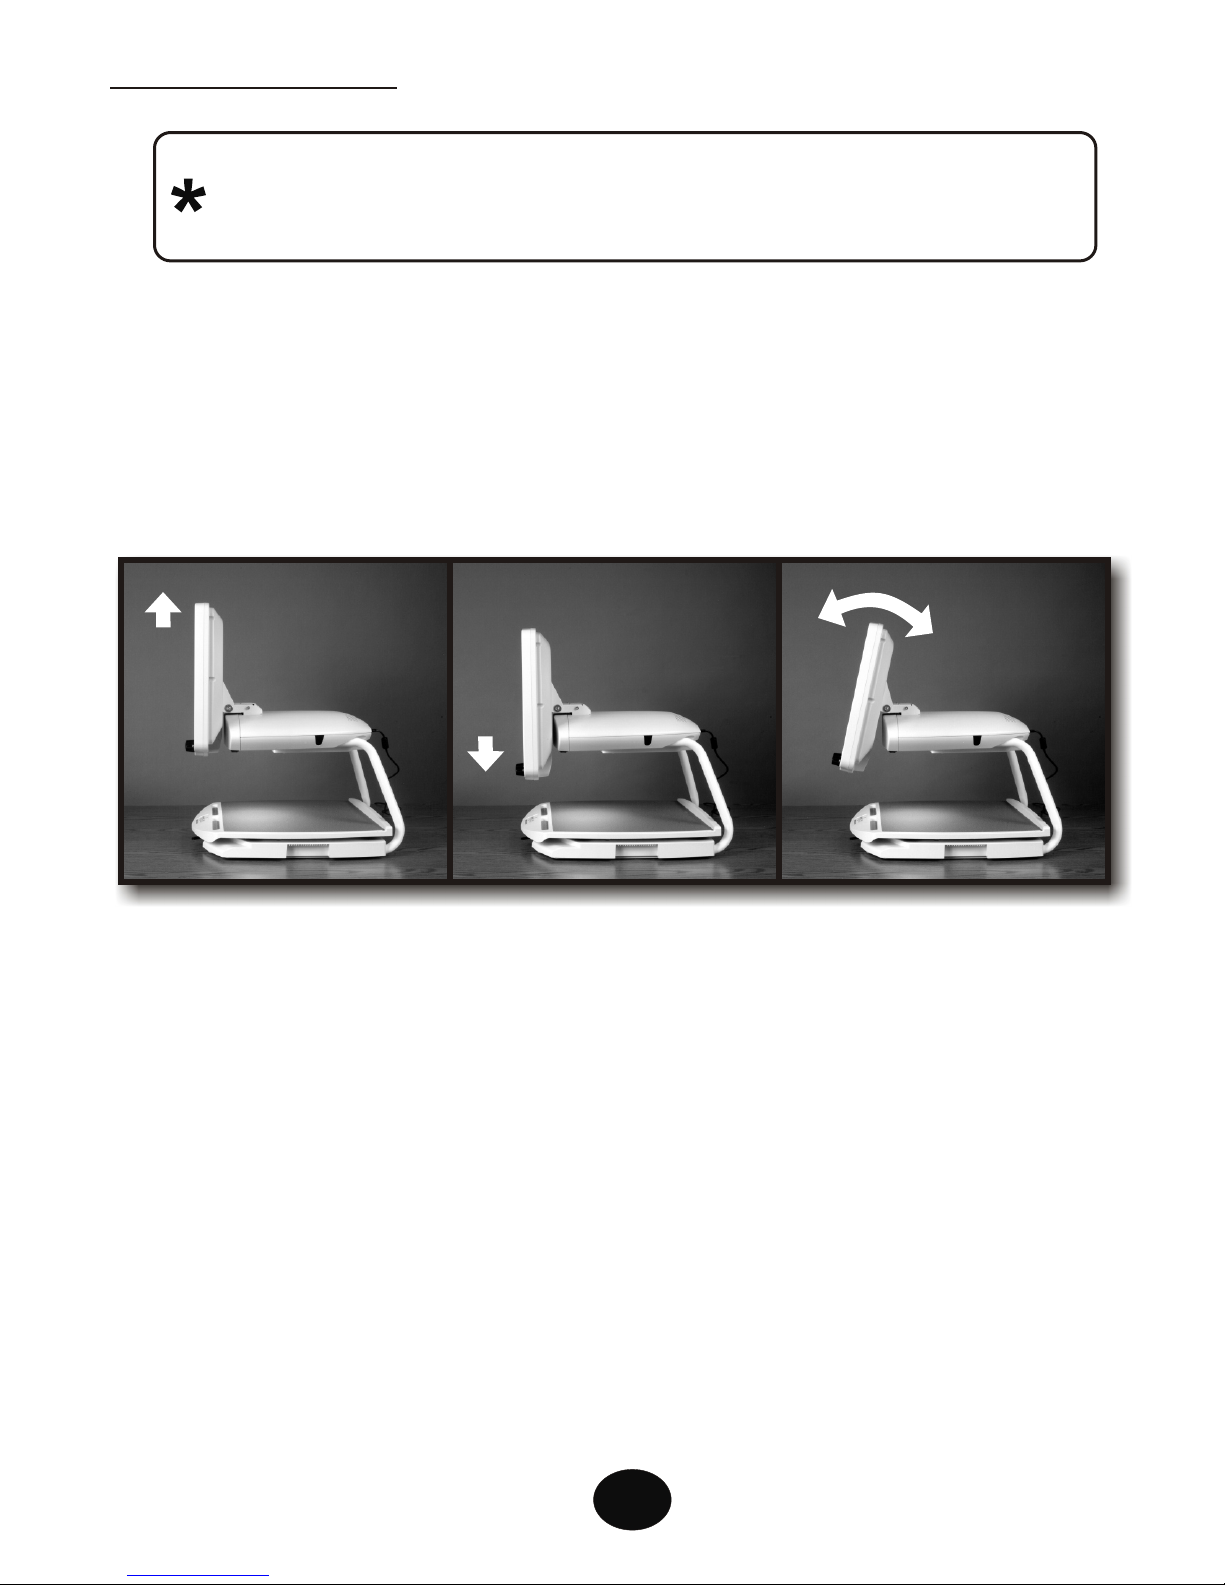
6. Tilt LCD Monitor to a vertical position. Adjust Monitor to desired
height by gripping both sides of the LCD monitor and sliding it up
or down on its adjustable track in a smooth, even motion. After
turning the Journey ON, re-check the height position for most
comfortable viewing. The screen can also be tilted forward or
backward to angle the screen for best user comfort.
Up
efore turning the
Tilt
Down
3
 Loading...