

Magnavox RG51B14C, RG51B1C, RG51B14/CE, RG51B31, RG51B31C REMOTE CONTROL MANUAL
...
Thank you for purchasing our air conditioner. Please read
this owner's manual carefully before using your air conditioner.
REMOTE CONTROL MANUAL
AIR CONDITIONER
MAGNAVOX and SMART. VERY SMART are registered
trademarks of Koninklijke Philips N.V. and are used under
license from Koninklijke Philips N.V.
For any service needs, call 1-855-368-8606
1
2
3
4
6
7
7
7
8
8
9
12
Using the Remote Control ............................................................
Remote Control Technical Specifications....................................
Button Functionality.................. ....................................................
Reading the LCD Display ..............................................................
Remote Control Button Instructions ...........................................
AUTO Mode.....................................................................................
COOLING/HEATING/FAN Mode.....................................................
DEHUMIDIFIER Mode ....................................................................
SWING Mode...................................................................................
TIMER Mode....................................................................................
ECONOMY Mode.............................................................................
CONTENTS
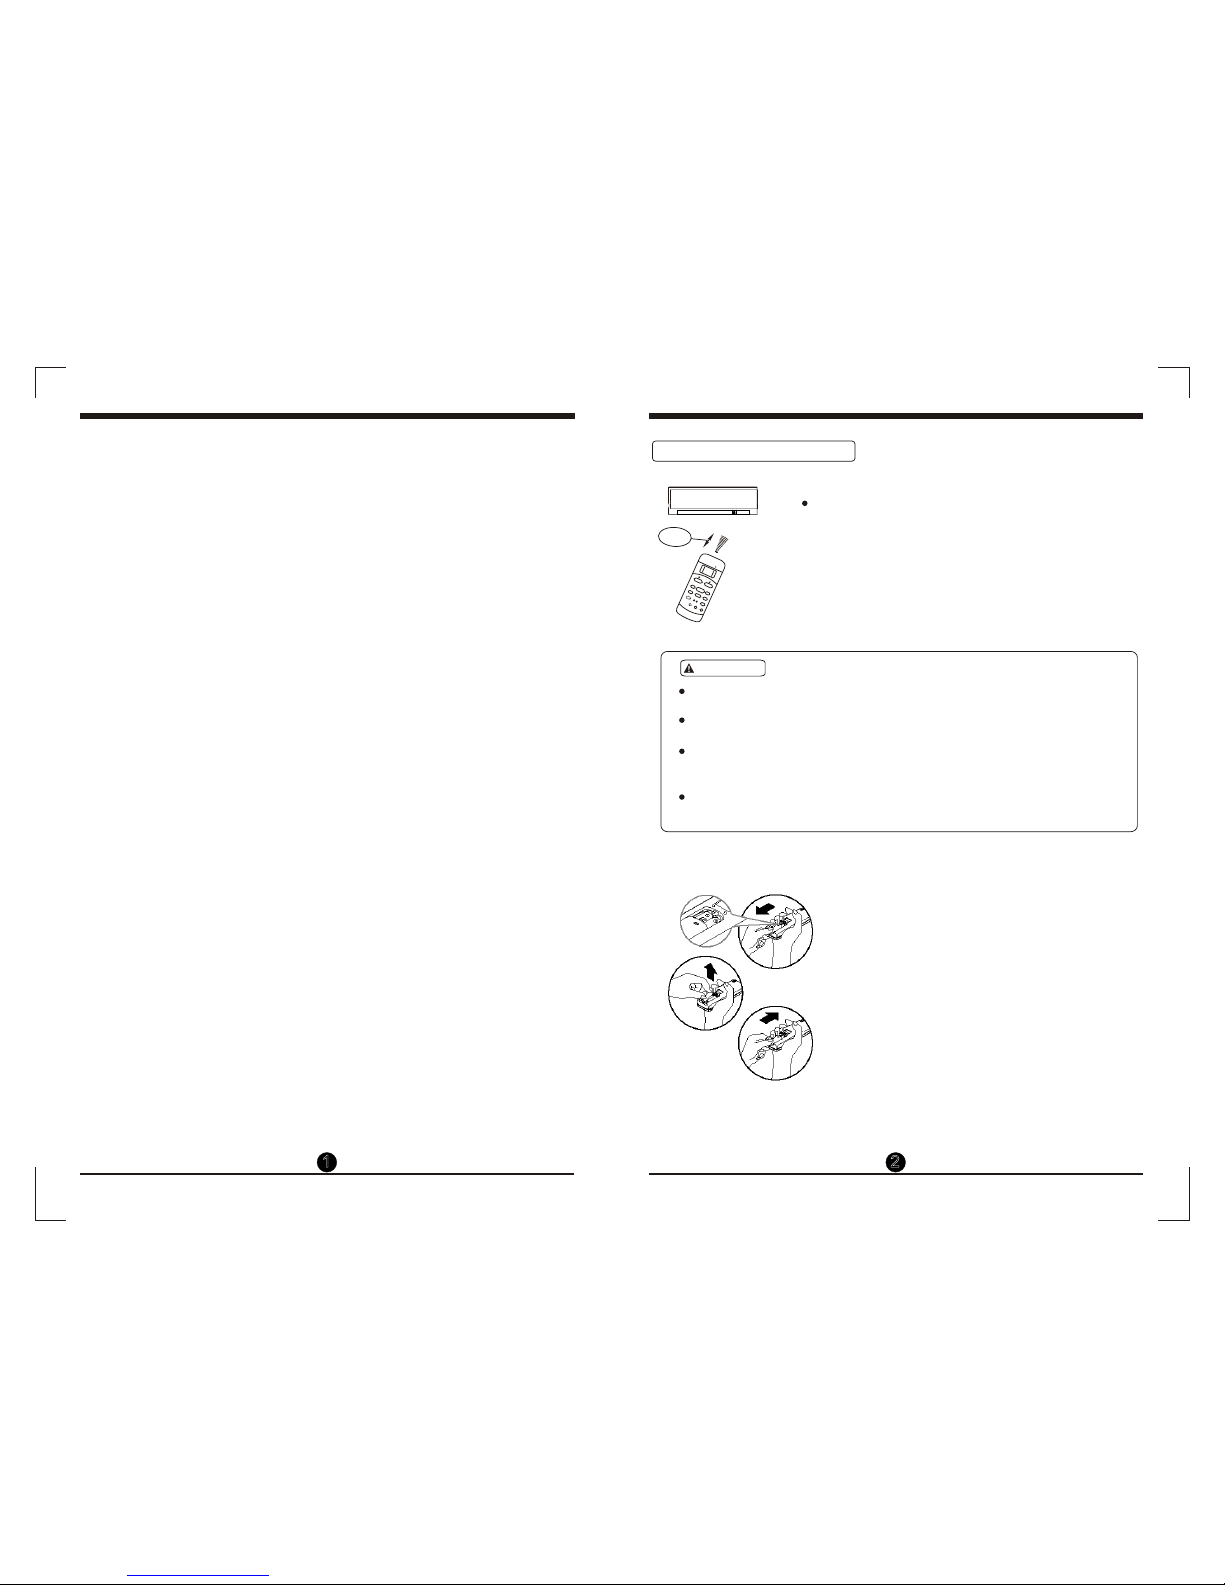
Use the remote control within a distance of 26 feet
from the unit, pointing it towards the receiver.
Button pushes are confirmed with beeps.
Proximity of remote control and unit.
26 ft.
CAUTION
The air conditioner will not operate if curtains, doors or other materials
block the signals from the remote control to the indoor unit.
Prevent any liquid from going into the remote control. Do not expose
the remote control to direct sunlight or heat.
If the infrared signal receiver on the indoor unit is exposed to direct
sunlight, the air conditioner may not function properly. Use curtains to
prevent the sunlight from falling on the receiver.
If other electrical appliances react to the remote control, either move
these appliances or consult your local dealer.
The remote control is powered by two AAA
batteries housed in the rear cover.
(1) Remove the cover by pressing and sliding out.
(2) Remove the old batteries and insert the new
batteries,placing the(+) and (-) ends correctly.
(3) Reattach the cover by sliding it back into
position.
NOTE: When the batteries are removed,
the remote control resets all programming.
The remote control must be reprogrammed
Replacing batteries
.
2
TEMP
AUTO
COOL
DRY
HEAT
FAN
HIGH
MED
LOW
MODE
FAN SPEED
SWING
TIMER ON
ECON
OMY
ON/OF
F
TIMER OFF
RESET LOCK
SET TEMPE
RATU
RE( C
)
FOLLOW
ME
LED
DISPLAY
ION
TURBO
Using the Remote Control
again.
Model
Lowest Voltage of
CPU Emitting Signal
Rated Voltage
RG51B/(C)EU, RG51B16/(C)E,RG51B31/(C)EU
-5 C~ 60 C( )
26.2 ft.~36 ft.
3.0V (Two AAA batteries)
2.0V
Remote Control Technical Specifications
1. Operating Mode: AUTO, COOL, DRY, HEAT(HEAT mode
not available on Cooling-only model) and FAN.
2. 24 hour Timer function
O O
3. Indoor Setting Temperature Range : 17 C~30 C(62 F~88 F).
4. Fully functional LCD (Liquid Crystal Display)
Environment
Signal Receiving
Range
Remote Control Features
CAUTION
Do not mix old and new batteries or batteries of a different type.
Do not leave the batteries in the remote control if it is not going
to be used for 2 or 3 months.
Dispose of the old batteries in the designated containers found
in sales outlets.
1
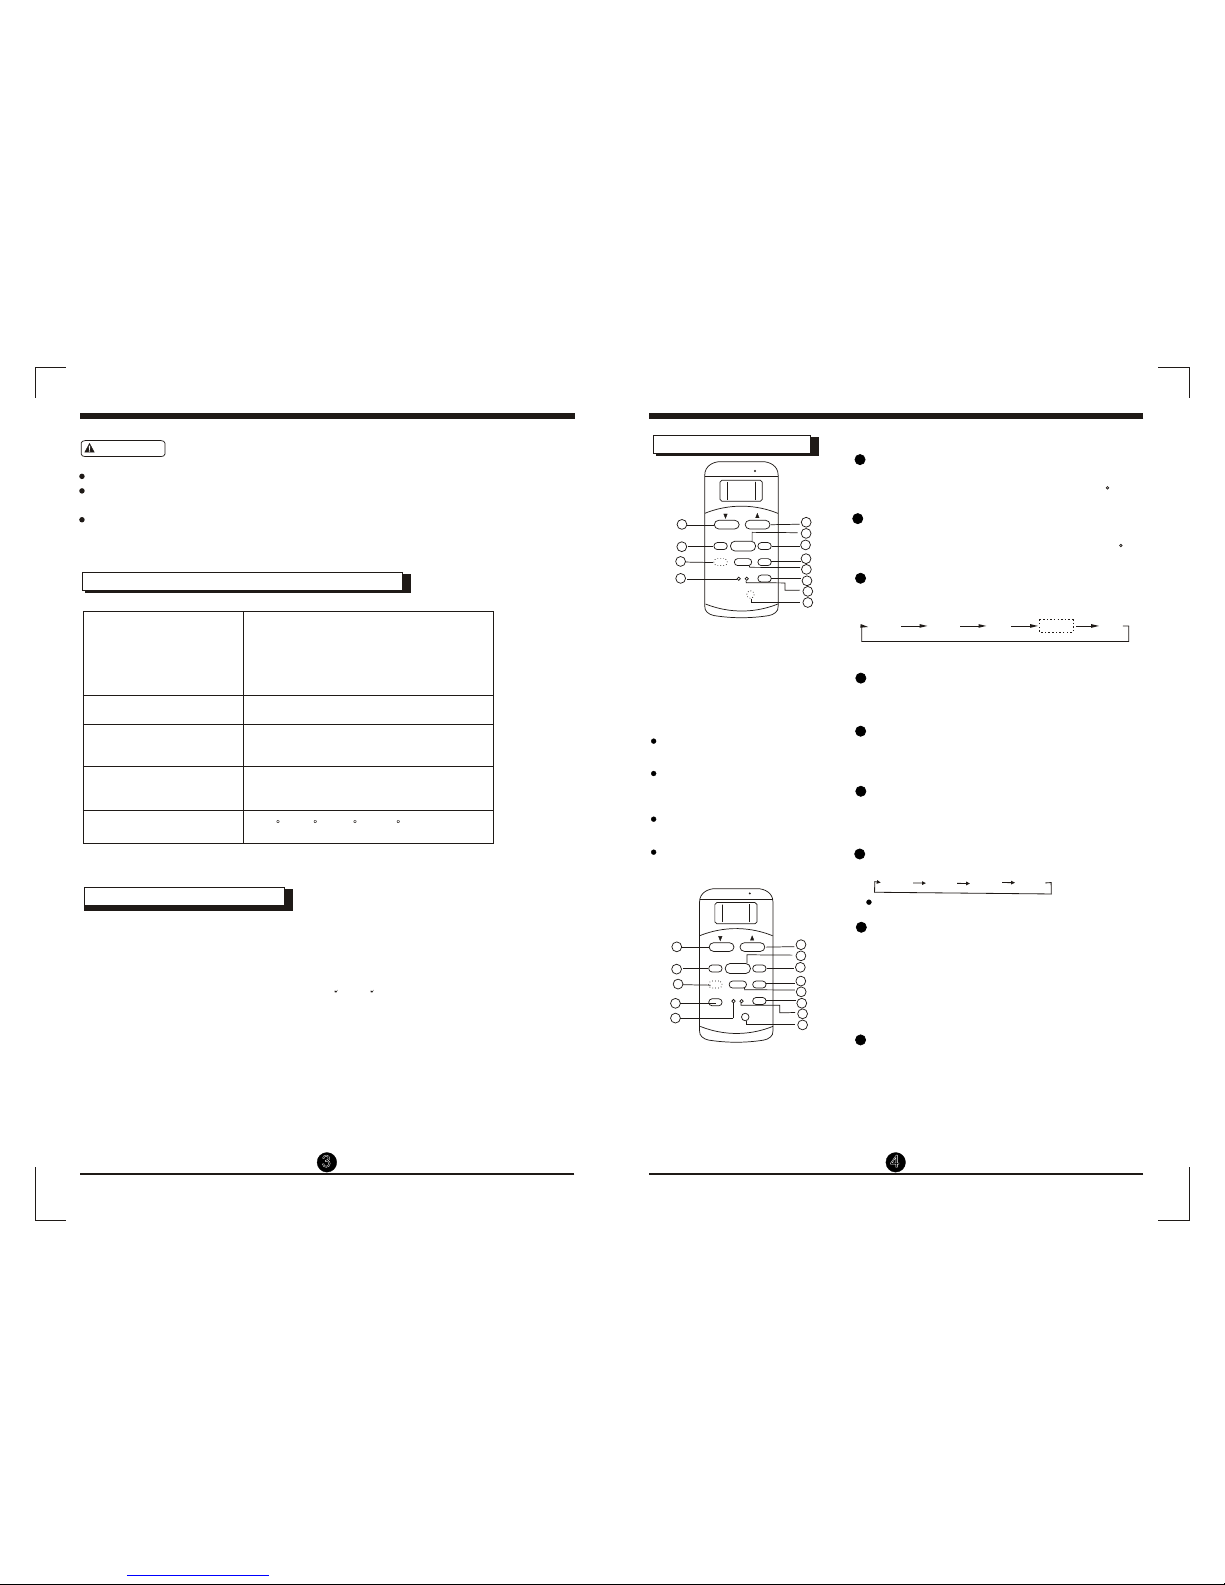
TEMP DOWN Button
This button decreases the temperature setting
o
in 1 degree increments down to 17 C(62 F).
2
TEMP UP Button
This button increases the indoor temperature
o
setting in 1 degree increments up to 30 C(88 F).
Model: RG51B14/(C)E,
RG51B16/(C)E,
RG51B18/(C)E,
RG51B19/(C)E-M,
RG51B20/(C)E
RG51B31/(C)E.
NOTE:
RG51B16/(C)E ,RG51B18/(C)E
models have no SWING feature;
RG51B18/(C)E ,RG51B19/(C)E-M,
RG51B20/(C)E models do not
have LED DISPLAY.
RG51B19/(C)E-M model does not
have MED FAN.
RG51B31/(C)E model ECONOMY button instead of SLEEP
button.
Push the MODE button to try cycle through the
following models in sequence.
3
MODE Button
3 4
TEMP
AUTO
COOL
DRY
HEAT
FAN
HIGH
MED
LOW
MODE
FAN SPEED
SWING
TIMER ON
ECONOMY
ON/OFF
TIMER OFF
RESET LOCK
1
2
4
3
6
5
7
8
9
10
11
SET TEMPERATURE( C)
LED
DISPLAY
4
SWING Button(on some models)
Used to stop or start louver movement and
set the desired up/down airflow direction.
5
6
RESET Button
The recessed RESET button resets all of the
current settings to the initial factory settings.
7
ON/OFF Button
This button starts the air conditioner and stops
when the button is pressed again.
NOTE: Heat mode is for Cooling & Heating models only.
AUTO
COOL
DRY
HEAT FAN
Used to select the fan speed in four steps:
Auto Low Med High
FAN SPEED Button
-41 F~140 F
RG51B1/(C)EU, RG51B14/(C)E,RG51B31/(C)E
12
RG51B19/(C)E-M, RG51B20/(C)E,RG51B30/(C)EU
RG51B25/(C)E, RG51B26/(C)EU;RG51B27/(C)E
TIMER ON Button
8
Press this button to activate the Auto-on TIMER
setting. Each press will increase the time by half
hour increments, up to 10 hours, then at 1 hour
increments up to 24 hours. To cancel the Auto-on
TIMER setting, just press the button until the
display shows 0.0.
9
ECONOMY(SLEEP) Button
Select this function for bedtime. It maintains the
most comfortable temperature and saves energy.
This function is available on COOL, HEAT or
AUTO mode only.
RG51B17/(C)EU, RG51B18/(C)E,RG51B32/(C)EU
Some models do not have Medium FAN Speed.
TEMP
AUTO
COOL
DRY
HEAT
FAN
HIGH
MED
LOW
MODE
FAN SPEED
TIMER ON
ECONOMY
ON/OFF
TIMER OFF
RESET LOCK
1
2
3
6
5
7
8
9
10
11
SET TEMPERATURE( C)
LED
DISPLAY
12
ION
14
Model: RG51B25/(C)E ;
RG51B27/(C)E .
SWING
NOTE:
RG51B25/(C)E model has no
SWING feature.
4
Illustrations in this manual are for explanation purpose only.
Your remote control may slightly differ.
NOTE:
Button Functionality
 Loading...