

Magnavox PR1916 Owner's Manual
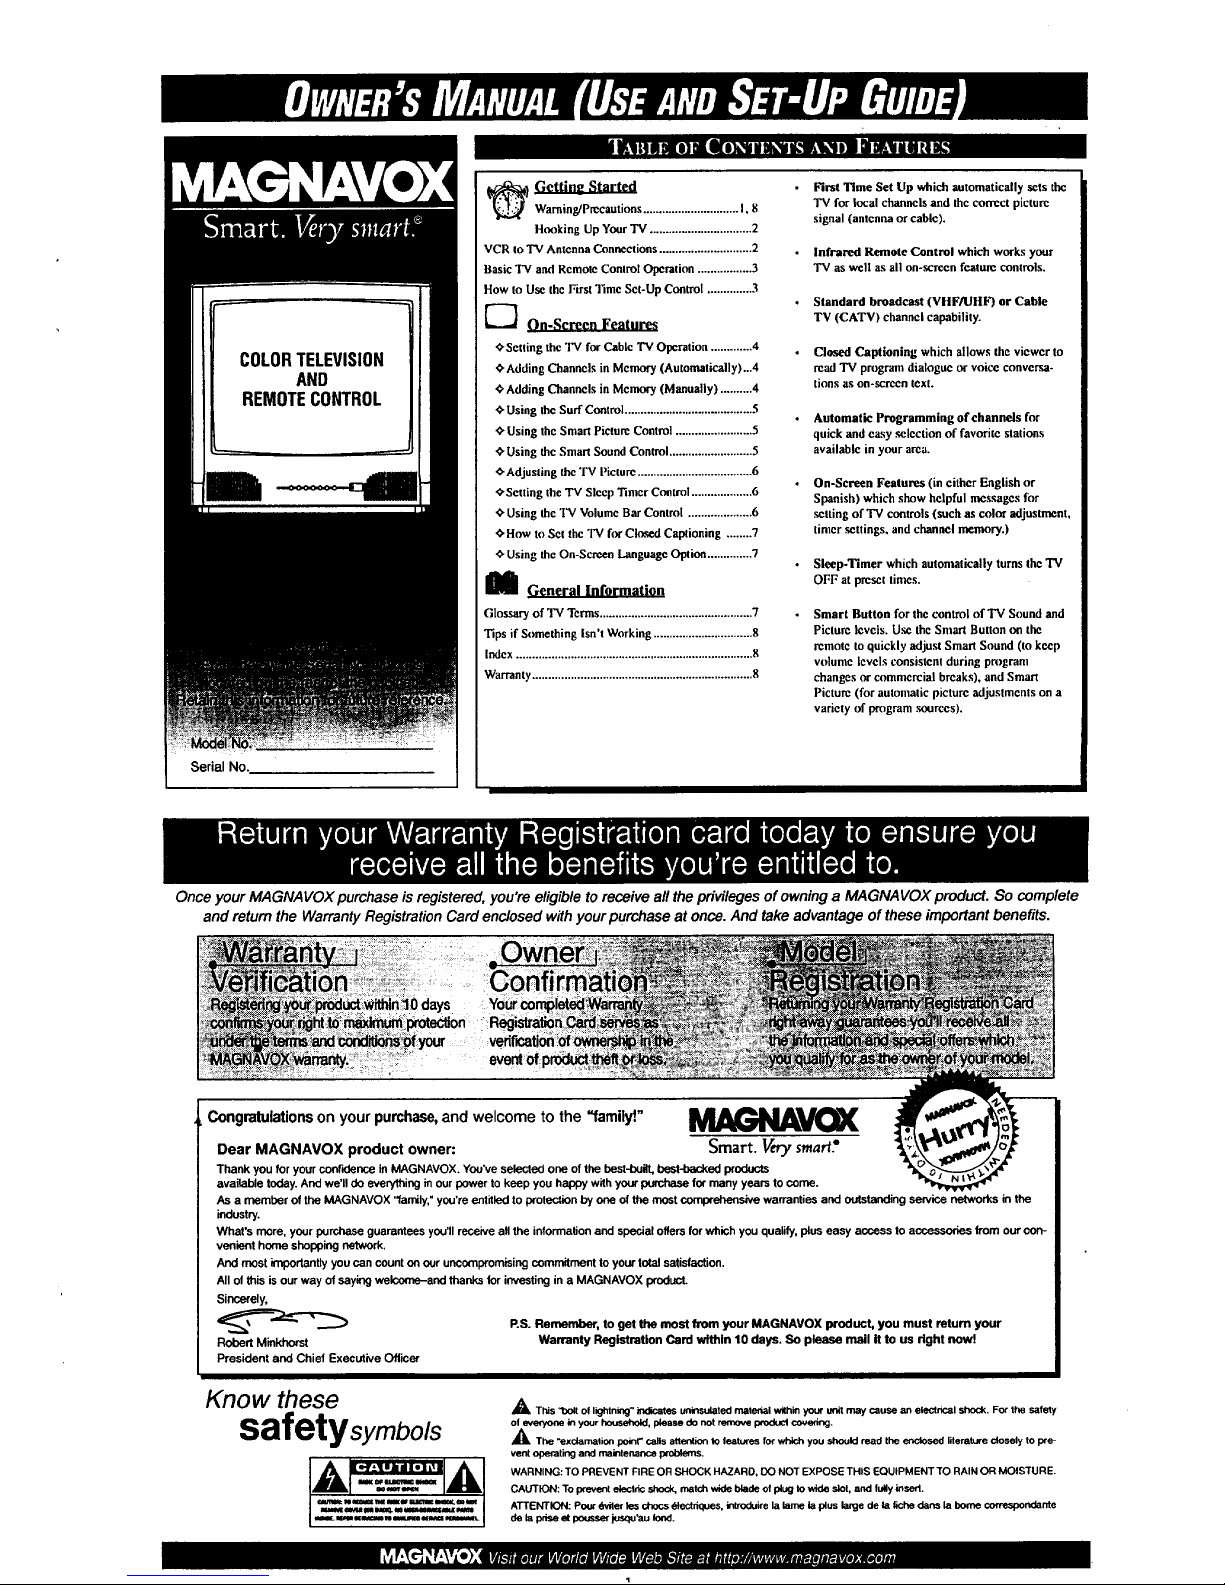
Serial No.
_ Gettin_ Started
Warning/Precautions .............................. I. 8
Honking Up Your TV ................................ 2
VCR to "IV Antenna Connections ............................. 2
Basic 'IV and Remote Control Operation ................. 3
How to Use the First Time Set-Up Control .............. 3
_"_ On-Screen Features
'0-Setting the TV for Cable TV Operation ............. 4 .
_Adding Channels in Memory (Automatically)...4
Adding Channels in Memory (Manually) .......... 4
€"Using the Surf Control ........................................ .5
_" Using the Smart Picture Control ........................ 5
€'Using the Smart Sound Control .......................... 5
_'Adjusling the TV Picture .................................... 6
OSetting the 'IV Sleep Timer Control ................... 6
Using the 3%' Volume Bar Control .................... 6
,¢.How to Set the "IV for Closed Captioning ........ 7
_" Using the On-Screen Language Option .............. 7
M General Information
Glossaryof TV Tcrms ................................................7
Tips ifSomething Isn'tWorking ...............................8
Index..........................................................................8
Warranty.....................................................................8
First Time Set Up which automatically sets the
TV for local channels and Ihc correct picture
signal (antenna or cable).
Infrared Remote Control which works your
TV as well as allon-screen feature controls.
Standard broadcast (VHF/UHF) or Cable
TV (CATV) channel capability.
Closed Captioning which allows the viewer to
read "IV pn)gram dialogue or voice conversa-
tiorls as on-screen text.
Automatic Programming of channels for
quick and casy ,selection of favoritc stations
available in your area.
On-Screen Features (in either English or
Spanish) which show helpful nmssagcs for
setting of 'IV controls (such as color adjustment,
tinier ,settings, and channel memory.)
Sleep-Timer which auton)atically turns thel"V
OFF at pmscl limes.
Smart Button for the control of TV Sound and
Piclurc Icvcls. Use the Smart Button on the
remote to quickly adjust Smart Sound (m kccp
volume levels consistent during program
changes ne commcreial breaks), and Smart
Picture (for automatic picture adjustments on a
variety of program ,sources).
Once your MAGNAVOX purchase is registered, you're eligible to receive all the privileges of owning a MAGNAVOX product. So complete
and return the Warranty Registration Card enclosed with your purchaseat once. And take advantage of these important benefits.
Congratulationson your purchase,and welcome to the "family"
Dear MAGNAVOX product owner: Smart. Very smart'
Thank you for yourcor_ence in MAGNAVOX. You've selected one of the best-built, best-backed products
availal_e today. And we'll do everything in our power to keep you happy with your _ fer many years to come.
As a member of the MAGNAVOX "family," you're entitled to protection by one of the most cor_ warranties and Outstanding service networks in the
industry.
What's more, your purchase guarantees you'll receive aft the information and special offers for which you qualify, plus easy access to accessories from our con-
venient home shopping network,
And most importantly you can count on our uncompromising commitment to yourtotal satisfaction.
All ol this isour way of saying welcome-and thanks 1orinvesting in a MAGNAVOX product.
Sincerely,
P.S. Remember, to gel the most from your MAGNAVOX product, you must return your
Robert Minkhorst Warranty Registration Card within 10 days. So please mail it to us dght now!
President and Chief Executive Officer
Know ese
safetysymbo/s
A This "bolt ol lightning" indicates uninsulated material within you' unit may cause an electK_.al shock, For the safety
of _ in your household, please do not remove producl cove_l.
_kThe "exc_mation po_t" calls attention to leatures for which you should read the enclosed literature closely to I:xe-
vent operating and maintenance p¢O_.
WARNIbIG: TO PREVENT FIRE OR SHOCK HAZARD, DO NOT EXPOSE THIS EQUIPMENT TO RAIN OR MOISTURE.
CAUTION: To pravant elestcic shock, match wide blade of plug to wide slot, and fuly insed.
ATTENTION: Pour _wile¢ les chocs €_lectra_es, iraroduire la lame la plus large de la f_che clans la borne correspondante
de la prise_ poussm juso_'au [o_d.
YF €"] _t T'e'--" K --,,, r_ar, g _ ............... r. r

L iIt1 l!II n k_lIlinrAlll k'tl ntl l a
Voar Cable TV input
• into your home may be
a single (75 ohm) cable, or
a Converter Box installa-
lion./n either ca_e the
connection to the TV is
very easy. Just put the
threaded end of the cable
signal to the TV's antenna
plug and screw it down
tight.
ohm) tben you're ready to con-
ncct to the TV.
If you have a Cable TV
Converter Box:
Connect the Cable 'IV signal to
!the Cable Signal IN(put) plug
on tbe Converter.
_Conne¢/the Cable TV
cable to the ANTENNA/CABLE
plug on the "IV.
If you have a Cable 'IV
Converter Box:
Connect the OUT(pu0 plug
from the Converler to the
ANTENNA/CABLE plug on the
rv t_
set the 'IV for the
type signal you've
just connected (see
page 3 of this Set-
Up Guide.)
To select only the
channel numbers on
your Cable system
sac "Auto Program"
(page 3). If yon use
a Cablc Convcrtcr
box, set the TV to
the same channel as
the converter's CH
314 switch (on the
rear of the convert-
er.)
_l'i1_111klTi/i1_lgllTAYllt
A ombination antenna
receives nornra[
broadcast channels (VHF
2-13 and UHF 14-69).
Your connection is easy
since there is only one
75[2 (ohm) antenna plug
on the back of your TV -
and that's where the anten.
na goes.
11 llll tltllltl I I|A| I Ii
i_twome of you may have
$eparate antennas.
One antenna is for VHF
channels (2-13) and the
other antenna is for UHF
channels (14-69).
For homes with separate
UHFIVHF ante_]nas, you
will need an optional
"combiner nbefore you can
connect to the TV See the
"Smart Help" section (to
the r_ght on this lmge)for
mrlering details.
_ur antenna has a
round cable (75 ohm) on the
end, tben you're ready m con-
nect it to the "IV.
If your antenna has flat twin-
lead wire (300 ohm). you first
need to attach thc antcnna wires
.<_ _und end of the
adapter (or antenna) onto the
ANTENNA/CABLE plug on
the rear of tbe TV. If thc round
end of the antenna wire is
threaded, screw t down light.
to the screws on a 300 to 75 _ _0 (o7._ u._ d'rv
ohm adapter. \\\ €1 ,, _.._ | .._ ^_e,
\\\ I | ii /,, (4a3521s27c031
TwinI.,e_l
Com_ km VHFIUHFAm_
__ • L
--_Attach
the separate
UHF and VHF antennas to
the correct screws on the com-
biner.
<_Push the round end of the combiner
onto the ANTENNA/CABLE plug on I
the rear of the TV, I_l
be sure to set the
TV for the type sig-
nal you've connect-
ed (sec page 3 of
this Set-Up Guide.)
To set the 'IV to
select only the
ichannel numbers in
! your area see how
i tO"Program" or
"Add" channels in
memory on page 3.
To order any
optional accessory
contact y(mr dealer
or call the toll-frec
accessory ordering
number (1-1100-292-
6066):
• UHFIVHF
Combiner:
(SBV1133AOI)
• 75-300 Ohm
Adapter:
(SBVI 113AOI)
• 300-75 Ohm
Adapter.
(483521827003)
' F _ Connect your
]Antenna or Cable TV signal
Ito the IN FROM ANT(enna)
,T_ee basic Antenna, or ]pplug on the VCR
• Cableto to
TV cannection is shown to
the right. For more infor-
mation on other hookups
(possible when Cable
ConverterlDescrambler
boxes are included) refer
to your accessory VCR
and Cable Converter
Owner'a" Manual for
detoils.
<,_Connect the OUT TO TV
plug on the VCR to the
ANTENNA plug on tbe TV
(connecting cable supplied
w th the VCR.)
<_Refer to the Owner's
Manual included with your
VCR for other possible con-
Inactions and TV/VCR operat- I
Ling details" ._
\
2
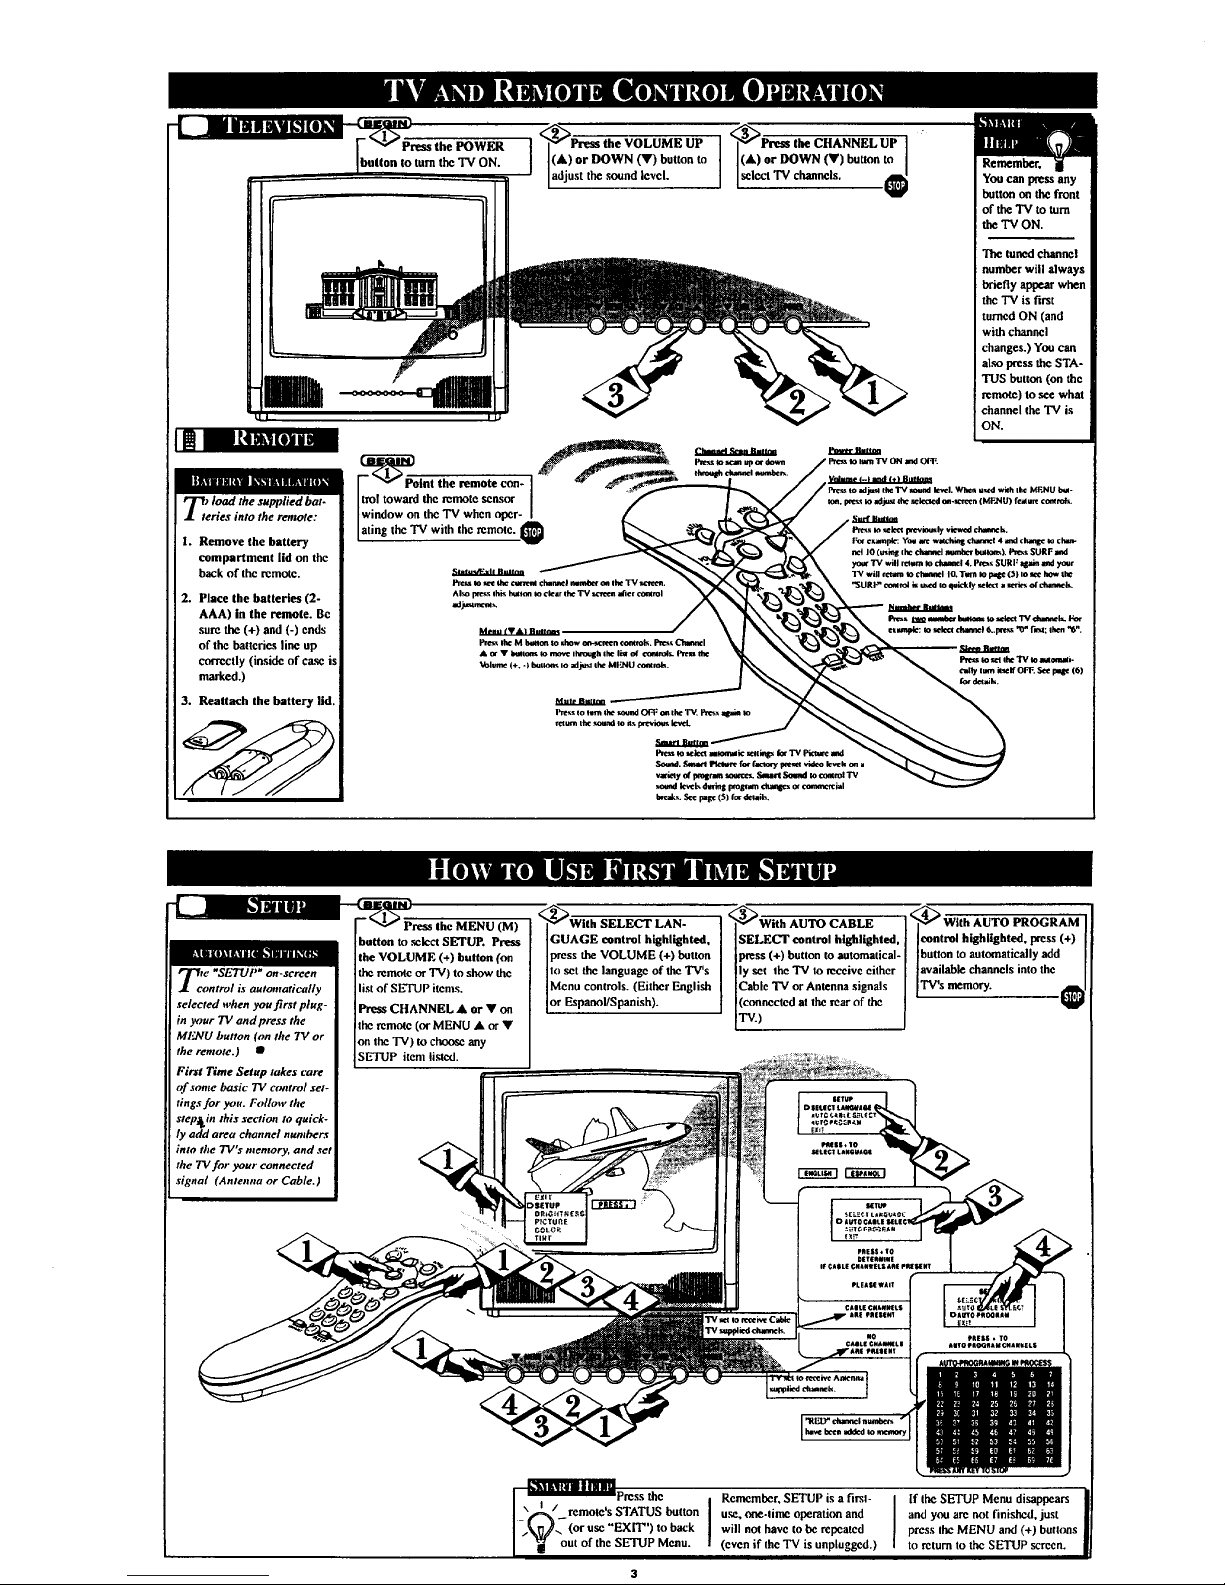
load the supplied bat.
des into the remote:
1. Remove the battery
compartment lid on the
back of the remo_e.
2. Place the batteries (2-
AAA) in the remote. Bc
sure the (+) and (-) ends
of the batteries line up
cca'w,ctly (inside of case
masked.)
3. Reattach the battery lid.
i
<_Press the VOLUME UP '<_Prem the CHANNEL UP
I
(A) or DOWN (Y) button to (A) or DOWN (Y) button to
adjust
the m3uad level.
I
select TV channe s. €
You can press any
button on the front
of the TV to turn
the TV ON.
le _SET_[ ,_ off-screen
ntrol is automatically
selected ,,hen you first plug-
in your TV and press the
MENU button (on tile 7V or
the remote.) •
First Time Setup lakes care
af ._ome basic 73/control set-
tings for you. Follow the
slep_ in this section Io quick-
ly add area channel numbers
into the TV'$ menmry, and set
the TVfor your connected
signal (Antenna or Cable.)
_ENU (M)
baron to select SETUP. Press
the VOLUME (+) button (on
the remote or TV) to show the
list of SETUP itcms.
Press CHANNEL • or • on
the remote (orMENU • or •
nn the "IV) to eheose any
SETUP item li_ed.
[_uGuWIIh SELECT LAN-
AGE control highlighted,
press the VOLUME (+) button
to set the language of the TV's
Mcnu controls. (Either "English
[or Espanol,'Span sh)+
•<_With AUTO CABLE .<__
SELECT control highlighted, control highl g ted, press ( )
press (+) button to automatical- button to automatically add
ly set the TV to rccoive either [ ]available channels into the
Cable TV or Antenna signals ] [TV's n_mory.
(connectcd at the rear of the I I
"IV.) J
I
nAg/ <oruse"EX,',"),oback I
I _ outoftheSETUPMe...
I
Remcmher, SETUP is a first-
u._. one-time operation and
will not have to bc repeated
(even if the "IV is unplugged.)
J If the SETUP Menu disappears
and you are not finished, just
press the MENU and (+) buttous
to return to the SETUP screen+
 Loading...