

Magnavox 43PP920201, 43PP9202/84, 43PP920284F, 46PP9302/17, 46PP930201 Repair Instructions
...Page 1

TV-KIT-010 Instructions Magnavox HVG Repair - 7621
Last Updated Monday, 29 October 2012 14:51
Magnavox Projection TV Repair Instructions
This guide will help you repair your Magnavox TV if it has
any of the following symptoms.
Power light and audio work but TV does not have video.
This repair kit is known to work on Magnavox TV sets with the following Chassis/Model
Numbers.
1 / 17
Page 2

TV-KIT-010 Instructions Magnavox HVG Repair - 7621
Last Updated Monday, 29 October 2012 14:51
DPTV305 , DPTV305F , DPTV310 , DPTV315 , DPTV330 , DPTV330F , DPTV335 , DPTV340 ,
DPTV345, MAG01
Model Numbers
( 43PP9202/17 43PP920217 43PP9202/17F 43PP9202/84 43PP920217F 43PP920284
43PP920201 43PP920284F 46PP9302/17 46PP930217 46PP930201 46PP930217F
46PP930284 46PP930284F 46PP9302H17 50PP9202/01 50PP9202/17 50PP9202/84
50PP9202/84F 50PP920201 50PP920217 50PP920284 50PP920284F 50PP920217F
51MP392H/17 51MP3964H/17 51PP9303H/17 51PP9363H17 51PW9303/17F 51PW936317F
55PP9352/17 50PP920217F 51MP392H17 51MP3964H17 51PP9303H17 51PP9363H17
51PW930317F 55PP935217 55PP935201 55PP9363H17 55PP9502/84 55PP950284
55PP950201 55PP950217 55PW936317F 55PW9383/17F 55RW9515/35 60PP9202/17
55PW938317F 55RW951535 60PP920217 60PP920201 60PP920217F 60PP9352/17
60PP935217 60PP935201 60PP9363H17 60PP938317F 60PP9502/17 60PP950217
60PP950201 60PW936317F 60PW938317F 43PP9202/17 43PP9202/17F 43PP9202/84
43PP920217 43PP920217F 43PP920284 43PP920201 43PP920284F 46PP9302/17
46PP930217 46PP930201 46PP930217F 46PP930284 46PP930284F 46PP9302H17
50PP9202/01 50PP9202/17 50PP9202/84 50PP9202/84F 50PP920217F 51PP9303H/17
51PP9363H17 51PW9303/17F 50PP920201 50PP920217 50PP920284 50PP920284F
51PP9303H17 51PW930317F 51PW936317F 55PP9352/17 55PP935217 55PP935201
55PP9363H17 55PP9502/84 55PP950284 55PP950201 55PP950217 55PW936317F
55PW9383/17F 55RW9515/35 60PP9202/17 55PW938317F 55RW951535 60PP920217
60PP920201 60PP920217F 60PP9352/17 60PP935217 60PP935201 60PP9363H17
60PP938317F 60PP9502/17 60PP950217 60PP950201 60PW936317F )
2 / 17
Page 3

TV-KIT-010 Instructions Magnavox HVG Repair - 7621
Last Updated Monday, 29 October 2012 14:51
Icons used in this document
This icon is used to indicate tips or tricks that will make the repair
go smoothly
This icon is used to point out important items such as safety
precautions
This icon is used to highlight additional notes.
Disclaimer
The procedures described in this document require access to potentially dangerous voltages,
proximity to the CRT and its implosion risk, and other possible dangers lurking inside a
television set. We will not be responsible for personal injury resulting from attempting these
repairs nor damage to the equipment that may result from lack of soldering experience or
inadequate de-soldering or soldering equipment.
3 / 17
Page 4
TV-KIT-010 Instructions Magnavox HVG Repair - 7621
Last Updated Monday, 29 October 2012 14:51
Please read this guide completely at least once before you attempt to fix your TV. You may also
want to print the document out. To do so click the "print" icon at the top of this article.
Unplug Power and all Cables
TV sets can hold a charge for a long time and can shock you even while unplugged if you are
not careful. It is strongly advised that you unplug your TV set from the wall at least 3 days
before attempting the fix. This will give the set some time to discharge some of the stored
electricity. Do not plug your TV back in until the repairs are completed.
4 / 17
Page 5

TV-KIT-010 Instructions Magnavox HVG Repair - 7621
Last Updated Monday, 29 October 2012 14:51
Remove all Cable TV, Speaker, Audio/Video Cables from rear of set.
Remove Rear Access Panel Using the proper tools remove all the rear cover screws along the top, sides, and bottom of therear panel.
5 / 17
Page 6
TV-KIT-010 Instructions Magnavox HVG Repair - 7621
Last Updated Monday, 29 October 2012 14:51
Loosen wire ties so that you are able to lift the board up without any of the wires getting pulled.
Flyback ( High Voltage Generator) Removal
The part that you will need to locate and replace is called the High Voltage Generator. You can
purchase the HVG from the following sources.
6 / 17
Page 7

TV-KIT-010 Instructions Magnavox HVG Repair - 7621
Last Updated Monday, 29 October 2012 14:51
www.PartStore.com
www.VanceBaldwin.com
The Philips part number is "312226832865'. Price is around $120.00 with shipping.
Update: 3/17/2009 - We have been informed by several customers that the HVG is now sold out
at Partstore and VanceBaldwin. The part is on back order with no estimated arrival date.
Another option is to contact Tri State Modules - Or PTS/Modulus.
They will rebuild your LSB board and replace the failed HVG.
If you decide to send them your board for repair you won't have to remvoe the HVG from the
board.
PTS Corp/Modulus
http://www.moduslink.com/
Website: http://www.tristatemodule.com/Phone : 800.203.7484 (ext. 210, ext. 203)
7 / 17
Page 8

TV-KIT-010 Instructions Magnavox HVG Repair - 7621
Last Updated Monday, 29 October 2012 14:51
Email Address: info@tristatemodule.com
CAUTION: You must be real carefull when working around the High Voltage Generator.
Locate the flyback as shown in the picture below.
Pull the rubber caps up on the high voltage wires.
8 / 17
Page 9

TV-KIT-010 Instructions Magnavox HVG Repair - 7621
Last Updated Monday, 29 October 2012 14:51
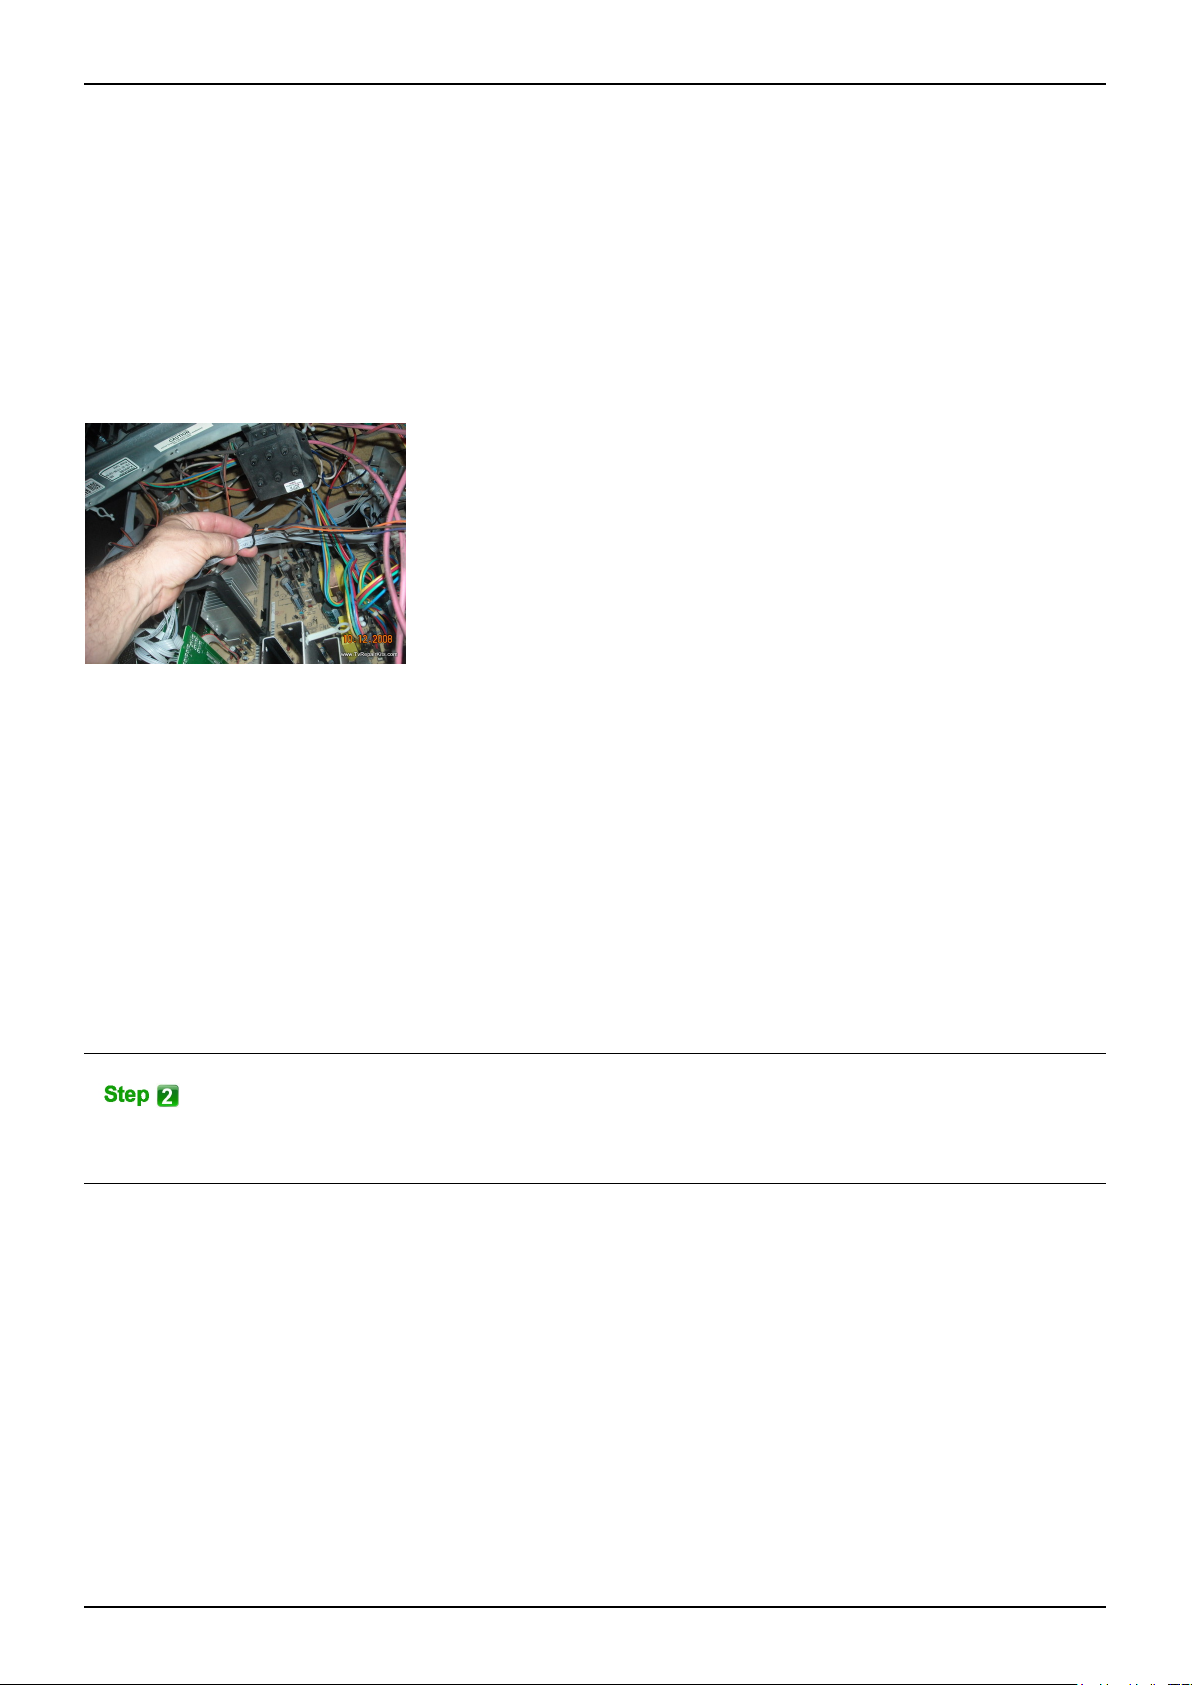
Slowly pull up on the first High Voltage Wire as shown in the picture. The wires are very tight atfirst because of the yellow clips. This is normal. Just increase the amount of upward pull forceon the wires until they pop out. An alternative method is to pop out the yellow plastic clips first.The problem with this method is sometimes the clips break as they are being removed and thebroken pieces get stuck in the old flyback.
If you place your other hand on the flyback it will provide more leverage.
Once the wire is removed touch it to the metal rack as shown in the photo. This will ground it outand drain the high voltage from the CRT/wires. You may or may not see a spark. The spark isthe stored voltages in the CRT tubes being discharged to ground. This will not damageanything. Once done you can safely handle the wires. Repeat the above steps for the remaining RED wires that are still connected to the High VolageGenerator.
You may want to touch the wires to the metal frame each time before you work on the set. Thiswill help insure that the voltages are drained and the wires are safe to handle.
Once you have safely discharged the HGV voltage from the CRT wires you can now remove therest of the cables from the circuit board.
Remove all the cables on the flyback board! Make sure you label them with a marker so thatyou know where to put them back!
9 / 17
Page 10

TV-KIT-010 Instructions Magnavox HVG Repair - 7621
Last Updated Monday, 29 October 2012 14:51
On the board you will find several screws that will need to be removed also.
Note: One screw is hidden on the side of the flyback. Remove it also.
Once all the cables and screws are removed you are now ready to pop the circuit board out. To
do this push the black plastic clips back shown in the photo below. The clips are located on the
right hand side of the board. If the board will not move freely you have missed as screw. Check
again!
10 / 17
Page 11

TV-KIT-010 Instructions Magnavox HVG Repair - 7621
Last Updated Monday, 29 October 2012 14:51
Caution: The large green capacitors shown in the photo below can store high voltages for a longtime. Do not touch the bottom of the board where they are located. Otherwise you may get onehell of a shock. To avoid them just circle the area with a permanent marker on the bottom of theboard. This will help to remind you not to touch this area. Note: You don't need to worry aboutthe smaller capacitors. Only the large green ones as shown below. You can also short them outwith a resistor if you like. This will discharge the voltages.
Once the board is removed place it on a table, workbench, etc.
Desolder High Voltage Generator
Note: We highly recommend using a desoldering iron like the one
shown below. You can purchase one from Radio Shack for under
fifteen dollars.
1. Plug the desoldering pump in...Let it warm up.
2. Position the circuit board so that you can get to the items that need to be desoldered.
3. Press the pump bulb - and hold it in.
4. Place it on the 1st pin to be desoldered - when the solder melts release the pump bulb.
5. The solder will get sucked into the desolderng iron.
11 / 17
Page 12

TV-KIT-010 Instructions Magnavox HVG Repair - 7621
Last Updated Monday, 29 October 2012 14:51
6. Place the pump over a piece of paper and press the pump bulb to blow out the solder
onto the paper.
7. Repeat the steps above
Using the desoldering iron shown above slowly remove the solder from the High Voltage
Generator pins on the underside of the board as shown in the photo below.
After you have removed the solder you will need to straighten the metal clamps to remove the
HVG. You may also have to use your soldering iron to melt any solder that may have been used
to weld the clamps to the board.
12 / 17
Page 13

TV-KIT-010 Instructions Magnavox HVG Repair - 7621
Last Updated Monday, 29 October 2012 14:51
Install New High Voltage Generator
After you have removed the old HVG it is now time to solder the new one into the circuit board.
Place the new HVG into the circuit board in the exact location as the old one.
Bend the holding pins so that the HVG stays in place during soldering.
Soldering Instructions
In order to do the repair you will need to own a soldering iron and rosin core solder. If you don't
13 / 17
Page 14

TV-KIT-010 Instructions Magnavox HVG Repair - 7621
Last Updated Monday, 29 October 2012 14:51
have these tools already you can pick them up at your local Radio Shack store for around
10.00.
We highly recommend the 15, 25, or 30 watt soldering irons. All three will work perfectly.
Safety precautions
• Never touch the element or tip of the soldering iron.
• They are very hot (about 400°C) and will give you a nasty burn.
• Always return the soldering iron to its stand when not in use.
• Never put it down on your workbench, even for a moment!
• Work in a well-ventilated area.
Preparing the soldering iron
• Plug the soldering iron in.
• Wait a few minutes for the soldering iron to warm up.
• You can check if it is ready by trying to melt a little solder on the tip.
• Wipe the tip of the iron on a damp sponge.
• This will clean the tip.
• Melt a little solder on the tip of the iron.
• This is called 'tinning' and it will help the heat to flow from the iron's tip to the joint. It only
needs to be done when you plug in the iron, and occasionally while soldering if you need to
wipe the tip clean on the sponge.
14 / 17
Page 15

TV-KIT-010 Instructions Magnavox HVG Repair - 7621
Last Updated Monday, 29 October 2012 14:51
Soldering
• Hold the soldering iron near the base of the handle.
• Touch the soldering iron onto the area that needs to be soldered.
• Make sure it touches both the item to be soldered and the board. Hold the tip there for a few
seconds .
• Feed a little solder onto the joint at the tip of the iron.
• It should flow smoothly onto the lead volcano shape. Apply the solder to the joint, not the iron.
• Remove the solder, then the iron, while keeping the joint still.
• Allow the joint a few seconds to cool before you move on to the next one.
• Inspect the joint closely.
Reassemble the TV
Reinstall the board in the reverse order that you removed it. Make sure that any plugs, wires,
15 / 17
Page 16

TV-KIT-010 Instructions Magnavox HVG Repair - 7621
Last Updated Monday, 29 October 2012 14:51
etc you disconnected are back into their proper connector. Make sure you double check every
plug and connector by hand, not by sight, for loose or shifted connections. After you have
checked all the cables power on the TV set and check to see if the video now works.
Leave the rear cover off the TV so that you can monitor it while it powers on. If you see any
sparks, glowing resistors, smoke, etc unplug the TV immediately.
We value your feedback. Please let us know if the above kit and instuctions helped resolve
your TV problem. Also, any feedback on how we can improve our kits, instuctions, or website
is always appreciated.
16 / 17
Page 17

TV-KIT-010 Instructions Magnavox HVG Repair - 7621
Last Updated Monday, 29 October 2012 14:51
17 / 17
 Loading...