

Magnavox 50MV349R, 43MV349R, 32MV319R Owner's Manual
Owner’s manual
Manual del propietario
Manuel du propriétaire
50MV349R
43MV349R
32MV319R
www.magnavox.com/support/
1 866 341 3738
www.magnavox.com/support/
1 866 341 3738
www.magnavox.com/support/
1 866 341 3738

Contents
2 .English
1 Notice ....................................................................... 6
2 Welcome ................................................................. 9
The new standard in Smart TVs
Get the most out of your new TV
3 Connections and setup ..................................... 11
Connecting an antenna, cable, or satellite box
Connecting external equipment with a composite AV
video cable
Connecting external equipment with an HDMI® cable
Connecting headphones or analog sound bar to the
TV
Connecting headphones to the Roku Enhanced
Voice Remote
Connecting an AV receiver or digital sound bar
Preparing for Internet connectivity
AC power
Roku remote batteries
Roku TV Remote
Panel buttons
Single button
Three buttons
Game-pad style joystick
Four buttons
Five buttons (with mute)
Five buttons (without mute)
Seven buttons
11
11
11
11
11
11
12
12
12
13
14
14
14
15
15
15
15
15
4 Guided Setup ....................................................... 16
Starting Guided Setup
Completing Guided Setup
Network connection
Activation
Connect your devices
Home screen
Personalize your Home screen
16
16
17
18
19
19
20
7 Using your TV ....................................................... 25
Status indicator
Standby mode energy savings
9
9
Opting in to Smart TV experience (U.S. only)
Disable Smart TV experience
Disable Auto Notifications
Watching Antenna TV channels
Changing channels
Favorite Channels in non-connected mode
Smart Guide (U.S. only)
Navigating the Smart Guide
Favorite channels in the Smart Guide
Turn off favorite channels
Viewing program information
Adjusting settings while watching a show
Pausing Live TV
Requirements
Enabling Live TV Pause
Using Live TV Pause
Notes about Live TV Pause
More Ways to Watch (U.S. only)
Using More Ways to Watch
Getting the most from More Ways to Watch
Switching TV inputs
Auto-detecting devices
Adjusting audio/video settings
Playing content from USB storage devices
Auto player launch
Playing content from local network media servers
Using your TV in a hotel or dorm room
About using your TV on a restricted public network
Roku voice remotes (select models only)
Re-pairing your Roku voice remote
Checking the Roku voice remote battery level
Finding your Roku Enhanced Voice Remote
Changing and previewing the Enhanced Voice
Remote finder sound
25
25
25
25
26
26
26
26
27
28
28
28
28
29
29
29
29
29
30
30
30
31
32
32
32
32
32
32
33
33
34
34
34
34
34
5 Benefits of connecting ...................................... 21
Connecting brings out your TV’s full potential!
What is streaming?
What if I didn’t connect my TV?
6 Setting up Antenna TV ...................................... 23
Why do I have to set up the TV tuner?
How do I set up the TV tuner?
21
22
22
23
23

3
.English
8 Adjusting TV settings ......................................... 35
Settings menu
Options menu
Options menu settings
Accessibility (U.S. only)
Accessibility menu settings
Video description through Secondary Audio Program
(SAP)
Advanced audio settings – DTS TruSurround (select
models only)
Advanced audio settings menu options – DTS
TruSurround
Advanced audio settings – Sonic Emotion Premium
(select models only)
Advanced audio settings menu options – Sonic
Emotion Premium
Sonic Emotion settings
Advanced picture settings
Advanced picture settings menu options
Expert Picture Settings (4K models only)
Changing privacy settings
Advertising
Microphone
35
35
35
36
36
36
37
37
37
37
38
38
38
39
39
39
39
9 My Feed ................................................................. 41
Movies Coming Soon
Movies, TV shows, and people
41
41
10 Searching for something to watch ................ 42
How do I search?
Keyboard search using the remote
Voice Search from a Roku voice remote
Searching from the Roku mobile app
I found a show, now what?
Follow on Roku
Recent Searches
42
42
42
42
43
43
43
11 Using the Roku Channel Store ....................... 44
Configure accessibility (U.S. only)
Captions mode
Captions preferred language
Captions style
Changing caption settings (Canada only)
Configuring parental controls
Creating a parental control PIN
Blocking Featured Free or Movie Store and TV Store
(U.S. only)
Blocking Broadcast TV shows
What happens when a TV show is blocked?
Changing the parental control PIN
Resetting parental controls
48
48
48
48
49
49
49
50
50
52
52
52
13 More settings ...................................................... 53
Changing network settings
Changing ZIP Code
Changing time settings
Scanning for Antenna TV channels again
Setting the HDMI® mode (4K models only)
Adjusting external device connections
Using Roku Wireless Speakers
Using the TV in a home theater
Turning off the TV speakers for home theater use
Setting up a digital audio connection
Pairing Bluetooth devices with Roku Wireless
Speakers
Turning off the TV screen while listening to music
Controlling other devices through CEC
Restarting the TV
Resetting the TV
Reset audio/video settings
Factory reset everything
What if I can’t access the Factory Reset option?
Network connection reset
Changing your Roku Channel Store PIN preference
Getting system updates
Checking for updates on a connected TV
Getting updates on a non-connected TV
53
53
53
54
54
54
54
55
55
55
55
55
56
56
57
57
57
57
57
57
58
58
58
12 Customizing your TV .......................................... 45
Add TV inputs
Add streaming channels
Rename inputs
Remove unwanted tiles
Rearrange tiles
Change themes
Edit Antenna TV channel lineup
Change volume
Configure power settings
Power on settings
Auto power savings
Standby LED On/Off
Fast TV start
45
45
45
45
45
46
46
47
47
47
47
47
47
14 Other devices ...................................................... 60
Screen Mirroring your phone or tablet
Getting and using the Roku mobile app
Private Listening on the Roku mobile app
Using a universal remote
60
60
60
60
15 FAQ ......................................................................... 61
16 Warranty ............................................................... 65
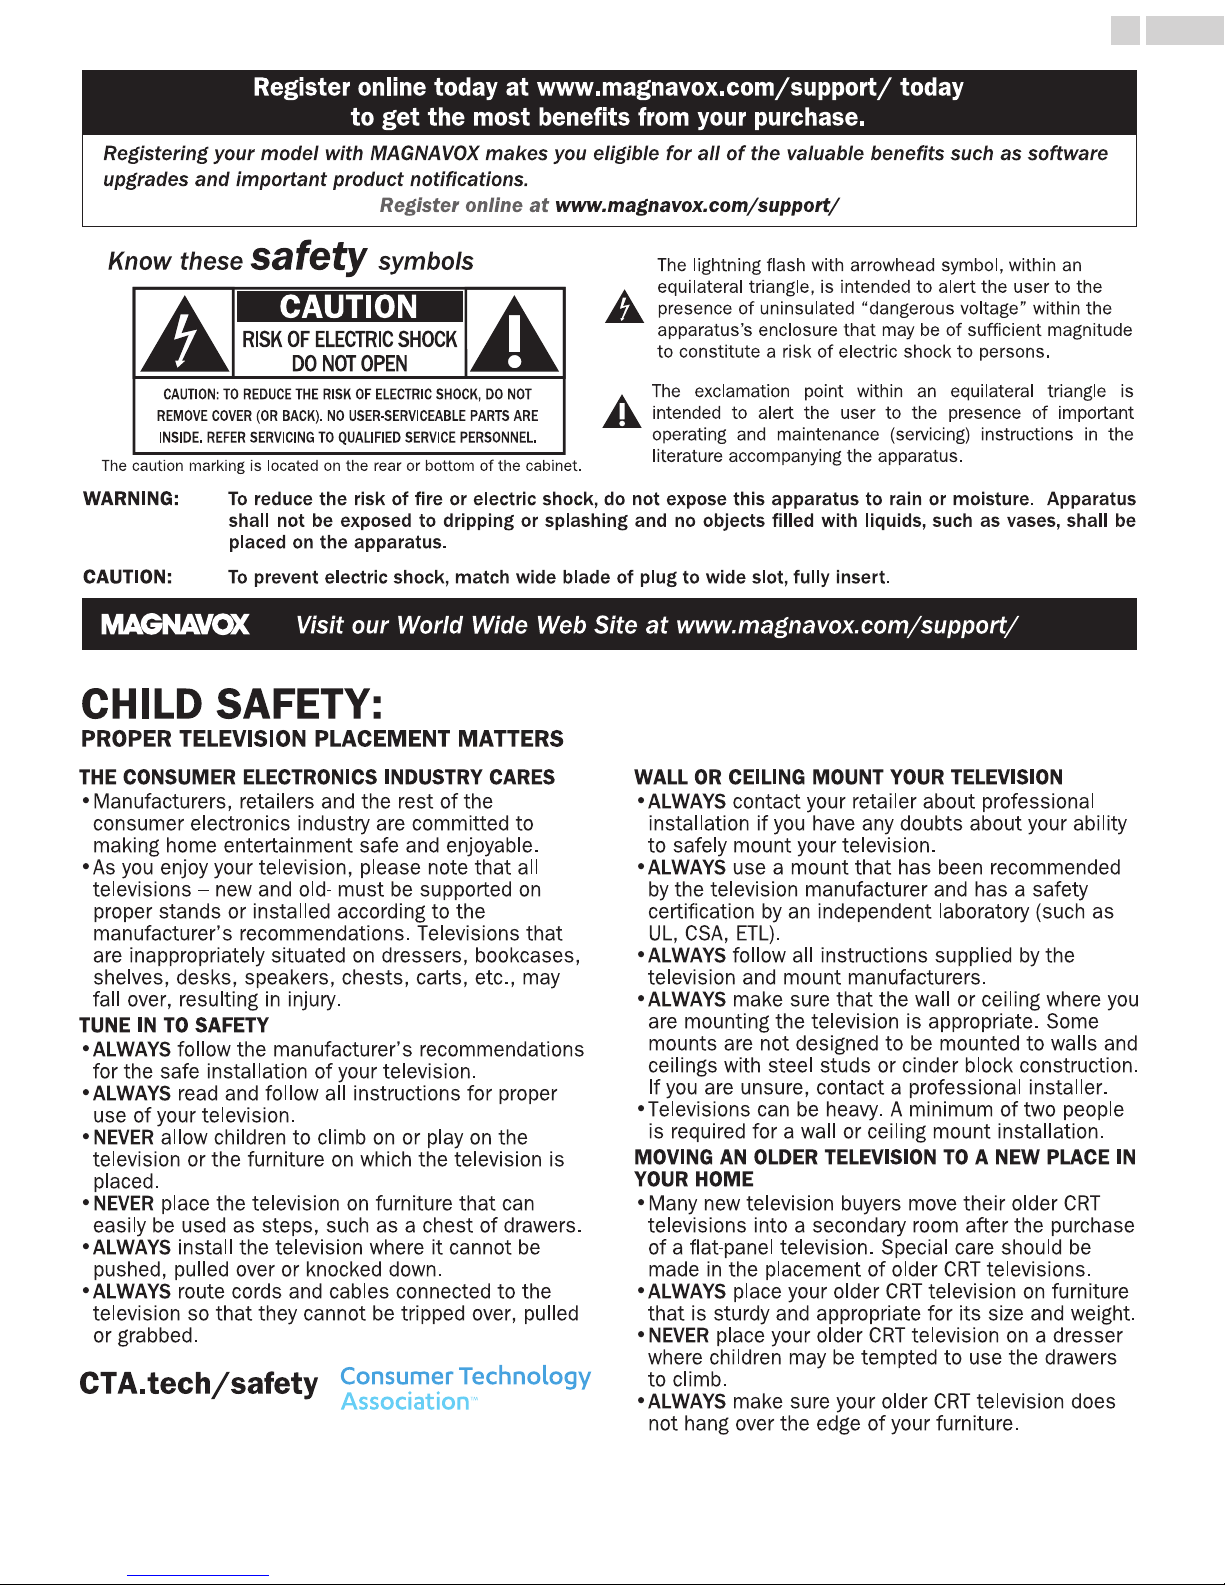
Know these safety symbols
The lightning ash with arrowhead symbol, within an
equilateral triangle, is intended to alert the user to the
presence of uninsulated “dangerous voltage” within the
apparatus’s enclosure that may be of sufcient magnitude
to constitute a risk of electric shock to persons.
The exclamation point within an equilateral triangle is
intended to alert the user to the presence of important
operating and maintenance (servicing) instructions in the
literature accompanying the apparatus.
CAUTION: TO REDUCE THE RISK OF ELECTRIC SHOCK, DO NOT
REMOVE COVER (OR BACK). NO USER-SERVICEABLE PARTS ARE
INSIDE. REFER SERVICING TO QUALIFIED SERVICE PERSONNEL.
RISK OF ELECTRIC SHOCK
DO NOT OPEN
The caution marking is located on the rear or bottom of the cabinet.
CAUTION
Register online today at www.magnavox.com/support/ today
to get the most benefits from your purchase.
Visit our World Wide Web Site at www.magnavox.com/support/
WARNING: To reduce the risk of re or electric shock, do not expose this apparatus to rain or moisture. Apparatus
shall not be exposed to dripping or splashing and no objects lled with liquids, such as vases, shall be
placed on the apparatus.
CAUTION: To prevent electric shock, match wide blade of plug to wide slot, fully insert.
Registering your model with MAGNAVOX makes you eligible for all of the valuable benets such as software
upgrades and important product notications.
Register online at www.magnavox.com/support/
CHILD SAFETY:
CHILD SAFETY:
PROPER TEL
PROPER TELE
VISION P
VISION PLA
CEMENT M
CEMENT MAT
TERS
TERS
THE CONSUMER ELECTRONICS INDUSTRY CARES
THE CONSUMER ELECTRONICS INDUSTRY CARES
•
Manufacturers, retailers and the rest of the
Manufacturers, retailers and the rest of the
consumer electronics industry are committed to
consumer electronics industry are committed to
making home entertainment safe and enjoyable.
making home entertainment safe and enjoyable.
•
As you enjoy your television, please note that all
As you enjoy your television, please note that all
televisions – new and old- must be supported on
televisions – new and old- must be supported on
proper stands or installed according to the
proper stands or installed according to the
manufacturer’s recommendations. Televisions that
manufacturer’s recommendations. Televisions that
are inappropriately situated on dressers, bookcases,
are inappropriately situated on dressers, bookcases,
shelves, desks, speakers, chests, carts, etc., may
shelves, desks, speakers, chests, carts, etc., may
fall over, resulting in injury.
fall over, resulting in injury.
TUNE IN TO SAFETY
TUNE IN TO SAFETY
•
ALWAYS
ALWAYS
follow the manufacturer’s recommendations
follow the manufacturer’s recommendations
for the safe installation of your television.
for the safe installation of your television.
•
ALWAYS
ALWAYS
read and follow all instructions for proper
read and follow all instructions for proper
use of your television.
use of your television.
•
NEVER
NEVER
allow children to climb on or play on the
allow children to climb on or play on the
television or the furniture on which the television is
television or the furniture on which the television is
placed.
placed.
•
NEVER
NEVER
place the television on furniture that can
place the television on furniture that can
easily be used as steps, such as a chest of drawers.
easily be used as steps, such as a chest of drawers.
•
ALWAYS
ALWAYS
install the television where it cannot be
install the television where it cannot be
pushed, pulled over or knocked down.
pushed, pulled over or knocked down.
•
ALWAYS
ALWAYS
route cords and cables connected to the
route cords and cables connected to the
television so that they cannot be tripped over, pulled
television so that they cannot be tripped over, pulled
or grabbed.
or grabbed.
WALL OR CEILING MOUNT YOUR TELEVISION
WALL OR CEILING MOUNT YOUR TELEVISION
•
ALWAYS
ALWAYS
contact your retailer about professional
contact your retailer about professional
installation if you have any doubts about your ability
installation if you have any doubts about your ability
to safely mount your television.
to safely mount your television.
•
ALWAYS
ALWAYS
use a mount that has been recommended
use a mount that has been recommended
by the television manufacturer and has a safety
by the television manufacturer and has a safety
certication by an independent laboratory (such as
certication by an independent laboratory (such as
UL, CSA, ETL).
UL, CSA, ETL).
•
ALWAYS
ALWAYS
follow all instructions supplied by the
follow all instructions supplied by the
television and mount manufacturers.
television and mount manufacturers.
•
ALWAYS
ALWAYS
make sure that the wall or ceiling where you
make sure that the wall or ceiling where you
are mounting the television is appropriate. Some
are mounting the television is appropriate. Some
mounts are not designed to be mounted to walls and
mounts are not designed to be mounted to walls and
ceilings with steel studs or cinder block construction.
ceilings with steel studs or cinder block construction.
If you are unsure, contact a professional installer.
If you are unsure, contact a professional installer.
•
Televisions can be heavy. A minimum of two people
Televisions can be heavy. A minimum of two people
is required for a wall or ceiling mount installation.
is required for a wall or ceiling mount installation.
MOVING AN OLDER TELEVISION TO A NEW PLACE IN
MOVING AN OLDER TELEVISION TO A NEW PLACE IN
YOUR HOME
YOUR HOME
•
Many new television buyers move their older CRT
Many new television buyers move their older CRT
televisions into a secondary room after the purchase
televisions into a secondary room after the purchase
of a at-panel television. Special care should be
of a at-panel television. Special care should be
made in the placement of older CRT televisions.
made in the placement of older CRT televisions.
•
ALWAYS
ALWAYS
place your older CRT television on furniture
place your older CRT television on furniture
that is sturdy and appropriate for its size and weight.
that is sturdy and appropriate for its size and weight.
•
NEVER
NEVER
place your older CRT television on a dresser
place your older CRT television on a dresser
where children may be tempted to use the drawers
where children may be tempted to use the drawers
to climb.
to climb.
•
ALWAYS
ALWAYS
make sure your older CRT television does
make sure your older CRT television does
not hang over the edge of your furniture.
not hang over the edge of your furniture.
CTA.tech/safety
CTA.tech/safety
4 .English
Important safety instructions
Read these instructions.
Keep these instructions.
Heed all warnings.
Follow all instructions.
Do not use this apparatus near water.
Clean only with dry cloth.
Do not block any ventilation openings. Install in
accordance with the manufacturer’s instructions.
Do not install near any heat sources such as
radiators, heat registers, stoves, or other apparatus
(including ampliers) that produce heat.
Do not defeat the safety purpose of the polarized or
grounding-type plug. A polarized plug has two blades
with one wider than the other. A grounding type plug
has two blades and a third grounding prong. The wide
blade or the third prong are provided for your safety. If
the provided plug does not t into your outlet, consult
an electrician for replacement of the obsolete outlet.
Protect the power cord from being walked on or
pinched particularly at plugs, convenience
receptacles, and the point where they exit from the
apparatus.
Only use attachments / accessories specied by the
manufacturer.
Use only with the cart, stand, tripod,
bracket, or table specied by the
manufacturer, or sold with the
apparatus. When a cart is used, use
caution when moving the cart /
apparatus combination to avoid injury
from tip-over.
Unplug this apparatus during lightning storms or when
unused for long periods of time.
Refer all servicing to qualied service personnel.
Servicing is required when the apparatus has been
damaged in any way, such as power-supply cord or
plug is damaged, liquid has been spilled or objects
have fallen into the apparatus, the apparatus has
been exposed to rain or moisture, does not operate
normally, or has been dropped.
13.
14.
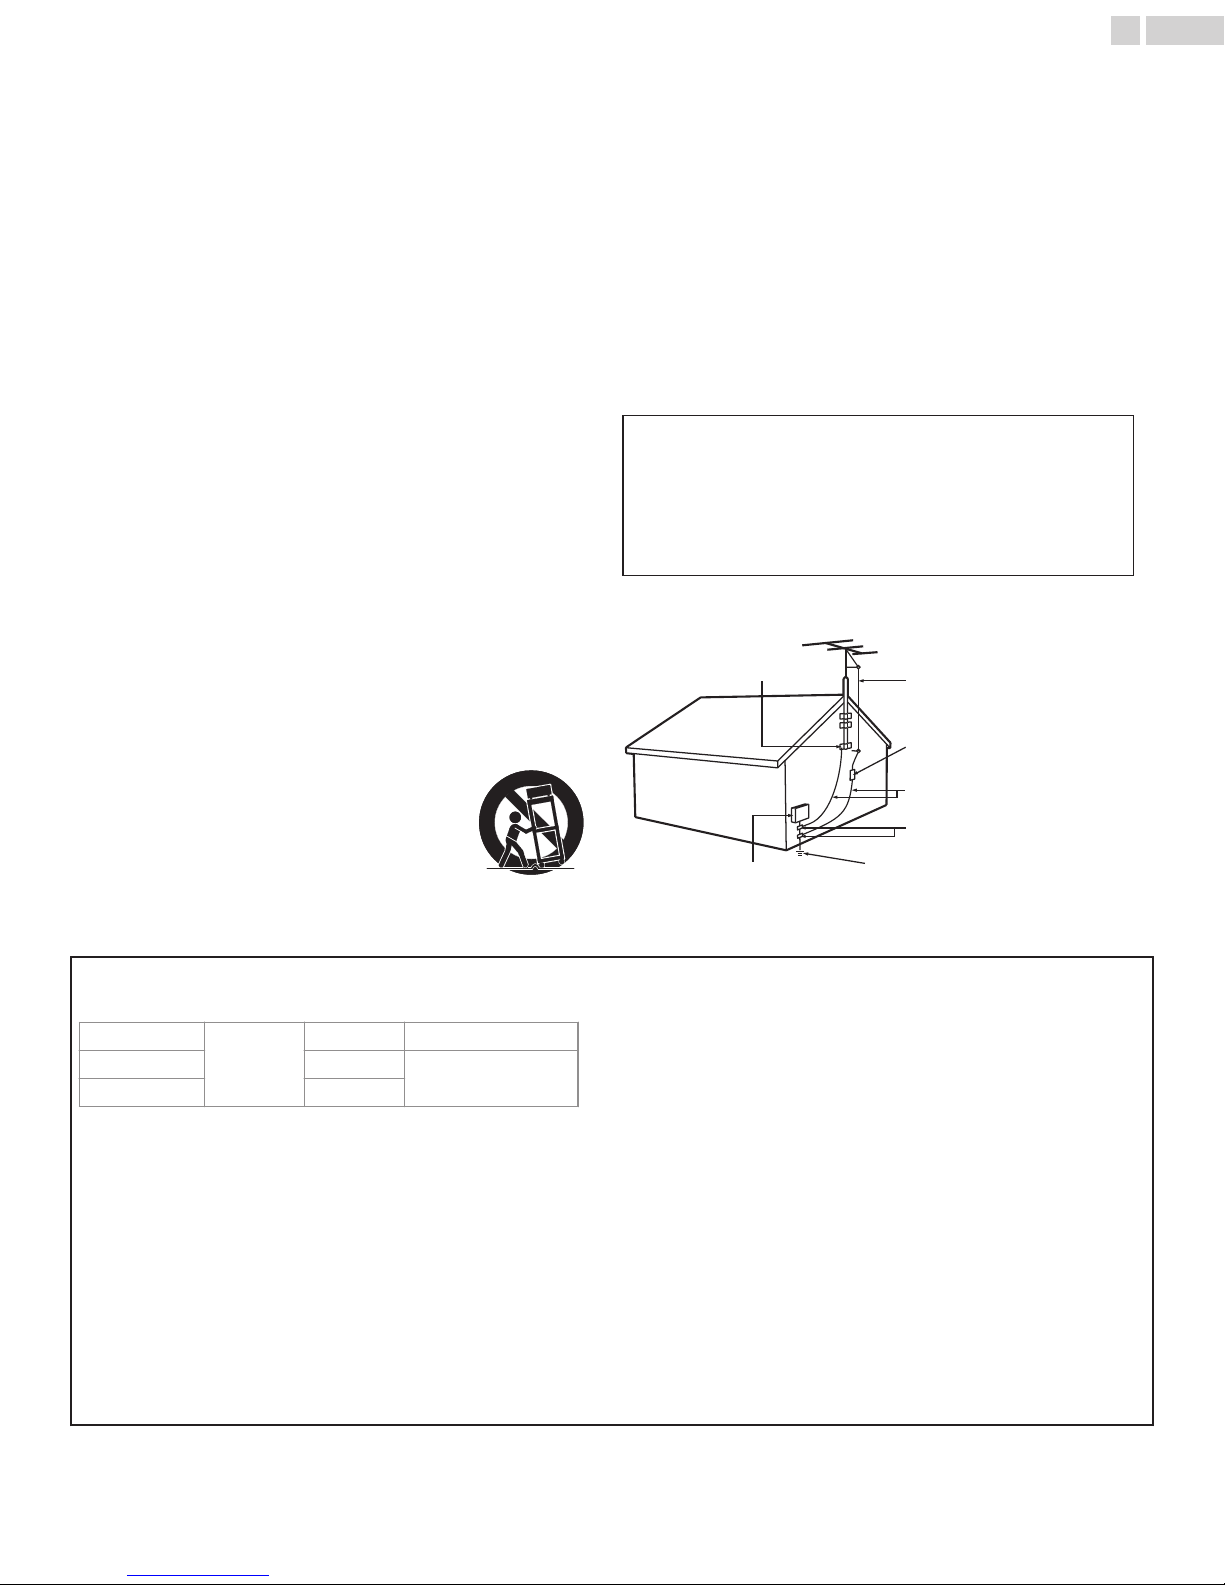
Note to the CATV system installer:
This reminder is provided to call the CATV system
installer’s attention to Article 820-40 of the NEC that
provides guidelines for proper grounding and, in
particular, species that the cable ground shall be
connected to the grounding system of the building, as
close to the point of cable entry as practical.
Example of antenna grounding as per NEC National Electric Code
ANTENNA LEAD IN WIRE
GROUND CLAMP
ANTENNA DISCHARGE UNIT (NEC
SECTION 810-20)
ELECTRIC SERVICE EQUIPMENT
GROUNDING CONDUCTORS (NEC
SECTION 810-21)
POWER SERVICE GROUNDING
ELECTRODE SYSTEM (NEC ART 250,
PART H)
GROUND CLAMPS
1.
2.
3.
4.
5.
6.
7.
8.
9.
10.
11.
12.
5 .English
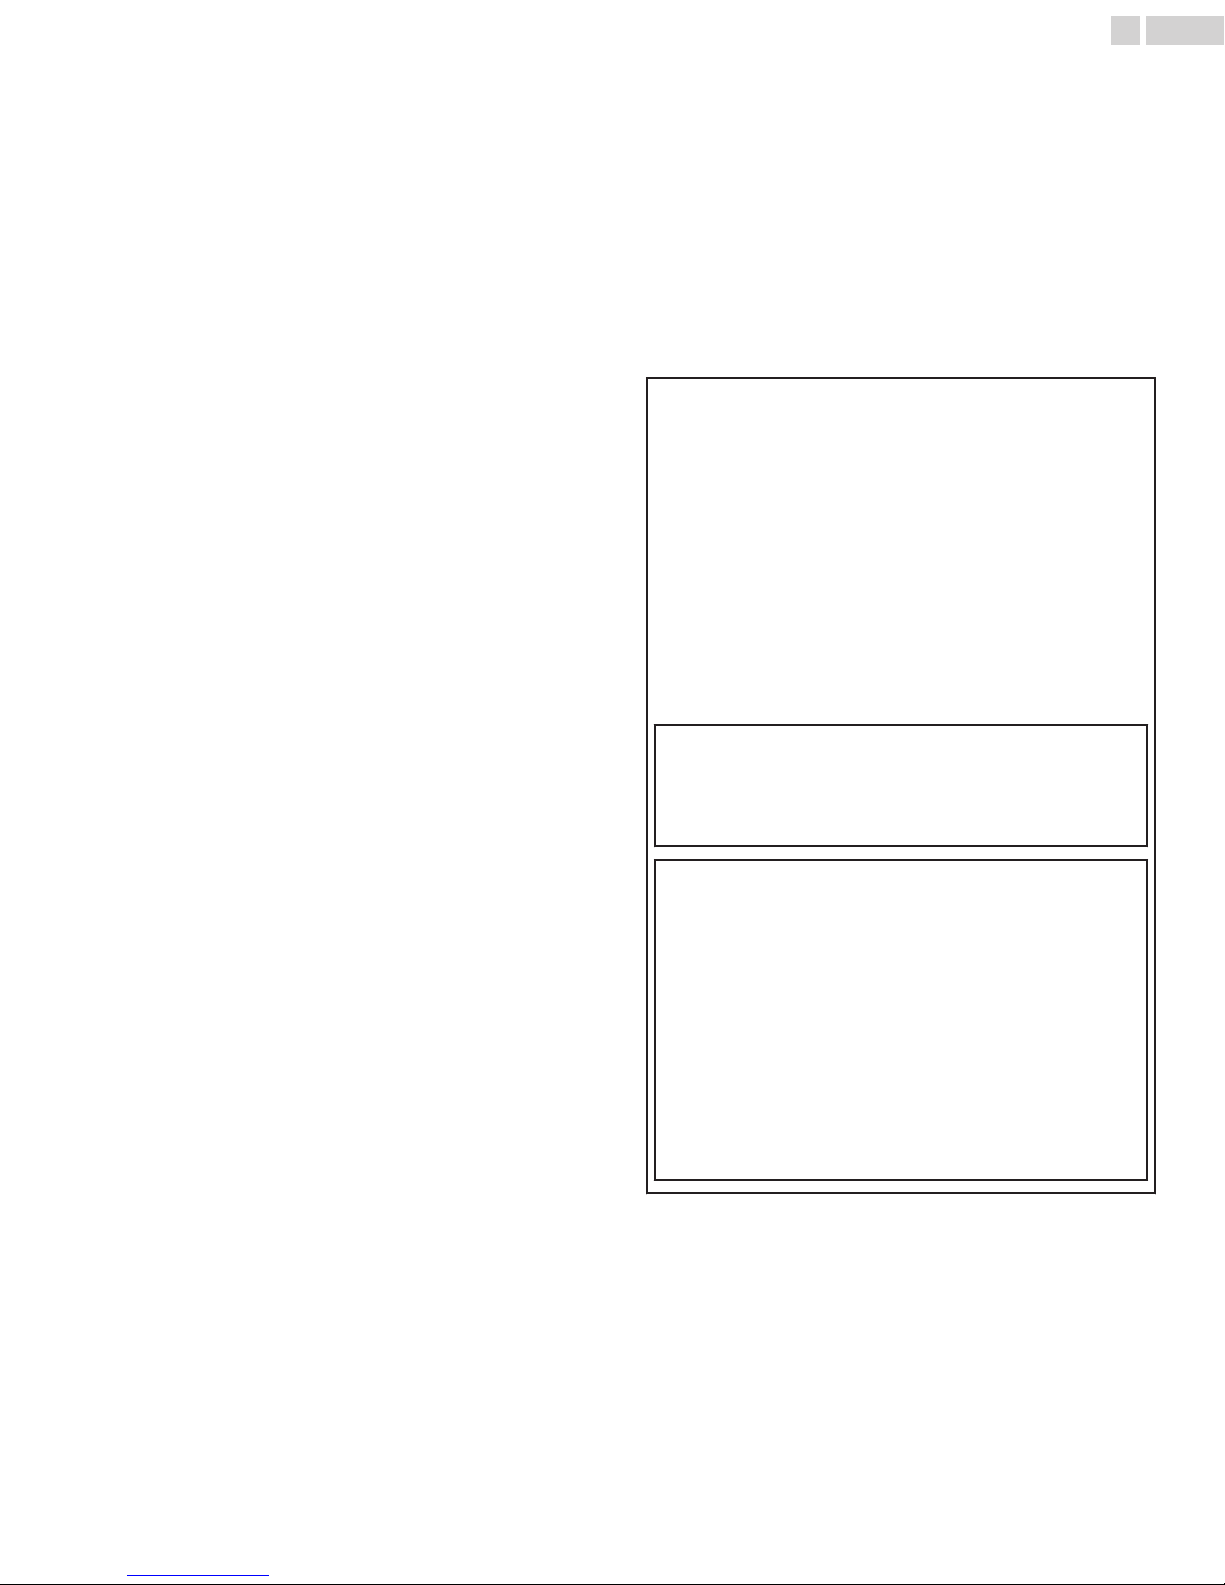
Wall mount bracket kit
Brand Model # Screw dimension
50MV349R
43MV349R 25BB
32MV319R AST16
●
Your TV meets the VESA standard for wall mounting. Consult
with your local dealer for a wall mount bracket which is
compatible with your TV model.
●
The recommended wall mount bracket kit (sold separately)
allows the mounting of the TV on the wall.
●
For detailed information on installing the wall mount, refer to
the wall mount Instruction book.
●
Funai is not responsible for any damage to the product or injury
to yourself or others if you elect to install the TV wall mount
bracket or mount the TV onto the bracket.
●
The wall mount bracket must be installed by experts.
SANUS
F80b M6 x 1.378” (35mm)
M4 x 1.378” (35mm)
Funai is not liable for these types of accidents or injuries noted
below.
●
Install the wall mount bracket on a sturdy vertical wall.
●
If installed onto a ceiling or slanted wall, the TV and wall mount
bracket may fall which could result in a severe injury.
●
Do not use screws that are longer or shorter than their
specified length. If screws too long are used this may cause
mechanical or electrical damage inside the TV set. If screws
too short are used this may cause the TV set to fall.
●
Do not fasten the screws by excessive force. This may damage
the product or cause the product to fall, leading to an injury.
●
For safety reasons use 2 people to mount the TV onto a wall
mounting bracket.
●
Do not mount the TV onto the wall mounting bracket while your
TV is plugged in or turned on. It may result in an electrical shock
injury.
When installing the unit on the wall, allow this much space.
Top
Left and right side
Bottom
: 11.8 inches (30cm)
: 5.9 inches (15cm)
: 3.9 inches (10cm)
6 .English
1 Notice
MAGNAVOX and SMART. VERY SMART. are registered trademarks of
Koninklijke Philips N.V. and are used under license from Koninklijke
Philips N.V.
Funai reserves the right to change products at any time without being
obliged to adjust earlier supplies accordingly.
The material in this Owner’s manual is believed adequate for the intended
use of the system. If the product or its individual modules or procedures
are used for purposes other than those specified herein, confirmation of
their validity and suitability must be obtained. Funai warrants that the
material itself does not infringe any United States patents. No further
warranty is expressed or implied.
Funai cannot be held responsible neither for any errors in the content of
this document nor for any problems as a result of the content in this
document. Errors reported to Funai will be adapted and published on the
Funai support website as soon as possible.
Pixel characteristics
This LCD product has a high number of color pixels. Although it has
effective pixels of 99.999% or more, black dots or bright points of light
(red, green or blue) may appear constantly on the screen. This is a
structural property of the display (within common industry standards) and
is not a malfunction.
Warranty
No components are user serviceable. Do not open or remove covers to
the inside of the product. Repairs may only be done by service centers
and official repair shops. Failure to do so shall void any warranty, stated
or implied.
Any operation expressly prohibited in this Owner’s manual, any
adjustments or assembly procedures not recommended or authorized in
this Owner’s manual shall void the warranty.
Federal communications commission notice
This equipment has been tested and found to comply with the limits for a
Class B digital device, pursuant to part 15 of the FCC Rules. These limits
are designed to provide reasonable protection against harmful
interference in a residential installation. This equipment generates, uses
and can radiate radio frequency energy and, if not installed and used in
accordance with the instructions, may cause harmful interference to radio
communications. However, there is no guarantee that interference will not
occur in a particular installation. If this equipment does cause harmful
interference to radio or television reception, which can be determined by
turning the equipment off and on, the user is encouraged to try to correct
the interference by one or more of the following measures:
●
Reorient or relocate the receiving antenna.
●
Increase the separation between the equipment and the receiver.
●
Connect the equipment into an outlet on a circuit different from that to
which the receiver is connected.
●
Consult the dealer or an experienced radio or television technician for
help.
Declaration of conformity
Trade name
Responsible party
Model
Address
Telephone number
This is not the mailing address for Open Source Software or Customer
*
service.
: MAGNAVOX
: FUNAI CORPORATION, Inc.
: 50MV349R, 43MV349R, 32MV319R
: 21061 S. Western Ave. Suite 210,
Torrance, CA 90501, USA*
: 1 866 341 3738
Modifications
This apparatus may generate or use radio frequency energy. Changes or
modifications to this apparatus may cause harmful interference.
Any modifications to the apparatus must be approved by Funai.
The user could lose the authority to operate this apparatus if an
unauthorized change or modification is made.
Cables
Connections to this device must be made with shielded cables with
metallic RFI / EMI connector hoods to maintain compliance with FCC
Rules and regulations.
Canadian notice
CAN ICES-3 (B) / NMB-3 (B)
Analog and digital television receiving apparatus, Canada BETS-7 /
NTMR-7.
The following FCC/IC RSS applies to the wireless LAN
adapter included in this product.
FCC caution: Any changes or modifications not expressly approved by
the party responsible for compliance could void the user’s authority
to operate this equipment.
This transmitter must not be co-located or operated in conjunction
with any other antenna or transmitter.
For product available in the USA market, only channel 1~11 can be
operated. Selection of other channels is not possible.
FCC/IC RF Exposure Compliance
This equipment complies with FCC/IC radiation exposure limits set
forth for an uncontrolled environment and meets the FCC radio
frequency (RF) Exposure Guidelines and RSS-102 of the IC radio
frequency (RF) Exposure rules.
This equipment should be installed and operated keeping the radiator
at least 20cm or more away from your body.
This device complies with Part 15 of FCC Rules and Industry
Canada licence-exempt RSS standard(s). Operation is subject to
the following two conditions: (1) this device may not cause
interference, and (2) this device must accept any interference,
including interference that may cause undesired operation of this
device.
5150-5250 MHz band is restricted to indoor operations only.
High-power radars are allocated as primary users (i.e. priority
users) of the bands 5250-5350 MHz and 5650-5850 MHz and that
these radars could cause interference and/or damage to LE-LAN
devices.
Compliance with IC requirement RSS-210 A9.4.4
Data transmission is always initiated by software, which is the
passed down through the MAC, through the digital and analog
baseband, and finally to the RF chip. Several special packets are
initiated by the MAC. These are the only ways the digital baseband
portion will turn on the RF transmitter, which it then turns off at the
end of the packet. Therefore, the transmitter will be on only while
one of the aforementioned packets is being transmitted. In other
words, this device automatically discontinue transmission in case
of either absence of information to transmit or operational failure.
7
.English
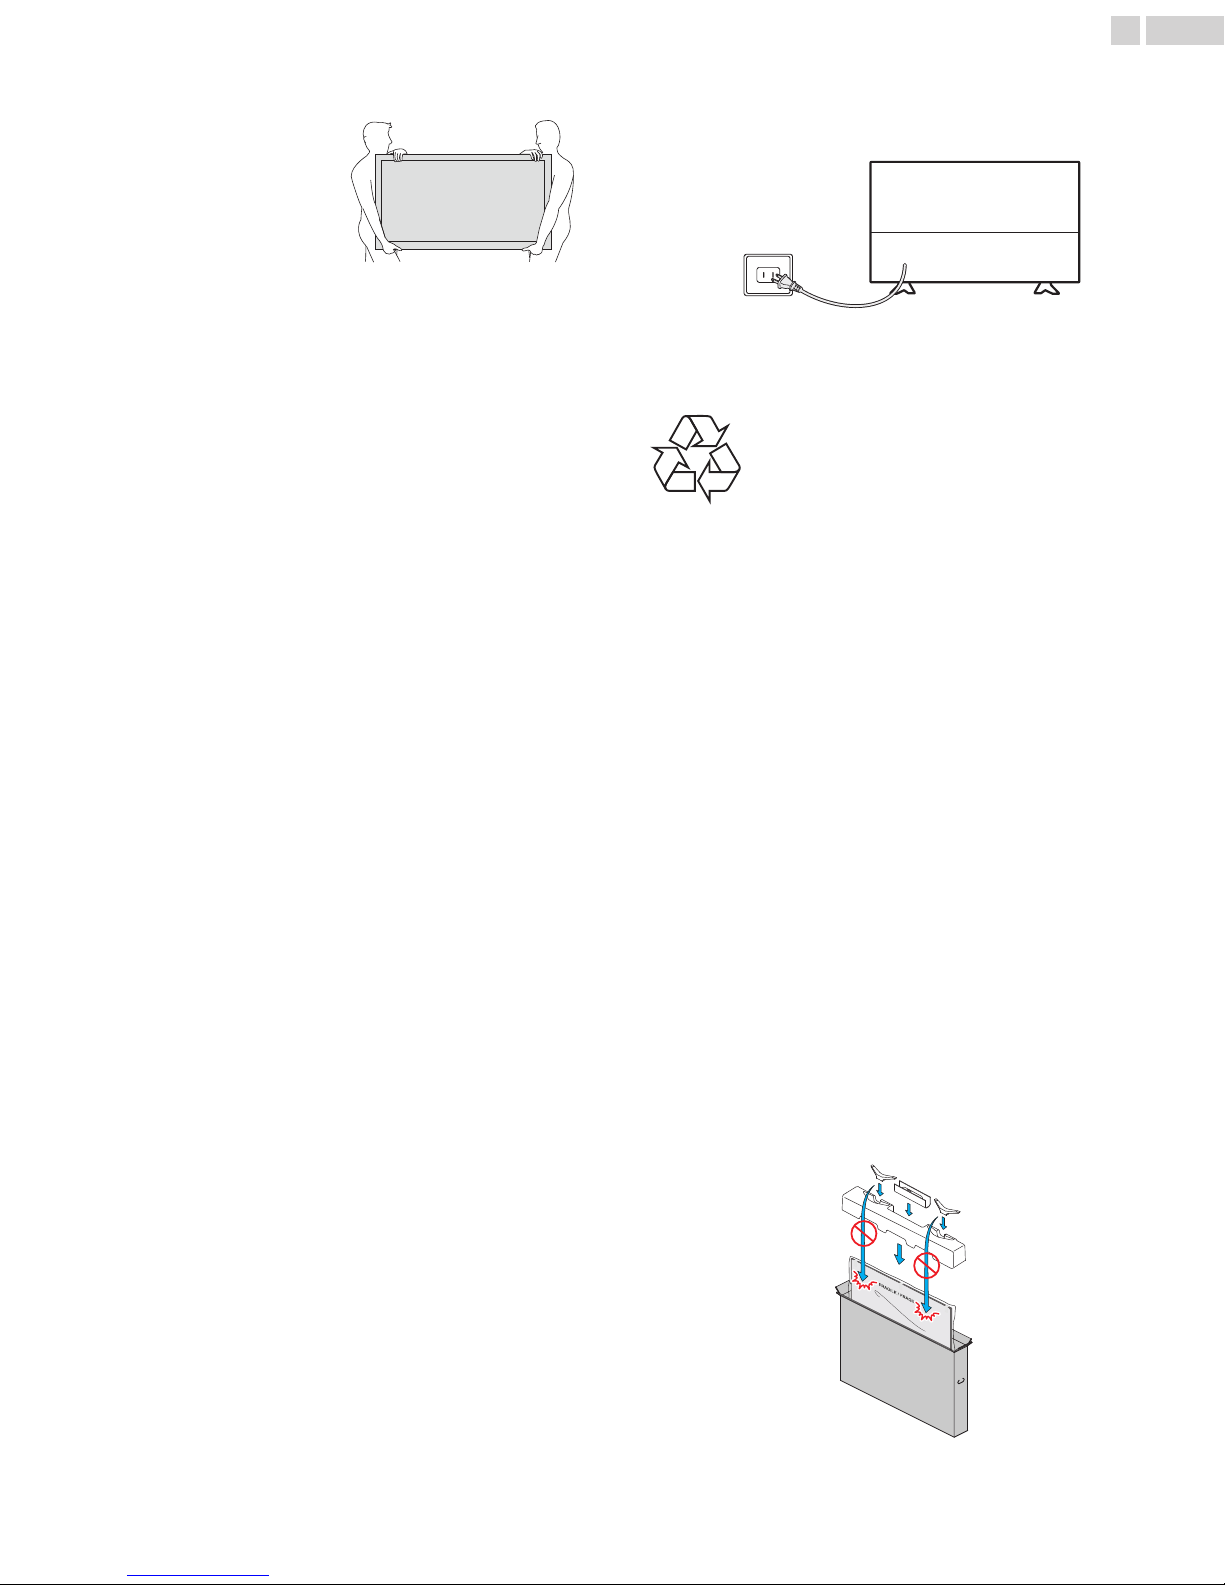
Positioning the TV
●
Large screen TVs are heavy. 2 people are required to carry and handle
a large screen TV.
●
Make sure to hold the upper and
bottom frames of the unit firmly as
illustrated.
●
Install the unit in a horizontal and
stable position.
●
Do not install the unit in direct
sunlight or in a place subject to dust
or strong vibration.
●
Depending on the environment, the temperature of this unit may
increase slightly. This is not a malfunction.
●
When installing this unit in a temperate environment, avoid a place with
rapid temperature changes.
–
Operating temperature: 41°F (5°C) to 104°F (40°C)
●
This unit should not be used in a tropical environment as it has not
been evaluated under such conditions.
●
No objects should be placed directly on or under this unit, especially
lighted candles or other flaming objects.
●
Depending on your external devices, noise or disturbance of the picture
and/or sound may be generated if the unit is placed too close to them.
In this case, please ensure enough space between the external devices
and the unit.
●
Do not insert the AC power cord into the power socket outlet before all
the connections are made.
●
Ensure that you always have easy access to the AC power cord and
outlet to disconnect the TV from the AC outlet.
●
Before you move the TV, disconnect attached cables to prevent damage
to connectors, especially the TV tuner.
●
Be sure to unplug the AC power plug from the AC outlet before moving
or carrying the unit.
●
When moving the TV and then setting it down, please be careful not to
pinch the AC power cord under the unit.
●
Do not place this unit in an area where it may be exposed to water, oil
or grease such as:
near a bathtub, basin, kitchen sink, washing tub, swimming pool,
kitchen exhaust fan, etc., or in a damp basement.
Regulatory notices
WARNING
WARNING
If your existing TV is being retained and relocated, the same
considerations as above should be applied.
: To prevent injury, this apparatus must be securely
attached to the furniture / wall in accordance with the
instructions. Tipping, shaking or rocking the unit may
cause injury / death.
: Never place a TV in an unstable location. A TV may fall,
causing serious personal injury or death. Many injuries,
particularly to children, can be avoided by taking simple
precautions such as:
–
Using cabinets or stands recommended by the
manufacturer of the TV.
–
Only using furniture that can safely support the TV.
–
Ensuring the TV is not overhanging the edge of the
supporting furniture.
–
Not placing the TV on tall furniture (for example,
cupboards or bookcases) without anchoring both the
furniture and the TV to a suitable support.
–
Not placing the TV on cloth or other materials that
may be located between the TV and supporting
furniture.
–
Educating the children about the dangers of climbing
on furniture to reach the TV or its controls.
Press B to turn the unit on and go into standby mode. To completely turn
off the unit, you must unplug the AC power plug from the AC power outlet.
Disconnect the AC power plug to shut the unit off when trouble is found
or not in use. The AC plug shall remain readily available.
AC power plug
Never use a gas duster on this TV.
The gas trapped inside of this unit may cause ignition and explosion.
Environmental care
The packaging of this product is intended to be recycled.
Contact your local authorities for information about how to recycle the
packaging.
Please visit http://www.magnavox.com and click Recycling under
Information (or type https://www.magnavox.com/en/content/9-recycling)
End of life directives
Magnavox pays a lot of attention to produce environmental-friendly
products in green focal areas. Your new TV contains materials which can
be recycled and reused. At the end of its life, specialized companies can
dismantle the discarded TV to concentrate the reusable materials and to
minimize the amount of materials to be disposed of. Please ensure you
dispose of your old TV according to local regulations.
# Batteries usage
CAUTION
WARNING
●
Do not mix old and new batteries.
●
Do not mix alkaline, standard (carbon-zinc) or rechargeable (ni-cad,
ni-mh, Li-ion, etc.) batteries.
: Danger of explosion if battery is incorrectly replaced.
Replace only with the same or equivalent type.
: Batteries (battery pack or battery installed) should not be
exposed to excessive heat such as sunshine, fire or the
like.
Disposal of used batteries
The batteries included do not contain the heavy metals mercury and
cadmium, however in certain localities, disposing batteries with household
waste is not permitted. Please ensure you dispose of batteries according
to local regulations.
Preparing to move / ship the unit
Please pack the unit properly by following the diagram on the carton (as
noted below).
Do not place the unit on the furniture that is capable of being tilted by a
child and an adult leaning, pulling, standing or climbing on it. A falling unit
can cause serious injury or even death.
In order to avoid interruption of ventilation, this unit should not be placed
in built-in equipment such as a book cabinet, rack, etc., and the vents of
this unit should not be covered with anything such as a tablecloth, curtain,
newspaper, etc. Make sure that there is enough ventilation space
(4 inches / 10 cm or more) around this unit.
●
To avoid damage to the screen, do not pack the stand on the same side
as the TV screen, refer to the illustration above.

8 .English
Copyright
All other registered and unregistered trademarks are the property of their
respective owners.
The terms HDMI and HDMI HighDefinition Multimedia Interface,
and the HDMI Logo are trademarks
or registered trademarks of HDMI
Licensing Administrator, Inc. in the
United States and other countries.
Manufactured under license from
Dolby Laboratories. Dolby, Dolby
Audio, and the double-D symbol are
trademarks of Dolby Laboratories.
Portions of this software are copyright © The FreeType Project
(www.freetype.org).
The American Academy of Pediatrics discourages television viewing for
children younger than two years of age.
Some apps are not pre-installed, internet connection is required for
download.
FUNAI CORPORATION, Inc. does not warrant access to the portal or to any
of the services, content, software and advertising. FUNAI CORPORATION,
Inc. or third party content / service providers may, in their sole discretion,
add or remove access to any specific services, content, software and
advertising at any time. Although FUNAI CORPORATION, Inc. will strive to
provide a good selection of services, content or software, FUNAI
CORPORATION, Inc. does not warrant continued access to any specific
services, and content or software.
FUNAI CORPORATION, Inc. does not warrant wireless screencasting
compatibility with all source devices such as smartphones, tablets,
laptops, etc. due to large variability in hardware, firmware, drivers,
software and implementation of wireless casting applications on these
source devices. Although FUNAI CORPORATION, Inc. will strive to enhance
compatibility and performance across a range of source devices, FUNAI
CORPORATION, Inc. does not warrant compatibility with specific source
devices.
© 2018 Funai Electric Co., Ltd. All rights reserved.
No part of this Owner’s manual may be reproduced, transmitted,
disseminated or transcribed, in any form or for any purpose without the
express prior written consent of Funai. Furthermore, any unauthorized
commercial distribution of this Owner’s manual or any revision hereto is
strictly prohibited.
2 Welcome
Congratulations on the purchase of your new Roku TV! Discover
the joy of endless entertainment. After it’s set up, you’ll be able
to access a world of streaming content channels that may include
paid subscription channels like Netfl ix or free channels like
YouTube, Crackle, CNET and literally thousands more.
Important : Your TV receives automatic updates from time to time,
enabling new content and features. This edition of the User Guide
describes Roku TV version 8.0. To determine the current version
of your Roku TV, go to Settings > System > About after you
complete Guided Setup.
The new standard in Smart TVs
Welcome to TV like you’ve most likely never seen before—a home
screen that you can personalize with your favorite devices and
streaming channels. Choose from hundreds of thousands of
streaming movies and TV episodes, plus music, sports, kids,
family, international and much more. You should never run out of
things to watch.
Note(s)
●
A paid subscription or other payments may be required for some channel
content. Channel availability is subject to change and varies by country.
Get the most out of your new TV
Follow these simple steps to get the most out of your new TV.
Connect to the Internet
1
●
It’s simple, it’s easy, and it will unlock a world of
entertainment. All you need is a network connection. There
are hundreds of free streaming channels, paid subscription
services like Netflix and Spotify, and convenient ways to
rent or buy a favorite film or show with, for example, Google
Play
Pick your favorite streaming channels
2
●
Find the entertainment you love. From the latest
blockbuster movies to your favorite TV shows, with tons of
live sports, a broad selection of music streaming channels,
popular programming in a dozen international languages,
24x7 live news and so much more, your new Roku TV has
your sweet spot. A paid subscription or other payments may
be required for some channels.
Find Antenna TV shows in the Smart Guide
3
●
Only in the United States, use the Smart Guide to see not
only what’s on TV right now, but what was on up to a week
ago, and what will be on in the coming two weeks. And for
many over-the-air programs, if you start watching the
program after it is already in progress, or you see something
you missed in the Smart Guide, you can use More Ways to
Watch to find streaming channels where you can see the
show from the beginning, find other episodes, or entire
seasons of the show, if applicable.
Use Roku’s Smart TV experience to discover More Ways to
4
Watch on other inputs
●
Only in the United States, When watching programs from a
cable box, Blu-ray player, or other source connected to the
HDMI® or AV inputs, keep an eye out for a notification of
streaming channels that offer the program you’re currently
watching and, if applicable, other episodes, the entire
series, or other programs with similar themes.
Personalize your Home screen
5
●
Put your favorite streaming channels, and TV inputs frontand-center on the Home screen. No more flipping through
inputs or wading through complicated menus. You can even
customize the names of each input and move tiles around
so your most-often used devices and streaming channels
are only a click away.
Search for your favorite movie, TV show, actor, or director
6
●
Once you’re connected to the internet, you can easily
search across top streaming channels and Antenna TV
channels. Search by movie or TV show title, actor or director
—all from one place. Search by typing words or phrases
using the on-screen keyboard or on your mobile device or,
only in the United States, speak words or phrases in a
conversational tone using Voice Search. Some channels
and content require payment.
Pause live TV
7
●
Pause, resume, fast forward, and rewind TV shows. Simply
connect your own USB drive with 16GB or bigger capacity
to the TV and pause live TV for up to 90 minutes.
Note(s)
Live TV Pause is available on digital TV shows received on the Antenna TV
●
input, and only when the TV is linked to a valid Roku account.
Control your TV with voice commands
8
●
Only in the United States, use your Roku Voice Remote
(select models), Enhanced Voice Remote (select models),
or the free Roku mobile app to control your Roku TV. Use
conversational voice commands to search for programs by
title, actor, director, or genre. Also use voice commands to
launch streaming channels, switch inputs, change Antenna
TV channels, or open the Smart Guide.
Send your personal media to the big screen
9
●
Send personal photos, videos, and music from your
compatible smartphone or tablet to the TV screen in just a
few taps. Plus, with certain channels, such as Netflix and
YouTube, you can send movies, shows, sport highlights,
and more directly to your TV.
Follow movies coming soon
10
●
Use My Feed to choose from and follow a list of upcoming
movies, and then watch for alerts each time one of your
followed movies becomes available or changes price.
Take charge with a smartphone or tablet
11
●
Control your TV with the included remote or from your
compatible smartphone or tablet with the free mobile app
for iOS®, and Android™ mobile devices . Browse channels,
view My Feed, listen to audio from Antenna TV and
streaming channels. Search more easily using a your
mobile device’s keyboard and, only in the United States,
Voice Search.
●
Mirror your compatible smartphone or tablet on your TV.
Share videos, photos, web pages, and more from
compatible devices.
Connect your Roku TV to networks found in hotels and college
12
dorms.
●
You can temporarily link the TV to your smartphone or table
to agree to any terms, enter codes, or provide required
information before you can get Internet access.
9
.English

Note(s)
Using your Roku TV on a restricted public network requires wireless
●
availability and use of your network-connected smartphone, tablet, or
computer to authenticate access to your account. You must use your Roku
TV remote to initiate the connection process. Streaming content might be
limited due to your geographic location or because of restrictions imposed
by the network host.
Go to support.roku.com for device compatibility information.
Let’s get started.
10 .English

11
.English
3 Connections and setup
Refer to your TV’s Quick Start Guide or other provided
documentation to for model-specific information about attaching
the base or a wall mount and making connections to AC power and
to your other audio/video devices. The following information
applies to all Roku TV models.
Connecting an antenna, cable, or satellite box
If you are using an antenna, CATV cable without a set-top box, or
a cable or satellite box that has only an antenna output, connect
a 75-ohm coaxial cable (not provided) from the device to the ANT/
CABLE input on the TV.
Tip(s)
●
If you are using an antenna with a 300 ohm twin-lead cable,
you need to use a 300-to-75 ohm adapter (not provided) to
adapt the twin-lead cable to a connection that is compatible
with the TV’s antenna input.
●
If you receive your TV stations through a set top box from a
cable or satellite TV provider, connect it to the TV using the
best connection method available. From most to least
desirable:
–
HDMI® input – Digital HD and SD video
–
AV input – analog SD video
–
Antenna input – analog SD video using NTSC
Connecting headphones or analog sound bar to the TV
You can connect headphones or an analog sound bar (not
provided) to the TV’s headphone jack.
Tip(s)
●
Inserting a plug in the headphone jack disables the sound from
the TV’s built-in speakers.
Warning
Loud noise can damage your hearing. When using headphones, use the
lowest volume setting on your headphones that still lets you hear the sound.
Select models also have an audio line out connection that is not affected by
TV volume or mute settings and does not disable the TV speakers. Use this
connection when you want to use your amplifi er or sound bar to control the
TV volume. To turn off the TV’s built-in speakers, in the Home screen menu,
navigate to Settings > Audio > TV speakers and change the setting.
Connecting headphones to the Roku Enhanced Voice
Remote
Select Roku TVs come with the Roku Enhanced Voice Remote. On
these models, you can connect headphones to the jack on the left
side of the remote.
Tip(s)
●
Inserting a plug in the remote’s headphone jack disables the
sound from the TV’s built-in speakers or attached receiver or
sound bar. The volume and mute controls on the right side of
the remote adjust the volume level of the connected
headphones.
Connecting external equipment with a composite AV
video cable
If the best connection available on your device is AV or composite
video output, connect it to the TV using a composite AV cable (not
provided). Composite AV cables typically have three RCA-type
plugs on each end, color coded as follows:
–
Yellow– Video
–
Red– Audio, right channel
–
White or black– Audio, left channel
Connect each plug to the corresponding connector on the device
and on the TV.
Note(s)
Select models have an AV Input that looks like a headphone jack. Use the
●
breakout cable (included) to adapt this input to the three RCA-type plugs on
your composite cable.
Connecting external equipment with an HDMI® cable
If possible, connect your devices using HDMI® cables (not
provided). They help to provide the best video quality and also
carry audio signals, so that only one cable is needed. For better
picture quality, we recommend that you use cables designated as
High Speed HDMI® Cables.
Tip(s)
●
You might need to configure the device to send its signal
through its HDMI® connector
Warning
Loud noise can damage your hearing. When using headphones, use the
lowest volume setting on your headphones that still lets you hear the sound.
You might notice that connecting headphones to your remote shortens the
remote’s battery life somewhat.
Connecting an AV receiver or digital sound bar
You can enjoy Dolby Audio™ multichannel sound from your TV if
you connect a digital amplifier or sound bar (not provided) in either
of two ways:
●
Digital optical audio out (S/PDIF) – Connect a TOSLINK optical
cable (not provided) from the TV to the Optical input on your
receiver or sound bar.
●
HDMI® ARC – Connect an HDMI® cable (not provided) from the
HDMI (ARC) connector to the HDMIR input on your
receiver or sound bar. This connection uses the Audio Return
Channel (ARC) feature of the HDMIR specification to output sound
from the TV to a compatible device. To use this feature, you must
configure the TV to enable HDMI® ARC, as explained in Enable
HDMI®ARC L p. 56.
The connector labeled HDMI IN (ARC) has the additional ability to
use the audio return channel to send digital audio to a receiver or
sound bar, as explained in Connecting an AV receiver or digital
sound bar L p. 11
Preparing for Internet connectivity
If you want to watch streaming content and take advantage of the
cool features of your Roku TV, connect it to the Internet through a
wireless modem/router or a wireless access point (not provided).
The TV has a built-in wireless LAN adapter.
Note(s)
●
The TV supports only its internal wireless network adapter—iit does not
support the use of a USB network adapter.
Select 4K models have wired in addition to wireless network
connectivity. To use the wired network connection, connect an
RJ-45 Ethernet cable (not provided) from the jack on the back of
your TV to your network router or switch. The wired connection
supports both 10 Base-T and 100 Base-T Ethernet.
AC power
Plug your TV into a power outlet. You can tell that the TV has power
because the status indicator lights up when the TV is off.
The topic Status indicator L p. 25 explains how the status
indicator shows what is happening with the TV.
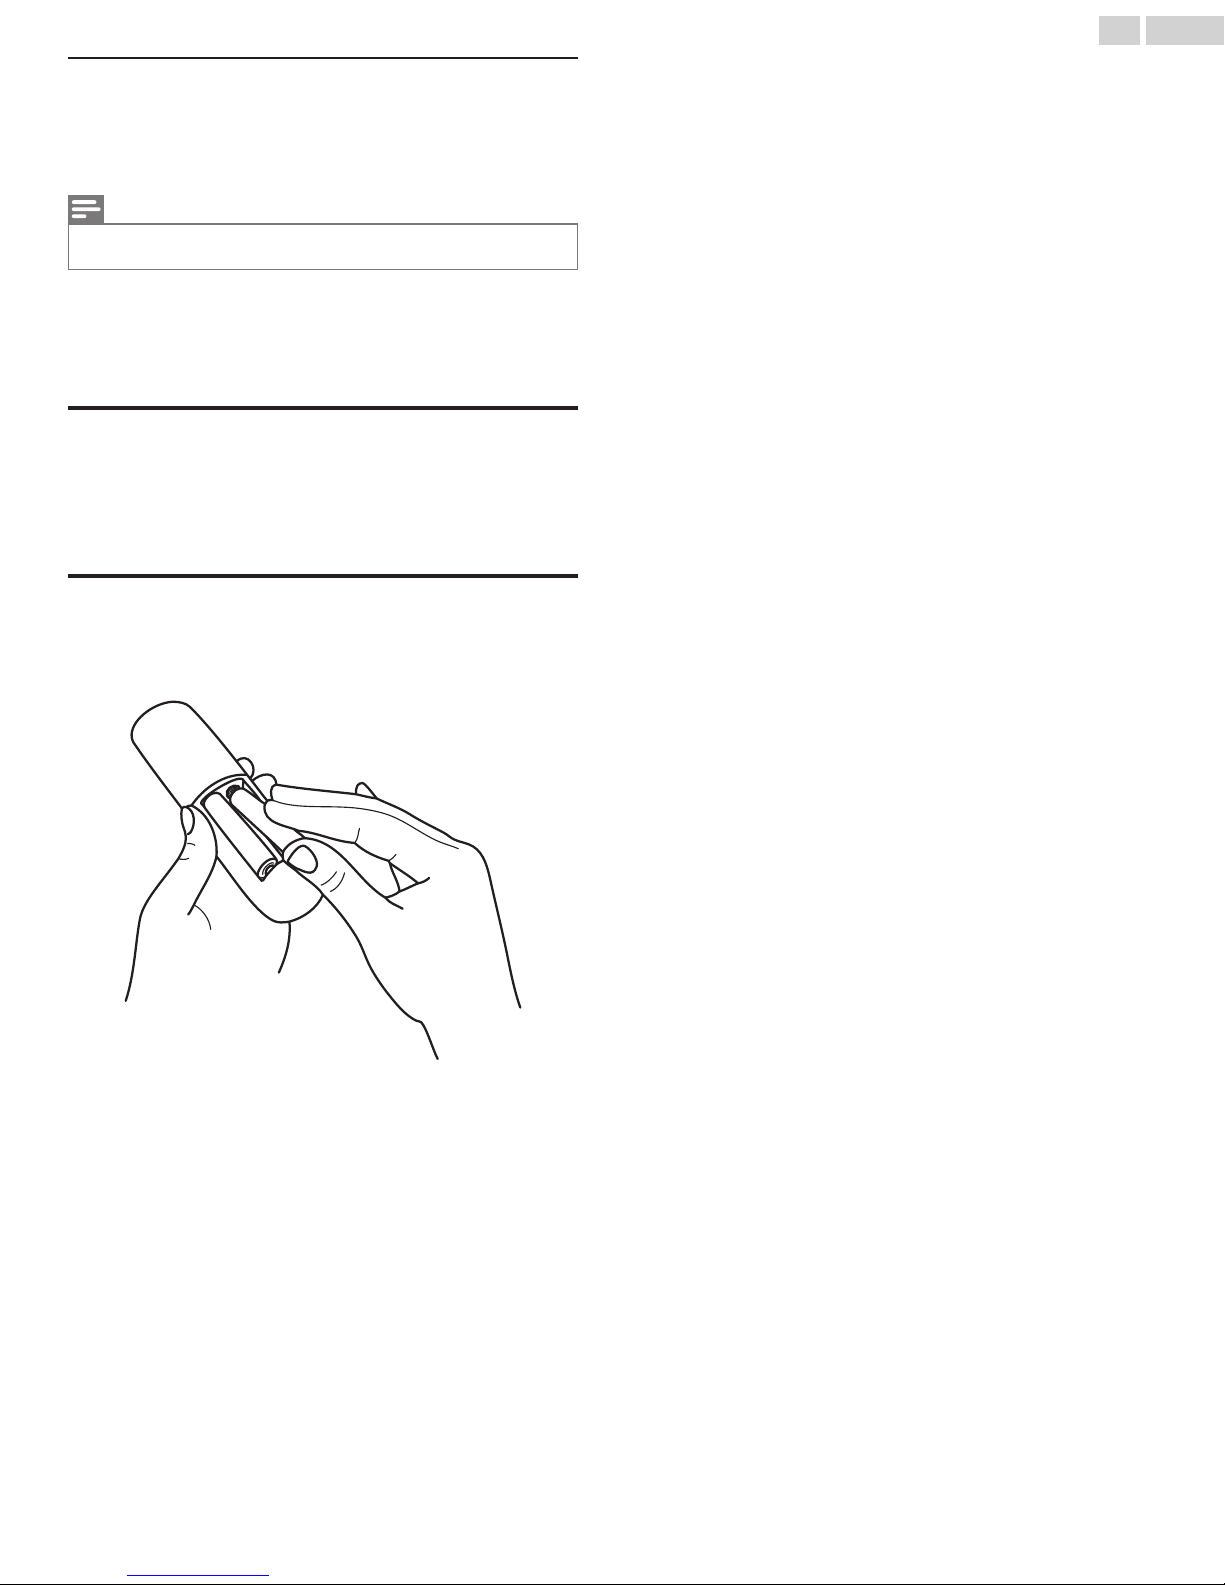
Roku remote batteries
12
.English
Open the back of your Roku remote and insert the included
batteries, observing the proper orientation as indicated in the
battery compartment. Reattach the back cover.
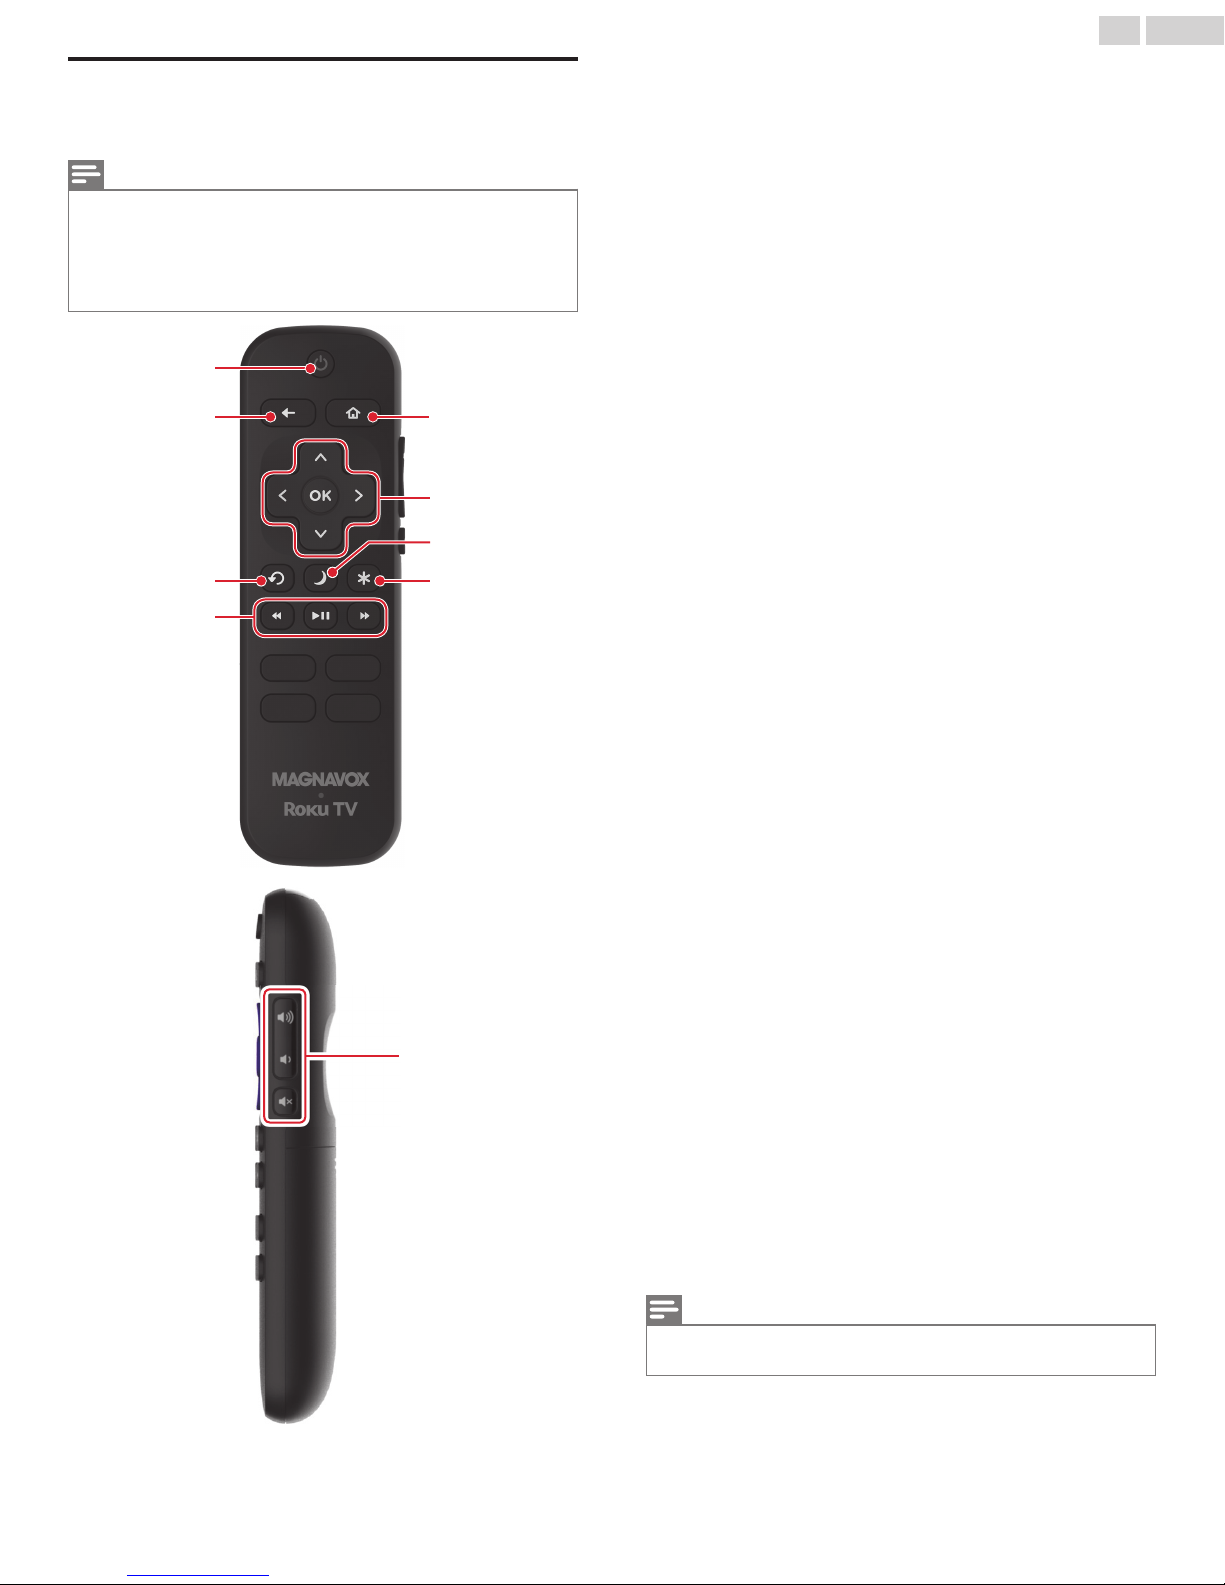
Roku TV Remote
A
B C
D
E
F
G
H
I
Use the following information to identify the buttons on your Roku
remote.
Note(s)
●
Certain remote buttons and features vary by model. Your remote might not
have all buttons or features listed.
●
If your remote has a microphone button D just below the purple pad, then
you have a Roku Voice Remote.
●
If your remote has a headphone jack on its left edge, then you have a Roku
Enhanced Voice Remote.
A
9(Power)
Turns TV on and off.
B
7(Back)
●
Menu: Goes back to previous menu/screen.
●
Home screen tile: Moves highlight back to the Home screen
option.
●
Watching Antenna TV or a TV input: Returns to Home screen.
●
Playing streaming content: Stops playing stream and returns
to the previous menu or screen.
●
Browsing streaming content: Goes to the previous level in
the content tree.
C
8(Home)
Immediately returns to the Home screen.
Pad
D
●
Left / Right / Up / Down moves the highlight in the
corresponding direction.
●
OK selects the highlighted option.
While watching TV:
●
Up/Down changes channel.
●
Left displays the Smart Guide (connected mode) or channel
list (non-connected mode).
●
Left / Right only on TVs operating in non-connected mode,
while in the channel list switches between All Channels and
Favorite channels.
●
OK while in the channel list selects the highlighted channel.
While watching live TV, displays the program information
banner.
E
C(Instant replay)
Select models. Streaming programs that support this feature
and Antenna TV channels: if Live TV Pause is enabled, jumps
back a few seconds with each press and resumes playing.
Broadcast TV: if Live TV Pause is disabled, jumps to previous
channel.
When using an on-screen keyboard: Backspaces in the text
you are entering.
Smart Guide: Return to the current day and time.
F
B(Sleep)
Select models. Displays a banner showing the remaining
sleep time, if any, or Sleep timer is off. Subsequent presses
cycle among the preset sleep time intervals. Once set, the
sleep timer remains in effect regardless of what you are
watching.
Media playback controls
G
Rewind, pause, play, and fast forward streaming content and
Antenna TV channels (if Live TV Pause is enabled).
Press Rewind or Fast forward one, two, or three times to
control the speed of the operation.
Rewind and Fast forward also jump backward and forward one
page at a time when viewing long lists, such as when you are
browsing Antenna TV shows in the channel list or Smart Guide
(U.S. only).
H
A(Options)
Displays additional options when available.
On-screen hints let you know when this button is active.
I
4/5 (Volume) / 6(Mute)
Increases/decreases volume and mutes the TV sound.
Note(s)
●
If the TV is muted, pressing Volume up unmutes.
Pressing Volume down does not unmute the sound.
13 .English

14 .English
Panel buttons
Your TV has a set of panel buttons that perform simple control
functions. The TV panel buttons are not a substitute for the
remote, as they do not give you access to all TV functions.
Depending on model, your TV model has one of several different
panel button designs. Choose the one that applies to your TV from
the following list:
–
Single button
–
Three buttons
–
Game-pad style joystick
–
Four buttons
–
Five buttons (with mute)
–
Five buttons (without mute)
–
Seven buttons
Single button
If your TV has this style of panel button, you can perform the
following functions:
–
Turn TV on : short press
–
Display the Input List : short press when TV is on
–
Select the next input in the Input List : short press while the
TV is showing the Input List
–
Dismiss the Input List without changing inputs : no press
–
Turn TV off : long press
Short press = less than two seconds
Long press = more than two seconds
No press: = no press within two seconds
Three buttons
If your TV has this style of panel buttons, you can perform the
following functions:
–
Turn TV on : middle button, short or long press
–
Volume up : right button when Input List is not active
–
Volume down : left button when Input List is not active
–
Display Input List : middle button, short press when TV is on
–
Highlight next input in the Input List : right button when Input
List is active
–
Highlight previous input in the Input List : left button when
Input List is active
–
Select highlighted item in the Input List : middle button, short
press, or no press
–
Turn TV off : middle button, long press
Short press = less than two seconds
Long press = more than two seconds
No press: = no press within four seconds
15 .English
Game-pad style joystick
If your TV has this style of panel button, you can perform the
following functions:
–
Press in : Toggle between power ON and
Standby
–
Press up or down : Increase/decrease the
volume
–
Press left or right : Switch inputs.
Each press moves the highlight up or
down one item. Pausing for a few
moments selects the highlighted item.
Four buttons
If your TV has this style of panel buttons, you can perform the
following functions:
–
Power: Turns the power on and off.
–
Input: Selects among TV inputs. Each press moves down one
item. Pausing for a few moments selects the highlighted item.
–
Volume +: Increases the volume.
–
Volume –: Decreases the volume.
Five buttons (with mute)
If your TV has this style of panel buttons, you can perform the
following functions. Note that the order of the buttons might vary
from model to model. Examine the panel button labels to
determine your TV model’s layout.
–
Power: Turns the power on and off.
–
Input: Selects among TV inputs. Each press moves down one
item. Pausing for a few moments selects the highlighted item.
–
Volume +: Increases the volume.
–
Volume –: Decreases the volume.
–
Mute: Mutes and unmutes the sound.
Five buttons (without mute)
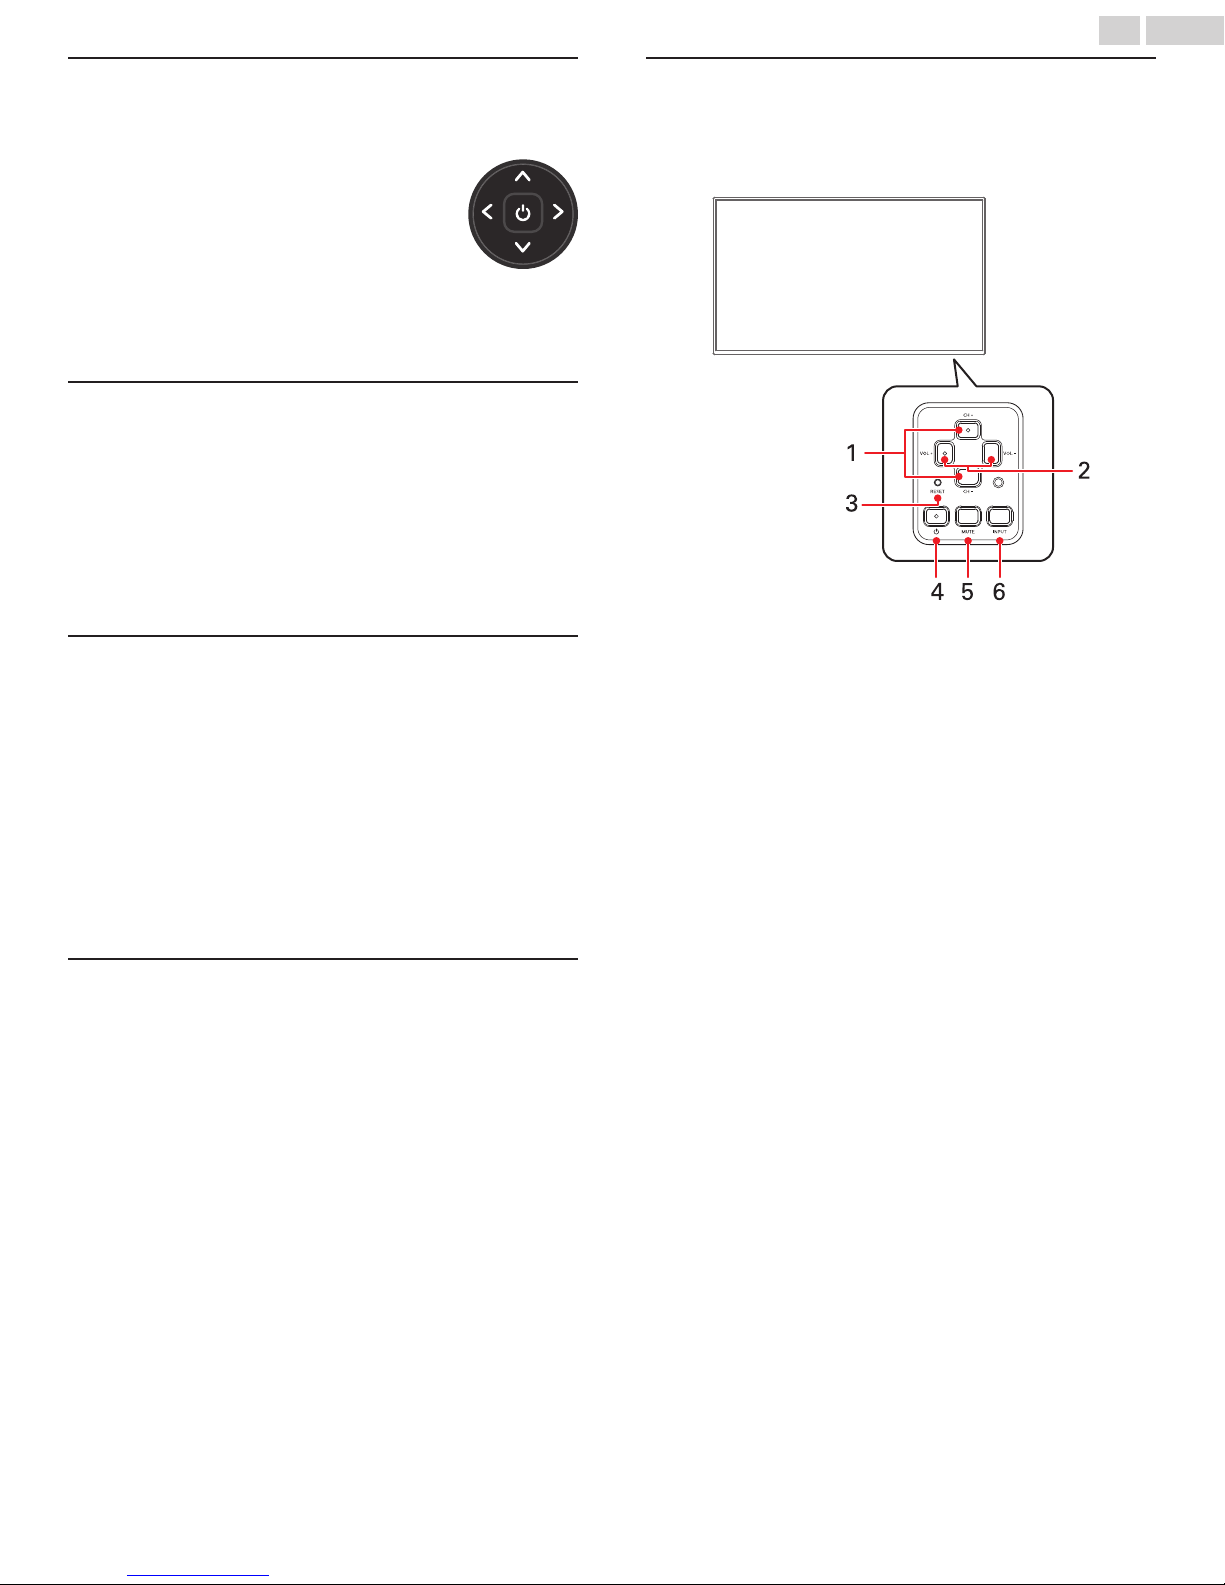
Seven buttons
If your TV has this style of panel buttons, you can perform the
following functions. Note that the order of the buttons might vary
from model to model. Examine the panel button labels to
determine your TV model’s layout.
Control panel located on the back of the TV.
1.
Channel+:Moves the highlighted item up in the current
menu.
Channel –: Moves the highlighted item down in the current
menu.
2. Volume +: Increases the volume.
Volume –: Decreases the volume.
3. Reset:
4. Power: Turns the power on and off.
5. Mute: Mutes and unmutes the sound.
6. Input: Selects among TV inputs. Each press moves
down one item. Pressing Channel + or Channel –
moves the highlight up or down. Pausing for a few
moments selects the highlighted item.
If your TV has this style of panel buttons, you can perform the
following functions. Note that the order of the buttons might vary
from model to model. Examine the panel button labels to
determine your TV model’s layout.
–
Power: Turns the power on and off.
–
Input +: Selects the next TV input. Each press moves down
one item. Pausing for a few moments selects the highlighted
item.
–
Input -: Selects the previous TV input. Each press moves up
one item. Pausing for a few moments selects the highlighted
item.
–
Volume +: Increases the volume.
–
Volume –: Decreases the volume.

16 .English
4 Guided Setup
With the preliminaries out of the way, it’s time to turn on your TV.
As the TV starts for the first time, it leads you through Guided
Setup, which configures the TV before you start to use it.
–
During Guided Setup, you’ll:
–
Answer a few questions
–
Provide network connection information
–
Get a software update
–
Link your TV to your Roku account.
–
Connect devices such as a DVD player, game console, or
cable box.
Starting Guided Setup
To start Guided Setup, press the 9 button on the remote to turn
on your TV.
Note(s)
●
Guided Setup normally runs only once, the first time you turn on your TV. If
you need to run Guided Setup again, you’ll have to perform a factory reset,
as explained in Factory reset everything L p. 57.
When you first turn on your TV, it will take a few seconds to get
itself ready. You’ll notice the following things happening:
The status indicator blinks every time the TV is busy doing
1
something; in this case it’s powering up and getting ready for
you.
The power-on screen appears and the status indicator blinks
2
slowly for a few more seconds. The power-on screen shows
a brand logo while the TV starts up.
After a few seconds, Guided Setup starts.
3
Completing Guided Setup
Tip(s)
●
On TVs sold in the United States, if you are blind or visually
impaired, you can activate Audio Guide, a text-to-speech
screen reader to help you navigate the TV’s menus and
commands. To enable the Audio Guide, press the A button on
the remote four times in rapid succession. Repeat to disable
Audio Guide. (The A button is located directly below the
directional pad on the right side of the Roku remote.)
Note(s)
●
If you enabled Audio Guide, choosing any language other than English
disables it.
Press the Down arrow on the remote to highlight your
2
preferred language, and then press OK or the Right arrow.
Some models have a country selection screen: If you don’t
3
see this screen, skip ahead to the next step. If you see this
screen, select your country.
Note(s)
●
If you enabled Audio Guide, choosing any country other than United States
disables it.
Press OK or the Right arrow on the remote to go to the next
4
screen:
Follow these steps to complete Guided Setup. At this point, you
should be seeing the Language screen.
Only on models that have a Roku voice remote: A few
1
moments after the Let’s get started screen appears, Guided
Setup starts the pairing process for the voice remote. (You’ll
know if you have this type of remote because it will have
microphone or search button just below the down arrow on
the purple pad.) If the voice remote does not pair
automatically, follow the instructions on the screen to
complete the pairing process.
Note(s)
●
Some models show the title First things first instead of Set up environment.
17 .English
Press OK to select Set up for home use. This is the right
5
choice for enjoying your TV at home. It provides energy saving
options as well as access to all features of the TV.
Note(s)
●
Store mode configures the TV for retail display and is not recommended for
any other use. In store mode, some features of the TV are missing or
limited. To switch from one mode to the other, you have to perform a factory
reset as explained in Factory reset everything L p. 57, and then repeat
Guided Setup.
Network connection
After you select Set up for home use, the TV prompts you to make
a network connection. If your TV has both wired and wireless
connections, you’ll see the following screen.
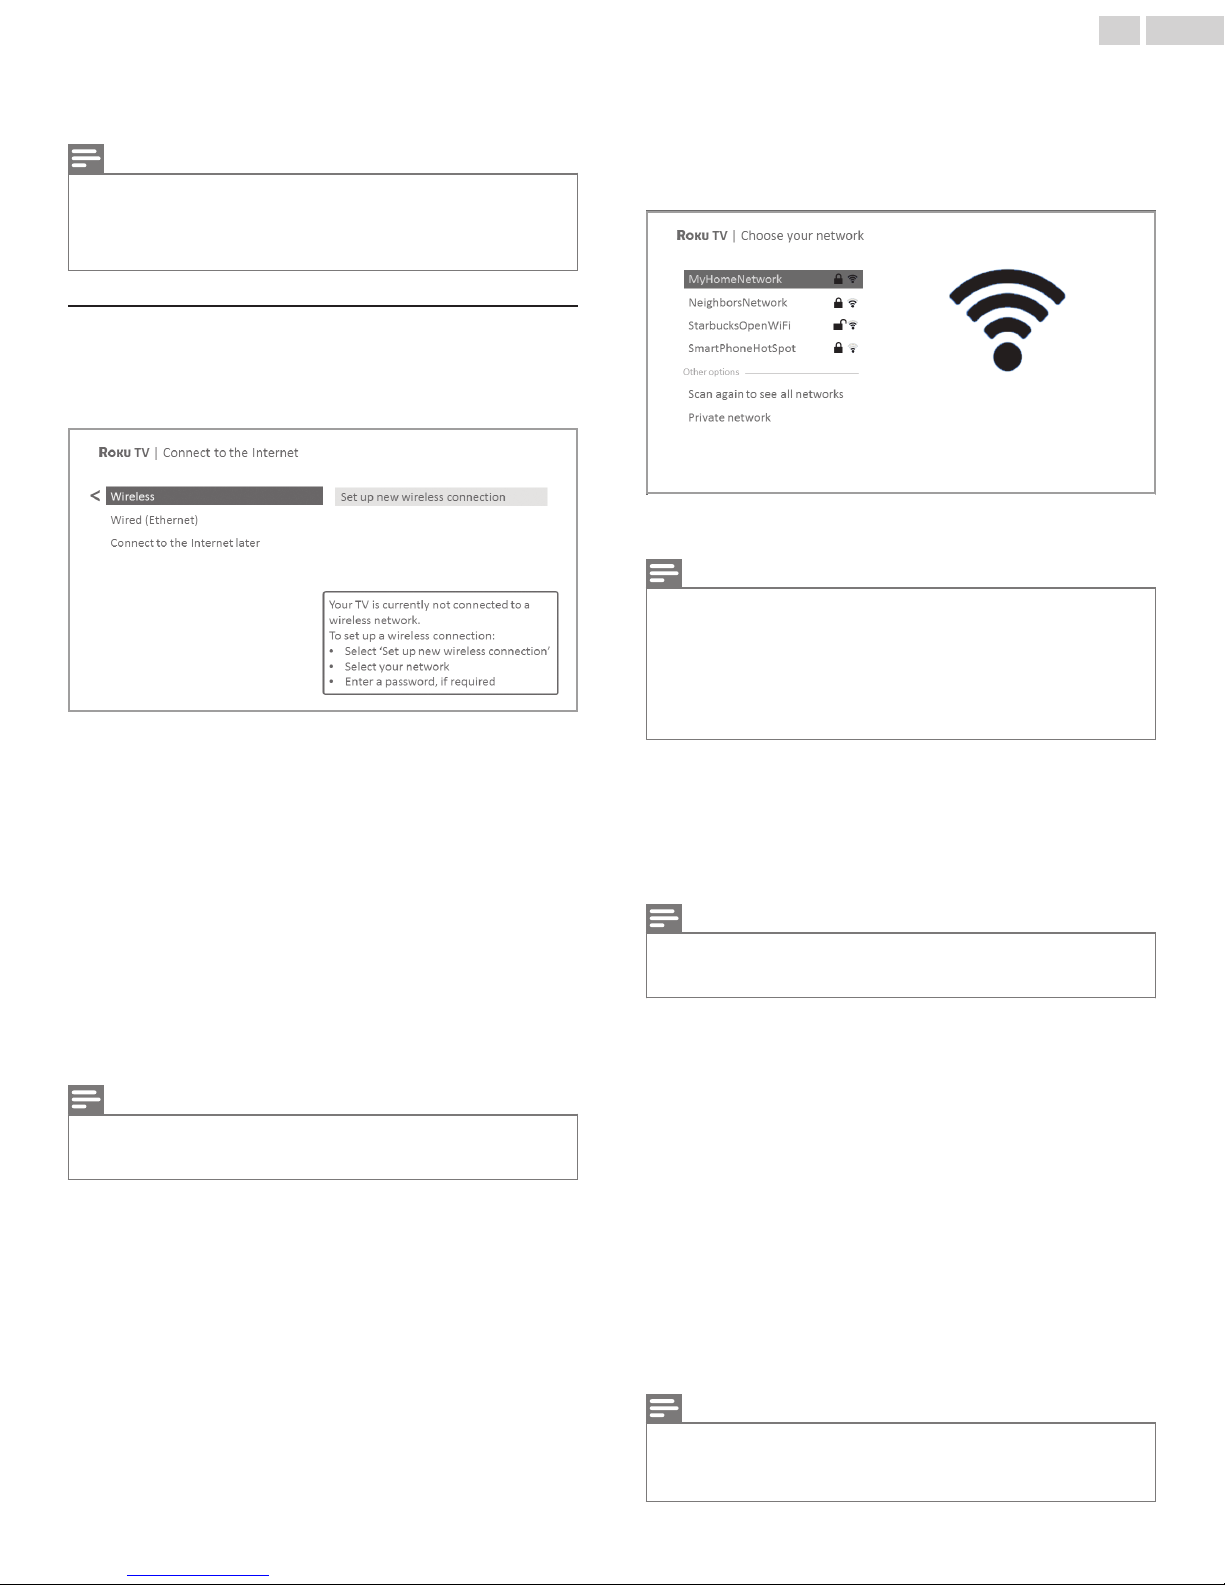
Only models that display the Connect to the Internet screen:
6
Make a selection:
–
Wireless connection – Highlight Set up new wireless
connection and press OK. The TV prompts you through
wireless setup. Skip ahead to the next step for help with
the process.
–
Wired connection – Highlight Connect to wired network
and press OK. The TV immediately attempts to connect
to your wired network, your local network, and then the
Internet. Go to Step 9 to continue with Guided Setup.
–
Connect to the Internet later – If you don’t want to connect
to the Internet right now, you can skip this step and use
the TV to watch Antenna TV channels, play games, and
watch DVDs. When you’re ready to connect, it’s easy.
We’ll show you how in Benefits of connecting L p. 21
Note(s)
●
If you decide not to connect, Guided Setup skips ahead to setting up the
devices that you’ve connected to your TV. Jump ahead to Connect your
devices L p. 19 to complete Guided Setup.
On models that have wireless only, or models with both wired
7
and wireless and you’ve selected Wireless: The TV scans for
the wireless networks within range and displays them in
order, with the strongest signals first. In addition to your own
wireless signal, the TV might pick up signals from your
neighbors.
Press the Up or Down arrows to highlight the name of your
wireless network, and then press OK to select it.
Note(s)
●
Some networks, such as those often found in dorm rooms, hotels, and
other public places, require you to read and agree to terms, enter a code,
or provide identifying information before letting you connect to the Internet.
If your Roku TV detects that you are connecting to such a network, it
prompts you through the connection process using your compatible
smartphone or tablet to provide the needed information.
For more information, see Using your TV in a hotel or dorm room L
p. 33.
Other options
●
Connect to the Internet later – If you don’t want to connect
to the Internet right now, you can skip this step and use the
TV to watch Antenna TV channels, play games, and watch
DVDs. When you’re ready to connect, it’s easy. We’ll show
you how in Benefits of connecting L p. 21.
Note(s)
●
If you decide not to connect, Guided Setup skips ahead to setting up the
devices that you’ve connected to your TV. Jump ahead to Connect your
devices L p. 19 to continue.
●
Scan again / Scan again to see all networks – The name of
this option depends on the number of wireless networks
within range.
–
Scan again appears if the list already shows all available
wireless networks within range. If you don’t see your
wireless network name in the list, you might need to
adjust the location of your wireless router or the TV, turn
on your router, or make other changes. When everything
is ready, select Scan again to see if your network name
now appears in the list.
–
Scan again to see all networks appears if there are more
wireless networks than the strongest ones it initially
listed. If you don’t see your wireless network name in the
list, this option displays the complete list. If you still don’t
see your network name, you might have your router
configured to provide wireless service as a “private
network.”
Note(s)
●
Highlighting either of these options displays an informational panel with the
unique media access control (MAC) address of your Roku TV. You will need
the MAC address if your wireless router is configured to use MAC address
filtering.

18 .English
●
Private network – If your wireless network name is hidden,
it won’t appear in the list. Select Private network to display
an on-screen keyboard, and use it to enter your network
name. Unless you changed the factory-set network name,
you can find the name (also called SSID) on a label on the
router.
Tip(s)
●
Wireless networks that are password-protected display a
“padlock” icon adjacent to the name. This icon enables you to
know that you are going to be prompted to enter a password
after you select that network.
Only if you select a password protected wireless network: An
8
on-screen keyboard appears. Use the keyboard to enter the
network password.
As soon as the TV is able to connect to the Internet, it
downloads and installs its first software update, and then
restarts.
Tip(s)
●
Your TV automatically checks for updates periodically.
These updates provide new features and improve your overall
experience with the TV. After an update, you might notice that
some Options have moved, and that there are new options or
features. This User Guide describes version 8.0. To determine
your current Roku TV software version, go to Settings > System
> About after you complete Guided Setup. You can download
an updated User Guide that matches your Roku TV software
version from the Roku TV web site.
Activation
After the TV restarts, it displays the Activation screen:
After you submit your wireless network password, the TV
displays progress messages as it connects to your wireless
network, your local network, and the Internet.
Only if your TV cannot get the correct time zone and current
9
time from your network service provider: Use the Up and Down
arrows to highlight your time zone, and then press OK.
Tip(s)
●
Your TV needs to know the local time zone so that it can
correctly display information about the program you are
currently watching. If the TV is unable to automatically
determine the local time zone, it prompts you to choose your
time zone from a list.
Using a compatible computer, tablet, or smartphone with an
10
Internet connection, go to the web address displayed on the
screen and enter the code that appears on your screen.
Why do I need a Roku account?
You need a Roku account for several reasons:
●
It links you, your Roku TV, and your other Roku streaming
devices to the Roku Channel Store and billing service.
●
Streaming content providers know that it’s OK to send
content you request to your Roku TV.
●
Roku can automatically send updates to your device.
You need a Roku account to activate your device and access
entertainment across thousands of streaming channels. Roku
accounts are free, and while a valid credit card number is not
required to create your account, providing your credit card
information makes renting and purchasing entertainment from
the Roku Channel Store fast and convenient.
After you log in or create your Roku account, the link page
suggests that you select some streaming channels. After you
confirm your selections, the TV gets an acknowledgement, and
then adds your preexisting and newly-selected streaming channels
to your Roku TV. This process is automatic and takes a few
moments—a little longer if you already have a lot of streaming
channels to add.
Tip(s)
●
Streaming channels from all Roku streaming devices
associated with your account are synchronized periodically, so
that all of your Roku streaming devices have the same set of
streaming channels (subject to compatibility with the device).
19 .English
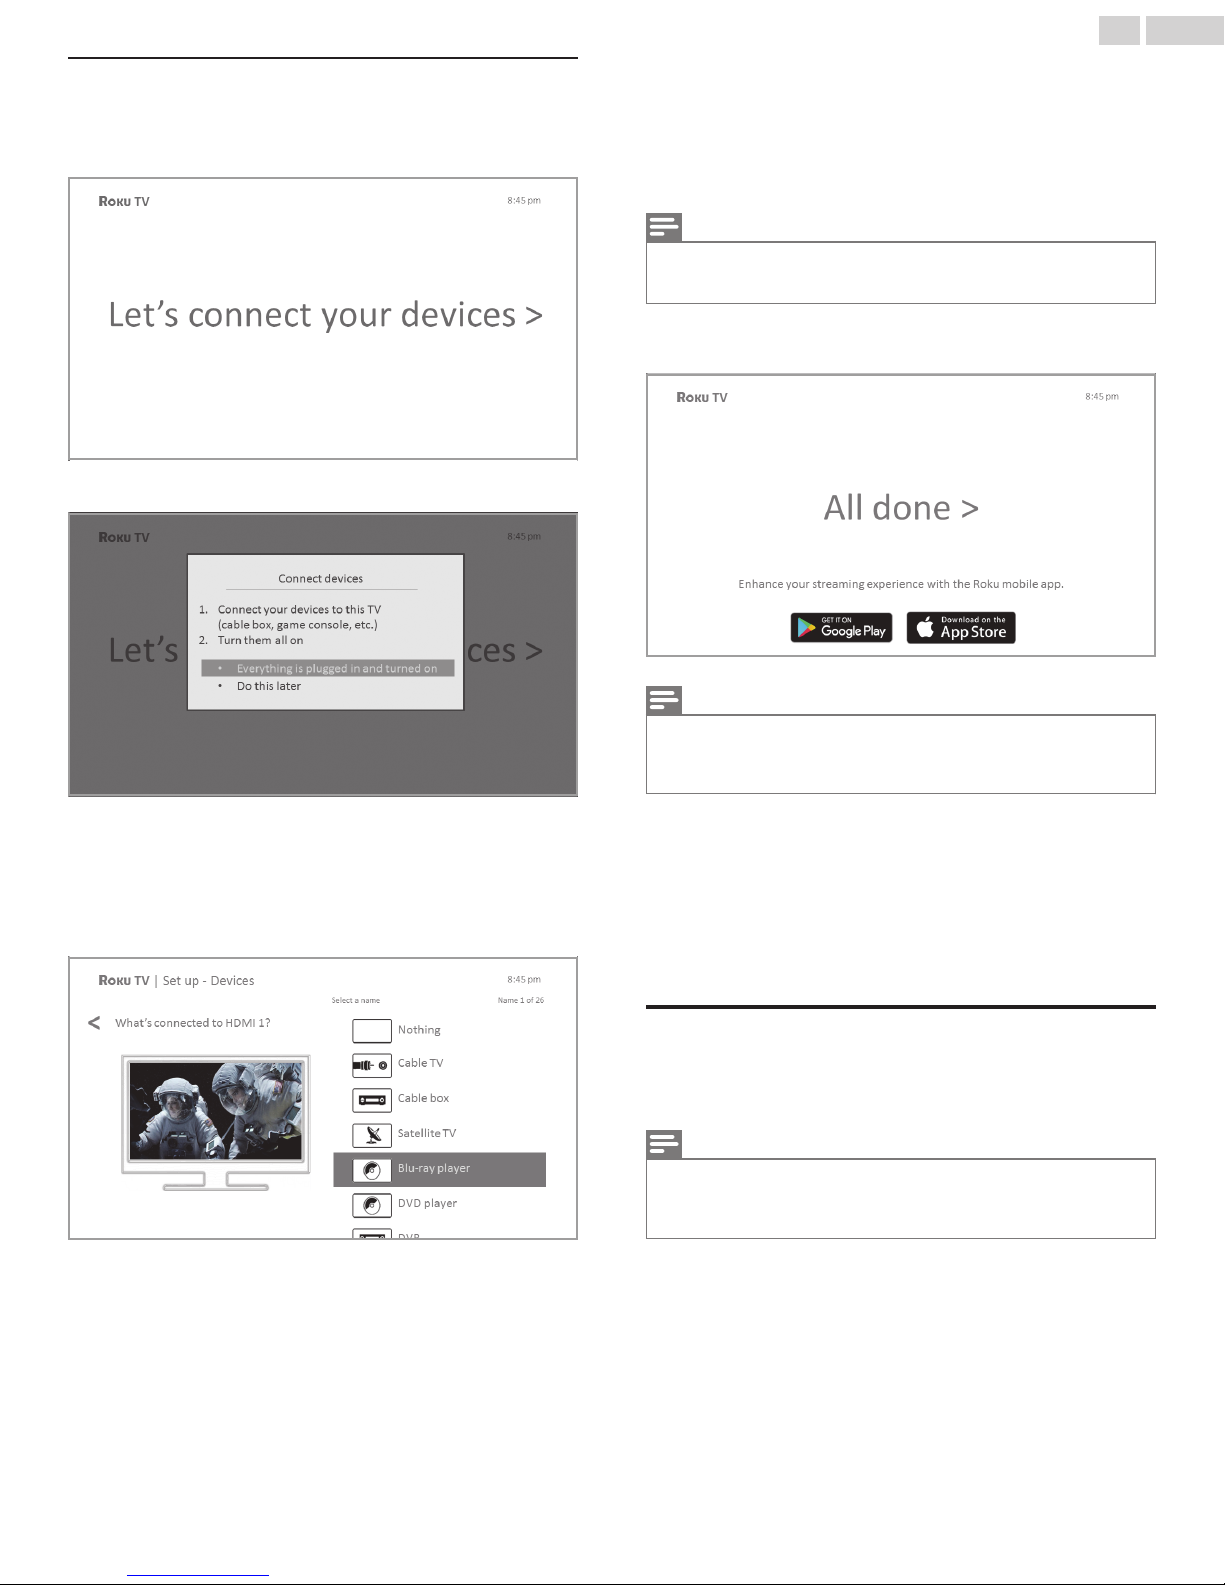
Connect your devices
Next, Guided Setup helps you set up the external devices that you
want to use with it, such as a cable box, Blu-ray™ player, or game
console.
Press OK or the Right arrow to proceed:
11
While setting up your devices, rather than using the
14
predefined names and icons, you can set a custom name and
icon. To do so, scroll up or down to highlight Set custom name
& icon, and then press OK. Follow the instructions on the
screen to enter a name and select an icon for the input. See
Rename inputs L p. 45.
Note(s)
●
If you have renamed the inputs, you cannot use voice commands to switch
inputs. Voice commands can only switch among inputs that have their
original names, such as “AV,” and “HDMI 1.”
Repeat the previous step for each input.
15
You’re done with Guided Setup.
Connect all the devices you plan to use with your TV, turn
12
them all on, and then select Everything is plugged in and
turned on. The TV now takes you step by step through each
of its inputs and asks what kind of device you have
connected. On each input that has a connected and active
device, you can see its picture and hear its sound.
Press the Up or Down arrows to highlight the label you want
13
to associate with the input. If you are not using the input,
select Nothing, and the input won’t appear on the Home
screen.
Note(s)
●
Some Roku TVs, depending on where you live and other factors, show you
an introductory video filled with some great hints and tips. If you’re not
interested in viewing this video, press 8 on the remote to return to the
Roku TV Home screen.
Whenever you press 8 on the remote, the Home screen greets
you.
From here, you can explore everything your TV has to offer. Press
the arrow keys to move around, and press OK to select a
highlighted item. We’ve designed the TV to encourage you to
explore, and you can probably figure out most of the capabilities
and settings on your own. If you have any questions or difficulties,
you can find answers and solutions in this guide.
Home screen
The following illustrations show typical Home screens, which vary
depending on location, connected mode, selected theme, number
of TV inputs enabled, and streaming channels and apps added.
Note(s)
●
A paid subscription or other payments may be required for some channel
content. Channel availability is subject to change and varies by country. Not
all content is available in countries or regions where Roku® products are
sold.

20 .English
Typical connected Home screen, United States
Typical connected Home screen, Canada
1
Home screen menu — shows options available to you when
you are on the Home screen
2
Highlighted option — press OK on the remote to select.
3
TV input tiles — select an input to watch the connected device.
4
Streaming channel and app tiles — select a tile to go to the
indicated streaming channel or application.
5
Options hint—press A on the remote for options when this
symbol is present.
6
Next screen hint—press the Right arrow on the remote to see
the next screen.
Typical non-connected Home screen
1
Home screen menu—shows options available to you when you
are on the Home screen.
2
Highlighted option—press OK on the remote to select.
3
TV input tiles—select an input to watch the connected device.
4
Options hint—press A on the remote for options when this
symbol is present.
5
Next screen hint—press the Right arrow on the remote to see
the next screen.
Personalize your Home screen
There are many things you can do to personalize your Home screen
and make it just right for you and your family:
●
Only in connected mode: Add streaming channels by using the
Streaming Channels menu option to browse the Roku Channel
Store.
●
Only in connected mode: Change the screen theme by going to
Settings > Themes to find and pick one to suit your mood.
●
Only in connected mode on U.S. models: Hide Featured Free or
Movie Store and TV Store as explained in Configuring parental
controls L p. 49.
●
Remove a tile by highlighting it and pressing A . Then highlight
Remove input or Remove channel and press OK.
●
Move a tile by highlighting it and pressing A . Then highlight
Move input or Move channel and press OK. Use the arrows to
move the tile, and then press OK to lock it in its new location.
●
Rename a TV input tile by highlighting it and pressing . Then
highlight Rename input and press OK. Highlight a new name in
the list, and then press OK to assign that name to the tile.
Rather than using the predefined names and icons, you can set a
custom name and icon. To do so, scroll up or down to highlight
Set custom name & icon, and then press OK. Follow the
instructions on the screen to enter a name and select an icon for
the input.
Note(s)
●
If you have renamed the inputs, you cannot use voice commands to switch
inputs. Voice commands can only switch among inputs that have their
original names, such as “AV,” and “HDMI 1.”

21 .English
5 Benefits of connecting
Connecting brings out your TV’s full
potential!
Make any night a movie night
Thousands of movies to choose from, across all major streaming
movie channels like Netflix, Crackle, and more*1. You’ll never run
out of something new to watch.
Get in the groove
Stream endless hours of music from free and subscription-based
channels like Deezer and TuneIn. With almost instant access to
thousands of music artists, your favorite beats are just as close
as your remote.
Explore your passions
In addition to popular streaming channels like YouTube, NHL, Sky
News and Google Play, your Roku TV also offers hundreds of
streaming channels to fuel your passions—including fitness,
cooking, religion, outdoors, International programming and much
more.
Mobile Private Listening
streaming programs and “over-the-air” TV shows from the Antenna
TV input on headphones (not provided) plugged into your IOS® or
Android™ mobile device*2.
*1 A paid subscription or other payments may be required for
some channels. Channel availability is subject to change
and varies by country. Not all content is available in
countries or regions where Roku® products are sold.
*2
Available only on Roku mobile app for IOS® and Android™.
This feature works with streaming content only. It is not
available when watching Antenna TV or HDMI inputs.
on the Roku mobile app lets you listen to
Enjoy FREE trials of popular channels
Your Roku TV comes loaded with special offers, including free
trials (if eligible) from popular streaming channels like Netflix,
Hopster, Acorn TV, and many more. REMEMBER THAT YOU MUST
CANCEL BEFORE THE FREE TRIAL ENDS TO AVOID SUBSCRIPTION
FEES.
Take advantage of awesome features
Powerful, voice-enabled search helps you find movies and TV
shows, actors, or directors across multiple streaming channels.
Search results also includes Antenna TV programs airing in your
region as well. Voice Search and Antenna TV search results are
available only in the United States.
Smart Guide is an electronic program guide that is available any
time you are watching “over-the-air” TV programs on the Antenna
TV input. You can scroll up and down to see all Antenna TV channels
you receive. You can scroll left to see the previous 7 days programs,
and scroll right to see the upcoming 14 days of programs. If you
highlight a show that has a purple asterisk (A), you can press the
A to see More Ways to Watch.
And your most-watched channels are automatically grouped into a
Favorites section at the top of the Smart Guide.
More Ways to Watch (U.S. only) gives you recommendations about
the show you are watching on the Antenna TV, HDMI, or AV input,
gives you options to stream the current show from the beginning,
the entire season, or the entire series, and recommends other
shows with similar themes. It also uses the shows you watch to
display ads that are more relevant to you.
Live TV Pause lets you connect a USB drive (not provided) and
pause live TV for up to 90 minutes. After pausing, you can play,
fast-forward, rewind, and pause again to any point within the rolling
90 minute window.
Voice commands let you use your Roku Voice Remote, Roku
Enhanced Voice Remote, or the Roku mobile app to change
stations, TV inputs, and launch streaming channels, and more.
Voice commands are available only in the United States.
 Loading...