

Page 1

Table of Contents
15C322OW
Other language versions
GETTING STARTED
INTRODUCTION . . . . . . . . . . . . . . . . . . . . . . . . . . . . . . . . . . 2
S
AFETY. . . . . . . . . . . . . . . . . . . . . . . . . . . . . . . . . . . . . . . 2
D
ESCRIPTION OF CONTROLS . . . . . . . . . . . . . . . . . . . . . . . . . 3
S
ETTING UP GUIDE. . . . . . . . . . . . . . . . . . . . . . . . . . FOLDOUT
HOW TO USE THE ON SCREEN DISPLAY (OSD)
CONTRAST . . . . . . . . . . . . . . . . . . . . . . . . . . . . . . . . . . . . 4
B
RIGHTNESS . . . . . . . . . . . . . . . . . . . . . . . . . . . . . . . . . . . 4
V
ERTICAL POSITION . . . . . . . . . . . . . . . . . . . . . . . . . . . . . . 5
H
ORIZONTAL POSITION . . . . . . . . . . . . . . . . . . . . . . . . . . . . 5
V
ERTICAL SIZE . . . . . . . . . . . . . . . . . . . . . . . . . . . . . . . . . . 6
H
ORIZONTAL SIZE. . . . . . . . . . . . . . . . . . . . . . . . . . . . . . . . 6
P
INCUSHION . . . . . . . . . . . . . . . . . . . . . . . . . . . . . . . . . . . 7
T
RAPEZOID . . . . . . . . . . . . . . . . . . . . . . . . . . . . . . . . . . . . 7
P
ARALLEL . . . . . . . . . . . . . . . . . . . . . . . . . . . . . . . . . . . . . 8
C
OLOR . . . . . . . . . . . . . . . . . . . . . . . . . . . . . . . . . . . . . . . 9
S
TATUS . . . . . . . . . . . . . . . . . . . . . . . . . . . . . . . . . . . . . . 9
R
ESET . . . . . . . . . . . . . . . . . . . . . . . . . . . . . . . . . . . . . . 10
O
SD OFF . . . . . . . . . . . . . . . . . . . . . . . . . . . . . . . . . . . . 10
ADDITIONAL INFORMATION
POWER SAVING FEATURE . . . . . . . . . . . . . . . . . . . . . . . . . . 11
G
LOSSARY . . . . . . . . . . . . . . . . . . . . . . . . . . . . . . . . . . . 11
P
IN ASSIGNMENT . . . . . . . . . . . . . . . . . . . . . . . . . . . . . . . 12
S
PECIFICATIONS . . . . . . . . . . . . . . . . . . . . . . . . . . . . . . . . 12
I
NDEX. . . . . . . . . . . . . . . . . . . . . . . . . . . . . . . . . . . . . . . 12
T
ROUBLESHOOTING . . . . . . . . . . . . . . . . . . . . . . . . . . . . . . 13
W
ARRANTY . . . . . . . . . . . . . . . . . . . . . . . . . . . . . . . . . . 14
FRENCH (FRANCAIS) . . . . . . . . . . . . . . . . . . . . . . . . .15
B
ECAUSE OF CONTINUOUS PRODUCT IMPROVEMENTS,
THE INFORMATION MENTIONED IN THIS DOCUMENT IS SUBJECT TO CHANGE WITHOUT NOTICE.
1
Page 2

2
Introduction and Safety
Safety precautions and maintenance
• Unplug the monitor, if you are not going to use it for an
extended period of time.
• Unplug the monitor, if you need to clean it with a slightly
damp cloth. Wiping the screen with a dry cloth is okay
when the power is disconnected. However, never use
alcohol or ammonia-based liquids.
• Consult a service technician if the monitor does not
operate normally when following the instructions in this
manual.
• The back cover should be removed only by qualified
service personnel.
• Keep the monitor out of direct sunlight and away from
stoves or any other heat source.
• The top of the monitor is not a shelf. Remove any object
that could fall into the vents or prevent proper cooling of
the monitor’s electronics.
• Keep the monitor dry. To avoid electric shock, do not
expose it to rain or excessive moisture.
• Keep the monitor away from magnetic objects, such as
speakers, electric motors, transformers, etc.
• When positioning the monitor, make sure the power plug
and outlet are easily accessible.
End-of-life disposal
Your new monitor contains materials that can be recycled
and reused. Specialized companies can recycle your
product to increase the amount of reusable materials and
to minimize the amount to be disposed of.
Please find out about the local regulations on how to
dispose of your old monitor.
ENERGY STAR is an U.S. registered mark.
IBM, IBM PC, and Power PC are registered trademarks of International Business Machines Corporation.
Apple, Macintosh, Quadra, Performa, and Centris are registered trademarks of Apple Computer, Inc.
Contact us at our web site: http://www.monitors.be.philips.com
Introduction
The Philips 105S color monitor displays sharp and brilliant
images of text and graphics with a maximum resolution of
1024x768 pixels. It is optimal for Windows, spread sheets
and any other application.
The monitor automatically scans horizontal frequencies
from 30KHz to 60KHz, and vertical frequencies from 50Hz
to 120Hz. With microprocessor-based digital-controlled
circuitry and on screen display (OSD) controls, the monitor
can automatically adjust itself to the video card’s scanning
frequency and can display an image with the precise
parameters you desire.
Features
• Digital Control – feature provides user-friendliness and
ease-of-use when operating the monitor.
• An anti-glare and anti-static – screen coating eliminates
any adverse effects caused by the screen’s surface, such
as reflection of the room light and dust attraction.
• 85Hz refresh rate – The maximum display resolution is
1024x768@75Hz non-interlaced mode. The recommended
optimum resolution is up to 800x600 pixels non-interlaced
by maximum 85Hz refresh rate.
• Green Design – including automatic power saving
function (NUTEK) and low-emission compliance.
• DDC1 / DDC2B allows communication between the
monitor and the PC for optimal video configuration.
NOTE: Your monitor operates according to the VESA-standard
DDC level 1 / 2B. Only computers that support the same
guidelines and operate at an equal or higher level can use this
feature. If your computer does not support the relevant
guidelines, you can still use your monitor and computer.
However, you may need to manually specify the appropriate
resolution in the computer.
As an Energy Star Partner,
PHILIPS has determined
that this product meets the
Energy Star guidelines for
energy efficiency.
Page 3
3
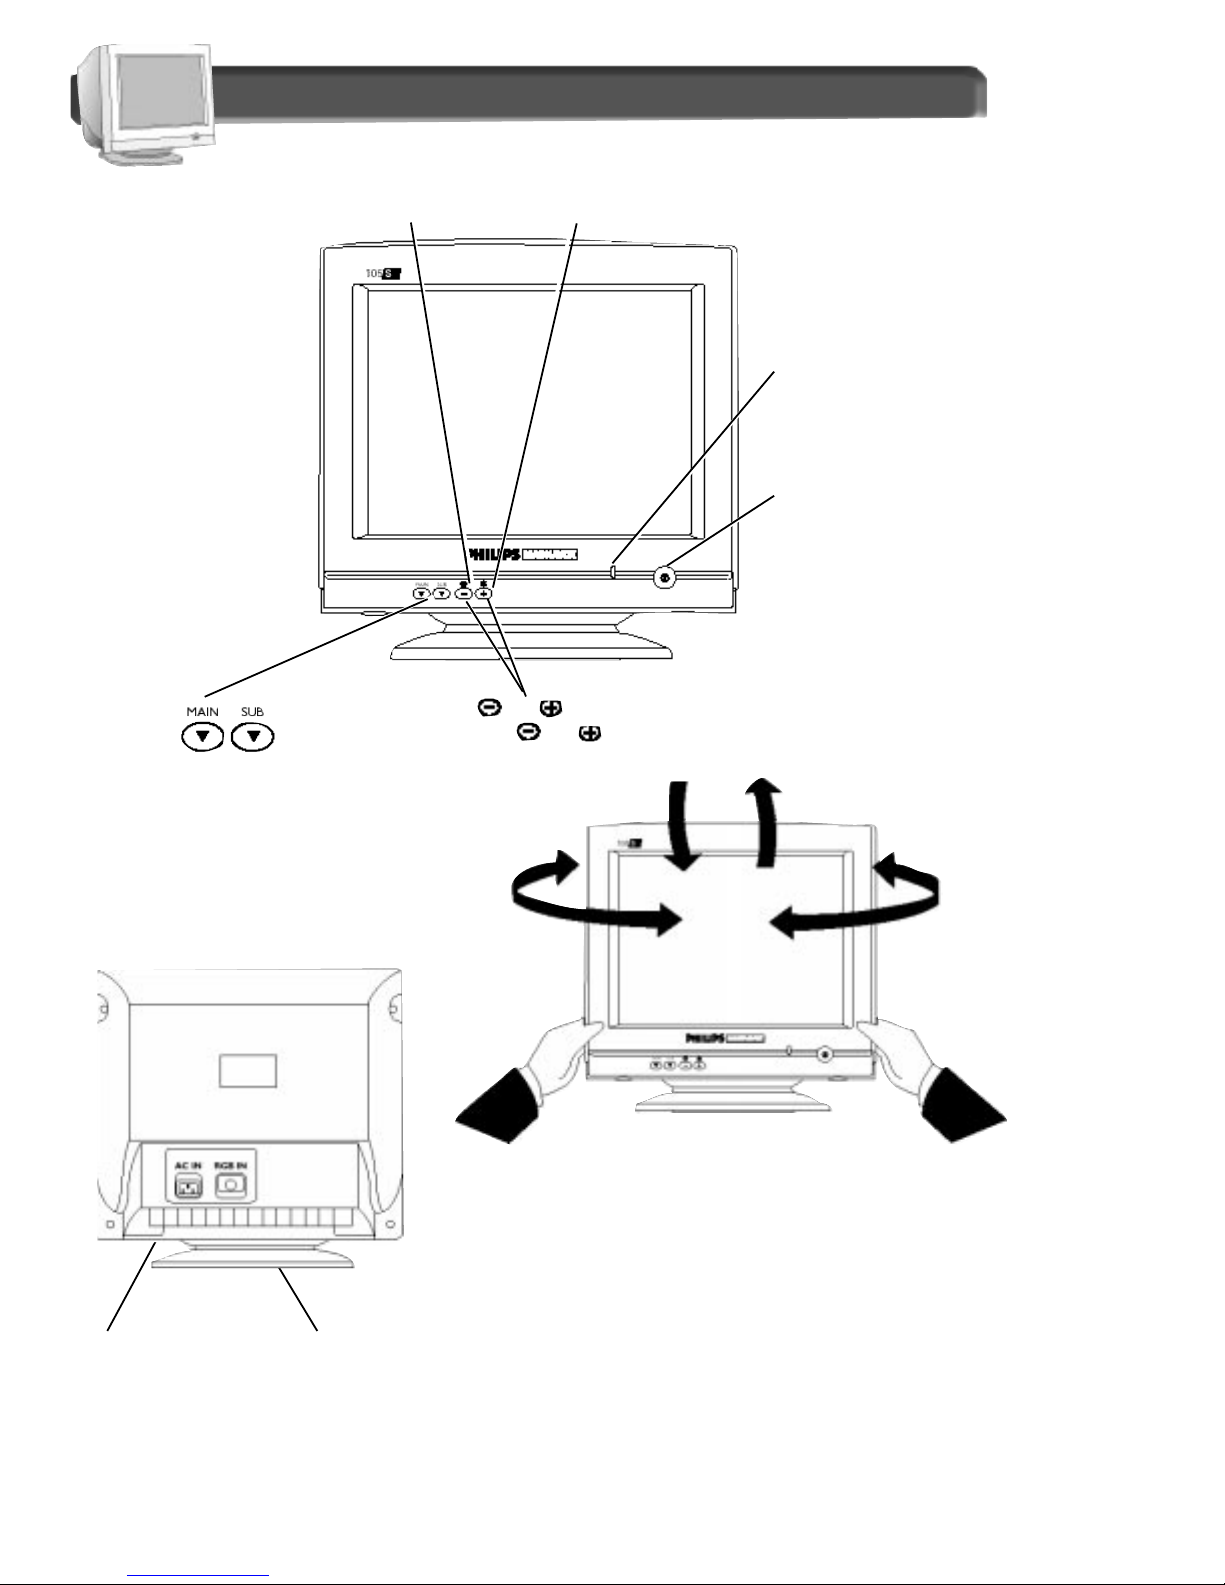
Description of Controls
Pedestal –
You can tilt and swivel the monitor
to the most comfortable viewing
angle. To best use your monitor,
always place it at eye level.
Power Plug – Plug
the power cord in
here. See foldout for
details.
Video In jack – One end of the cable is
already connected here.
The other end connects to the computer.
See foldout for details.
“ ”or“ ”(Decrease or Increase)
Press “ ”or“ ” to adjust the picture or image.
Brightness Knob
_
Adjust the screen’s brightness.
Contrast Knob
_
Adjust the screen’s contrast.
Power Knob
_
Turns the electricity On
and Off.
LED
_
Light Emitting Diode
Turns green when the
monitor is on and at full
power.
OSD Main menu and Sub-menu selection buttons.
Page 4
How to Use the On Screen Display (osd)
Contr
Contr
ast
ast
Brightnes
Brightnesss
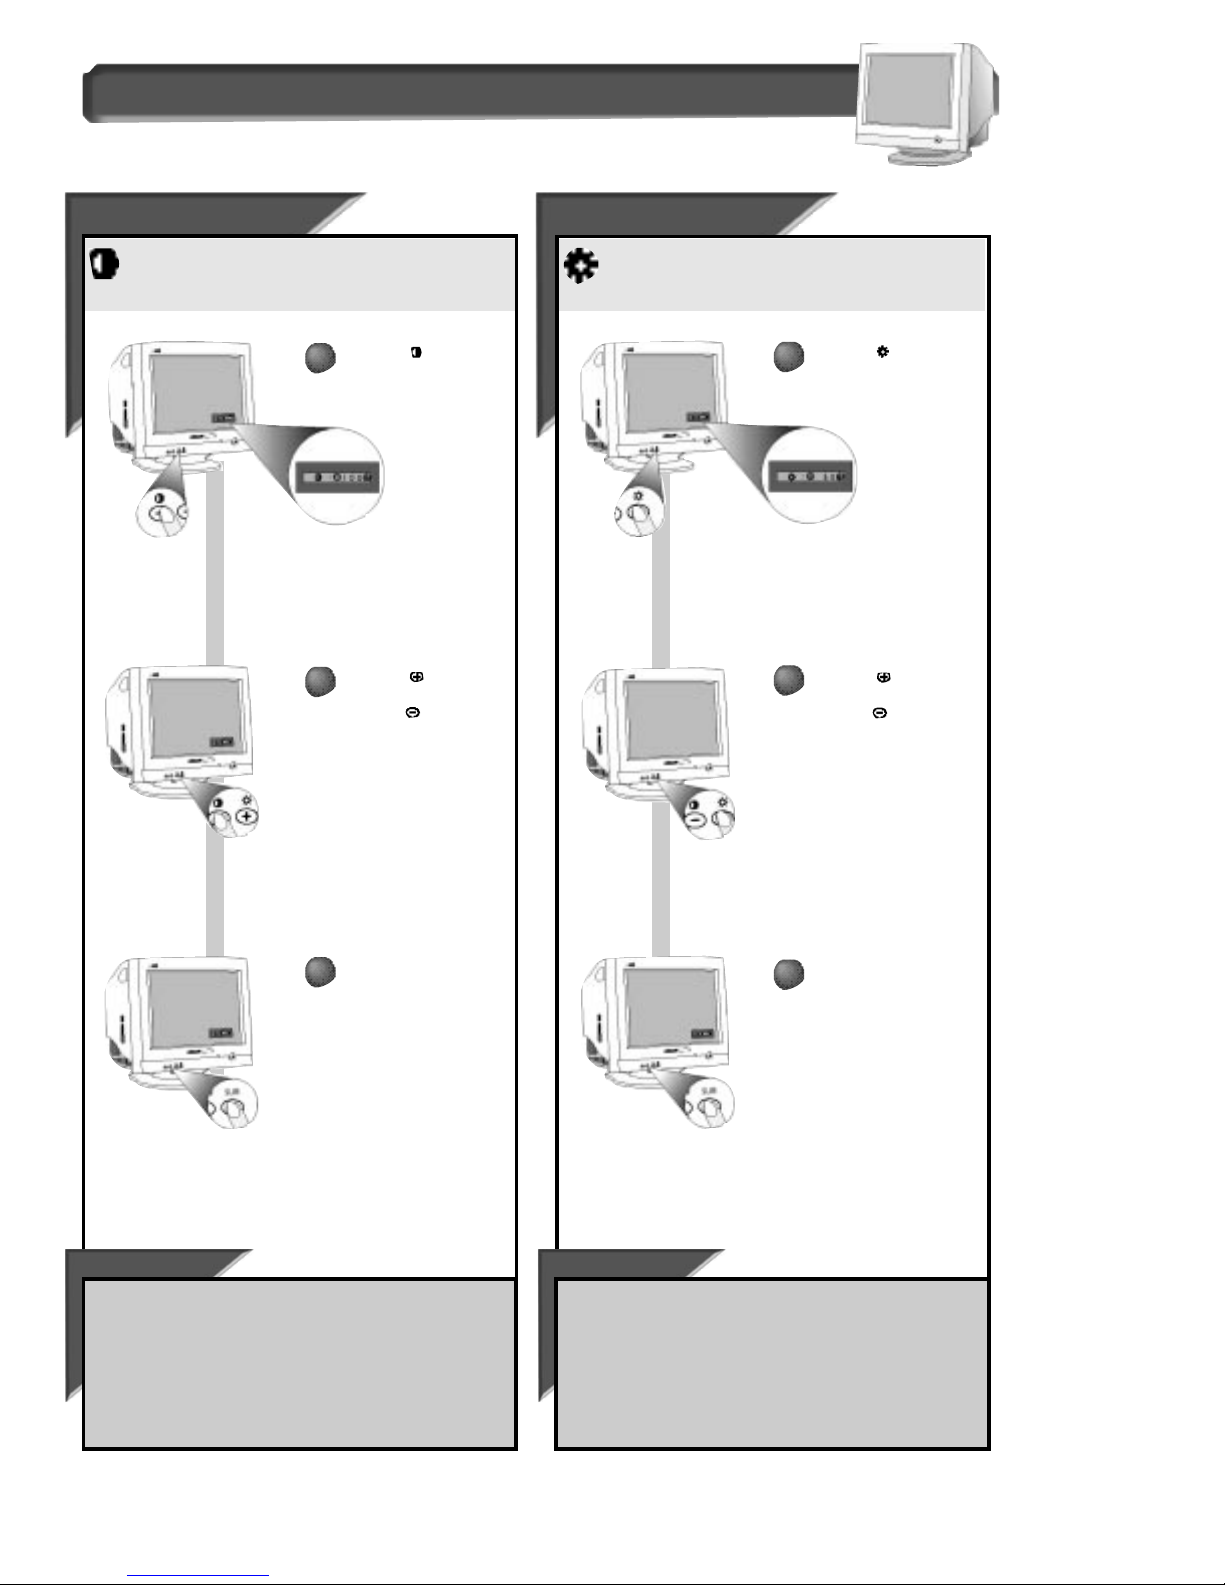
To adjust your screen’s contrast, follow the steps below.
Contrast is the difference between the light and dark areas
on the screen. A 100% contrast level is recommended.
To adjust your screen’s brightness, follow the steps below.
Brightness is the overall intensity of the light coming from
the screen. 100% Brightness level is recommended.
Press the Contrast
button (second one on
the right) on the front of
the monitor.
Press the button to
increase Contrast, or
press the button to
decrease Contrast.
When finished, press the
SUB button (the Contrast
screen disappears.)
To continue to Brightness,
press the brightness button on the front
of the monitor. Next, follow steps 2-3 under BRIGHTNESS.
If you do not press the SUB button,
the Contrast window will “time
out” (disappear) after five seconds.
SMAR
SMAR
T HELP
T HELP
To continue to Contrast,
press the contrast button on the front of
the monitor. Next, follow steps 2-3 under CONTRAST.
If you do not press the SUB button,
the Brightness window will
“time out” (disappear) after five seconds.
SMAR
SMAR
T HELP
T HELP
Press the brightness
button (furthest one on the
right) on the front of the
monitor.
Press the button to
increase Brightness, or
press the button to
decrease Brightness.
When finished, press the
SUB button (the Brightness
screen disappears.)
contrast and brightness
44
1
1
2
2
3
3
3
3
2
2
1
1
The Contrast
window appears.
The Brightness
window appears.
Page 5
Horizont
Horizontalal
Position
Position
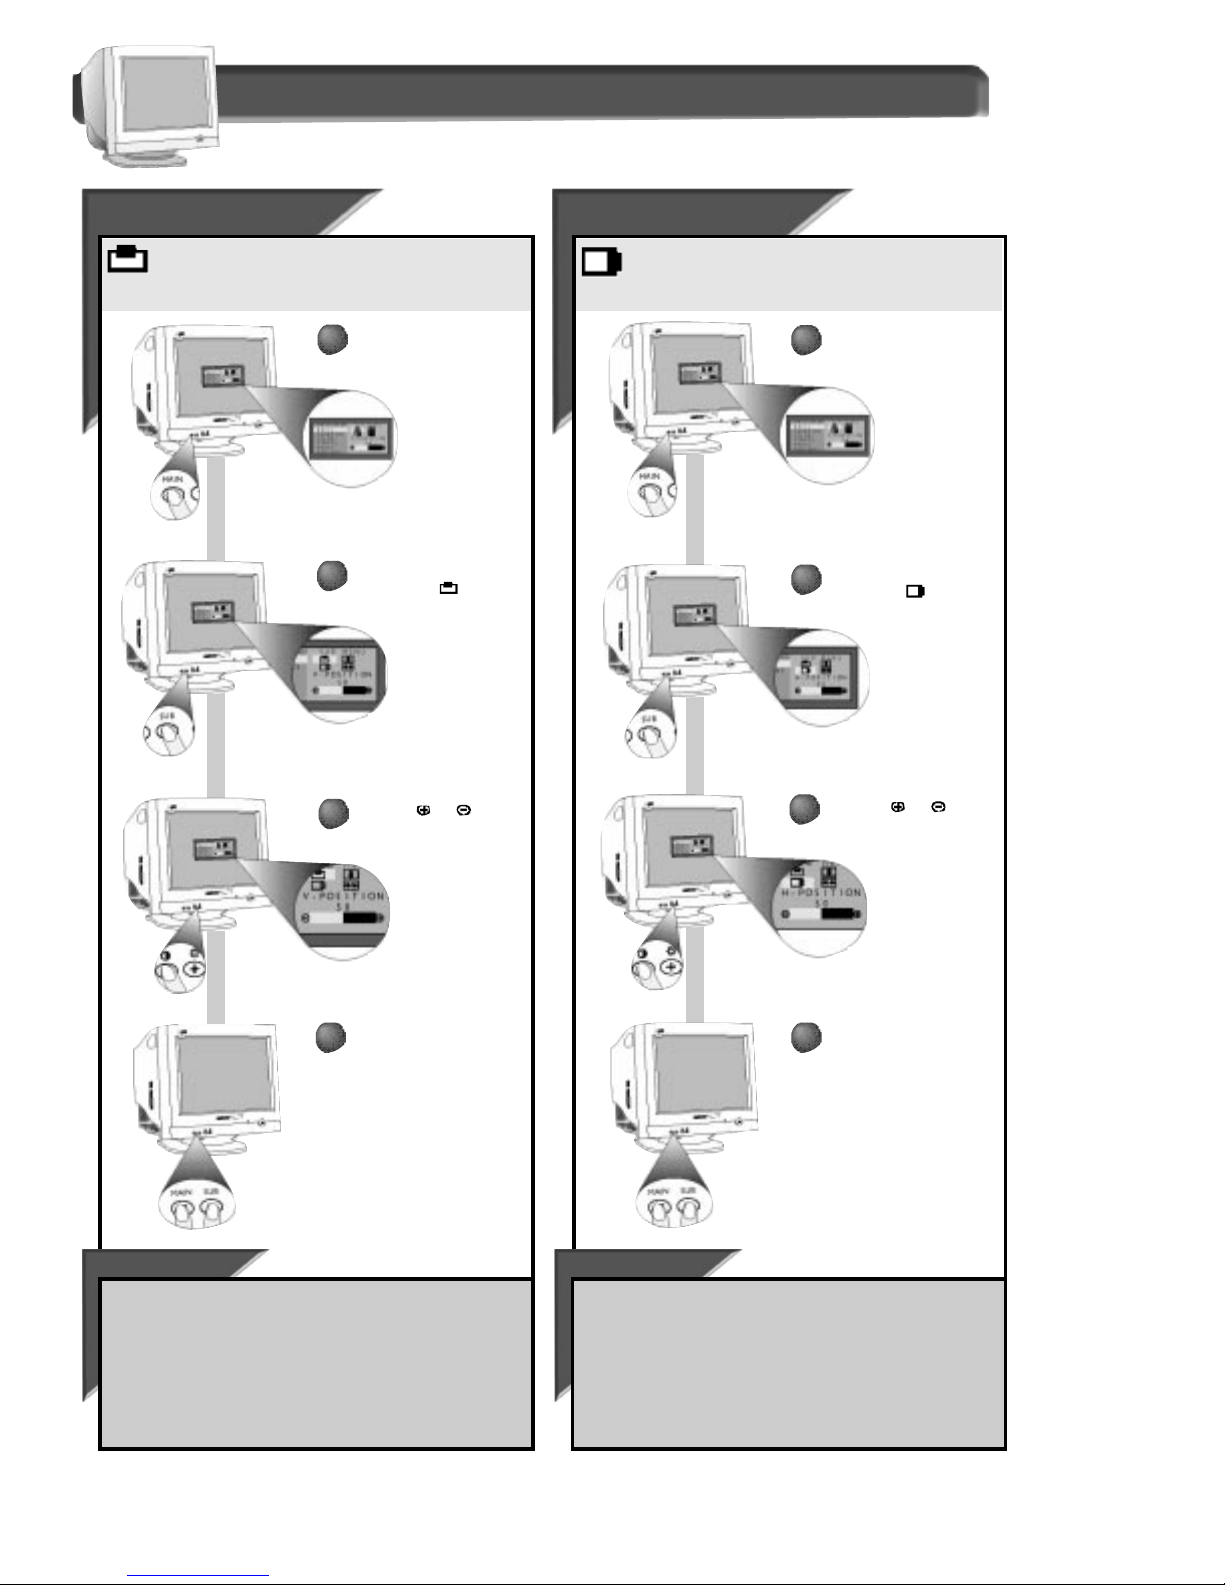
How to Use the On Screen Display (osd)
Horizontal position shifts the image on your screen either
to the left or right. Use this feature if your image does not
appear centered.
Press the MAIN button on
the front of the monitor to
highlight BASIC.
The MAIN MENU
window appears.
Press the SUB button to
highlight the icon
(V-POSITION is selected.)
When finished, press the
MAIN and SUB button at
the same time. The display
screen disappears.
To continue MAIN MENU options,
press the MAIN button on the
front of the monitor.
To continue to SUB MENU options
, press the SUB button on the
front of the monitor.
If you do not press any button,
the Vertical Position window will
“time out” (disappear) after ten seconds.
SMAR
SMAR
T HELP
T HELP
To continue MAIN MENU options,
press the MAIN button on the
front of the monitor.
To continue to SUB MENU options,
press the SUB button on the
front of the monitor.
If you do not press any button,
the Horizontal Position window will
“time out” (disappear) after ten seconds.
BASIC WINDOW
Press the MAIN button on
the front of the monitor to
highlight BASIC.
The MAIN MENU
window appears.
Press the SUB button to
highlight the icon
(H-POSITION is selected.)
When finished, press the
MAIN and SUB button at
the same time. The display
screen disappears.
Press the or
button to adjust Vertical
position.
Press the or button
to adjust Horizontal
position.
SMAR
SMAR
T HELP
T HELP
5
VVerertic
ticalal
Position
Position
Vertical Position shifts the image on your screen either up
or down. Use this feature if your image does not appear
centered.
1
1
1
1
2
2
2
2
3
3
3
3
4
4
4
4
Page 6

6
How to Use the On Screen Display (osd)
BASIC WINDOW
Horizont
Horizontalal
Size
Size
VVerertic
ticalal
Size
Size
Vertical size expands or contracts the image on your screen
pushing it out toward the top and button sides, or pulling it
in toward the center.
Horizontal size expands or contracts the image on your
screen pushing out toward the left and right sides, or
pulling it in toward the center.
Press the MAIN button on
the front of the monitor to
highlight the BASIC.
The MAIN MENU
window appears.
Press the SUB button to
highlight the icon
(V-SIZE is selected.)
When finished, press the
MAIN and SUB button at
the same time. The display
screen disappears.
To continue MAIN MENU options,
press the MAIN button on the
front of the monitor.
To continue to SUB MENU options,
press the SUB button on the
front of the monitor.
If you do not press any button,
the Vertical Size window will “time
out” (disappear) after ten seconds.
SMAR
SMAR
T HELP
T HELP
To continue MAIN MENU options,
press the MAIN button on the
front of the monitor.
To continue to SUB MENU options,
press the SUB button on the
front of the monitor.
If you do not press any button,
the Horizontal Size window will
“time out” (disappear) after ten seconds.
Press the MAIN button on
the front of the monitor to
highlight the BASIC.
The MAIN MENU
window appears.
Press the SUB button to
highlight the icon
(H-SIZE is selected.)
When finished, press the
MAIN and SUB button at
the same time. The display
screen disappears.
Press the or button
to adjust Vertical size.
Press the or
button to adjust Horizontal
size.
SMAR
SMAR
T HELP
T HELP
1
1
1
1
2
2
2
2
3
3
3
3
4
4
4
4
Page 7

7
How to Use the On Screen Display (osd)
GEOMETRY WINDOW
TTrrapezoid
apezoid
Pincushion
Pincushion
Pincushion is to correct the pincushion distortion of the
image. Note: Use this feature only when the picture is not
square.
Trapezoid is to correct the trapezoid distortion of the
image. Note: Use this feature only when the picture is not
square.
Press the MAIN button to
highlight BASIC, then press
MAIN button to select the
GEOMETRY control window.
Press the SUB button to
highlight the icon
(PINCUSHION is selected.)
When finished, press the
MAIN and SUB button at
the same time. The
display screen disappears.
To continue MAIN MENU options,
press the MAIN button on the
front of the monitor.
To continue to SUB MENU options,
press the SUB button on the
front of the monitor.
If you do not press any button,
the Pincushion window will “time
out” (disappear) after ten seconds.
SMAR
SMAR
T HELP
T HELP
To continue MAIN MENU options,
press the MAIN button on the
front of the monitor.
To continue to SUB MENU options,
press the SUB button on the
front of the monitor.
If you do not press any button,
the Trapezoid window will “time out”
(disappear) after ten seconds.
Press the MAIN button to
highlight BASIC, then press
MAIN button to select the
GEOMETRY control window.
Press the SUB button to
highlight the icon
(TRAPEZOID is selected.)
When finished, press the
MAIN and SUB button at
the same time. The display
screen disappears.
Press the or
button to adjust
PINCUSHION.
Press the or
button to adjust
TRAPEZOID size.
SMAR
SMAR
T HELP
T HELP
1
1
1
1
2
2
2
2
3
3
3
3
4
4
4
4
Page 8

8
PPararallel
allel
Parallel is to correct the parallelogram distortion of the
image. Note: Use this feature only when the picture is not
square.
Press the MAIN button to
highlight BASIC, then press
MAIN button to select the
GEOMETRY control window.
Press the SUB button to
highlight the icon
(PARALLEL is selected.)
When finished, press the
MAIN and SUB button at
the same time. The display
screen disappears.
To continue MAIN MENU options,
press the MAIN button on the
front of the monitor.
To continue to SUB MENU options,
press the SUB button on the
front of the monitor.
If you do not press any button,
the Parallel window will “time out”
(disappear) after five seconds.
SMAR
SMAR
T HELP
T HELP
Press the or
button to adjust
Parallelogram.
How to Use the On Screen Display (osd)
GEOMETRY WINDOW
4
4
1
1
2
2
3
3
Page 9

9
Color
Color
Your monitor has two preset options to select: 9300° K or 6500°
K. Computer Aided Design (CAD) usually works best with the
9300° K setting. Desktop Publishing (DTP) usually works best
with the 6500° K setting.
Press the MAIN button.
The On Screen Display
window appears.
Press the MAIN button to
select the COLOR
function.
Press the button to
select 9300, or press the
button to select 6500.
To continue MAIN MENU options,
press the MAIN button on the
front of the monitor.
To continue to SUB MENU options,
press the SUB button on the
front of the monitor.
If you do not press any button,
the COLOR window will “time out”
(disappear) after ten seconds.
SMAR
SMAR
T HELP
T HELP
When finished, press the
MAIN and SUB button at
the same time. The display
screen disappears.
StStaatus
tus
Status tells you the vertical and horizontal scanning frequencies
that your computer is using to operate your monitor.
Note: This
screen is for review only.
To continue MAIN MENU options,
press the MAIN button on the
front of the monitor.
To continue to SUB MENU options,
press the SUB button on the
front of the monitor.
If you do not press any button,
the STATUS window will “time out”
(disappear) after ten seconds.
SMAR
SMAR
T HELP
T HELP
How to Use the On Screen Display (osd)
Main Menu window
Press the MAIN button.
The On Screen Display
window appears.
Press the MAIN button to
select the STATUS
function.
When finished, press the
MAIN and SUB button at
the same time. The display
screen disappears.
1
1
1
1
3
3
4
4
2
2
2
2
3
3
Page 10

10
MAIN MENU WINDOW
RReset
eset
Resetting from the On Screen Display returns the monitor’s
control settings to factory preset values.
Press the MAIN button. The
On Screen Display window
appears.
Press the MAIN button to
select the RESET function.
Press the button to
select NO, or press the
button to select YES.
To continue MAIN MENU options,
press the MAIN button on the
front of the monitor.
To continue to SUB MENU options,
press the SUB button on the
front of the monitor.
If you do not press any button,
the RESET window will “time out”
(disappear) after ten seconds.
SMAR
SMAR
T HELP
T HELP
When finished, press the
MAIN and SUB button at
the same time. The display
screen disappears.
OSD Off
OSD Off
Exiting from the On Screen Display removes the On Screen
Display from the monitor screen.
To continue MAIN MENU options,
press the MAIN button on the
front of the monitor.
If you do not press any button,
the OSD OFF window will “time out”
(disappear) after ten seconds.
SMAR
SMAR
T HELP
T HELP
Press the MAIN button.
The On Screen Display
window appears.
Press the or
button to exit the OSD.
Press the MAIN button to
select the OSD OFF
function.
How to Use the On Screen Display (osd)
4
4
3
3
3
3
2
2
2
2
1
1
1
1
Page 11

11
Additional Information
Glos
Glosssararyy
Here are a few definitions that may help you.
Brightness Refers to how light or dark the overall screen is.
Contrast Refers to the sharpness of objects on the screen and the ability to easily distinguish one from the other.
DDC (Display Data Channel) is a signaling standard established to help the performance of personal computers. In order to
use this function, your computer must be designed for DDC. There are several types of DDC. Most computer monitors
are designed for DDC1 and DDC2 Level B (DDC1 /2B).
AAutoma
utoma
tic Power Sa
tic Power Sa
vings &
vings &
Preset R
Preset R
esol
esol
ution Modes
ution Modes
If you have VESA's DPMS compliance display card or software installed in your PC, the monitor can automatically reduce its power
consumption when not in use. If input from a keyboard, mouse, or other device is detected, the monitor automatically “wakes up.” The
table at left shows the power consumption and signalling of this automatic power-saving feature. The table at right shows the 9 factory
preset resolution modes. The maximum number of modes is 13. This leaves room for additions.
Power Management Definition
VESA's mode Video H-sync V-sync Power Power LED
used saving(%) color
ON Active Yes Yes < 80W 0% Green
Stand-by Blanked No Yes < 15W 80% Amber
Suspend Blanked Yes No < 15W 80% Amber
OFF Blanked No No < 8W 90% Amber
This monitor is Energy Star compliant and power management compatible.
AS AN ENERGY STAR PARTNER, PHILIPS HAS DETERMINED THAT
THIS PRODUCT MEETS THE ENERGY STAR GUIDELINES FOR ENERGY
EFFICIENCY.
The proper operation of the function requires a computer with VESA
DPMS power management capabilities. When used with a computer
equipped with VESA DPMS, the monitor is Energy Star compliant.
MODE RESOLUTION H. FREQ. V. FREQ. STANDARD
(KHZ) (HZ)
1 640 x 400 31.5 70 VGA
2 640 x 480 31.5 60 VGA
3 640 x 480 37.5 75 VESA/75
4 640 x 480 43.3 85 VESA/85
5 800 x 600 37.9 60 VESA/60
5 800 x 600 46.9 75 VESA/75
7 800 x 600 53.7 85 VESA/85
8 1024 x 768 48.3 60 VESA/60
9 1024 x 768 60 75 VESA/75
Factory Preset Resolution Modes
Power saving feature / Glossary
Page 12

12
Additional information
Pin As
Pin As
signment
signment
The 15-pin D-sub connector (male) of the signal cable:
1 Red video input
2 Green video input
3 Blue video input
4 Identical output
- connected to pin 10
5 Self test
6 Red video ground
7 Green video ground
8 Blue video ground
9 No connection
10 Logic ground
11 Identical output
- connected to pin 10
12 Serial data line (SDA)
13 H. Sync / H+V
14 V. Sync (VCLK for DDC)
15 Data clock line (SCL)
Pin No. Assignment
Specific
Specificaa
tions
tions
GENERAL
CRT
Screen size :15" (38.1 cm) flat & square
Viewable Image Size (VIS) :13.8"
Dot pitch :0.28 mm (horizontal)
Phosphor :P22 or equivalent, medium short
persistence
Screen treatment :AGAS IRIS
Display area
Factory preset :270 mm (H) x 202 mm (V)
Maximum usable :280 mm (H) x 210 mm (V)
Scanning frequency
Horizontal (line) :30-60kHz (AutoScan)
Vertical (frame) :50-120 Hz (AutoScan)
Input power :100 - 240 V AC, 50 - 60 Hz
Power consumption :70 Watt normal, 80 Watt max.
Input signal
Video :0.7 Vpp, 75 Ohm impedance
Sync :Separate sync. TTL
Pedestal
Tilt :5° forward, 15° backward
Swivel :90° left, 90° right
Physical
Unit dimension (WxHxD) :362x370x396mm
Net weight :12.5kg (27.5lbs)
Operating conditions
Temperature :0° C - 40° C (32° F - 104° F)
Humidity :20% - 80%
Storage conditions
Temperature :-25° C - 65° C (-13° F - 150° F)
Humidity :20% - 90%
Specifications subject to change without notification.
Index
Index
Brightness . . . . . . . . . . . . . . . . . . . . . . . . . . . . . . . . . . . . . . . . .4
Contrast . . . . . . . . . . . . . . . . . . . . . . . . . . . . . . . . . . . . . . . . . . .4
DDC1 / 2B . . . . . . . . . . . . . . . . . . . . . . . . . . . . . . . . . . . . . . . . . .2
Description of controls . . . . . . . . . . . . . . . . . . . . . . . . . . . . . . . .3
End-of-life disposal . . . . . . . . . . . . . . . . . . . . . . . . . . . . . . . . . . .2
Features . . . . . . . . . . . . . . . . . . . . . . . . . . . . . . . . . . . . . . . . . . .2
Glossary . . . . . . . . . . . . . . . . . . . . . . . . . . . . . . . . . . . . . . . . . .11
Hook Ups . . . . . . . . . . . . . . . . . . . . . . . . . . . . . . . . .Set Up Guide
Horizontal Position . . . . . . . . . . . . . . . . . . . . . . . . . . . . . . . . . . .5
Horizontal Size . . . . . . . . . . . . . . . . . . . . . . . . . . . . . . . . . . . . . .6
LED . . . . . . . . . . . . . . . . . . . . . . . . . . . . . . . . . . . . . . . . . . . . . . .3
Maintenance . . . . . . . . . . . . . . . . . . . . . . . . . . . . . . . . . . . . . . . .2
Pedestal . . . . . . . . . . . . . . . . . . . . . . . . . . . . . . . . . . . . . . . . . . .3
Pin Assignment . . . . . . . . . . . . . . . . . . . . . . . . . . . . . . . . . . . .12
Pincushion . . . . . . . . . . . . . . . . . . . . . . . . . . . . . . . . . . . . . . . . .7
Power button . . . . . . . . . . . . . . . . . . . . . . . . . . . Set Up Guide, 3
Power plug . . . . . . . . . . . . . . . . . . . . . . . . . . . . .Set Up Guide, 3
Power Saving . . . . . . . . . . . . . . . . . . . . . . . . . . . . . . . . . . . . . .11
Reset . . . . . . . . . . . . . . . . . . . . . . . . . . . . . . . . . . . . . . . . . . . . .10
Resolution Modes . . . . . . . . . . . . . . . . . . . . . . . . . . . . . . . . . . .11
Safety precautions . . . . . . . . . . . . . . . . . . . . . . . . . . . . . . . . . . .2
Specifications . . . . . . . . . . . . . . . . . . . . . . . . . . . . . . . . . . . . . .12
Trapezoid . . . . . . . . . . . . . . . . . . . . . . . . . . . . . . . . . . . . . . . . . .7
Troubleshooting . . . . . . . . . . . . . . . . . . . . . . . . . Set Up Guide, 9
Vertical Position . . . . . . . . . . . . . . . . . . . . . . . . . . . . . . . . . . . . .5
Vertical Size . . . . . . . . . . . . . . . . . . . . . . . . . . . . . . . . . . . . . . . . 6
Warranty . . . . . . . . . . . . . . . . . . . . . . . . . . . . . . . . . . . . . . . . . .14
Coming to Terms with this Book
Page 13

13
Additional Information
What to do if Something isn’t Working
TTroubleshooting
roubleshooting
Having trouble? Something not working? Before calling for help, try these suggestions.
H
AVING THIS PROBLEM? CHECK THESE ITEMS
No Picture Make sure the Power cable is plugged in the wall and back of the monitor.
(Power LED not lit) Power button on the front of the monitor should be in the ON position.
Disconnect the monitor from the power outlet for about one minute.
No Picture Make sure the computer is turned on.
(Power LED is Amber Make sure the monitor cable is properly connected to your computer.
or Yellow) Check to see if the monitor cable has bent pins.
The Energy Saving Feature may be activated. See page 11 for details.
No Picture Make sure the Brightness and Contrast controls are set correctly. See page 4 for details
(Power LED is Green) Make sure the monitor cable is properly connected to your computer.
Check to see if the monitor cable has bent pins.
Make sure the computer Power button is on.
Color appears blotchy Remove any nearby magnetic objects.
Face the monitor East for best picture quality.
Missing one or Make sure the monitor cable is properly connected to your computer.
more colors Check to see if the monitor cable has bent pins.
Dim Picture Adjust the Brightness and Contrast controls. See page 4 for details.
Check your video card and the manual instructions for it. It may be a non-VESA-DDC Standard card.
Picture is too large Adjust the Horizontal and/or Vertical Size. See page 6 for details.
or too small
Edges of the picture See page 7 and 8 for details.
are not square
Picture has a double Eliminate the use of a video extension cable and/or video switch box.
image Face the monitor East for best picture quality.
Unstable Picture Increase your refresh rate. Consult your computer manual for details.
Windows ’95 cannot Select “Super VGA” under S
TANDARD DISPLAY TYPES, or contact your video card manufacturer
find your video card for the right drivers.
For further assistance, contact Philips at (800) 835-3506 or (423) 475-0280.
Page 14

14
Additional Information
EL6309E001 / 3-98
Philips Service Company, P.O. Box 555, Jefferson City,Tennessee 37760
COMPUTER MONITOR
Three Years Free Labor / Three Years Free Service on Parts / One Year Exchange*
*Product will be exchanged with a new or renewed to original specifications unit within two business days for the
first year. This product must be shipped in for service during years two and three.
This warranty gives you specific legal rights. You may have other rights which vary from state/province to state/province.
WHO IS COVERED?
You must have proof of purchase to receive warranty service. A
sales receipt or other document showing that you purchased the
product is considered proof of purchase. Attach it to this owner’s
manual and keep both nearby.
WHAT IS COVERED?
Warranty coverage begins the day you buy your product. For three
years thereafter, all parts will be repaired or replaced, and labor is
free. After three years from the day of purchase, you pay for the
replacement or repair of all parts, and for all labor charges.
All parts, including repaired and replaced parts, are covered only for
the original warranty period. When the warranty on the original
product expires, the warranty on all replaced and repaired products
and parts also expires.
WHAT IS EXCLUDED?
Your warranty does not cover:
• labor charges for installation or setup of the product, adjustment
of customer controls on the product, and installation or repair of
antenna systems outside of the product.
• product repair and/or part replacement because of misuse,
accident, unauthorized repair or other cause not within the
control of Philips Consumer Electronics Company.
• reception problems caused by signal conditions or cable or
antenna systems outside the unit.
• a product that requires modification or adaptation to enable it to
operate in any country other than the country for which it was
designed, manufactured, approved and/or authorized, or repair of
products damaged by these modifications.
• incidental or consequential damages resulting from the product.
(Some states do not allow the exclusion of incidental or
consequential damages, so the above exclusion may not apply to
you.This includes, but is not limited to, prerecorded material,
whether copyrighted or not copyrighted.)
• a product used for commercial or institutional purposes.
WHERE IS SERVICE AVAILABLE?
Warranty service is available in all countries where the product is
officially distributed by Philips Consumer Electronics Company. In
countries where Philips Consumer Electronics Company does not
distribute the product, the local Philips service organization will
attempt to provide service (although there may be a delay if the
appropriate spare parts and technical manual(s) are not readily
available).
WHERE CAN I GET MORE INFORMATION?
For more information, contact the Customer Care Center at Philips
Service Company by calling (800) 835-3506 (U.S.A. customers only)
or (423) 475-0280.
BEFORE REQUESTING SERVICE...
Please check your owner’s manual before requesting service.
Adjustments of the controls discussed there may save you a service
call.
TO GET WARRANTY SERVICE IN U.S.A.,
PUERTO RICO OR U.S. VIRGIN ISLANDS...
Contact the Customer Care Center phone number listed below for
product assistance and procedures for servicing:
Customer Care Center - Philips Service Company
(800) 835-3506
or
(423) 475-0280
(In U.S.A., Puerto Rico and U.S.Virgin Islands, all implied warranties,
including implied warranties of merchantability and fitness for a
particular purpose, are limited in duration to the duration of this
express warranty. But, because some states do not allow limitations
on how long an implied warranty may last, this limitation may not
apply to you.)
TO GET WARRANTY SERVICE IN CANADA...
Please contact Philips at:
(800) 479-6696
Three years free parts and three years free labor will be provided at
Philips Canada depot or any one of its authorized service centers.
(In Canada, this warranty is given in lieu of all other warranties. No
other warranties are expressed or implied, including any implied
warranties of merchantability or fitness for a particular purpose.
Philips is not liable under any circumstances for any direct, indirect,
special, incidental or consequential damages, howsoever incurred,
even if notified of the possibility of such damages.)
REMEMBER...
Please record the model and serial numbers found on the product
below. Also, please fill out and mail your warranty registration card
promptly. It will be easier for us to notify you if necessary.
MODEL #
________________________________________________
SERIAL #
________________________________________________
LIMITED WARRANTY
Page 15

15
 Loading...