

Page 1
User Manual
Guide de l’utilisateur
™
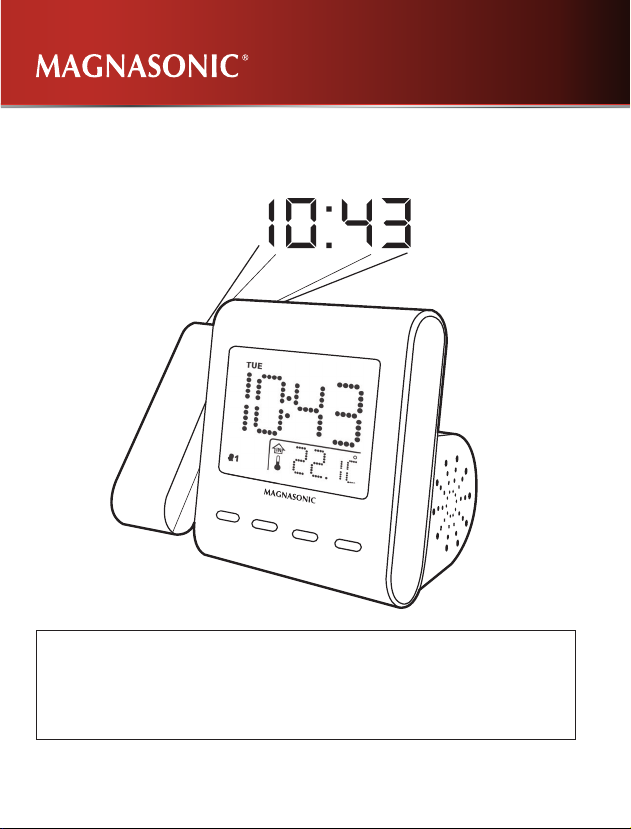
Clock Radio with Dual Alarm
SelfSet
Radio - réveil SelfSet™ avec double alarme
MM176K
Thank you for your p urchase of this M agna sonic product . Plea se read t his instruct ion man ual car efully
before using product to ensure p roper use. Keep t his man ual in a sa fe place for futu re refer ence.
Merci d ’avoir fai t l’achat de cet app areil M agnasonic. Veuillez l ire le présent guide attentive ment av ant
de fair e fonct ionner l’appar eil pour vous assurer de l’utilise r correc teme nt. Conservez le présent
guide d ans un en droit sû r an de pouvoir vou s y référe r au besoin.
magnasonic.com/support
Page 2

IMPORTANT SAFETY INFORMATION
RETAIN THIS MANUAL FOR FUTURE REFERENCE
1. Read these instructions.
2. Keep these instructions.
3. Read all warnings.
4. Follow all instructions.
5. Do not use this product near water.
6. Clean only with a dry cloth.
7. Clean the screen only with a dry cloth, moistened slightly if needed. Do not cle an the inside of t his
product.
8. Check that the power voltage stated on the rating label corresponds to your local elec tricity supply.
9. Do not block any ventilation openings. Inst all in accordance with the manufacturer’s instructions.
10. Do not place this product near any heat sources such as radiator s, heat registers, stoves or other
apparatus (including ampliers) that produce heat.
11. Do not immerse this produc t, the power cord or any accessories in water or any other liquid.
12. Unplug the power ad aptor from the wall when the product is unused for a long period of time and
during thunderstorms.
13. Only use attachments / accessories specied by the manufacturer.
14. Unwind and straighten t he power cord before use.
15. Damage Requiring Service
Unplug the power cord and refer ser vicing to qualied service professional under the follow ing
conditions:
A. If liquid ha s been spilled on or into the product.
B. If the product has been exposed to rain, water, or other liquids.
C. If the product does not operate normally by following the operating instructions. Adjust only
those controls that are covered by t he oper ating instructions. Improper adjustment of other
controls may result in damage and will of ten require extensive work by a qualied technician to
restore the product to its normal operation.
D. If the product has been dropped or damaged in any way.
E. When the product exhibits a distinct change in performance. This may indicate a need for ser vice.
16. Servicing
Do not attempt to service this product yourself as opening or removing covers may expose you to
dangerous voltages or other hazards. Refer all ser vicing to a qualied service professional.
17. Replacement Parts
When re placement parts are required, be sure the service technician ha s used replacement parts
speci ed by the manuf acturer, or have the s ame characterist ics as the original par ts. Unauthorized
substitutions may result in re, electric shock, or other hazards.
18. Safety Check
Upon completion of any service or repairs to this product, ask the service technician to perform
safety checks to determine that the product is in proper operating condition.
19. Caution marking is located at the back of apparatus.
20. The marking information is located on the bottom of apparatus.
TABLE OF CONTENTS
IMPORTANT SAFETY INFORMATION ...................................................2
PRODUCT INFORMATION .......................................................................4
OPERATING INSTRUCTIONS .................................................................. 6
Connecting Power ......................................................................................................... 6
Battery Backup ................................................................................................................ 6
Installing the Battery ..................................................................................................... 6
Daylight Saving Time (DST) / Summer Time .......................................................... 7
Cancelling / Reactivating Automatic DST / Summer Time ................................. 7
Setting the Date & Time ............................................................................................... 8
Setting Alarm 1 & Alarm 2........................................................................................... 8
Snooze Function .......................................................................................................... 10
Sleep Timer .................................................................................................................... 10
Nap Timer ...................................................................................................................... 10
Dimmer ........................................................................................................................... 10
Temperature Settings .................................................................................................. 11
Listening to the Radio ......................................................................... ........................ 11
To Set the Radio Presets ............................................................................................ 11
To Recall the Radio Presets....................................................................................... 12
Projection Unit ............................................................................................................. 12
AUX In ............................................................................................................................ 12
TROUBLESHOOTING .............................................................................. 14
SPECIFICATIONS ...................................................................................... 14
CARE AND MAINTENANCE ................................................................... 15
WARNINGS ................................................................................................. 16
- 2 - - 3 -
Page 3

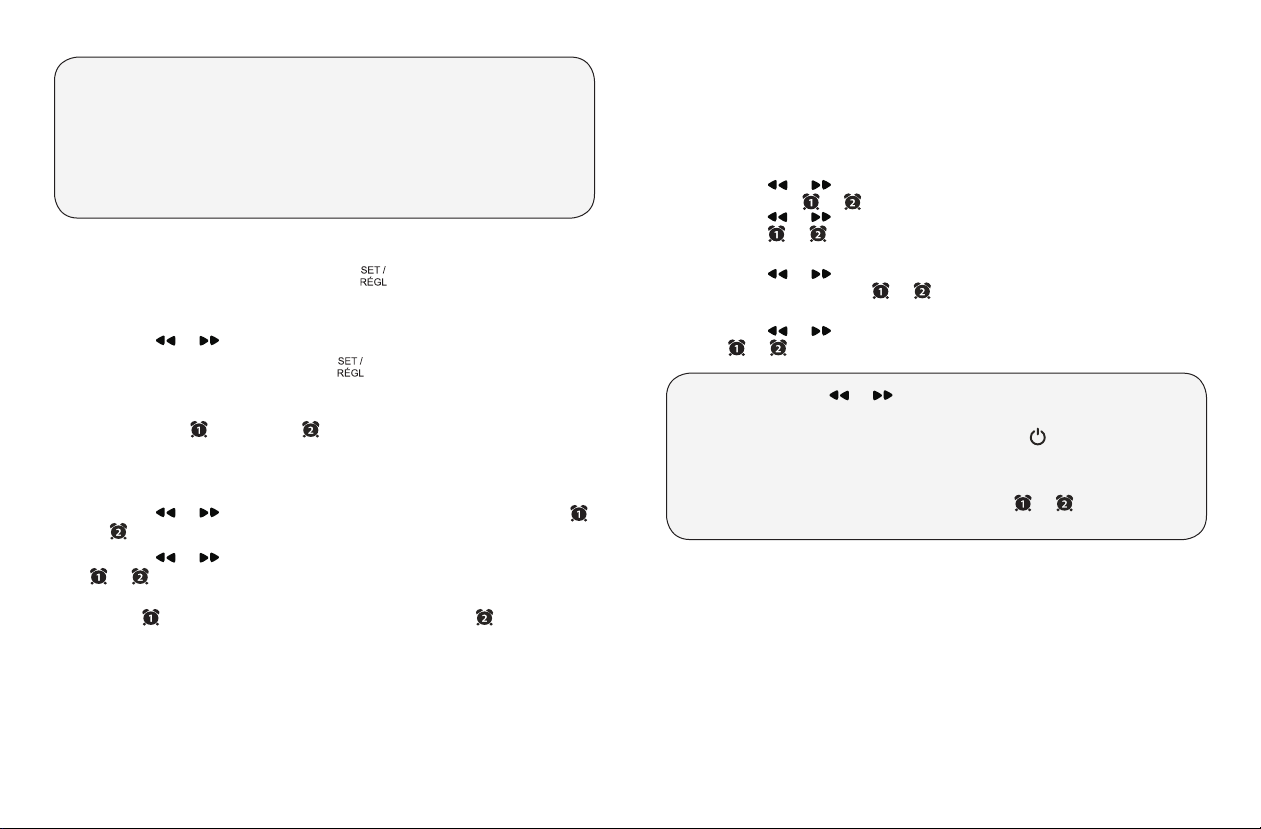
PRODUCT INFORMATION
1 2
9
3
4
10
22
23
11
5
6
12
24
25
AUX
26
7 8
2827
29
30
31
NAP / SIESTE°C / °FDST / HA
14 15 16 17
TIME ZONE / FUS HOR
SET /
RÉGL
SNOOZE / SLEEP
MIN SOM / SOMNO
DIMMER / GRADATEUR AM / FMMEM / M+
18 19 20 21
- 4 - - 5 -
1. Month Indicator
2. Daylight Savings Time ‘on’ Indicator
3. Year I ndic ator
13
4. PM Indicator
5. Time Zone Selection ‘on’ Indicator
6. FM/AM Band Indicator
7. Alarm Indicators:
Alarm 1 Radio / Alarm 1 Buzzer /
Alarm 2 Radio / Alarm 2 Buzzer
8. Sleep Mode ‘on’ Indicator
9. Day of the Week Indicator
10. Date Indicator
11. Time / Main Function Indicator
12. Indoor Temperature Display
13. LCD Screen
14. << / Daylight Savings Time
15. >> / ºC-ºF
16. Volume Down / Nap
17. Volume Up / Calendar
18. Projection Unit
19. Set / Memory
20. Time Zone / Snooze / Sleep / Dimmer
21. Radio ON/OFF / AM/FM Band
22. Alarm 1
23. Alarm 2
24. AUX Input
25. Speaker
26. FM Antenna
27. Indoor Temperature Sensor
28. Battery Door
29. Projection Focus
30. Projection 180º Flip / Projection
Temp erature O N/OF F
31. Projection ON/OFF
Page 4

OPERATING INSTRUCTIONS
Connecting Power
The SelfSet
power is connected, the clock display will ash '2' which is TIME ZONE 2
(Eastern time) and the default TIME ZONE setting.
To select TIME ZONE 2 (Eastern time) as your default time zone:
To change your time zone upon setup:
To change your time zone after setup:
There are 8 programmed times zones:
0 - Newfoundland time
1 - Atlantic time
2 - Eastern time (default)
Battery Backup
This alarm clock is equipped with a battery backup feature. This feature will
restore your alarm clock settings in the event of a power outage. The 3V,
CR2032 Flat Lithium battery is pre-installed at the factory, however, should you
need to replace the battery, please read the following instructions.
Installing the Battery
™
Clock Radio is equipped with an "auto time set" feature. When
• Press
ONCE to conrm your selection.
• The correct time will be displayed, unless you are in another time zone.
• Press
or until your own time zone appears on the display; press
ONCE to conrm your selection.
• With the radio off, press and hold the
button until the time
zone numbers ash.
• Press
or until your own time zone appears on the display; press
ONCE to conrm your selection.
3 - Central time
4 - Mountain time
6 - Alaska time
7 - Hawaiian time
5 - Pacic time
1. Using a small Phillips Head screwdriver, loosen the screw from the battery
panel on the bottom of the unit.
2. Remove the battery compartment panel.
3. Remove/properly dispose of depleted battery and replace with new, 3V,
CR2032 Flat Lithium battery.
4. Close the battery compartment and put screw into place to secure battery panel.
- 6 - - 7 -
• Batteries must be installed by an adult.
• Use only the recommended size and type of battery specied.
• Please be sure to follow the correct polarity when installing the battery
in the battery compartment. A reversed battery may cause damage to
the alarm clock.
• When not using the unit for a prolonged period of time, please remove
the battery to avoid possible damage caused by a leaking battery.
ATTE NTI ON
• When replacing the battery, do not disconnect AC plug from AC outlet.
Current time and alarm will stay the same.
• Do not plug or unplug the power cable if you have wet hands.
• If you are not planning to use the unit for an extended period of time,
disconnect the power cable from the wall outlet.
• Do not pull on the cord! You may damage the power cord and may cause
an electric shock when disconnecting the power cord from the wall outlet.
Pull rmly at the base of the plug.
Daylight Saving Time (DST) / Summer Time
Daylight Saving Time/Summer Time is automatically preset. An icon will appear
on screen to indicate DST is on
• Daylight saving time begins at: 2:00 AM on the second Sunday of March.
• Standard time begins at: 2:00 AM on the rst Sunday of November.
Cancelling / Reactivating Automatic DST / Summer Time
1. To cancel DST/Summer Time, press and hold the
button for 3
seconds while the radio is OFF.
2. ‘OFF’ will appear in the display to show that the Automatic DST/Summer
Time adjustment is cancelled. The display will return to the clock.
3. To reactivate DST/Summer Time, press and hold the
button for 3
seconds while the radio is OFF.
4. ‘ON’ will appear in the display to show that the Automatic DST/Summer
Time adjustment is reactivated. The display will return to the clock.
Page 5
• The timing of Automatic DST/Summer Time employed by the unit
(see above) is subjected to variations by region and the law in each
country/region. In such a case, cancel the Automatic DST/Summer Time
adjustment.
• If you live in a country/region that has not introduced Daylight Saving
Time/Summer Time, you must cancel Automatic DST/Summer Time
adjustment before using the unit.
Setting the Date & Time
To change the Date/Time, press and hold the
appear in the following order:
YEAR > MONTH > DAY > 12/24 H > HOUR > MIN
1. Press the
2. To conrm your selection, press the
Setting Alarm 1 & Alarm 2
Press the ALARM 1
setting and then press and hold to enter the alarm set mode. The alarm time will
ash, and the settings will appear in the following order:
HOUR > MIN > ALARM MODES > WAKE OPTIONS > RADIO VOLUME
3. Press the or buttons to decrease/increase the HOUR; press the
or button to conrm HOUR. The MINUTES will begin to ash.
4. Press the
or button to conrm MINUTES. Alarm modes will ash.
Alarm modes allow you to set more than one alarm in a week e.g.,
ALARM 1
you on weekends.
Alarm mode settings:
1-5 : Monday to Friday
1-7 : Whole week
or buttons to toggle through the settings
or ALARM 2 button once to view the current alarm
or buttons to decrease/increase the MINUTES; press the
set to wake you Monday-Friday and ALARM 2 set to wake
button. The settings will
button once again.
(if applicable)
6-7 : Saturday & Sunday
1-1 : One day of week
NOTE: When selecting 1-1, you must select a specic day as follows:
1=Monday
2=Tuesday
3=Wednesday
4=Thur sday
5. Press the
then press the or button to conrm your selection; if 1-1 is selected,
press the or buttons to toggle between the days of the week and
press the or button to conrm your selection. The Wake options
will begin to ash.
6. Press the
or bu (buzzer); press the or button to conrm your selection; if AM
or FM is selected, the Alarm Volume selection will begin to ash.
7. Press the
the or button to conrm your selection.
• Press and hold the or buttons to quickly decrease/increase
through settings.
• To cancel an alarm while it is going off, press the
• If an alarm is not cancelled, it will sound for 30 minutes then automatically
turn off. It will resume to the same alarm time on next scheduled day.
• To enable/disable an alarm, press and hold the
will appear on screen to indicate that an alarm is enabled.
or buttons to toggle between the ALARM MODE settings
or buttons to toggle between the Wake options AM, FM
or buttons to decrease/increase the Alarm Volume; press
5=Friday
6=Saturday
7=Sunday
or button. An icon
button.
- 8 - - 9 -
Page 6
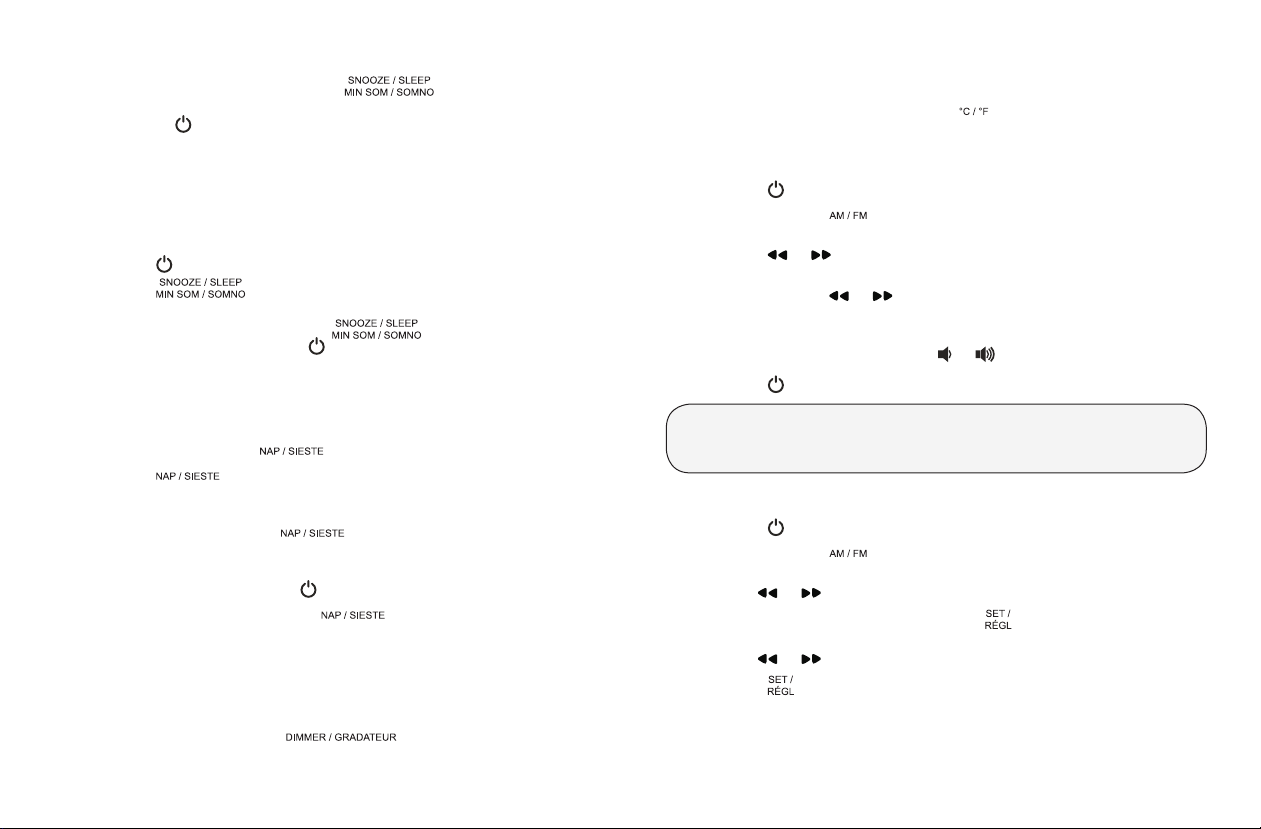
Snooze Function
• When an alarm is sounding, press the
alarm for 9 minutes. Alarm will resume after 9 minutes.
• Pressing the
function; Snooze function will also stop automatically after 30 minutes.
Sleep Timer
The sleep timer allows you to listen to music for a preset amount of time
ranging from 90 minutes to 15 minutes. It is commonly used by people who
prefer to fall asleep to music.
1. Press the
2. Press the
90min > 60min > 30min > 15min > OFF
3. To cancel the sleep timer, press the
‘OFF’ in the display or press the button.
Nap Timer
The nap timer allows you to set a buzzer alarm to go off after a preset amount
of time ranging from 90 minutes to 10 minutes.
1. With radio off, press the
2. Press the
90min > 80min > 70min > 60min > 50min > 40min > 30min > 20min >
10min > OFF
3. When enabled, pressing the
and pressing again will reset the timer to 90 minutes.
4. When the nap timer expires, it will continue to buzz for 30 minutes or it
can be stopped by pressing the
5. To cancel the nap timer, press the
the display.
Dimmer
You can adjust the brightness of the LED display making it brighter, dimmer or
even turning it off. There are three dimming options: High > Low > OFF.
1. With the radio off, press the
the dimmer settings.
button on the top of the unit will cancel the snooze
button to turn the radio on.
button to toggle through the preset times:
button to turn on the nap timer.
button to toggle through the preset times;
button will show current nap timer
button.
button to stop the
button until you see
button until you see ‘OFF’ in
button to toggle between
Temperature Settings
The temperature can be displayed in °C or °F.
1. With the radio off, press and hold the
or °F modes.
Listening to the Radio
1. Press the
2. Press and hold the
AM and FM radio.
3. Press the
at a time.
4. Press and hold the
forward through the stations; the unit will automatically scan to the next
broadcasting station.
5. Control the radio volume with the
6. Press the
Please ensure that the FM antenna is completely unrolled and extended for
best FM reception. The AM band uses an internal directional aerial. For best
7.
To Set the Radio Presets
1. Press the
2. Press and hold the
AM and FM radio.
3. Use the
4. To set a radio present, press and hold the
will blink on the display e.g., ‘P02’.
5. Use the
6. Press the
7. Repeat steps 2 through 6 to set more presets.
button on the top panel to turn the radio 'ON'.
button while the radio is ON to toggle between
or buttons once, to move back/move forward one station
or buttons for one second to scan back /
button to turn the radio 'OFF'.
reception, please rotate the radio.
button on the front panel to turn the radio ‘ON’.
button while the radio is ON to toggle between
or buttons to select the desired radio station.
or buttons to toggle to the desired preset number.
button again to set the preset.
button to switch between °C
or buttons.
button. A preset number
- 10 - - 11 -
Page 7

To Recall the Radio Presets
1. Press the
2. Press the
appear on the display. Press the button again to cycle through all radio
presets.
button on the front panel to turn the radio ‘ON’.
button to select a preset. The current preset number will
10 for AM radio (P01 to P10) and 10 for FM radio (P01 to P10)
Projection Unit
The Projection Unit will project the Time or the Temperature on a wall or
ceiling of a darkened room (maximum distance is 3-9 feet).
• To turn the projected image ON/OFF, press the
• Turn the Focus Adjustment Wheel (
unit) until the projected time/temperature is clearly shown on the ceiling
or wall.
• To display the temperature, press and hold the
projection unit.
• To ip the projected image (temperature or time) 180°, press the
button once.
AUX In
This clock radio is equipped with a convenient auxiliary input that allows you to
use your clock radio as a speaker for another audio device.
1. Connect a 3.5mm cable (not included) into the
of the clock radio and connect the other end of the cable to the audio out
connection of your external audio device.
2. Any device connected through the auxiliary input will override the radio
function when the radio is on.
3. Operate the external audio device as you normally would. You can control
the volume with the clock radio
There are 20 available presets.
button.
on the back of the projection
button on the back of the
connection on the back
or buttons.
NEED
HELP?
DO NOT RETURN THIS
PRODUCT TO THE STORE
Please contact a MAGNASONIC customer support representative rst
regarding any additional information on product features, specications or
assistance with setup.
Please contact us via one of the methods below:
Support:
magnasonic.com/support
Online Web Chat:
magnasonic.com
For more product information visit magnasonic.com
- 13 -- 12 -
Page 8

TROUBLESHOOTING
If you experience a problem with this unit, check the chart below before calling
for service.
SYMPTOM POSSIBLE CAUSE POSSIBLE SOLUTION
GENERAL
Power doe s not come on AC cord not plugged in Insert plug rmly into AC outlet
RADIO
No sound
Noise or sound is distor ted on
AM or FM radio
Incorrect time
Alarm does not turn on
Power is not on Press power to turn the radio on
Volume control is at the
minimum position
AM: Interference
FM: Antenna wire not extended Extend antenna wire
CLOCK
Batteries inserted incorrectly,
not connected or dead
Clock not set Set the clock
Alarm is not set t o turn on
Clock is not set Set the clock
Alarm time is not set Set alarm time
Turn the volume control up
Position the radio for better AM
reception
Check batteries
Press and hold ALARM 1 or
ALARM 2 to turn on the al arm
SPECIFICATIONS
Frequency Range (AM) 520 - 1710 kHz
Frequency Range (FM) 87.5 - 108 MHz
Power Supply AC 120V ~ 60Hz, 5W
Battery Backup DC 3V CR2032 (battery included)
Indoor Temperature Range 0 to +50°C or 32 to 122 °F
CARE AND MAINTENANCE
PRECAUTIONS:
1. Always turn off the unit after use.
2. Keep the unit away from magnetic objects, water or heat sources.
3. Use a clean soft cloth moistened with lukewarm water to clean the
cabinet. Never use chemical cleaners that could damage the nish of the
unit.
4. Disconnect the unit from any power sources before cleaning.
NOTE: This equipment has been tested and found to comply with the limits
for a Class B digital device, pursuant to Part 15 of the FCC Rules. These limits
are designed to provide reasonable protection against harmful interference
in a residential installation. This equipment generates, uses, and can radiate
radio frequency energy and, if not installed and used in accordance with
the instructions, may cause harmful interference to radio communications.
However, there is no guarantee that interference will not occur in a particular
installation. If this equipment does cause harmful interference to radio or
television reception, which can be determined by turning the equipment off and
on, the user is encouraged to try to correct the interference by one or more of
the following measures:
• Reorient or relocate the receiving antenna.
• Increase the separation between the equipment and the receiver.
• Connect the equipment to an outlet on a circuit different from that to
which the receiver is connected.
Specications are subject to change without notice.
- 14 - - 15 -
Page 9

!
WARNINGS
WARNING
To reduce the risk of re or electric shock, do not expose this appliance to rain or
moisture.
CAUTION
Use of controls or adjustments or performance of procedures other than those
specied may result in hazardous radiation exposure.
CAUTION - TO REDUCE THE RISK OF ELECTRIC SHOCK, DO NOT
REMOVE COVER (OR BACK). NO USER-SERVICABLE PARTS INSIDE,
REFER TO QUALIFIED USER PERSONNEL.
The lightning ash wit h arrowhead symbol, within an equilateral triangle, is intended to
alert the user to the presence of uninsulated “dangerous voltage” within the product’s
enclosure that may be of suf cient magnitude to constit ute a risk of elect ric shock to
persons.
The exclamation point within an equilater al triangle is intended to alert the user to
the presence of import ant operating and maintenance (servicing) instructions in the
literature accompanying the appliance.
DO NOT INGEST BATTERY, CHEMICAL BURN HA ZARD
This product contains a coin/button cell battery. If the coin/button cell battery is
swallowed, it can cause severe internal burns in just 2 hours and can lead to death.
Keep new and used batteries away from children. If the battery compartment
does not close securely, stop using the product and keep it away from children.
If you think batteries might have been swallowed or placed inside any part of the
body, seek immediate medical attention.
WARNING
1. No naked ame sources, such as lighted candles, should be placed on the apparatus.
2. Do not place the product in closed bookcases or racks wit hout proper ventilation.
3. The mains plug is used as the disconnect device, the disconnect device shall remain readily operable.
4. The ventilation should not be impeded by covering the ventilation openings with items, such as
newspapers, table-cloths, curtains, etc.
5. It shall not be exposed to dripping or splashing and th at no objects lled with liquids , such as vases, shall
be placed on the apparatus.
6. Do not connect FM antenna to out side antenna .
7. The unit should not be exposed to direct sunlight , very high or low temperature, moisture, vibrations or
placed in dust y environment.
8. Do not use abrasive, benzene, thinner or other solvents to clean the surface of the unit. To cle an, wipe
it with mild non -abrasive detergent solution and clean soft cloth.
9. Never attempt to insert wires, pins or other such objects into the vents or opening of the unit.
10. Batteries shall not be exposed to excessive heat such as sunshine, re or the like.
11. Attention should be drawn to the environmental aspects of battery disposal.
Do not dispose this product into usual household garb age at the end of it s lifec ycle; hand it over
to a collection center for recycling the electrical and electronic appliances. By recycling, some of
the mat erials can be reused. You are making an important contribution to protect our
environment . Please inquire your community administr ation for the authorized disposal center.
CAUTION
Danger of explosion if battery is incorrectly replaced. Replace only with the same or equivalent type.
WARNING
To prevent electric shock ; do not use this plug with an extension cord receptacle or other outlet unless t he
blades can be fully inserted to prevent blade exposures. To prevent re or shock haz ard; do not install this
product in a conned spaced such as a book case or similar unit.
- 16 -
- 17 -
Page 10

NOTES INFORMATIONS IMPORTANTES SUR LA SÉCURITÉ
CONSERVEZ CE GUIDE POUR RÉFÉRENCE FUTURE
1. Lire ces instructions.
2. Conserver ces instructions.
3. Respecter tous les avertissements.
4. Observer toutes les instructions.
5. Ne pas utiliser cet appareil près de l’eau.
6. Utiliser uniquement un chif fon sec pour le nettoyage.
7. Nettoyer l’écran ave c un chif fon sec, légèrement humecté si nécessaire. Ne pas nettoyer l’intérieur
de cet appareil.
8. Vérier que la tension d’aliment ation indiquée sur l’étiquette signalétique correspond à votre
alimentation d’électricité locale.
9. Ne pas obstruer les bouches d’aération. Installer conformément aux instruc tions du fabricant .
10. Installer l’appareil à l’écart de sources de chaleur telles que les radiateurs, les bouches de chaleur, les
fours ou autres appareils (incluant les amplicateurs) qui produisent de la chaleur.
11. Ne pas plonger l’appareil, le cordon d’alimentation ou ses accessoires dans l’eau ou tout autre liquide.
12. Débrancher l’appareil lors d’orage ou lorsqu’il n’est pas utilisé pendant une période prolongée .
13. N ’utiliser que des périphériques et des accessoires spéciés par le fabricant.
14. Dérouler et redresser le cordon d’aliment ation avant utilisat ion.
15. Dommages nécessitant des réparations
Débrancher l’appareil et faire appel à un professionnel qualié dans les conditions suivantes:
A. Si du liquide a été renversé sur ou dans l’appareil;
B. Si l’appareil a été exposé à la pluie, l’eau ou d’autres liquides;
C. Si l’appareil ne fonctionne pas normalement en suivant le mode d’emploi. Ef fectuer que les
commandes qui sont couverte s par le mode d’emploi. Un mauvais réglage des autres commandes
peut entraîner des dommages et nécessitera souvent un travail approfondi par un technicien
quali é an de remettre l’appareil à son état de fonctionnement normal;
D. Si l’appareil a été échappé ou endommagé de quelque façon;
E. Si l’appareil a un fonctionnement anormal. Ce la peut indiquer un besoin de réparation.
16. Réparation
Ne pas tenter de réparer cet appareil vous-même, car l’ouver ture ou le retrait du boîtier peut vous
exposer à des tensions dangereuses ou autres dangers. Conez toute réparation à un professionnel
qualié.
17. Pièce s de rechange
Lorsque des pièces de re change sont nécessaires, assurez-vous que le technicien a ut ilisé les
pièces spéciées par le fabricant ou ayant les mêmes carac téristiques que les pièces d ’origine. Des
substitutions non autorisées peuvent provoquer un incendie, une décharge élec trique ou d’autres
dangers.
18. Contrôle de sécurit é
À l’issue de tout entretien ou ré paration de cet appareil, de mande r au technicien d’effectuer les
vérications de sécurité an de vous assurer que l’appareil est en bon état de fonctionnement.
19. L’étiquette des mises e n garde se trouve à l’arrière de l’appareil.
20. Les informations de marquage se trouvent sur le dessous de l’appareil.
- 18 -
- 19 -
Page 11

INFORMATIONS IMPORTANTES SUR LA SÉCURITÉ ...................... 19
RENSEIGNEMENTS SUR LE PRODUIT ................................................ 21
MODE D’EMPLOI .......................................................................................23
Raccordement électrique ..........................................................................................23
Pile de secours ..............................................................................................................23
Installation de la pile .................................................................................................... 24
Heure avancée (HA) / Heure d’été ......................................................................... 24
Annulation/réactivation automatique de l’HA/l’heure d’été ............................25
Réglage de la date et de l’heure ...............................................................................25
Réglage de l’alarme 1 et de l’alarme 2 .................................................................... 25
Fonction de rappel de sonnerie ......................................................................... ......27
Minuterie sommeil ....................................................................................................... 27
Minuterie sieste ............................................................................................................27
Intensité d’éclairage ..................................................................................................... 28
Réglages de la température ....................................................................................... 28
Écouter la radio ............................................................................................................ 28
Pour régler les stations programmées ...................................................................29
Pour rappeler les stations programmées .............................................................. 29
Unité de projection ..................................................................................................... 30
Entrée AUX ................................................................................................................... 30
DÉPANNAGE .............................................................................................. 32
SPECIFICATIONS ...................................................................................... 33
ENTRETIEN ET MAINTENANCE ........................................................... 33
MISES EN GARDE ...................................................................................... 34
RENSEIGNEMENTS SUR LE PRODUITTABLE DES MATIÈRES
1 2
9
3
4
5
6
7 8
NAP / SIESTE°C / °FDST / HA
14 15 16 17
10
11
12
13
SET /
RÉGL
18 19 20 21
- 20 - - 21 -
TIME ZONE / FUS HOR
SNOOZE / SLEEP
MIN SOM / SOMNO
DIMMER / GRADATEUR AM / FMMEM / M+
Page 12

22
23
24
25
AUX
26
2827
1. Indicateur du mois
2. Indicateur de l’heure d’été
« ON » (activée)
3. Indicateur de l’année
4. Indicateur p.m.
5. Indicateur de sélection du fuseau
horaire « ON » (activé)
6. Indicateur de fréquence AM/FM
7. Indicateurs d’alarme :
Alarme 1 Radio / Alarme 1
Avertisseur sonore / Alarme 2 Radio
/ Alarme 2 Avertisseur sonore
8. Indicateur du mode Sleep (arrêt
différé) « ON » (activée)
9. Indicateur du jour de la semaine
10. Indicateur de la date
11. Indicateur de la fonction Heure /
Actuelle
12. Afchage de la température
intérieure
13. Écran ACL
14. << / Heure d’été
15. >> / ºC et ºF
16. Réduction du volume / Sieste
MODE D’EMPLOI
29
30
31
17. Augmentation du volume /
Calendrier
18. Unité de projection
19. Réglage / Mémoire
20. Fuseau horaire / Rappel de
sonnerie / Arrêt différé / Intensité
d’éclairage
21. Radio « ON/OFF » (allumée/
éteinte) et fréquence AM/FM
22. Alarme 1
23. Alarme 2
24. Entrée AUX
25. Haut-parleur
26. Antenne FM
27. Capteur de la température
intérieure
28. Couverture des piles
29. Mise au point de projection
30. Projection basculement 180º /
Projection température
« ON/OFF » (allumée/éteinte)
31. Projection « ON/OFF » (allumée/
éteinte)
Raccordement électrique
Le radio-réveil SelfSetMC est doté d’une fonction de “réglage automatique de
l’heure”. Lorsque l’alimentation est connectée, l’afchage de l’horloge clignote
“2”qui représente le FUSEAU HORAIRE 2 (heure de l’Est) et le réglage du
fuseau horaire par défaut.
Pour choisir le FUSEAU HORAIRE 2 (heure de l’Est) comme fuseau horaire par
défaut:
• Appuyez
UNE fois sur • an de conrmer votre choix.
• L’heure exacte s’afche, sauf si vous êtes dans un autre fuseau horaire.
Pour changer votre fuseau horaire lors de la conguration:
• Appuyez sur
ou jusqu’à ce que votre propre fuseau horaire apparaît
à l’écran; appuyez sur UNE fois pour conrmer votre sélection.
Pour changer votre fuseau horaire après la conguration:
• Avec la radio éteinte, appuyez et maintenez enfoncé le bouton jusqu’à ce
que les numéros des fuseaux horaires clignotent.
• Appuyez sur
ou jusqu’à ce que votre propre fuseau horaire apparaît
à l’écran; appuyez sur UNE fois pour conrmer votre sélection.
Il y a huit (8) fuseaux horaires programmes
0 – Heure de Terre-Neuve
1 – Heure de l’Atlantique
2 – Heure normale de l’Est (par défaut)
3 – Heure normale du Centre
Pile de secours
Ce réveil dispose d’une fonction de sauvegarde de la pile. Cette fonction permet
de restaurer vos réglages d’alarme de réveil en cas de coupure de courant. La
pile lithium-ion plate 3V de modèle CR2032 est préinstallée en usine, cependant,
si vous devez remplacer la pile, veuillez lire les instructions suivantes.
- 22 - - 23 -
4 – Heure normale des Rocheuses
5 – Heure normale du Pacique
6 – Heure normale du Alaska
7 – Heure d’Hawaii
Page 13

Installation de la pile
1. À l’aide d’un petit tournevis cruciforme, desserrez la vis du couvercle du
compartiment de la pile situé au bas de l’appareil.
2. Retirez le couvercle du compartiment de la pile.
3. Retirez la pile et s’en débarrasser en suivant les normes appropriées puis
remplacez avec une pile pile lithium-ion plate 3V de modèle CR2032 neuve.
4. Refermez le couvercle du compartiment de la pile et replacez la vis en place an
de bien xer le couvercle.
• La pile doit être installée par un adulte.
• N’utilisez que la taille et le type de pile spéciés.
• Veuillez prendre soin de respecter la polarité lors de l’installation de
la pile dans son compartiment. Une pile inversée peut endommager le
réveil.
• L’orsque l’appareil n’est pas utilise pendant une période prolongée,
veuillez retirer la pile an d’éviter les dommages éventuels causés par une
pile qui a fui.
ATTE NTI ON
• Lors du remplacement de la pile, ne pas débrancher la che CA de la prise
de courant.
• L’heure et l’alarme seront initialisées.
• Ne pas brancher ou débrancher le câble d’alimentation si vous avez les
mains mouillées.
• Si vous ne prévoyez pas d’utiliser l’appareil pendant une longue période de
temps, débranchez le câble d’alimentation de la prise murale.
• Ne tirez pas sur le cordon! Vous pourriez endommager le cordon
d’alimentation et provoquer une décharge électrique en débranchant le
cordon d’alimentation de la prise murale.
• Tirez fermement à la base de la che.
Heure avancée (HA) / Heure d’été
L’heure avancée/l’heure d’été est programmée automatiquement. Une icône
apparaîtra sur l’écran pour indiquer que l’heure d’été est activée
• L’heure d’été commence à 2 h du matin le deuxième dimanche du mois de mars.
.
- 24 - - 25 -
• L’heure normale commence à 2 h du matin le premier dimanche du mois de
novembre.
Annulation/réactivation automatique de l’HA/l’heure d’été
1. Pour annuler l’HA/l’heure d’été, appuyez et maintenez le bouton enfoncé
pendant 3 secondes alors que la radio est éteinte.
2. « OFF » apparaîtra à l’écran pour indiquer que le réglage automatique
l’HA/l’heure d’été. L’afchage revient à l’horloge .
3. Pour réactiver l’HA/l’heure d’été, appuyez et maintenez enfoncé le bouton
pendant 3 secondes alors que la radio est éteinte.
4. Le mot « ON » s’afchera à l’écran pour indiquer que le réglage
automatique de l’HA/l’heure est réactivé. L’afchage reviendra à l’horloge.
• La programmation automatique de l’HA/l’heure d’été utilisée par
l’appareil (voir ci-dessus) est soumise à des variations selon la région et
la juridiction de chaque pays/région. Dans un tel cas, annulez le réglage
automatique de l’HA/l’heure été.
• Si vous vivez dans un pays ou une région qui n’a pas introduit l’heure
avancée/l’heure d’été, vous devez annuler le réglage automatique de
l’HA/l’heure d’été avant d’utiliser l’appareil.
Réglage de la date et de l’heure
Pour changer la date et l’heure, appuyez et
enfoncé. Les paramètres s’afchent dans l’ordre suivant:
ANNÉE > MOIS > JOUR > 12/24 H > HEURE > MIN
1. Appuyez sur les boutons
2. Pour conrmer votre sélection, appuyez de nouveau sur le bouton.
Réglage de l’alarme 1 et de l’alarme 2
Appuyez une fois sur le bouton ALARME 1
réglage actuel de l’alarme, puis appuyez et maintenez enfoncé pour entrer dans
le mode de réglage de l’alarme. L’heure de l’alarme clignote, et les paramètres
apparaissent dans l’ordre suivant:
HEURE > MIN > MODES ALARME > OPTIONS D’ÉVEIL > VOLUME RADIO
(le cas échéant)
ou pour parcourir les paramètres.
maintenez le bouton
ou ALARME 2 an d’afcher le
Page 14

1. Appuyez sur les boutons ou pour augmenter et diminuer l’HEURE;
appuyez sur le bouton ou pour conrmer l’HEURE. Les MINUTES
se mettront à clignoter.
2. Appuyez sur les boutons
MINUTES; appuyez sur le bouton ou pour conrmer les MINUTES.
Les modes de l’alarme se mettront à clignoter.
Les modes d’alarme vous permettent de dénir plus d’une alarme dans une
semaine par exemple, l’ALARME 1
vendredi et l’ALARME 2 dénie pour vous réveiller le week-end.
Paramètres du mode d’alarme:
1 à 5: lundi au vendredi
6 et 7: samedi et dimanche
REMARQUE: lors de la sélection 1-1, vous devez choisir un jour spécique
comme suit:
1 = lundi
2 = mardi
3 = mercredi
4 = jeudi
3. Appuyez sur les boutons
MODE D’ALARME puis appuyez sur le bouton ou pour conrmer
votre sélection; si 1-1 est sélectionné, appuyez sur les boutons ou
pour basculer entre les jours de la semaine et appuyez sur le bouton
ou pour conrmer votre sélection. Les options RÉVEIL se mettront à
clignoter.
4. Appuyez sur les boutons
RÉVEIL AM, FM ou BU (avertisseur sonore); appuyez sur le bouton ou
pour conrmer votre sélection; si l’option AM ou FM est choisie, la
sélection du Volume de l’alarme se mettra à clignoter.
5. Appuyez sur les boutons
l’alarme; appuyez sur le bouton ou pour conrmer votre sélection.
ou pour augmenter et diminuer les
dénie pour vous réveiller du lundi au
1 à 7: toute la semaine
1-1: un jour de la semaine
5 = vendredi
6 = samedi
7 = dimanche
ou pour basculer entre les paramètres du
ou pour basculer entre les options de
ou pour augmenter/réduire le volume de
- 26 - - 27 -
• Appuyez et maintenez enfoncé les boutons ou pour passer
rapidement à travers les paramètres.
• Pour annuler une alarme lorsqu’elle retentit, appuyez sur le bouton
• Si une alarme n’est pas annulée, elle retentira pendant 30 minutes, puis
s’éteindra automatiquement. Il reprendra à la même heure établie pour
l’alarme au prochain jour prévu.
• Pour activer/désactiver une alarme, appuyez et maintenez enfoncé le
bouton
alarme est activée.
Fonction de rappel de sonnerie
• Lorsqu’une alarme retentit, appuyez sur le bouton
arrêter l’alarme pendant 9 minutes. L’alarme retentira à nouveau après 9
minutes.
• Pour appuyer la fonction de rappel de sonnerie, appuyez sur le bouton
sur le dessus de l’appareil; la fonction de « Rappel de sonnerie » s’arrête
automatiquement après 30 minutes.
Minuterie sommeil
Le minuteur de sommeil vous permet d’écouter de la musique pendant une
durée prédénie allant de 90 minutes à 15 minutes. Il est couramment utilisé par
les personnes qui préfèrent s’endormir en musique.
1. Appuyez sur le bouton
2. Appuyez sur le bouton
programmées:
90 min > 60 min > 30 min > 15 min > OFF (FERMÉ)
3. Pour annuler la minuterie sommeil, appuyez sur le bouton
jusqu’à ce que vous voyez “OFF” (Fermé) à l’écran ou appuyez sur le
bouton .
Minuterie sieste
Le minuteur de sieste vous permet de dénir une sonnerie d’alarme pour retentir
au bout d’un temps prédéni allant de 90 minutes à 10 minutes.
1. Avec la radio fermée, appuyez sur le bouton
minuteur de sieste.
ou . Une icône apparaîtra sur l’écran pour indiquer qu’une
pour allumer la radio.
pour faire déler les heures
pour allumer le
.
pour
Page 15

2. Appuyez sur le bouton pour faire déler les heures
programmées:
90 min > 80 min > 70 min > 60 min > 50 min > 40 min > 30 min > 20 min >
10 min > OFF (FERMÉ)
3. Lorsqu’il est activé, appuyez sur le bouton
réglage actuel de la minuterie sieste et en appuyant de nouveau, vous
permettra de réinitialiser la minuterie à 90 minutes.
4. Lorsque la minuterie sieste expire, l’alarme continuera à retentir pendant
30 minutes ou elle peut être arrêtée en appuyant sur le bouton
5. Pour annuler la minuterie sieste, appuyez sur le bouton
ce que « OFF » (Fermé) s’afche à l’écran.
Intensité d’éclairage
1. Vous pouvez régler la luminosité de l’écran DEL le rendant plus lumineux,
moins intense ou même l’éteindre. Il y a trois options de gradation:
High > Low > OFF (Élevé > Bas > Fermé).
2. Avec la radio fermée, appuyez sur le bouton
basculer entre les paramètres d’intensité.the dimmer settings.
Réglages de la température
La température peut être afchée en °C ou °F.
1. Avec la radio fermée, appuyez et maintenez enfoncé le bouton
basculer entre les modes °C ou °F.
Écouter la radio
1. Appuyez sur le bouton
« ON ».
2. Appuyez et maintenez enfoncé le bouton
allumée (ON) an de basculer entre la radio AM et FM.
3. Appuyez une fois sur les boutons
station à la fois.
4. Appuyez et maintenez enfoncé les boutons
an de balayer avant/arrière à travers les stations; l’appareil balayera
automatiquement jusqu’à la prochaine station de radiodiffusion.
sur le panneau supérieur an d’allumer la radio
ou pour revenir/avancer d’une
pour afcher le
.
jusqu’à
an de
pendant que la radio est
ou pendant une seconde
- 28 - - 29 -
an de
5. Réglez le volume de la radio avec les boutons
6. Appuyez sur le bouton
Veuillez vous assurer que l’antenne FM est entièrement déroulée et étendue pour
une meilleure réception FM. La fréquence AM utilise une antenne directionnelle
interne. Pour une meilleure réception, veuillez faire tourner la radio.
7.
Pour régler les stations programmées
1. Appuyez sur le bouton
2. Appuyez et maintenez enfoncé le bouton
allumée an de basculer entre la radio AM et FM.
3. Utilisez les boutons
4. Pour programmer une station de radio existante, appuyez et maintenez
en foncé le bouton
exemple: « P02 ».
5. Utilisez les boutons
6. Appuyez à nouveau sur le bouton
7. Répétez les étapes 2 à 6 pour régler plusieurs paramètres prédénis.
Pour rappeler les stations programmées
1. Appuyez sur le bouton
2. Appuyez sur le bouton
numéro de présélection actuel apparaîtra sur l’afchage. Appuyez à
nouveau sur le bouton pour faire déler toutes les stations de radio
préréglées.
10 pour la radio AM (P01 à P10) et 10 pour la radio FM (P01 à P10)
pour éteindre la radio “OFF”.
sur le panneau avant pour allumer la radio« ON ».
ou pour choisir la station de radio souhaitée.
. Un numéro préréglé clignotera à l’écran; par
ou pour passer au numéro préréglé souhaité.
pour dénir le préréglage.
sur le panneau avant pour allumer la radio « ON ».
pour sélectionner un numéro préréglé. Le
Il y a 20 préréglages disponibles.
ou .
pendant que la radio est
Page 16

Unité de projection
L’Unité de projection projettera l’heure ou la température sur un mur ou au
plafond d’une pièce sombre (distance maximale est de 0,9 à 2,7 m (3 à 9 pi)).
• Pour activer et désactiver l’image projetée (ON/OFF), appuyez sur le
bouton
• Tournez la roulette de réglage de la mise au point (
• Pour afcher la température, appuyez et maintenez enfoncé le bouton
• Pour faire basculer l’image projetée (la température ou l’heure) de 180°,
Entrée AUX
Ce radio-réveil dispose
d’utiliser votre radio-réveil comme un haut-parleur pour un autre périphérique
audio.
1. Branchez un câble de 3,5 mm (non fourni) dans la prise à l’arrière du radio-
2. Tout périphérique connecté via l’entrée auxiliaire remplace la fonction de
3. Utilisez le périphérique audio externe comme vous le feriez normalement.
l’appareil de projection) jusqu’à ce que l’heure ou la température à projeter
soit clairement afchée sur le mur ou au plafond.
l’arrière de l’appareil de projection.
appuyez une fois sur le bouton
réveil et branchez l’autre extrémité du câble à la connexion de sortie audio
de votre périphérique audio externe.
radio lorsque la radio est allumée.
Vous pouvez contrôler le volume avec les boutons
réveil.
.
sur le dos de
.
d’une entrée auxiliaire pratique qui vous permet
ou du radio-
BESOIN
à
D’AIDE?
NE RETOURNEZ PAS CE
PRODUIT AU MAGASIN!
Veuillez contacter d’abord un représentant du soutien à la clientèle
ELECTROHOME® pour toute information supplémentaire sur les
caractéristiques du produit, les spécications ou pour de l’aide avec
l’installation.
Veuillez nous contacter par l’une des méthodes ci-dessous:
Soutien:
magnasonic.com/support
Clavardage en ligne:
magnasonic.com
- 30 -
Pour plus d’information sur nos produits, visitez magnasonic.com
- 31 -
Page 17

DÉPANNAGE
Pour tout problème avec cet appareil, consultez le tableau ci-dessous avant
d’appeler le service de réparation.
SYMPTÔME CAUSE POSSIBLE SOLUTION POSSIBLE
GÉNÉRAL
L'appareil ne s'allume pas
Pas de son
Bruit ou le son est déformé sur la
radio A M ou FM.
Incorrect time
L’alarme ne sonne pas
Le cordon d'alimentation n'est
pas branché
RADIO
Elle n’est pas allumée
Le contrôle du volume est à la
position minimum
AM : interférence
FM : le de l'antenne n'est pas
bien étiré
HORLOGE
La pile est mal insérée , l’appareil
n’est pas branché ou la pile est
à plat
L’horloge n’est pas réglée
L’alarme n’est pas progr ammée
pour sonner
L’horloge n’est pas réglée Réglez l’horloge
L’heure de l’al arme n’est pas
réglée
Insérez ferme ment la che dans
la prise murale
Appuyez sur POWER pour
allumer la radio
Tournez la commande de volume
vers le haut
Placez la radio pour une
meilleure réception AM
Étirez le l de l’antenne
Réglez l’horloge
Appuyez et maintenez enfoncé
le bouton de l’AL ARME 1 ou
l’ALARME 2 an d’activer
l'alarme
Appuyez et maintenez enfoncé
le bouton de l’AL ARME 1 ou
l’ALARME 2 an d’activer
l'alarme
Réglez l’alarme
SPECIFICATIONS
Bande de fréquences (AM) 520 - 1710 kHz
Bande de fréquences (FM) 87.5 - 108 MHz
Source de courant AC 120V ~ 60Hz, 5W
Pile de secours DC 3V CR2032 (pile inc luse)
Échelle de température intérieure 0 à +50 °C ou 32 à 122 °F
Les spé cica tions sont indiquées sou s réser ve de modicati ons.
ENTRETIEN ET MAINTENANCE
PRECAUTIONS:
1. Éteignez toujours l’appareil après utilisation.
2. Éloignez l’appareil des objets magnétiques, de l’eau ou de sources de
ch aleur.
3. Utilisez un chiffon doux et propre humidié avec de l’eau tiède pour
nettoyer le boîtier. N’utilisez jamais de nettoyants chimiques qui
pourraient endommager la nition de l’appareil.
4. Débranchez l’appareil de toute source d’alimentation avant de le nettoyer.
REMARQUE: Cet équipement a été testé et s’est avéré conforme aux limites
pour un appareil numérique de classe B, conformément à la Partie 15 des
règlements de la FCC. Ces limites sont conçues pour fournir une protection
raisonnable contre les interférences nuisibles dans une installation résidentielle.
Cet équipement génère, utilise et peut émettre une énergie de radiofréquence
et, s’il n’est pas installé et utilisé conformément aux instructions, il peut
causer des interférences nuisibles aux communications radio. Cependant, il
n’existe aucune garantie que des interférences ne se produiront pas lors d’une
installation particulière. Si cet équipement provoque des interférences nuisibles
à la réception radio ou télévision, ce qui peut être déterminé en mettant
l’équipement hors et sous tension, l’utilisateur est encouragé à essayer de
corriger l’interférence par l’une ou plusieurs des mesures suivantes:
• réorientez ou déplacez l’antenne de réception;
• augmentez la distance entre l’équipement et le récepteur;
• branchez l’équipement à une sortie sur un circuit différent de celui sur
lequel le récepteur est branché
- 32 - - 33 -
Page 18

MISES EN GARDE
MISE EN GARDEA
n de réduire le risque d’incendie ou de décharge élec trique, ne pas exposer cet appareil à la pluie ou
à l’humidité.
AVERTISSEMENT
L’utilisation de commandes, de réglages ou l’exécution de procédures autres que ceux spéciés peut
entraîner une exposition à des rayonne ments dangereux.
ATTENTION
RISQUE DE CHOC
ÉLECTRIQUE NE
PAS OUVRIR
ATTENTION - AFIN DE RÉDUIRE LE RISQUE DE DÉCHARGE
ÉLECTRIQUE, NE PAS RETIRER LE COUVERCLE (OU LE DOS). IL
N’Y A AUCUNE PIÈCE POUVANT ÊTRE ENTRETENUE OU RÉPARÉE
PAR L’UTILISATEUR À L’INTÉRIEUR. VEUILLEZ CONSULTER UN
PERSONNEL UTILISATEUR QUALIFIÉ.
L’éclair avec le symbole è che, dans un tri angle équilatéral est destiné à aler ter
l’utilisateur de la présence d’une « tension dangereuse » dans le boîtier de l’appareil,
qui peut être d’une magnitude suf sante pour constituer un risque d’électrocution des
personnes.
Le point d’exclamation dans un triangle équilatéral es t destiné à aviser l’utilis ateur de
la présence d’instructions pour le fonctionnement et l’entre tien (réparation) dans la
documentation accompagnant l’appareil.
!
DNE PAS INGÉRER LA PILE, RISQUE DE BRÛLURE CHIMIQUE
Cet appareil contient une pile de la taille d’une pièce de monnaie/bouton. Si cette
pile est avalée, elle peut causer des brûlures internes graves en seulement 2
Gardez les piles neuves et usagées hors de la portée des enfants. Si le
compartiment de la pile ne se referme pas correctement, cessez d’utiliser
l’appareil et éloignez-le des enfants.
Si vous pensez qu’une pile pourrait avoir été avalée ou placée à l’intérieur d’une
partie du corps, consultez immédiatement un médecin.
MISE EN GARDE
heures, voire même la mort.
1. Aucune source de amme nue, telle que des bougies allumées, ne doit être placée sur l’appareil.
2. Ne pas placer l’appareil dans des bibliothèques ou des supports fermés sans ventilation adéquate.
3. La che de secteur est utilisée comme dispositif de déconnexion, le dispositif de déconnexion doit
rester facilement accessible.
4. Les bouches d’aération ne doivent pas être obstruées en les recouvrant d’objets tels que des journaux,
des nappes, des rideaux, etc.
5. Il ne doit pas être exposé au ruissellement ou aux éclaboussures et aucun objet rempli de liquide,
comme des vases, ne doit être placé sur l’appareil.
6. 6. Ne pas brancher l’antenne FM à une antenne extérieure.
7. L’appareil ne doit pas être exposé directement au soleil, à des températures extrêmement élevées ou
basse s, à l’humidité , aux vibrations ou placé dans un environnement poussiéreux.
8. Ne pas utiliser d’abrasif, le benzène, de diluant ou d ’autres solvants pour nettoyer la sur face de l’appareil.
Pour net toyer, essuyez-le avec une solution de détergent non abrasif et un chiffon doux et propre.
9. Ne tentez jamais d’insérer de s ls, des épingles ou autres objets dans les bouches d’aération ou
l’ouverture de l’appareil.
10. Les piles ne doivent pas être exposées à une chaleur excessive comme le soleil, un feu ou autre élément
semblable.
11. Il convient de souligner les aspects environnementaux de l’élimination de la pile.
Ne pas jeter la pile dans les ordures ménagères à la n de son cycle de vie; remet tre à un centre
de collecte pour le recyclage des appareils électriques et électroniques. En recycl ant, certains des
matér iaux peuvent êt re réutilisés. Vous apportez une contribution importante à la protection de
notre environnement. Pour connaître les centres de récept ion autorisés, veuillez communiquer
avec votre municipalité.
AVERTISSEMENT
Danger d’explosion si la pile est mal remplacée . Remplacez-la uniquement avec le même modèle ou
l’équivalent.
MISE EN GARDE
Pour éviter les décharges électriques, ne pas utiliser cette che avec une rallonge ou une autre sor tie, à
moins que les lames de cont act puissent être entièrement insérées an d’éviter l’exposition des lames de
contact. Pour éviter un incendie ou une décharge, ne pas installer cet appareil dans un espace clos comme
une bibliothèque ou un meuble semblable.
- 34 - - 35 -
Page 19

NOTES
- 36 -
 Loading...