

Page 1
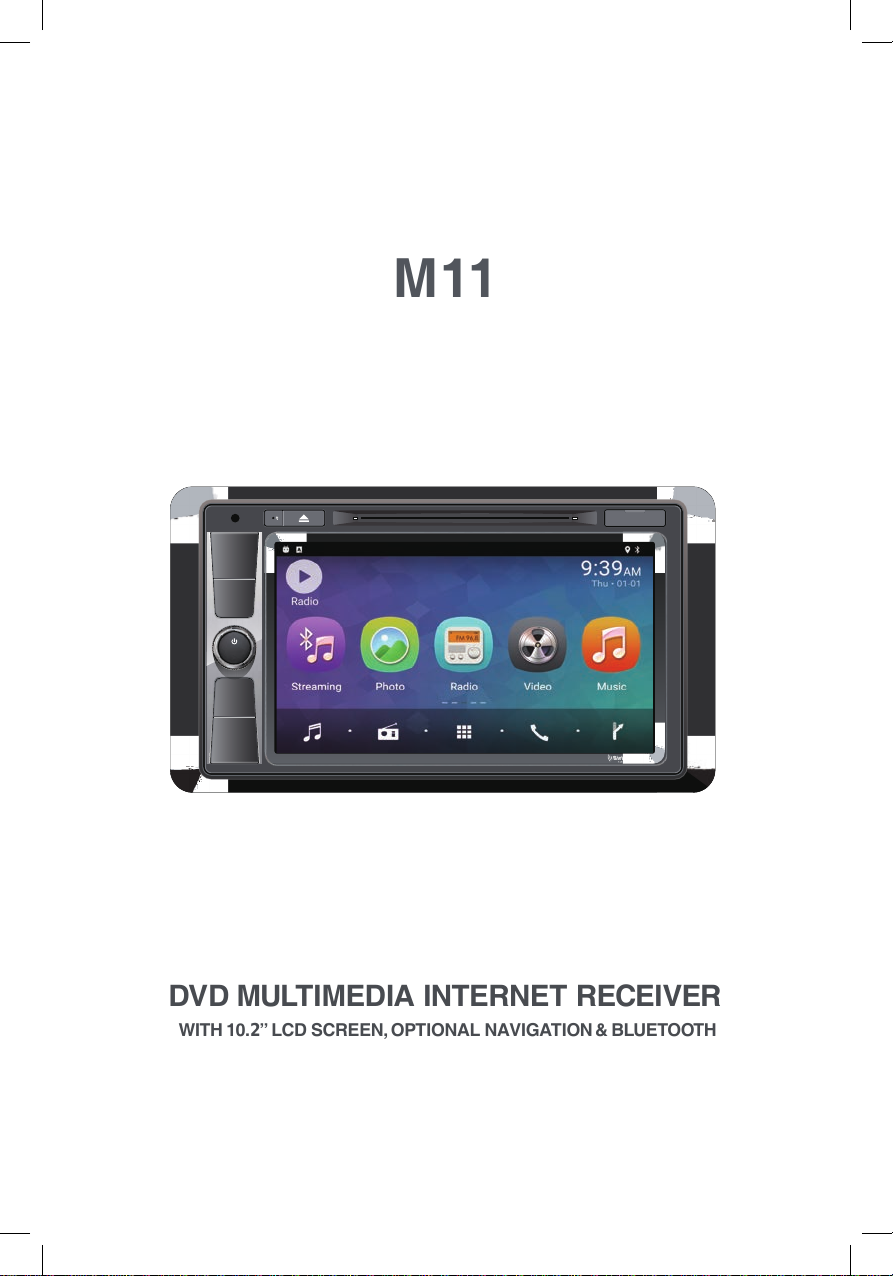
M11
D
VD MULTIMEDIA INTERNET RECEIVE
R
WITH 10.2” LCD SCREEN, OPTIONAL NAVIGATION & BLUETOOTH
HOME
HOME
BACK
BACK
VOL/MUT E
VOL/MUT E
SELECT
SELECT
USB
USB
AUX IN
AUX IN
SD MAP
SD MAP
Page 2

Page 3
Precautions
MUTE
OK
MUTE
OK
MUTE
OK
Thank you for y our purc hase of the
M11 ent er
“Q uick Start” style manual. It will
provide basi c inf ormation on the
operation of all the f eatures of your
new M11.
After you have finis hed reading t his
manual, pleas e k eep i t in a safe place
for ready ref erence.
For a more det ailed descript ion of
certain f eatures of the M11, please
use the internet and nav igate to
www.magnady ne.com. Loc at e t he M11
radio page and there y ou will f ind a
“manuals” tab. Searc h t he doc uments
for t he area of the M11that y
more in
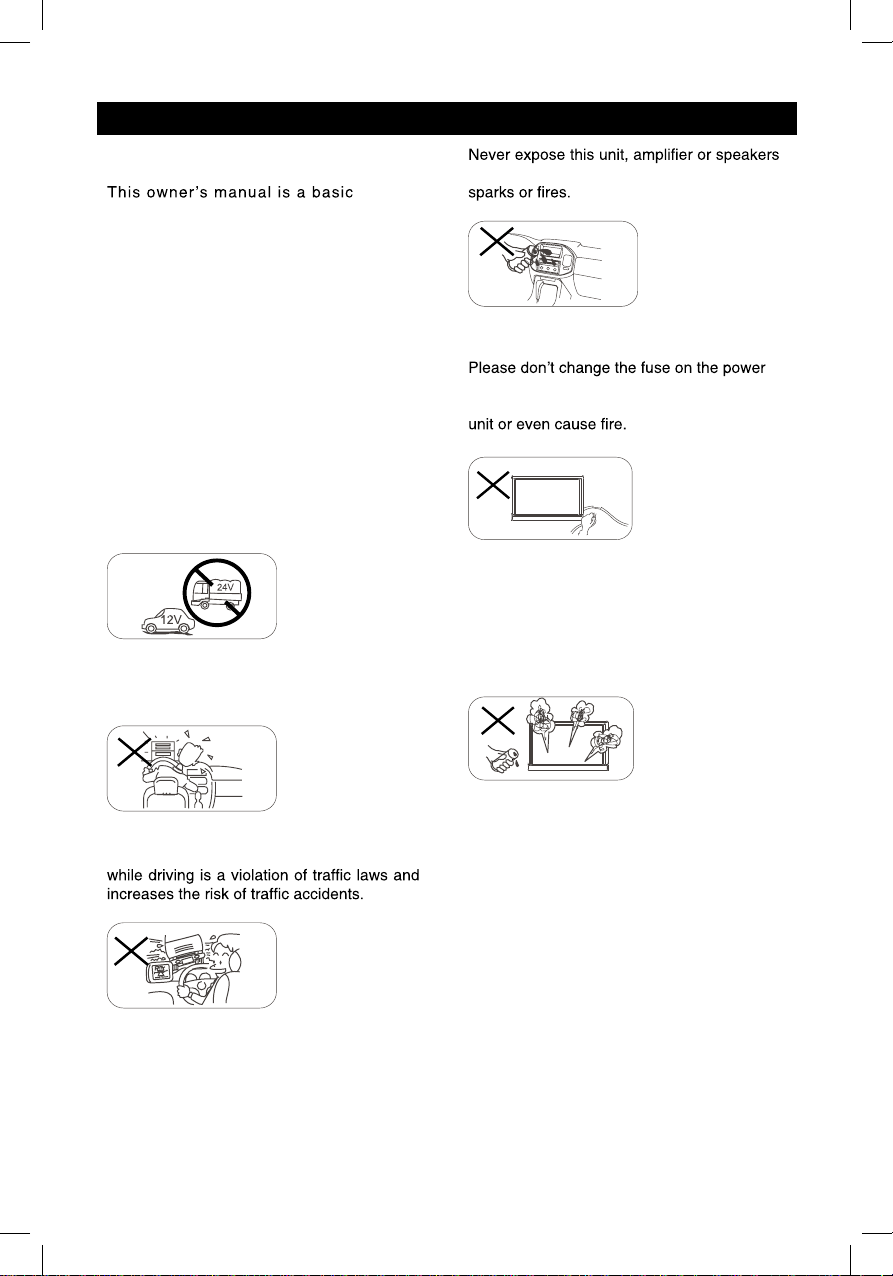
Only connect the unit to a 12-volt power
supply with proper negative grounding.
Never install this unit where the operation
a n d cond i t i o n for dr iving sa fe ly i s
compromised.
tainment system.
ou want
format ion on.
to moisture or water to prevent electronic
cord without professional guidance, using
an improper fuse may cause damage to this
Please power off this unit at once and send it
back to the after-sales service center or the
dealer /distributor you purchased from if one
of the following symptoms is found:
Never use the video display while the car
is in motion. The use of video playb ack
To ensure safe driving, please adjust the
volume to a safe & comfortable level in case
of emergency situations.
(a). No audio output;
(b). No image output;
(c). Water or other obstacle enters the unit;
(d). Smoking;
(e). Peculiar smell.
To provide a clear demonstration and a n
alternative for easy understanding of the
operation of this unit, graphic illustration
was used. However, this illustration is not
necessary printed as the actual image found
on the unit.
1
Page 4
Precautions Contents
Warning
Operate the unit correctly according to the
instruction manual to prevent unnecessary
problems.
CAUTIONS ON HANDLING
This product is a
Use of controls or adjustments or performance
of procedures othe r than those specified
herein may result in hazardo us radiati on
exposur e. Do not open covers and do not
repair yourself. Refer servicing to qualified
personnel.
CLASS 1 LASER PRODUCT.
Two laser products
Wave length: CD: 780mm DVD: 650mm
La se r power: No ha za rd ou s radiation is
emitted with safety protection.
To reduce the risk of fire electric shock, and
annoying interference, use only the included
components.
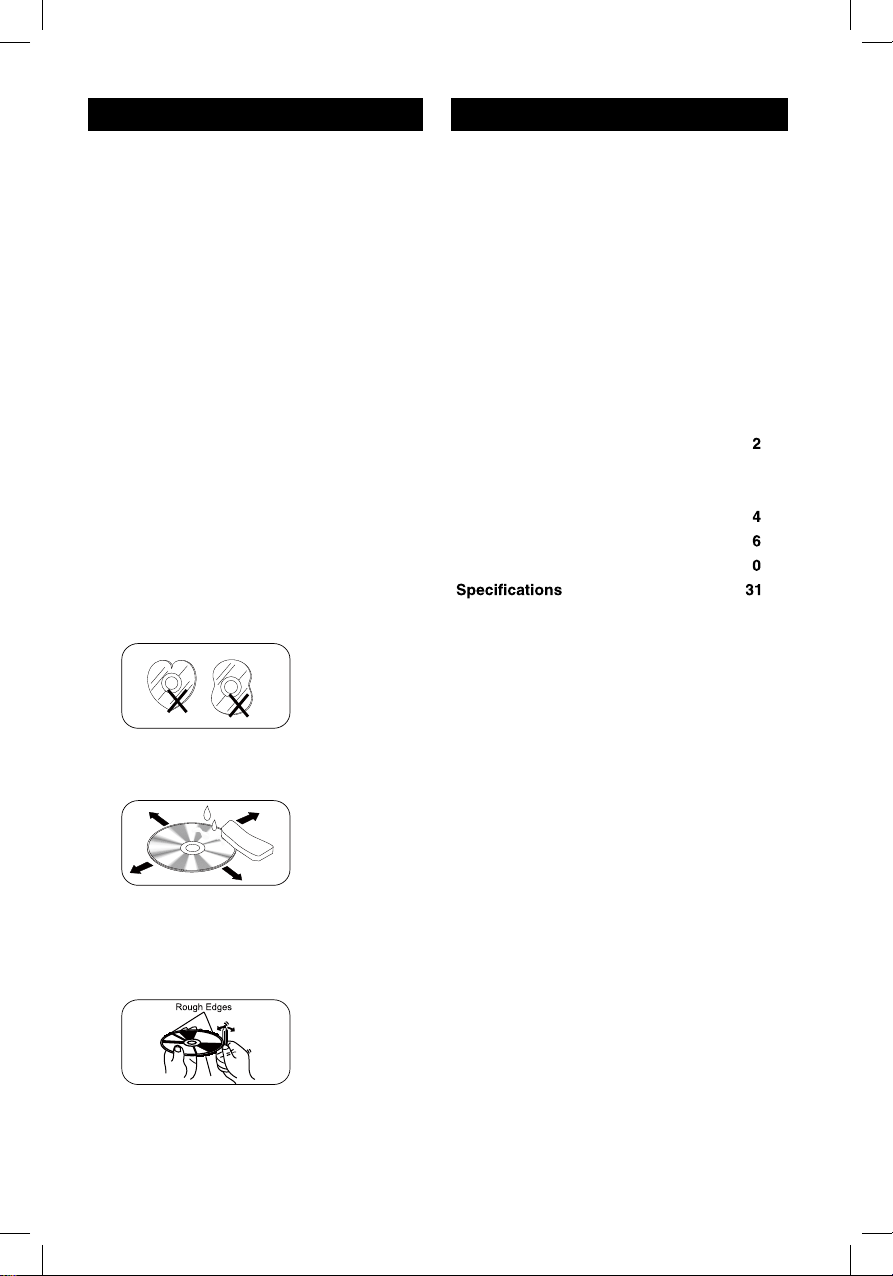
Caution of disc using
1. DO NOT use irregular shaped disc.
Precautions ...............................................1
Control Panel ...........................................3
Remote Control .........................................4
Basic Operations ......................................6
Main menu .................................................7
Disc Operation ..........................................7
USB Operations ......................................12
Bluetooth Operations .............................15
iPod/iPhone Operations .........................17
DVR-RECORDER (optional) ...................18
SiriusXM Satellite Radio ........................19
Internet ....................................................2
Sound setting..........................................23
Other Mode..............................................23
System settings ......................................2
Device Connections ...............................2
Troubleshooting .....................................3
.........................................
FCC Statement ....................................... 32
Warranty .................................................33
01.................................... snoitarepO oidaR
2. Disc Cleaning. Use a dry, soft cloth to
wipe the disc from center to edge, only neutral
detergent can be used.
3. When playing a new disc. New disc may
have some rough spots around the inner and
outer edges. If such a disc is used, remove
these rough spots with a pencil or ball-point
pen, etc.
2
Page 5
3
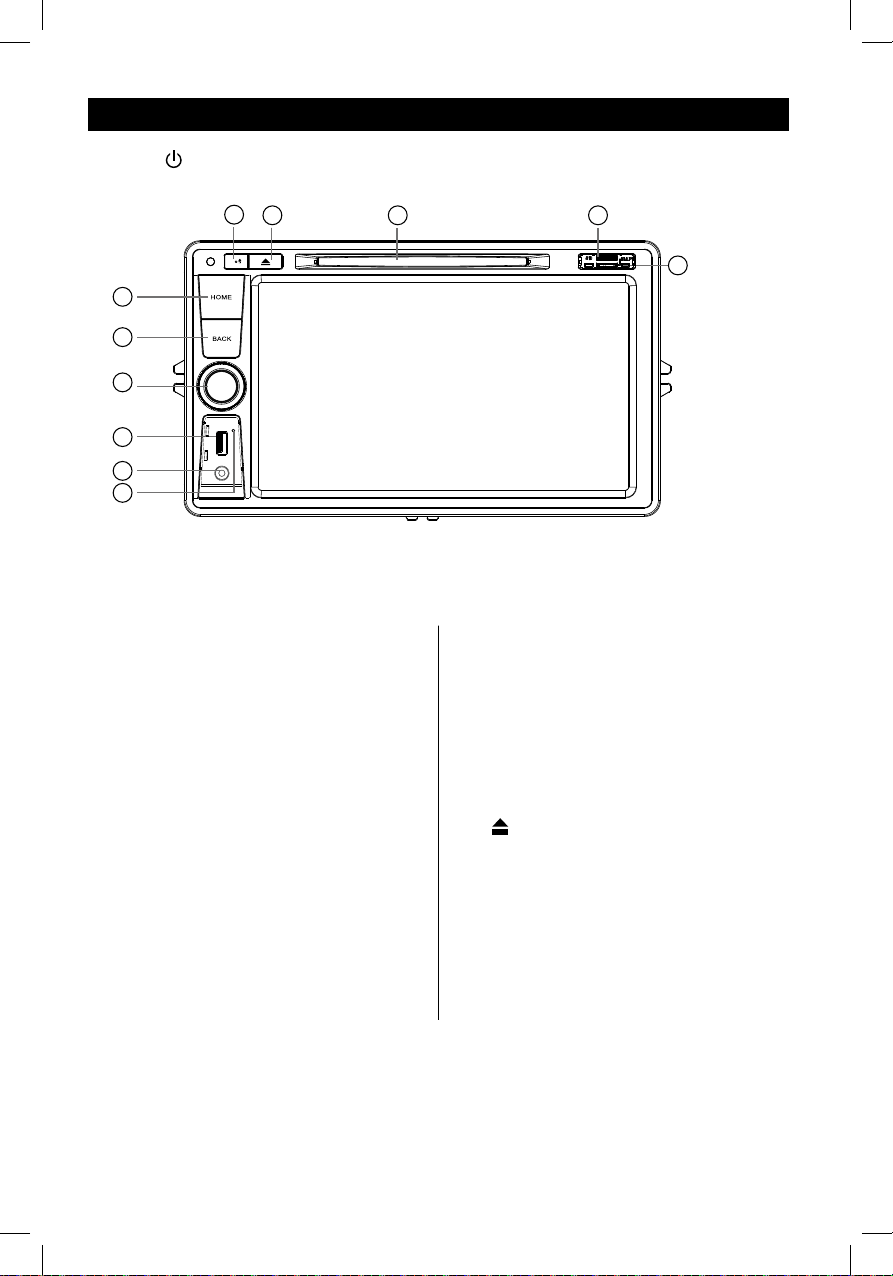
Control Panel
Press [ VOL/MUTE SELECT ] button to turn on the unit.
1. [
HOME ] Button
Show main menu (press)
Show main options(long press)
2. [
BACK ] Button
Press to go back one step on any
screen
3.
Volume Ring /Mute Button
> When radio is off, press and release
to turn radio on
> When radio is on, press and hold
to turn radio off
> When sound is playing, press and
release to mute the sound
> When sound is muted, press and
release to un-mute sound
Increase or decrease the audio volume
by rotating the ring
Note: Rotating the volume ring while in
mute will un-mute the audio.
4. USB Socket
5. AUX IN Socket
1
2
3
4
5
7
8 9
11
6
10
6. Reset
Load factory settings
7.
Bluetooth MIC
8. Eject Disc (when disc inserted)
9. Disc Slot
10. SD Card Reader for Media. (Top)
11.
Map Card Slot (Bottom)
Control Panel
Press [ VOL/MUTE SELECT ] button to turn on the unit.
7
8 9
10
1
2
3
4
5
6
HOME ] Button
1. [
Show main menu (press)
Show main options(long press)
BACK ] Button
2. [
Press to go back one step on any
screen
Volume Ring /Mute Button
3.
> When radio is off, press and release
to turn radio on
> When radio is on, press and hold
to turn radio off
> When sound is playing, press and
release to mute the sound
> When sound is muted, press and
release to un-mute sound
Increase or decrease the audio volume
by rotating the ring
Note: Rotating the volume ring while in
mute will un-mute the audio.
4. USB Socket
5. AUX IN Socket
6. Reset
Load factory settings
Bluetooth MIC
7.
8.
Eject Disc (when disc inserted)
9. Disc Slot
10. SD Card Reader for Media. (Top)
11.
Map Card Slot (Bottom)
11
3
Page 6

Remote Control
MENU
1. Change playing source in sequence
2. Eject the disc
3. nal oidua tceleS guage
Show music catalog
5. Show home menu
6. Select radio band
7. Call out - Outgoing call
8. Zoom
9. DVD title
11. Setup menu
13. gir/tfel/nwod/pu rosruc eht evoM ht.
OK
15. Mute the volume
17. Select DVD subtitle language
18. Select DVD angle
EQ
19. Return to previous display
20. Main menu
21. Clear information
22. Hang up
23. Previous/Next
Auto tuning (long press)
24. Display settings
25. Adjust volume
26. Play / Pause
27. Go-to search
28. Enter the EQ setting
Page 7
Remote Control
Notes of remote control using
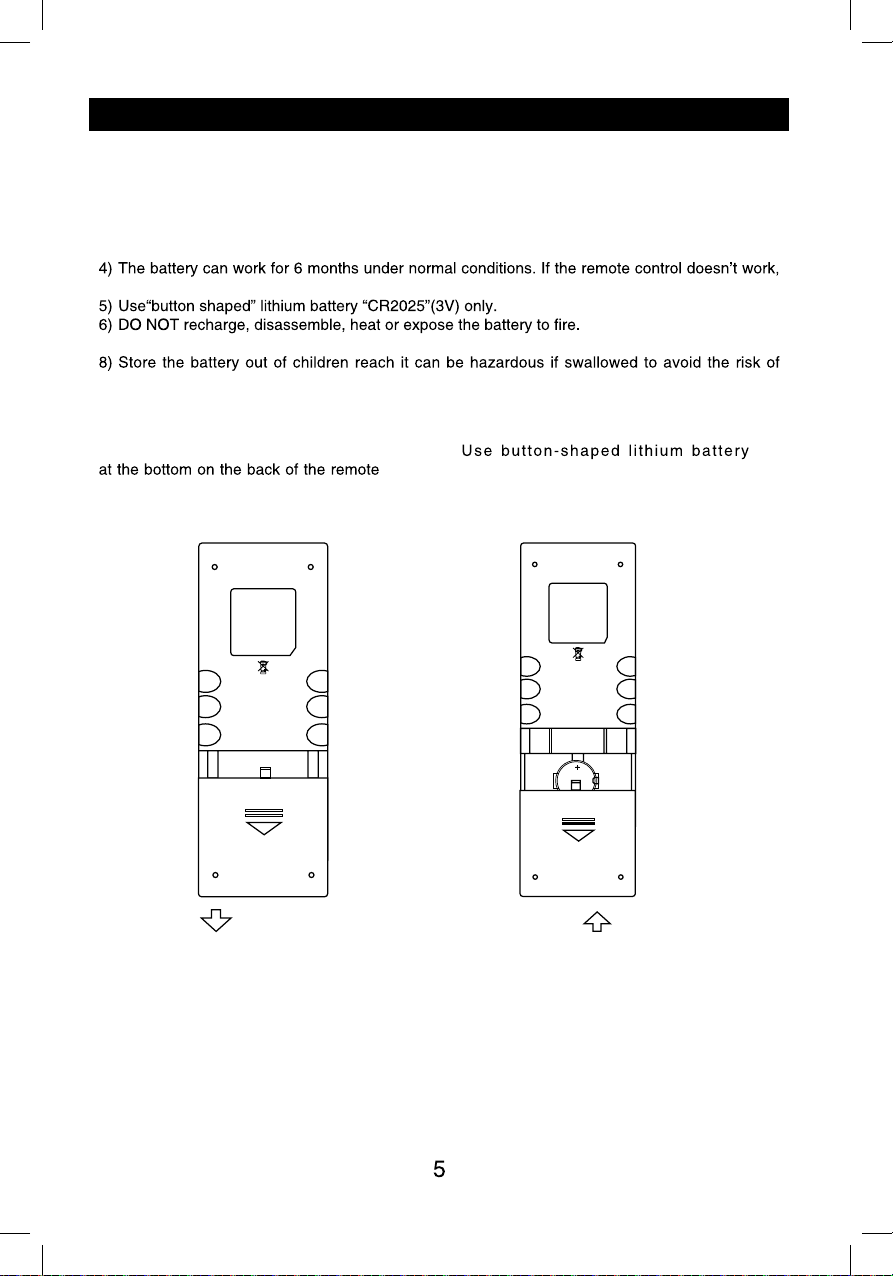
1) Aim the remote control at the remote sensor on the unit.
2) evomeR the battery from the remote control or insert a battery insulator if the battery has not
been used for a month or longer.
3) DO NOT store the remote control under direct sunlight or in high temperature environment, or it
may not function properly.
change the battery.
7) Insert the battery in proper direction according to the ( + ) and ( - ).
accident.
Uninstall Battery
Slide out the battery compartment tray
control.
Install Battery
CR2025 (3V)” only. Insert the battery
to the battery tray with proper direction
according to the (+) and (-) poles.
PULL OUT PUSH IN
Remote Control
Notes of remote control using
1) Aim the remote control at the remote sensor on the unit.
2) evomeR the battery from the remote control or insert a battery insulator if the battery has not
been used for a month or longer.
3) DO NOT store the remote control under direct sunlight or in high temperature environment, or it
may not function properly.
change the battery.
7) Insert the battery in proper direction according to the ( + ) and ( - ).
accident.
Uninstall Battery
Slide out the battery compartment tray
control.
Install Battery
CR2025 (3V)” only. Insert the battery
to the battery tray with proper direction
according to the (+) and (-) poles.
PULL OUT PUSH IN
Page 8
6
Basic Operations
Turn on/off the power
1. Press and release [
VOL/M UTE SELECT
]
to turn the unit on.
2. Press and hold the [
VOL/M UTE SELECT
]
to turn the unit off.
The unit will power on in the same state
it was in when powered off.
Mute
Press the [
VOL/M UTE SELECT
]
button to mute the sound.
Note:
Pressing the [
VOL/M UTE SELECT
]
butto n again or adjusti ng volume will
unmute.
Adjust the Volume
Rotate the [
VOL/M UTE SELECT
]
but ton to increase or decrease the volume
level.
The adjustable range of volume is 0 to 40.
Playing Source Selection
1. Press the [
HOME
] button on the panel to
show main source menu.
2. Touch the desired icon on the the screen
to enter corresponding mode, such as
Disc, Navi, Radio, etc.
Drag left/right to scroll.
Note:
When some devices are not ready, they
cannot be selected.
You should stop switching when the playing
source you desired has been selected and
wait for some seconds, the unit will auto enter
the playing source mode you have selected.
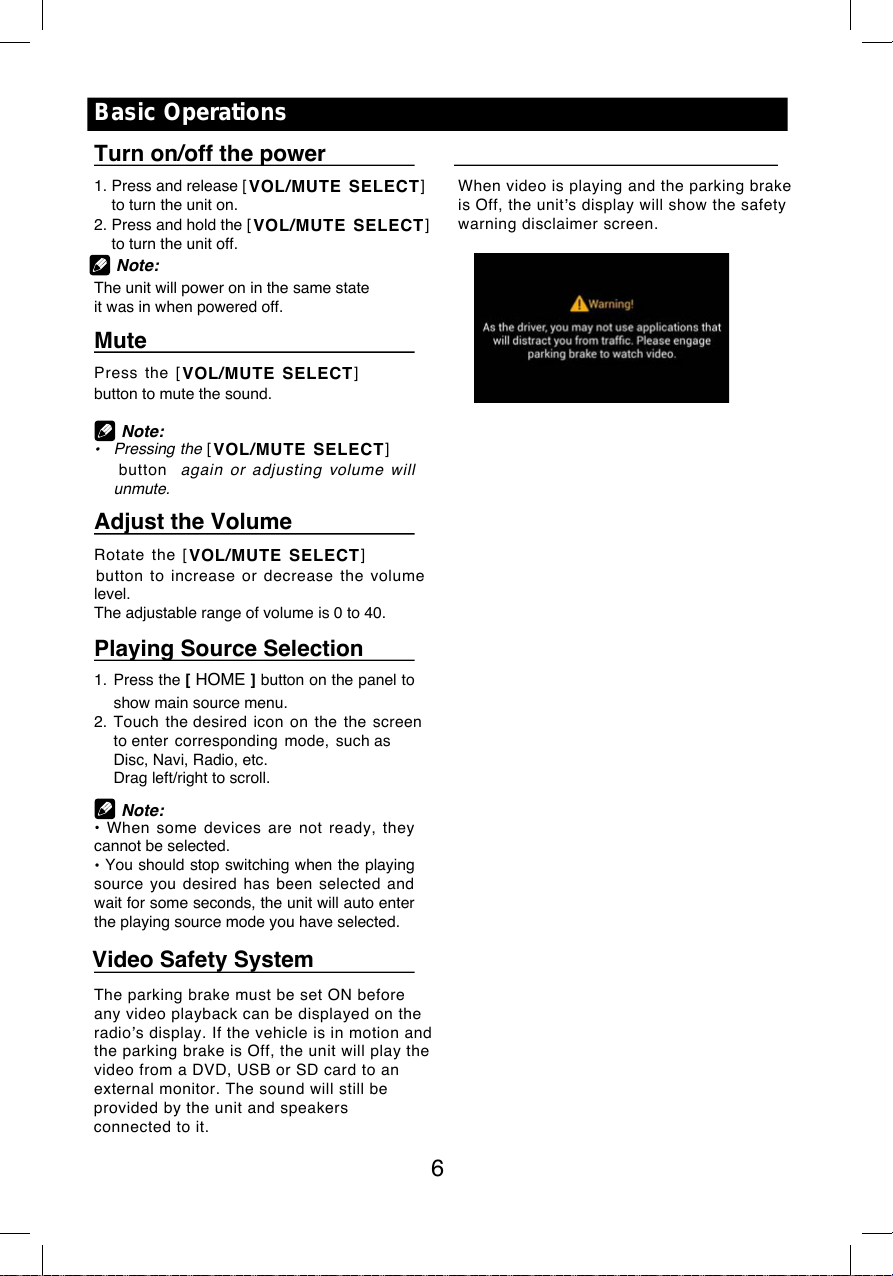
Video Safety System
The par king brake must be set ON before
any video playback can be displayed on the
radio
s display. If the vehicle is in motion an d
the par king brake is Off, the unit will play the
video from a DVD, USB or SD card to an
external monitor. The sound will still be
provided by the unit and speakers
connected to it.
Note:
When video is playing and the parking brake
is Off, the unit
s display will show the safety
warning disclaimer screen.
Page 9
7
Main menu
Main Menu
Touch the [
HOME
] button to enter main
source menu.
1
96
8
7
2
5
43
1. Show current player source.
2. Hold and drag down to show the
3. Car AV system source bar:
Touch and hold the center of the bar and
drag left/right to show more icons.
Touch desired icon to enter corresponding
mode.
4. Clock.
5. Enter music menu. (USB or SD card)
6. Enter radio mode.
7. Show applications list.
8. Enter bluetooth phone mode.
9. Enter NAVI mode.
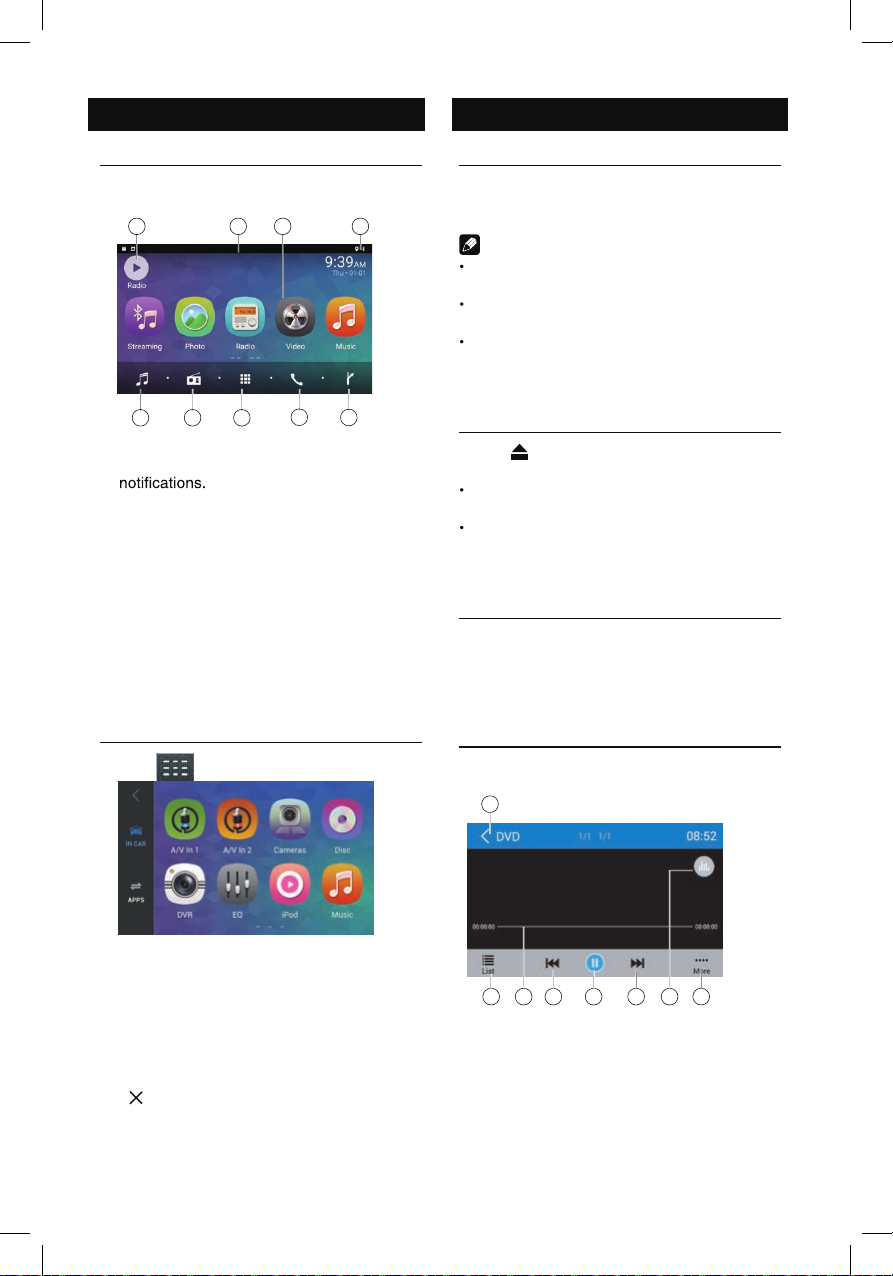
Applications Menu
Touch [ ] to enter applications menu.
1. IN-CAR
Car AV applications.
2. APPS
Show the Android applications installed.
In the list menu, drag left/right to scroll.
Touch and hold an icon for more than 2
seconds to add shortcut to the desktop. To
delete the shortcut, hold it and drag to the
[
] on the top, and release after it turns
red.
Touch the [ BACK ] button on the panel to
exit.
Disc Operation
Insert a Disc
Insert a disc into the slot, and the unit will
change to disc mode automatically.
Notes:
Please confirm whether there is a disc in
the unit before you insert another one.
The unit will exit current playing source and
enter DVD mode when one disc is inserted.
The following disc formats are supported:
CD-R, CD-RW, DVD-R, DVD+R, DVD-RW,
DVD + RW .
Eject the Disc
Press [ ] on the panel to eject the disc.
Notes:
After ejecting the disc, the unit reverts to
another source automatically.
If the disc is not removed fro m the unit
within 10 seconds, the disc will be reloaded
to prevent accidental damage.
Disc Playback
Wh en a dis c is ins erted, the displa y wil l
show “Loading...”. For MP3/WMA or a disc
with mixed files, reading time may exceed 1
minute.
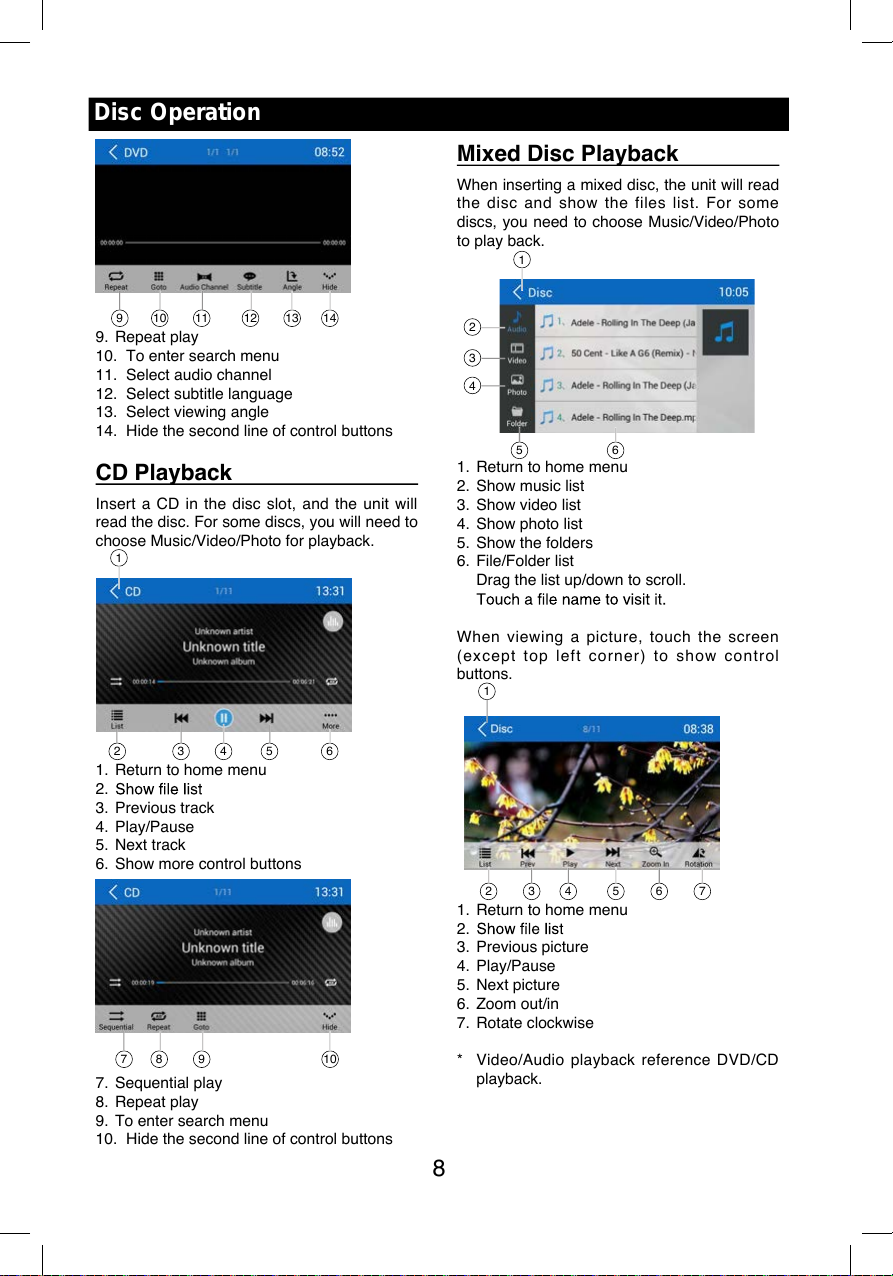
DVD Playback Menu
During playback, touch the screen (except top
left corner) to show control buttons.
1
7 865432
1. Return to home menu
2. Show DVD menu
3. Progress bar
4. Previous chapter
5. Play/Pause
6. Next chapter
7. Enter preset EQ menu
8. Show more control buttons
Main menu
Disc Operation
Main Menu
Touch the [
source menu.
1
1
] button to enter main
HOME
2
2
1. Show current player source.
2. eht wohs ot nwod gard dna dloH
3. Car AV system source bar:
4. Clock.
5. Enter music menu. (USB or SD card)
6. Enter radio mode.
7. Show applications list.
8. Enter bluetooth phone mode.
9. Enter NAVI mode.
Applications Menu
Touch [ ] to enter applications menu.
5
5
Touch and hold the center of the bar and
drag left/right to show more icons.
Touch desired icon to enter corresponding
mode.
7
Insert a Disc
Insert a disc into the slot, and the unit will
43
43
8
876
96
9
change to disc mode automatically.
Notes:
Please confirm whether there is a disc in
the unit before you insert another one.
ehT unit will exit current playing source and
enter DVD mode when one disc is inserted.
The following disc formats are supported:
CD-R, CD-RW, DVD-R, DVD+R, DVD-RW,
DVD + RW .
Eject the Disc
Press [ ] on the panel to eject the disc.
Notes:
After ejecting the disc, the unit reverts to
another source automatically.
If the disc is not removed fro m the unit
within 10 seconds, the disc will be reloaded
to prevent accidental damage.
Disc Playback
Wh en a dis c is ins erted, the displa y wil l
show “Loading...”. For MP3/WMA or a disc
with mixed files, reading time may exceed 1
minute.
DVD Playback Menu
During playback, touch the screen (except top
left corner) to show control buttons.
1
1
1. IN-CAR
Car AV applications.
2. APPS
Show the Android applications installed.
In the list menu, drag left/right to scroll.
Touch and hold an icon for more than 2
seconds to add shortcut to the desktop. To
delete the shortcut, hold it and drag to the
] on the top, and release after it turns
[
red.
hcuoT the [ BACK ] button on the panel to
exit.
2 3 4 5 6 87
1. Return to home menu
2. Show DVD menu
3. Progress bar
4. Previous chapter
5. Play/Pause
6. Next chapter
7. Enter preset EQ menu
8. Show more control buttons
7
7 865432
Page 10
8
Disc Operation
9 10 11 12 13 14
9. Repeat play
10. To enter search menu
11. Select audio channel
12. Select subtitle language
13. Select viewing angle
14. Hide the second line of control buttons
CD Playback
Insert a CD in the disc slot, and the unit will
read the disc. For some discs, you will need to
choose Music/Video/Photo for playback.
1
2 3 4 5 6
1. Return to home menu
2.
3. Previous track
4. Play/Pause
5. Next track
6. Show more control buttons
7 8 9 10
7. Sequential play
8. Repeat play
9. To enter search menu
10. Hide the second line of control buttons
Mixed Disc Playback
When inserting a mixed disc, the unit will read
the disc and show the files list. For so me
discs, you need to choose Music/Video/Photo
to play back.
1
5
2
3
4
6
1. Return to home menu
2. Show music list
3. Show video list
4. Show photo list
5. Show the folders
6. File/Folder list
Drag the list up/down to scroll.
When viewing a pic ture, touch the screen
(e xcept top le ft corner) to show con trol
buttons.
1
2 3 4 5 6 7
1. Return to home menu
2.
3. Previous picture
4. Play/Pause
5. Next picture
6. Zoom out/in
7. Rotate clockwise
* Video/Audio playback reference DVD/CD
playback.
9 10 11 12 13 14
1
2 3 4 5 6
7 8 9 10
1
2 3 4 5 6 7
1
5
2
3
4
6
Page 11
9
Stop Playback Temporarily
1. During play ba ck, press [ ] to pause
playback. The sound will be muted.
2. Press [
] to continue playback.
Select Desired Track/Chapter
Press [ ] or [ ] to skip to the previous or
next track/chapter.
Repeat
During playback, press [ ] button on screen
to select repeat playback.
Default setting is off.
Note:
If you do not select Repeat on, when the
entire disc or TITLE playback has finished,
the system will stop. If no other control, after 5
minutes the unit will turn into standby mode.
Sequential Track Playback
(for CD/VCD/MP3/WMA Only)
You can play all the tracks in random order.
1. During playback, press [
] button on the
screen to select random playback.
2. Press [
] to select sequential playback.
Disc Operation
Search
1. Touch [Goto] on the control bar.
2. Input the chapter number.
3. Touch [OK] to c
DVD Audio Select
Press [ ] button to select audio language to
listen if the DVD has multiple audio languages.
VCD Audio Select
Press [ ] button to select audio channel to
listen (LEFT, RIGHT, MIXED, STEREO).
DVD Subtitle Select
Press [ Subtitle ] button to select the subtitle
language to show if the DVD has multiple
language subtitles.
9
Stop Playback Temporarily
1. During play ba ck, press [ ] to pause
playback. The sound will be muted.
2. Press [
] to continue playback.
Select Desired Track/Chapter
Press [ ] or [ ] to skip to the previous or
next track/chapter.
Repeat
During playback, press [ ] button on screen
to select repeat playback.
Default setting is off.
Note:
If you do not select Repeat on, when th e
entire disc or TITLE playback has finished,
the system will stop. If no other control, after 5
minutes the unit will turn into standby mode.
Sequential Track Playback
(for CD/VCD/MP3/WMA Only)
You can play all the tracks in random order.
1. During playback, press [
] button on the
screen to select random playback.
2. Press [
] to select sequential playback.
Disc Operation
Search
1. Touch [Goto] on the control bar.
2. Input the chapter number.
3. Touch [OK] to c
DVD Audio Select
Press [ ] button to select audio language to
listen if the DVD has multiple audio languages.
VCD Audio Select
Press [ ] button to select audio channel to
listen (LEFT, RIGHT, MIXED, STEREO).
DVD Subtitle Select
Press [ Subtitle ] button to select the subtitle
language to show if the D VD has multiple
language subtitles.
Page 12

Radio Operations
Select [Radio ] on the main menu to enter
radio mode.
1 2 4 53
7 6 11 210198
1. Return to home menu
3. Current frequency
4. Tune forward
Auto tune forward. (long press)
5. Enter EQ menu
6. Enter favorite list
7. snoitats teserp erots dna hcraeS
automatically
8. To receive local / distant radio stations
9. Goto station by inputting frequency
10. Band switch
11. Stations list
12. Show more control buttons
13 14 15 16 17
13. Enter customized list
14. snoitats yrevocsid wohS
15. Show favorite stations
16. Mute radio
17. Hide the second line of control buttons
18. Show RDS options
Select One Radio Band
Touch the [ Band ] button to select one radio
band among FM and AM.
Manual Tuning
During manual tuning, the frequency will be
changed in steps.
Touch the [
] or [ ] button on the
operation bar to tune in a lower/higher station.
Auto Tuning
Hold the [ ] or [ ] button on the
operation bar for more than 2 seconds
a lower/higher station.
To stop searching, repeat the operation above
or press other buttons having radio functions.
Note:
Auto Store
be detected and stored in the memory.
To start automatic station search, touch the
[
] button on the operation bar.
To stop auto store, repeat the operation above
or press other buttons having radio functions.
Note:
Manual store
1. neeb sah noitats oidar detcepxe eno nehW
detected, touch [
] to show customized
station store list.
2. erots ot tsil eht no meti na tceles ot hcuoT
the current station in the memory.
3. Touch top left of the screen to exit.
18
1 2 4 53
76 8 9 10 1211
13 14 15 16 17
18
Page 13

Radio Operations
Recall the Stored Stations
Method 1:
1. Touch [ ] button on the screen to show
the preset stations.
2. Select a band
3. o elddim eht nO f the screen, drag the list
left/right to scroll, touch a station on the list
to listen to.
Method 2:
1. Touch [ ] button on the screen to show
the favorite stations.
2. Select a band
3. o elddim eht nO f the screen, drag the list
left/right to scroll, touch a station on the list
to listen to.
4. Touch top left of the screen to exit.
Local Seeking
stations with strong radio signal will be be
received.
To open LOCAL function, touch [
] button
on the operation bar, then touch the [ ]
button to select “Loc” or “DX”.
Note
Key Search
Touch [ ] button on the operation bar to
touch [ OK ] to goto the station directly.
To cancel an input number, touch [ ].
RDS Basics
Radio Data System (RDS) enables t raffic
reports to be received and provides many
facilities, including enabling the radio station
name to be displayed on the radio display.
Adjust RDS Settings
1. In Radio menu, touch [ ].
The option menu is displayed.
2. Touch on the selected option to change the
setting.
synchronization function.
TA
Press the TA ON/OFF button to switch the
AF
The receiver can automatically switche to an
alternative frequency (AF) of the same station
if the reception becomes poor. Press the OFF/
ON touch-point to turn the automatic scanning
for alternative frequencies of an RDS broad-
cast station off and on.
CT (Clock Time)
Radio Operations
Recall the Stored Stations
Method 1:
1. Touch [
] button on the screen to show
the preset stations.
2. Select a band
3. o elddim eht nO f the screen, drag the list
left/right to scroll, touch a station on the list
to listen to.
Method 2:
1. Touch [
] button on the screen to show
the favorite stations.
2. Select a band
3. o elddim eht nO f the screen, drag the list
left/right to scroll, touch a station on the list
to listen to.
4. Touch top left of the screen to exit.
Local Seeking
stations with strong radio signal will be be
received.
To open LOCAL function, touch [
] button
on the operation bar, then touch the [
]
button to select “Loc” or “DX”.
Note
Key Search
Touch [ ] button on the operation bar to
touch [ OK ] to goto the station directly.
To cancel an input number, touch [ ].
RDS Basics
Radio Data System (RDS) enables traffic
reports to be received and provides many
facilities, including enabling the radio station
name to be displayed on the radio display.
Adjust RDS Settings
1. In Radio menu, touch [ ].
The option menu is displayed.
2. Touch on the selected option to change the
setting.
synchronization function.
TA
Press the TA ON/OFF button to switch the
AF
The receiver can automatically switche to an
alternative frequency (AF) of the same station
if the reception becomes poor. Press the OFF/
ON touch-point to turn the automatic scanning
for alternative frequencies of an RDS broad-
cast station off and on.
CT (Clock Time)
Page 14

PTY Function
and arrows on the screen.
of the next station matches the current. If no
return to the original radio frequency.
SD/USB Operations
Using a SD Card
1. Open the card slot cap, insert a SD card
into the corresponding slot, the unit will load
another source, in order to avoid damaging
off the card after it pops out.
Using USB device
cable.
Music Playback
Select [Music] on the applications menu, the
unit will display all the music on the mobile
storages.
1 2
3
4
5
6
7
8
9 10
1. Return to home menu
Touch a song to start play.
Drag up/down to scroll.
Radio Operations
1 2
3
4
5
6
7
8
9 10
Page 15

SD/USB Operations
9. List window
Drag up/down to scroll.
Touch an item to select.
10. Enter search menu.
1
11
12 13 14 15 16
11. Favorite
12. Show list menu
14. Play/Pause
15. Show more control buttons
17
18 19 20
17. Sequential play
18. Repeat play
19. Follow your heart
20. Hide the second line of control buttons.
Play/Pause
When playing, press [ ] button to pause, and
the sound will be mute.
Press [ ] button to play.
Previous/Next Track
Press [ ] or [ ] button to go to previous or
Select Music by Artist
1. Touch [Artists] on the left of the screen.
2. Touch an artist shown on the list.
3. Select a song to play.
Select Music by Album
1. Touch [Albums] on the left of the screen.
2. Touch an album shown on the list.
3. Select a song to play.
Select Music by Song Name
1. Touch [Songs] on the left of the screen.
2. Select a song to play.
Playlists
Add a song to favorite playlist
1. [ tceles dna gnos a sserP
].
2. Add it to an favorite playlist.
If choose [Favorite], you need input a name
of the playlist.
Delete a song from favorite playlist
1. hcuoT [favorite], and select a playlist name
on the screen.
2. Press [
] on the favorite playlist, then
remove it from playlist.
Video Playback
Select [Video] on the applications menu,
the unit will display all the video files on the
storages.
left corner) to show control buttons.
1 2
3 4
1. Return to home menu
3. Folder/File list
Drag up/down to scroll, touch to access.
4. Thumbnail
SD/USB Operations
9. List window
Drag up/down to scroll.
Touch an item to select.
10. Enter search menu.
1
1
11
11
12 13 14 15 16
12 13 14 15 16
11. Favorite
12. Show list menu
14. Play/Pause
15. Show more control buttons
16
18 19 20
17
18 19 20
17
17. Sequential play
18. Repeat play
19. Follow your heart
20. Hide the second line of control buttons.
Play/Pause
When playing, press [ ] button to pause, and
the sound will be mute.
Press [
] button to play.
Previous/Next Track
Press [ ] or [ ] button to go to previous or
Select Music by Artist
1. Touch [Artists] on the left of the screen.
2. Touch an artist shown on the list.
3. Select a song to play.
Select Music by Album
1. Touch [Albums] on the left of the screen.
2. Touch an album shown on the list.
3. Select a song to play.
Select Music by Song Name
1. Touch [Songs] on the left of the screen.
2. Select a song to play.
Playlists
Add a song to favorite playlist
1. [ tceles dna gnos a sserP
2. Add it to an favorite playlist.
If choose [Favorite], you need input a name
of the playlist.
Delete a song from favorite playlist
1. hcuoT [favorite], and select a playlist name
on the screen.
2. Press [
remove it from playlist.
] on the favorite playlist, then
Video Playback
Select [Video] on the applications menu,
the unit will display all the video files on the
storages.
left corner) to show control buttons.
1 2
1 2
3 4
1. Return to home menu
3. Folder/File list
Drag up/down to scroll, touch to access.
4. Thumbnail
3 4
].
Page 16

14
SD/USB Operations
9 018765
5. Show list menu
6. Previous chapter
7. Play/Pause
8. Next chapter
9. Enter preset EQ menu
10. Show more control buttons
11 12 13
11. Sequential play
12. Repeat play
13. Show previous page of control buttons
Notes
Disconnect USB storage devices from the
unit when not in use.
Use an optional cable to connect the USB
audio player/USB memory as any device
connected directly to the unit will protrude
out from the unit and may be dangerous.
Do not use unauthorized products.
Gallery Operations
1. Select [Photo] on the APPS menu.
2. Select one gallery to show the picture list.
3. Touch to view it.
Drag left/right to scroll.
Touch top left corner to back.
5 6 7 8 109
11 12 13
Page 17

15
The Bluetooth allows you to utilize your s
built-in audio system for handsfree wireless
mobile phone or music communication. Some
Blue tooth mobile phones have the audio
features, and some portable audio players
support Bluetooth feature. This system can
play audio data stored in a Bluetooth audio
device. The car stereo with Bluetooth will be
able to retrieve phonebook contacts, received
calls, dialed calls, missed calls, incoming calls,
outgoing call and listen to music.
Notes:
This system will not operate or may operate
improp er ly wi th so me Blue to ot h aud io
players.
The unit cannot guarantee the compatibility
of all mobile phones together with the unit.
Audio playback will be set to the same
volume level as set during telephone call.
This can cause problems, if extreme volume
level is set during the telephone call.
Touch [
] on th e main menu to e nt e r
Bluetooth Phone mode.
1. If the Bluetooth function of the unit is off,
the unit will ask you to turn it on.
(Default setting is on)
2. Turn on Bluetooth function of your mobile
phone.
3. Searc h for new Bluet oo th d ev ic es o n
your phone. Select “MAG-M6” from the
pairing list on the mobile phone, and enter
password
Or touch [
Scan ] button on the screen to
search mobile Bluetooth devices.
After connect successfully, the unit show
following menu.
Bluetooth Operations
Making a Call
Dial Number
1. Input numbers by digit-keys on the screen.
Touch [
] to clear the digits.
2. Touch [
] button to dial out.
3. Touch [
] button to terminate call.
Answering a call
You can answer an incoming call by pressing
the [
] button.
Touch [
] button to reject an incoming call.
Disconnect
To dis c onn ect a paired devi c e, tou c h
[Disconnect] button.
Call from Phonebook
1. Touch [ Contacts ] but ton to show your
phone book.
2. Select a number to select and touch [
]
button to dial out.
3. Touch [
] to search a contact name.
15
The Bluetooth allows you to utilize your s
built-in audio system for handsfree wireless
mobile phone or music communication. Some
Blue tooth mobile phones have the audio
features, and some portable audio players
support Bluetooth feature. This system can
play audio data stored in a Bluetooth audio
device. The car stereo with Bluetooth will be
able to retrieve phonebook contacts, received
calls, dialed calls, missed calls, incoming calls,
outgoing call and listen to music.
Notes:
sihT system will not operate or may operate
improp er ly wi th so me Blue to ot h aud io
players.
ehT unit cannot guarantee the compatibility
of all mobile phones together with the unit.
Audio playback will be set to the same
volume level as set during telephone call.
This can cause problems, if extreme volume
level is set during the telephone call.
Touch [
] on th e main menu to e nt e r
Bluetooth Phone mode.
1. If the Bluetooth function of the unit is off,
the unit will ask you to turn it on.
(Default setting is on)
2. Turn on Bluetooth function of your mobile
phone.
3. Search for new Bluet oo th dev ic es o n
your phone. Select “MAG-M11” fr om the
pairing list on the mobile phone, and enter
password
rO touch [
Scan ] button on the screen to
search mobile Bluetooth devices.
After connect successfully, the unit show
following menu.
Bluetooth Operations
Making a Call
Dial Number
1. .neercs eht no syek-tigid yb srebmun tupnI
Touch [
] to clear the digits.
2. Touch [
] button to dial out.
3. Touch [
] button to terminate call.
Answering a call
You can answer an incoming call by pressing
the [
] button.
Touch [
] button to reject an incoming call.
Disconnect
To dis c onn ect a paired devi c e, tou c h
[Disconnect] button.
Call from Phonebook
1. Touch [ Contacts ] but ton to sh ow your
phone book.
2. tceleS a number to select and touch [
]
button to dial out.
3. Touch [
] to search a contact name.
Page 18

Bluetooth Operations
Call History
Access Call History by touching [ Call log ]
button.
Then select a number from Dialled/Missed/
Received calls.
Bluetooth Audio Streaming
What is audio streaming?
Audio streaming is a technique for transferring
audio data such that it can be processed
can stream music from their external audio
player to their car stereo wirelessly and listen
Please consult your nearest dealer for more
information on the product of wireless audio
streaming transmitter offered.
CAUTION
Please avoid operating your connected
mobile phone while audio streaming as
this may cause noise or the sound to cut in
and out on playback.
Audio streaming may or may not resume
after telephone interrupt as this is
dependent on your mobile phone.
Touch [Streaming] button to play music on
your mobile phone.
: Play/Pause
: Enter Bluetooth Phone
Bluetooth Settings
Touch [ Settings ] button to show Bluetooth
setting menu.
Page 19

iPod/iPhone Operations
This unit supports only the following iPod/iPhone models:
· iPhone 5
· iPhone 4S
· iPhone 4
· iPod touch (5th generation)
· iPod touch (4th generation)
· iPod classic
· iPod nano (7th generation)
· iPod nano (6th generation)
· iPod nano (5th generation)
“Made for iPod,” and “Made for iPhone” mean that an electronic accessory has been designed to
meet Apple performance standards.
Apple is not responsible for the operation of this device or its compliance with safety and
regulatory standards. Please note that the use of this accessory with iPod or iPhone may affect
wireless performance.
Accessing iPod mode
connector via an iPod cable.
RED
WHITE
AUX IN
LIGHTING
Touch [iPod] on the main menu to enter iPod
menu.
If [iPod] isn’t on the current menu, slide the
Pausing play
1. Touch the [ ] button on the bottom of the
screen to pause play.
“PAUSE” appears in the display, and [ ]
button becomes [ ] .
2. Touch [ ] button to resume play.
Selecting a track
Track-up
Touc h the [ ] button to move to th e
Track-down
1. Touch the [
2. Touch the [
Fast forward/Fast reverse
Fast forward
Touch and hold the [ ] button .
Fast reverse
Touch and hold the [ ] button .
Repeat play
repeatedly.
Touch the [ ] button to select Repeat one
or Repeat all.
Random play
recorded in a random order.
Touch the [ ] button to perform random
play.
Search function
1. Touch the [ ] button to enter search
menu.
2 Input number by touc hing buttons on
the screen, then touch [
] to begin
searching.
Touch [ ] button to delete inputted
number.
iPod/iPhone Operations
This unit supports only the following iPod/iPhone models:
to meet Apple performance standards. Apple is not responsible for the operation of this device or
its compliance with safety and regulatory standards.
Accessing iPod mode
Connect an iP od or iPhone to the US B
connector via an iPod cable.
2. Touch the [
Fast forward/Fast reverse
Fast forward
Touch and hold the [
Fast reverse
Touch and hold the [
] button .
] button .
LIGHTNING
Touch [iPod] on the main menu to enter iPod
menu.
If [iPod] isn’t on the current menu, slide the
Pausing play
1. Touch the [ ] button on the bottom of the
screen to pause play.
“PAUSE
button becomes [
2. Touch [
] button to resume play.
] .
Selecting a track
Track-up
Touch the [
Track-down
1. Touch the [
] button to move to the
Repeat play
repeatedly.
Touch the [
Repeat all.
] button to select Repeat one or
Random play
recorded in a random order.
Touch the [
play.
]
Search function
1. Touch the [ ] button to enter search
menu.
2 Input number by touching buttons o n
the screen, then touch [
searching.
Touch [ ] button to delete inputted
number.
] button to perform random
17
] to begin
Page 20

DVR-RECORDER (optional)
Connect car recorder to the unit.
After connection, user can control the car
recorder through DVD screen.
To access the Recorder menu, touch DVR
icon on the main menu.
Computer
Computer
Quick instruction
3 2
6
7
1
1. Video record/Power
2. Voice record/System
3. File browse/Time setting
5. Mic
6. LED
7. Micro SD Card slot
Indicator status table
Power Mute Record Function
Power Indicator
Mute Off Indicator
Record(Mute)
Record(Voice)
Mute indicator
the begining of the
Color indicates On,White indicates Off, Slash
indicates Flash.
Cautions of installation
1. Install the car recorder on a dry, clean and
safety position by the 3M double-sided
tape.
2. Installation temperature range is 15~40°C .
3. If you need to re-install the recorder,
replace the 3M double-sided tape by a new
one.
Plug in microSD
icon to enter.
left side which is
supposed to be
”
CAUTION:
When reading the micro SD card on PC,
in the case the Anti-virus softwares remind
Settings
TIME SETTING
1. Press “ ” to pause record.
2. gnittes emit retne ot sdnoces 5 sserp gnoL
menu.
3. Press “
minute, second option.
4. Press “
option.
5. gnol ,putes retfA press 5 seconds “
exit time setting menu.
PAL/NTSC SWITCH
Press “ ” to stop record, blue LED off light.
Long press 5 second “
NTSC.
” to switch year, month, day, hour,
” or “ ” to switch the current
” to
” to switch PAL/
Page 21

SiriusXM Satellite Radio
SiriusXM® Satellite Radio
The device can be used for SiriusXM satellite
Once subscribed, you can tune to channels
in your sub-scription plan. Note, the activation
Note:
optional Siriu sXM Connect Ve hicle Tuner
must be connected.
Only SiriusXM® brings you more of what you
love to listen to, all in one place. Get over 140
channels, including commercial-free music
and entertainment. Welcome to the world
of sat-ellite radio. A SiriusXM Vehicle Tuner
and Subscript ion are required. For more
information, visit www.siriusxm.com.
Activating your SiriusXM
Subscription
After installing your SiriusXM Connect Vehicle
Tuner and antenna, power on your device
able to hear the SiriusXM preview channel
on Channel 1. If you cannot hear the preview
Connect tuner is properly in-stalled.
After you can hear the Preview channel, tune
to Channel 0 to find the Radio ID of your
tuner. In addition, the Radio ID is located on
the bottom of the SiriusXM Connect Ve-hicle
number to activate your subscription. Write the
number down for reference.
to be powered on and receiving the SiriusXM
signal to receive the activation message.
SiriusXM features
This device supports the following SiriusXM
features:
The Parental Control feature allows you to
limit access to SiriusXM channels with mature
content. When enabled, the Parental Control
feature requires you to enter a passcode to
can be found in the sections “Op-tions menu”
and “List mode displays”, subsection “Parental
Control display”.
The Replay feature allows you to pause,
rewind and replay live SiriusXM Satellite Radio
programming. Operation of the Replay feature
can be found in the section “SiriusXM replay
display”.
SmartFavorites allow you to rewind and replay
any missed programming from your Preset
sports segment? No Prob-lem, because you
can rewind and replay when you tune to one
of your Preset channels and hear what you
missed.
Note: The SiriusXM Radio ID does not include
the letters I, O, S or F.
calling SiriusXM Listener care:
2349
For Canadian Subscriptions, please contact:
As part of the activation process, the SiriusXM
satellites will send an activation message to
your tuner. When your radio detects that the
tuner has received the activation message,
With the TuneStart™ feature turned ON, you
will hear the beginning of the song when you
tune to one of your Preset channels. It may
after power up or after changing preset bands.
Information for turning TuneStart On or Off
can be found in the section “Options menu”.
Note:
SmartFavorites and TuneStart are compatible
with SXV200 and tuner models. SXV200
will limit the features to the first 6 Favorite
Channels in your Preset list.
Starting SiriusXM playback
In the Car AV applications, select the SiriusXM
app.The SiriusXM main display opens and
Page 22

SiriusXM main display
The SiriusXM main display feat ures the
following functions and displays:
1. unem niam eht ot gnignahC
2. :aera ofni lennahC
number (if applicable)
4. Time
5. yalpsid yalper eht ot gnignahC
6. .uneM yrtnE tceriD eht yalpsiD
7. lennahc suoiverp eht ot enuT
category only
9. .lennahc txen eht ot enuT
10. .2 egaP uneM ®MXsuiriS ot oG
11 13 15 17 81 91
11. ercs drowssap egnahc eht ot oG en.
12. tsil teserp eht snepO
14. tsil lennahc eht snepO
15. Touc h to acce ss the Equalizer leve l
settings menu
16. tsil yrogetac eht snepO
17. TuneStart On/Off
18. Touch to scan all channels starting at
5 6 7 8 9 01
1
2
3
4
12
14
16
channel 1
19. 1 egaP uneM ®MXsuiriS ot oG
Seek Tuning
the [ ] icon and to scroll through the
higher channels touch and hold the [
]
icon.
the [ ] icon and to scroll through the
lower channels touch and hold the [
]
icon.
Direct Tuning
To enter a SiriusXM® radio channel directly:
1. On the SiriusXM® menu, touch
[
]
icon
to display the Direct Entry Menu.
2. retnE the desired SiriusXM® radio channel
using the on-screen number pad then touch
number touch the [ X ] icon.
3. To exit the screen without changing the
channel, touch [ < ] icon.
Using Preset Channels
A preset is a channel name that is stored for
instant access to that channel. Ten numbered
preset buttons store and recall channels for
each band.
Storing a Channel
1. On the SiriusX M® menu page 2, touch
[
] icon to access the Preset Channel
Screen.
2. Touch the preset number (P1 through P18)
channel (or touch the [ < ] icon to cancel
and close the menu).
The channel will be stored and displayed in
SiriusXM Satellite Radio
5 6 7 8 109
1
2
3
4
11 13 15 17 191812
14
16
that preset. Drag up/down to scroll.
3. Touch the [ < ] icon to return to the SXM
Menu screen.
Page 23

that preset. Drag up/down to scroll.
3. Touch the [ < ] icon to return to the SXM
Menu screen.
Recalling a Channel
1. Touch the Preset icon to access the Recall
Preset Channel Screen.
2. hcuoT a channel on the preset channel list
to select the corresponding stored channel.
Drag up/down to scroll.
Searching for a Channel
Search by Channel
1. On the SirusXM® menu, touch the [ ]
icon (if needed) to select Channel.
2. Touch List to display the Channel Search
Screen.
3. Touch a channel to tune to that channel.
Drag up/down to scroll.
Search by Category
Categories group music by type such as jazz,
1. On the SirusXM® menu, touch the [ ]
icon (if needed) to select Category.
2. Touch List to display the Category Search
Screen.
3. Touch a category item. A channel lis t
screen appears.
4. Touch a channel to tune to that channel.
Scroll up or down the list.
Locking Individual SXM
Channels
on the channel list.
Locking a Channel
1. hcuot ,2 egap unem ®MXsuriS eht nO
[
] icon. The following screen appears:
2. Enter your 4-digit password and then press
the OK icon.
Unlocking a Channel
1. hcuot ,2 egap unem ®MXsuriS eht nO
[ ] icon. The Enter Password Screen
appears appears.
2. .drowssap tigid-4 ruoy retnE
Change Lock Password
to change the password from current custom
password to another password.
To change a password:
1. [ eht hcuoT ] icon.
2. Enter your 4-digit password and press the
OK icon.
3. Enter the new 4-digit password and press
the OK icon. The new password is set.
SiriusXM Satellite Radio
that preset. Drag up/down to scroll.
3. Touch the [ < ] icon to return to the SXM
Menu screen.
Recalling a Channel
1. Touch the Preset icon to access the Recall
Preset Channel Screen.
2. hcuoT a channel on the preset channel list
to select the corresponding stored channel.
Drag up/down to scroll.
Searching for a Channel
Search by Channel
1. On the SirusXM® menu, touch the [
]
icon (if needed) to select Channel.
2. Touch List to display the Channel Search
Screen.
3. Touch a channel to tune to that channel.
Drag up/down to scroll.
Search by Category
Categories group music by type such as jazz,
1. On the SirusXM® menu, touch the [ ]
icon (if needed) to select Category.
2. Touch List to display the Category Search
Screen.
3. Touch a category item. A channel lis t
screen appears.
4. Touch a channel to tune to that channel.
Scroll up or down the list.
Locking Individual SXM
Channels
on the channel list.
Locking a Channel
1. hcuot ,2 egap unem ®MXsuriS eht nO
[
] icon. The following screen appears:
2. Enter your 4-digit password and then press
the OK icon.
Unlocking a Channel
1. hcuot ,2 egap unem ®MXsuriS eht nO
[
] icon. The Enter Password Screen
appears appears.
2. .drowssap tigid-4 ruoy retnE
Change Lock Password
to change the password from current custom
password to another password.
To change a password:
1. [ eht hcuoT
] icon.
2. Enter your 4-digit password and press the
OK icon.
3. Enter the new 4-digit password and press
the OK icon. The new password is set.
SiriusXM Satellite Radio
Recalling a Channel
1. Touch the Preset icon to access the Recall
Preset Channel Screen.
2. Touch a channel on the preset channel list
to select the corresponding stored channel.
Drag up/down to scroll.
Set SmartFavorite Channel
SXV200 will limit the features to the first 6
Favorite Channels in your Preset list. The
maximum number of SmartFavorites for
SXV300G tuner supported is 20.
1. On the SiriusXM® menu page 2, touch
[
] icon to access the Preset Channel
Screen.
2. Press the [
] button to mark the preset
channel as SmartFavorite, and [
] becomes
[
]. Press again to cancel it.
Searching for a Channel
Search by Channel
1. On the SirusXM® menu, touch the [
]
icon (if needed) to select Channel.
2. Touch List to display the Channel Search
Screen.
3. Touch a channel to tune to that channel.
Drag up/down to scroll.
Search by Category
Categories group music by type such as jazz,
rock, classical, etc. To search by category:
1. On the SirusXM® menu, touch the [
]
icon (if needed) to select Category.
2. Touch List to display the Category Search
Screen.
3. Touch a category item. A channel lis t
screen appears.
4. .lennahc taht ot enut ot lennahc a hcuoT
Scroll up or down the list.
Locking Individual SXM
Channels
A user can lock individual channels. When
locked, a channel has the lock icon next to it
on the channel list.
Locking a Channel
To lock an individual channel:
1. On the SirusXM® menu page 2, touch
[
] icon. The following screen appears:
2. Enter your 4-digit password and then press
the OK icon.
Unlocking a Channel
To unlock an individual channel:
1. On the SirusXM® menu page 2, touch
[
] icon. The Enter Password Screen
appears appears.
2. Enter your 4-digit password.
3. Touch a lock icon to unlock a channel. The
icon is replaced by an unlocked icon. The
channel is now unlocked.
Change Lock Password
The Change Lock Password option allows you
to change the password from current custom
password to another password.
To change a password:
1. Touch the [
] icon.
2. Enter your 4-digit password and press the
OK icon.
3. Enter the new 4-digit password and press
the OK icon. The new password is set.
Page 24

Internet
Wi-Fi Settings
hcuoT .tinu eht ot elgnod iFiW eht tcennoC .1
the [ Settings ] icon on the main menu to
enter setting menu, and turn on Wi-Fi
(if necessary).
[ hcuoT .2
] to
enter WiFi setting menu.
3. Touch an available WiFi hotspot.
T .4 ouch [ Password ] and input the password,
Visit Website
To acc es s the intern et , you must se tu p
“wireless & network” in system settings menu.
Select [
] on the main menu to view a
website.
Touch the dialog box on the upper side of
the screen to show keypad. Input the website
address, and touch [Go] to visit it. Drag the
web page to scroll.
E-mail
Select [Email] or other mail software on the
applications menu.
First you must setup an account, or sign into
an existing account. Enter your Email address
and password. Then you can send/receive
E-mails through the unit.
[ eht ,detcennoc yllufsseccus retfA .5
]
icon appears on the top right corner of the
main menu . Now you can access internet.
Wi-Fi Settings
1. Connect the WiFi dongle to the unit. Touch
the [ Settings ] icon on the main menu to
enter setting menu, and turn on Wi-Fi (if
necessary).
5. After successfully connected, the [
icon appears on the top right corner of the
main menu . Now you can access internet.
]
2. Touch [ ] to
enter WiFi setting menu.
3. Touch an available WiFi hotspot.
4. Touch [ Password ] and input the password,
Visit Website
To a ccess the internet, y ou must setup
“wireless & network” in system settings menu.
Select [
website.
Touch the dialog box on the upper side of
the screen to show keypad. Input the website
address, and touch [Go] to visit it. Drag the
web page to scroll.
E-mail
Select [Email] or other mail software on the
applications menu.
First you must setup an account, or sign into
an existing account. Enter your Email address
and password. Then you can send/receive
E-mails through the unit.
] on the main menu to view a
Page 25

Other Mode
Navigation Operations
To navigate by the unit, simply select the
desired navigation application on the main
menu. Then navigate by the touch screen.
AUX Operations
Select [A/V In 1]/[A/V In 2] on the main menu
to visit auxiliary device.
File Explorer
Select [File Explorer] on the applications menu
The USB files and folders are in the folder
named "external_usb".
You can install applications and edit files/
folders.
Se lect [EQ] on the menu to enter sound
setting mode.
Touch to select a preset EQ on upper side of
the screen from Flat, Pop, User,Rock, Techno,
Classic, Jazz and Optimal.
[ ]: When listening to music at low
volumes, this featurewill selectively boost
certain bass and treble frequencies.
Touch [
] to enter Fader/Balance/
Subwoofer setting menu.
Touch [
] or [ ] to setup Balance, touch
[
] or [ ] to setup Fader.
[ hcuoT :leveL refoow buS ] or [ ] to adjust
subwoofer Level.
Touch [“Speakers”] to enter the speaker
setting menu
(A): Touch to set A speakers On or Off
(B): Touch to set B speakers On or Off
(C): Touch to set C speakers On or Off
Note: All three speakers sets can be
On at the same time.
Sound setting
Sound Setting
Other Mode
Select [EQ] on the menu to enter sound
setting mode
Touch to select a preset EQ on upper side of
Classic, Jazz and Optimal.
[ ]: When listening to music at low
volumes, this featurewill selectively boost
certain bass and treble frequencies.
Touch [
Subwoofer setting menu.
Touch [
[
] or [ ] to setup Fader.
Sub woofer Level: Touch [ ] or [ ] to adjust
subwoofer Level.
] to enter Fader/Balance/
] or [ ] to setup Balance, touch
Navigation Operations
To navigate by the unit, simply select the
desired navigation application on the app
menu. Then navigate by the touch screen.
AUX Operations
Select [A/V In 1]/[A/V In 2] on the main menu
to play an auxiliary device.
Blackout Mode Settings:
Blackout Mode is used for two purposes;
1. Provides a black screen to eliminate
illumination issues during nighttime
operation
2. Controls the default screen image for
special applications such as Navigation or
Rear Camera View
From the “General” settings menu, touch the
“Blackout” selection. Then select the type of
screen you want displayed and the delay time
for it to become active.
15 or 30 seconds after the last radio function,
the screen will divert to your selection.
setting menu
Note 1: All three speakers sets can be On
at the same time.
Note 2: C speakers are Off by default.
- In Blackout Mode, any action or touch to the
radio screen or controls will return the screen
to the last view.
- In Navigation Mode, press the “Back” button
to exit navigation or the “Home” button to
select another playing source and Navigation
will continue operation.
- In Rearview Camera Mode, you can touch
the screen to select another camera you want
to view (Default view is rear camera). To exit
camera view, press the “Back” button or the
“Home” button.
Page 26

System settings
Steering Wheel Control:
Select [SWC] on the manin menu to enter SWC setting menu.
1.Touch number button to select a SWC button.
2. Select a function.
3. Press each individual steering wheel control button
for each corresponding function.
4. Touch [Study] to program.
5. Once the final steering wheel control button is programmed,
the functions are saved and the programming will end.
6. Touch [Reset to reset he programming.
Display System
1. Touch the upper left corner to display main menu.
2. Touch [ Settings ].
The settings menu is displayed.
3. Touch the upper left corner of the screen to exit.
Adjust General Settings
1. Touch [ General ].
2. Touch to select a setting.
3. Touch on the option to display/select an option.
General settings Options Description
Lighting You can select the key color.
Customized See page 6 for reference.
Radio region Select one that matches your location.
Microphone
Blackout Choose screen blackout off, 15s or 30s.
Fast boot Choose fast boot off, 1 day , 3 days or 5 days.
Beep
Internal Internal microphone for Bluetooth calls.
External External microphone for Bluetooth calls.
On Turn on the beep sound. Each time you press a button, the unit beeps.
Off Turn off the beep sound.
Adjust Video Settings
1. Touch [Video].
2. Touch an option repeatedly to select.
Video settings Opciones Descripción
Video output NTSC/PAL
Camera Settings
Choose rear/left/right camera display mode
Choose video output mode
.
.
Page 27

System settings
Adjust Time Settings
1. Touch [ Time ].
2. To setup Date & time.
Adjust Volumes Settings
Choose input volume gain of each source.
1. Touch [Volumes].
The volume setting sub-menu is displayed.
2. Touch on a source, to assign value: 0 to 40.
When switching to the source, the volume increases automatically.
Adjust Disc Rating
1. Touch [Disc].
2. Touch an option repeatedly to select.
DVD rating Options Description
Audio Select DVD audio language. Options available depending on DVD disc.
Subtitle Select DVD subtitle language. Options available depending on DVD disc.
Disk Menu Select DVD menu language. Options available depending on DVD disc.
AgeControl
Parental Set password to restrict the play of discs. The default password is 000000.
KID SAF Acceptable for children.
G Acceptable for general viewers.
PG Parental guidance suggested.
PG 13 Unsuitable for children under age 13.
PGR Recommend parents to restrict viewing for children under 17 .
R
NC17 Unsuitable for children under age 17.
ADULT Acceptable for adults only.
Restricted re parental guidance is advised for children under the age of
17 .
Network
* For Wi-Fi settings, refer to “Internet”.
Personal
To setup Location access, Security, Language & input, Factory data reset, All data erase,
Accounts, etc.
Device
To setup Brightness, Storage, Apps.
System settings
Accessibility
To setup accessibility related applications.
You need download a screen reader and establish an account.
Software version
To view software version information.
UUID QR code
To view UUID QR code information.
Page 28

Device Connections
Notes of connection
This unit is designed to be used in a vehicle with a 12-volt battery and negative grounding.
voltage is appropriate for this unit to be used, otherwise, have a professionally installed
transformer to convert the output voltage to 12V.
disconnected before installation.
To prevent short circuit in the wiring and damaging to this unit, secure all wirings with cable
clamp or adhesive tape. Route the wirings in a secured, out of heating place without touching
being melted / worn off.
Never pass the yellow power cord through the installation hole into the engine compartment and
connect to the car battery. Otherwise, a high possibility of serious short circuit to the electrical
system may occur.
problems continue to occur, please contact your local retailer or installer.
Otherwise, this unit may be damaged by short circuit.
nempiuqe rehto tcennoc TON OD ts with the car battery to avoid battery overheating.
saelp ,elbaliava CCA on si ereht fI e connect ACC lead to the power supply with a switch.
Page 29

Parking Brake Cable Connections
Device Connections
Green/White Wire
Device Connections
Parking Brake Cable Connections
Green/White Wire
Page 30

Device Connections
Wiring Diagram
YELLOW
B1
VIDEO_IN
Device Connections
Wiring Diagram
Zone B Right +
Zone B Right -
Zone A Left +
Zone A Left -
ACC
Zone A Right +
Zone A Right -
Zone B Left +
Zone B Left -
GPS
Antenna
BLUE
BT ANT
(Do Not Connect)
Optical Audio
Input
External Mic (Optional)
PWR / Ground
C
Speakers
A & B
Speakers
Safety Cameras
(Optional)
BATT+
GND
Optional Amplifier
BROWN
YELLOW
WHITE
RED
WHITE
RED
YELLOW
WHITE
RED
YELLOW
RED
BLACK
Zone C Left +
Blue
Blue/Black
Brown
Brown/Black
Zone C
Left
-
Zone C
Right
+
Zone C Right-
MIC
RADIO ANT
WIFI
Siriusxm
SiriusXM
Tuner
Input
(Optional)
TV
Automotive
AM/FM
Antenna
B3
B1
B2
WIFI
AUX_IN_R
VIDEO_IN
AUX_IN_L
VIDEO OUT
FRONT L
SUB OUT
REAR L
REAR R
FRONT R
YELLOW
GREEN
Remote Amp Turn On (+)
Blue/White
Parking Brake Input (-)
Green/White
GPS
Antenna
Optional Amplifier
BROWN
WHITE
WHITE
YELLOW
RED
RED
Automotive
SUB OUT
REAR L
REAR R
FRONT L
FRONT R
VIDEO OUT
AM/FM
Antenna
WIFI
BT ANT
(Do Not Connect)
WIFI
RADIO ANT
Optical Audio
Input
Safety Cameras
(Optional)
Siriusxm
TV
SiriusXM
Tuner
(Optional)
Input
Page 31

Device Connections
Wiring Diagram
Zone B Right +
Zone B Right -
Zone A Left +
Zone A Left -
ACC
Zone A Right +
Zone A Right -
Zone B Left +
Zone B Left -
BLUE
External Mic (Optional)
PWR / Ground
C
Speakers
A & B
Speakers
BATT+
GND
YELLOW
WHITE
RED
YELLOW
RED
BLACK
Zone C Left +
Blue
Blue/Black
Brown
Brown/Black
Zone C
Left
-
Zone C
Right
+
Zone C Right-
MIC
B3
B1
B2
AUX_IN_R
VIDEO_IN
AUX_IN_L
YELLOW
GREEN
Remote Amp Turn On (+)
Blue/White
Parking Brake Input (-)
Green/White
Troubleshooting
The following checklist can help you solve the problems which you may encounter when using the
unit. Before consulting it, check the connections and follow the instructions in the user manual.
Problem Possible cause Solution
Troubleshooting
The following checklist can help you solve the problems which you may encounter when using the
unit. Before consulting it, check the connections and follow the instructions in the user manual.
Problem Possible cause Solution
General
The unit will not switch on.
Car ignition is not on.
Cable is not properly
connected.
Fuse is burnt.
Turn your car key in the ignition.
Check cable connection.
Replace fuse with a new fuse of the
same capacity.
No sound
Volume is set at minimum or
the mute function is on.
Check the volume or switch the mute
function off.
The unit or screen does
not function normally.
The unit system is unstable. Press the RESET button.
Remote control
The remote control is not
working or does not work
properly
The battery is low or empty. Change the batteries.
DVD mode
The appliance will not play
discs.
The disc is inserted incorrectly.
The disc is dirty or damaged.
Disc must be inserted with the label
side facing up. Clean the disc and
check for damage. Try another disc.
Sound skips due to
vibration.
Mounting is unstable.
Adjust mounting angle to less than
Mount the unit securely with the
supplied parts.
TUNER mode
Unable to receive stations.
The antenna is not connected
properly.
Connect the antenna properly.
Poor quality reception of
radio station.
The antenna is not fully
extended or it is broken.
Fully extend the antenna and if
broken, replace it with a new one.
Preset stations are lost.
The battery cable is not
properly connected.
Connect the permanent live on the unit
to the permanent live on the vehicle.
USB mode
Unable to insert USB
device.
The USB device has been
inserted the wrong way round.
Insert USB the other way around.
The USBdevice cannot be
read.
NTFS format is not supported.
is in FAT or FAT32 format. Due to
different formats, some models of USB
storage devices or MP3 players may
not be read.
Wiring Diagram
Zone B Right +
Zone B Right -
Zone A Left +
Zone A Left -
ACC
Zone A Right +
Zone A Right -
Zone B Left +
Zone B Left -
BLUE
External Mic (Optional)
BATT+
GND
YELLOW
WHITE
RED
YELLOW
RED
BLACK
Zone C Left +
Blue
Blue/Black
Brown
Brown/Black
Zone C
Left
-
Zone C
Right
+
Zone C Right-
MIC
B3
B1
B2
AUX_IN_R
VIDEO_IN
AUX_IN_L
YELLOW
GREEN
Troubleshooting
The following checklist can help you solve the problems which you may encounter when using the
unit. Before consulting it, check the connections and follow the instructions in the user manual.
Problem Possible cause Solution
General
The unit will not switch on.
Car ignition is not on.
Cable is not properly
connected.
Fuse is burnt.
Turn your car key in the ignition.
Check cable connection.
Replace fuse with a new fuse of the
same capacity.
No sound
Volume is set at minimum or
the mute function is on.
Check the volume or switch the mute
function off.
The unit or screen does
not function normally.
The unit system is unstable. Press the RESET button.
Remote control
The remote control is not
working or does not work
properly
The battery is low or empty. Change the batteries.
DVD mode
The appliance will not play
discs.
The disc is inserted incorrectly.
The disc is dirty or damaged.
Disc must be inserted with the label
side facing up. Clean the disc and
check for damage. Try another disc.
Sound skips due to
vibration.
Mounting is unstable.
Adjust mounting angle to less than
Mount the unit securely with the
supplied parts.
TUNER mode
Unable to receive stations.
The antenna is not connected
properly.
Connect the antenna properly.
Poor quality reception of
radio station.
The antenna is not fully
extended or it is broken.
Fully extend the antenna and if
broken, replace it with a new one.
Preset stations are lost.
The battery cable is not
properly connected.
Connect the permanent live on the unit
to the permanent live on the vehicle.
USB mode
Unable to insert USB
device.
The USB device has been
inserted the wrong way round.
Insert USB the other way around.
The USBdevice cannot be
read.
NTFS format is not supported.
is in FAT or FAT32 format. Due to
different formats, some models of USB
storage devices or MP3 players may
not be read.
PWR / Ground
C
Speakers
Parking Brake Input (-)
Green/White
Remote Amp Turn On (+)
Blue
A & B
Speakers
SWC
Black
Page 32

General
Reference Supply Voltage .................................................................... 12V(DC)
Operating Voltage Range ........................................................10.5 - 15.8V(DC)
Max Operating Current .................................................................................18A
Grounding System .................................................... Car Battery Negative Pole
Dimensions(WXHXD) ................................................ 314.0 x 176.0 x 171.0mm
Weight(main unit) ......................................................................................
FM
Signal Noise Ratio ................................................................................
..........................................................
Frequency Response(-3dB) ..........................................................20Hz~7KHz
....................................................................
Distortion ..............................................................................................
Stereo Separation(1KHz) .....................................................................
Antenna Impedance ...................................................................................
AM
..........................................................
Frequency Response(-3dB) ..........................................................50Hz~2KHz
LCD
Screen size ........................................................................... 10.1 inches(16:9)
Display resolution ........................................................................800X480dots
DVD Player
Signal / Noise Ratio ..............................................................................
Dynamic Range ....................................................................................
Distortion(line out) ................................................................................
Frequency Response(±3dB) .......................................................20Hz~20KHz
Maximum Output Power ........................................................................6×30W
Load Impedance ...........................................................................................
AUX IN
Distortion ..............................................................................................
Frequency Response(±3dB) .......................................................20Hz~20KHz
Audio Input Level ...................................................................................500mV
Audio
Audio Output Impedance .........................................................................
Audio Output Level ....................................................................... 2Vrms(Max)
Video
Normal Video Input Level(CVBS) .......................................................1.0±0.2V
Video Input Impedance...............................................................................
Video Output Impedance ............................................................................
Video Output Level .............................................................................1.0±0.2V
Environment
Operating Temperature .............................................................-10°C ~ +60°C
Storing Temperature..................................................................-20°C ~ +70°C
Operating Humidity .....................................................................
Storing Humidity .........................................................................
Notice:
When the unit is operated in extreme conditions, such as operated with maximum power output
for a long time, or the temperature is over 70°C, it will enter heat protection mode, the volume will
automatically be lowered. This is normal.
Troubleshooting
The following checklist can help you solve the problems which you may encounter when using the
unit. Before consulting it, check the connections and follow the instructions in the user manual.
Problem Possible cause Solution
General
The unit will not switch on.
No sound
The unit or screen does
not function normally.
Remote control
The remote control is not
working or does not work
properly
DVD mode
The appliance will not play
discs.
Sound skips due to
vibration.
TUNER mode
Unable to receive stations.
Poor quality reception of
radio station.
Preset stations are lost.
USB mode
Unable to insert USB
device.
The USBdevice cannot be
read.
Car ignition is not on.
Cable is not properly
connected.
Fuse is burnt.
Volume is set at minimum or
the mute function is on.
The unit system is unstable. Press the RESET button.
The battery is low or empty. Change the batteries.
The disc is inserted incorrectly.
The disc is dirty or damaged.
Mounting is unstable.
The antenna is not connected
properly.
The antenna is not fully
extended or it is broken.
The battery cable is not
properly connected.
The USB device has been
inserted the wrong way round.
NTFS format is not supported.
Turn your car key in the ignition.
Check cable connection.
Replace fuse with a new fuse of the
same capacity.
Check the volume or switch the mute
function off.
Disc must be inserted with the label
side facing up. Clean the disc and
check for damage. Try another disc.
Adjust mounting angle to less than
Mount the unit securely with the
supplied parts.
Connect the antenna properly.
Fully extend the antenna and if
broken, replace it with a new one.
Connect the permanent live on the unit
to the permanent live on the vehicle.
Insert USB the other way around.
is in FAT or FAT32 format. Due to
different formats, some models of USB
storage devices or MP3 players may
not be read.
Page 33

FCC ST A TEMENT
1. This device complies with Part 15 of the FCC Rules.Operation is subject to the following two
conditions:
(1) .ecnerefretni lufmrah esuac ton yam ecived sihT
(2) Th is de vi ce mu st ac cept an y int er ference re ceiv ed , inc luding int erferencethat may
causeundesired operation.
2.
void the user's authority to operate the equipment.
NOTE: This equipment has been tested and found to comply with the limits for aClass B digital
device, pursuant to Part 15 of the FCC Rules. These limits aredesigned to provide reasonable
protection against harmful interference in aresidential installation.
This equipment generates uses and can radiate radio frequency energy and,if not installed and
used in accordance with the instructions, may causeharmful interference to radio communications.
However, there is noguarantee that interference will not occur in a particular installation. If
this equipment does cause harmful interference to radio or televisionreception, which can
bedetermined by turning the equipment off and on, the user is encouraged to try to correct the
interference by one or more ofthe following measures:
.annetna gniviecer eht etacoler ro tneiroeR
.reviecer dna tnempiuqe eht neewteb noitarapes eht esaercnI
Conne
ct the equipment into an outlet on a circuit different from that towhich the receiver is
connected.
.pleh rof naicinhcet VT/oidar decneirepxe na ro relaed eht tlusnoC
FCC Radiation Exposure Statement
This equip ment complies with FCC radiation ex posure limits set fort h for an uncontrolled
environment. This equipment should be installed and operated with minimum distance 20cm
between the radiator & your body.
FCC S TA TEMENT
1. This device complies with Part 15 of the FCC Rules.Operation is subject to the following two
conditions:
(1) .ecnerefretni lufmrah esuac ton yam ecived sihT
(2) This devi ce mu st ac cept any inter feren ce re ce iv ed, including interferencetha t may
causeundesired operation.
2.
void the user's authority to operate the equipment.
NOTE: This equipment has been tested and found to comply with the limits for aClass B digital
device, pursuant to Part 15 of the FCC Rules. These limits aredesigned to provide reasonable
protection against harmful interference in aresidential installation.
This equipment generates uses and can radiate radio frequency energy and,if not installed and
used in accordance with the instructions, may causeharmful interference to radio communications.
However, there is noguarantee that interference will not occur in a particular installation. If
this equipment does cause harmful interference to radio or televisionreception, which can
bedetermined by turning the equipment off and on, the user is encouraged to try to correct the
interference by one or more ofthe following measures:
.annetna gniviecer eht etacoler ro tneiroeR
.reviecer dna tnempiuqe eht neewteb noitarapes eht esaercnI
Connec
t the equipment into an outlet on a circuit different from that towhich the receiver is
connected.
.pleh rof naicinhcet VT/oidar decneirepxe na ro relaed eht tlusnoC
FCC Radiation Exposure Statement
This equip ment complies with FCC radiation ex posure limits set forth for an u ncontrolled
environment. This equipment should be installed and operated with minimum distance 20cm
between the radiator & your body.
General
Reference Supply Voltage .................................................................... 12V(DC)
Operating Voltage Range ........................................................10.5 - 15.8V(DC)
Max Operating Current .................................................................................18A
Grounding System .................................................... Car Battery Negative Pole
Dimensions(WXHXD) ................................................ 314.0 x 176.0 x 171.0mm
Weight(main unit) ......................................................................................
FM
Signal Noise Ratio ................................................................................
Frequency Response(-3dB) ..........................................................20Hz~7KHz
Distortion ..............................................................................................
Stereo Separation(1KHz) .....................................................................
Antenna Impedance ...................................................................................
AM
Frequency Response(-3dB) ..........................................................50Hz~2KHz
LCD
Screen size ........................................................................... 10.2 inches(16:9)
Display resolution ......................................................................1024X600dots
DVD Player
Signal / Noise Ratio ..............................................................................
Dynamic Range ....................................................................................
Distortion(line out) ................................................................................
Frequency Response(±3dB) .......................................................20Hz~20KHz
Maximum Output Power ........................................................................6×30W
Load Impedance ...........................................................................................
AUX IN
Distortion ..............................................................................................
Frequency Response(±3dB) .......................................................20Hz~20KHz
Audio Input Level ...................................................................................500mV
Audio
Audio Output Impedance .........................................................................
Audio Output Level ....................................................................... 2Vrms(Max)
Video
Normal Video Input Level(CVBS) .......................................................1.0±0.2V
Video Input Impedance...............................................................................
Video Output Impedance ............................................................................
Video Output Level .............................................................................1.0±0.2V
Environment
Operating Temperature .............................................................-10°C ~ +60°C
Storing Temperature..................................................................-20°C ~ +70°C
Operating Humidity .....................................................................
Storing Humidity .........................................................................
..........................................................
....................................................................
..........................................................
15A
Notice:
When the unit is operated in extreme conditions, such as operated with maximum power output
for a long time, or the temperature is over 70°C, it will enter heat protection mode, the volume will
automatically be lowered. This is normal.
Page 34

FCC STATEMENT
1. This device complies with Part 15 of the FCC Rules.Operation is subject to the following two
conditions:
(1) .ecnerefretni lufmrah esuac ton yam ecived sihT
(2) This device must accept any interferenc e received, including interferencet hat may
causeundesired operation.
2.
void the user's authority to operate the equipment.
NOTE: This equipment has been tested and found to comply with the limits for aClass B digital
device, pursuant to Part 15 of the FCC Rules. These limits aredesigned to provide reasonable
protection against harmful interference in aresidential installation.
This equipment generates uses and can radiate radio frequency energy and,if not installed and
used in accordance with the instructions, may causeharmful interference to radio communications.
However, there is noguarantee that interference will not occur in a particular installation. If
this equipment does cause harmful interference to radio or televisionreception, which can
bedetermined by turning the equipment off and on, the user is encouraged to try to correct the
interference by one or more ofthe following measures:
.annetna gniviecer eht etacoler ro tneiroeR
.reviecer dna tnempiuqe eht neewteb noitarapes eht esaercnI
Connect
the equipment into an outlet on a circuit different from that towhich the receiver is
connected.
.pleh rof naicinhcet VT/oidar decneirepxe na ro relaed eht tlusnoC
FCC Radiation Exposure Statement
This equipment complies with FCC radiation exposure limits set forth for an uncontrolled
environment. This equipment should be installed and operated with minimum distance 20cm
between the radiator & your body.
FCC STATEMENT
FCC Statement
1. This device complies with Part 15 of the FCC Rules.Operation is subject to the following two
conditions:
(1) .ecnerefretni lufmrah esuac ton yam ecived sihT
(2) This device must accept any interferenc e received, including interferencethat may
causeundesired operation.
2.
void the user's authority to operate the equipment.
NOTE: This equipment has been tested and found to comply with the limits for aClass B digital
device, pursuant to Part 15 of the FCC Rules. These limits aredesigned to provide reasonable
protection against harmful interference in aresidential installation.
This equipment generates uses and can radiate radio frequency energy and,if not installed and
used in accordance with the instructions, may causeharmful interference to radio communications.
However, there is noguarantee that interference will not occur in a particular installation. If
this equipment does cause harmful interference to radio or televisionreception, which can
bedetermined by turning the equipment off and on, the user is encouraged to try to correct the
interference by one or more ofthe following measures:
.annetna gniviecer eht etacoler ro tneiroeR
Connect the equipment into an outlet on a circuit different from that towhich the receiver is
connected.
FCC Radiation Exposure Statement
This equipment complies with FCC radiation exposure limits set forth for an uncontrolled
environment. This equipment should be installed and operated with minimum distance 20cm
between the radiator & your body.
.reviecer dna tnempiuqe eht neewteb noitarapes eht esaercnI
.pleh rof naicinhcet VT/oidar decneirepxe na ro relaed eht tlusnoC
Page 35

Warranty
ONE (1) YEAR LIMITED WARRANTY
Magnadyne Corporation or its authorized agents will within one year from the date of sale
to you, repair, replace or refund the retail sales price of said product or any part thereof, at
the option of the Magnadyne Corporation or its authorized agents, if said product or part
is found defective in materials or workmanship, when properly connected and operating
on the correct power requirements designated for the specific product. This warranty
and Magnadyne Corporation or its authorized agent’s obligations hereunder do not apply
where the product was; damaged while in the possession of the consumer, subjected to
unreasonable or unintended use, not reasonably maintained, utilized in commercial or
industrial operations, or serviced by anyone other than Magnadyne Corporation or its
authorized agents, or where the warning seal on the product is broken or the power and/or
plugs are detached from the unit. Magnadyne Corporation or any of its authorized agents
will not assume any labor costs for the removal and reinstallation of any product found
to be defective, or the cost of transportation to Magnadyne Corporation or its authorized
agents. Such cost are the sole responsibility of the purchaser.
This warranty does not cover the cabinet appearance items or accessories used in
connection with this product, or any damage to recording or recording tape, or any damage
to the products
acts of nature.
MAGNADYNE CORPORATION OR ITS AUTHORIZED AGENTS SHALL NOT BE LIABLE TO
ANYONE FOR CONSEQUENTIAL OR INCIDENTAL DAMAGES OR CLAIMS EXCEPT THOSE
ACCORDED BY LAW. NO EXPRESSED WARRANTY OR IMPLIED WARRANTY IS GIVEN
EXCEPT THOSE SET FORTH HEREIN. NO IMPLIED WARRANTY SHALL EXTEND BEYOND
ONE YEAR FROM THE DATE OF SALE.
This warranty extends only to the original purchaser of the product and is not
transferable. Some states do not allow limitations on how long an implied warranty lasts,
and some states do not allow the exclusion or limitation of incidental or consequential
damages, so the above limitations or exclusion may not apply to you. This warranty gives
you specific legal rights, and you may have other rights that vary from state to state.
“NOTE: The manufacturer is not responsible for any radio or TV interference caused by
unauthorized modifications to this equipment. Such modifications could void the User’s
authority to operate the equipment.”
Defecti
secondly, to Magnadyne Corporation, 1111 W. Victoria Street, Compton CA
Return Authorization must be obtained before sending, or merchandise may be refused.
resulting from improper installation, alteration, accident, misuse, abuse or
ve merchandise should be returned to the original point of purchase or
90220.
Page 36

CLASS 1
LASER PRODUCT
© Copyright 2019
Magnadyne Corporation
M11-UM_rev.A
P.N.: 1270750018000
 Loading...