

Page 1
For Technical Assistance (800) 638-3600
For Fax on Demand Technical Assistance (800) 994-9977
(Must be a Registered Dealer to Use Fax on Demand System)
© Copyright 2002 Magnadyne Corporation
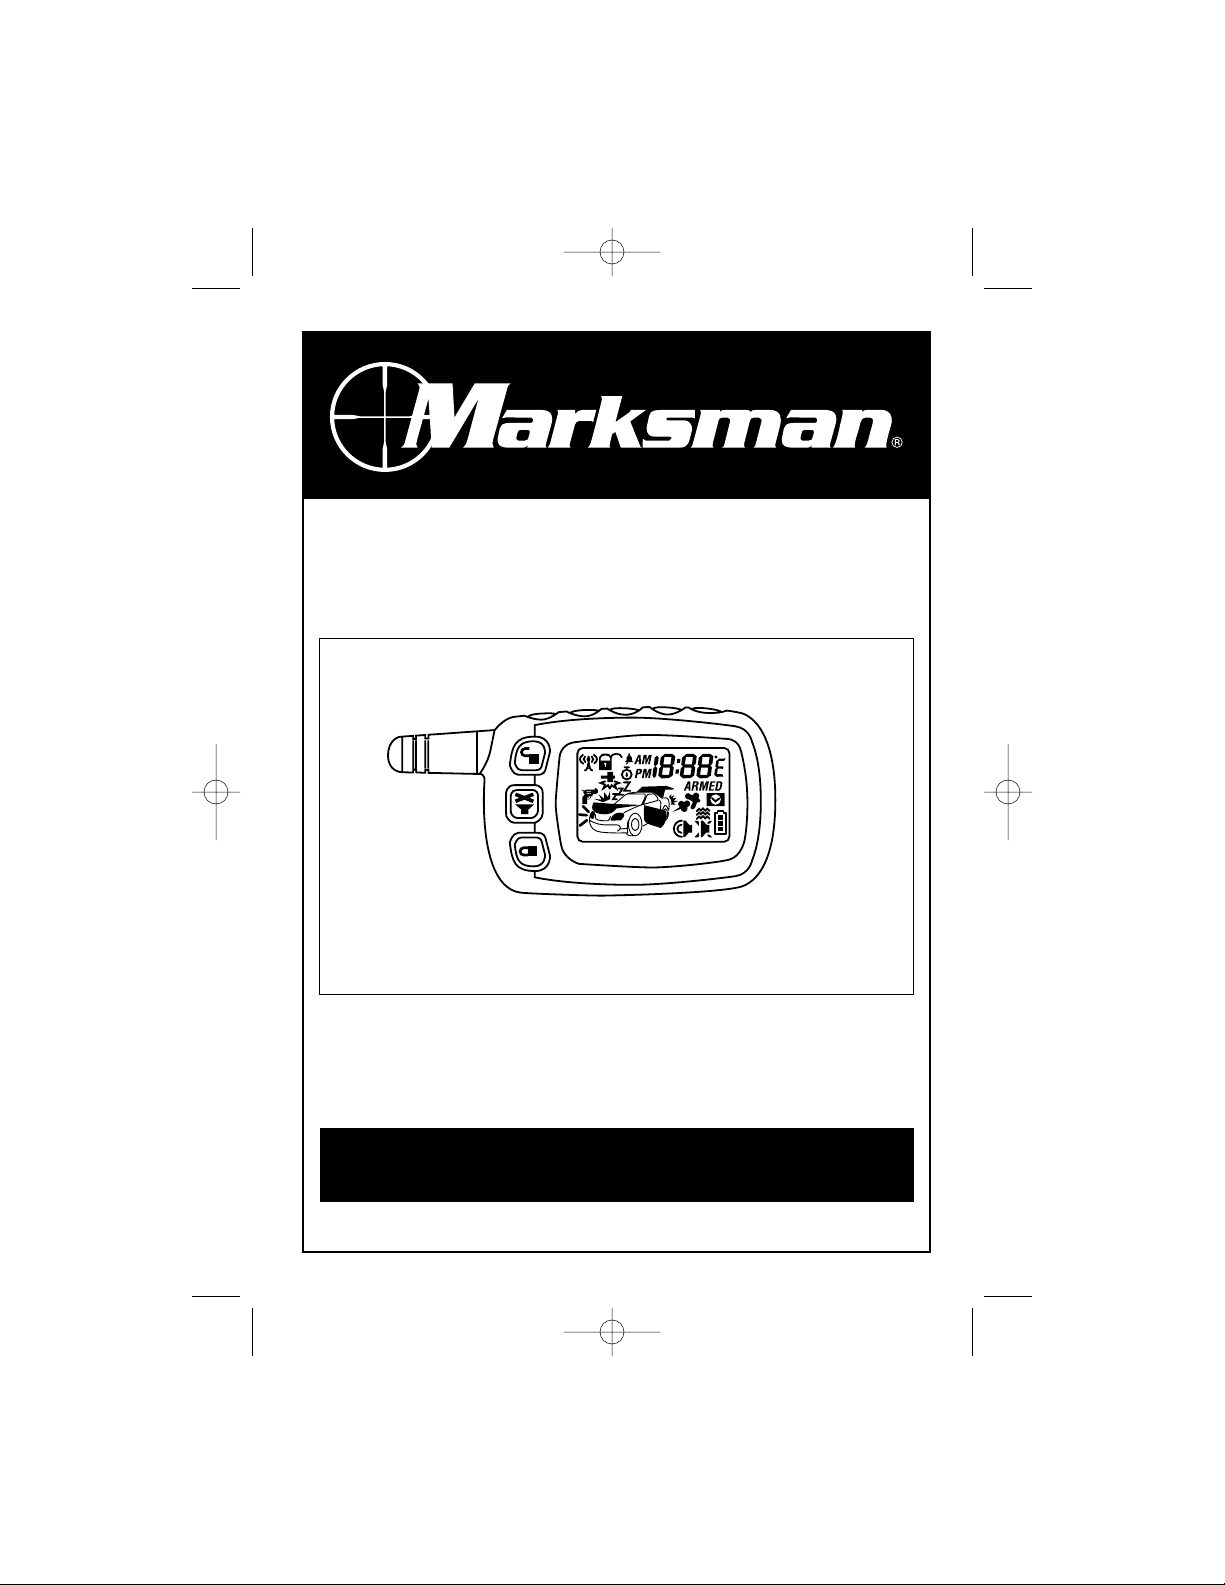
User’s Manual
Model: M10RF-LCD
Two Way Communication LCD Screen Transmitter
M10RF-LCD-UM 1/25/02 9:04 AM Page 1
Page 2
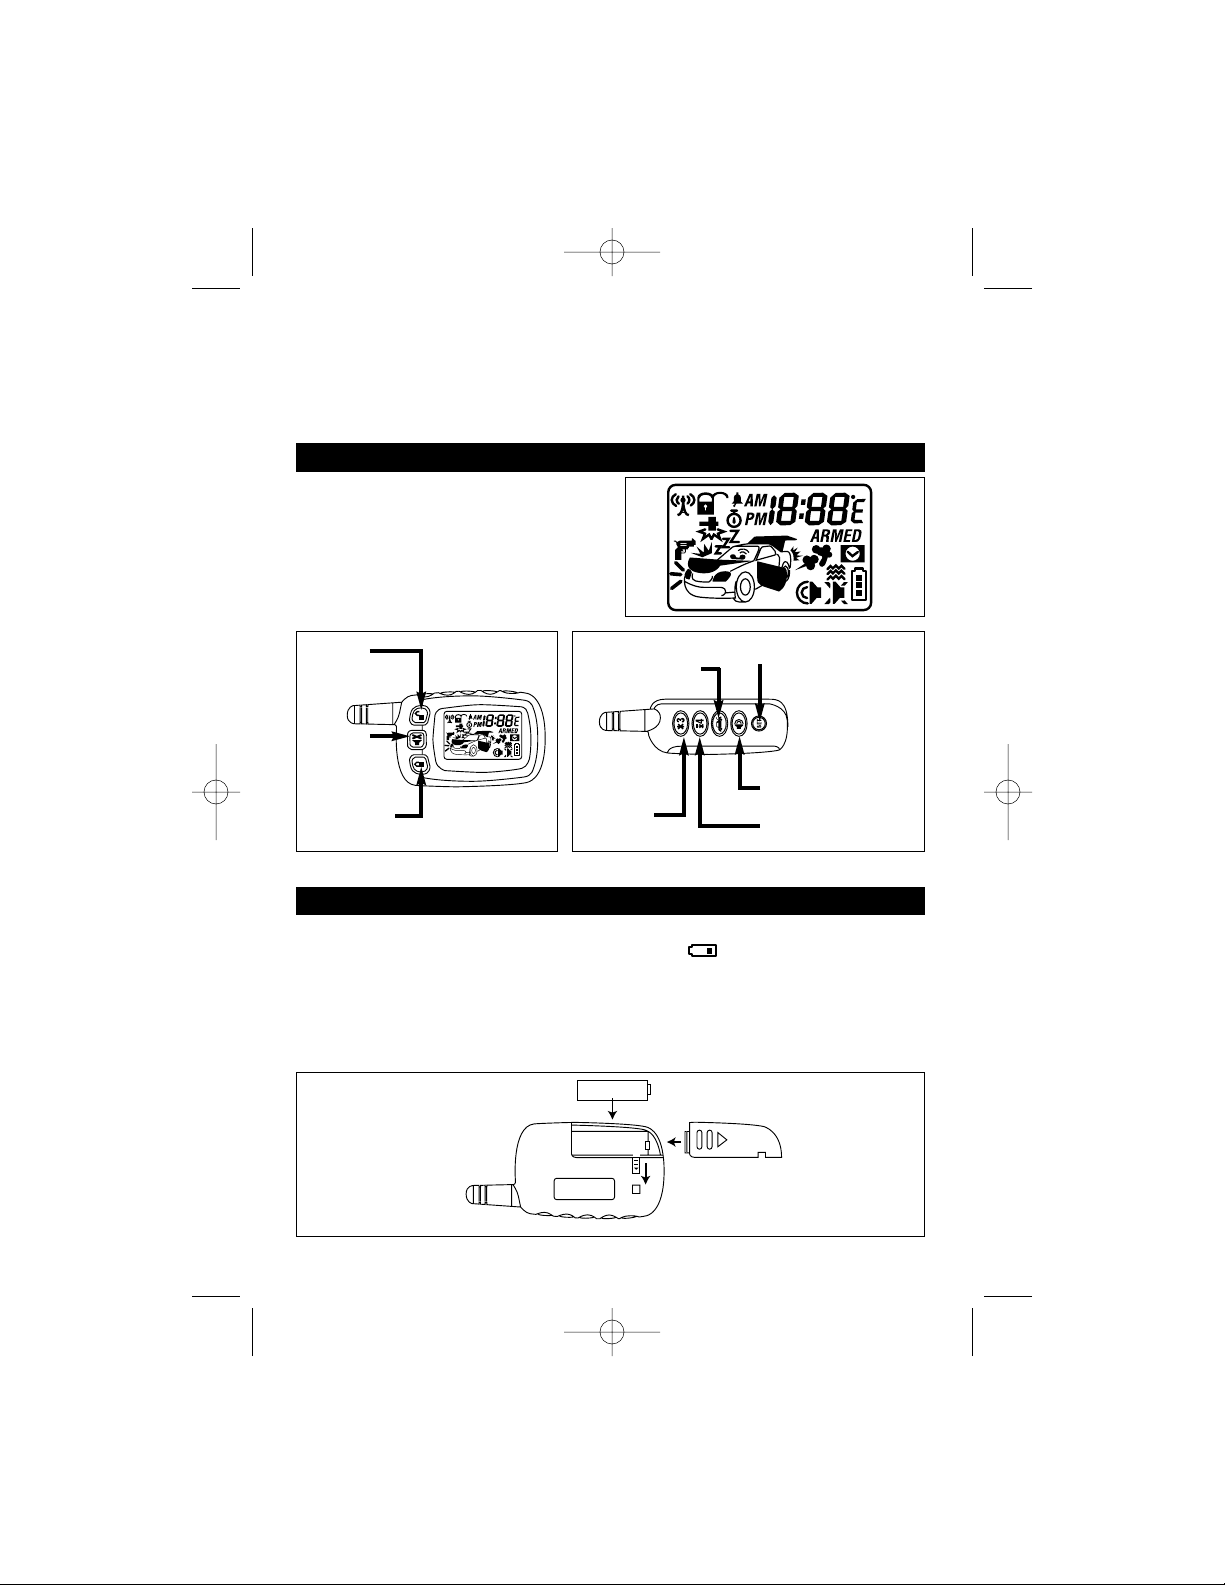
The remote control is powered by a 1.5V type AAA Alkaline battery. When the power of the battery
weakens the battery icon will be displayed on the LCD screen. When the old battery is replaced
to the new one, there will be a beep to indicate the power is up and the clock on the LCD screen
returns to AM12:00 after displaying all the icons. Correct the time by pressing SET for 3 seconds
before using. Note: Even if the battery is replaced, your programmed set value shall remain
unchanged. The remote control automatically reads and memorized all the previous set information
saved in the main control module.
2
Congratulations on your purchase of a quality Marksman automotive security and remote start
system. Marksman automotive security products have been designed to provide the consumer with
a product that is technologically superior and will provide years of trouble free operation. The
information enclosed will provide a ready reference of the operation and maintenance of your new
Marksman security and remote start system.
Remote Control Transmitters
Door
Unlock/Disarm
Silent
Arm/Disarm
Door Lock/Arm
Battery Replacement
Engine Start/
Channel 3
Engine Stop/Channel 4
Trunk Release/System’s
Status Check
Car Locater/Panic
Turn on the Light,
Clear Trigger Icon,
Feature Setting
The LCD screen on the remote control displays
graphic icons or figures. It provides you visual
information on any trigger of the sensors and
around the clock surveillance to your armed
vehicle as well as showing the present status of
the system
SET:
M10RF-LCD-UM 1/25/02 9:04 AM Page 2
Page 3
3
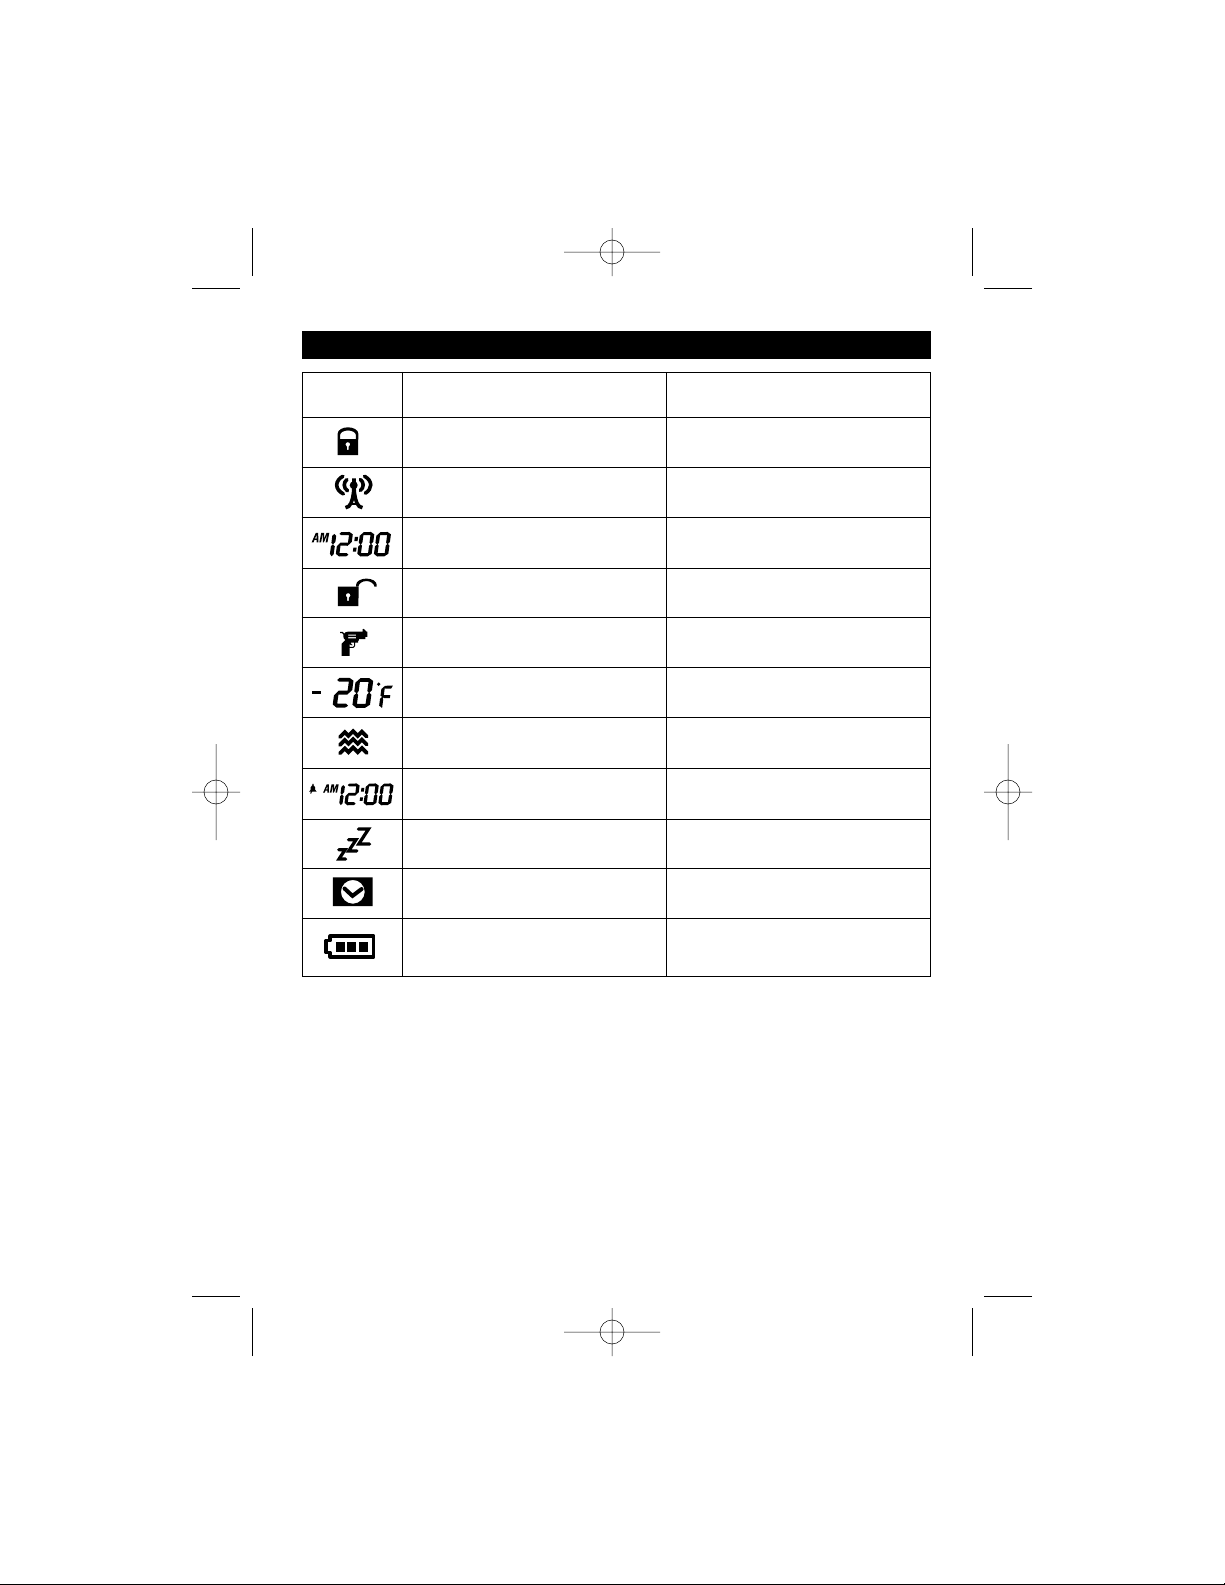
LCD Screen
Icon Function Remark
Icon
Door Lock Your Vehicle Doors are Locked
Remote Transmission You are Transmitting a Signal
Time Monitor Time Indicator of Your Vehicle
Door Unlock Your Vehicle Doors are Unlocked
Anti-car jacking Mode
Your Vehicle is Activated with Anti-Car jacking
Temperature Monitor Indoor Temperature of Your Vehicle
Vibration Mode (Optional)
Remote Control Vibrates when the Security
System is triggered
Alert Alarm You Have Set Alert Timer
Valet Mode
All Security System Functions will be
Temporarily Held
Timer Controlled Start
At the Set Time (3-24 hrs.) Engine Starts
Automatically
Battery Charge Battery Duration Indicator
Remote Control Transmitters
Warning:
Press the SETbutton a couple times
when the battery compartment is empty,
then insert the new battery.
M10RF-LCD-UM 1/25/02 9:04 AM Page 3
Page 4

4
LCD Screen
Icon Function Remark
Icon
Trunk/Hood Trigger Trunk or Hood is Illegally Opened (Zone 2)
Optional Sensor Triggered Optional Sensor Triggered (Zone 4)
Silent Arming Operating in Silent Mode (Armed/Disarmed)
Count Down Timer Reminder when Time is up for Parking Meter
Arming Mode Your Vehicle Security System is Armed
Engine Start Your Vehicle’s Engine is Running
Driver Paging (Optional)
Someone is Paging you in Front of your
Vehicle
Opened Door Warning Doors are Illegally Opened (Zone 3)
Shock Sensor Triggered On Board Trigger Sensor Activated (Zone 1)
Remote Control Transmitters
About LCD Screens
FLASHING
Note: Press Button, with one melody sound, the system’s status will be shown on the LCD
Screen.
M10RF-LCD-UM 1/25/02 9:04 AM Page 4
Page 5

5
Programming of Two-Way Remote Control
Transmitter
Description Operation
Button
LCD Screen Lamp ON Press Once Lamp on for 5 Seconds
SET
Clear the Trigger Icon’s on the LCD Screen Press and Hold for 2 Seconds
SET
Set up Fixed Count Down Timer Press Both Button Cycling
10 min, 20 min, 30 min, 1 Hr., 1.5 Hr., 2 Hr. *Leave Both Buttons Starting Count
Down Then Icon Flashes
SET +
Alert Alarm Settings (On/Off)
Press Both Buttons Switching Alarm
On Indicates on the Screen
SET +
Press Both Buttons Switching
Set-Up Vibration/Melody Mode
* Vibration Mode indicates
* Melody Mode without but Response
Melody
SET +
Screen Lamp ON:
Press (SET) button once and the screen display will stay on for 5 seconds.
Clear the Trigger Icons:
Press (SET) button once for 2 seconds then “2-Beep” tones will sound. It will clear the trigger
icons on the LCD screen
Set-Up Fixed Count Down Timer:
Press (SET+ ) buttons simultaneously to adjust fixed count down timer.
Example: Press button (SET+ ) once simultaneously showing time on the screen (ie. :10)
Release the button and it starts to count down. Press both buttons simultaneously again
showing next order time on the screen (ie.0:20), press them again (ie.0:30)...and so on.
Note: 1. the count down period is fixed as 10 min., 20 min., 30 min., 1hr., 1.5 hr and 2 hr. max.
Note:2. When count down timer showing 0:00 means to turn off the timer.
Note: 3. Press (SET) for real time indication when the timer is counting down.
Alert Alarm Setting (ON/OFF):
Press (SET + ) simultaneously to set up alert alarm On/Off.
Example: Press button (SET+ ) once simultaneously then, the screen shows
and alarm time (ie 12:00) to turn on the alert alarm.
Press both buttons once again then disappears to turn off the alert alarm.
Set-Up Vibration/Melody Mode:
Press (SET+ ) buttons simultaneously to select the Vibration or melody mode.
Example: Press buttons (SET+ ) once simultaneously the screen shows to turn on the
vibration mode
Press both buttons once again then icon disappears and responds with melody.
Programming of Two-Way Remote Control
M10RF-LCD-UM 1/25/02 9:04 AM Page 5
Page 6

6
Timer Setting
Transmitter
Description Operation
SET Button
Time Setting (Hour) for (-) and for (+)
Time Setting (Minute) for (-) and for (+)
Press & Hold
for 4 Seconds
Once
Alert Alarm Time Setting (Hour) for (-) and for (+)
Once
Alert Alarm Time Setting (Minute)
for (-) and for (+)
Once
Count Down Timer Setting (Hour)
for (-) and for (+)
Max. 19 Hrs. 59 Min.
Once
Count Down Timer Setting (Minutes)
for (-) and for (+)
Max. 19 Hrs. 59 Min.
Once
Count Down Timer Setting (On/Off) for (Off) and for (On)
Once
Timer Setting Exit:
Press and hold "SET" button for 4 seconds or for 10 seconds, the system will exit the
programming mode
Programming:
Press "SET" once for 4 seconds then listen for 3 Beep sounds. It is now in programming mode.
Press to decrease digits of the hour and to increase digits of the hour.
Press "SET" once again then the minute digit is flashing for adjustments.
Press to decrease digits of the minutes and to increase digits of the minutes.
Example: Time setting at AM 10:30
Press "SET" once for 4 seconds, the hour digit begins to flash.
Press or to decrease or increase the hour digit until AM 10:XX.
Press "SET" once again, the minute digits begin to flash.
Press or to decrease or increase the minute digit until AM 10:30.
Alert Alarm Setting (On/Off)
for (Off) and for (On)
Once
M10RF-LCD-UM 1/25/02 9:04 AM Page 6
Page 7

Alert Alarm Time Setting
Programming:
Press and hold (SET) button for 4 seconds until it beeps three times. It is now in Programming mode.
Press (SET) button twice, the alert alarm “Hour” digit is now flashing and the icon is on solid.
Press to decrease the “Hour” digit and to increase the “Hour” digit.
Press (SET) once again and the “Minutes” digit flashes for adjustment.
Press to decrease the “Minute” digit and to increase the “Minute” digit.
Press (SET) once again, and icon flashes for alert alarm On/Off adjusting.
Press button for “Off” and Button for “On” of the alert alarm.
Example: Set alert alarm time at PM 6:30
1.Press (SET) once for 4 seconds to set the “Hour” digit.
2.Press (SET) twice and the alert alarm “Hour” digit flashes.
3.Press icon to increase or icon to decrease the hour digit until desired time.
4.Press (SET) once again to change the “Minutes”.
5.Press icon to increase or icon to decrease the minutes digit until desired time.
6.Press (SET) once again for alert alarm On/Off adjustment.
7.Press icon for Off and icon for On.
Count Down Timer Setting
Programming:
1. Press and hold (SET) button for 4 seconds until it beeps three times. It is now in
Programming mode.
2. Press (SET) button 5 Times, the hour digit flashes and the icon starts flashing.
3. Press to decrease the “Hour” digit and to increase the “Hour” digit.
Note: Maximum is 19 Hours
4. Press (SET) once again to change the “Minutes”.
5. Press icon to increase or icon to decrease the minutes digit until desired time.
6. Press (SET) once again then icon is solid for count down timer On/Off adjustment.
7. Press icon for Off and icon for On.
Example: Set alert alarm time at PM 6:30
1.Press (SET) once for 4 seconds to set the “Hour” digit.
2.Press (SET) 5 times and the count down “Hour” digit flashes.
3.Press icon to increase or icon to decrease the hour digit until desired time.
4.Press (SET) once again to change the “Minutes”.
5.Press icon to increase or icon to decrease the minutes digit until desired time.
6.Press (SET) once again for alert alarm On/Off adjustment.
7.Press icon for Off and icon for On.
7
M10RF-LCD-UM 1/25/02 9:04 AM Page 7
Page 8

Send Check or Money Order Only (No Cash) To:
Magnadyne Corporation
ATTN: Consumer Parts Sales
P.O. Box 5365
Carson, CA 90749-5365
SHIP TO: (No P.O. Boxes)
LAST NAME FIRST NAME INITIAL
STREET ADDRESS
ADDITIONAL ADDRESS
ADDITIONAL ADDRESS
CITY STATE ZIP CODE
DAY TIME PHONE NUMBER
PAR
T # DESCRIPTION
QTY. PRICE EACH TOTAL
Sales Subtotal = ________ . ______
California Residents Add Sales Tax = ________ . ______
Shipping and Handling (See Chart) = ________ . ______
TOTAL = ________ . ______
No C.O.D.’s
On regular orders please allow 4-5 weeks for delivery.
Please give a shipping address where this order may be delivered between the hours of 9 am and 5 pm weekdays.
If UPS is unable to deliver, your order will be returned and additional shipping charges will be required.
M10RF-LCD-UM
1-25-02 Rev. A
Parts and Accessories Order Form
Shipping and Handling
Subtotal + Tax Add
Up to $20.00 $5.00
20.01 to 30.00 5.95
30.01 to 45.00 6.50
45.01 to 70.00 6.95
Over 70.01 7.95
M10RF-LCD-UM 1/25/02 9:04 AM Page 8
 Loading...