


eaaaaaa_
important Safety Unstructions .. 1-4
Surface Cooking ......................... 5-6
Controls
Sealed Gas Burners
Oven Cooking ............................ 7-18
Man ual Clean Oven Controls
Clock Baking
Timer Broiling
Manual Cleon Oven Knob ControH
Baking Broiling
Self=Clean Oven Controls
Clock DeUay
Timer Keep Warm
Baking Broiling
Cook& Hold Oven Racks
@as Range
Form No, C/03/05 Part No. 8113P472-60 Rev.1 ®b2005 Maytag Appliances Sales Co. Litho U.S.A.

Model Number
Serial Number
any part of your appliance unless it is specifically recom-
mended in this guide. All other servicing should be
referred to a qualified servicer. Have the installer show
you the location of the gas shut off valve and how to
shut it off in an emergency.
Always disconnect power to appliance before servicing.
t-800-688-1120 (U.S.A and Canada}
Inourc0ntinu!ng effortto improve the qua!Jtyand performance
el our COOlingproducts, it may benecessaryto makechanges
to the appUiancew!thout revising this guide.
Fer senzice infermaden, see page 29.
Warning and Important Safety Instructions appearing in
this guide are not meant to cover all possible conditions
and situations that may occur. Common sense, caution,
and care must be exercised when installing, maintaining,
or operating the appliance.
Always contact the manufacturer about problems or
conditions you do not understand.
Recognize Safety Symbols, Words, Labels
If the information in this manual is not followed
exactly, a fire or explosion may resumt causing
property damage, personal injury or death.
- [}o not store or use gasohne or other flam-
mable vapors and liquids in the vicinity of this
or any appliance.
mFYOU SIVlELL GAS:
o Do not try to light any appliance.
- Do not touch any emectricam switch.
o Do not use any phone in your building.
- immediately can your gas supplier from a
neighbor's phone. Follow the gas supplier's
instructions.
o If you cannot reach your gas supplier, call
the fire department°
- instaUation and service must be performed by
a quahfied installer, service agency or the gas
su pplier,
by smet! n!Che, Gas SUpp!!ers recommend you put:
chase and insta!! an UL approved gas detector, Install
instructions.
COULD result in severe persona! injury or deathl
CAUTUON _ Hazards 0r unsafe Practices which
Genera instructions
COULD resuJtin minor personal injury,
Read and follow aH instructions before using this
appmiance to prevent the potential risk of fire, electric
shock, personal injury or damage to the appliance as a
result of improper usage of the appliance. Use appliance
only for its intended purpose as described in this guide.
To ensure proper and safe operation: Appliance must
be propedy installed and grounded by a qualified techni-
cian. Do not attempt to adjust, repair, service, or replace
ALL RANGES CAN TnP AN[}
CAUSE INJURIES TO PERSONS
F

To check if device is properly installed, look underneath
range with a flashlight to make sure one of the rear
leveling legs is properly engaged in the bracket slot. The
antPtip device secures the rear leveling leg to the floor
when properly engaged. You should check this anytime
the range has been moved.
Do not use water on grease fires. Use baking soda, a
dry chemical or foam-type extinguisher to smother fire
or flame.
Child Safety
To Prevent Fire or Smoke
Be sure all packing materials are removed from the
appliance before operating it.
Keep area around appliance clear and free from com-
bustible materials, gasoline, and other flammable vapors
and materials.
If appliance is installed near a window, proper precau-
tions should be taken to prevent curtains from blowing
over burners.
NEVER leave any items on the cooktop. The hot air from
the vent may ignite flammabb items and may increase
pressure in dosed containers which may cause them to
burst.
NEVER store items of interest to children in cabinets
above an appliance Or`on backguard 0f a range.
items could be seriously injured.
NEVER leave children alone or unsupervised near the
appliance when it is in use or is still hot.
NEVER allow children to sit or stand on any part of the
appliance as they could be injured or burned.
Children must be taught that the appliance and utensils
in it can be hot. Let hot utensils cool in a safe place, out
of reach of small children. Children should be taught
that an appliance is not a toy. Children should not be
allowed to play with controls or other parts of the unit.
Many aerosol-type spray cans are EXPLOSIVE when
exposed to heat and may be highly fiammabb. Avoid
their use or storage near an appliance.
About Your Appliance
Many plastics are vulnerabb to heat. Keep plastics away
from parts of the appliance that may become warm or
hot. Do not leave plastic items on the cooktop as they
may melt or soften if left too close to the vent or a
lighted surface burner.
To eliminate the hazard of reaching over hot surface
burners, cabinet storage should not be provided directly
above a unit. If storage is provided, it should be limited
to items which are used infrequently and which are
safely stored in an area subjected to heat from an
appliance. Temperatures may be unsafe for some items,
such as volatile liquids, cleaners or aerosol sprays.
In Case of Fire
Turn off appliance and ventilating hood to avoid spread-
ing the flame. Extinguish flame then turn on hood to
remove smoke and odor.
Cooktop: Smother fire or flame in a pan with a lid or
cookie sheet.
NEVER pick up or move a flaming pan.
Oven: Smother fire or flame by closing the oven door.
NEVER use appliance door as astep stool or seat as this
may result in possible tipping of the appliance and serious
mjudes.
NEVER use this appliance as a space heater to heat or
warm a room. Doing so may result in carbon monox-
ide poisoning and overheating of the oven.
NEVER cover any slots, hobs or passages in the oven
bottom or cover the entire rack with _aterials such as
aluminum foil. Doing so blocks air _:lowthrough the
oven and may cause carbon monoxide poisoning.
Aluminum foil may also trap heat causing a fire
hazard.
NEVER obstruct the flow of combustion and ventilation
air by blocking the oven vent or air intakes. Doing so
restricts air to the burners and may result in carbon
monoxide poisoning.
2
The oven vent is located at the base of the backguard.
Avoid touching oven vent area while oven is on and for
several minutes after oven is turned off. Some parts of
the vent and surrounding area become hot enough to

causeburns.Afterovenisturnedoff,donottouchthe
ovenventorsurroundingareasuntiltheyhavehad
sufficienttimetocool.
Otherpotentiallyhotsurfacesincludecooktop,areas
facingthecooktop,ovenvent,surfacenearthevent
opening,ovendoor,areaaroundtheovendoorand
ovenwindow.
Do not touch a hot oven light bulb with a damp cloth as
the bulb could break Should the bulb break, disconnect
power to the appliance before removing bulb to avoid
electrical shock
Do not use the cooktop or ovens as a storage area for
food or cooking utensils.
Ceeking Safety
Always place a pan on a surface burner before turning it
on. Be sure you know which knob controls which
surface burner. Make sure the correct burner is turned
on and that the burner has ignited. When cooking is
completed, turn burner off before removing pan to
prevent exposure to burner flame.
Always adjust surface burner flame so that it does not
extend beyond the bottom edge of the pan. An exces-
sive flame is hazardous, wastes energy and may damage
the appliance, pan or cabinets above the appliance.
NEVER leave a surface cooking operation unattended
especially when using a high heat setting or when deep
fat frying. Boiiovers cause smoking and greasy spiliovers
may ignite. Clean up greasy spills as soon as possible.
Do not use high heat for extended cooking operations.
NEVER heat an unopened container on the surface
burner or in the oven. Pressure build-up may cause
container to burst resulting in serious personal injury or
damage to the appliance.
Use dry, sturdy potholders. Damp potholders may cause
burns from steam. Dish towels or other substitutes
should never be used as potholders because they can
trail across hot surface burners and ignite or get caught
on appliance parts.
Always let quantities of hot fat used for deep fat frying
coo[ before attempting to move or handle.
Do not let cooking grease or other flammable materials
accumulate in or near the appliance, hood or vent fan.
Clean hood frequently to prevent grease from accumu-
lating on hood or filter. When flaming foods under the
hood turn the fan on.
NEVER wear garments made of flammable material or
loose fitting or long-sleeved apparel while cooking.
Clothing may ignite or catch utensil handles.
Always place oven racks in the desired positions while
oven is coo[. Slide oven rack out to add or remove food,
using dry, sturdy potho[ders. Always avoid reaching into
the oven to add or remove food. If a rack must be moved
while hot, use a dry potho[der. Always turn the oven off at
the end of cooking.
Use racks only in the oven in which they were shipped/
purchased.
Use care when opening the oven door. Let hot air or
steam escape before moving or replacing food.
PREPARED FOOD WARNUNG: Follow food
manufacturer's instructions, if a plastic frozen food
container and/or its cover distorts, warps, or is otherwise
damaged during cooking, immediately discard the food
and its container. The food could be contaminated.
NEVER use aluminum foil to cover oven racks or oven
bottom. This could result in risk of electric shock, fire, or
damage to the appliance. Use foil only as directed in this
guide.
Utensil Safety
Use pans with flat bottoms and handles that are easily
grasped and stay cool. Avoid using unstable, warped,
easily tipped or loose-handled pans. Also avoid using
pans, especially small pans, with heavy handles as they
could be unstable and easily tip. Pans that are heavy to
move when filled with food may also be hazardous.
Be sure utensil is large enough to properly contain food
and avoid boilovers. Pan size is particularly important in
deep fat frying. Be sure pan will accommodate the vol-
ume of food that is to be added as well as the bubble
action of fat.
To minimize burns, ignition of flammable materials and
spillage due to unintentional contact with the utensil, do
not extend handles over adjacent surface burners. Always
turn pan handles toward the side or back of the appli-
ance, not out into the room where they are easily hit or
reached by small children.
Never let a pan boil dry as this could damage the utensil
and the appliance.
Follow the manufacturer's directions when using oven
cooking bags.
:3

Only certain types of glass, glass/ceramic, ceramic or
glazed utensils are suitable for cooktop or oven usage
without breaking due to the sudden change in tempera-
ture. Follow manufacturer's instructions when using
glass.
This appliance has been tested for safe performance
using conventional cookware. Do not use any devices or
accessories that are not specifically recommended in
this guide. Do not use eyelid covers for the surface
units, stovetop grills, or add-on oven convection sys-
tems. The use of devices or accessories that are not
expressly recommended in this manual can create
serious safety hazards, result in performance problems,
and reduce the life of the components of the appliance.
Cmeaning Safety
Turn off all controls and wait for appliance parts to cool
before touching or cleaning them. Do not touch the
burner grates or surrounding areas until they have had
sufficient time to cool.
Clean appliance with caution. Use care to avoid steam
burns if a wet sponge or cloth is used to wipe spills on a
hot surface. Some cleaners can produce noxious fumes
if applied to a hot surface.
Self-Clean Oven (select models)
Do not leave food 0Fcooking utensils, etc, in the even
during the self-clean cycie.
Clean only parts listed in this guide. Do not clean door
gasket. The door gasket is essential for a good seal.
Care should be taken not to rub, damage, or move the
gasket. Do not use oven cleaners of any kind in or
around any part of the self-clean oven.
Before self-cleaning the oven, remove broiler pan, oven
racks and other utensils and wipe up excessive
spillovers to prevent excessive smoke, flare-ups or
flaming.
It is normal for the cooktop of the range to become hot
during a self-clean cycle. Therefore, touching the
cooktop during a clean cycle should be avoided.
important Safety Notice and
The California Safe Drinking Water and Toxic Enforce-
ment Act of 1986 (Proposition 65} requires the Governor
of California to publish a list of substances known to the
State of California to cause cancer or reproductive harm,
and requires businesses to warn customers of potential
exposures to such substances.
Users of this appliance are hereby warned that the
burning of gas can result in low-level exposure to some
of the listed substances, including benzene, formalde-
hyde and soot, due primarily to the incomplete combus-
tion of natural gas or liquid petroleum (LP} fuels. Prop-
erly adjusted burners will minimize incomplete combus-
tion. Exposure to these substances can also be mini-
mized by properly venting the burners to the outdoors.
Users of this appliance are hereby warned that when
the oven is engaged in the self-clean cycle, there may
be some low-level exposure to some of the listed
substances, including carbon monoxide. Exposure to
these substances can be minimized by properly venting
the oven to the outdoors by opening the windows and/
or door in the room where the appliance is located
during the self-clean cycle.
IMPORTANT NOTICE REGARDING PET BIRDS:
Never keep pet birds in the kitchen or in rooms where
the fumes from the kitchen could reach. Birds have a
yen/sensitive respiratory system. Fumes released during
an oven self-cleaning cycle may be harmful or fatal to
birds. Fumes released due to overheated cooking off, fat,
margarine and overheated non-stick cookware may be
equally harmful.
Save These instructions for Future Reference
4

Low: Use to simmer foods, keep foods
warm and malt chocolate or butter. Some
cooking may take place on the Low
setting if the pan is covered.
High: Use to bring liquid to a boil, or reach
pressure in a pressure cooker. Always
reduce setting to a lower heat when liquids
begin to boil or foods begin to cook.
Med: An intermediate flame size is used to
continue cooking. Food will not cook any
faster when a higher flame setting is used
than needed to maintain a gentb boil.
Water boils at the same temperature
whether boiling gendy or vigorously.
Surface Controls
• Ifflame should go out during a cooking operation, turn
the burner off. If a strong gas odor is detected, open a
window and wait five minutes uefore relighting the
burner
- Be s_re all surface controls are set in the OFF position
prior to supplying gas to the range.
- NEVERtouch cooktop until it has cooled. Expec_some
parts of the cooktop, especiaii} around the burners, to
become warm or hot during cooking. Use potholders to
Pilotless ignition (selectmodels)
Pilotless ignition ehlinates the need for a constant standing
pilot light. Each sealed burner has a spark ignitor. There are
two ignitors for conventional surface burners. When cleaning
around the surface burner use care. If cleaning cloth should
catch the ignitor, it could be damaged, preventing ignition.
If the surface burner does not
light, check if ignitor is __N_.EAO
broken, soiled or wet. If /t/ ///Xt,"
clogged, dean tile _ _,, " _ X
small port beneath (_ _ _ _#k -1
tileignitor PORTB /
using a _.
straight pin. _ NIGNITOR
PORT BELOW IGNITOR
Pimot ignition (selectmodels)
When the range is first installed, the standing pilots may be
difficult to light due to air in the gas line. To bleed off air from
the line, hold a lighted match next to the burner and turn the
knob on. When the burner lights, turn the knob off and
proceed as directed below.
To light pilot:
Raisethe cooktop and hold a
lighted match near the pilot
ports (:Seeillustration}. There
are two pilot ports, one on the
right side and one on the left
side.
Surface Control Knobs
Use to turn on the surface burners= An infinite choice of heat
settings is available from Low to High. At the High setting a
detent or notch may be felt. The knobs can be set on or
between any of the settings.
0 0 Graphics next to the knob identify which burner the
knob controls. For example, the graphic at left shows
0 the left front burner location.
Setting the controls:
The size and type of cookware will affect the heat setting. For
information on cookware and other factors affecting heat
settings, refer to "Cooking Made Simple" booklet.
1. Place a pan on the burner grate.
" The burner flame may lift off or appear separated from
the port if a pan is not placed on the grate.
2. Push in and turn the knob counterclockwise to the Lite
setting.
" A ciicking (spark} sound wiii be heard and the burner
wiii iighL (Aii ignitors wiii spark when any surface
burner knob is turned to the Lite position.}
3. After the burner lights, turn knob to desired flame size.
The ignitor wiii continue to spark until the knob is
turned past the Lite position.
5

Operating During a
Power Failure
When lighting the
controls are in the OFF position, Strike the match first and
hoM it in position before tur!ing the knob to Lite,
1. Hold a lighted match to the desired surface burner head.
2. Push in and turn the control knob slowly to Lite.
3. Once lit, adjust the flame to the desired level.
To prevent the cooktop from discoloring or
staining:
, Clean cooktop after each use.
" Wipe acidic or sugary' spills as soon as the cooktop has
cooled as these spills may discolor the porcelain.
Sea ed Burners
The sealed burners of your range are secured to the cooktop
and are not designed to be removed. Since the burners are
sealed into the cooktop, boilovers or spills will not seep
underneath the cooktop.
However, the burner should be cleaned
after each use. (See page 21 for cleaning
directions.}
Unlike a range with standard gas burners,
this cooktop does not lift-up nor is it
removable. Do not attempt to lift the
oktop for any reason.
Conventional Burners
Freestanding ranges with conventional gas burners feature a
lift-up cooktop.
TO raise the cook, top:
When cool, grasp the front edge
of the cook-top and gently lift up
until the two support rods, if
I
equipped, at the front of the i
cooktop snap into place, i
TO lower:
Hold the front edge of the cooktop and carefully push back
on each support rod, if equipped, to release the notched
support. Then gently lower the top into place. The support
rods will slide into the cooktop frame.
High Performance Burner
(select models} (12,000 BTU
There is one high speed burner on your range, located in the
right front position. This burner offers higher speed cooking
that can be used to quickly bring water to a boil and for large-
quantity cooking.
Simmer Burner (select models}
This burner is located in the left rear position. The simmer
burner offers a lower BTU*flame for delicate sauces or
melting chocolate.
BTU ratings will vary when using LPgas,
Burner Grates
The grates must be properly positioned before
cooking. Improper installation of the grates may
result in chipping of the cooktop.
Do not operate the bamers without a pan oil
the grate. The grate's porcelain finish may chip
without a pan to absorb the heat from the
bamer flame.
Although the burner grates are durable, they will gradually
lose their shine and/or discolor, due to the high temperatures
of the gas flame.
6
A properly adjusted burner with clean ports will light
within a few seconds. If using natural gas, the flame
will be blue with a deeper blue inner cone.
If the burner flame is yellow or is noisy, the air/gas
mixture may be incorrect. Contact a service technician
to adjust. (Adjustments are not covered by the war-
ranty.}
With LPgas, slight yellow tips on the flames are
acceptable. This is normal and adjustment is not
necessary'.
" With some types of gas, you may hear a "popping"
sound when the surface burner is turned off. This is a
normal operating sound of the burner.
" If the control knob is turned very quickly from High to
Low, the flame may go out, particularly if the burner is
cold. If this occurs, turn the knob to the OFF position,
wait several seconds and relight the burner.
" The flame should be adjusted so it does not extend
beyond the edge of the pan.

Manual Clean Oven Control
(:select models)
A B
BROIL ....................
TIMER CLOCK CANCEL
e D E F
NOTE: The display will show 12:00 when the appliance is first connected to power or if power is interrupted. The Bake and Broil
indicators light when function is pressed.
A
B
D
F
BAKE
BROIL
TIMER
CLOCK
CANCEL
A {More} or
V {Less}
Use for baking and roasting.
Usefor broiling and top browning.
Sets timer.
Use to set time-of-day clock.
Cancels all operations except timer
and clock.
Enters or changes time, oven
temperature. Sets HI or LO broil
Using the Teuehpads
° Pressthe desired pad.
° Pressthe A or V pad to enter time or temperature.
° A beep will sound each time a function pad is pressed.There
is no beep for the A or V pad.
° A double beep will sound if a programming error occurs.
Note: Four seconds after pressing the A or V pad, the
time or temperature will automatically be entered, if more
than 30 seconds elapse between touching a function pad
and the A or V pad, the function will be canceled and the
display will return to the previous display.
Setting the Clock
CLOCK
1. Press the CLOCK pad.
° The clock time cannot be set if the control is pro-
grammed for a bake, broil or timing operation.
2. Set the correct time of day using the A or _ pads. if the
A or V pad is not pressed within 30 seconds, the program
will cancel Pressthe CLOCKpad and begin again.
Setting the Timer
The timer can be set from one minute {:01} up to 99 hours
and 59 minutes {99:59}. Time will be displayed in minutes and
not in seconds. THE TIMER DOES HOT COHTROL THE
Pressthe TIMER pad. 11MER
, 0:00wiii light and the colon (:} wiii flash in
the display.
2. Pressthe A or V pad untii the desired time is displayed.
° The timer wiii begin as soon as the time is set.
° The flashing colon indicates that a timing operation is in
progress. Crhe colon wiii not flash if the time of day or
oven temperature is displayed.}
° Two short beeps signal the end of the operation. "0:00"
will appear in the display.
If desired, press the CLOCK pad and the time of day will
briefly reappear in the display during a timing operation.
If desired, press the BAKE or BROIL pads and the
current temperature setting will briefly reappear in the
display during a timing operation.
To cancel the timer operation:
Press and hold the TIMER pad for several seconds.
7

Baking, Roasting and Broiling
Foradditional baking, roasting and broiling times and tips, see
"Cooking Made Simple" booklet,
Setting the Controls For Baking or Roasting:
1= PressBAKE pad=
, 000 will light and the Bake indicator light [BAKIFi
will flash in the display. ........
, If you press the BAKE pad and do not set an oven temp-
erature within 30 seconds, the program will automatically
cancel and the time of day will reappear in the display.
2. Press the A or V pad until the desired oven temperature is
displayed.
, The oven temperature can be set from 170°to 550° R
, 350° will appear in the display when either A or V pad
is pressed once.
, Press and tap the A or V pad to change the oven temp-
erature by 5° increments or press and hold the A or V
pad to change the oven temperature by 10° increments.
, 100° or the actual oven temperature, whichever is higher,
will appear in the display when the oven turns on.
, The temperature in the display will increase in 5°
increments until preset temperature is reached. A single
beep will sound when the oven is preheated.
, Allow 10 to 15 minutes for the oven to preheat.
, To recall preset temperature during preheat, press the
BAKE pad. The temperature will be displayed for three
seconds.
, To change oven temperatare daring cooking, press
the Bake pad, then press the A or V pad until the
desired temperature isdisplayed.
3,
4.
, To change oven temperatare daring preheat, press
the Bake pad twice, then press the A or V pad until
the desired temperature is displayed.
Place food in the oven. Check food for aloneness at the
minimum cooking time.
At the end of cooking, press the CANCEL pad to turn the
oven off and remove the food from the oven.
5. After broiling, press CANCEL to turn the oven
off and remove the broiler pan from the oven.
The current time of day will reappear in the
Broiling Chart - Lower Corn artment display.
I LOWEROOBaPARTBaENT_ _
FOOD DONENESS 8RO_LING POS_TmON* _ (MINUTES_
Beef Steaks, 1" thick Medium Middle 14 - 20 rain=
Well Done Middle 16 - 24 rain.
Hamburger Patties, 3/4" thick Well Done Middle 16- 24 min.
Pork Ham, precooked 1/2" slice Warm Middle 8 - 12 rain.
Chops, 1" thick Well Done Middle 18- 25 min.
Chicken Pieces Well Done Bottom (Lo Broil 450° FJ
30-45 min.
Seafood Fish filets Flaky Middle 8 - 12 min.
Fish steaks, 1" thick Flaky Middle 10 - 15 rain.
, The oven features an automatic shut-off= If the oven is
left on for 12 hours it will automatically turn off and 000
will appear in the display. Pressthe CANCEL pad and
the time of day will reappear in the display.
Setting the Controls For }}roiling:
(lower compartment - select models]}
For best results, use pan designed for broiling.
1= Place broiler pan on recommended broiling compartment
position shown in the chart below.
2= Pressthe BROIL pad=
, SETwill light and the
Broil indicator light ....
will flash in the display.
3= Pressthe A pad to select Hi (high} broil or the V pad to set
Lo Llow} broil.
, Select Hi broil for normal broiling.
, Select Lo broil for low temperature broiling to avoid
excessive browning of longer cooking foods like poultry.
If you do not select Hi or Lo Broil within 30 seconds, the
program will automatically cancel and the time of day
will reappear in the display.
4. Follow the suggested times in the broil chart below. Meat
should be turned once about halfway through cooking time.
Upper is the top position; middle istile lower position; bottom is the bottom of tile broiler compartment (removethe rack}.
** This chart is a suggested guide. The times may vary with the food being cooked.
8

Manuam Clean Oven
Knob Control
(:select models:)
Oven Temp Knob
The Oven Temp knob is used to sdect
and maintain the oven temperature. AHways
_J
turn this knob just to the desired temperature. Do not turn to
a higher temperature and then back.
Setting the Control for Baking and Roasting:
1. Push in and turn Oven Temp knob to desired temperature.
AHow 10-15 minutes for preheating.
2. Hace food in the center of oven. Check food for aloneness
at minimum time in recipe. Cook Hongerif necessary.
3. Remove food from oven and turn Oven Temp knob to OFF.
Note: For additional baking, roasting and broiling tips, see
"Cooking Made Simple" booklet.
Setting the Control for Broiling:
1. For best results, use a broiling pan. Place the broiler pan
on recommended rack position (see chart on page 8).
2. Turn Oven Temp knob to BROIL or, for lower temperature
broiling, to 450° F.
, Lower temperature broiling avoids excessive browning
of longer cooking foods such as poultry.
3. Follow the suggested times in the broil chart on page 8.
Meat should be turned once about halfway through
cooking time.
4. Check the aloneness by cutting a slit in the meat near the
center to check the color.
5. After broiling, turn the Oven Temp knob to OFF. Remove
the broiler pan from the oven.
Pilotless ignition (selectmodels:)
Your range is equipped with pilotless ignition. With this type
of ignition system, the gas automatically shuts off and the
oven will not operate during a power fai/ureo
A lighted match will not light the oven burner. No attempt
should be made to operate the oven during a power failure.
Pi ot ignition (selectmodels:)
Light the right rear burner first before lighting the oven pilot
light. This will remove air from the gas system and aid in the
ignition of the pilot light. If this step is not performed, ignition
time may be longer than expected.
To light pilot:
When cool, open the broiler door and remove the broiler rack
and broiler pan.
While in the OFF position, push in and hold the
Oven Temp knob and hold a lighted match
to the pilot located at the back of the
oven burner (see illustration:). Once
the pilot lights, let go of the
Oven Temp knob and replace
\_ the broiler rack and pan. (NOTE:
The oven burner is shown with
the metal flame spreader
removed.)

Se f-C ean Oven Contro (seWectmodels}
A B
BAKE
C
V
D
TIMER
COO_{& KEEP
HO_D CLEAN DE_AY CLOCK WARM
E F G H J
The control panel isdesigned for easein programming. Thedisplaywindow on thecontrol shows time ofday, timer and oven functions.
Control panel shown includes model specific features. (Styling may vary depending on modek}
A
B
C
D
E
H
BROIL
BAKE
More (A} or
Less (V}
TIMER
COOK& HOLD
CLEAN
DELAY
CLOCK
KEEPWARM
CANCEL
Use for broiling andtop browning.
Use for baking and roasting.
Enters or changes time, oven
temperature. Sets HI or LO broik
Sets timer.
Bakes for apreset time, then holds food
warm for 1 hour.
Use to set self-clean cycle.
Programs the oven to start baking at
a later time.
Use to set time of day clock.
Use to keep cooked food warm in oven.
Cancels all operations except timer
and clock.
Using the Teuchpads
Pressthe desired pad.
Pressthe A or V to enter time or temperature.
° A beep wiiI sound when any pad is touched.
° A double beep wiii sound if a programming error occurs.
Note: Four seconds after pressing the A or V pads, the
time or temperature will automatically be entered. If more
than 30 seconds elapse between touching a function pad
and the A or V pads, the function will be canceled and
the display will return to the previous display.
The clock can be set to display time in a 12-hour or 2a-hour
format. The clock is set at the factory for the 12-hour format.
To change the clock to 24-hour format:
1. Pressand hold the CANCEL and DELAY
pads for three seconds.
2. Press A or T to select 12 or 24 hour. -- CANCEL
3. Set the time of day following the ............
directions below. -- DELAY
To set the Cmock: ..............
1. Pressthe CLOCKpad.
° Time of day and colon flash in the
display. CLOCK
2. Press A or V to set the time of day.
° Colon continues flashing.
3. Pressthe CLOCKpad again or wait four
seconds.
When electrical power is supplied or after a power
interruption, the last clock time before power was
interrupted wiii flash.
To recall the time of day when another time function is
showing, press the CLOCK pad.
Clock time cannot be changed when the oven has been
programmed for cook or clean Delay or Cook & Hold.
conto
10

To cance! the Clock display:
If you do not want the time of day to display: ................
Press and hold the CANCEL and CLOCK pads
for three seconds. The time of day wiiI
disappear from the display
When the dock display is cancebd, press -- CLOCK
the CLOCK pad to brbfly display the time of day...............
To restore the Cmockdisplay:
Press and hold the CANCEL and CLOCK pads for three
seconds. The time of day wiiI reappear in the display.
The timer can be set from one minute (00:01] up to 99 hours
and 59 minutes (99:59].
The timer can be used independendy of any other oven
activity. It can abo be set while another oven function is
operating.
The Timer does not control the oven. It only controls a
beeper.
To set the Timer: .................................
1. Press the TIMER pad. TIMEJ[_
,0:00 lights in the display.
, The colon will flash.
3,
Press the A or _' pad until the
correct time appears in the display.
, The colon will continue to flash.
PressTIMER pad again or wait four seconds.
, The colon continues flashing and the time begins
counting down.
, The last minute of the timer countdown wiii be displayed
as seconds.
4. At the end of the set time, one long beep wiii sound.
To cancem the Timer:
1. Press and hold the TIMER pad for three seconds.
OR
2. Press the TIMER pad and set the time to 00:00.
Locking the Controms
The touch pad controls can be locked for safety, cleaning, or
to prevent unwanted use. They will not function when locked.
If the oven is currently in use, the controls cannot be locked.
The current time of day will remain in the display when the
controls are locked.
To took:
Press and hold the CANCEL and COOK& ....
HOLD pads for three seconds. ............................................
LOCKflashes in the display. __ COOK&
To unlock: ..........................
Press and hold the CANCEL and COOK& HOLD pads for
three seconds.
LOCKdisappears from the display.
Faumt Codes
BAKE or LOCK may flash rapidly in the display to alert you if
there is an error or a problem. If BAKE or LOCKflash in the
display, press the CANCEL pad. If BAKE or LOCKcontinue to
flash, disconnect power to the appliance. Wait a few minutes,
and then reconnect power. If the flashing still continues,
disconnect power to the appliance and call an authorized
servicer.
11

To set Bake:
1. Press the BAKE pad. %%
° BAKEwill flash.
° 000 will light in the display.
2. Select the oven temperature. The oven tempera-
ture can be set from 170° to 550°. Pressor press
and hold the A or V pads.
° 350°will light when either pad is first pressed.
° Press the A pad to increase the temperature.
° Press the V pad to decrease the temperature.
3. Press BAKE pad again or wait four seconds.
° BAKEwill stop flashing and light in the display.
¸¸¸¸%.¸¸¸¸¸¸¸¸¸
° 100° or the actual oven temperature will display. The
temperature will rise in 5° increments until the preset
temperature is reached.
4. Allow the oven to preheat for 8-15 minutes.
° When the set oven temperature is reached, one long
beep will sound.
° To recall the set temperature during preheat, press the
BAKE pad.
5. Place food in center of oven, allowing a minimum of two
inches between utensil and oven walls.
6. Check cooking progress at the minimum cooking time.
Cook longer if needed.
7. When cooking is finished, press CANCEL.
8. Remove food from the oven. .....
Baking Notes:
To change oven temperatare daring cooking, press
the Bake pad, then press the A or V pad until the
desired temperature is displayed.
To change oven temperatare daring preheat, press
the Bake pad twice, then press the A or V pad until
the desired temperature is displayed.
If you forget to turn off the oven, it will automatically turn
off at the end of 12 hours. If you wish to deactivate this
feature, see page 15.
For additional baking and roasting tips, see "Cooking
Made Simple" booklet.
Baking Differences Between Your
and New Oven
It is normal to notice some baking time differences between a
new oven and an old one. See"Adjusting the OvenTemperature"
on page 15,
Cook & Hold
Cook & Hold allows you to bake for a preset amount of time,
followed by a one-hour Keep Warm cycle.
To set Cook & Hemal: ..............
1. Pressthe COOK& HOLD pad. COOK&
HOLD
° BAKE and HOLD flash. "............
° 000 lights in the display.
2. Select the oven temperature. The oven tempera-
ture can be set from 170° to 550°. Pressor press
and hold the A or V pads.
° Pressthe A pad to
° Pressthe V pad to
Press COOK& HOLD
° HOLD flashes.
increase the temperature.
decrease the temperature.
again ORwait four seconds.
¸¸%:¸¸¸¸¸¸¸¸
° 00:00flashes in the display.
4. Enter the amount of time you want to bake by pressing the
A or _' pads. Bake time can be set from 10 minutes
(00:10} to 11 hours, 59 minutes (11:59}.
° BAKE and HOLD light in the display.
° The baking time will light in the display.
° The baking time will start counting down.
When the cooking time has elapsed:
° Four beeps will sound.
° BAKE will turn off.
° HOLD and WARM will light.
, 170°will disphy.
After one hour in HOLD WARM:
° END will display.
° The time of day reappears in the display.
To cancel Cook & Hold at any time:
Press the CANCEL pad. Remove food from oven.
............¸,¸¸¸¸¸¸¸¸¸¸¸¸¸¸.¸¸¸¸¸.%
12

Delay Bake
Do not use deUayedbaking for highUype[ishaMe foods such
as dairy products, pork, poultry, or seafood.
When using Delay, the oven begins to cook later in the day.
Set the amount of time that you want to delay before the oven
turns on and how long you want to cook. The oven begins to
heat at the selected time and cooks for the specified length of
time.
Delay time can be set from 10 minutes (00:10} to 11 hours, 59
minutes (11:59}.
To set a Demayed Baking cycle: ...............
1. Press the DELAY pad. DE_,Y
° DELAY flashes. ................
° 00:00 flashes in the display.
2. Press the A or V pad to set the delay time.
While DELAY is still flashing:
3. Press the COOK& HOLD pad.
° 000 lights in the display..................
° BAKE and HOLD flash. COOKSfl
HOLD
4.
Press A to set the baking temperature.
° 00:00 and HOLD flash.
° BAKE stays lit.
Press A to set the baking time.
° The Delay time, DELAY, BAKE and HOLD light in
the display.
When the Delay time has expired:
° DELAYwill turn off.
° Baking time is displayed.
° BAKE and HOLD are displayed.
To set a Delay when Cook & Hold has already
been programmed: .............
1. Pressthe DELAY pad. IDIFL/_Y
° DELAY flashes.
° 00:00 appears in the display. '
2. Pressthe A or V pad to set the delay time.
° After four seconds, DELAY will
stay lit to remind you that a delayed
cooking cycle has been set.
When the Delay time has expired and the oven
starts:
° The baking time will be displayed.
° DELAYwill turn off.
° BAKE and HOLD wiii remain iit ..................
To eaneem:
Press the CANCEL pad. .....
, All timed and untimed cooking functions will be
canceled.
, The time of day will reappear in the display.
Notes."
Do not use delayed baking for items that require a
preheated oven, such as cakes, cookies, and breads.
Do not use delayed baking if oven is already hot.
13

Keep War
Forsafdy keeping foods vvaml or for vvarmhlg broads and
pHates.
To set Keep Warm:
1. Press the KEEPWARM pad. U4%P
WA/_M
° WARM flashes. .......................
,000 appears in the display.
Select the Keep Warm temperature. The Keep A
Warm temperature can be set from 145° to 190°.
Press or press and hold the A or V pads.
° 170°will light when either pad is first pressed. V
° Press the A pad to increase the temperature.
° Press the V pad to decrease the temperature.
WARM and the temperature wiii be displayed whiie Keep
Warm is active.
Keep Warm Notes:
, Foroptimal food quality, ovencooked foods should bekept
warm for no longer than 1 to 2 hours.
, To keep foods from drying, cover loosely with foil or a lid.
, To warm dinner rolls:
- cover rolls loosely with foil and place in oven.
- press KEEPWARM and A pads to set 170° F.
- warm for 12-15 minutes.
, To warm pmates:
- place 2 stacks of up to four plates each in the oven.
- press KEEPWARM and A pads to set 170° F.
- warm for five minutes, turn off the oven and leave plates
in the oven for 15 minutes more.
- use only oven-safe plates, check with the manufacturer.
- do not set warm dishes on a cold surface as rapid
temperature changes could cause crazing or breakage.
To cancel Keep Warm:
1. Press the CANCEL pad....
2. Remove food from the oven.
14

Automatic Shut-Off/Sabbath
Mode
The oven vqHautomatically turn off after 12hours if you
acddentaHy Heaveit on. This safety' feature can be turned off.
To cancel the 12-hour shut-off and run the
oven continuously for 72 hours:
1. Set the oven to bake (see page 12}........ .....
2. Press and hoid the CLOCK pad for five seconds. CLOCK
° SAb will be dispiayed and flash for five seconds.
° SAb will then be displayed continuously until turned off
or until the 72-hour time limit is reached.
° BAKEwill also be displayed if a bake cycle is in use
while the oven is in Sabbath Mode.
All other functions EXCEPTBAKE {Timer, Keep Warm,
Clean, etc.} are locked out during the Sabbath Mode.
To cancel Bake when in Sabbath Mode:
Press CANCEL.............
, BAKEwill turn off in the display.
, No beeps will sound.
To cancel the Sabbath Mode:
1. Press the CLOCK pad for five seconds. CLOCK
OR ...........
2. After 72 hours, the Sabbath Mode will end.
, SAb will flash for 5 seconds.
, The time of day will return to the display.
Adjusting the Oven Temperature
Oven temperatures are carefully tested for accuracy at the
factory. It is normal to notice some baking or browning
differences between a new oven and an old one. As ranges
get older, the oven temperature can shift.
You may adjust the oven temperature if you think the oven is
not baking or browning correctly. To decide how much to
change the temperature, set the temperature 25° higher or
lower than your recipe recommends, then bake. The results
of the "test" should give you an idea of how much to adjust
the temperature.
TO adjust the oven temperature:
1.
2.
3.
Press BAKE, BAKE
Enter 550° by pressing the A pad,
Pressand hold the BAKE pad for several ............................
seconds or until 0° appears in the display.
If the oven temperature was previously adjusted, the
change wii] be displayed. Forexampb, if the oven tem-
perature was reduced by 15°the display wii] show "-15 °''.
Pressthe A or V pad to adjust the temperature.
Eachtime a pad is pressed, the temperature changes by
5°, The oven temperature can be increased or decreased
by 5° to 35°,
The time of day wii] automatically reappear in the display.
You do not need to readjust the oven temperature if there
is a power failure or interruption. Broiling and cleaning
temperatures cannot be adjusted.
Sabbath Mode Notes:
° Sabbath Mode can be turned on at any time with or
without the oven on.
° Sabbath Mode cannot be turned on if the touchpads are
locked out or when the door is locked.
, If the oven is baking when Sabbath Mode is set, BAKE
will go out at the end of the baking cycle. There will be
no audible beeps.
, When the Sabbath Mode is started, no preheat beep wiii
sound.
, Aii prompts, messages and beeps are deactivated when
Sabbath Mode isactive.
, Pressing CANCEL wiii cancel a bake cycle, however the
controi wiii stay in the Sabbath Mode.
° If power faiis, the oven wiii power up in Sabbath Mode with
72 hours remaining and no cycle active.
15

To set Broit:
1. Press the BROIL pad.
, BROILflashes.
, SET is displayed.
Press the A pad to set HI broil or press the V pad to set
LO broil.
, HI or LO wiiI be displayed.
, Sebct HI broil (550° F} for normal broiling. Sebct
LO broil (450° F} for low-temperature broiling of longer
cooking foods such as poultry.
After four seconds, the oven wiiI start.
, BROILwiii remain lit.
4. For optimum browning, preheat for 2-3 minutes before
adding food.
5. Place food in the oven. Close the oven door.
6. Turn meat once about halfway through cooking.
7. When food is cooked, press the CANCEL pad.
Removefood and broiler pan from the oven.
° The time of day wiii reappear in the display.
Broil Notes:
, For best results when broiling, use a pan designed for
broiling.
, HI is used for most broiling. Use LO broil when broiling
longer cooking foods. The lower temperature allows
food to cook to the well done stage without excessive
browning.
, Broil times may be longer when the lower broiling temp-
erature is selected.
, Food should be turned halfway through broiling time.
, For additional broiling tips and temperatures, refer to
the "Cooking Made Simple" booklet.
Oven Broiling Chart
I i
FOODS DONENESS COOK TIME
Beef
Steak, 1" thick
Hamburgers, 3/4" thick
Pork
Bacon
Chops, 1"
Ham - precooked slice, 1/2'+thick
Poumtry
Chicken Pieces
Seafood
Fish Steaks, buttered, 1" thick
Fillets, 1/2++thick
*The top rack position is #5.
4
4
4
4
4
4
Medium
Weii Done
Weii Done
Weii Done
Weii Done
Warm
15 - 20 minutes
18 - 24 minutes
15 - 18 minutes
6 - 10 minutes
22 - 26 minutes
8 - 12 minutes
LO Broil
3 or 4 Well Done 30-45 minutes
Flaky
Flaky
10 - 15 minutes
8 - 12 minutes
Note: This chart is a suggested guide. The times may vary with the food being cooked.
16

Oven Vent
When the oven is h use the area near the vent may become
hot enough to cause burns. Never Mock the vent opening.
The oven vent is located below the backgaard vent
shield on your range.
OVEN VENT
Do not pHace
pHasticsnear the
vent opening as
heat from the
vent couHddistort
or malt the
pHastic.
Oven Light (select models)
Press the oven Hightpad to turn the oven Highton
and off.
oven lighf
Oven Bottom
Protect oven bottom agahst spiHovers, especially acidic or
sugary spills, as they may discoHorthe porcdahl enamel. Use
the correct pan size to avoid spillovers and boilovers. Do not
place utensils or aluminum foil directly on the oven
bottom.
Oven Racks
is hot.
Do no[ use the oven for storing food or cookware.
Your oven has two racks. They are designed with a lock-stop
edge.
To remove:
1. Pull rack straight out until it
stops at the lock-stop position.
2. Lift up on the front of the rack
and pull out.
To replace:
1. Place rack on the rack support in the oven.
2. Tilt the front end up slightly. Slide rack back until it clears
the lock-stop position.
3. Lower front and slide back into the oven.
Do not cover an entire rack with aluminum foil or place
foil on the oven bottom. Baking results will be affected
and damage may occur to the oven bottom.
Rack Positions
5
4
..... 3
2
RACK 5 (highest position): Used for toasting bread or broiling
RACK 4: Used for most two-rack baking.
RACK 3: Used for most baked goods on a cookie sheet or
jelly roll pan, layer cakes, fruit pies, or frozen convenience
foods.
cent.
17

RACK 2: Used for roasting small cuts of meat, casseroHes,
baking Hoavesof bread, bundt cakes, custard pies or two-rack
baking+
RACK 1: Used for roasting Hargecuts of meat and pouHtry,
frozen pies, dessert souffles, angd food cake, or two-rack
baking+
ROASTING POSiTiON:
Used for roasting taller cuts of meat
or turkey. PHaceboth oven racks, one
above the other, on the raised sides
of the oven bottom.
MULTIPLE RACK COOKING:
Two rack: Use rack positions 2 and 4,or 1 and 4.
Note: Never pHacepans directHyon the oven bottom.
Haft Rack Accessory
A haHfrack, to hcrease oven capac-
it},,,isavaiHaMeas an accessory. It fits
in the Heft,upper portion of the oven
and provides space for a vegetaMe
dish when a Hargeroaster is on the
Howerrack. Contact your dealer for
the "HALFRACK" Accessory Kit or
call 1-877-232-6771 USA or
1-800-688-8408 Canada.
IIK'_/ :¢ ++
18

Se f-C ean Oven (select models)
Note: For manual dean oven, see page 22. [
o it is normal for parts of the rangeto become hot dul ng a
6. Wipe up sugary and acidic spiHoverssuch as sweet
potatoes, tomato, or miik-based sauces. Porceiain ename]
is add-resbtant, not acid-proof. The porceiain finish may
discobr if acidic spills are not wiped up before a serif-
dean cycb.
To set Self-Clean:
- To prevent personal injur_ and damage to the oven door
do not attempt to open door when "LOCK" is disphyed
• Avoid touching cooktop, door window or oven vent area
during a dean cycle.
• Do not use commercial oven cleaners on the oven finish
or around any part of the oven. They will damage the
finish or parts.
The self-clean cycle uses above-normal cooking temperatures
to automatically clean the oven interior. Do not force the oven
door or lock lever open. This may result in exposure to high
temperatures and be a burn hazard.
It is normal for flare-ups, smoking, or flaming to occur during
cleaning if the oven is heavily soiled. It is better to clean the
oven regularly rather than to wait until there is a heavy build-
up of soil in the oven.
During the cleaning process, the kitchen should be well
ventilated to get rid of normal odors associated with cleaning.
Before Seff-C eaning
1. Turn off the oven light before cleaning. The light may burn
out during the clean cycle.
2. Remove broiler pan, all pans, and oven racks from the
oven. The oven racks will discolor and may not slide easily
after a self-clean cycle if they are not removed.
3. Clean oven frame, door frame, area outside of gasket, and
around the opening in the door gasket with a nonabrasive
cleaner such as Bon Ami* or detergent and water. The
self-cleaning process does not
clean these areas. They should be
cleaned to prevent soil from baking
on during the clean cycle. (The
gasket is the seal around the oven
door and window.[}
4. To prevent damage, do not clean or
rub the gasket around the oven
door. The gasket is designed to seal in heat during the
clean cycle.
5. Wipe up excess grease or spillovers from the oven bottom.
This prevents excessive smoking, flare-ups or flaming
during the clean cycle.
Note: Oven temperature must be below 400° Fto program
a clean cycle.
1. Close the oven door.
2. Move door lock lever right to the locked position.
3. Press the CLEAN pad. CLEAN
, CLEAN flashes in the display.
If the door is not closed, beeps wiii sound and DOOR wiii
display. If the door is not closed within 45 seconds, the
self-cleaning operation wiii be canceled and the display
will return to the time of day.
4. Press the A or V pad. ........
° CL-M (Clean - Medium Soil} is displayed.
5. Press the A or V pad to scroii through the
self-cleaning settings.
CL-H {Clean - Heavy'Soil, 4 hours}
CL-M (Clean - Medium Soil, 3 hours}
CL-L (Clean - Light Soil, 2 hours}
Choosing the soil level of the oven automatically programs
the self-cleaning time.
6. After four seconds, the oven will start cleaning.
° The cleaning time will start counting down in the display.
° LOCKwiii appear in the display.
° CLEAN wiii appear in the display.
To Delay a Self-CJean Cycle:
1. Press the DELAY pad.
° DELAY flashes.
2.
DELAY
, 00:00 wiii appear in the display.
Press the A or V pad to set the amount of time you want
to delay the cycle. Delay time can be set from ten minutes
@0:10} to 11 hours, 59 minutes (11:59}.
conto
*Brand names for cleaning products are registered trademarks ofthe respective manufacturers,
19

3. Press the CLEAN pad. .........................
, CLEAN wiii flash. CLEAN
4. Press the A or Y pad.
° CL-M (Clean - Medium Soil} is displayed.
5. Press the A or V pad to scroii through the
self-cleaning settings.
CL-H (Clean - Heavy Soil, 4 hours} .......................
CL-M (Clean - Medium Soil, 3 hours}
CL-L (Clean - Light Soil, 2 hours}
Choosing the soil level of the oven automatically programs
the self-cleaning time.
6. After four seconds, CLEAN, DELAY and LOCK will appear
in the display to show that the oven is set for a delayed
clean operation. The delay time is displayed.
Jf the oven has amready been set for a clean
cycJe and you wish to set a delay:
1. Press the DELAY pad. D_[AY
° DELAY flashes. .............
° 00:00will appear in the display.
2. Press the A or V pad to set the amount of time
you want to delay the cycle.
After four seconds, CLEAN, DELAY and LOCK will appear
in the display to show that the oven is set for a delayed
clean operation. The delay time is displayed.
When the Self-Clean cycle starts:
° DELAYwill turn off.
° The clean time will appear in the display.
To cance! the Self-Clean cycle: ..............
Press the CANCEL pad.
° All words disappear from the display.
° All functions are canceled.
° The time of day appears in the display.
During the Se_f-C_ean Cycle
When LOCK shows hi the dispHay,the door cannot be opened.
To prevent damage to the door, do not force the door open
when LOCK is dbpHayed.
Smoke and Smemls
You may see some smoke and smell an odor the first few
times the oven is cleaned. This is normal and will lessen in
time.
Smoke may also occur if the oven is heavily soiled or if a
broiler pan was left in the oven.
Sounds
As the oven heats, you may hear sounds of metal parts
expanding and contracting. This is normal and will not
damage the oven.
After Seff-C_eaning
About one hour after the end of the self-clean cycle, LOCK
will turn off. The door can then be opened. Move door lock
lever to the left to unlock.
Some soil may leave a light gray, powdery ash. Remove
it with a damp cloth. If soil remains after wiping, that means
the clean cycle was not long enough. The soil will be re-
moved during the next clean cycle.
mfoven racks were left in the oven and do not slide
smoothly after a clean cycle, wipe racks and rack supports
with a small amount of vegetable oil to make them easier to
move.
Fine lines may appear in the porcelain because it went
through heating and cooling. This is normal and wiii not
affect performance.
A white discoloration may appear after cleaning if acidic
or sugary foods were not wiped up before the self-clean
cycle. This discoloration is normal and will not affect perfor-
mance.
° If the oven door is left open, DOOR wiii flash in the
display and a signal will beep until the door is closed
and the CLEAN pad is pressed again.
° The oven door will be damaged if the oven door is
forced to open when LOCK is still displayed.
2O

Cleaning Procedures
, Be sure appliance is elf and all parts ate bee! before handming
or cleaning. This is te avoid damage and possible burn s, _ Brand names are registered trademarks of the
, Te p[event staining or discoloration, dean appliance after each use, respective manufacturers.
!1:a part iSremoved, be sure it is correct!y replaced. _ To order call 1-877-232-6771 USA and
1-800-688-8408 Canada.
PROCEDURE
Broiler Pan Never cover insert with aluminum foil as this prevents the fat from draining to the pan below.
and insert ° Place soapy cloth over insert and pan; let soak to loosen soil.
° Wash in warm soapy water. Use scouring pad to remove stubborn soil=
° Broiler pan and insert can be cleaned in dishwasher=
Surface ° Clean frequently= Allow burner to cool=Clean with soap and plastic scouring pad=Forstubborn soils, use
Burners a non-abrasive cleaner and a cloth. Tryto prevent the cleaner from seeping into the gas ports asthis will
- Conventional affect the fla me.If thecleaner doesenter the ports, cleanwith asoft bristle brush or a straight pinespecially
- Sealed the port below the igniter. Do not enlarge or distort holes.
° Be careful not to get water into burner ports.
° Use care when cleaning the ignitor= If the ignitor iswet or damaged the surface burner will not light=
, Conventional Burners: Dry'burners in the oven set at 170° R
Burner Bo× The burner box is located under the lift-up cooktop=Clean frequently to remove spillovers=If soil is allowed
- Conventional to accumulate, it may damage the finish.
Burners Only , Remove grates and surface burners. Raise lift-up top=
° Clean with soap and water, rinse and dry=
° Forstubborn soils,use mildlyabrasive cleaning agents such asbaking soda/water pasteor BonAmi_,and
a non-abrasive plastic scrubbing pad=
Burner Grates ° Wash grates with warm, soapy water and a nonabrasive, plastic scrubbing pad=Forstubborn soils, clean
with a soap-filled, nonabrasive pad or a sponge and Cooktop Cleaning Creme (Part #20000001_)=_*
, For burned on soils, remove grates, place on newspapers and carefully spray with commercial oven
cleaner= (Do not spray surrounding surfaces.[)Place in plastic bags for several hours or overnight=
Wearing rubber gloves, remove from bags. Wash, rinse, dry' and replace on cooktop=
Clock and , To activate "Control Lock" for cleaning, see page 11.
Control Pad ° Wipe with a damp cloth and dry. Do not use abrasive cleaning agents as they may scratch the finish.
Area ° Glass cleaners may be used if sprayed on a cloth first= DO NOT spray directly on controlpad and
display area.
Control Knobs ° Remove knobs in the OFFposition by pulling forward.
° Wash, rinse and dry. Do not use abrasive cleaning agents as they may scratch the finish.
° Turn on each burner to be sure the knobs have been correctly replaced=
Cooktop and Porcelain enamel isglassfused onmetal and maycrack or chip with misuse. Itis acid resistant, notacid proof.
Control Panel - All spillovers, especially acidic or sugary spillovers, should be wiped up immediately with a dry cloth=
Porcelain Enamel ° When cool, wash with soapy water, rinse and dry=
, Never wipe off a warm or hot surface with a damp cloth. This may cause cracking or chipping.
, Never use oven cleaners, abrasive or caustic cleaning agents on exterior finish of range.
21

PROCEDURE
Storage Drawer,
Oven Door
(select models},
Lower Broimer
Door (select
models} and
Door Handmes-
Painted Enamem
Oven Window
and Door - Gmass
(semect models}
Oven interior
Oven Racks
Stainless Steel
(sebct modeb}
° When cool wash with warm soapy water, rinse and dry. Never wipe a warm or hot surface with a damp
cbth as this may damage the surface and may cause a steam burn.
° Forstubborn soft,use mfldiy abrasive cbaning agents such as baking soda paste or BonAmi*. Do not use
abrasive cleaners such assteal wooi pads or oven cbaners. These products wfli scratch or permanendy
damage the surface.
Note: Use a dry towel or cloth to wipe up spills, especially acidic or sugary spills. Surface may
discolor or dull if soil is #ot immediately removed. This is especially important for white surfaces.
° Avoid using excessive amounts of water which may seep under or behind glass causing staining.
° Wash with soap and water. Rinsewith clear water and dry. Glasscleaner can be used if sprayed on a cloth
first.
° Do not use abrasive materials such asscouring pads,steelwool or powdered cleaners as theywfll scratch
glass.
Self-Clean:
, Follow instructions on page 19-20 to set a self-dean cycle,
JVianaal Clean:
, Clean frequently using mild abrasive cleaners and a plastic pad.
, Do not use metallic scouring pads because they will scratch the surface.
, When using commercial oven cleaners follow the manufacturer's instructions.
, Wipe up acidic spills (tomato or milk based foods} as soon as possible with soap and water. If the spill
is not wiped up, it may discolor the porcelain.
To make cleaning easier, remove the oven door, if desired. (See Maintenance section on
page 23{}
®
®
®
Clean with soapy water.
Removestubborn soil with cleansing powder or soap-fflbd scouring pad. Rinse and dry.
Racks will permanently discolor and may not slide out smoothly if left in the oven during a self-dean
operation, if this occurs, wipe the rack and embossed rack supports with a small amount ofvegetable oil
to restore ease of movement, then wipe off excess oil.
. DO NOT USEANY CLFANING PRODUCT CONTAINtNO CHLORINE BLEACH.
* DO NOT USEABRASIVE OR ORANGE CLEANERS.
* ALWAYS WIPE WITH THE GRAIN WHEN CLEANING.
* Daily Cleaning/Light Soil -= Wipe with oneof the following - soapywater, white vinegarlwater sohtion,
Formula 409 Glass and Surface Cleaner* or a similar glass cleaner - using a sponge or soft cloth.
Rinse and dry=To polish and help prevent fingerprints, follow with Stainless Steel Magic Spray_
(Part No=20000008}_.
* JVioderate/Heavy Soil -- Wipe with one of the following - Ben Ami, Smart Cleanser, or Soft Scrub_-
using a damp sponge or soft cloth. Rinse and dry'.Stubborn soils may be removed with a damp multi=
purpose Scotch-Brite* pad; rub evenly with the grain. Rinseand dry=To restore luster and remove streaks,
follow with Stainless Steel Magic Spray*.
* Discoloration -- Using a damp sponge or soft cloth, wipe with Cameo Stainless Steel Cleaner*. Rinse
immediately and dry=To remove streaks and restore luster, follow with Stainless Steel Magic Spray*.
* Brand names for cleaning products are registered trademarks of the respective manufacturers,
** To order direct, carl 1-877-232-6771 USA and 1-800-688-8408 Canada.
22

Oven Door
Leveling Legs
Do not place excessive weight on or stand on an open
o_en door. This could cause [he range to tip over. break
the door. or injure the user.
Do not attempt to open or close door or operate oven until
door is properly replaced.
NeveHplace fingers between hinge and front oven frame.
Hinge arms are sprung mounted. Jf accidentally hit. the
hinge wiii siam shut against oven frame and could injure
your fingers.
To remove:
1. When cool, open the oven door to
the first stop position (opened
about four inches}.
2. Grasp door at each side. Do not
use the door handle to lift door.
3. Lift up evenly until door clears
hinge arms.
To replace:
1. Grasp door at each side.
2. Align slots in the door with the hinge arms on the range.
3. Slide the door down onto the hinge arms until the door is
completely seated on the hinges. Push down on the top
corners of the door to completely seat door on hinges.
Door should not appear crooked.
Note: The oven door on a new range may feel "spongy"
when it is closed. This is normal and will decrease with use.
Oven Window (select models}
To protect the oven door window:
1. Do not use abrasive cleaning agents such as steel wool
scouring pads or powdered cleansers as they may scratch
the glass.
2. Do not hit the glass with pots, pans, furniture, toys, or other
objects.
3. Do not close the oven door until the oven racks are in
place.
Scratching, hitting, jarring or stressing the glass may weaken
its structure causing an increased risk of breakage at a later
date.
Be Sure the antbtip bracket secures one of the rear
from accidentally tipping.
Oven Light (select models}
Disconnect power to range before replacing Rightbulb,
when repUacingbuUb.
Do not touch hot bulb W!th a damp cbth asthis may cause
the bulb to break.
To Replace Oven Light Butb:
1, When oven iscool, hold bulb cover (ifequipped} in place,then
slide wire retainer off cover,
Note: Bulb cover will fall if not held in place while removing
wire retainer.
J
2. Remove bulb cover and light bulb.
BULB COVER
3. Replace with a @-watt appli-
ance bulb.
4. Replace bulb cover and se-
cure with wire retainer.
5. Reconnect power to range.
Resetclock.
RETAINER
23

Electrical Connection
Appmiances which require emectricai
power are equipped with a three=
prong grounding plug which must be
pHuggeddirectHyinto a propedy grounded
three-hoNe 120vog dectricd outHet.
A/ways ch_connectpower to app/iance before servicing.
The three-prong grounding pHugoffers protection against
shock hazards. DO NOT CUT OR REMOVE THE TNmRD
GROUNDmNG PRONG FROM THE POWER CORD PLUG.
If an ungrounded, two-hoNe or other type dectricd outHetis
encountered, it is the personal responsibility of the
appliance owner to have the outlet replaced with a
properly grounded three=hole electrical outlet.
Remova of Gas Appmiance
Gasappliance connectors used to connect this appliance to
the gas supply are not designed for continuous movement.
Once installed, DO NOT repeatedly move this gas appliance
for cleaning or to relocate. If this appliance has to be moved
and/or removed for servicing, follow the procedure described
in the installation instructions. Forinformation, contact
Customer Assistance at 1-800-688-1120 USA,and Canada.
To prevent range from accidentally tipping, range must be
secured to the floor by sliding rear leveling leg into the anti-
tip bracket.
the two tabs on the burner assembly into the two slots on the
burner support bracket which is mounted to the burner
bottom. {NOTE:If the tabs are not properly inserted into the
slots, the assembly may rock and the burners may not light
properly.}
Storage Drawer (select models:)
Do not store p!astic, paper products, food or flammab!e
for these items when the oven is in use,
The storage drawer can be removed to allow you to clean
To remove:
1. Empty'drawer and pull out to the first stop position.
2. Lift up the front of the drawer.
3. Pull out to the second stop position.
4. Grasp sides and lift drawer up and out.
To replace:
1. Fit the ends of the drawer glides into the rails in the range.
2. Lift up the front of the drawer and gently push in to the
first stop position.
3. Lift drawer up again and push until drawer is closed.
Conventional Surface Burners
(select models:)
Under no circumstances are the surface burner assemblies to
be taken apart for cleaning. The surface burner assembly can
be removed to clean the burner box area=
Freestanding range only:
The two surface burner assemblies are secured in place
during transportation with screws. Once the range is installed,
these screws may be removed to allow quick and easy
removal of the burner assemblies.
To remove:
Allow the burner assembly to cool. Lift up cooktop. Grasp the
burner assembly and rotate it slightly toward the left to
release the two tabs on the assembly. Then lift the assembly
and pull toward the back of the cooktop until the air shutter
ends on the assembly release from the valves.
To replace:
Insert the air shutter ends on the burner assembly over the
valves and lower the assembly into place. Be sure to secure
Oven Bottom
Protect oven bottom against spillovers, especially acidic or
sugary spills, as they may discolor the porcelain enamel. Use
the correct pan size to avoid spillovers and boilovers.
The oven bottom may be removed for easier cleaning.
To remove:
from oven,
To replace:
Fit the front edge of the oven bottom into the oven front
frame. Lower the rear of the oven bottom and slide the two
catches back to lock the oven bottom in place.
24

PROBLEM SOLUTION
For most concerns, try these first. ° Check if oven controHshave been propedy set.
° Check to be sure pHugis secureHyinserted into receptacle.
° Check or re-set circuit breaker. Check or repHacefuse.
° Check power suppHy.
Surface burner fails to light. , Check to be sure unit is propedy connected to power suppHy.
° Check for a Mown circuit fuse or a tripped main circuit breaker.
° Check to be sure ignitor is dry and cHicHng.Burner will not Hightif ignitor is damaged.
soiHedor wet. If ignitor doesn't chick,turn controHknob OFF.
The flame is uneven. ° Burner ports may be clogged.
Sarface burner flame lifts ° Check to be sure a pan issitting on the grate above.
off ports.
Baking results are not as , Check the oven temperature selected. Make sure oven is preheated when recipe
expected or differ from or directions recommend preheat.
previous oven. , Make sure the oven vent has not been blocked. See page 17 for location.
, Check to make sure range is level.
, Temperatures often vary between a new oven and an old one.,Asovens age,the oven
temperature often "drifts" and may become hotter or cooler. See page 15 for
instructions on adjusting the oven temperature (select models:). NOTE: It is not
recommended to adjust the temperature if only one or two recipes are in question.
, Use correct pan. Dark pans produce dark browning. Shiny pans produce light
browning. See "Cooking Made Simple" booklet for more information on bakeware.
, Check rack positions and pan placement. Stagger pans when using two racks. Allow
1-2 inches between pans and oven wall.
, Check the use of foil in the oven. Never use foil to cover an entire oven rack. Place
a small piece of foil on the rack below the pan to catch spillovers.
Food is not broiling properly or , Check oven rack positions. Food may be too close to flame.
smokes excessively. , Aluminum foil was incorrectly used. Never line the broiler insert with foil.
, Trim excess fat from meat before broiling.
, A soiled broiler pan was used.
, Preheat oven for 2-3 minutes before placing food in the oven.
, Broil with the oven door closed.
Oven will not self-clean. , Check to make sure the cycle is not set for a delayed start. See pages 19-20.
(select models) , Check if door is closed.
° Check if control is in Sabbath Mode. See page 15.
° Oven may be over 400° F.Oven temperature must be below 400° Fto program a
clean cycle.
25

PROBLEM $OLUTmON
Oven did not self-clean properly ° Longer cHeaningtime may be needed.
(select models). , ExcessivespiHovers, especially sugary'and/or acidic foods, were not removed prior
to the stir-dean cycle.
Oven door will not unmock
after self-clean cycle
(select models)
Moisture collects on oven
window or steam comes from
oven vent.
There is a strong odor or light
smoke when oven is turned on.
FaamtCodes
(select models)
Noises may be heard.
There are no beeps and
"SAb" flashing and then
Oven interior is still hot. AHow about one hour for the oven to cooHafter the
compHetionof a stir-dean cycle. The door can be opened when "LOCK" is not
displayed.
The control and door may be locked. See pages 11and 20 to unlock.
, This is normal when cooking foods high in moisture.
, Excessive moisture was used when cleaning the window.
, This is normal for a new range and wi[[ disappear after a few uses. Initiating a dean
cycle will "burn off" the odors more quickly.
° Turning on a ventilation fan will help remove the smoke and/or odor.
° Excessivefood soils on the oven bottom. Use a self-clean cycle.
° BAKE or LOCK may flash rapidly in the display to alert you if there is an error
or a problem. If BAKEor LOCK appear in the display, press the Cancel pad.
If BAKE or LOCK continue to flash, disconnect power to the appliance.
Wait a few minutes, and then reconnect power. If the flashing still continues,
disconnect power to the appliance and call an authorized servicer.
° If the oven is heavily soiled, excessive flareups may result in a fault code during
cleaning. Press the CANCEL pad and allow the oven to cool completely, wipe out
excess soil, then reset the clean cycle. If the fault code reappears, contact an
authorized servicer.
, Theoven makes several low level noises. You may hear the oven relays asthey go on
and off. This is normal.
, As the oven heats and cools, you may hear sounds of metal parts expanding and
contracting. This is normal and will not damage your appliance.
° Control may be in Sabbath Mode. See page 15.
° Oven is in Sabbath Mode. To cancel, press and hold the Clock pad for five
seconds.
26

Gas Range Warranty
Full One Year Warranty -
Parts and Labor
Forone (1[}year from the original retail
purchase daEe,any part which fails in
normal home usewill be repaired or
replacedfree of charge.
Please Note, Thisfull warramy applies
onl_when the appliance is locatedinthe
United Statesor Canada.Appliances
locatedelsewhereare covered by the
limited warranties only, including pares
which fail during the first year.
Canadian Residents
Thiswarranty coversonly those
appliances installedin Canadathat have
been Hstedwith Canadian Stanaaros
Association unless the appliances are
brought into Canaoaaue to transfer of
residencefrom the United Statesto
Canada.
The,_pee/Ticwarrantiesexpressedabove
are the ONLYwarrantiesprovided bythe
maaufacture_ Thiswarrantygivesyou
specific'legale'ghts,andyou may a/sohave
otherr_l/-,'tsthat racyfroth'state to state.
What is Not Covered By These Warranties:
1= Conditions and damages resulting from any of the following:
a=Improper instaiIation,delivery,or maintenance.
b=Any repair, modification, alteration, or adjustment not authorized by the
manufacturer or an authorized servicer=
c=Misuse, abuse,accidents, unreasonable use,or acts of God=
d. Incorrect electric current, voltage, or supply=
e=Impropersetting of any control.
2= Warranties are void if the original serial numbers have been removed,altered,or
cannot be readily determined.
3= Light bulbs.
4= Productspurchased for commercial or industrial use=
5= The cost of service or servicecall to:
a=Correct installation errors.
b=Instruct the user on the proper useof the product.
c=Transportthe appliance to the servicer and back.
6= Consequentialor incidental damages sustained by anyperson as aresult of any
breach of these warranties.
Somestates do not allow the exclusionor limitation of consequential or incidental
damages,sothe above exclusion may not apply.
To be Eligible for Warranty Service you Must:
1= Presentthe original bill of sale,deliveryslip orsome other appropriate payment
record with date.
2= Bewithin the statedwarranty period.
3= Fornew appIiancessoId with new homes- the buiIder is to provide the appliance
biII of saie to the buyer. Thewarranty period wiII begin on the appiiance purchase
date unless proof of the closing date onthe new home is provided asweft=
If you needservice,first seethe TroubIeshootingsection in your Useand CareGuide
or call Maytag ServicessM,Customer Assistance at 1-800-688-1120U=S=A=and Canada=
To Obtain Warranty Sewice
To locate an authorized service company in your area contact the dealer from
whom your appliance was purchased or call May'tag Servicess_J_,Customer
Assistance=Should you not receive satisfactory warranty service, call or write:
Maytag ServicessM
Attn: CAIR_:Center
P=O=Box 2370, Cleveland, TN 37320-2370
UoS.and Canada 1=800=688=1120
UoSocastemers using TTY for deaf, hearing impaired or speech
impaired, call 1=800=688=2080.
Note: When contacting Maytag ServicessM,Customer Assistance about a
service problem, pleaseinciude the following:
a=Your name,addressand telephone number.
b=Mode! number and seriaI number of your appliance=
c=Name and address of your dealer.
d.A dear description of the problem you are having.
e=Proof of purchase with date.
Use and Careguides, service manuals and parts information are available from Maytag ServicessM,Maytag Customer Assistance.
22

Cuisini re gaz
Je la surlace de cuisson
116s
four .................... 37-48
manuem
Cuisson courante
Grii
Jfour _ nettoyage manuel
@il
s du four _ autonettoyage
D_marrage diff6r6
Maintien au chaud
urante Gril
Grilles du four
Nettoyage ....................................... 49-52
Four autonettoyant
M6thodes de nettoyage
Entretien .......................................... 53-54
Recherche des pannes ................ 55-56
Garantie et service apres-vente ....... 57
Guia demUsuarie ...................................58

Censemmateur :VeuiNez!irele gu!doet le conserverpour
consultat!on ult@ieure_Conservezlafactured'achatou !e cheque
encaiss_Commepreuvede I'achat.
Num6ro de mo@!e
Num@o des6rie
Date d'achat
Darts le cadrede nospratiquesd:am6!iorationc0nstantede ia
qualit6 et de ia performancedenos produitsde cuisson,des
modificationsde I:apparejlquir!esent pas mentionn@sda0sce
guide pourront8treintroduites.
Repoftez-vous _ la page 5_ pout plus d'iuformadons
cencemaut #eservice apr_s_vente.
Les instructions de s6curitd importantes et los paragraphes
<<avertissement >>de ce guide ne sent pas destin6s a couvrir
toutes los conditions et situations qui pourraient se pr6senter.
II faut faire preuve de ben sons, de prudence et de soin Iors de
I'installation, de I'entretien ou du fonctionnement de I'appareil.
Toujours prendre contact avec le fabricant darts le cas de
problemes ou de conditions qui ne seraient pas comprises.
Reconnaitre los _tiquettes, paragraphes et
symboles sur la s6curit_
mort.
que pourrait susciter une utilisation incorrecte de I'appareil.
Utiliser I'appareil uniquement pour les fonctions prevues.
d6crites dans ce guide
Pour une utilisation ad6quate et en s6eurit6, i[ faut que
I'appareil soit convenablement install6 pallun technicien
qualifi6, et reli6 a la terre. Ne pas r6gler, reparer n remplacen
un composant, a mounsque cola ne soit sp6cifiquement
recommand6 dans ce guide. Toute autre reparation dolt 6tre
effectu6e pall un technicien qualifi6 Demander a I'installateun
de montren ou se trouve le robinet d'arr6t degaz et comment
le former en cas d'urgence.
Toujours d6brancher I'appareil avant d'y faire de I'entretien.
Si los directives don _es darts le present guide ne
sent pas respect6es _ la lettre, il y a risque d'incendie
ou d'e×plosion pouvant causer des dommages, des
blessures et m_me la mort,
- Ne pas ranger ni utiliser d'essence ou autre vapeur
ou liquide inflammable _ proximit_ de cot appareil
ou de tout autre appareiL
- QUE FAIRE SI L'ON SENT UNE ODEUR DE GAZ :
o Ne mettre aucu_ appareil en marche,
o Ne pas toucher _ un interrupteur _lectrique,
o N'utiliser aucun t_l_pho_e de I'im_euble.
o Se re,tire chez un voisin et t_l_phoner
imm_diate_e_t _ la compagnie de gaz. Suivre los
directives do_u_es par le pr_pos_ de la
compag_ie de gaz.
o S'il est impossiMe de joindre la compag_ie de
gaz, t_l@honer au service des ince_dieso
o L'installatio_ et les r_parations doive_t 8tre
confi_es _ an installateur competent, _ _ne
entreprise de service ou _ la compagnie de gaz.
Une fuite de gaz pourrait surTen!r darts le SystSmeet
suffire p0ur d6tecter une fuite de gaz. Lesfoumisseur s de
ATTENTION - Dangers 0u pratiques dangereuses qui
POURRAIENTrdsulter en des blessures mineures,
conform_ment aux instructions du fabdcant.
Life routes les instructions avant d'utiliser cot appareil;
observer toutes los instructions pour 61iminer los risques
d'incendie, choc 61ectrique,dommages mat6riels et corporels
29

instructions g neraJes
o TOUTE CUm$1NmEREPEUT BASCULER
ET PROVOQUER DES BLESSURES°
,, mNSTALLERLA BRIDE
ANTIBASCULEMENT FOURNJEAVEC
CETTECUmSINmERE.
o RESPECTERTOUTES LES iNSTRUC-
TiONS [}'iNSTALLATION.
AVERTJSSEMENT: Peur r_duire Je
risque de bascubment de I'appareil _ m'eccasien
d'une utiHsatien anermaie eu d'un chargement
e×cessif de Japorte du feur, imfaut que JabrMe
antibascuiement seit cenvenabiement instaii_e,
Utiliser une Bmpe torche pour determiner si la bride
antibascubment est convenabbment instaflee sous la
cuisiniere, L'un des pie@ arriere de reghge de Faplomb doit
etre convenabbment engage darts la fente de la bride,
Lorsque la cuisiniere est convenabbment calee, la bride
antibascubment immoNise b pied arriere contre b sol,
Verifier la parfaite immobflisation de la cuisiniere par la bride
apres chaqae @placement de la cuisiniere,
Pour viter tin incendie ou des
dommages par la fumee
S'assurer que tous bs materiaux de conditionnement sont
retires de Fappareil avant de b mettre en marche,
Garder bs materiaux combustibles, [essence et autres
matieres et vapeurs inflammables bien 61oignesde Fappare&
Si Fappareil est instafle pres d'une fenetre, des precautions
appropriees doivent 6tre prises pour @iter que b vent entrdne
bs rideaux au-dessus des brQburs,
NEJAMAJS hisser des articles sur la table de cuisson, L'air
chaud de F@ent peut bs enfiammer et mettre egabment sous
pression des contenants fermes qui pourraient alors exploser,
De nombreux flacons d'aerosol peuvent EXPLOSERIorsqu'on
bs expose a la chabur, et ib peuvent contenir un produit tres
inflammable, Eviter d'utifiser ou remiser un flacon d'aerosol
proximite de [@pare&
De nombreux articles en plastique peuvent etre deteriores par
la chabur, Conserver bs articles en pBstique a distance des
composants de ['apparei[ susceptibies de devenir tiedes ou
chauds, Ne pas laisser des articles en plastique sur la table
de cuisson; un article en plastique trop proche de I'event du
four ou d'un bn:deur allume pourrait s'amollir ou fondre,
Pour eliminer le besoin d'atteindre quelque chose par-dessus
les brQburs de surface, il est preferable qu'il n'y ait aucune
armoire de cuisine directement au-dessus de I'appareil, S'il y
a une armoire, on ne devrait y remiser que des articles peu
frequemment utilises et capables de resister a la chaleur
emise par I'appareil, La temperature pourrait etre excessive
pour certains articles, comme liquides volatils, produits de
nettoyage ou flacons d'aerosol,
En cas d'incendie
[nterrompre [e fonctionnement de ['apparei[ et de [a hotte de
ventilation pour minimiser le risque d'extension des fiammes,
Eteindre les fiammes, pub mettre la hotte en marche pour
evacuer la fumee et Fair vicie,
, Table de caisson : Utfliser un couverde ou une plaque
biscuits pour etouffer bs fiammes d'un feu qui se declare
darts un ustensib de cuisine,
NE JAMAmS saisir ou d@Bcer un ustensib de cuisine
enfiamm&
, Fear : Fermer la porte du four pour etouffer bs fiammes,
Ne pas projeter de [eau sur un feu de graisse, Utiliser du
bicarbonate de sodium ou un extincteur a mousse ou produit
chimique sec pour eteindre bs fiammes,
S curit6 pour enfants
enfantS Peuvent s!nt_resser, Un enfant tentant de grimper
subiEde graves bbssures.
NEJAMAmS iaisser des enfants seuis ou sans supervision
Iorsque I'appareil est en service ou encore chaud,
NF JAMAIS laisser un enfant s'asseoir ou se tenir sur une
partie quelconque de I'appareil, II pourrait se blesser ou se
brQler,
II est important d'enseigner aux enfants que la cuisiniere et les
ustensiles places dessus ou dedans peuvent etre chauds,
Laisser refroidir les ustensiles en un lieu sQr,hors d'atteinte
30

des enfants. II est important d'enseigner aux enfants qu'un
appareiI mdnager n'est pas un jouet, et qulb ne doivent
toucher aucune commande ou autre composant de rappareiI.
Familiarisation avec l'appareil
NE JAMAmS utiiiser [a porte de ['apparei[ ou [e tiroir Oecas
Cuisson et s curit6
Phcer toujours un ustensib sur un brObur de surface avant de
rdiumer. Veiibr a bien conndtre la correspondance entre bs
boutons de commande et bs brqeurs. Veiibr a aiiumer le
brObur correct et verifier que b brObur s'diume
effectivement. A la fin de la periode de cuisson, eteindre b
brqeur avant de retirer rustensib, pour eviter une exposition
aux fiammes du brqeur.
echeant} comme tabouret-escabeau pourrait se remerser
et causer de graves blessures.
NE JAMAIS utiiiser cet appareil comme appareii de
chauffage d'appoint pour chauffer ou rechauffer une piece.
Ceci peut entrainer une asphyxie par oxyde de carbone et
une surchauffe du four.
NE JAMAmS obturer bs fentes, ouuesou ouvertures b la
pattie inferieure du four ou recou_fir compietement une
grille avec par exempb une feuille d'aluminium. Ceci
empeche I'air de circuler correctement dans iefour. ce qui
pourrait entrdner une asphyxie par oxyde de carbone. La
feuiiie d'aiuminium pourrait aussi emprisonner la chaieur.
d'oO risque d'incendie.
NE JAMAmS couper la circulation de rair d'aeration ou de
combustion en obturant les events ou les arrivees d'air. Ceci
reduit la quantite d'air necessaire aux brOieurs et pourrait
Veiller a toujours ajuster correctement la taille des flammes
pour qu'elles ne depassent pas sur la peripherie de I'ustensile.
Des flammes de trop grande taille sur un brSleur sont
dangereuses, elles entrdnent un gaspillage d'energie et elles
peuvent faire subir des dommages a I'ustensile, a I'appareil ou
I'armoire situee au-dessus.
NE JAMAIS iaisser un brQieur de surface aiiume sans
surveillance, particulierement avec une puissance de
chauffage elevee ou Iors d'une operation de friture. Un
debordement pourrait provoquer la formation de fumee et des
produits gras pourraient s'enfiammer. Eiiminer des que
possible les produits gras renverses. Ne pas utiliser une
puissance de chauffage elevee pendant une periode
proiongee.
NE JAMAmS faire chauffer un recipient non ouvert dans ie
four ou sur un brOleur de surface; I'accumulation de pression
dans le recipient pourrait provoquer son eclatement et de
entrainer une asphyxie par oxyde de carbone, graves dommages materiels ou corporels.
L'event du four est situe a la base du tableau de commande.
Eviter de toucher ie voisinage de i'event du four iorsque ie four
est utiiise et pendant piusieurs minutes apres i'arret du four.
Certains composants de I'event et la zone voisine peuvent
devenir suffisamment chauds pour provoquer des brQiures.
Apres i'arret du four, ne pas toucher i'event du four ou ia zone
voisine avant que ces composants aient pu se refroidir
suffisamment.
Autres surfaces potentiellement chaudes: table de cuisson,
zones faisant face a la table de cuisson, event du four, zone
voisine de I'event, porte du four et zone voisine de la porte et
du hubiot.
Ne pas toucher I'ampoule chaude du four avec un linge
humide; le choc thermique pourrait la briser. Encas de bris de
I'ampoule, debrancher I'appareil de la source d'electricite
avant d'enlever I'ampoule, pour eviter un choc electrique.
Ne pas remiser des aliments ou ustensiles de cuisine sur la
table de cuisson ou dans le four.
Utiliser des maniques robustes et seches. Des maniques
humides peuvent provoquer la formation de vapeur brSlante.
Ne jamais utiliser un torchon a vaisselle ou autre article textile
la place de maniques; un tel article pourrait trainer sur un
brSleur et s'enflammer, ou accrocher un ustensile ou un
composant de I'appareil.
Laisser toujours refroidir un recipient d'huile de friture chaude
avant de tenter de le deplacer et le manipuler.
Ne pas laisser la graisse de cuisson ou autre materiau inflam-
mable s'accumuler dans ou pres de I'appareil, de la hotte ou
du ventilateur de I'event. Nettoyer frequemment la hotte pour
empecher route accumulation sur la hotte elle-meme ou sur le
filtre. Lots du flambage d'aliments sous la hotte, mettre le
ventilateur en marche.
NE JAMAmS porter, Iors de I'utilisation de I'appareil, des
vetements fairs d'un materiau inflammable, ou amples, ou
Iongues manches. De tels vetements peuvent s'enflammer ou
accrocher la poignee d'un ustensile.
Placer toujours ies grilles b ia position appropriee dans ie four
Iorsque le four est froid. Faire coulisser lagrille vers I'exterieur
31

avant d'ajouter ou en[ever un plat; uti[iser pour ce[a une
manique robuste et seche, Eviter d'introduire la main darts le
four pour y placer ou retirer un plat, S'il est n6cessaire de
d6placer une grille Iorsqu'elle est chaude, utiliser une manique
seche, Veiller a toujours arr6ter le four a la fin d'une p6riode
de cuisson,
N'utiliser lesgrilles que darts le four darts lequelelles ont 6t6
achet6es/exp6di6es.
Ouvrir toujours la porte du four tres prudemment. Laisser I'air
chaud ou la vapeur s'6chapper avant de retirer/introduire un
plat.
AVERTiSSEMENT : P_letsprepares : Respecter les instruc-
tions du fabricant. Si le contenant ou le couvercle en plastique
d'un mets surgel6 sed6forme ou est endommag6 durant la
cuisson, jeter imm6diatement le r6cipient et son contenu. Les
aliments pourraient 6tre contamin6s.
NE JAMAIS garnir la sole ou une grille du four avec de la
feuille d'aluminium. Ceci pourrait susciter un risque de choc
61ectrique ou d'incendie, ou une autre d6t6rioration de
I'appareil. Utiliser de la feuille d'aluminium uniquement selon
les instructions de ce guide.
Ustensiles et s curit6
Utiliser des ustensiles a fond plat comportant une poign6e
qu'on peut facilement saisir et qui reste froide, Eviter d'utiliser
un ustensile instable ou d6form6, qui pourrait facilement
basculer, ou dont la poign6e est mal fix6e, Eviter 6galement
d'utiliser des ustensiles de petite taille comportant une
poign6e Iourde; ces ustensiles sont g6n6ralement instables et
peuvent facilement basculer, Un ustensile Iourd Iorsqu'il est
rempli peut 6galement 6tre dangereux Iors des manipulations,
Veiller a utiliser un ustensile de taille suffisante pour que le
contenu ne risque pas de d6border, Ceci est particulierement
important pour un ustensile rempli d'huile de friture, V6rifier
que la taille de I'ustensile est suffisante pour qu'il puisse
recevoir les produits alimentaires a cuire, et absorber
I'augmentation de volume suscit6e par 1'6bullition de la
graisse,
Pour minimiser les risques de br01ure,d'inflammation de
matieres et de renversement par contact non intentionnel avec
un ustensile, ne pas orienter la poign6e d'un ustensile vers un
br01euradjacent; orienter toujours lapoign6e d'un ustensile
vers le c0t6 ou I'arriere de I'appareil; ne pas laisser non plus la
poign6e d'un ustensile d6border a I'avant de I'appareil, o0 un
jeune enfant pourrait facilement la saisir,
Veiller a ne jamais laisser le contenu Iiquide d'un ustensile
s'6vaporer completement; I'ustensile et I'appareil pourraient
subir des dommages,
AppNquer [es instructions du fabricant [ors de ['emp[oi d'un
sachet pour cuisson au four,
Seuls certains mat6riaux en verre, vitroc6ramique, c6ramique,
ou certains ustensiles vitrifi6s/6maill6s peuvent 6tre utilis6s sur
la table de cuisson ou darts le four sans risque de bris sous
I'effet du choc thermique, Observer les instructions du
fabricant Iors de I'utilisation d'un ustensile en verre,
La s6curit6 de fonctionnement de cet apparel[ a 6t6 test6e
I'aide d'ustensiles de cuisine conventionnels. Ne pas utiliser un
ustensile ou accessoire qui n'est pas sp6cifiquement
recommand6 darts ce guide. Ne pas utiliser de couvre-br01eur,
gril plac6 sur la table de cuisson ou systeme de convection
additionnel. L'utilisation d'un dispositif ou accessoire qui n'est
pas express6ment recommand6 darts ce guide peut degrader
la s6curit6 de I'appareil ou sa performance, ou r6duire la
Iong6vit6 des composants.
Nettoyage et s curit
Arreter routes les commandes et attendre le refroidissement
de tousles composants avant de les toucher ou d'entre-
prendre le nettoyage, Ne pas toucher la grille d'un br01eurou
la zone voisine avant que ces composants aient pu suffisam-
merit refroidir,
Exercer une grande prudence Iors du nettoyage de I'appareil,
Travailler prudemment pour 6viter des br01urespar la vapeur
en cas d'utilisation d'un chiffon ou d'une 6ponge humide Iors
de 1'61iminationd'un produit renvers6 sur une surface chaude,
Certains produits de nettoyage peuvent g6n6rer des vapeurs
nocives Iorsqu'on les applique sur unesurface chaude,
Four autonettoyant
(certains modeles[}
dans le fo0r !ors d'0ne op6rat!0n d'autonett0yage,
Nettoyer uniquement les pieces mentionn6es dans ce guide.
Ne pas nettoyer le joint de porte; le joint joue un r01eessentiel
quanta 1'6tanch6it6. Ne pasfrotter, endommager ou d6placer
le joint. Ne pas utiliser de produit de nettoyage du four darts
le four autonettoyant ou sur les zones voisines.
,Avantd'ex6cuter une op6ration d'autonettoyage, retirer la
lechefrite, les grilles du four et les autres ustensiles, et 61iminer
par essuyage tout exces de r6sidus renvers6s pour 6viter la
formation de fum6e ou I'inflammation de ces r6sidus.
32

IIestnormalquelasurfacedecuissondeviennechaude
durantuneoperationd'autonettoyage;parconsequent,evRer
detoucherlasurfacedecuissondurantI'autonettoyage,
Avertissement et avis
important pour la s curit
La Ioi cdifornienne _Safe Drinking Water and Toxic Enforce-
ment Act _ de 1986 (proposition 65)stipule la publication par
le gouverneur de la Cdifornie d'une liste de substances que
I'etat de Cdifornie considere comme cancerigenes ou
dangereuses pour le systeme reproducteur, et impose aux
entreprises commerddes I'obligation de signaler a leurs
clients les risques d'exposition a de telles substances,
Les utilisateurs de cet appareil peuvent etre exposes a une
faible concentration de certaines substances figurant darts la
liste mentionnee ci-dessus, dont benzene, formaldehyde et
suie, du far de la combustion incomplete du gaz naturel ou du
gaz de petrole liquefie, Pour minimiser lacombustion
incomplete, veiller a ce que les brLileurs soient parfaitement
regles, Pour minimiser Fexposition aces substances, veiller
bien evacuer les gaz de combustion a I'exterieur,
Nous informons les utilisateurs de cet appareil que Iors d'une
operation d'autonettoyage, ils peuvent etre exposes a une
faible concentration de certaines substances figurant darts la
liste mentionnee ci-dessus, dont le monoxyde de carbone,
Pour minimiser [exposition, veiller ace que la piece ou]se
trouve le four soit convenablement aeree durant une operation
d'autonettoyage par I'ouverture d'une fenetre ou d'une porte,
AViS IMPORTANT - OISEAU× FAMILIERS : Lesoiseaux ont
un systeme respiratoire tres sensible, Ne pas garder un oiseau
familier darts la cuisine ou darts une piece oQil pourrait etre
expose aux fumees, Les fumees emises durant une operation
d'autonettoyage peuvent etre dangereuses ou mortelles pour
un oiseau, de meme que les fumees emises Iors du chauffage
excessif de graisse, huile, margarine, et du chauffage excessif
dans un ustensiie a revetement antiadhesif,
Conserver ces instructions pour consultation ult rieure
33

low (Basse}: S'utilisepour Ie mijotageoule
maintiendelatemperatured'un mets,ou pour
lafusionde chocolatou beurre.LorsqueIeplat
ou I'ustensileest couvert,un debutde cuisson
peutseproduireaveclapuissancede
chauffageLow.
Commandes de ma
surface de cuisson
o Si un brO[eurs'eteintdurant uneoperationde culsson ferme[
Farriveedegazau brt]leur.Siuneforteodeur degaz es[ percep-
tible, ouvrlrunefenetre etattendrecinq minutesavamd'allumer
de nouveaule brOleur.
- Avant d ou_rir Farriveede gaza lacuisiniere,verifierquecnaque
boutonde commandeest_ la positionOFF{ArreO.
o NEJAMAIS toucher la surfacedecuissonavantqu'eNesesolt
completementrefroidie.Certmneszonesde la surface.
particuNerementauvo_sLnagedes brCJleurs,peuventdevemrtres
3haudesdurantunecuisson.UtiNserdesmaniques.
AHumage sans fla e de
veiHe (certains modeles)
...... T_E DU _OLEUR
Lesystemed'alIumagesansflampaede veiNe J, z-_
rend inutilel'alimentationpermanente __i.._...... _ ',
d _Jneflammede vellle.Chaquebruleur \ ..... "_'--._ s'
• ,, _ ___J/_
sce e de a tabe de cussol est doted u_ '_ ...... _.....
O_I_ICEsous LA£t U_rUR
allumeura 6tincelles.lI y a deuxaNumerspour
lesbrt_leursde surfaceconventionnels.Procederavecprudencelots
du nettoyageauvoisinaged'un brCJleurde IatabIede cuisson.Si le
chiffon utilis6accrochait ledispositifd'allumage il pourraitle
deteriorer,cequi empecheraitensuiteI'aNumagedu breJleur.
Si un brOIeurdelatable decuissonnes'aNumepas,determinersi
I'aNumeurestbrise,souilk_oumouill& Lecas6cheant,deboucher
avecuneaiguiNeou unebrocherectiligneI'orifice situ6juste au-
dessousde I'allumeur.
Allu age par veilleuse (certains
modeles}
Lots de I'installationinitiale de Iacuisiniere,ilpeut 6tredifficile
d'allumerlesveilIeusescontinues_causede I'airquisetrouve clans
la conduitede gaz.PourpurgerI'airde la conduite,tenir une
alhmette enflammeepresdu brtSleuret mettre le bouton_ la
34
High (t'levee}: S'utilisepour porter un Iiquide
6bulIitionouatteindreIa bonnepressiondansun
autocuiseur.Reduireensuitela puissancede
chauffageapres ledebut de 1'ebulIitionou de la
cuissondes aliments.
Meal {Moyen}: Unepuissancedechauffage
intermediaireest utiliseepour Iapoursuitede la
cuisson.Lesalimentsnecuisentpasplus
rapidementsi on utiliseunepuissancede
chauffageplus 6leveeque necessairepour Ie
maintiend'une douce6bullition.Ueau bout
toujours_ lamemetemperature,que 1'ebullition
soittranquilIeouvigoureuse.
positionON{MARCFIE}.Unelois le
brtileurallum6,mettreIe bouton_ la
positionOFF(ARRt_T}et proceder
commeil est indiqu6ci-dessous.
Allumage de la veilleuse :
Releverla tablede cuissonet tenir une
allumetteenflammeepresdes
orificesde la veilleuse0doirillustra-
tion}, un a droite etI'autre_ gauche.
Boutons de commande de la
surface de cuisson
OnutilisecesboutonspourcommanderI'allumagedesbr8leursde
surface.Onpeut reglerchaquebouton _ toute positionentreles
positionsextrSmesLow {Basse}etttigh {t_levee}.Onpeutpercevoir
unedetentedecalageaIa positionHigh. Onpeutchoisir toute
positionderegIageentreIesdeuxpositionsextremes.
O O Un graphique presdechaqueboutonidentifiele br8leur de
surfacecommand6parce bouton.Parexemple,legraphique
O _ gaucheidentifielebrOleuravant!gauche.
lleglage des comma_des :
Lapuissancede chauffagea employerdependdutype etde Iataille
de I'ustensileutilise.OntrouvedartsIabrochure_<La cuisson
simptifiee>>deI'informationsurlesustensilesetautresfacteurs
affectantIe reglagedeIapuissancedechauffage.
1. Placerunustensilesur la grille du brOleur.
o Siaucunustensilen'est placesurla grille du br_leur,les
flammespeuventavoirtendance_ seseparerdu brtileur.
2. Appuyeret toumer le bouton danslesensanti-horaire,jusqu'_ la
position[lie {Allumage}.
o On peutpercevoirle cliquetis correspondant_Ia production
desetincelles,et le brtileurs'alIume.{Lesquatrealhmeurs
produisentdes6tincellesIorsqu'onplacele boutonde Fundes
brt]leurs_ la position[ile.}
s_ite,, o

3. ApresFalhmagedubr0Ieur,r6gIerIatailIedesflammesselonle
desirentournantleboutondecommande.
• L'alhmeur continue_ produiredes 6tincellesaussiIongtemps
que tebouton est _ tapositionUte=
Utilisation durant une panne
Avantd_allumerun brOieurdeSurface,v_rifierquetousles boutons
de c0mmandesont_ la posit!onOFF(Arr6t).Approchor ['a
GriJJesde br@ eur
Avantuneop6rationde cuisson,v6rifierque la griIIeest
correctementphc6e. Unegrille de brQteurincorrectement _//J
instatI6epeut 6caiIter1'6mailde tatamedecuisson.
Ne pas faire fonetionner un breieur sans qu'un N_
ustensile soit preachsur magrille. L'_maii de magrille /_
pnuts'_nailler s'il n'ya aucun ustensile capable
d'ahsorber machameur8raise par mebremeur.
M6mesi les grilIesdebrOleursonttr6s durabIes,etlesperdront
progressivementleur Iustreet changerontde couleur,du fait des
temp6ratures61ev6esauxquelIeslesbrOleursJesexposent.
Remarques :
• Un br_JeurconvenaMementr6gl_et dont lesodfieessont
propress'allumeen queIquessecondes.Lorsde I'aIimentation
au gaznaturel lesfiammessont bieues,avecun cone interne
bleu intense.
Si lesflammesd'un br6Jleursontiaunes ou si Iacombustion
est bruyante,Ieratio aiUgazpeut 6treincorrect.Demander
un techniciend'effectuerle r6giage.(Lagarantienecouvre
pasce r#glage.]
Lorsde I'alimentatJonau gazdep6troie liqudi6, il est accept-
able que I'extr6mit#desflammessoit iaune. CeciestnormaJ;
aucunr6glagen'estn#cessaire.
• Aveccertainstypesde gaz,on peutpercevoirunpetit bruit
d'explosionlots de rextinction d'un brOleurdesurface.Ceci
est normal
• Sion fait passerrapidementle boutondecommandedela
position High {Etev6e}_ la positionLow (Basse],lesfiammes
peuvents'6teindre,particuli6rementsi Iebr_Jleurestfroid. Si
ceci seproduit,placerIe boutonde commande_ la position
OFF(Arr60et attendrequelquessecondesavantd'allumer de
nouveaule brOleur.
• Ajusterla puissancedechauffagedetelle maniereque Ies
flammesned6bordentpasa lap6riph6riede I'ustensile.
36

Commandes du four nettoyage manuel (certains modeles]
A B
BAKE
BROIL
TIMER CLOCK CANCEL
c D E F
t
REMARQUE: L'afficheurindklue 12:00[orsqueI'appareilestbranch6[apremierefoisouen cas depannede courant. Lest6moins lumineux
de cuissoncouranteet decuissonaugrins'alhment IorsqueFonappuiesur latouche defonction correspondante.
i
iA
i
i
iB
i%
i l
i
ic
iD
i
E
i iN
ii i_i
iF
i
Cuissoncourante
Grin
Minuterie
Horloge
ANNULER
A,(Plus]ou
Ir (Moins]
S'utiHsepourla cuissoncouranteet le
rOtissage.
S'utilisepour la cuissonaugril et le
rissolagesurpattie superieure.
Programmela minuterie.
S'utilisepour programmerrheuredu jour.
AnnuletoutesIesoperationssaulminuterie
et horloge.
S'utilisepourentrerou changerIaduree,la
temp(!raturedu four.Etablitlegril
temp6rature6Iev6eoubasse.
Utilisation des touches
o Appuyersurla touche d6siree.
o AppuyersurA (Plus)ou Ir (MoNns]pour entrerla dur6eou la
temp6rature.
o Unhip retentit IorsqueI'onappuiesurune touchedefonction.II
n'ya pasde bip pourla touche A ou _'.
o Undoublebip retentitencas d'erreurde programmation.
Remarque : Quatresecondesapresavoirappuy6sur Iestouches
,Lou _', la dureeou la temp6ratureserontautomatiquement
entrees.Siplusde 30secondess'_coulententreIa pressionsur
une touchede fonctionetsur IestouchesA ou T, lafonction
seraannuleeet I'afficheurreviendra_I'affichagepr6c6dent.
R6glage de I'horloge CLOC
1. Appuyer surla toucheCLOCK(Horloge].......
• L'hodogenepeutpasetre regl6esi lefour estdej_programme
pouruneop6rationde cuissoncourante,de grii ou une
op6rationminut6e.
2. Mettre _ I'heure_I'aidedestouchesA ouT. Si I'onn'appuie
passurcestouchesen moinsde 30secondes,Ieprogrammeest
annule.Appuyer surla toucheCLOCKet recommencer.
Pregrammatien de la minuterie
La minuteriepeut6treprogrammeedeune minute 001] jusqu'a99
heureset 59minutes(99:59).Ladur6e seraafficheeen minuteset
non ensecondes._ MtNUTERtENECOMMANDE PAt; IE FOUR.
1. Appuyer surla toucheTIMER(Minuterie). .............
[IMER
° 0:00s'alk_meet lesdeux poh_ts(:] clignotent
I'aflicheur.
2. Appuyersur _,ou T jusqu'_ ceque la dur_ed_sNreesoK
affich_e.
• Laminuteriecommence_decompterdesque ladureeaet_
programm_e.
o Lesdeux pointsgui clignotent indiquentqu'un d@compteest
en cours.(Lesdeuxpointsne clignotentpassNI'heureou Ja
tempSraturedufour sontaffich_es0
• Deuxhipscourtssignalentla fin de I'op_ration.0:00parait
I'afficheur.
• SiI'onveut,appuyersur latoucheCLOCKet rheuredujour
reapparaitbrievement_ I'afficheurpendantune operation
minut#e.
• SiI'onveut,appuyersurIestouchesBAKEou BROILetle
reglagede temperatureactueller_apparaitbrievement
I'affichagependantuneoperationminut6e.
A_lation de la min_terie :
Appuyersur latoucheTNMERet la maintenirainsi pendantplusieurs
secondes.
37

Cuisson coutante, retissage et
cumsson au gril
PourobtenirdesconseiIset desdur6esde cuissoncourante,de
rOtissageet decuissonaugril,sereporter_labrochure<_Lacuisson
simpiifi6e_>.
Programmation des commandos pour une cuisson
coutante ou un tetissage :
1. AppuyersurIatoucheBAKE(Cuissoncourante). BAKE
.000 s'attumeetIetemoin tumineuxde cuisson .........
couranteclignote_I'afficheur.
. Si Fonappuiesur latoucheBAKE,sansprogrammerune temp-
eraturedu four danslos30secondessuivantes,le programme
est automatiquementannuleet I'heuredujour reapparait
I'afficheur.
2. AppuyersurIatoucheA (Plus)ou "IV[Moins)iusqu'_ceque la
temperaturedesireedu foursoit affichee.
. Latemperaturepeutetreprogrammeede 75_ 285°C(170
550°F).
.350 ° parait_I'afficheurIorsqueI'onappuieuneloissurlatouche
,L ou V.
° Appuyer_plusieursreprisessurIatoucheA ou_' pour
changerla temperaturedu four parintewaflesde 3 °C(5°F)ou
appuyersur IatoucheA ou _' enmaintenantlapression,
pour changerlatemperaturedufourpar intervallesde6 °C
O0 °F).
. 100°ou [atemperaturereeiledu four,selonlaqueiieest [aplus
e[evee,parait_['afficlleur Iorsquelefoursemeten marclle.
. Latemperature_ I'afficheuraugmentepar intervallesde 3°C
(5°F),jusqu'_ceque latemperaturepreprogrammeesoit
atteinte.Unseulbip retentitIorsquelefour estoil COUFSde
precllauffage.
. LaisserIefourprechaufferpendant10_ 15minutes.
. PourrappeierlatemperaturepreprogrammeependantIe
prechauffage,appuyersurIatoucheBake.Latemperaturesera
afficheependanttroissecondes.
. Pour changer matemperature du four pendant maeuisson,
appuyersur Bake,puissur Iatouche ,L ou_' iusqu'_ce que la
temperaturedesireesoit affichee.
. Pour changer matempdrature du four morsd, pr6ehauffage.
appuyerdeu× lois surIatouche Bake,puis surIa touche
A ou _"iusqu'_ce que Iatemperaturedesireesoitaffichee.
3. Placerla nourrituredansle four.VerifierI'avancementdela cuisson
la dureemhlimalede cuisson.
4. LorsqueIacuissonestterminee,appuyersurIatoucheCANCEL
(Annule0poureteindreIefour, puisrotifer la nourrituredufour.
. Lefoursecaracteriseparun arr6t automatique.S'ilestIaisse
en marchependant12heures,ils'arr6teraautomatiquementet
000paraitra_ Fafficheur.Appuyersur latoucheCancelet
I'heurereapparaitra_I'afficheur.
Programmation des commandos pour la
cuisson au gHI : (compartiment inferieur -
certains modeles)
Pourde meflleursresultats,utiliserFustensileprevupour ce genrede
ouisson.
1. Phcer IaI_chefrite_ lapositionrecommandee[voirletableauci-
dessous)clansIecompartimentdecuissonau gril.
2. Appuyersur latoucheBROIL
(Gril).
* SEts'aIlumeetletemoin
lumineuxde cuissonaugril " ...............
c%note_ I'afficheur.
Tablea de c isson gril -
Compartiment infdrie r
TYPE DE VIANDE I CUISSON COIVlPARTINENTINFE_IEUN* TOTAL(IVIINUTES}_
Boe_f Steaks,_paisseur2,5cm(! po) Cuissonmoyenne Moyen 14-20rain.
Biencuit Moyen 16- 24 rain.
Boeufhach_- steakettes, Biencuit Moyen 14- 18rain.
epaisseur2 cm(:_/_,po)
Pore Jambon,precuit- tranchede 1,3cm(_/_po) Tilde Moyen 8 - 12rain.
Cetelettes,_paisseur2,5cm(1po) Biencuit Moyen 20- 28rain.
Ve_aille Pouletenmorceaux Biencult Fond Gril ran.[232° C)
(LoBroil450°F)30-45rain.
£oissoa Filets,epaisseur1,3cm C/_po) Lachairsedetache Moyen 8- 12rain.
Dames,_paisseur2,5cm(1po) Lachairse detache Moyen 10- 15rain.
Haut= positionsup6rieure:moyen= positionintermediairefond= lefondducon Fartimentdecuissonaugril (enleverlagrille).
'_*Tempsdecuissonapproximatifs,variablesselonlescaracteristiquesdechaquepiecedeviande.
38

3. Appuyersurlatouche_kpour choisirungrin_ temp6ratureHi
[Ebv@}ousur latouche_' pourchoisirungrin_temperatureLo
(Bass@.
• Choisirler6glageHipourun grinnormal
+ChoisirIe r6glageLopour un griI_temp6raturebasse,afin
d'@iterun rissoBgeexcessifdesalimentsn6cessitantdes
dur@sde cuissonpNusbngues,commela voBiHe.
• SiI'onnechoisitpas Ier6glageHi ou Loen moinsde30
secondes,Ieprogrammeseraautomat+quementannul6et
rheure r6apparaitra_I'afficheur.
4. UtiliserIestempsdecuissonsugg6r6sdansletabbau en page38.
Retournerlespiecesdeviandeverslemilieudela periodede
cuisson.
5. Apreslegril,appuyersurCANCELpour6teindrele
four,puisret+rerB Iechefritedufour+L'heuredu jour
r6apparait_ I'afficheur. +
R gulateur de four
(certains modebs)
R6g age du bouton
Le boutonOvenTemp(Temperaturedu fou0
permetdeselectionneretmaintenirla
temperaturedu four.On dolt toujoursfaire
tourner ce boutonexactementJUSQU'AIapositionde laternD6rature
d@ir@.Nepasfairetournerle boutonau-deB de la positiond@ir@
pour Iefaire toumer ensuiteversle sensinverse.
R6giage du four pour une cuisson courante ou
un r6tissage :
1. Enfoncedfairetourner le boutonOvenTemp(Temperaturedu
fou0, jusqu'_ lapositioncorrespondant_ latemp6ratured@ir@.
LaisserIefour pr@haufferpendant10_ 15minutes+
2. Placerlanourritureau centredu four. A I'expirationdu tempsde
cuissonminimumindiqu6danslarecette,6valuerle degr6de
cuisson.PoursuivreIacuissonsi c'est n@essaire.
3. RetirerIe metsdu four etramenerlebouton OvenTemp
0-emp6raturefour} _la positionOFF(Arret}.
Remarque : Ontrouved'autresconseilsconcemantia cuisson
aufour,IerOtissageougril dansla brochure<_LaCuisine
Simplifi@>_.
R6glage du four pour c_isso_ a_ gril
(certains modeles} :
1. Pourobtenir lesmeilburs r@ultats,utiliser un ustensilecongu
pour lacuissonau griL Placerla I@hefrite_ la positionre-
command@dansle grille du four. {Voirle tabbau enpage38.}
2. PlacerIeboutonOvenTemp[Temperaturedu fou0 {_Iaposition
BROIL(GriI}ou{_Iaposition(232° C}450° Fpour unecuissonau
gril _ bassetemperature.
• Utiliserla temperatureplusbassepour la cuissonaugril pour
@iter un bmnissageexcessifoupour un metsn@essitantune
Iongueeuisson@atexemplevolaille}.
3. Utiliserlestemps decuissonsugg6r@dansIetableauenpage38.
Retournerlespiecesdeviandeverslemilieudelaperiodede
cuisson.
4. Contr6IerJedegr@de cuisson:inciser Napiece deviandeprosdu
centre pouren observerIacoubur.
5. A lafin de lap6riodedecuisson,ramenerlebouton OvenTemp
0-emperaturedu fou0 a JapositionOff [Arret}. RetirerJa
I@hefritedu four.
AH mage sa s flamme de veiHe
(certains modSles}
La cuisini6reestdot@ d'un systemed'alIumagesansflammede
veille.Cesyst@_efermeautomatiquementI'arriv6edegazet
emp_che teut _o_cdem_eme_td_ _eurtots d'_te _tterr_pdo_
de Faiime_tatien _ectriqueo
IIne serapaspossibled'alIumerle br_IetJrdu four avecune
allumette.Ne pastenter defairefonctionnerle four lots d'une
interruption de ralimentationelectrique.
AH mage par re+Hesse (certains modeles}
AllumezIebrOleurarriereen premier,avant laveilbuse du four. Ceci
enl6verafair du circuit degazet favoriseraI'allumagede la veilIeuse.
Sinon,Ia dur6ederaliumagepeut6treplusJonguequecelJequi est
pr@ue.
Atl_mage de la veille_se d_ fo_r :
Unefob laportedu grilloir refroidie,I'ouvriret retirerla grille et la
I@hefrite.
Toutenetant _ la positionARRET,appuyezet maintenez
enfonc_b bo_to_ de matemp_,rat_re d_ fo_r et
tenezuneaIIumetteallure@au-dessusdeIa
veilbuse situ@ _ I'arrieredu br0bur [volt
I'illustration}.Unefob laveilbuse alhm@,
re!_chezIebo_to_de temperature d_
\
" four et remettezla I@hefriteet le plateau.
(REMARO,UE: Lebr0bur du four est
illustr_ sanslediffuseurde flammeen
m_taL}
39

Commando du four autonettoyant (certains modeles)
A B C D
IBROR.
CO0<& ............................ .................. KEEP
HOLD CLEAN DELAY CLOCK WAR>M
E F G H j
TIMER
CANC%
Le tabieaude commandeestcongupourfac/iter la programmation.LafenStred'affichageind[queFheure,bs fonctionsavecminuterieet
fonctionsdufour. Le tableaude commanderepresent6comprendcaract_rJstiquessp@ifiquesau mo@le.(Lestylepeutvarierselonle
modele.}
....,...m
A
B
Di
G
t
/i
Gill
Cuisson courante
A (Plus}ou
V (Moins}
Minuterie
Cuissonet
msJntien
Nettoysge
Demsrrsge
differ6
Horloge
Msintiensu
chsud
Annulet
S'utilisepourIscuissoeaugril et lerissolage
surpsrtiesuperbure.
S'utilisepourIscuissoncoursnteet b
rOtissage.
S'utilisepourentrerouchangerladur@,la
temp@sturedu four.Etsblitle gril
tersperatureELEVEEou BASSE.
ProgrammeIsminuterie.
Pourcuirependantunedureepr66tablie,
avecmsintiensuchaudpendantuneheure.
S'utilisepourprogramrnerlecycle
d'sutonettoyage.
Programmelefourpourdebuterunecuisson
plustard.
S'utilisepourprogrammerI'heuredujour.
S'utilisepourmsintenirsu chsuddanslefour
losalirsentscults.
Annuletouteslosop@ationssaufminuterb
ethorloge.
Utilisation des touches
o Appuyersur Iatouche desir@.
° Appuyersur latoucheA (Plus}ou_r (MoJns}pourentrerladureeou
latemp@ature.
o Unbip retentit IorsqueI'on@pub sur unetouche.
o Undoublebip retentitencasd'erreurde programmation.
Remarque : Quatresecondesapt@ avoirappuy6sur Iestouches
A ou l!', Iadur@ou Iatemperatureseraautomatiquemententr@.
Si plusde 30secondess'ecoulententre lapressbn et sur une
touche de fonctionsur lostouches A ou Y, lafonctionsera
[annu eeet affic]eur reviendrai affic]age pr@edent.
L'hodogepeutetre programm@pourafficher la dur@ dansun
formatde 12ou24 heures.L'horlogeestprogramm@enusJnepour
un formatde 12heures.
Changement de l'horioge _ un format de 26 heures :
1. Appuyer sur lestouchesCANCEL
(AnnubO et DELAY(Demarragediff6r@et
maintenirIapressionpendanttrois
secondes.
2. Appuyer surIa touche A ou T pour
programmerun formatde 12ou 24 heures.
3. ProgrammerI'heureen suivantlesinstructions
donn@sen dessous.
Regia9 e de l'horloge
1. Appuyer sur latouche CLOCK(Horloge).
• L'heuredu jour etdeux pointsclignotent
I'afficheur.
-- DELAY
CL JCK
2. Appuyer surIa touche A ou T pour
programmerJ'heuredu jour
+ DeuxpointscontJnuent_clignoter.
3. Appuyer £ nouveausur latouche CLOCKou attendrequatre
secondes.
suite,..
40

Lorsquele courant6Hectriquearriveou apr@ une interruptionde
courant,HademiereheureavantFinterruptiondecourantva
clignoter.
Pourrappebr Fheuredujour brsqu'une autrefonction de dur6e
s'affbhe,appuyersur latouche CLOCK.
L'heurede I'hodogenepout 6trechang@ Iorsqueb foura et6
programm6pour une cuissonouun nettoyagediffereou pour la
fonctionde cuissonet maintien.
AnnuJation de J'affichage de J'heure :
Si I'onnedesire pasI'affichagedeI'heuredu jour :
Appuyersur bs touches CANCEL[Annule0 et
CLOCK[Horloge}et bs maintenirainsipendant
trois secondes.L'heuredu jour disparakde
I'afficheur.
Lorsque['affichagede['heureest annuHe,appuyersur
la touche ClockpourafficherbrievementI'heuredu jour.
R6affichage de J'heure :
Appuyersur bs touches CANCELet CLOCKet bs maintenirainsi
pendanttrois secondes.L'heuredujour rSapparatt_I'afficheur.
,/::8">+" ..........
-- CLOCK
La minuterie peut 6tre programmee de une minute [00:01} jusqu'_
99 heures et 59 minutes (99:59}.
La minuterie peut 6tre utilis@ ind@endamment de toute autre
activite du four. Elle peut 6tre aussi programm@ alors qu'une autre
fonction du four est en cours d'utilisation.
La minuterb necommandepas Jefour.Ellenesort qu'_ 6mettre
deships.
Programmation de ia minuterie :
1. Appuyer surIa toucheTIMER[Minuterie}. ++IMEF_
+ 0:00s'alJume_ J'afficheur. .............
+ LesdeuxpointscHignotent. /
A
2. Appuyer surIa toucheA ouY jusqu'_ce que Fheure
juste paraJsse_Fafficheur.
+ Lesdeuxpointscontinuent_ cHgnoter.
3. Appuyer _ nouveausur HatoucheTimerouattendrequatre
secondes.
+ Lesdeuxpointscontinuent_ clignoteret le d@omptede la
dur@commence.
+ LadernJ@eminutedu d@ompteseraaffich6esousformede
secondes.
4. A Jafin de Jadur6e programm@,un hip longretentit.
AnnuJation de Ja minuterie :
1. Appuyer surla toucheTIMERetla maintenirainsipendanttrob
secondes.
OU
2. Appuyer surla toucheTIMERetr6gHerI'heure_ 00:00.
VerrouiJJage des commandos
Lestouches peuvent6treverrouilI@spourdes raisonsde s@urit6,
nettoyageou pouremp@hertouteutilisation non souhait@.Ellesne
pourront6treutiJis6essJellessontverrouJll@s.
Sile four esten cours d'utilbation, les commandesne peuvent8tre
verrouJll@s.
L'heureactueJJedujour restera_ J'afficheurJorsquelescommandes
serontverrouiJJ@s.
VerrouiJJage:
Appuyersur bs touches Cancelet Cook& Hold
F
(Cuissonet maintJen}et lesmaintenirainsJ j
pendanttrois secondes.
L
+ LemotLOCK[VERROUILLAGE} __ COOK&
clignote _ I'afficheur.
D6verrouiJJage :
Appuyersur lestouches CANCELet COOK& HOLDet lesmaintenir
ainsipendanttroissecondes.
+ LemotLOCKdisparaitdeI'affJcheur.
Codes d'anomaJie
LeerootsBAKE[CUBSONCOURANTE[ouLOCK(VERROUILLAGE}
peuventciignoter rapidement_ i'afficheurpourpr@eniren cas
d'erreurou de probl@me.Si teJest lecas,appuyersur iatouche
CANCEL.Si losrootsBAKEou LOCKcontinuentb ciignoter,
d6brancherJ'appareiJ.Attendre quelquesminutes,puisrebrancher
J'appareil.Si Fundesrootscontinue_ciignoter,d6brancherI'appareil
et prendrecontactavecun r@arateurautoris_.
41

Cuisson courante
Pregrammatien de macuisson ceurante :
1. Appuyer surla toucheBAKE(Cuissoncourante}.
• LemotBAKE(CUHSSONCOURANTE)c@note.
• 000cIignote_ t'affbheur.
2. %bctionner tatemperaturedu four.Latemperature
peutetreprogramm@de75 _290°C(170_550°F}.
Appuyerunefois sur latoucheA ou T ou appuyer
sur latouche A ou_' et la maintenirainsk
• 175° (350°} s'allumeIorsqueton @pub la
premierefoissur I'unedestouches.
• AppuyersurIa toucheA pour augmenterla temperature.
o AppuyersurIatoucheT pour diminuerlatemperature.
3. Appuyer _ nouveausur latouche BAKEou attendrequatre
secondes.
_KE
o LemotBAKEs'arretede clignoteret s'allume_ I'afficheur.
• 38° (100°] ou Ia temperaturer@lle du four seraaffich@. La
temperatureaugmenterapar intervalb de 3°C {5°F}jusqu'a
ceque latemperaturepreprogramm@soit atteinte.
4. LaisserIefour pr@hauffer pendant8_ 15minutes.
• LorsqueIatemperatureprogramm@pourlefour est atteinte,
un hip long retentit.
• Pourrappelerlatemperatureprogramm@pendantIe
pr@hauffage,appuyersurla touche BAKE.
5. Placerlanourritureau centredu four, en laissantunminimum de
2 pouces(5 cm} entrerustensib etlesparoisdu four.
6. Verifier ravancementde la cuisson_Ia dureeminimalede
cuisson.Cuirephs Iongtempsaubesoin.
7. LorsqueIacuissonestterrain@,appuyersur
latoucheCANCEL(Annule0. C_CEI ....
8. RetirerIa nournturedu four.
Differences de cuisson entre 'ancien
four et nouveau
II est normalderemarquerquetquesdifferencesdansIadur@ de
cuissonentre un four neufet un fourancien.VoirAjustementde la
temperaturedu four _ la page45.
Remarques sur Uaeuissen eourante
au four :
• Pour changer matemperature du fo_r pendant mac_isso_,
appuyer sur Bake, puis sur Iatouche A ou T jusqu'_ ce que la
temperature desiree soit affich@.
• Po_r eha_ger matemperature d_ fo_r mo_sd_ pr_cha_ffage,
appuyer de_x lois sur latouche Bake, pub sur la touche
A ou _ jusqu'a ce que la temperature desir@ soit affich@.
• Si I'on oublie d'arreter Ie four, il s'arretera automatiquement
apres 12 heures. Si I'on desire desactiver cette fonction, voir page
/#5.
• PourdesconseibsuppJementairessur la cuissoncouranteet le
rOtissage,voir lablochure<_Lacuissonsimplifi@>>.
C isso et mai tie
Lafonction cuissonet maintienpermetde cuire pendantune dur@
pre@termin@,suivb par un cyclede maintienauchaud d'une
heure.
P_og_a_atio_ de _afo_ctio_ c_isso_ et _ai_tie_ :
1. Appuyer surla toucheCOOK& HOLD{Cuissonet _COOIK@_
o LesrootsBAKE(CUISSON}et HOLD HOLD
(MAINTIEN}clignotent.
o 000s'allume_ I'afficheur.
2. SelectionnerIatemperaturedu four. Latemperatureper
programm@de75_290°C (170_ 550°F}.Appuyerun
Jatouche A ou You appuyersur latouche ,_ ou_ et '-
maintenirainsi.
o Appuyersur latoucheA pour augmenterla temperatur_...............
o Appuyersur latouche_ pour diminuerJatemperature.
3. Appuyer a nouveausur Jatouche COOK& HOLDOU attendre
quatresecondes.
o Le mot HOLDclignote.
o 00:00clignotea I'afficheur.
4. EntrerIadureependantIaquelb ton desirequela cuissonait lieu
en appuyantsur bs touches_ ou T. Ladur@ decuissonpeut
etre programm@de 10minutes[00:10}_ 11heures,59minutes
(11:59}.
o LesrootsBAKEet HOLDs'allument8 I'afficheur.
o La dureede cuissons'allume_ rafficheur.
o La dureede cuissoncommencele compte_ rebours.
s_iteooo
42

Lorsque la dur6e de cuissou s'est 6coulee :
• O,uatrehipsretentissent.
• LemotBAKEs'6teint.
• LesrootsHOLDet WARM(CHAUD)s'allument.
• 75° (170°) parait_ rafficheur.
4. Appuyersur A pour programmerlatemp6raturedecuisson.
• 00:00et lemotHOLDclignotent.
• LemotBAKErestealhm6.
5. Appuyersur _kpourprogrammerladur6e decuisson.
• Ladur6ed'attente,IesrootsDELAY,BAKEet HOLDs'allument
I'afficheur.
Apr_s uue heure de MAINTIEN AU CHAUD :
o LemotEND(Fin)s'affiche.
o Uheuredu jour reapparak_ raffJcheur.
Auuulatiou de la fouctiou cuissou et maiutieu _ tout
momeut : ........ ,.
Appuyersur Iatouche CANCEL(Annule0.Retirerla
nourrJturedu four........ ....
Cuisson diff6r6e
Ne pas utilise[la cuissondiff6r6epourdes dearies tr6s
p6rJssab!escomuleles pr0du!tslaitiers,leporc,lavo!a!lleou les
fruits de mer,
AvecIafonctiondiff6r6e, Iefour semet _cuire plustard dansla
journ6e.Programmerla dur6ed'attented6sir6eavantque Ie four
ne semetteen marcheet ladur6e decuissond6sir6e.Lefour
commence_ chauffer_ I'heures61ectionn6eet cuit pour ladur6e
sp6cifiee.
La dureed'attentepeut6tre programm6ede 10minutes(00:10)&
11heures,59 minutes(11:59].
Programmatiou d'uu cycle de cuissou couraute
diff6r6e :
1. Appuyer surla toucheDELAY(D6marragediffer6). ......................
DELAY
. Lemot DELAY(AT[ENTE)c%note.
. 00:00clignote&I'afficheur..........................
2. Appuyer surla touche ,L ou T pourprogram-
merIadurSed'attente.
Alorsque le mot DELAYciignotetoujours :
3. Appuyer surla toucheCOOK& HOLD(Cuisson
et maintien). ......................
o 000s'allume_ I'afficheur. COOK_::
HOD
o LesrootsBAKE(CUISSONCOURANTE)
et HOLD(MAINTIEN)clignotent.
Lorsque la durSe d'atteute s'est 6coulSe :
• LemotDELAYs'6teint.
• Ladur6edecuissonestaffich@e.
• LesrootsBAKEet HOLDsont affich@s.
Pour programmer uu temps d'atteute lorsque la
fouctiou cuissou et maiutieu a d_j_ _t_
programmee :
1. Appuyer surla toucheDELAY(D6marragediff6r6). DI[ELAY
• LemotDELAY(ATTENTE]clignote. .......
o 00:00para_t_ rafficheur.
2. Appuyer surIa touche ,L ou_ pour programmer
ladur6ed'attente.
• AprSsquatresecondes,Iemot DELAYreste
allure6pourrappelerqu'uncyclede cuisson
diff_reea6t6 pmgramm&
Lorsq_e ta d_r6e d'atte_te s'est 8coulSe et que
le four se met eu marche :
• Ladur_edecuissonet latemperatureseraaffichee.
• LemotDELAYs'_teint.
• LesrootsBAKEet HOLDresteallure&
Auuulatiou : ...........
Appuyersur latoucheCANCEL(Annule0.
• TouteslesfonctionsdecuissonmJnut6eet non
minut_eserontannulSes.
• L'heuredu jour r_apparait_ rafficheur.
_emarques :
NepasutJlJserlacuissondiff@reepour desarticlesqui
n6cessitentquelefour soitprechauff&commelesg_teaux,
Jespetits biscuitset lespains.
NepasutJliserle cycle decuissonet maJntiendiffer@ssi le
four estd_]_ chaud.
43

Maintien au chaud
Pourmaintenirauchaud dansIe four desalimentscuits etchauds
ou pour r6chaufferpainsetassiettes,
Programmation du maintien au chaud :
1. Appuyer surla toucheKEEPWARM[Mah_tienau KEEP
chaud].
° Lemot WARM(CHAUD)clignote.
° 000parait8 rafficheur.
2. %iectionner latemperaturede maintienauchaud.
Celle-cipeut6trer6gl6ede 63_ 90 °C(145
190°F_.Appuyerunefoissur Iatouche_kou Ir ou V
appuyersur latouche A ou I_"et Iamaintenirainsi.
• 75° (170°_s'aIIumeIorsqueton appuiela
premiSrefois sur I'unedestouches.
° AppuyersurIatoucheA pouraugmenterla temp6rature.
° Appuyersurla touche_" pour diminuerIatemperature.
LemotWARM(CHAUD}et la temperatureserontaffich6s
pendantque la fonctionmaintienauchaud estactive.
Annumation dn maintien an chand : .................................
1. Appuyer surla toucheCANCEL(Annulet}.
2. Retirer[a nourrituredu four. ..................................
Remarques sur Uafonction maintien au
chaud :
• Pourobtenirdesqualit6salimentaireset nutritivesoptimales,
lesalimentscults aufour nedoiventpas 6tregard6sauchaud
plusde ] a 2 heures.
• PourempScherIesalimentsdedessdcher,Iesrecouvrirde
papieraluminium,sansserrer,ou d'uncouvercle.
• Pourr_chauffer des petits pains :
- recouvrirlespetitspainsde papierahminium sansserreret
lespiaceraufour.
- appuyersur IestouchesKEEPWARMet A pour
programmer75°C(170°F).
- r6chaufferpendant 12_ 15minutes.
• Pourr_chauffer des assiettes :
- placerdeux pilesdequatreassiettesmaximumdans [efour.
- appuyersur IestouchesKEEPWARMet A pour
programmer75°C(170°F}.
- r6chaufferpendant5minutes,arr6terle four et hisser les
assiettesaufour pendantencore15minutes.
- n'utiliserquedesassiettespouvantalleraufour, _ v6rifier
avec lefabricant.
- nepasposerdesassiettestildes surune surfacefroide, les
changementsrapidesde temp6raturepouvantcasser
I'assietteou lafendiller.
44

Arr t auto atique/Mode
Lefour s'arr6teautomatiquementapr_s12heuress'il a 6t6
accidentellementlaiss6en marche.CettecaracterJstiquedesecurite
peut6trearr6tee.
Pour annuJer J'arr_t 12 heures et faire fonctionner Je
four en continu pendant 72 heures :
1= ProgrammerJefour pour unecuissoncourante[voirpage42].
2. Appuyer surIa toucheCLOCK[Horloge)et la maintenir
ainsipendant cinqsecondes. CLOCK
• SAbseraafficheetcJignoterapendantcinqdes.
• SAbseraensuiteafficheen continujusqu'_ cequ'on I'arr6teou
iusqu'_ce que IadureeJimitede 72heuressoit atteinte.
• LemotBAKE(CUISSONCOURANTE)sera aussiaffichesi un
cycIede cuissoncouranteesten coursalorsque Jefour est en
modesabbat.
ToutesIesautresfonctions (Minuterie,Maintienau chaud,Nettoyage,
etc.)sont verrouiilees,sauf BAKE,pendantle modesabbat.
AnnuJation de Ja cuisson courante aJors que mefour
est eu mode sabbat :
Appuyersur Jatouche CANCEL[Annuler)=
• LemotBAKEs'eteint_ I'afficheur=
• Aucun hip sonoreneretentiL
AuuuJatiou du mode sabbat :
1=Appuyer surJatoucheCLOCKpendantcinqsecondes=
OU
2. Apr_s 72 heures,le modesabbatsetermine.
• SAbclignotependantcinq secondes.
• L'heuredu jour revient_ I'afficheur.
Ajustement de temp6rature
¢tu four
La precisiondestemp6raturesdu four a etesoigneusementv@ifiee
I'usine=lIest normalderemarquerquelquesdiff@encesdans la
cuissonentre un four neufet un four ancien=Au fur et _mesureque
Jescuisinieressontmoinsneuves,latemperaturedufour poutvarlet=
II estpossibIed'ajusterlatemperaturedufour siI'onpenseque Ie
four necur pasou nerissolepascorrectement=Pourdeciderde
J'ajustement_ apporter,regler le four_ unetemperaturede 15°C
(25 °F)pius61eveeouplus bassoque la temperatureindiqueedarts
Jarecette,puisfaire cuire Iapreparation=LesresuItatsdu _test >>de
cuissondoiventdonner uneideedu hombrede degresduquel Ia
temperaturedoit 6treaiustee=
Ajustemeut de Jatemp@ature du four :
1=Appuyer surla toucheBAKE[Cuissoncourante)=
BAKE
2= Entrer285 °C{550°F)en appuyantsurla touche A
3= Appuyersurla toucheBAKEet Iamaintenirainsi ,...........
pendantptusieurssecondesoujusqu'_ceque 0°
paraisse_ J'afficheur=
Si Iatemperaturedu four a eteprecedemmentajustee,Ie
changementseraaffich& Parexempie,si Ia temp@aturedufour
a ete reduitede 8 °C (15°F),I'affJcheurindiquera-8° (-15°)=
4= AppuyersurIa touche ,L ou_r pour ajusterJatemperature=
A chaquefois que I'onappuiesur unetouche, latemp@ature
changede3 °C(5 °F)=Latemp@aturedu four peut6tre
augmenteeou dimlnueede3 _ 20 °C (5_ 35°F)=
5= L'heuredu iour reapparaitautomatiquement_ I'afficheur=
IIn'estpasnecessaireder6ajusterIatemperaturedu four en cas
de panneou d'interruptlonde courant=Lestemp@aturesde
cuissonau gril et de nettoyagenepeuvent6tre ajustees=
Remarques sur Uemode sabbat :
• Lemodesabbatpout6tre mis en marche_ tout moment,que
Jefoursoit enmarcheou non=
• Lemodesabbatne peutpas6tremisen marchesi Ies
commandossont verrouiJl6esou laporteverrouiJI6e=
• Silefour esten modecuissonJorsquelemodesabbatest
programm6,lemot BAKE(CUISSONCOURANTE]s'eteint_ Ja
fin du cycledecuisson=lIn'y aura aucunsignalsonoreaudible=
• Lorsquele modesabbatad6marre,aucun hip de prechauffage
ne retentit=
o Tous Iesmessageset leshipssontdesactivesIorsquelemode
sabbatestactiE
o Si I'onappuiesur [atouche CANCEL,uncycle de cuisson
couranteaufour seraannule.Cependant,Jeprogrammateur
resteraen modesabbat=
o Apr6sunepannede courant,Ie four revientenmodesabbat
avec72heuresrestanteset aucuncycleactif.
45

Cuisson au gril
Programmation de la cuisson au gril :
1. Pourcommencer,appuyersur latouche
BROHL(GriD+ BRO+L
o Le mot BROIL(GRIL:)ciignote.
+ LemotSET{VAUDER:)est affich6.
2. Appuyersur latouche A pour programmerun gril 8temp6rature
61ev6eousur Iatouche T pour prograpapaerun gril
temp6raturebasse.
o LesrootsHI (ELEVEE)ouLO (BASSE:)serontaffich6s.
o %tectionnerHI broil (GriI_temp6rature6tev6e:)(290°C
[550°F]] pour un gril normal.S61ectionnerLObroil (Gril
temp6raturebasse:)(230°C[450°F]:)pour un gri!
temp6ratureinf_rieured'aliments_ cuissonplusIongue
commeIa volaille.
3. AprSsquatresecondes,Ie fourse metenmarche.
o Le mot BROILresteallum6.
4. Pourun dssoJagemaximum,pr6chaufferle fourpendant2 ou 3
minutesavantd'ajouter[anourrJture.
5. PJacer[a nourrituredans [efour. Fermer[aportedu foul
6. Retoumer[avJandeunefois _ [a moJti6de [adur6ede cuisson.
7. Lorsque['aJimentest cuit,appuyersur [atouche CANCEL
(AnnuleO.Retirer[a nourntureet [a[_chefrKedu four.................
• L'heuredu jour r6apparait_ ['affJcheuL
Remarques sur Uacuisson au grH :
o PourdemeilIeursr6sultatsIorsdu gri+,se servird'un ustensile
pr6vupour ce type de cuisson.
o Legril aureglageHI(Elev6:)estutilis_pour la majorlt6des
op6rationsde cuissonau griLUtiliser le gril au r6glageLO
(Bas:)pour la cuissondemetsdevantcuireplus longtemps,
afinde leur permettred'6trebien cults sansrissolageexcesslf.
o Lesdur(!esde cuissonaugril peuvent6treplus [onguesavec
unetemp6raturede gril inf6rieure.
o Retournerla nourriture[orsquela moiti6de [a dur6e pr6vue
pour la cuissonaugri[s'est6coul6e.
o Pourdestemp6raturesetdes conseilssuppl6mentairessur [a
cuissonau gril, sereporter_ [abrochure<<Lacuisson
simplifi6e_>.
TabUeau de cuisson au griUdu foBr
POSITION OEG_E OE TEMPS DE CU[SSON
ALIMENTS DES GP,_LLES+
Bifteck, 2,5cm (1 po:)d'#paisseur
Hamburgers, 2 cm (3/4 po:)d'6paisseur
Pot'c
Bacon
C6tetettes,2,5 cm (1 po:)
Jambon- pr_-cuittranche de 1,3cm (1/2 po:)
4
4
4
4
4
4
CUISSON
Cuissonmoyenne
Biencuit
Biencuit
Biencult
Biencuit
TiSde
TOTAL (_NUTES)
15 - 20 minutes
18 - 24 minutes
15 - 18 minutes
6 - 10 minutes
22 - 26 minutes
8 - 12 minutes
Voiaiiie
Pouletenmorceaux
Fruits de met
Dames de poisson, beurrSes, 2,5 cm (1 po:)d'_paisseur
Filetes, 1,3 cm (1/2 po:)d'6paisseur
3ou4
4
4
Bien cuit
Lachairsed6tache
Lachairsed6tache
LOBroil-
Gril _temperaturebasse
30 - 45minutes
10 - 15 minutes
8 - 12 minutes
Grillesuperieure_ la positionn° 5.
Remarque : Cetableaun'estqu'un guidede suggestions.Lesdur6espeuventvarierselon ['aliment_cuire.
46

1
Event du four
LorsqueIe fourfonctionne,Iessurfacesvoisinesde I'6ventpeuvent
devenirassezchaudespourentrainerdesbrOlures.Nejamaisbloquer
1'6venL
L'_ventest situs sous meprotecteur d'_vent du dosseret, sur ma
euisini_re. _ EVENT
I DU FOUR
__ _ ._ Ne})asmettre de
I_ _,_J plastiquesprosde
I r6ve.t,Iaohaleur
I _ "_._" -_,. pouvantIesddormer
Eclamrage du four
(certains modeles)
Appuyersur Iecommutateurd'6clairagedu foursitu6
surle tableau decommandepour allumerou6teindre
[alampe. Oven
Ligh_
Sole du four
ProtegerIasoIedesproduitsrenvers6s,enparticulieracidesou
sucres,ceux-cipouvantd6colorer1'6mailvitri% Utiliserdes
ustensilesde Iabonnedimensionpour 6viterque lesproduitsnese
renversentoupassentpar-dessusI'ustensileenbouillant.Ne pus
placerd'ustensimesou de feuimmed'amuminiumdireetement sur ma
somedu four.
GriJJes du four
, Ne pastenter dechanger [apositiondesgrilles Io[sque[efour
"No Pasrangerde nourdtureou d'ustensiiedans[efour.
Le fourest dot6 de deuxgrilles;cesgrillescomportentun dispositif
de calage.
E×traotio, : __]_1
1. Tirer la grille en ligne droitejusqu'_ X_'F_ T_FFYFF/-_
oequ'elIes'arr6te_ lapositionde _rrrrFF_Frr _
2. Souieverlagrille_ ['avantpour
pouvoir['extraire.
R6insta[[ation :
1. Placerla grille sur lessupportsclanslefour.
2. SouleverIeg6rementI'avant.Faireglisserla grillevers I'arrJ_re
au-del_dela positiondecalage.
3. Abaisserla grille etla faireglisserdartsle four.
Ne pus reeouvrirmatotamit_d'une grimmeavee de mafeuimme
d'amuminium,ni garnir mefond du four ave€ de mafeuiiie
d'amuminium.Ceei modifierait ruesr6sumtatsdeeuisson au four,
et mefond du four pourrait subir des dommageso
Positions des griJJes
POSITION5 _ositlon laplus haute) : Pourcuissonbreveaugri[ -
pain grille ou alimentsmincescontenant peu de graisse.
POSiTiON b,: Pour[apiupartdescuissonssur deuxgrilles.
POSITION3 : Pour[aplupart descuissonsdep_tisseries
surune t6[e_ biscuits- g_teaux_ 6tages,tartes auxfruits, mets
surgel_s.
suite...
47

POSmON 2 : PourrOtissagede piecesde viande,mets ensauce,
cuissonde pain,g_teauI6gerencouronne[baba)ou entremets,ou
cuissonsur deuxgrilles+
POSITION1 : PourIe rOtissaged'unegrossepiecede viandeou
voIaiNe,tartessurgelees,soufflesoug_teauxdesanges,ou cuisson
surdeux grilles+
POSITIONPOURROTISSAGE: 9
UtiNsercettepositionpour Ia cuisson
d'tm grosrOtiou d'unedinde+PlacerIes
deuxgrillesdufour I'unesurI'autre,en
appuisur [essupports[aterauxdufond
du four.
CUISSONSURPLUSIEURSGR+LLES:
Deu× grilles: PIacerles griNesauxpositions2 et 4ou 1et 4+
Remarque: Ne jamaisplacerleplat directementsur lefond du four.
Dem+-griHe
Une demi-griNeestdisponibleenaccessoire+ENeaugmentela
capacit6du four ets'accroche_gauche,_ lapattie sup6rieure+
Elleestutile pour Iacuissond'un platde
16gumesIorsqu'ungrosr0ti setrouvesur
la grille inferieure+Prendrecontact avec
le revendeurpourdemanderI'accessoire
HALFRACK(demi-grilIe)oupour
commander,composerle
1-877-232-6771E.-U.ou
1-800-688-8408Canada+
48

Four autonettoyant
(certains modeles)
Remarque : Pourla nettoyagemanuaIvoir b page52+
, II est norma que certamespiecesde la cuis+nieredeviennent
Ires chaudeslots d'un cycledenettoyage.
" Pourevite+devous blesseretd'endommagerlapore du four.
n'essayezpasd'ouvdr la porte quand<_LOCK,,
(VERROUILLAGE)estaflich6.
- Ev+terdetoucher la porte.Jehublotet Iazone de I'dvemdu four
Iorsd'un cycled'autonettoyage
o NepasutiJiserdenet[oyampour four ducommercesurle fini
du four ousurtout autrecomposantdu four. Celaab;meraitie
fini ou lescomposantsdufour.
Eliminerbs r@idusde graisseou de produitsrenvers@sur la
soleavantIenettoyage.Ceciemp@helaformationde fiammes
ou de fum@ durant lenettoyage.
Essuyerbs rdsidussucreset acides,commelespatatesdouces,
latomateou bs sauces_ basede Iait.La porcelainevitrifi@
posse@unecertaineresistanceauxcompos6sacides,maisqui
n'estpaslimit@.EIb peut sed6colorersiIesr6sidusacidesou
sucr6snesont pasenlev6savantde commencerrautonettoyage.
Programmation de l'autonetteyage :
[ Remarque : Latemperaturedu four doltetresitu@ en dessous
de 205°C(400°F)pourprogrammerun cycle d'autonettoyage.
1. FermerIa portedu four.
2. Placerlamanettede verrouillage_ la position deverrouillage.
L'autonettoyageutilisedestemperaturessup6rieures_ceilesde Ia
cuissonnormabpour nettoyerautomatiquementI'interieurdu four.
Neforcez pasIa portedu four nile levierde verrouillagepourbs
ouvrir.Cecipeutprovoquerune exposition8 destemp6ratures
6bv6es,et doncpr6senterun risquedebrOlure+
Si Iefour esttres sale,ilest normalqu'on observelaformationde
fum@ou de flammesdurant ienettoyage+NettoyerIefour
intervalbsr6guiiersplutOtqued'attendreuneaccumuiation
importantede r@idus.
Durantleprocessusd'autonettoyage,il convientde bienaerer Ia
cuisinepour61iminerles odeursnormabment 6raisesdurantle
nettoyage.
Avant J'autonettoyage
1+ Eteindrela lampe du fouravant lenettoyage+Elierisqueraitsinon,
de griller+
2+ EnbverIaI@hefrite,tousles platset lesgrilles du four. Lesgrilles
risquentdese@coloreret dene plus glisseraussibienapt@ un
cycled'autonettoyagesion ne lesenlevepas+
3. Nettoyerlecadredu four, Iecadrede la porte,la zone_ rext6rbur
du joint et autourde rouverturedartsb joint dela porte,_ I'aide
d'un produitde nettoyagenonabrasifcommeBonAmi*oud'eau
additbnn@ de detergent.Leprocessusd'autonettoyagene
nettoiepasceszones.Ellesdoiventetrenettoy@spour emp@her
lasabt6 des'incrusterpendantle cycle
de nettoyage.(Lejoint assure
1'6tancheiteautourde la porteet du
hublotdu four.}
4. Pouremp@hertout dommage,ne pas
nettoyerni frotter [ejoint qui setrouve
autour de laportedu four.Cejoint est
congupour @iterles pertesde chaleur
pendantle cycb d'autonettoyage.
3. Appuyersur latouche CLEAN(Nettoyage}. CLEAN
o Le mot CLEAN(NETTOYAGE}clignoteaI'afficheur.
Si la porten'estpasferm@,deships retentissentet le motDOOR
(PORTE}para_t_ I'afficheur.SiIaporte n'estpasferm@ dansles
45secondes,I'operationd'autonettoyageestannul#eet
I'afficheurrevienta I'heuredujour.
4. Appuyersur latouche A ou IL
+ CL-M (Nettoyage-saletemoyenne}estaffich6.
5. Appuyersur latouche A ou T pourvoir defiler
lesdifferentsreglagesde rautonettoyage.
CL-H (Nettoyage- salet6importante,4 heures}
CL-M @ettoyage- saletemoyenne,3 heures)
CL-L (Nettoyage- salet#leg6re,2 heures}
Le choixdu niveaudesalet6du four programme
automatiquementladur6edu cycled'autonettoyage.
6. Apr6s quatresecondes,lefour commencelenettoyage.
+ Ladur6ede nettoyagecommenceIed@ompte_ I'afficheur.
o Le mot LOCK{VERROUiLLAGE}parait_ I'afficheur.
• Lemot CLEANparait_ rafficheur.
Oemarrage differ8 d'un cycle d'autonettoyage :
1. Appuyersur latouche DELAY(D6marragediffer@.
DE+oA'Y
o Le mot DELAY{ATTENTE}clignote.
+ 00:00parait_ rafficheur.
suite,.,
+Lesnomsde marquedesproduitsdenettoyagesontdesmarquesd@os6esdes diff6rentsfabricants.
49

2. Appuyer surIa toucheA ou_ pour programmer .................
tadur@ d'attenteavantquenecommencetecycle.
Ladur@d'attente peut6treprogramm@de 10
minutes(00:10}a 11heureset 59minutes(11:59}.
3. Appuyer surla toucheClears(Nettoyage}.
+ LemotCLEAN{NETTOYAGE}vaclignoter...............................
4. Appuyer surIa toucheA ou_'. CLEAN
+ CL-M{Nettoyage- sabt6 moyenne}estaffich_. ...........................
5. Appuyer surIa toucheA ou_' pour voirdditer les ..........
diff6rentsregtagesde I'autonettoyage.
CL-H{Nettoyage- saleteimportante,4heures}
CL-M {Nettoyage- satet6moyenne,3 heures}
CL-L(Nettoyage- salet6 16gere+2 heures}
Lechoixdu niveaude saletedu four programme
automatiquementladur@ du cycled'autonettoyage.
6. Apres quatresecondes+lesrootsCLEAN,DELAYet LOCK
paraissent_rafficheurpour indiquerque lefour est programm6
pouruneop6rationde nettoyagediffere.Letempsd'attente
parak_ I'afficheur.
Si mefour a dej_ ete programme pour un cycle de
nettoyage et que re'ondesire 8tabmir un demai:
1. Appuyer surla toucheDELAY{D6marragediff6r@........................
• LemotDELAYciignote. DEII...AY
• 00:00parak_I'afficheur. .......................
2. Appuyer surIa toucheA ouT pour programmerIa .........................
dur6ed6sir@de I'attenteavantque ned6butele A
cycle.
Apresquatresecondes+les rootsCLEAN,DELAYet
LOCKparaissent_ I'afficheurpour indiquerque le four ...............
estprogrammepourune op6rationde nettoyagediff6re.
Letempsd'attente parait_ I'afficheur.
Lorsque mecycle d'autonettoyage d_bute :
+ LemotDELAYs'6teint.
• Ladur@de nettoyageparait_ I'afficheur.
Annuiation du cycle d'autonettoyage :
Appuyersur Iatouche CANCEL(Annulet}. .....................................
+ Tousles rootsdisparaissentde I'afficheur.
• ToutesIesfonctionssent annul@s.
• L'heuredu jour parait_ ['afficheur.
Pendant _e cycle d'autonetteyage
Lorsquele mot LOCKparak_ raffbheur, Ia portene peut 6tre
ouverte.Pour@iterd'endommagerlaporte,ne paslaforcer pour
I'ouvrirIorsquele motLOCKestaffich6.
Fum6e et odeurs
La premierefoiso8 lefour estnettoye, peut y avoirproduction
d'odeuretde fum@.Ceciestnormaietdisparattraa I'usage.
Si lefour esttr6s saleousi la I@hefritea 6t6laiss@clanslefour, il
peutyavoirproductionde rum@.
Bruits
Pendantque lefour chauffe,ilpeut seproduiredes bruitsdem6tal
en diIatationou encontraction.Ceciestnormal et n'indiquepasque
le fours'abime.
Apr_s _e cycle d'autonettoyage
Environuneheureapr@ la fin ducycle,le motLOCKs'6teint.A ce
moment,laportepeut 6tre ouverte.Pousserlamanettedela porte
verslagauchepour d@errouiller.
La saiet6 peut aveir iaisa6an r6sidu gris poudrea×. L'enlever
avecunlinge humide.S'iIrestede lasalet_,cetaindiqueque le cycle
de nettoyagen'apas6t6assezlong.Cettesalet6restantesera
enlev@au prochain cycled'autonettoyage.
si ruesgrimmeaem_t_ maiss_es_ m'i_t_rie_rda fear pendantme
cycle d'a_tenettoyage et q_'elles glisse_t real sur burs sup-
ports,lesenduire,ainsique lessupports,d'unefine couched'huile
v6g_tale.
De fi_es iig_es peuve_tappa_ait_eda_s ia perceiai_e pa_ce
qa'elle a s_bi chale_r et refreidissement, Ceciestnormalet
n'affecterapasla performance+
U_e d_cemeratio_blanche pe_t apparaitre apr_s me_etteyage
si des aliments acides o_ sacrSs _'e_t pas_t_ e_lev_s avast
qae _e comme_ce l'aate_ettoyage. Lad@olorationestnormale
et n'affecterapasla performancedufour+
_emarq_e5:
+ si Iaporte du four n'estpasferm@,le motDOOR{PORTE}
clignote a I'affbheur et le four@_etdesbipsjusqu'_ ceque la
portesoit ferm@ etque I'onappuieanouveausurClean.
+ Laportedu four setrouveraendommag@si I'on forceson
ouverturealorsque le mot LOCKest encoreaffbh6.
5O

M6thodes de nettoyage
_ Avantroute manipumatbn eu operation de netteyage,v_rifiet qae l,appareil est arr_t_
et qae teas los eemposants sent froids, afin d,6vitet des demmages ea des brNures. * Losnomsdemarquesentdes marques
' pour 6viter B formation de{achesouun Ohangementde€ouieur nett0 er i'appareila r@ d@os6esdes diff6rentsfabrbants.
, Y P
chaqueutilisation. ** Pourcommanderdirectement,
composerle 1-877-232-6771E=-LLou
, Apr_s tout d@nontagede composants,vei!ler_ effectuerun remontagecorrect. 1-800-688-8@8Canada.
NETTOYAGE
L_ehefdteet Nejamais ceuvrir la gdHe de papier d'aluminium; cola emp_che la graisse de ceuler dalls la I_cheMte.
o Recouvrirla I@hefriteetsagrille d'un lingesavonneux;Iaisseragirpour d6tacherIesr6sidus.
o Laveravecde I'eausavonneusetiSde.Utiliser un tampon_ r@urer pour@minerlessouilIurestenaces.
• OnpoutplacerIesdeux composantsdela I@hefrite clansun lave-vaisselle.
Br_meurs
surface
- Cenventionnem
- seemm_s
Cadre de Br_mear
- Br_meurs
eenventiennems
sealemem
Zone de la
console de
cemmandeet
horlege
Beatens de
commando
Tabmede caisson
et taNeaa de
commando -
_mail vitrifi6
o Nettoyerfr_quemment.LaisserIebffJleurrefmidir.Nettoyeravecdu savonetun tam,pen_ r@urer de plastique.Pour
dessouillurestenaces,utiliser un produit de nettoyagenonabrasifavecun chiffon. Eviterde laisserle produit de
nettoyages'introduiredanslosorificesdesortie du gaz;cecipourraitaffecter Iacombustiondu gaz.Sile produitde
nettoyagep@etreclanslesorifices,nettoyeravecun pinceausoupb ou unebrochedroite,particulierementI'orifice
situ6 au-dessousdeI'allumeur.Veilbr _ ne pasddormer ou agrandirlostrous.
o VeilIer_ nepas hisser de reau s'introduiredans Iesorificesdu brOleur.
o Pro@tierprudemmentIorsdu nettoyagede I'alhmeur. Le brqeur ne s'alhmera passiI'allumeurestmouiil6 ou
endommag6.
o Br0burs conventionnels:LesbrCJleurssecsclanslefour ont pIa@_ 75° C070° F).
Le cadrede brOleurestsitu6 soussoubvent-vers letablede cuissonrelevable.Nettoyezfr6quemmentpour enleverdes
d6bordements.Sion permetb Iesol de s'accumuler,il peutendommagerlafinition.
o RetirezIesgrilles et IesbrObursext6rieurs.Augmentezletable de cuissonrebvable.
• Nettoyeravecdusavonet I'eau,rin_ageet s6chez.
o PourIessob t6tus,utilisezIesproduits d'@uration mod6r6mentabrasifstelsque une patede le bicarbonatede soude
et eauou le nettoyantBenAmi_,et un garniturede frottement en plastiquenon-abrasive.
o Laverles grillesavecde l'eausavonneusetradeetun tampon b r_curerdepBstique non abrasiLPourlessouillures
tenaces,nettoyeravecune@onge ou un tampon nonabrasifsavonneuxet la CooktopCbaningCreme
(_)roduitn°20000001}**,
o Pourlosr_sidusalimentairescarbons@,enleverlosgrilles pourIesplacersurdu papier-journal,et pulv6riser
prudemmentun produit commercialde nettoyagedefour (no pasproieter Ieproduit sur Iasurfaceenvironnante).
PlacerIesgrillesdansun sachet de piastiquependant plusieursheuresou pendantune nuiLPorterdesgants
de caoutchoucetretirerIesgrilles du sachet.Lavedrincedfaires@heret r@_stallerlesgrillessurla tabb de cuisson.
o Pourutiliser la fonctionVerrouillagedes commandospour Ienettoyage,voirpage41.
o Laver,rinceret faire@chef.Ne pasutiliserun agentde nettoyageabrasifsusceptibb de rayerIafinition.
o On poututiliser un produitde nettoyageduverre,pulvSrised'abordsurun chiffon.NEPASprejeter_epreduit
direeteme_t s_r _este_ches de eemma_de e_ s_r Faffiche_r.
o Placerchaque bouton_ lapositiond'ARRET,et retirerchaqueboutonen ietirant.
• Laver,rinceret fairesScher.Ne pasutiliserun agentde nettoyageabrasifsusceptibb de rayerIafinition.
o Fairefonctionner bri@ementchaquebr8leur pourv6rifier que le boutona 6t6correctementr@_stalI6.
L'@miIvitrifi_ estdu verre Ii6au metalpar fusion. IIpeutsefissurer ous'@ailieren casde mauvaiseutilisation.II est
r6sistantauxacides,maispastotalement inattaquablepar lesacides.TouslesproduitsrenversSs,en particulieracides
ou sucr@,doivent_treessuy@imm6diatementavecun Iingesec.
o Unefois refroidi,laveravecdeI'eausavonneuse,rinceret s@her.
o NejamaisessuyerunesurfacetiSdeou chaude avecun Iinge humide.CecipourraitIafissurerouI'@ailler.
o Nejamaisutiliserde nettoyantspourfour,d'agentsde nettoyagecaustiquesou abrasifssur lefini exterieurde la
cuisini_re.
51 suite...
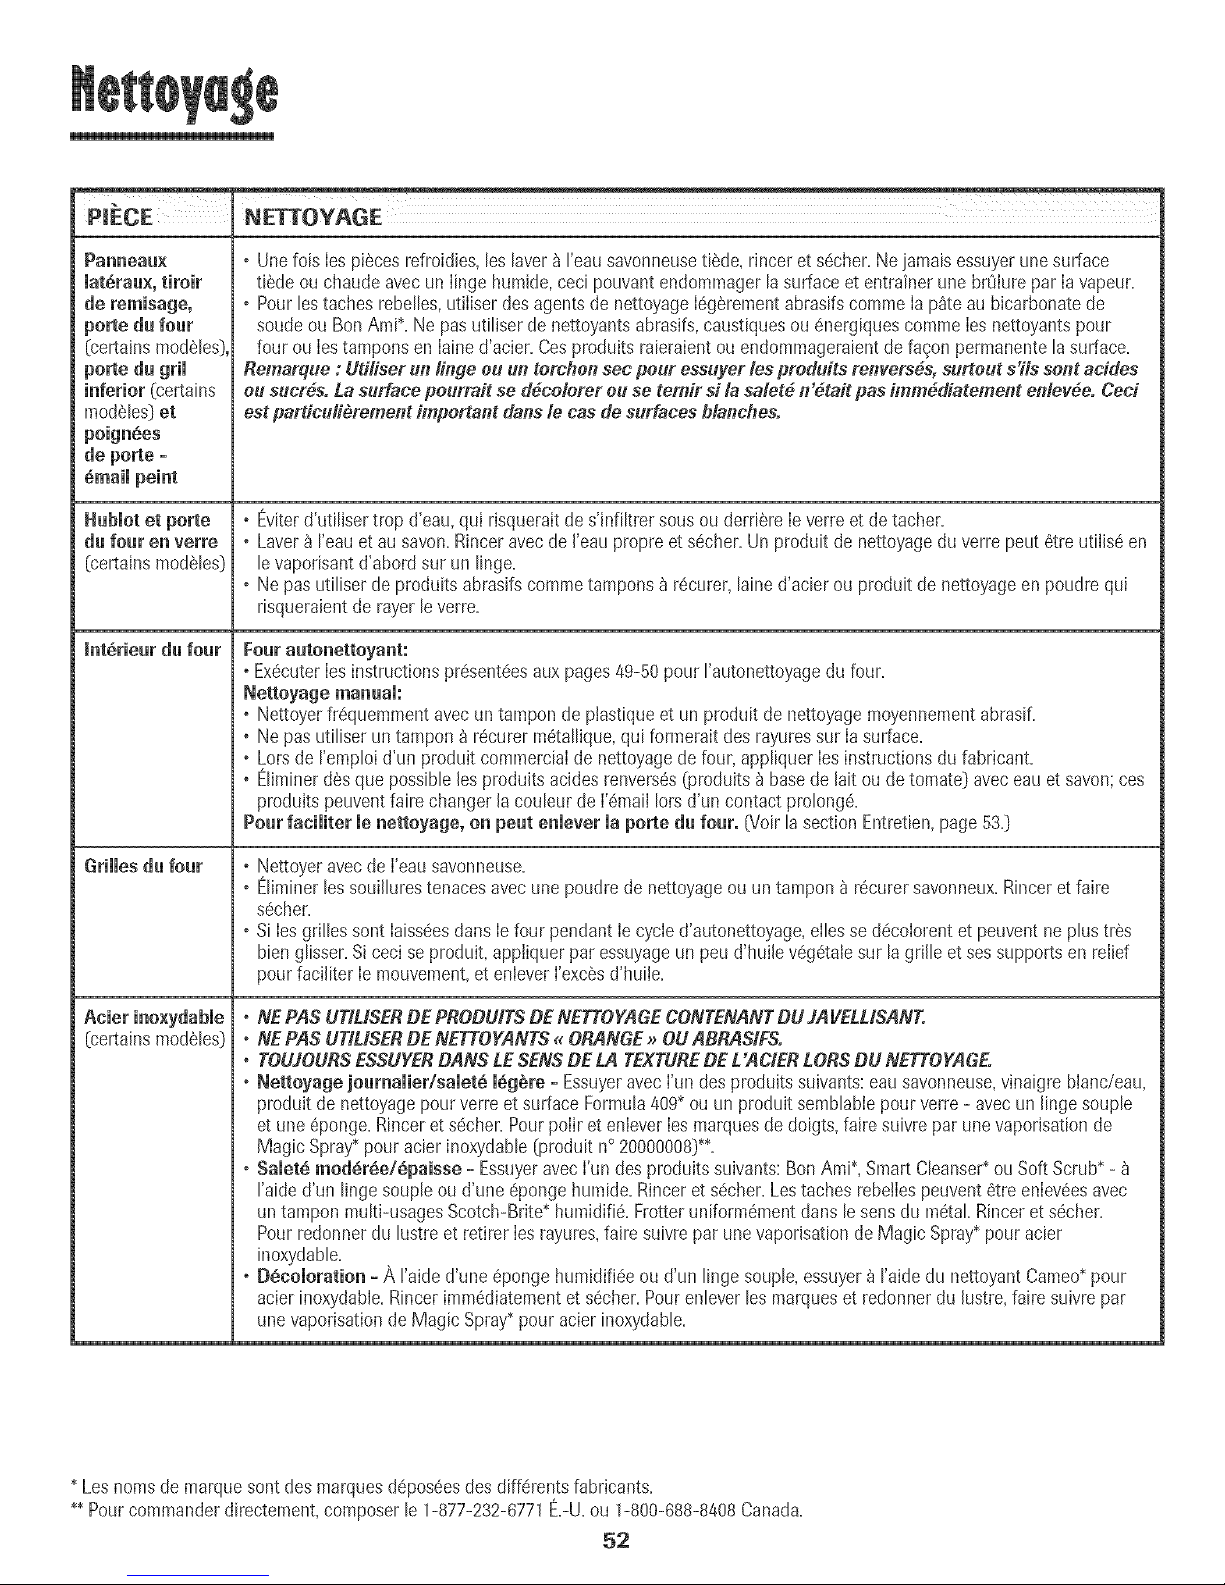
NETTOYAGE
PanmmGaux
mat_rau×,tiroir
de remisage,
porte du four
[certahs modules),
porte du grii
inferior Ccertains
modSies)et
de per_e -
du four en verre
(certains modules)
Int6rieur du four
Grilles du four
[certains modules)
* Une fois Iespi6cesrefroidies,les laver_ I'eausavonneusetilde, rinceret s6cher.Neiamaisessuyerune surface
ti6deou chaudeavecunIinge hurnide,cecipouvantendommagerlasurfaceetentrainer une brOlurepar Iavapeur.
, Pourlestachesrebelles,utiliserdesagentsde nettoyageI6g6rementabrasifscommeIap_te au bicarbonatede
soudeou BonAmR Ne pasutiliser de nettoyantsabrasifs,caustiquesou 6nergiquescommeIesnettoyantspour
four ou Iestamponsen Iained'acier.Cesproduitsraieraientouendommageraientde fagonpermanentelasurface.
Remarque : Uti]iserult linde eu uI_terchensec pour essuyer ]es preduits rerwers6s, surtout s'Hsscottaddes
eu sucr6s. Lasurface peurmit se d6celerer eu se remit sJ/a salet6 iF6tait pas imm6diatement enlev6e. Ceci
est pardcu#_rement important darts le eas desurfaces b/anches.
* Eviterd'utilisertrop d'eau,qui risqueraitdes'infiltrer sousou derri6reIeverreet detacher.
, Laver_I'eauet ausavon.Rinceravecde I'eaupropre ets6cher.Unproduitde nettoyageduverrepeut 6tre utilis6en
le vaponsantd'abordsur un linge.
, Ne pasutiliserde produits abrasifscommetamponsar6curer,lained'acierouproduit de nettoyageenpoudrequi
risqueraientde rayerleverre.
Four autonettoyunt:
* Ex6cuterIesinstructionspr6sent6esauxpages49-50pourI'autonettoyagedu four.
* Nettoyer%quemment avecuntampon de plastiqueet unproduit de nettoyagemoyennementabrasif.
, Ne pasutiliser untampon _ r6curer m6tallique,quiformerait desrayuressur Iasurface.
, Lots de I'emploid'un produit commercialdenettoyagede four,appliquer Iesinstructionsdu fabricant.
, EIiminerd6squepossiblelesproduits acidesrenvers6s(produits_ basede laitou detomate)aveceauet savon;ces
produitspeuventfairechangerlacouleurde I'6maillots d'uncontact prolong6.
Pourfaeiliter le netteyage, oil peut e_lever la per_e(Jufour° (Voirla sectionEntretien,page53.}
, ,NettoyeravecdeI'eausavonneuse.
* Eliminerlessouiliurestenacesavecunepoudrede nettoyageouun tampon_ r6curer savonneux.Rinceretfaire
s6cher.
, SiIesgrillessont Iaiss6esdartsIefour pendantIecycled'autonettoyage,eliessed6colorentetpeuventne plustr6s
bien giisser.Siceciseproduit, appliquerparessuyageun peu d'huilev6g6talesur lagrilleet sessupportsen relief
pour faciliterIe mouvement,et enleverI'exc6sd'huile.
* NE PASUT]LtSERDE PRODUffSDE NETTOYAGECONTENANTDUJAVELLISANT.
, NE PAS UT_USERDENETTOYANTS_ ORANGE_ OU ARRASifS.
, TOUJOURSESSUYERDANS LESENSDE LA TEXTUREDEL'ACiERLORSDU NETTOYAGE.
. Nettoyuge joumaiier/saiet6 16gSre- EssuyeravecI'undesproduitssuivants:eausavonneuse,vinaigreblanc/eau,
produitde nettoyagepourverreetsurfaceFormula409_ou un produit sembiablepour verre-avecun lingesouple
etune 6ponge.Rinceret s6cher.Pourpoliret enleverIesmarquesde doigts,fairesuivrepar unevaporisationde
Magic Spray_pour acierinoxydabie(produitn°20000008)_.
, Salet6 mod6r6e/6puisse - EssuyeravecI'un desproduitssuivants:BonAmi_,SmartCleanse€ouSoft Scrub*-
raide d'un linge soupleoud'une _pongehumide.Rincerets6cher.Lestachesrebe!Iespeuvent6treenlev6esavec
un tamponmulti-usagesScotch-Brite*humidi% Frotteruniform6mentdanslesensdu metal Rinceret sQcher.
Pourredonnerdu lustreet retirerIesrayures,fairesuivrepar unevaporisationdeMagic Spray_pouracier
inoxydabie.
, D6colorutio_ - A !'aided'une 6pongehumidifi6eoud'un lingesoupie,essuyer_ raide dunettoyantCameo*pour
acierinoxydable.RincerimmQdiatementet s6cher.Pourenieverlesmarquesetredonnerdu lustre,fairesuivre par
unevaporisationde MagicSpray_pouracierinoxydabie.
Lesnomsde marquesontdes marquesd@pos6esdesdiff6mntsfabricants.
_ Pourcommanderdirectement,composerle 1-877-232-6771E.-U.ou 1-800-688-8408Canada.
52

Porte du four
Pieds de r glage de l'aplomb
, Ne pasgrlmpersur [apor[e(]ufour ouverte,ou [ui imposerune
chargeexcessive.Cecipourraitprovoquerunbascu[ementde la
cuismlere [ebnsde [apore ou desblessurespout la personne
concemee.
- Nepastenterd'ouvnr ou fermerla _omeou d'utiliser lefour
, avantque la porte ait 6t6convenablementr6install6e.
Nejamais placerlesdoigtsentrela charni_reetie cadreavant
du four. Lesbrasdecharnieresont montessur ressort.Une
charni_repourraitse refermerbrutalementcontrelecadredu
four et provoquerdesdrieusesblessures.
Depose de la porte:
1. Apres Ierefroidissementdu four, ouvrirla
porte- positionde cuissonaugriI (porte
entrouverted'environ10cm [4 pouces]).
2. Saisirlaportede chaquecote.Nepas
utiliser Iapoign6ede porte pour la
soulever.
3. Souleveruniformementpour d6gagerlaportedescharnieres.
1. SaJsJrJaportede chaquecote.
2. Aligner lesfentesavecIesbrasde chamieresur Jacuisiniere.
3. FairedescendreIaportepour Ia positionnercorrectementsur Jes
charni@res.PoussersurIesanglessup6rieursde laporte pour
I'enfoncercomplStementsurles charniSres.II faut quelaporte
soit parfaitementd'aplomb.
[ emarque : On peutpercevoirune certaine<<61asticite>>Iorsde
la fermeturede laporte du four d'unecuishliSreneuve;ceciest
normal;ceteffetdisparaitprogressivement.
Hublot du four (certains modeles )
Pour proteger le hublot de la porte du four :
1. Ne pasutiIiserdeproduits nettoyantsabrasifscommedes
tampons_ r6curerenIained'acierou des produitsde nettoyage
en poudrequirisqueraientde rayerleverre.
2. Ne pasheurter le hublotenverreavecun ustensile,un articlede
mobilier,un jouet,etc.
3. Ne pasfermerla portedu four avantque lesgrillesne soienten
pIacedansle four.
Toutedegradationdu hub!otde verre- rayure,choc,tension,etc.-
peutaffaiblir sa structureet augmenterle risque de bris_ unedate
uiterieure.
53
VeFifbEque[a brideantibascu!ementagrippeconvenablement
Fun des piedsarE[ereder6giagede ['aplomb,pourque[a
cuis!ni_rene Puissebascu[er accidente
D placement d'un appareil
Losraccordsdesappareils_ gazservant_ branchercot appareii
I'alimentationde gaznesont paspr6vuspour6tre d@lac6s
continuellement.Unefois I'appareiIinstalle,NEPASIe d@lacerde
fa_onr@eteepourIe nettoyerou Iechangerde place.Sicot
appareildoit6tre demenageet/ou enlevepouretre r@are,suivre la
methodedecrite dansIesinstructionsd'insta%tion.Pourtoute
information,prendrecontactavecleservice_la clienteleau
1-800-688-1120E.-U.et Canada.
IIfaut queIepiedarrierede Iacuisini_resoit engagedansla bride
antibasculementpourque la cuisinierene puissebasculer
accidentellement.
Tiroir de remisage
(certains modeles)
Ne pas rangerdanscetiroir desartic!esde p!astiqt!eoude
papier, des produitsinflamrnables0udes produitsalimentaires.
Durant !efonctionuementdu_our,une temperatureexcessive
pour cosartic!espoutsletaNir darts!etiroir;
Letiroir de remisagepeut etreenle% pourvous permettrede
nettoyersousla cuisini6re.
D6pose :
1. Viderle tiroir et letirer iusqu'_la positionde la premierebutee.
2. SouleverI'avant.
3. Tirerjusqu'_la positionde Ia secondebutee.
4. SaisirIetiroir parlos coteset soulever/tirerpour I'extraire.
1. Insererlosextremitesdesglissieresdutireir danslesrailsdela
cuisini6re.
2. SouleverI'avantdutiroir etpousserdoucementjusqu'_la
positiondela premierebutee.
3. Souleverde nouveauletiroir et le pousserpour lerefiner.
Br meurs conventionnel
(certains modeles_)
Enaucunecirconstance,iIne fautdemonterIesensemblesde
brOleursde surface pour losnettoyer.Un ensemblede brOleurpout
etreenleved'un blocpour nettoyer lazonecorrespondante.
Los cuisini_res autonomes seu_eraent:
Losdeux ensemblesdebrQleurssont fixesenplacependantle
transport8 I'aidedevis.Unelois lacuisiniereinstallee,il estpossible
d'enlevercosvispour permettreunedeposerapideetfacile des
ensemblesdebrOieurs.
54
D_pose :
LaisserI'ensembledebrQleurrefroidir.Souleverla tablede cuisson_
SaisirI'ensemNedebrOleuret Ietourner leg_rementvers lagauche
pour liberer losdeuxpattesde I'ensemble.Puis,souleverI'ensemble
et Ietirer versI'arriSrede Iatable decuissonjusqu'_ ceque les
extremitesdeI'obturateurd'air de I'ensePablesedegagentdes
soupapes.
Remise en pmace:
hltroduireIesextremitesdeI'obturateurd'air sur I'ensemblede
brOleur,par-dessuslossoupapes,et baisserI'ensemNeen place.
S'assurerde fixer losdeuxpattesdeI'ensemblede brOleurdanslos
deuxfentes du supportde brOleurmonteau dessousdu brOleur.
(REMARQUE:Si Iespattes nesont pascorrectementintroduites
danslosfentes,I'ensemblepoutbasculeret los brOleurspeuventne
pass'allumercorrectement._)
Sole du four
ProtegerIasoledu four contreIesrenversements(particu%rement
pour Iesproduitsacidesousucresl),qui peuventsusciterun
changementdecouleurde I'emailvitdfie. Utiliserun ustensiledela
tailleapproprieepour evitertout renversementou debordement.
La soledu four pout etreenleveepourpermettreunnettoyageplus
facile.
Depose :
Apr_sle refroidissementdu four,retirerIes
grillesdu four. Fairecoulisservers%vant du
four los deuxpitonssituesdanslosangles
arriSrede Iasoledufour.
SouleverIebordarrierede Iasoledu four,
puisIafaireglisserversI'arrierepourdegager
le bordavantdeIa pattiefrontale du chassis.Retirerla soledu four.
R_i_stallatio_ :
Engagerrebordavantde [asoledu four dans[apartiefronta[edu
chassisdu four. Abaisser['arriSrede lasoleet fairecou[isser[es
deuxpitonsvers['artiStepourimPaobiliser[a soleenplace.
Raccordeme t lectriq e
Losappareiis nScessitant_ne amimentation [_-----_/_.........
_mectriq_ecomportent _ne fiche _ trois broehe., _L.(',_ _
Paise_ laterre qui dolt etrebrancheedirectement
dartsuneprisede 120volts_ trois caviteset
correctementraise_ laterre.
Touioursd_bmncher/'appareL;avantd'yfaire def'entretien,
Lafiche_ trois brochesraise_ laterrefournit uneprotectioncontre
losdechargeselectriques,NE PAS COUPERN_ENLEVERLA
RROCNEDE TERRE DU CORDOND'ALliV_ENTATION.
SiIaprisene comporteque deuxcavites,n'estpasraise_laterre ou
n'estpasappropriee,mepropriStaire de m'appareiiamarespoasa-
bimit_de faire rempmaeermaprise par line prise _ trois eavitSs
eorreetemeat raise _ matorte°

P_OBL_WE iiiiiiiiiiiiiiiiiiiiiiiiiiiiiiiiiiiiiiiiiiiiiiiiiiiiiiiiiiiiii_SOLUT[_NI_
Pourmapmupa desprobm mes
observes, essayer d'aberd mes
semutienspessibmes,_ dreite.
Un br_ieur de surface ne s'ammume
pas.
° Verifier que Iescommandesdu four sontcorrectementreglees.
° Verifier si lafiche est biersinsereedartsIa prise.
° Inspectedrearmerled[sjoncteur.Inspectedremplacerlesfusibles.
° ContrO[erlasourced'alimentationelectrique.
Verifierque I'appareilestcorrectementraccorde_ [asourced'e[ectrlcite.
Determinersi I'alimentationelectriqueest interrompue(fusiblegrilIddisjoncteur ouvert).
Verifierque I'a[[urneurestsec et qu'iIemetdesetince[[es.Lebr0Ieurne peuts'a[lumersi
I'a[[umeurestendommage,soui[[eoumouilIe.Si['alIumeurnegenerepasd%t[ncel[es,ramener
Ieboutonde commande_ [aposition OFF(ARRCT_.
Fmammesnon uniformes. , Orificesdu brQleurobstrues.
S_paration entre lesflammes et , VeilIer _ placercorrectement['ustensilesur Iagri[Iedu brOleur.
mebreleur,
R_suitats de cuisson au four
differents des attentes ou de ¢eu×
produits par mefour ant_rieur,
R_sumtats ineerrects morsdema
cuisson au grim,ou _mission
e×eessive de fum_e,
Verifierque Ia temperaturese[ectionneeest correcte. Veillera prechaufferlefour si
ceciestdemandedans[arecette.
° Determinersi I'eventdu four estobstrue.Voirsonemplacementpage47.
° S'assurerquelacuisiniereest d'ap[omb.
° Lesreglagesdetemperaturevarientsouvententreun four neufet tefour qu'iIremp[ace.
Onobservesouventune derivedu reg[agede temperatured'un four a mesurequ'iIvieiI[it;
il peutdevenirpluschaudou moinschaud.Voir page45 lesinstructionsd'ajustementde
latemperaturedufour {certainsmode[es).REMARQUE:IIn'estpasutiledemodifier[eregiage
detemperaturesi Iavariation n'affectequ'uneoudeux recettes.
° UtiliserIesborisustensi[es.Lesustensilesfoncesdonnentunbrunissementdecouleurfoncee,
lesustensilesbri[[ants,unbrunissementplus clair.Pourd'autresinformationsau sujetde [a
cuissonau four,voir IabrochureLacuissonsimplifiee.
° Verifier [apositiondesgrilleset desustensiles. Lorsde [arepartitionsur deuxgriI[es,nepas
superposerIesplats. Veil[era hisser unespacede 2,5a 5cm (1_2 po} entre [esplatset les
paroisdu four.
° ContrO[er['uti[isationde feuille d'a[uminiumclanslefour. Nejamais recouvrircomp[Stement
unegrilledufouravecde[afeuil[ed'aluminium.Placerun petitmorceaudefeui[[ed'a[uminium
sur[agrille sous[eplat pourrecuperer[esmatieresrenversees.
Determiner[apositiondesgrilles.Lesalimentspeuvent6tretrop pr8sdesflammes.
Utilisationincorrectede feui[[ed'aJuminium.Nejamais garnir [agrillede [Schefriteavec
de IafeuilIe d'aluminium.
EnleverI'excesde graissesur Iapiecede viandeavant[acuissonau griL
Utilisationd'unelechefritesouillee.
PrechaufferIefour pendant2_ 3minutesavantdeplacer le platdans le four.
Portedu four fermeedurant [acuissonau gri[.
suite,,,
55
PROBLEME SOLUTION
Impossibimit_d'autonettoyage
du four (terrains modules).
Lefour nese aatonettoie pas
correctement (certains mod_mes).
Laporte da four ne se d6verrouimme
(certainsmod_mes)o
o Determinerque['apparei[n'a pas6t6programmepour un autonettoyagediffere.Voir
pages49-50.
° Verifierque Iaporte estfermee.
° Verifiersi[a commandeesten Mode Sabbat.Voirpage45.
o Lefour estpeutetre bune temperaturesuperieureb 205°C (400°F}.La temperaturedu
four doit etreinferieure_205°C{400°F}pour pouvoirprogrammeruncycIed'autonettoyage.
° Untempsdenettoyagepluslongpeutetrenecessaire.
° Onn'apas6Iimin6avant['operationd'autonettoyagelesaccumuIationsexcessivesderesidus,
particuIierementIesresidusd'aIimentsacidesousucres.
Accumalation d'humidit_ sur le ° Ceciest normal durantIa cuissond'alimentscontenantbeaucoupd'eau.
hublot ou vapeur sorlant de l'event, • Utilisationexcessived'humidit6 [orsdu nettoyagedu hub[ot.
emission d'une loire odeur ou de
fumee lots de la raise en marche
du four.
Codes d'anomalie
(terrains modules).
Des bruits se font entendreo
L'interieurdufour eatencore chaud.Attendreenvironune heureapresrachevementde la
perioded'autonettoyage.I!estpossibled'ouvrir [aporteapres[adisparitiondu messageLOCK
G_ERROUILLAGE)surI'afficheur.
Lescommandesetlaportesontpeut-etreverrouillees.Voirpages41et50pour[edeverrauiIIage
o Ceciest normalpourune cuisiniereneuveetdisparaitapresquelquesutilisations.
Uncycled'autonettoyage_<br0lera_>plus rapidementlesodeurs.
o Laraiseen marched'unventilateuraide_retirer fumeeet odeurs.
o Presencede saIetessur [asole.Proceder_un autonettoyage.
o LesrootsBAKEouLOCKpeuventcJignoterrapidementbI'afficheurpourprevenird'uneerreur
ou d'un probJ_me.Si[emotBAKEou LOCKparaitb['afficheur,appuyersur [atoucheCancel
Si [emot BAKEou LOCKcontinueb clignoter,debrancher['appareiLAttendre queIques
minutes,puisrebrancherI'appareiLSi [e mot continue_ clignoter,debrancherrapparei[et
prendrecontactavecun reparateurautoris&
o SiIefouresttressale,lesfiammechespeuventproduireuncoded'anomaIieaucoursducycle
d'autonettoyage.Appuyersur IatoucheCancelet IaisserIefour refroidircompIetement,
essuyer[asaIet6enexcaspuisreprograminerI'autonettoyage.Si[ecoded'anomaIiereapparait,
prendrecontactavecun reparateurautorise.
®
Lefourfait plusieursbruitsfaibles.IIestpossibled'entendrelesrelaisdu four qui semettent
en marcheets'arretent.Ceciest normal.
AIorsqueIefourserechauffeetserefroidit,iIestpossibled'entendredesbruitscorrespondant
Iadilatationet_lacontractiondespi_cesmetalliques.Ceciestnormaletn'endommagepas
I'appareil.
I1n'y a ni bip ni affichageo o Lefour estpeut-etre en Mode Sabbat.Voir page45.
_ SAb ))clignote puis
reste ammum_.
• Lefour esten modesabbat.Pourannuler,appuyersurla toucheClocket maintener-ia
enfonceependantcinq secondes.
56

Garantie de la cuisini re gaz
Garantie cemplbte d'une annee - Pibces
et main-d'oeuvre
Durantuneperioded'un (1) an a compterdela date
de I'acnatinitialau detail,toute piecequ_serevelerait
ddectueusedansdesconditionsnormabsd'usage
menagersera repareeou remplaceegratu_tement
VeuiUezrioter : Cegarantiecompletenes'appliquem
quesi le apparellset[x}uveau Canadaou auxEtats-
Unis.Lesappareilssitu@ailburs nesontcouver[sque
parlesgarantieslimit@s,y comprisde piecesquJse
revelerabntddectueuseslapremiereann@.
Residents canadiens
Legarantlec_-dessuscouvrentlesapparellsin_talles
au Canada.seubmen_s'ilsontete agr@,sparB CSA
saulsicesappareiBonteteintroduit,sau Canada
I'occasiond'unchangementde residencedesEtats
Unisversb Canaoa.
Lesgarantiesspecifi@'esformul@sci-dessusson[le_
SEULESque/e fabricantaccorde.Ce_/arantievous
conbrentdesdroitsjufidiquessp_cifi@'ese_vous
pouvez#,,galementjowd'autresdrot_s,va#ablesd'un
6tat b/'autre,d'uneprovinceauneautre.
Ne sent pas couverts par ces garanties :
1= Lesdommagesou derangementsdus_:
a=Miseenservice,livraisonou entretieneffectuesincorrectement=
b=Toutereparation,modification,alterationettout reglagenon autoris@par
lefabncantou par unprestatairedeserviceaprSs-venteagree=
c=Mauvaisemploi,empIoiabusif,accidents,usagenonraisonnable,ou
catastrophenatureile=
d=Aiimentationelectrique[tension,intensit@incolrecte=
e=Reglageincorrectd'unecommande=
2= Lesgarantiesnepeuventetrehonoreessi Iesnum@osdeseried'origineontete
enleves,modifi@ou nesontpasfacibmentlisibles=
3. Ampoules.
4. Appareilsachet@auxfinsd'usagecommercialouindustriel.
5. Lesfraisdevisited'un prestatairedeserviceoudeserviceapres-venteencourus
pour lesraisonssuivantes:
a.Correctiond'erreursde raiseen service.
b.initiationde rutilisateur_I'emploideI'appareiL
c. Transportde I'appareiljusqu'aI'entreprisedeserviceapres-venteet sonretour.
6. Dommagessecondairesou indirectssubispartoute personnesuiteau non-
respectdecesgaranties.CertainsetatsouprovincesnepermettentpasI'exclusion
ou la limitationdesdommagessecondairesou indirects;parconsequentles
limitationsou exclusionsci-dessuspeuventnepass'apptiqueravotrecas.
Pour avoir droit au service en vertu de magarantie, imfaut :
I. PresenterB factured'origine,b bordereaud'expeditionouautrepapierappropde
donnantIesdetailsdu reglementetladate.
2= Ladatedoittomberdanslaperiodestipul@dansla garantie=
3= PourIesappareilsneufsvendusavecdesresidencesneuves- Ieconstructeurdoit
fourniraucibnt Iafacture_racheteur=Laperiodedegarantb commenceleiour
de I'achatdeI'appareiIsaufsi unepreuveavecdatedetransfertde lapropriete
neuveestegalementfoumie=
Si unserviceapr_s-venteestn@essaire,iIfaut d'abordconsulterla sectionsurle
d@annagedumanueld'utilisationet d'entretienou appebr MaytagServicesSM/service
laclientSieau 1-800-688-1120t_=-U=etCanada=
Pour obtenir prestations de garantie
PourIocalberuneagenceagreeede serviceapres-ventedansvotreregion,prenez
contactavecle@taiIlanto_ vousavezacheteI'appareil;ouappelezMaytag
ServicesSM/service_ IaciientSle.Sivousn'obtenezpasunservicesatisfaisantenvertu
de la garantie,veuiIlezecrireoutel@honer_:
MaytagServicessM
A I'attentiondu CAIR Center
P.O.Box2370,CleveBnd,TN37320-2370
Eo-Uoet Canada 1-80e-688-1120
Remarque : Lorsdetout contactaupresdeMaytagServicessM,Servicea la
clientebet concemantunprobl_me,veuilbzfournirhnformationsuivante:
a.Vosnora,adresseetnumerodetel@hone;
b.Numerode modeleet numerodeserie(situes_gauchede lacuve}de
['appareiI;
c. Noraet adressedu detaillant;
d.Descriptionclairedu probl_meobserve;
e.Preuved'achatavecladate.
Lesguidesd'utilisation,bs manueisdeserviceetbs mnseignementssurbs piecessont disponibbsaupresdeMaytagServicesSM,serviceala clientSb.
57

Estufa a @as
de #Waterias
3ortaNtes
............................... 59=63
:ufa ................... 64-65
de Gas Sdlados
_omo ................... 66=77
"he de Limp|eza Manuam
Hornear
zador Asa,
Cuidado y Limpieza ......................... 78-81
Homo Autoiimpiante
Procedimbntos de Limpbza
IViantenimiento ................................. 82-84
Locaiizaci6n y Soluci6n
de Averias ..........................................85-86
Garantia y Servicio ................................. 87
Asa
o Autolim piante
ParriHasdel Homo
Mantener CaHente
Asa
Diferido
er Caliente

mnstamador:PotfavordejeestagalaJuntocone!
Consumidor:Potfavorba y conserveestagufaparareferencia
futura. Conserveel Eecibode compray!o el chequecanceBd0
c0m0 c0mpr0bantedecompta.
N8merode Serie
Fechade C0mpra
Sitiene preguntas,liamea:
!s800_688_2080 _Y en EE.UU.para personas
Ennuestrocontinuoaf_inde mejorarlacalidady rendimientode
nuestrosebctrodom@tbos,puedeque Seanecesariomodificar
Para iafermacidn sebre servide, ver pbgina 87.
Las advertencias e instrucciones importantes sobre seguridad
que aparecen en esta guia no est_indestinadas acubrir todas
las posibles circunstancias y situaciones que puedan ocurrir,
Se debe ejercer sentido comOn, precauci6n y cuidado cuando
instale, realice mantenimiento o haga funcionar el artefacto,
Siempre pdngase en contacto con el fabricante si surgen
problemas o situaciones que usted no comprenda,
Reconozca los sffnbolos, advertencias,
etiquetas de seguridad
ADWR'rENC A;Pe,gr0o r ct CassegurasqUe
PODR!AN causar bsi6n personal grave o mortal.
PRECAUCI6N _%l!gms 0 prScticas n0 seguras que
PODRtAN causar lesi6n personal menos grave.
Lea y siga todas las instrucciones antes de usar este
electrodom6stico para evitar el riesgo potencial de incendio,
choque ei6ctrico, iesi6n personal o dafio ai eiectrodom6stico
como resultado de su uso mapropiado, Utilice este
electrodomestico solamente para el propOsito que ha sido
destinado seg8n se describe en esta gula.
Para asegarar funcionamiento correcto y segaro: El
eiectrodom6stico debe ser instaiado debidamente y puesto a
tierra pot un tecnico caiificado. No intente ajustar, reparar.
prestar servicio o reemplaza ninguna pieza de este electro-
domestico a menos que seaespecdicamente recomendado en
esta guia. Todas las reparaciones deben sellrealizadas pot un
t6cnlco calificado, Pidaal instalador que le indique la
ubicaci6n de la v_lvula de cierre del gas y como cerrarla en
caso de una emergencia,
Siempre desenchufe el electrodom6stico antes de efectuaH
alguna reparacion
Si no se sigue estrictameate la iaferraaci6n
prepercienada ea esta gu [a, se puede preducir ua
iacendie e una exp|esi6n, causande da_es materiales,
bsieaes perseaales e mertales,
- No almaceae ai use gaseliaa ni etres vaperes y
I_quidos iaflamables ea la veciadad de este
electredemSstice e de c_aiqaier otto.
o QUE ttACER SI PERCIBE OLOR A (;AS:
o No irate de eaceader _iag_a ar_efacto.
o No toque aiagua interrupter el_ctrice,
o No _se aiagea tel_feae ea sa edificieo
o Liame ia_ediata_eate a s_ preveeder de gas
desde el tel_feae de _n veciae. Siga las
i_str_ccie_es prepercieaadas per el lsreveeder
_e gas.
o Si _e p_ede lecalizar a s_ preveedor de gas,
Ilarae al c_erpe de beraberes.
- La instalaci_a y reparacieaes debea set efect_adas
per _a t_caice calificade, _aa ageacia de
reparacieaes e el preveeder de gas.
una situac!6n pdigmsa, Los escapes de gas no pueden set
detectad0s pot e! o!or solamente, Los proveedores de gas
aprobado por ei laboratorio UL tnst_lelo y Liselode
acuerdo con las instrucciones del [abdcante.
59

lnstruccienes Generates
o TODAS LAS ESTUFAS SE PUEDEN
VOLCAR Y CAUSAR LESJONES
PERSONALES
° mNSTALEELDmSPOSffW(}
ANTiVUELCO INCLUIDO CON LA
ESTUFA
o SIGA TODAS LAS mNSTRUCCiONES
DE mNSTALACmON
ADVERTENCIA: Para redueir el desgo de vuelco deU
ebctrodom6stico a eausa de use anormal o debido a
peso e×eesivo en Japuerta deJ homo, es neoesario
asegurarJo mediante un dispositivo antivueleo
debidamente instalado=
Paraverificar si eI disposidvo est,1debidamente instaBdo, mire
debajo de la estufa con una linterna para asegurarse de que
uno de los tornillos niveladores traseros estd debidamente
enganchado en la ranura del soporte, Eldispositivo antivuebo
asegura el tornillo niveBdor trasero al piso cuando estd
debidamente enganchado, Estodebe verificarse carla vez
que la estufa sea movida,
Pata Evitar un it|cot|die e
Da e Causado pet eJ Hume
Asegurese de que se hayan retirado redes los materiabs de
empaque del ebctrodomdstico antes de su use,
Mantenga el drea alrededor del ebctrodomdstico libre y
exenta de materiabs combustibles, gasolina u otros vapores y
materiabs infiamabbs,
Si el ebctrodomestico es instalado cerca de una ventana, se
debe tener cuidado para evitar que Bs cortinas pasen sobre
los quemadores,
NUNCA deje articulos sobre la cubierta de la estufa, Elaire
caliente del respiradero puede encender los articulos
infiamabbs y aumentar la presi6n en los envases cerrados
hasta hacerlos reventar,
Muchos envases de %0 aerosol son EXPLOSIVOScuando son
expuestos al crier y pueden ser altamente infiamabbs, Evite
su use o su almacenamiento cerca del ebctrodom6stico,
Muchos pl_sticos son vulnerables al calor, Mantenga los
pl_sticos alejados de las piezas de la estufa que puedan estar
tibias o calientes, No deje art{culos de pl_stico sobre la
cubierta de la estufa pues se pueden derretir o ablandar si
est_indemasiado cerca del respiradero o de un quemador
superior encendido,
Paraeiiminar ei riesgo de pasar sobre los quemadores
superiores calientes, no se deben guardar art{culos en los
armarios que estSn directamente sobre la estufa, Si tabs
armarios son usados para almacenamiento, debe limitarse a
colocar articulos de use poco frecuente y que pueden
guardarse en forma segura en una _rea que est_ sujeta ai
calor proveniente de la estufa, Las temperaturas pueden no
set apropiadas para algunos articulos, tal come liquidos
vol_itiles,limpiadores o sprays en aerosol,
En Case de lncendie
Apague ei eiectrodomestico y ia campana de ventiiaci6n para
evitar que las llamas se dispersen, Extinga las llamas luego
encienda ia campana para expuisar ei humo y ei oior,
• En la eubierta: Apague ei fuego o ia llama en una sart_n
con una tapa o una bandeja de hornear,
NUNCA levante o mueva una sartdn en llamas,
• En el homo: Apague el fuego o la llama cerrando la puerta
dei homo,
No use agua en los incendios de grasa, Use bicarbonate, un
producto quimico seco o un extinguidor dei tipo con espuma
para apagar un incendio o la llama,
Seguridad para Jes Ni es
NUNCA almacene art[cuios de inter6s para !os nih0S en !0S
armar!os que est_n sobre la estufa o en el protecto[ t[asero
de la estufa, LOSn!SoSque se trepan en la puerta de la
sedamente,
NUNCA deje a los niSos solos o sin supervisi6n cuando el
electrodomestico est6 en use o este caliente,
NUNCA permita que los niSos se sienten o se paren en
ninguna parte del electrodom6stico pues se pueden lesionar o
quemar,
6O

i
Se Hesdebe ensdiar a Hosni_'iosque eHeHectrodomdst[coy
HosutensH[osque estan en dHo sobre 6Hpueden estar
caHentes, Deje enfr[ar bs utensH[os caHentesen un Hugar
seguro, fuera delldcance de Hosni_'iospequdios, Se Hes
debe ensdiar a Hosni_'iosque un eHectrodom6st[cono es un
juguete, No se debe perm[t[r que Hosniu'iosjueguen con Hos
controHesu otras p[ezas de Haestufa,
NUNCA use la puerta o el cajOn(si viene equ[pado] dell
eHectrodom_st[cocomo un pe[da_o o as[ento ya que el
musmose puede voica_ _,ocasionar lesuonesgraves.
NUNCA Jse este eHectrodomesticocomo caHefactorde area
o para elevar la temperatura de la habitaciOn, Esto puede
causar envenenamiento pot monoxido de carbono y el
sobrecaHentamiento dd homo,
NUNCA cubra ninguna rendija, agujero o canal en la parte
inferior del homo o cubra la rejiHHacompieta con materiaHes
tales como el papeHde duminio, Esto evita que el aire fluya
a trav(_sdell homo y puede causar envenenamiento pot
monOxido de carbono, B papel de duminio tambien puede
contener el caHory producir un riesgo de Jncendio,
NUNCA obstruya el fiujo del aire de combustion y de
ventiiaciOn cubriendo las entradas o saiidas de aire del
homo, Esto Duede restringir el acceso dellaire a los
quemadores y causar envenenamiento por monOxido de
desconecte [a corr[ente e[dctr[ca hac[a [a estufa antes de sacar
el foco para evitar choque eldctrico,
No use la cubierta o el homo como una area para almacenar
alimentos o utensilios de cocina,
Seguridad Para Coeinar
Siempre co]oque un utensiHioen un quemador superior antes
de encender]o, AsegQresede usar HaperiHHacorrecta que
controHacada quemador superior, AsegQrese de encender el
quemador correcto y comprobar de que en efecto el
quemador haya sido encendido, Cuando haya terminado de
cocinar, apague el quemador antes de retirar el utensiHiopara
evitar exposici6n a Hallama dellquemador,
Siempre ajuste Hallama de] quemador superior de modo que
no se extienda m4s aHHade] borde inferior de] utensiHio, Una
llama excesiva es peHigrosa,desperdicia energia y puede
dau'iarHaestufa, el utensiHioo los armarios que estan sobre Ha
estufa,
NUNCA deje sin supervisi6n Hacubierta de Haestufa cuando
estd cocinando, especNmente cuando usa un ajuste de caHor
alto o cuando est6 usando una freidora, Los reboses pueden
producir humo y los derrames de grasa pueden infiamarse,
Limpie los derrames grasosos tan pronto como sea posibHe,
No use caHoralto durante periodos de cocci6n proHongados,
NUNCA cdiente un envase cerrado en el quemador superior
o en el homo, La acumuHaci4nde presi6n puede hacer
expHotarel envase causando una Hesi6npersonal grave o da_o
a Haestufa,
carbono. Usetomaollas secos y gruesos, Los tomaollas humedos
pueden causar quemaduras a causa del vapor, Lastoallas u
E[respiradero de[ homo se encuentra en [a base de[ pane[ de
control,
Evite tocar el area del respiradero del homo cuando el homo
este encendido y durante varios minutos despuds de que el
homo haya sido apagado, Algunas piezas del respiradero y
del area circundante se calientan Iosuficiente como para
causar quemaduras, Despu6s de que el homo haya sido
apagado, no toque el respiradero ni las areas circundantes
hasta que elias hayan tenido tiempo suficiente para enfriarse.
Otras superficies potencialmente calientes incluyen la cubierta
de la estufa, las areas dirigidas hacia la cubierta de la estufa,
el respiradero del homo, la superficie cerca de la abertura del
respiradero, la puerta del homo y la area alrededor de la
puerta y la ventana del homo,
No toque un foco caliente del homo con un pa_o huJmedo
pues el foco se puede quebrar, Si se quiebra el foco,
otros sustitutos no deben ser usados como tomaoHHasporque
eHHospueden quedar coHgandoa traves de los quemadores
superiores y encenderse o enredarse en Haspiezas de Ha
estufa,
Siempre deje enfriar Hagrasa cdiente que se ha usado en Ha
freidora antes de intentar mover o manipuHarHa,
No permita que se acumuHegrasa u otros materiaHes
infiamabHesen Haestufa o cerca de ella, en Hacampana o en el
ventiHadoraspirador, Limpie Hacampana extractora con
frecuencia para evitar que Hagrasa u otros materiaHes
infiamabHesse acumuHenen Hacampana o en el fiHtro,
Encienda el ventiHadorcuando cocine aHimentosfiameados
debajo Hacampana,
NUNCA use vestimentas de materides infiamabHes,ropa
sueHtao de mangas hrgas cuando estd cocinando, La
vestimenta se puede encender o enganchar en los mangos de
los utensiHios,
61

i
Sbmpre coIoque las parriihs deI homo en la posbi6n deseada
cuando eI homo est6 frio. Desibe la parriih deI homo hacia
afuera para agregar o retirar aiimento, usando tomaoiias secos
y resbtentes. Siempre evite abanzar dentro deI homo para
agregar o retirar aiimentos. Si una parriiia debe ser sacada
cuando est,1todavia caibnte, use un tomaoiias seco. Siempre
apague eI homo @spuds de haber terminado de cocinar.
Use las parriiias soiamente en eI homo en que fueron
enviadas/compradas.
Tenga cuidado cuando abra la puerta deI homo. Deje que
escape eI aire o eI vapor caibnte antes de sacar ovolver
colocar el alimento.
ADVERTENCIA SOBRE LOS ALIMENTOS PREPARADOS:
Siga las instrucciones del fabricante de los alimentos. Si un
envase de pldstico de alimento congeBdo y/o su tapa se
deforma, se comba o se ddia de dguna otra manera durante
la cocci6n, descarte inmediatamente el alimento y su envase.
Elalimento puede estar contaminado.
NUNCA use pape[ de aiuminio para cubrir una parriiia de[
homo o la parte inferior del homo. El uso incorrecto puede
resultar en un riesgo de choque el@trico, incendio o da_o al
ebctrodom6stico. Use papel de aluminio solamente como se
indica en esta guia.
Utensilios Apropiados
Use sartenes con rondos pBnos y mangos que sean fdcibs de
tomar y que permanezcan frios. Evite usar sartenes u ollas
inestabbs, combadas que se pueden vobar facilmente u olhs
cuyos mangos est6n sueltos. Adem_is evite usar utensilios
especialmente pequdios o sartenes con mangos pesados
pues ellos pueden ser inestabbs y vobarse fdcilmente. Los
utensilios que son pesados de mover cuando estdn Ibnos con
alimento pueden tambi_n ser un peligro.
AseguJresede que el utensilio sea Io suficientemente grande
como para contener en forma debida los dimentos y evitar
derrames. El tama_ioes particuhrmente importante cuando
se utiiizan freidoras. AsegOrese de que e[ utensiiio tiene
capacidad para el volumen de alimentos que se va a agregar
al igual que para la formaci6n de burbujas de la grasa.
Para reducir a un minimo las quemaduras y que los materiales
infiamables y los derrames se enciendan debidos a contacto
no intencional con el utensilio, los mangos no deben
extenderse sobre el quemador superior adyacente. Siempre
gire los mangos de los utensilios hacia el lado o hacia la parte
trasera de la estufa, no hacia la habitaci6n donde puede ser
fdcilmente golpeados o alcanzados por los niffos pequeffos.
Nunca deje que un utensilio hierva hasta quedar seco pues
esto puede da_iar el utensilio y la estufa.
Siga las instrucciones del fabricante cuando use bolsas para
cocinar en el homo.
Solamente ciertos tipos de utensilios de vidrio cer_imico, de
ceramica o glaseados son convenientes para uso en la
cubierta de la estufa o en el homo sin quebrarse debido al
cambio repentino de temperatura. Siga las instrucciones del
fabricante cuando use utensilios de vidrio.
Esteelectrodomestico ha sido probado respecto asu
rendimiento seguro usando utensilios de cocina
convencionales. No use ningun dispositivo o accesorio que no
haya sido espedficamente recomendado en esta guia. No use
tapas para cubrir los quemadores superiores, rejiiias para ia
cubierta de la estufa ni agregue sistemas de convecci6n para
hornos. El uso de dispositivos o accesorios que no son
expresamente recomendados en esta guia, puede crear serios
peligros de seguridad, resultar en problemas de rendimiento y
reducir la vida utii de los componentes de la estufa.
Seguridad de la Limpieza
Apague todos los controies y espere que se enfrien ias piezas
de la estufa antes de tocarlas o limpiarlas. No toque las
rejiiias de los quemadores o ias _reas circundantes hasta que
elias no hayan tenido tiempo suficiente de enfriarse.
Limpie la estufa con cuidado. Tenga cuidado para evitar
quemaduras de vapor si se usa una esponja o un paso mojado
para iimpiar los derrames en una superficie caiiente. Aigunos
iimpiadores pueden producir vapores nocivos cuando se
aplican a una superficie caliente.
Homo Automimpiante
(modelos selectos}
No deje a!imento ni utensilios de COCina,etc. en e! homo
durante e! ciclo de autol!mp!eza.
Limpie solamente las piezas que se indican en esta guia. No
iimpie ia junta de ia puerta. La junta es esenciai para un
sellado herm6tico. No restriegue, da_e, ni mueva la junta de
la puerta. No use limpiadores de homo de ninguna clase en el
homo ni alrededor de cualquier parte del homo autolimpiante.
62

i
Antes de la autolimpieza del homo, saque la asadera, las
parrillas dd homo y otros utensilios y limpie los derrames
excesivos para evitar que se produzca demasiado humo,
Ilamaradas o llamas.
Esnormal que lacubierta de la estufa se cdiente durante el
ciclo de autolimpieza. Pot Io tanto, se debe evitar tocar la
cubierta durante un ciclo de autolimpieza.
Aviso y Advertencia
lmportante Sobre Seguridad
La Propuesta 65 de la Leyde 1986 del Estado de California
Sobre Seguridad y Contaminad6n del Agua Potable (California
Safe Drinking Water and Toxic Enforcement Act of 1986_}exige
que el Gobemador de California publique una lista de las
sustancias que segun el estado de California causan c_incer o
da_io al sistema reproductivo y exige que hs empresas
adviertan a sus dientes sobre la exposici6n potencid a tales
sustancias.
Se advierte a los usuarios de esta estufa que la combusti6n
del gas puede resultar en exposici6n de bajo nivel a dgunas
de las sustancias publicadas en la lista, induyendo benceno,
formddeh{do y hollin, debido principalmente a la combusti6n
incompleta del gas natural o de los combustibles de petr61eo
licuado. Losquemadores ajustados en forma debida
reducirdn la combusti6n incompleta. La exposici6n a estas
sustancias puede tambi6n set reducida a un minimo
ventilando los quemadores al exterior en forma adecuada.
Se advierte a los usuarios de este electrodomdstico que
cuando el homo est,1funcionando en el cido de autolimpieza,
puede haber exposici6n de bajo nivel a dgunas de las
sustancias indicadas en la lista, induyendo mon6xido de
carbono. La exposici6n a estas sustancias puede set reducida
a un minimo ventilando el homo al exterior en forma
adecuada, abriendo las ventanas y/o la puerta en la habitaci6n
en donde est,1ubicado el electrodomdstico durante el cido de
AVISO mMPORTANTE RESPECTOA LOS PAJAROS
DOMESTmCOS:
Nunca mantenga los pdjaros en la cocina o en las
habitaciones donde puedan Ilegar los humos de la cocina. Los
pdjaros tienen un sistema respiratorio muy sensitivo. Los
humos producidos durante el cido de autolimpieza dd homo
pueden set perjudiciales o mortales para los p_ijaros. Los
humos que despide el aceite de cocina recalentado, la grasa,
margarina y los utensilios antiadherentes recalentados pueden
tambi6n set perjudiciales.
Conserve estas lnstrucciones para Referencia Futura
63
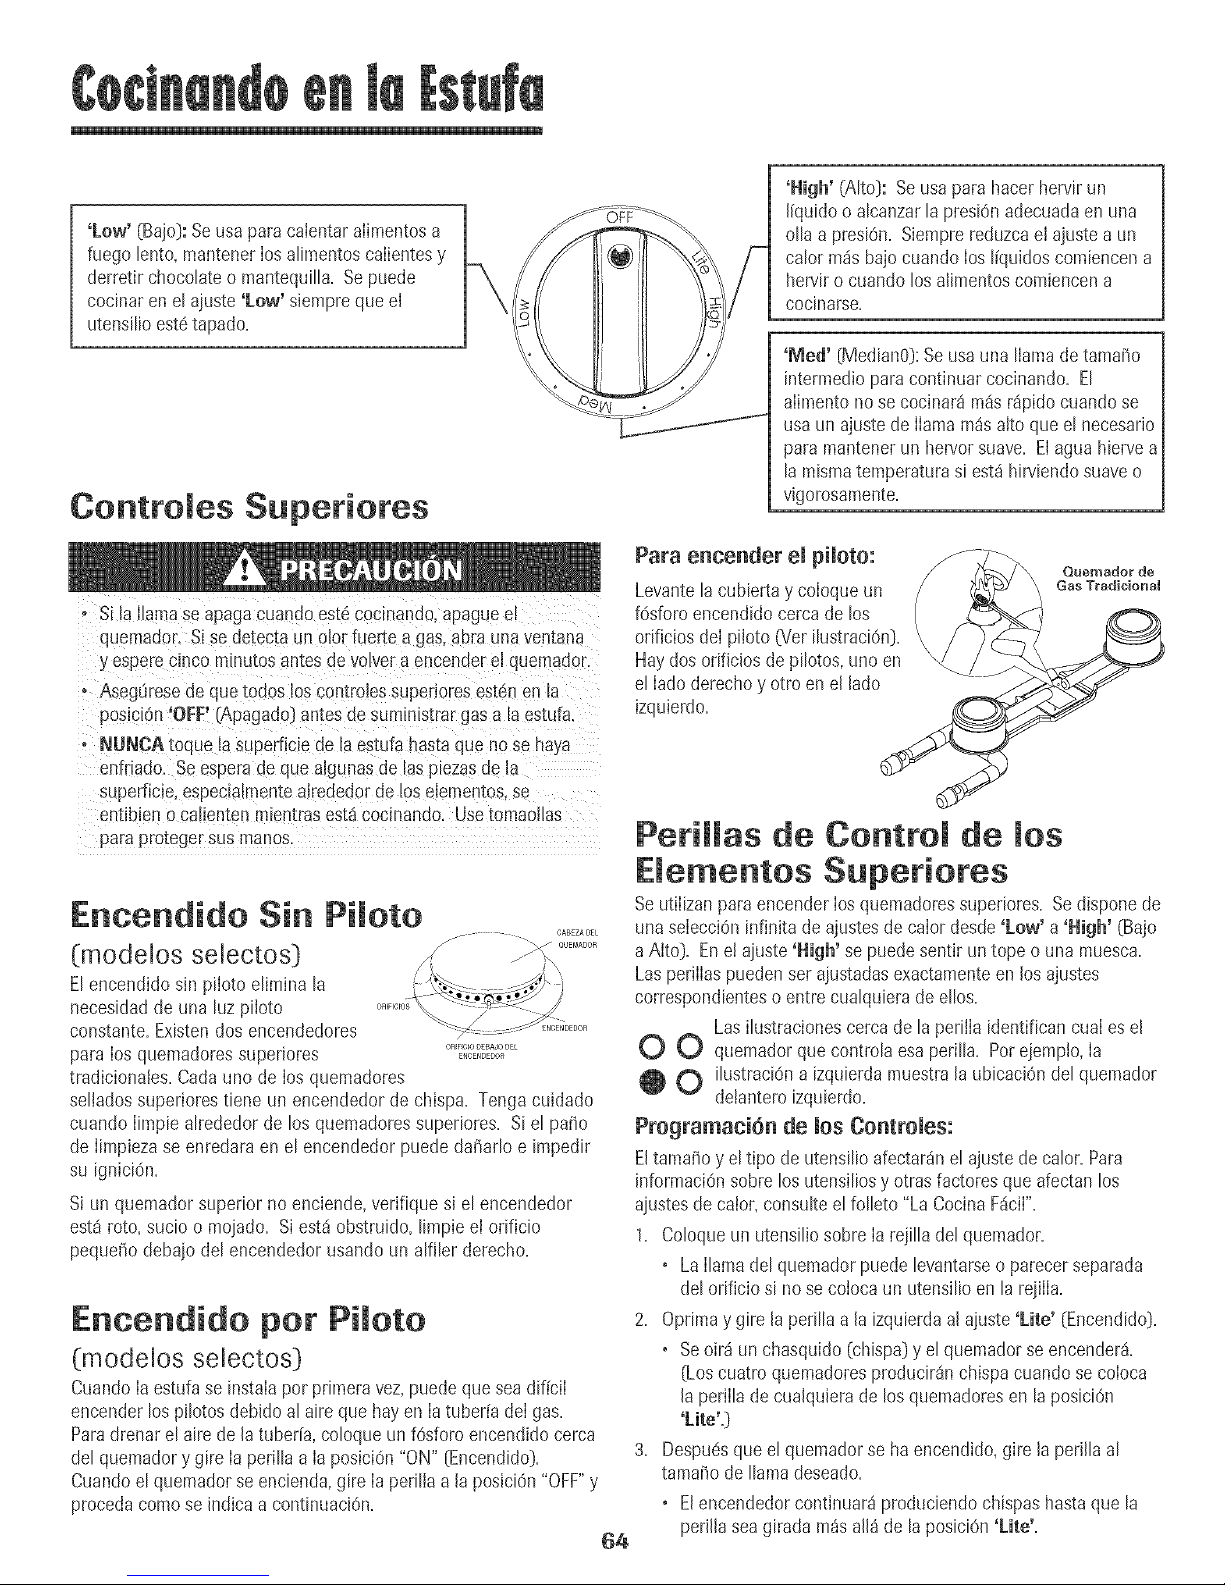
'Low' (Bajo):Seusa para caientaralimentosa
fuegotento,mantenerlos atimentoscaiieutesy
derretirchocotateo mantequi%+Sepuede
cocinarenetajuste'Low' siempreque el
uteusitioest6tapado+
Controies Superiores
. Si [a llamaseapagacuandoest6cocinandu,apaguee[
quemador. Si sedetectauno[orfuerte a gas.aura unavenmna
y esperec+ncommutosantesdevoiveraencenderel quemador.
+ AsegOresedequeEodos[oscontro[essuperioresest6neuEa
pos+ciOn'OFF'(Apagado)antesde summistrargasa taestufa.
• NUNOAtoque [asuperficiede [aestufahasmque nose haya
enfdado. Seesperadeque aigunasdelasplezasde [a
superf+cie,especialmenteairededorde loselementos+se
entibieno caEientenm[eutrasestacocmando. Usetomao[las
paraprotegersusmanos.
Encendido Sin Pi ote
(mode[os se[ectos)
El encendidosin piloto elimina la
uecesidaddeuna luz piioto
constante+Existendos eucendedores
para [os quemadoressuperiores .................E_o+o++_
tradicionales+Cadaunode [osquemadores
selladossuperiorestiene uu encendedordechispa+Tengacuidado
cuando [impiealrededorde los quemadoressuperiores+Si el paffo
de [impiezase enredaraen el enceudedorpuededaffarlo e impedir
su igniciOn+
Si un quemadorsuperior no euciende,verifique si eleuceudedor
est_ roto,sucio o mojado+Si est_obstruido,Hmpieel orificio
pequdio debajo del enceudedorusaudo uu alfiler derecho+
Encendide per Pi[ote
(mode[os se[ectos }
Cuando[a estufase instalapot primeravez,puedeque seadifici[
encenderlos p+lotosdebidoal aireque hayen [atuber[ade[gas+
Paradreuarelaire de [atuber[a,coloqueun fOsforoencendidocerca
del quemadory gire [aperillaa [a posiciOn"ON" [Eucendido)+
Cuandoel quemadorseencienda,gire [a perilia a [aposiciOu"OFF"y
procedacomose[udicaacontinuaciOn+
64
'High' (Alto): Seusaparahacerhervirun
[[quidoo alcanzarla presiOnadecuadaeu una
0% a presiOn.Siemprereduzcael ajustea un
calor m_sbajocuandolos I[quidoscomienuena
herviro cuaudolosalimentoscomiencena
oouinarse.
'iVied' [Median0]:Seusauna [lamadetamafio
intermedioparacontinuarcocinando. El
alimentonosecocinar_m_sr_pidocuandose
usaun ajustede llama m_saltoque el uecesario
paramantenerun hervorsuave. Elaguahiewe a
la mismatemperaturasi est_hirviendosuaveo
vigorosameute.
Para ericerider empimOtO: _+_-'_j\
Querr+ador de
Levantela cubiertayco[oqueun _V GasTrad+_io,al
f6sforoeucendidocercade los / _
orifioiosde[piloto (Veti[ustraciOn]. \ / ) _f-_}-
Haydosorifiuiosdepilotos uuoen \_/ __
el [adoderechoy otro euel [ado ___
izquierdo.
PeriHas de Contro de mos
E ementos Superiores
SeutilizanparaeucenderIosquemadoressupedores.Sedispouede
una selecciOninfinitade ajustesdecalordesde'Low' a'High' (Bajo
aAlto). Eneiajuste'Nigh' sepuedesentiruutope o una muesca.
LasperilIaspuedeuserajustadasexactamenteen los ajustes
correspondienteso entrecualquieradeellos.
Lasilustracionescercade laperilIaidentifican cuaIesel
O O quemadorque controlaesaperilla. Potejempto,Ia
O ilustraciOna izquierdamuestrala ubicaciOndel quemador
delauteroizquierdo.
Programaci6n de los Controles:
EltamaSoyel tipo deutensilioafectar_nelajustedecalor+Para
iuformaciOnsobre losutensiliosy otrasfactoresque afectaulos
ajustesdecalor+consulte el folleto "La CocinaFdciI".
1. ColoqueunuteusiliosobreIarejilladel quemador.
+ Lallamadelquemadorpuedelevantarseo parecerseparada
del orificio si nosecoiocaun utensi% en la rejilia.
2. Optimay girela perillaala izquierdaalajuste'Life' (Encendido).
+ Seoirduu chasquido(chispa)y elquemadorse enceuder&
(Loscuatro quemadoresproducirSnchispacuandose coloca
la perillade cualquierade losquemadoreseu la posiciOu
'Lite'+)
3+ Despudsqueel quemadorseha encendido,gire la perillaal
tamariodellamadeseado+
• Elencendedorcontinuar8produciendochispashastaquela
periHaseagiradam_saH_de la posiciOu'Life'+

Funcionamiento durante una
lntettupci6n de Energia
Cuand0seencienden10Squemad0ressupedores,aseg0resede
quetodasBs perillasdecontrol est6nen laposici0n'OFF!,
Primer0enciendaerfosforoy rrlant@_ga!oen posici6nantesde
g[rar[aperiila a[ajuste!Lite!:
1. Acerque un fOsforoencendidoa tacabezadetquemador
superiordeseado.
2. Oprimay gire [aperiiladecontrol [entamentea la posiciOn'Life'.
3. Cuando[allamaesencendidoaiustea[nive[deseado.
Para evitar que la cubierta se descolore o se manche:
. Limpie la cubiertade la estufadespu_sdecadauso.
. Limpie losderrames8cidoso azucaradostanpronto comola
cubbrta sehayaenfriadopuesestos derramespuedendescolorar
la porcelana.
Quemadores SeJJados
Losquemadoresselladosde su estufaest_naseguradosa Ia
cubiertay no hartsidodiseSadosparasersacados. Debidoa que
losquemadoresest_nselladosen Ia cubierta,los derrameso
rebosesno seescurrir_ndebajode la cubiertade la estufa.
Sinembargo,losquemadorespuedenset limpiadosdespu@de
_ adauso. (Veren Iap_gina80 Ias
_Z...... S_ instruccionessobreIa Iimpieza.}
_5 A diferenciade una estufacon quemadoresde
:- gasest_ndar,estacubiertanose levantani
tampocoes removible.No il_tente/evantar
la cuflierta per Idl_g_n modvo.
Quemadores TradicionaJes
Lasestufasautoestablescon quemadorestradicionalesest_n
equipadascon unacubbrta quepuedeser bvantada.
Para levantar lacubierta: }
Y
Cuandoest6fr[a,sujetee! bordedelanterode la
cubiertay levSntelocuidadosamentehastaque
lasdosvarillasde soporte,si lastiene,situadas
en el frentede Iacubiertaentrenen su lugarconun chasquido.
Para bajar:
Sujeteel hordedelanterodeIa cubbrta y cuidadosamentelevSntelo
haciaatr_sencadavarilladesoporte,si lastiene,para desengan-
charlas. Luegobajecon cuidadolacubierta haciasu lugan Las
varillasde soportesedeslizar_nhaciadentin delmarcodela cubbrta.
65
Quemador de Alto Rermdimiento
(modeJos selectos) (12.000 BTU)*
Existeunquemadordealto rendimientoen suestufa,situadoen la
posici6nderechadelantera. EstoquemadorofrececocciOnm_s
r@iday puedeser usadoparaherviraguacon rapidezo paracocinar
grandescantidadesde alimento.
Quemador para Cocinar a
Fuego Lento (modelosselectos)
Estequemadorse encuentraen laposici6nizquierdatrasera. Et
quemadorparacocinara fuegoIentoofrece una llamade menor
intensidad(BTU*inferio0 para cabntar salsasdelicadasoderretir
chocolate.
_' r@'imennominaldeBTUva,c@r_cuandoseusagasficuado,
RejiJJas de Jos
Las rejillasdeben estar debidamente coIocadas antes de _w_
comenzaracocinar. Lainstalacidnincorrectadelas _'//xx_
rejillaspuederesultarenpicadurasdela cubierta.
No use los quemadores sin tenet un utensilio en la parrilla. El
aeabado de porceiana de las parriiias puede piearse si no e×iste
un utensilio que absorba el camordemallamadel quemador.
AunqueIasparrilhs de losquemadoressondurables,gradualmente
perder_nsu bdllo y/ose descolorar_n,debido a lasaltastemperaturas
de la llamadelgas.
• Unquemadorajustadode maneracorrectacon orificioslimpios
seencender_dentrode unospocossegundos. Siest_usando
gasnaturalla llamaser_ azuIcon uncono interiorazulprofundo.
SiIa llamadetquemadoresamarillao esruidosa,la mezclade
aire/gaspuedeserincorrecta. Pdngaseen contactocon un
t@nicodeserviciopara aiustarla. [Losajustesno estfincubiertos
per [agarant[a.)
Congas licuadoson aceptablesaigunaspuntasamariliasen [a
llama. Estoesnormalyno esnecesariohacerningOnajuste.
• Conalgunostiposde gas,ustedpuedeoir un "chasquido"
cuandoel quemadorsuperiorseapaga. Esteesun sonido
normalde[funcionamientodelquemador.
• Si[aperil[adecontro[se gira muy r@idamentede '_igh' a'Low',
la [lamapuedeapagarse,particuIarmentesi elquemadorest_fr[o.
Siestoocurre,girela perii[a a la posici6n'OFF' {Apagado},
esperealgunossegundosyvue[vaencenderel quemador.
° La [lamadebeserajustadademodoqueno seextiendam_sa[l_
del hordede[utensi[io.

Controies del Homo de Limpieza Manual
(modelos selectos) A B
BROIL ....................................................... _,_
TIMER CLOCK CANCEL ...............
-I
C D E F
NOTA:Elindicadorvisualdespliega 12:00cuando seconectaelelectrodom6sticoporprimeravezosi seinterrumpeelsumJnistroeJectrico.
Laslucesindicadoras'Bake'y 'Broil'sedespliegancuandose activalafunciOncorrespondiente.
A
B
C
B
E
F
'BAKE'(Hornear)
'BROIL'[Asa0
'TIMER'(Temporizado0
'CLOCK'(Reloj)
'CANCEL'(CanceD0
Seusaparahorneary asar.
SeusaparaasaraJaparrillaydorarlos
alimentos.
Programael temporizador.
Seusaparaprogramarla horadeld[a.
CancelatodaslasfuncionesaexcepciOn
deltemporizadory delreloj.
Seusanparaseleccionaro cambiarel
tiempoyIatemperaturadelhomo.
Seleccionalosajustesdeasado'HI'(Alto]
o 'LO'(Bajo).
Use de las Teclas
+ Oprimalatecla deseada.
o Optima latecla A (M_s)oY (Menos)paraseleccionarel tiempoo
la temperatura.
o Seescuchar_unaseral sonoracadavezque oprimaunatecla.No
seescuchar_unaserialsonoracuandose oprJmanlasteclasA o
Y.
+ Seescuchar_ndosseralessonorassiocurre un erroren la
programaciOn.
Nora: Cuatrosegundosdespu6sdeoprimir IateclaA o V, el
tiempoo latemperaturaque sedespliegaseprogramar_
autom4ticamente.Sitranscurrenm_sde 30segundosdespu6sde
haberoprimidounatecla de funciOnyla tecla A o V, Iafunci6n
set4canceladay el indicadorvisualvolver4aldespliegueanterior.
Programaci6n deJ ReJoj CLOC+<
1 OprhTmIatecia'CLOCK'.
+ Lahorade! relojnosepuedeprogramarsi elcontrol hasido
programadoparahornearo asaro parausarel temporJzador.
ProgrameIahoracorrectadel d[ausandoIasteclasA o V. Si la
tecD A o V nose oprimeen 30segundos,laprogramaciOndeI
relojser_cancelada.OprJmalatecla 'CLOCK'paracomenzarde
nil evo.
Programaei6n deJ Temporizador
EItemporizadorpuedesetprogramadode un minuto 001)hasta99
horasy 59minutos[99:59[.EItiempo sedesplegar4en minutosy no
en segundos.ELTEMPORIZADOR NO CONTRO£A ELHORNO.
1. Optima latecla 'TIMER'. ......
• Enel indicadorvisualdesp[egara0:00y losdos T+IMER
puntos(:[destellar4nenel indicadorvisual. ...... ....
2. Opnma latecla A o V hastaque sedespliegueel tiempo
deseado.
+ EltemporJzadorcomenzar_a funcionar cuandoseprogrameel
tiempo.
+ Losdospuntosdestellantesindicanque un conteodel
temporizadorest_enprogreso.(Losdos puntosnodestellansi
el indicadorvisualmuestralahoradel dia o latemperaturadel
homo.}
+ Aifinal del tiempoprogramado,seescuchar_ndosserales
sonoras.EIindicadorvisualdespiegar4"0:00".
+ Sias[Io desea,optima la tecla 'CLOCK'duranteel
funcionamientodel temporizadorparadesplegarbrevemente
Jahoradel d[a.
• SiasiIodesea,optimaIa tecla 'BAKE'o 'BROIL'duranteel
funcionamientodel temponzadorparadesplegarbrevemente
el ajusteactual detemperatura.
Para canceiar el temporizador:
OprJmaymantengaoprJmidalatecla 'TIMER'durantevariossegundos.
66

Homeado, Asado y Asado
a maParrilla
ParaobtenermayorinformaciOnsobrelostiemposy Iassugerencias
de horneado,asadoy asadoa la parriHa,consuiteel foHeto"La
CocinaFdcir.
, ParaverificarHatemperaturaprogramadadurantee!precalenta-
mientodelhomo,oprimaHatech 'BAKE'.Latemperaturase
despiegar_durantetressegundos.
. Para cambiaria temperatura dei homo durante el proceso
de coeei6n,opdma[atecia 'Bake',[uegooprh_aaA o V hasta
quesedespHeguela temperaturadeseada.
Ajuste de los Controles para Homeado y
Asado:
1. OptimaIatecla'BAKE'. BAKE
• '000'sedesplegar_y Ialuz indicadora'BAKE' .............................
desteIlar_enel indicadorvisual
3.
4.
. Para cambiarmatemperatura demhomo durante 'Preheat',
oprimados veces Iatecia 'Bake',Iuegooptima A o V hasta
quesedespiieguela temperaturadeseada.
Coioqueelalimentoel en homo+Verifiqueel progresode la
coccidncuandohayatranscurridoeltiempominimorecomendado.
AIt6rminode lacocciOn,optimaIatecla 'Cancel'paraapagarel
• Sioprimelatecla 'BAKE'y no programalatemperaturaen30
segundos,el programasecancelardautom_ticamentey la
horadeld[asedespiegar_nuevamenteenei indicadorvisual
2. Oprimalatecia A (Mds)o'V' (Menos)hastaquelatemperatura
deseadase despiiegueenel indicadorvisual
• LatemperaturadeIhornopuedeser programadade75°a
285° C (170°a 550° F).
• '175°, (350°)se despiegar_cuandooprimalateciaA o V pot
primeravez.
• OprimaJatecJaA o V repetidamenteparacambiarJa
temperaturaen incrementosde3° C [5°F),u oprirnalay
mant6ngaJaoprimidaparacambiarlatemperaturaen
homoy retireel aJimentodeJhomo+
, EIhornocuentacon unafunci6n deapagadoautom4tJco.Si
sedejaencendidodurante12horas,eJhomoseapagar4
autom4ticamentey elindicadorvisualdespiegara'000'.OprimaJa
tecla'CANCEL'yJahoradeId[asedesplegar4nuevamenteeneJ
indicadorvisual
Ajuste de los Controles para Asar a la Parrilla:
(compartimiento inferior - modelos selectos)
Paraobtenermejoresresultados,use un utensiliodisehado
especiaimenteparaasara la parriila.
1. CoIoquelaasaderaenlaposici6ndelcompartimientorecomendado
incrementosde6°C (10°F).
2.
• EneJindicadorvisualsedesplegar438° (100°)oIatemperatura
reaJdeJhornosi esqueessuperiora38°C (100° F)cuandose
enciendeeJhorno.
• Latemperaturaaumentar4enincrementosde 3° C(5° F]hasta
JJegara Jatemperaturaprogramada.Cuandoel homo sehaya 3.
precaJentado,seescuchar4unasehaJsonora.
• Esperea queel hornoseprecaJientedurante10-15minutos.
labia para Asar a la ParriHa +
Compartimento inferior
paraasara laparrillaquesemuestraenlatabia siguiente.
Optimalatecla'BROHL'. ....
, 'SEt'sedespIegar_y la
luzindicadora'BROHL'
desteIiar8en eIindicadorvisual
Oprimalatecla A paraprogramarelasadoenel
ajuste'Hi'(alto)o V parael ajuste'LO' (bajo).
, Seleccioneel ajuste'Hi' (alto)paraasadoa la parrilIanormal
, Seleccionee! ajuste'LO'(bajo)paraasadoaIa parriilaa bajas
temperaturasparaevitareldoradoexcesivoen aiimentosque
requierenmayorestiemposdecocciOntalescomo lacamede
ave. Cont.
TERMINO D=_ ASABO A LA PARRmLLA EN EL_
TIPO DE CARNE COCCION COIViPARTIiViEP_TOiNFERiOR* COCCION (MINUTES}+ +
Camede Res Bistecs,2,5cm(!"} de grossor Medio Centro 14- 20rain.
Bienhecho Centro 16- 24rain.
Hamburguesas,2cm (V4") Bienhecho Centro 14- 19rain.
degrossor
Cerdo RebanadasdeJambbn,precocidas, Tibio Centro 8- 12rain.
1,3cm(V/') degrossor
Chuletas,2,5cm(1") degrossor Bienhecho Centro 18- 25rain.
Ave Polioen Presas Bienhecho inferior (LOBroil232°C(450°F)
30-45rain.
Pescade Filetes,1,3cm(V2")degrossor Desmenuzado Centro 8- 12rain.
Bistecs,2,5cm0") de grossor Desmenuzado Centro 10- 15rain.
Superioresla posicibnm_salta,Centroes la posicidnm_sbaja; Fondoeselfondodelcompartimientodelasador(sacarlaparrilla).
++Lostiemposdecoccidnsonaproximadosy puedenvariardependiendodelacame.
67

• SinoseleccionaunajustedeAsado('HH'o'LO']en30segundos,
elprogramasecancetar_iautom_ticamenteylahoradeld[ase
desplegar_nuevamenteenelindicadorvisual
4+SigaIostiempossugeridosenlatabhparaasaraIaparrillaquese
incluyeacontinuaci6n+Lacamedebedarsevuekaunavezcuando
est_amitaddeitiempodecocciOn+
5+CuandoterminedeasaraIaparrilh,optimalatecla
'CANCEL'paraapagarel homoyretireei utensilio
del homo+Lahoradel d[avolver_adesplegarseen
el indicadorvisual.
PeriHa deJ Homo de Limpieza
ManuaJ (modeJos seJectos]
Per+Ha de Ja Temperatura
deJ Homo
Laperiiia'OvenTemp'CfemperaturadeI
Homo]seusaparaseleccionary mantenerla
temperaturadel homo+Siempregireesta
perillajusto HASTAiatemperaturadeseada+
Nogire a unatemperaturam_saltayhego
retroceda+
Ajuste del Homo para Homeado y asado:
1+ Optimaygire la periiia 'OvenTemp'a ia temperaturadeseada+
Espere10a 15minutosparael precaientamiento+
2+ Coloqueel aiimentoen el centro del homo+Verifiquesi e!
alimentosecoc+n6en eltiempo mhimo indioadopara la receta+
Cocinepor m4stiemposi esnecesario+
3+ Saqueelalimentodel homo y gireJaperilJa'OvenTemp'ala
posici6n"OFF"+
Nora: Parasugerenciasadicionaiessobre comohorneadodel
horno,asardoy asadoa la parriJla,consulteel folJeto"LaCocina
F_cir'+
Ajuste de ruesControles para Asado a la
ParriHa (modelos selectosD:
1+ Paraobtenermejoresresultados,useun utensil+odise_ado
especiaImentepara asara la parrilla+Coioquela asaderaen la
posiciOnde laparrilia recomendado+(Vetiatabla en p_gina67y
2+ Gireiaperiila'OvenTemp'a 'Broir paraasadoala parrillaa
temperaturasm_sbajas,a232°C (450° F)+
+ Elasadoa la parrilh a temperaturasm_sbajasevitael dorado
excesivode iosalimentosquesecocinanpot m_stiempo,
tales comolascarnesde ave+
3. SigaIostiempossugeridosen latabla en p_gina67 paraasaraIa
parrillaqueseincluyea continuacidn.La carnedebedarsevuelta
una vezcuandoest_a mitaddel tiempodecocciOn.
4. Verifiqueeit6rmino de cocciOnhaciendoun corteen la carne
cercadelcentro paraverificaretcolor.
5. Despu6sdeasara la pardlla+coloquela perilla'OvenTemp'enla
posiciOn"Off". Saquela asaderadelhorno.
Eneendide Sin Pi ete
(modelos selectos )
Suestufaest8equipadacon un encendidosin piloto+Conestetipo
de sistemade encendido,e+gasse apagaautom_iticamentey e/
herI1otte eperar_ dut_nte utta il_terrupcidndela cerriente
el_ctHca.
Unf6sforoencendidono encender_e!quemadordelhomo. No se
debeintentarencenderel homodurantela interrupciOnde la
corrienteel6ctrica.
Encendido per Pimoto
(modelos selectos }
Enciendaelquemadortraseroantesde encenderel piloto delhomo+
Estoremover_eIairedel s+stemadesuministrodegasy ayudar_a
encenderla llama piloto.Sinoserealizaestepaso,el tiempode
encendidopuedeserrosslargode Ioesperado.
Para encender empimotodemhomo:
Cuandoel hornoest6frio, abra la puertadelasadory retirela parrilla
de(asadory [aasadera.
Enlaposici6n'OFF'(APAGADO),optimay mantenga
oprimidala periiia'Oven Temp' (Temperaturade[
Homo)ysostengaunaceriliaencendidasobreel
pilotoque se encuentraen [aparte traserade[
quemadorde[ homo(ver i[ustraciOn).Una
\ vezque se enciendaet piloto,suelte[a
periila'Oven Temp+ywJelvaa co[ocar [a
rejillade!asadorylabandeja. (NOTA:Et
quemadordeI homo semuestrasin tenet
instaladoel difusorde llamamet_lico.)
68

ControJes deJ Homo AutoJimpiante (modelos sebctos}
A B C D
COOK& KEEP
HOLD CLEAN DE++AY CLOCK WARM
E F O H l
TH_IER
Elpaneidecontrol hasido disehadoparasu f4ciJprogramaci6n.Elindicadorvisualen el paneJde controi muestralahora deIdfa,eI
temponzadory lasfunciones deIhorno.Elpanelde control mostradoarribaincJuyelas caracteristicasespecificasdel model& (Elestilodel
paneldecontrolvariaseg_nel modelo.}
A
B
C ¸
D
E
iiill_
ixl
G ¸
H
I
ill
m
'BROIL'[Asara
laParrilla}
'BAKE'(Hornea0
A (Mds}o
V (Mer!os}
'TIMER'{Tempor+zador}
'COOK& HOLD'
(Cocci0nyMantener
Caliente}
'CLEAN'(Limpieza}
'DELAY'(Diferido}
'CLOCK'(Reloj}
'KEEPWARM'
[MantenerCabnte}
+CANCEL'(Cancela0
Seusaparaasara laparrillaydorarlos
alimentos.
Seusaparahornearyasar.
Programaocambialahora,la
temperaturadelhomo.Programaasara
laparrilla'HI'o 'LO'.
Programaa!temporizador.
Seusaparahornearduranteuntbmpo
sebccionado,luegomantbnee!alimento
calienteduranteunahora.
Seusaparsprogramarancidode
autolimpieza.
Programselhomoparacomenzara
hornearo limpiarsea unahoraposterior.
Seusaparaprogramarlahoradeldia.
Seusaparamantenercalienteenet
homoelalimentococinado.
CancehtodaslasfuncionesaexcepciOn
deltemporizadory e!reloj.
Uso de Jas Tedas
o Oprimalatecla deseada.
o OprimaA o V paraprogramareltbmpo o latemperatura.
o Seescuchar_unasepalsonoracada vezque oprimaunatecla.
o Seescuchar_ndos serialessonorassiocurre un error en la
programaciOn.
Biota: Cuatrosegundosdespu6sde haberoprimidoIateciaA o
V, se programar4autom4ticamenteel tiempoo latemperatura.
Si transcurrenm4sde30 segundosdespu6sde haberoprimido
unatecladefunci6ny antesdeoprimir iatecia A o V, ia
funci6n set4 canceladay el indicadorvisualvolveraal despliegue
anterior.
'Clock' (Reloj)
El relojpuedeserajustadoparadespbgar Iahorayaseaen formato
de 12horaso 24 horas.EIreIojhasido programaticen la f_brJca
paraelformatode 12horas.
Para cambiar eJreJoj a formate de 24 horas:
1. Oprimay mantengaoprimidas[asteclas
'CANCEL'y 'DELAY'durantetres
segundos.
2. OptimaA o V parasebccionar el
formatode 12horaso24 horas.
3. ProgrameIahoradel dia siguiendolas
instruccionesindicadasabajo.
Programaci6n deJ ReJoj:
1, Optimala tecla'CLOCK',
, Lahora del diay dospuntosdestellanenel
h_dicador.
J
,, (,s S#, ¸
-- DELAY
CLOCK
, ¸¸¸¸;""¸%¸¸¸¸¸¸
2. Optima_&o '_ para programar[ahorade[dia.
+ Losdos puntoscontinQandesteJlando.
3. Oprimalatecla'CLOCK'nuevamenteo espere
cuatrosegundos.
V
conto
6g

Cuandose conectaenergiae!6ctricaa[hornoo despudsdeuna
interrupci6ndeHaenergfaei6ctrica,IaL]Htimahoradel reHojpreviaa
la interrupcidndesteHar8en ei indicador.
ParadespHegarHahoradeIaliacuandoei indicadorest6mostrando
otrafuncidn detiempo,optima Hatech 'CLOCK'.
La horadeIreloj no puedeset cambiadacuandoel hornohasido
programaticpara'DELAYCOOK','CLEAN'o 'COOK&HOLD'.
Para canceiar el despiiegue dei reioj:
Si nodeseaque ei indicadorvHsualmuestrelahoradel alia:
OprHmay mantengaoprimidaIasteclas'CAN- .................
CEL'y 'CLOCK'durantetressegundos.Lahora
del d[adesaparecer8en el indicador.
Cuandose cancelael desplieguede! reloj.......................
oprimaIatecla'CLOCK'paradesplegar -- CLOCK
brevementelahoradel dia.
Para restaurar el despmiegue demremoj:
Oprimay mantengaoprimidaIastechs 'CANCEL'y 'CLOCK'durante
tres segundos.Lahoradel d[areaparecer8enel indicador.
'Timer' emporizador}
E!temporizadorpuedesetprogramatic de un minuto {00:01}hasta
99 horasy 59 minutos[99:59}.
Eltemporizadorpuedeset usado independientementedecualquier
otraactividaddelhorno.Adem_spuedeset programadocuandootra
funciOndel homoest6en funcionamiento.
Eltemporizadorno controlael horno.Solamentecontrolauna serial
sorlora.
Para programar el temporizador:
1+ OptimaIatecla 'TIMER'O-emporizadoO+ ..................................
+ '0:00'destetlaen el HndHcadorvisual T+MEB
+ Losdospuntosdesteflar_n. ...........................
2. OptimaIatecla,A o _' hastaque et tiempo
correctoaparezcaenel hldHcadorvisual
• LosdospuntoscontimiandesteHando.
3. Oprimanuevamentelatecla 'THMER'o esperecuatro .............................
segundos.
+ LosdospuntoscontinOandesteHandoy comienzaHacuenta
regresivadel tHempo.
• El_iltimominutodeIacuentaregresHvadel temporHzadorse
desplegar_ensegundos.
4. AI finaldel tiempo programatic,se escuchar_unasepalsonora
larga.
Para canceiar el temporizador:
1+Oprimay mantengaoprh_idala tecla'TIMER'durantetres
segundos+
U
2. Optima latecla 'THMER'y coloqueHahoraa00:00.
Blequeo de los Conttoles
Eltec[adopuedeserb[oqueadoparaseguridad,[impiezao evitare[
usono autorizado+Nofuncionar_ncuandoest6nbloqueados+
Siel homoestden uso+loscontrolespuedenbloquearse+
La horaactualdeld[a permanecer_en el indicador cuandolos
controlesest6nbloqueados+
Para bloquear:
Optimay mantengaoprimidaslasteclas
'CANCEL'y'COOK& HOLD'durantetres
segundos+ .....................
'LOCK'destelIaenel indicadorvHsuaL __ COOK&
HOLID
Para lesbloquear: ..........
Optimay mantengaopdmHdaslasteclas 'CANCEL'y 'COOK&HOLD'
durantetres segundos+
'LOCK'desaparecedel indicadorvHsuaL
C6digos de Ettores
'BAKE'o 'LOCK'puedendestellarr_pidamenteparaadvertirleque
hayun error o un problema+Si'BAKE'o 'LOCK'destelIanen el
indicadorvisual,optimala tecla'CANCEL'.Si'BAKE'o 'LOCK'
continOandestellando,desconectelacorrienteel6ctrica haciael
artefacto.Espereunospocosminutosy vuelvaa conectarla
corrJenteel6ctrica+SiIaspalabrasaOncontinOandesteiJando,
desconecteJacordenteeJ6ctricahacia eJartefactoy JHamea un
t6cnicodeservHcioautorizado+
7O

'Bake' (Horneado)
Para programar 'Bake':
1. Oprimalatecia'BAKE'. BAKE
+ 'BAKE'destetlar_. ...............................
+ '000'destellar8en el indicadorvisual. ...........................
A
2. SeleccioneIatemperaturadel horno.Latemperatura
deIhornopuedeserprogramadade75° a285° C
070°a 550° F}.Oprimau oprimay mantenga
oprimidala tecla A o V. .........................
+ Cuandocuaiquieradeestasdosteclasseoprime
per primeravez,'175°, {'350°') seiluminar_.
+ Optimalatecla A paraaumentarlatemperatura.
+ Optimalatecla V paradisminuirla temperatura.
3. Optimalatecia 'BAKE'nuevamenteo esperecuatrosegundos.
+ 'BAKE'dejar_de @stellary seiluminar8en el indicadorvisual.
+ '100°'o latemperaturaactualdel hornose desplegar_.La
temperaturase elevar8enincrementosde 5°hastaquese
alcancela temperaturaprogramada.
4. Espereaqueel horno seprecalientedurante 8-15minutos.
+ Cuandoel hornoIlegaa Iatemperaturaprogramadase
escuchar_unasei_alsonoraIarga.
+ ParaverificarIatemperaturaprogramadaduranteel
precalentambntodel horno,optima latecla 'BAKE'.
5. Coloqueel alimentoen el centrodel horno,dejandoun m[nimode
dospulgadasentreel utensilioy Iasparedesdel homo.
6. Venfique el progresodeIacocci@cuandohayatranscurridoel
tiempo minimorecomendado.Contin8elacocci6nsi esnecesano.
7. AI t6rmino de la cocci6n,optima latecla 'Cancel'.
8. Retireel alimentodel homo.
D+ferencias del homeado entre su homo
antiguo y su homo nuevo
Esnormal observaraigunasdiferenciasen eItiempode horneadode
suhomo antiguoy suhomo nuevo.Vea"Ajustede la Temperatura
del Homo"en la p%ina 74.
Notas sobre Homeado:
Paraeambiar matemperatura demhomo durante emproceso
de ¢ocei6n, oprimalatecla 'Bake',luegooptimaA o V hasta
quesedesplbgue latemperatura@sea@.
Paraeambiar latemperatura del homo durante 'Preheat',
oprimados veces latecla'Bake',luegoopnmaA o V hasta
quesedesplieguelatemperatura@sea@.
Si olvidaapagarel homo, se apagar_automa4ticamentedespu@
detranscurrir 12horas.Sideseadesactivarestacaracter[stica,
yeaIap%ina 74.
Parasugerenciasadicionabssobre homeadoy asado,consulte
elfolbto "LaCocinaFacil".
'Cook & Hold' (Cocci6n y
Mantener Caliente}
'Oook & Hold' Ie permitehornearduranteunacantidad
determinadadetbmpo, seguidodeun ciclo 'KeepWarm'de una
hora.
Para programar 'Cook & Hold':
1.Oprimalatecla 'COOK& HOLD'. COOK&
o 'BAKE'y 'HOLD'destetlan. HO+oD
o '000'seiluminaen el indicadorvisual.
2.Seleccionela temperaturade[homo.Latemperatura
del hornopuedeserprogramadade 75° a 285°C 070°
a 550°F}.Oprimauoprimay mantengaoprimida la
tecla A o V.
/¸.¸>¸%¸¸¸
o Optima latecla A paraaumentarla
temperatura.
o Optima latecla V paradisminuirlatemperatura.
3.Oprimalatecla 'COOK& HOLD'nuevamenteo esperecuatro
segundos.
o 'HOLD'destella.
o '00:00'destellaenel indicadorvisual+
4.Programelacantidaddetiempodurantela cualusteddesea
hornearopdmbndo Iatecla A o T. Eltbmpo de horneado
puedeprogramarsedes@ 10minutes(00:10}hasta11horas,
59 minutos{11:59}.
o 'BAKE'y 'HOLD'sefluminanenel indicadorvisual.
o Eltbmpo de horneadoseihminar8enel indbador visual
o Comenzar_la cuentaregresivadeltbmpo de horneado.
71
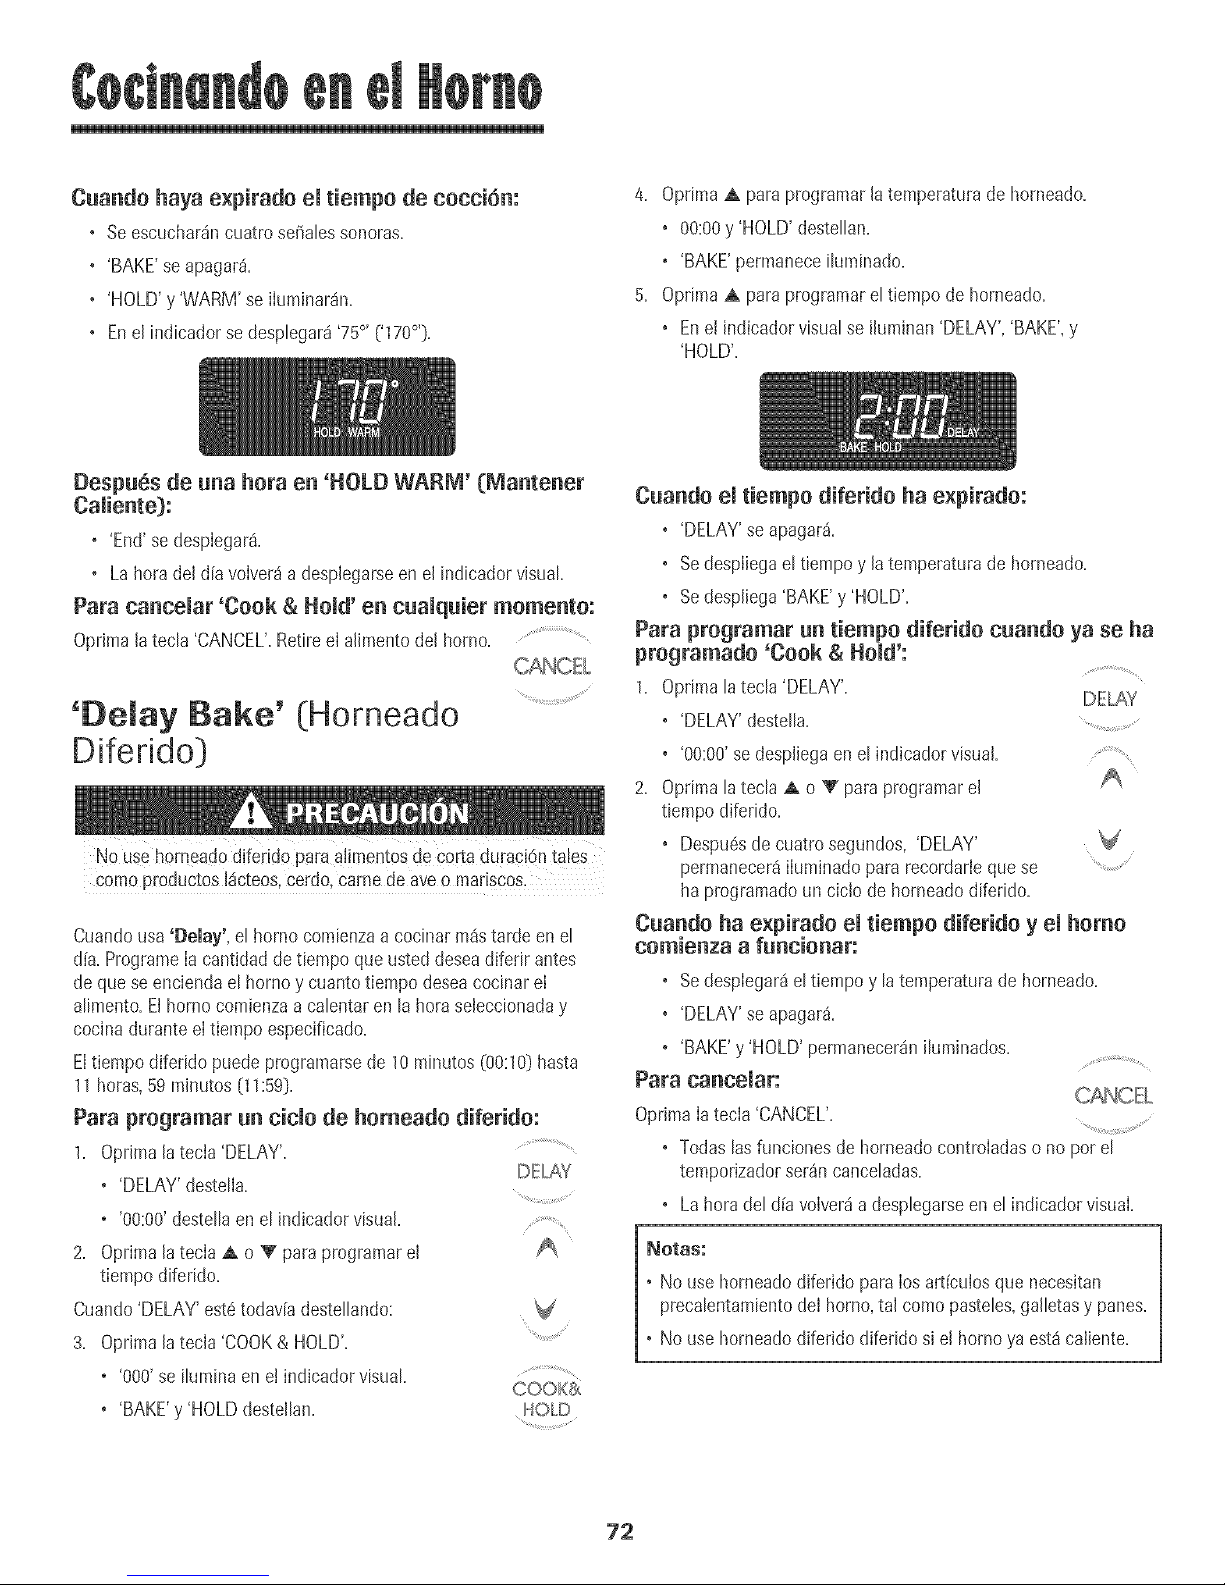
Cuando haya expirado eJtiempo de cocci6n:
• Seescuchar4ncuatrase_atessonoras,
• 'BAKE'seapagar&
• 'HOLD'y 'WARM'se iluminar4n.
• Enelindicadorsedespiegar4'75°'('170°').
4. Optima A paraprogramar[atemperaturade homeado.
• 00:00y'HOLD'desteIIan.
• 'BAKE'permaneceiIuminado.
5. Optima A paraprogramare[tiempo de horneado.
• Ene[ indicadorvisualseiJuminan'DELAY','BAKE',y
'HOLD'.
DespuBs de una hera en 'HOLD WARM' (Mantener
Camiente):
o 'End'sedesplegar&
o La heradel d[avolver4a despJegarseen el indicadorvisuak
Para canceJar 'Cook & HoJd' en cuaJquier memento:
OprJma[atecIa'CANCEL'.Retiree[ aJimentode[ homo.
'DeJay Bake' (Horneado
Diferido )
NOuse horr!eadodifeddoparaalimentosde Cor_aduraci6ntales
comeproductosJ4cteos,cerdo,camede aveomariscos.
Cuandousa 'Delay', eLhomo comienzaacocinarm4stardeen eL
d[a.ProgrameIa cantidaddetiempoque usted@sea difedrantes
de queseenciendaelhomo ycuantotiempo deseacocinarel
alimento.Elhomocomienzaa calentaren la heraseteccionaday
cocinaduranteeItiempoespecificado.
Eltiempodifeddo puedeprogramarsede 10minutes(00:10)hasta
11betas,59 minutes[11:59].
Para pregramar un cicJo de hemeade diferide:
1. OprJma[atecia'DELAY'. ........
DE[AY
o 'DELAY'destell&
o '00:00'desteJJaen eJJndicadorvisual. ................
2. OprimalateclaA o V paraprogramarel
tiempo diferido.
Cuando'DELAY'est6todav[adeste[[ando: V
3, OprJmaJatecJa'COOK&HOLD'. ...........................
o '000'se i[uminaen eJindicadorvisuak ......................
COOK&
o 'BAKE'y 'HOLDdesteJJan= HOID
Cuando eJtiempe diferido ha expirade:
• 'DELAY'seapagar&
• Sedespliegae[tiempoy Jatemperaturadehorneado=
• Sedespliega'BAKE'y 'HOLD'.
Para programar un tiempo diferide cuando ya se ha
programatic 'Cook & HoJd':
1=Oprima [atecIa'DELAY',
DELAY
• 'DELAY'desteJJa. ............................
• '00:00'sedesplJegaen e[ indicadorvisual
2. Oprima [atecIa A o V paraprogramarel
tiempo diferido.
• Despu6sde cuatrosegundos,'DELAY'
permanecer4iluminadopararecordariequese ....................
haprogramaticun cicJodehorneadodifeddo=
Cuande ha expirade e[ tiempe diferide y e[ homo
cemienza a funcienar:
• Sedespiegar_ie[tiempoy [atemperaturadehomeado=
• 'DELAY'seapagar&
o 'BAKE'y'HOLD'permanecer4niIumJnados=
Para canceJar:
OprJmaia tecla 'CANCEL'.
• Todas[asfuncionesde homeadocontroiadaso no pare[
temporizadorser_ncanceIadas=
• Laherade[diavolver4a despIegarseen e[ indicadorvisuai=
Notas:
• Nousehorneadodiferido para iosart(cuJosque necesitan
precaIentamientodeI homo,tal comepasteIes,gaJIetasy panes.
• NousehomeadodiferJdodiferidosi eJhomoyaest4caliente=
72

'Keep Warm' (Mantener
Caliente:)
Paramantenercatientesen forma seguraalimentoscalienteso para
calentarpanesyphtos.
Para pregramar 'Keep Warm': .............
KEEP
1+ OptimaIatecla 'KEEPWARM'. WA£M
+ 'WARM'destefla+
• '000'se despliegaenet indicadorvisual........................
2. SeleccioneIatemperaturade 'KeepWarm'.La A
temperaturapara 'KeepWarm'puedeserpro-
gramadade63° a90°C (145° a 190° F]).Oprimau
oprimay mantengaoprimidaIatectaA o V.
+ Cuandocualquieradeestasdostechs seoprimeper primera
vez,'75°,('WO°') seituminar_.
+ Optimalatecla A paraaumentarlatemperatura.
+ Optimalatecla V paradisminuirla temperatura.
'WARM'y Iatemperaturase desplegar_nenel indicador cuando
el ciclo'KeepWarm'est6active.
Para oa_oeJar 'Keep Warm':
1. OprimaJatecla 'CANCEL'.
2+ Retireelalimentodel homo+
Notas sobre 'Keep Warm':
, ParacaIidadOptimade los alimentos,losal+mentoscocinados
en e!borne debensermantenidoscalientesperno m_sde 1a
2 horas+
+ Paraevitarquelosalimentossesequen,cObraloslevemente
con papelde aluminioo unatapa.
, Para caientar panecimmos:
- cubra Ievementelospanecillosconpapelde ahminio y
colOquelosenel homo+
- oprima'KEEPWARM'y lateclaA para programar
75°C [170° F].
- calientedurante 12a 15minutes.
+ Para calentar plates:
- coloque2 pilas decuatroplatescadaunaen el borne.
- oprima'KEEPWARM'y lateclaA para programar
75°C [170° F].
- caliente losplatosdurante cinco minutes,apagueel homoy
deje lospiatosen eIbornedurante 15minutesm_s.
- usesoiamenteplatesresistentesal horno,verifiqueconel
fabricante.
- nocoloqueIosplatescalientessobreunasuperficiefr[a
puesei cambior_pidode temperaturapuedecausarfisuras
superficiales.
73

Cierre Aute tico/Mode
Ajuste de la te peratura del
Elhornoseapagar_autom_ticamentedespu6sde 12horassi ustedIo
dejaaccidentalmenteencendido. Estacaracteffsticadeseguddad
puedesetdesactivada.
Para cancemar emcierre autem_tice de 12 heras y
dejar que el home funciene centinuamente durante
72 horas:
1. Programeel homopara hornear(verp%ina 71}.
2. Optimay mantengaoprimidaIatecia 'CLOCK' CLOCK
durantecinco segundos.
• 'SAb'se desplegar4ydestellar4durantecinco segundos.
• 'SAb'se desplegar4continuamentehastaquese desactiveo
hastaque transcurrael I[mitede 72horas.
• 'BAKE'tambi6nse desplegar4siseest4usandoun ciclo de
horneadocuandoel hornoest4en modosab4tico.
TodasIasotrasfuncionesEXCEPTO'BAKE'['Timer','KeepWarm',
'Clean',etc.}est4nbloqueadasduranteel ModoSab_tJco.
Pata caBeeiar 'Bake' cuaBde el Mode Sab_tice
est_ active:
Oprimala tecla 'CANCEL'.
• 'BAKE'seapagar_enel indicadorvisual
• Noseoir8 ningunaseriaisonora.
Para caBcemar el Mode Sab_tice:
1. Oprimalatecla 'CLOCK'durantecincosegundos. CLOCK
O ¢
2. Despu6sde 72horas,el Modo Sab_ticoterminar&
• 'SAb'destellar_durantecincosegundos.
• Lahoradeldia reaparecer_en el indicadorvisual
La exactitudde lastemperaturasdel homo escuidadosamente
probadaenIaf_brica. Esnormalnotaralgunadiferenciaentrela
temperaturade homeado, entre un hornonuevoy un homoantiguo.
Conel correrdeltiempo,Iatemperaturadel horno puedecambiar.
UstedpuedeaiustarIatemperaturadelhomo,si consideraquesu
homo noest_ horneandoo dorandoenforma correcta. Paradecidir
cuantodebecambiarIa temperatura,programelatemperaturadeI
homoa 15° C (25° F)m_salta om_sbaiaque latemperatura
indicadaen susrecetas,luegohornee. Losresultadosdela
"prueba"puedendarleuna ideade cuantoaiustarlatemperatura.
Ajuste de la temperatura del home:
1. Optima latecla 'BAKE'. BAKE
2. Programe550° oprimiendolatecla A. . ..... ....
3. Optimay mantengaoprimidaJatecla'BAKE'durante ......
vadossegundosohastaque 0° aparezcaen el
indicadorvisual.
Si Iatemperaturadel homo hasido previamenteajustada,el
cambioaparecer_en el lndicadorvisual. Porejemplo,si Ia
temperaturadel hornofue reducidaen 8°C [15°F)el indicador
mostrar_'- 8°' ('-15°').
4. Optima latecla A o V paraajustarlatemperatura.
Cadavezquese oprimeuna tecla,latemperaturacambiaen
3° C [5° F}. LatemperaturadeI homo puedeser aumentadao
disminuidaen3°a 20° C[5° a 35°F).
5. Lahoradel d[areaparecer_autom_ticamenteenel indicador
visual.
Nonecesitareaiustarlatemperaturadethornosi hayuna fallao
interrupciOnde energ[ael6ctrlca. Lastemperaturasdeasara la
parrilla y Iimpiezano puedenset aiustadas.
Notas Sobre et Modo Sab tico:
• ElModoSab_ticopuedeseractivadoencualquiermomento,
est6ono el homo encendido.
• ElModoSab_ticonopuedeset activadosi lasteclas est_n
bloqueadasocuandola puertaest_bloqueada.
• Sielhomo est_homeandocuandoel ModoSab_ticoes
programado, 'BAKE'seapagar_al final del ciclode horneado.
Noseemitir_nse_alessonoras.
• CuandocomienzaelModoSab_tico,nose emitir_ lasepal
sonorade precalentamiento.
o Cuandoel Modo SabSticoest_activo,todos losavisos,
mensajesyse_alessonorasest_ndesactivadas.
o Sioprimela tecla'CANCEL'se cancelar8un ciclo 'Bake',sin
embargoel control permanecer_en ModoSab_tico.
o Sifalla Iacorrienteelectrica,cuandovuelvaIaenerg[ael horno
seactivar_enModo Sab_ticocon72 horasrestantesy ningOn
ciclo activo.
74

'Broiling' (Asar a la Parrilla}
(modelos selectos]
Para programar 'Brei[':
1. Paracomenzar,oprimaHatech 'BROIL'. BII_Oll.....
. 'BROIL'desteih..................... .........................
o 'SET'sedespiiegaeneiindicador.
2. Oprimalatecla A paraprogramarasara la parrilla'Hi' u oprima
[atecla V paraprogramarasarlaparrilla'LO'.
o Enelindicadorvisualsedesplegar_'Hi' o 'LO'.
o Selecciones'Hi broil'285°C (550° F}para asadoala parrilla
normal Seleccione'LObroil'230°C [450° F}paraasara la
parrillacontemperaturabajaalimentosquedebenset
cocinadospot m_stiempo,tal como [acamede ave.
3. Despuesde cuatrosegundos+elhorno comenzar_a funcionar.
o 'BROIL'continuar_iluminado.
4. Paraun dorado6ptimo,precaHenteel hornoa [aparrfl[adurante
2 a 3 minutosantesde co[ocarela[imento.
5. Co[oqueel a[imentoenel homo. Cierre[a puertade[ homo.
6. DevueItaa lacame unavezaproximadamentea mitadde [a
cocciOn.
7. Cuandoelaiimentoestecocinado,oprima[atecia
'CANCEL'.Retireel aiimentoy laasaderade[horno. O#_CEL
• Lahorade[diavoIver_adespIegarseen el ...........................................
indicadorvisual
Notas Sebre Asado a [a ParriHa:
o Paramejoresresultadoscuandoasea [aparrilla,useuna
asaderadiseriadapara asara [a parriiia.
o 'Hi' seusa para [amayoffade los asadosa laparriila. Use'LO
broi['cuandoasea [a parrilla alimentosquenecesitancoccien
proiongada. Latemperaturainferiorpermite queei alimentose
cocine hastaquedar bienasadosin dorarsedemasiado.
o Lostiemposdeasadoa la parrilla puedenser m_s[argos
cuandoseseleccionalatemperaturarodsbajadeasara [a
parriiJa.
o E[alimentodebeserdado vue[tacuandoest_a mKadde[
t[empodeasar.
o Parasugerenciasy temperaturasadiciona[essobreasara[a
parrfl[a,consu[tee[ fo[[eto"LaCocinaF_ci[".
Tab[a de Asar a [a Parr[Ha de[ Homo
POSiCiON DE T[EMPO TOTAL DE
COCO[ON COCO[ON(M[NUTOS)
Came de Res
Biftec,2,5cm {1"] 4 A medic asar 15- 20minutos
4 Bienasado 18- 24minutos
Hamburguesas,1,9cm [3/4"}de grosor 4 Bienasado 15- 18minutos
Came de Cerdo
Tocino 4 Bienasado 6 - 10minutos
Chuletas,2,5cm [1"} 4 Bienasado 22 - 26minutos
JamOn- Rebanadasprecocidas,1,3cm [1/2"}de grosor 4 Tibio 8 - 12minutos
Came de Ave 'LOBroil'
Presasde polio 3 o 4 Bienasado 30 - 45minutos
Mariscos
Bistecsde pescado,conmantequiIia,2,5cm [1"] de grosor 4 Desmenuzado 10- 15minutos
FiJetesde pescado,1,3cm [1/2"} de grosor 4 Desmenuzado 8 - 12minutos
Laposiciende[a parriJiasuperior es#5.
Nora: Estatablaesse[ounagu[a. Lostiempospuedenvariarcon el tipo deaJJmentoqueseest_cocinando.
75

Respiradero de[ Homo
Cuandoe[ homo est4en uso,e[4reacercade[respiraderopuede
calentarsetosuficientecorrloparacausarquemaduras=Nunca
bJoquee[a aberturade[respiradero=
Emrespiradero demhomo se encuentra debate demrespamdo
protector de sa estufao
RESPIRADERO
Nocoloquepi4sticos
cercade[aabertura
de[respiraderopues
eJcaJorque sale
puededeformaro
derretire[pJ4stico=
'Oven Light' (Luz deJ Homo)
(modelos seiectos)
OprimaeJinterruptorde[aJuzdeJhomo ene! panel
de control paraencendery apagar[aJuzdeJhomo,
Panel inferior de[ Homo
Oven
Light;
ProteiaeJpanel inferiorde[ homocontraderrames,especialmente
azucaradosoaddicos,pues puedendescoJorar[aporceJana
esmaltada=UseeJutensiJiode tamaBocorrectoafin de evitar
derrames=No coioque atensiiios ni papei de aiuminio
directamente en maparte inferiordei homo.
Parriiias de[ Homo
, No intentecambiar [aposici6nde [asparrfliascuandoe[ homo
' NO usee[ homoparaguarda[a!imentosni utensflios.
Su hornotiene dosparriilas=Hansidodise_adasconun tope de
engancheen el borde=
Para retirar [a parrilla:
1=Tire de Japarrilladerechohacia
afuerahastaquesedetengaen Ja
posici6ndeJtopedeenganche=
2= Levanteelfrentede [a parriiJay tire
de [aparriiia haciaafuera=
Para reinstaJar [a parriJJa:
1= Co[oque[aparri[[aen e[soportede [a parri[[aene[ homo,
2= incline[evementehaciaarribae[ extremode[antero;des[ice[a
parr[Hahac[aatrSshastaquepasesobre[astopesde enganche=
3= Bajee[frente de [aparri[[ay des[[ce[ahacia adentrode[ homo,
No cubra una parriiiacompmetacon papei de amuminioni
comoquepapei de aiuminio en maparte inferior demhomo° Se
afectar_n mosresumtadosdel homeado y se puede da5ar ma
parte inferior dei homo°
Posiciones de [a ParriHa
PARfliLLA5
_osicidn m_saitaD:
Seusaparatostar
pan o asara[a
parriiia aiimentos
deigadosno
grasosos=
PARRiLLA4: Usada
para la mayoriade[
homeadocon dos parriiias=
\ , i .... 5
.... 2
PARRiLLA3:Seusaparahomearalimentosen unabandeja
de homeargalietaso un moide pararollo de mermelada,para
pasteles,paysde frutaso aiimentoscongelados=
PARRiLLA2: Usadapara asarcortesde came pequeffos,caceroias,
homearpan,paste[enmoidede tubo,f[anesu horneadocondos
parriiias=
PARRILLA1: Usadoparaasarcortesde camegrandesy
came de ave,pastelescongelados,sufi6s,paste[esponiosou
homeadocon dosparrillas=
conto
76

POS+CION PARA HORNEAR:
Usadoparaasarcortesrossaltos decame
de reso de pavo+Co[oqueambasparri[[as
dethomo,una sobretaotra,en[as
satientes[ateralesde taparteinferior del
homo,
HORNEADO CON VAR+AS PARR+LLAS:
Dos parHllas: Use[asposiciones2y 4,o 1y 4,
Nora: Nuncaco[oquelosutensi[iosde cocinadirectapaenteen et
rondodethomo,
Aeeesorio de [a Media Parri[[a
Sedispone,comoaccesorio,de unamedia _--i, /
parrilla paraaumentarlacapacidaddelhomo+
Seinstalaen[asecciOnsuperiordel[ado
izquierdode[ homoy ofreceespacioparauna
platode verdurascuandose hacolocadouna
asaderagrandeen [a parrilla inferior+
P6ngaseencontactocon sudistribuidorpara " "" ""
obtenere[accesorio"HALFRACK"opara
so[icitar,Ilapaea[ 1-877-232-6771EE+UU+o 1-800-688-8408Canada+
??

Homo AutoJimpiante
(modelos selectos}
Nota: ParaIa limpiezamanual,verp_gina81.
- Esnormal que Jasp_ezasdet homose calentenduranteet cido
de autolJmpteza
o Afin de evitaruna lesion personaly @rio a la puertade!homo.
no trate de abnr la ptJertacuandoest6desp_egadala paiabra
+LOCK"(B+oqueada}.
, Evite[ocar la puer_a,lavencanao el 4teadel respiraderodel
norno duranteu_cido deiimpieza
o No use limpiadoresde hornos comerciabsen etacaDaaodeJ
homo ni a+rededorde mngunaplezadel homo puespuede
dafiarel acabadoolas p+ezas.
1.
2.
Limpieel excesode grasao derramesde laparteinferior del
homo+Estoevitahumoexcesivoo Ilamaradasduranteel ciclo de
[impieza.
Limpielos derramesazucaradoso_cidostalescomo papaduIce
[camote),tomateso satsasabasede bche. La porcelana
esmaitadaes resistentea[4cido pero no a pruebade _cidos. Et
acabadode porcelanapuededescolorarsesi losderrames4cidos
o azucaradosno son [impiadosantesde uncicio de autoJimpbza.
Para programar 'Self-Clean' (Autolimpieza):
Nota: Latemperaturadel hornodebeser inferiora 205° C
(400° F} paraprogramarun ciclo de limpbza.
Cbrre Ia puertadeI homo.
Muevalapalancade bloqueode la puertaala derechaa la
posicidnbloqueada.
Elcido de autolimpiezausatemperaturassuperioresa Bs
temperaturasnormalesde cocci@para limpiarautom4tbamenteel
interiordel homo. Nofuerce IapuertadeIhorno ni la palancade
bloqueoparaabrirla.EstopuedecausarexposiciOna las
temperaturasaltasy constituir unriesgodequemadura.asnormales
para limpiarautomaticamentetodo el intedordel homo.
EsnormalqueocurranIBmaradas,humoo llamasdurantela limpieza
si el homoest4demasiadosucio.EsmejorIimpiarelhorno
regularmenteenvezdeesperarhastaquese hayaacumulado
demasiadasucbdad.
Duranteel procesode Iimpieza,la cocinadebeestarbienventilada
para eliminarlos oloresnormalesasociadosconla limpieza.
Antes de la Autolimpieza
1. Apague Ia Iuzdei hornoantesdela Iimpieza.La luzdel horno
puedefundirse duranteel cicio deIimpieza.
2. Retirelaasadera,todos los utensiliosy lasparrilIasdel homo.Las
parrillasdel homo sedescolorardny no sedestizar_nf_cilmente
despu@de unciclo de autoiimpiezasi no son retiradasdei homo.
3. Limpieel marcodel homo,e+marcode Iapuerta,el 4reafuerade
lajunta de la puertay alrededorde laaberturaen Iajunta dela
puerta,con un agentede IimpiezanoabrasJvotaI como'Bon
Ami'* o con detergentey agua.El
procesode autolimpbzano Iimpia
estas4teas. Elias@benser limpiadas
paraevitarqueIasuciedadsehornee
duranteel ciclo de autolimpieza. (La
junta es el selloalrededorde lapuerta
y ventanadel homo.}
4. Paraevitardafio noIimpieni frote Iajunta situadaalrededorde la
puertadel homo.Lajunta est4disefiadaparasellar
hermOticamenteelcalor duranteel ciclo de limpbza.
3. Optimalatecla 'CLEAN'.
CLEAN
o 'CLEAN'destelJaenel indicadorvisual.
SiB puertano secierra,se oir4 unaserialsonoray Iapalabra
'DOOR'se despbgar_en e! indicadorvisual Si lapuerta noes
cerradadentro de 45segundos,laoperaciOnde autolimpieza
ser_canceladay el indbador volver4a desplegarlahorade!d[a.
4. Optimalatecla A o _'.
, Sedesptiega'CL-M (Limpieza- Suciedad
Moderada}.
5. OprimalateclaA o V paradesplazarlos
ajustesdeautoJimpieza.
'CL-H'(Limpieza- Sucbdad Intensa,4 horas}
'CL-M' (Limpbza- SuciedadModerada,3horas}
'CL-L' (Limpieza- SucbdadIeve,2horas}
AIseleccionare!niveldesuciedaddel homose programa
autom4ticamenteel tiempo de Iimpieza.
6. DespuOsdecuatrosegundos,elhomo comenzar4a Jimpiar.
o Eltiempo de limpbza comenzar4Jacuentaregresivaen el
indicador.
o 'LOCK'se desplegar_enel indicadorvisual.
o 'CLEAN'sedesplegar_enel indicadorvisual.
Para diferir un ciclo de autolimpieza:
1. Optimalatecla 'DELAY'.
o 'DELAY'destella.
o '00:00'sedesplegar4enel hldbadorvisual+
DEtAY
conto
*Losnombresdelosproductosson marcasregistradasde sus respectivosfabrbantes.
78

2+ Optima[atectaA o V para programar[acantidadde
tiempo queusted deseadiferir etcic[o+E[tiempodiferido
puedeserprogramadode 10minutos (00:10)a
11horas,59minutos01:5%
3+ Optimatatecta'CLEAN'.
+ 'CLEAN'destellar4+
4+ Optima[atecJaA o V+
+ 'CL-M' (Limpieza- SuciedadModerada]se
despJiegaen et[ndicador+
CI+EAN
A
5. OprimaIatecla A o V paradesplazarlosajustesde
autolimpieza.
'CL-H'(Limpieza- SuciedadIntensa,4horas)
'CL-M' (Limpieza- SuciedadModerada,3horas)
'CL-L' (Limpieza- Suciedadleve,2horas)
AI seleccionarel nivelde suciedadde! homose programa
autom_ticamenteel tiempo de limpieza.
6. Despu6sde cuatrosegundos,'CLEAN','DELAY'y 'LOCK'se
desplegar_nen e! indicadorvisualparaind+carque el horno esta
programadoparaun ciclo de limpiezadiferido.Eltiempodiferido
tambiensedespliegaen elind+cadorvisual.
Si emhomo ya ha sido programado para un cido de
mimpiezay usted desea programar un tiempo
1+ Optima[atecia 'DELAY'= DEL_ff_
+ 'DELAY'desteJla+
+ '00:00'se desplegar4en el [ndicadorvisual
A
2+ Optima[atecia A o 'V'para programarla cantidad
detiempoqueusteddeseadiferir elcicio+
Despu6sdecuatrosegundos,'CLEAN','DELAY'y
'LOCK'sedesplegar4nen el indicadorvisuaipara
indicarqueel homo est4programadopara unaciclo de limpieza
difeddo+Eltiempo diferidotambi@nse despJJegaenel [ndicador
visual
Cuando comienza ei cicJo de autoiimpieza:
+ 'DELAY'seapagar&
+ Eltiempode [[mpiezase desplegardenei indicadorvisual
Para canceiar e[ cicio de autoiimpieza: ................................................
Optima[atec[a'CANCEL'.
+ Elindicadorvisualquedaenblanco.
+ Todas[asfuncionesson canceladas+
Durante e[ cic[o de auto[impieza
Cuandoaparece'LOCK'enei ind+cador,[apuertano sepuedeabrir+
Paraevitardahoa lapuerta,nofuerce [apuertapara abrirlacuando
[apalabra'LOCK'est8desplegadaenel ind+cadorvisual
Humo y Omores
Ustedpuedevet humoy sentirolor [asprimerasvecesque el homo
eslimpiado+Estoes normaly disminuir_conel tiempo+
Tambienpuedeocurdr humosi e[homoest_demasiadosuc[oo si
seha dejadounaasaderaenel homo+
Sonidos
A medidaque el homosecalienta,ustedpuedeoir sonidosde
piezasmet_licasquese expandenycontraen+Estoesnormaly no
dahar_elhomo+
Despu6s de( c+c[o de auto[imp+eza
Aproximadamenteunahora despu6sde[fin de[ciclo de limpieza,
'LOCK'desaparecer_i+Lapuertaahorapuedeset abie+ta+Mueva[a
palancade bloqueode [a puertaa la izquierdaparadesbloqueada+
gmgunasuciedad puede quedar como una mereceniza gHs tipo
pomvo.Ret[re[aconunpaiio h0medo+Si[asuciedadpermanece
despuesde [impiar[a,significaque e[ciclode limpiezanorue1o
suficientementelargo. Lasuciedadset8eiiminadaduranteel
proximocic[ode [[mpieza.
Si masparrimmasdemhomofueron dejadasenel homoynose
desiizan suavemente despu_s de un ¢ido de [impieTa+Iimpie
[asparrillasy lossoportesde lasparriiiascon una pequehacantidad
de aceitevegeta[para hacerdes[izarlasconm_sfacilidad+
Puede_ aparecer m+_easdemgadase_ maporcema_aampasar pot
_[cmosde came_tamie_toye_friamie_to. Estoesnormaly no
afectar_e[ rendimiento+
U_a _escomoracih_bma_cap_eSeaparecer despuSs _emc+cmo
de mimpiezas[ mosamimemos_cidos o az_carados _o f_ero_
limpiados a_tes dem_i_mode a_tomimpieza.EstadescoloraciOnes
normaly no afectar8el rend+miento+
+ Sise dejaabiertala puertadel homo,[apalabra'DOOR'
destellar_enel indicadorvisua[yseescucharaunasehal
sonorahastaque la puertaseacerraday la tecla'Clean'sea
oprimidanuevamente+
+ Lapuertadelhomosedahar_sisefuerzaparaabrirla cuando
la palabra'LOCK'contin0adesp[egadaen el indicador+
+ Lahoradelaliasedesp[iegaen elindicadorvisual+
79

Procedi ientos de Li pieza
Ase rose,eq.eel,ore0est6.pa .,oyq°ot0,aS p e.asest n
frgasantes det0carJo o [impiar[o. De este mode se evitar_ da_e y
posiblesquemaduras. * Losnombresde losproductossonmarcasregistradas
Paraevitarrnanchasodeco!oraciSnlimpiee[homo desPU6Sdecarlauso. de susrespectivosfabricantes=
•*Parahacerpedidos,IIameal 1-877-232-6771EEUU=o
, Siseretiraaigunapieza,asegOresede que seareinstaladaenformacorrecta, al 1-800-688-8408Canada=
P[EZA PROCED[M[ENTO DE LiMPiEZA
Asadera e Nunca cobra el inserto con papel de afumhde poes este evita que la grasa se eacurra a la bandeja inferior.
[nserto o Co[oqueun patio enjabonadosabree[ insertoy [abandeja;dejeremojarparasoitar[asuciedad=
o Laveen aguajabonosatibia. Useuna esponjadefregarparaquitar [a suciedadpersistente=
o La bande]adeasary el insertopuedenset [avadasene[ [avavajiIIas=
Quemadores de o Limpiefrecuentemente=Esperequee[ quemadarseenfr[e=Limpiecon unaespon]ade fregarde pI_sticocon]abOn=
ia Cnbierta Paralasuciedadpersistente,use un [[mpiadornoabrasivoyun patio.Tratedeevitarqueel limpiadorseescurrahacia
- Conventional losorificiosde[gaspuesestoafectar_ia [hma.Siellimpiadorpenetraenlosorificios,limpieconunaescobiHadecerdas
=Seiiados suaveso un aifi[er derecho,especiaImenteelorificio debaiode!encendedor. No agrandeodistorsionelosaguieros.
o Tongacuidadodeque no entreaguaen los orificiosde los quemadores.
o Tongacuidadocuando[impiee[encendedor.Si el encendedorestdhi,rondoo datiadoe[ quemadorsuperior
no encenderZ
o Horni[[asConvenciona[es:Lashorni[[assecasene[ homofijaron en75°C(170°F).
Caja de ia Homilla Lacaja de [ahornilla est_situadobajo [acubiertaque puedese[evantada.Limpieconfrequenciaparaquitarspillovers.
Si e[sue[osepermiteacumular,puededatiare[final
o Quite[asrejillasy [ashorniliassuperficiaies.Levante[acubiertaparaarr[ba[atapa.
o Limpieconel jabOny riegue,aciaraciOny sequese.
o Paralossue[osobstinados,utiiice losagentesde[[mpiezasuavementeabrasivostalescomo unengrudodebicarbonato
de sosay aguao delBonAm[*,yuna pistaque friga p[_sticano abrasiva.
Rejiiias de los o Lave[asrejiilascon aguatibiajabonosay unaesponjade fregarde pi4sticonoabrasiva.Parasuciedadpersistente,
Quemadores [[mpiecon unaesponjano abrasivae impregnadaconiab6n o con unaesponiay unaCooktopCleaningCreme
(pieza#20000001)**=
o Parasuciedadquemada,saque[asparrillas,cotoqueperiOdicosy rode cuidadosamentecon un [impiadorde homo
comerciaL[Norode [assuperficiesvecinas=DCo[oqueenbalsasdepiSsticodurantevariashorasotoda[anoche=Usando
guantesde goma,retirede [asboisas=Lave,enjuague,sequeyvueivaaco[ocaren [a cubierta de [aestufa=
Area dei Reioj y o Paraactivar'ControlLock'[Bioqueode los controles)para[a [impieza,vet p_gina70=
de las Tedas o Lave,eniuagueyseque=No useagentesde l[mpiezaabrasivospunspueden rayarel acabado=
de Control o Sepuedeusar[impiav[ddossi se rocianen e[paso primero=NOroc[e directamenteen eipaneL
Perimmasde o Retirelasperillascuandoest_nen [aposiciOn'OFF'tir_ndo[ashaciaado[ante.
Control . Lave,enjuagueyseque=No useagentesde [impiezaabrasivospunspueden rayare[ acabado=
o Enciendacadaquemadorparaasegurarsede que [asperiIIashartsido correctamentereinstaIadas.
Cubiertay Panel Laporcelanaesmaitadaesvidr[ofundidoen metalypuedeagrietarseo picarsesi noseusacorrectamente=Esresistente
de Control - a los_cidos,noa pruebade4cidos=Todoslosderrames,especia[mentelos derramesazucaradosoacidicos debenset
Esmalte de [impiadosinmediatamenteconunpatio seco.
Poreelana oCuandoseenfffe,lavecon aguajabonosa,enjuaguey seque.
o Nunca[impie unasuperficietibia ocaiienteconun paffohOmedo.Estopuedecausaragrietamientoo picaduras.
o Nuncause[impiadoresdehomo,agentesde [impiezaabrasivoso c_usticosene[acabadoexteriorde [a estufa.
8O
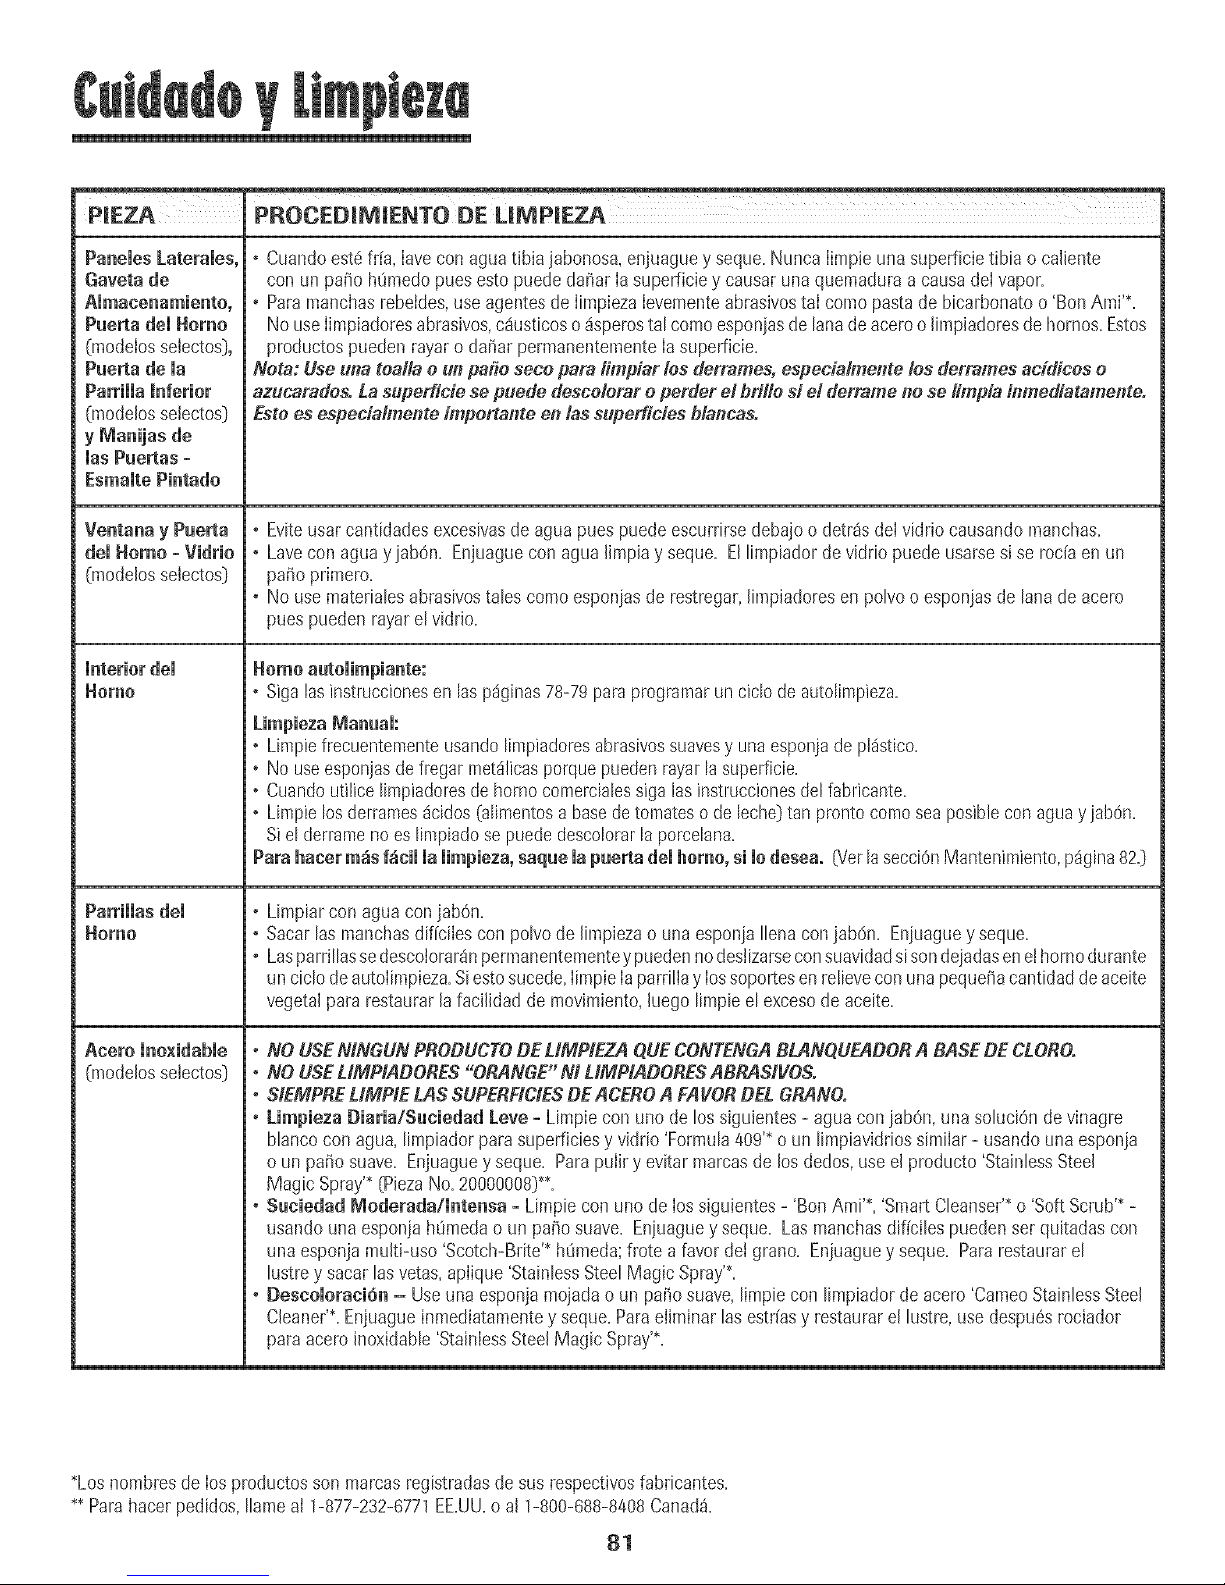
PIEZA PROCEDIMIENTO DE UMPIEZA
PaneiesLateraies
Gavetade
Pue_a dei Homo
[modelosselectos},
Pue_a de ia
Parrimmainferior
(modelosselectos}
y Manijas de
iasPuertas+
EsmamtePintado
Ventana y Puerta
demHomo- Vidrio
(rnodelosseiectos}
Acem Jno×idabie
(modelosselectos}
+ Cuandoest6fr[a, Iaveconaguatibiajabonosa,enjuaguey seque.NuncaIimpieunasuperficietibia ocaliente
conun patio hLimedopuesestopuededa_arIa superficiey causaruna quemaduraacausadeIvapor.
• Paramanchasrebeides,use agentesde IimpiezaIevementeabrasivostai comopastade bicarbonatoo 'BonAmi'*.
NouseIimpiadoresabrasivos,cSusticoso _sperostal comoesponjasde lanadeaceroolimpiadoresde hornos.Estos
productospuedenrayaroda_ar permanentementeIa superficie.
Neta: Use uI_atoalla e un pa_e seco para limp_arlos derrames,especialme1_telos dermmesacidicos e
azucaradosoLa supedicie se puede desceiorare perder e! brille si el dermme ipose limpia inmediatamente.
Estees espedah_ente impertante en tassuperficies blancas.
+Eviteusar cantidadesexcesivasde aguapuespuedeescurrimedebajoo detrSsdelvidrio causandomanchas.
• LaveconaguayjabOn. Enjuaguecon agualimpiay seque. Ellimpiadordeviddopuede usarsesi serociaen un
patioprimero.
• Nousematerialesabrasivostalescomoesponjasde restregar,limpiadoresenpolvoo esponiasde lanade acero
puespuedenrayarelvidrio.
+ Siga las instrucciones en las pdginas 78-79 para programar un ciclo de autolimpieza.
LimpiezaMammi:
+Limpiefrecuentementeusandolimpiadomsabrasivossuavesy unaesponjade pl_stico.
, No useesponjasdefregarmet_licasporquepuedenrayarlasuperficie.
° Cuandoutilicelimpiadoresdehomocomercialessigalasinstruccionesdelfabricante.
° Limpielosderrames_cidos(alimentosa basedetomateso de leche}tan prontocomoseaposibleconaguayjabOn.
Sielderramenoeslimpiadosepuededescolorarlaporcehna.
Parahater m_sf_icii ia iimpieza, saque ia puerta dei heine, siie desea. {VetlasecciOnMantenimiento,p%ina82.}
+ Limpiarcon aguaconjab6n.
+ Sacarlas manchasdificilesconpolvode Jimpiezao una esponjaIlenaconjab6n. Enjuagueyseque.
• LasparrillassedescoJorar4npermanentementeypuedennodesJizarseconsuavidadsisondejadaseneJhornodurante
unciclodeautolimpieza.Siestosucede,IimpieIaparri!Iay Iossoportesenrelieveconunapequetiacantidaddeaceite
vegetalpara restaurarJafaciJidadde movimiento,Juegolimpieelexcesode aceite.
+NO USENINGUN PRODUCTODELIMPtEZA QUECONTENGABLANQUEADOBA BASEDE CLORO.
+ NO USELIMPIADORES "ORANGE"Nt LIMPtADOBESABRASIVOS.
+SIEMPRELIMPIE LASSUPERFiCiESDE ACEROA FAVORDELGRANO,
+[impieza Diaria/Suciedad Leve+Limpie conuno de los siguientes- aguaconjabOn+unasoluciOnde vinagre
blancocon agua,limpiador parasuperficiesyviddo 'Formula409'*o unlimpiaviddossimiJar- usandounaesponja
o un patiosuave. Enjuaguey seque. ParapulJry evitar mamasdeJosdedos,useelproducto 'StainlessSteel
Magic Spray'*[PiezaNo.20000008}++.
• Suciedad Moderada/Jntensa +Limpiecon unode Iossiguientes- 'BonAmi'*,'SmartCleanser'*o'SoftScrub'_-
usandounaesponjahOmedao un patio suave. Enjuaguey seque. Lasmanchasdificilespuedenserquitadascon
una esponjamulti-uso 'Scotch-Brite'_hOmeda;frote a favordeJgrano. Enjuaguey seque. Pararestaurarel
lustreysacar lasvetas,aplique'StainlessSteelMagicSpray'+.
+Bescomoraci6n- Useuna esponjamojadaoun pasosuave,limpieconlimpiadorde acero'CameoStainlessSteeJ
Cleaner'*.Enjuagueinmediatamenteyseque.Paraeiiminarlasestriasy restaurarel lustre,usedespu6srociador
paraaceroinoxidable'StainlessSteelMagicSpray'*.
*LosnombresdeIosproductosson marcasregistradasde sus respectivosfabricantes+
** Parahacerpedidos,Ilameal 1-877-232-6771EEUU.oal 1-800-688-8408Canada.
81

Puerta del Homo
Tornillos Niveladores
, No coloquepeso exceslvomsepareen ia puer[adei homo.
Estopodffahacervobar la estufa,quebrar[a puertao lesionar
a[usJano.
o No intenseabnro cerrar [apuerta n[hacerfuncLonare[horuo
hastaque[apuertano hasido debiuamemereempiazada
o Nuncaco[oquelosdedosentrela b_sagray el marcodelantero
de[homo. Losbrazo,<dearticuiacionsonmontadosaresor_e.
Sisegolpeaaccidenta[mente[abisagrasecerral
bruscamentecontrae[marcode[homo ypuede[esionarsus
_Jedos.
Para sacar:
1.Cuandoest6fffa,abra [a puertadei hornohasta[aposici6n
primerodeasara la parriiB [abbrta aproximadamente10cm
{cuatro pulgadas}].
2.Suietelapuertadecadalado. No usela
manijade lapuertapara Ievantarta.
3.Levanteuniformementehastaque Iapuerta
sesaIgade los brazosde articulaciOn.
Para vo[ver a CO[OCar:
1.Suiete[apuertade cada [ado=
2.Aiinee[asranurasde [a puertacon los brazesde articuiaci6nde [a
estufa.
3.Desiicelapuerta hacia[osbrazosdearticuiaci6nhastaque est6
compietamenteasentadaen [asbisagras.Empuiehaciaabajo[as
esquinassuperioresde la puertapara asentariacompbtamenteen
[asbisagras.La puertano debequedartorcida.
Nora: La puertade[ homoen unaestufanuevapuedesentirse 1
1"esponiosa"cuandose cierra. Estoesnormaly disminuir_conel
1
[USO.
Ventana de[ Homo
(mode[os se[ectos}
Para proteger [a ventana de [a pnerta de[ homo:
1. No useagentesde [[mpiezaabrasivostabs comeesponjasde
restregarde[anadeaceroo [impiadoresen po[vopuesellos
pueden rayare[vidrio.
2. No golpeee[vidriocon ollas,sartenes,muebies,juguetes uotros
obietos.
3. No cierre[apuertade[ homo hastaque [asparrillasde[homono
est@en su [ugar.
A[goipear,rayar,hacervibrar oesforzare[viddopuededebilitarsu
estructuracausandounmayorrbsgo de roturaen unafecha
posterior=
82
[0Stomil[os n!veladorestraseros. Estesopo[teevitaquela estufa
sevueiqueacc[dentaimentel
VerifiqueSielsoporte antiyuelc0estaasegurandoatPiS0un0de
Laestufadebeserniveladacuandoseinstaia. S[[a
estufano est_nivelada,gire los torni[[osniveladores [ _1
depkisticoub[cadosencadaesquinade[aestufa
hastaque quede nive[ada. _,,/J
TORNILLO NIVELADOR
Luz de[ ["[orno (mode[os se[ectos}
Desconecte[a energiaa[aestufaantesde reempBzare[focQi
use un tomao[[asSeco paraevitar pOsib[edaffoa Sus manos
cuandoest6teempJazandee[foc0.
o NOtoque e!foc0ca[ienteConUn pa_0h(]medo[suesesto[suede
quebrarelfoce,
Para reemplazar el foco de[ borne:
1.Cuandoe[homoest6fifo, sujete[atapade [a bombi[[a(s[est_
equipado}ensu [ugar,[uego@slice e[ ret@de aIambrefuerade
[acubierta.
; Nora: Lacubierta de [a bombiiiase caer_si no essujetaen su 1
[ugarcuandoest_sacandoe[ ret@de aIamb_e.
J
2.Saque[acubiertade[ focoy el foco.
CUBIERTA DEL
3. Co[oqueunfoco de 40watts para foco
ebctrodom@ticos.
4.Vue[vaa co[ocar[acubiertade
[abombiilay aseg8reIacon e[
ret@ deaIambre.
5.Vue[vaa enchufar[aestufa. RETENDEALAMBRE
Vue[vaa co[ocar[a hora
correcta.

Retiro de la Estufa a Gas
Losconectoresde taestufaa gasusadosparaconectareste
artefactoalsuministrode gasno est_ndise_adosparamovimiento
continuo. Unavezinstatados,NOmuevarepetidamenteeste
artefactoagasparasutimpiezao paraubicadoen otro Iugar. Si
esteartefactotiene quesermovidoy/o retiradoparareparaciOn,siga
el precedimientodescritoentasinstruccionesde instahciOn.Para
informaciOn,pOngaseen contactoconel Servicioa losClientes
Ilamandoal 1-800-688-1120EE.UU.y Canada.
Paraevitarquela estufase vuelqueaccidentaimente,sedebe
aseguraral piso coIocandoeltornillo niveladortraseredentro del
soporteantivuelco.
Gaveta de Ammacenamiento
(modelos selectosD
materiales inf[amaNesenestagaveta.Lagaveta puedecalentarse
den!asiado_araestosarticuloscuandose est_usandoe!homo,
La gavetade almacenamientopuedeset retiradaparaqueusted
puedalimpiardebajode la estufa.
Para sacar :
1. Vade la gavetay deslicelahaciaafuera hastala primeraposiciOn
tope.
2. Levantela partedelanterade la gaveta.
3. Tirela hastaIasegundaposiciOnde tope.
4. Sujete losladosy IevanteIagavetapara retirarla.
Para vomvera comocar:
1. InserteIosextremosde Iascorrederasde lagavetaen los rieles
de laestufa.
2. Levantela partedelanterade la gavetay suavementeempSjelaa
la primeraposiciOndetope.
3. Levantelagavetanuevamentey empSjelahastaquequede
completamentecerrada.
Para SaCat:
DejequeeIquemadorseenfr[e.Levantelacubiertade Iaestufa.
Sujeteel conjuntodel quemadoryg[relolevementehaciaIa
izquierdaparadesengancharlas dosIengOetasde!conjunto. Luego
levanteetconjunto ytire de 61hacia lapartetraserade Iaestufa
hastaquelosextremosdeI obturadordeaire del conjuntose
desenganchende lav_lvula.
Para velvet a colocar:
Insertelos extremosdel obturadorde airedeI conjuntodel
quemadoren Iasv_Ivulasy baje elquemadora su Iugar.Asegurelas
doslengOetasde!quemadoren lasranurasdetsoportedeI
quemadorqueest_ instaladoen la parte inferiordel quemador.
(NOTA:SiIasIengQetasnoquedanbien insertadasenlasranuras,el
conjuntodelquemadorquedar_inestabley puedequelos
quemadoresno enciendanenformadebiday
Paneminferior del Homo
Protejaei paneIinferiordel borne contraderrames,especiaImentede
tipo addico o azucarado,puespuedendescolorarla porcetana
esmaltada.Useel utensiliodetama_ocorrectoa fin deevitar
derramesyreboses.
Elpanelinferiordel hornopuedesersacadoparasu limpieza.
Para sacar:
Cuandose enfr[e,saquelasparrilIasdel homo+ __
DesliceIosdosretenes,ubicadosen cada "
esquinadeJpanelinferiordel horno haciaJa J_?Sf
partedelanteradeJhomo. 1_/
H_
LevanteeIhordetraserodel paneJinferior del
homo Iigeramentey Juegodeslicelohaciaatr4s hastaqueeJhorde
delanterodel homo pasapot sobreeJmarcodelantero.Saqueel
panelinferiordeJhomo+
Para vomvera comocar:
Coloqueel bordedelanterodelpanelinferiordel hornoeneImarco
delanterodel homo+Bajela partetraseradelpanel inferiordei
homoy desliceiosdosreteneshaciaatr_sparabloquearel panel
inferiordel homo ensu hgar.
Quemadores Superiores
(modelos selectos)
Bajoningunacircunstanciasedebendesarmarlosquemadores
superioresparasu limpieza. ElconjuntodeIquemadorsuperior
puedesetretiradoparalimpiarel _reade la caja delquemador.
En _as Estufas Ais_ado SoNamente
Losdosconjuntos de quemadoressuperioreshartsido asegurados
duranteel transporte contornillos. Unavezque se hayainstaladoIa
estufa,estostorn+IIosdebenserretiradosparaque losquemadores
puedansetsacadosen formaf_cil y r_pida.
83

Cone×iSn El6ctrica
Los eiectrodom6siicos que requieren energia
ei_ctrica est_in equipados con an enchafe de
ires ciavijas con cone×iSn atierra, eIcualdebe
set enchufadodirectamenteen un tomacorriente
eI6ctricode tres agujeros,para 120voltios
debidamenteconectadoatierra.
Siempre desenchufe e/ etectrodomdstico antes de efectuar
reparac/ones.
Etenchufe de tres claviias con conexiOn a tierra ofrece protecci6n
contra peligms de choques et6ctricos. NO CORTE Nl EHIVitNt: EA
TERCEPJ_ CLAVUA DE CONE×ION A TIERRA DEL ENCHUFE
DEE CORDON ELECTRICO.
Si solamente se dispone de un tomacorriente sin conexiOn a tierra,
de dos agujeros u otto %o de tomacorriente el6ctrico, el
propietario dei eieetrodomg_stieo es persenaimente
responsabme de reempmazar emtomacorriente coil un
tomacorriente em_ctrico de tres agujeros debidamente puesto
a tierra.
84

Paramamayor ademosprobmemas,
verifiqueprimero moaigaiente.
Emquemadorsuperior no se
eneiende.
Revisesi[os controtesde[homo est_ndebidamenteaiustados=
, Verifiquesie[enchufeest_firmementeinsertadoene[ tomacorriente=
• Verifiqueo vueivaa reponerel disyuntor=Verifiqueo reempIaceelfusible=
• Verifiqueel suministrode energ[aeI6ctrica=
Verifiquesi laestufaest_debidamenteconectadaa [a fuente deaiimentaciOn=
Verifiquesiest_fundido un fusibledel circuitoo si sedisparOel disyuntor principa[=
Verifiqueparaasegurarsede que e[ encendedorest6secoy que emitachasquidos=EI
quemadornoseencender_si elencendedorest_da_ado,sucioomojado=Sielencendedor
no produceun chasquido,gire la periIIade control a la posici6n'Off'.
Lammamaes dispareja° Losorificiosde[quemadorpuedenestarobstruidos=
Lallama demquemadorsuperior se , Verifique paraasegurarsedequee[utensi[[oest_asentadoen [aparr[Hasobree[quemador=
mevantademorifieio.
Les resumtados demhomeado no son
come se esperaban o son
diferentes u los demhomo anterior°
Los amimentos no se asan a ma
parrimmaen forma debida o sale
demasiado humo.
Verifique[atemperaturade[hornoseiecc[onada.Aseg_iresede queel homoest6
precaientadocuando[a recetao[nstrucc[onesrecom[endanprecaientamientode[homo.
AsegOresedequeelrespiraderodelhomo noest6b[oqueado.Vetpag[na76para[aubicaci6n.
Verifiqueparaasegurarsede que la estufaest_ n[velada.
Lastemperaturasamenudovarianentreun hornonuevoy unoant[guo.A medidaquepasa
e[tiempo, [atemperaturade[ hornocambiay puedehacersem_isca[ienteo m_isfria. Ver
p%. 7/, para[asinstruccionescomo a]ustar[atemperaturade[horno (modeiosselectos}.
NOTA:No serecomiendaaiustar[atemperaturas[ hatenidoprobiemasconsolounao dos
recetas.
Usee[ utens[[iocorrecto.Los utensii[ososcurosproducendoradooscuro.Losutens[[ios
briiiantesproducendoradoc[aro.Consu[tee[fo[[eto"LaCocinaF_cil"paramayorinformac[On
sobre[osutensiiiosdehornear.
Verifique[asposicionesde[asparriiiasy [aco[ocaciOnde[osutensi[ios.A[ternelosutens[[ios
cuandouse dosparri[[as.Deje2,5-5cm 0-2 puigadas}entrelosutens[[iosy [asparedesde[
homo.
Verifiquee[usode pape[dea[uminioen e[ homo. Nuncausepape[deaiuminio paracubrir
unaparriiiacompletade[homo.Co[oqueunpedazopeque_odepape[dea[uminioen[aparrii[a
queest8debajode[ utensi[iopararecibir[osderrames.
Verifiquelasposicionesdelasparrillasdel homo. Elalimentopuedeestarmuycercade
[allama,
E[papeidea[uminiose us6demanera[ncorrecta,Nuncaforte e[[nsertode[asadorconpape[
de a[uminio,
Recortee[excesodegrasade [acame antesde ponedaaasara [a parri[[a,
Se us6unaasaderasucia.
Precaiienteel homodurante dosa tresminutosantesdeco[ocare[aIimentoen e[homo.
Asea [aparriIIacon[apuerta de[homo cerrada=
85
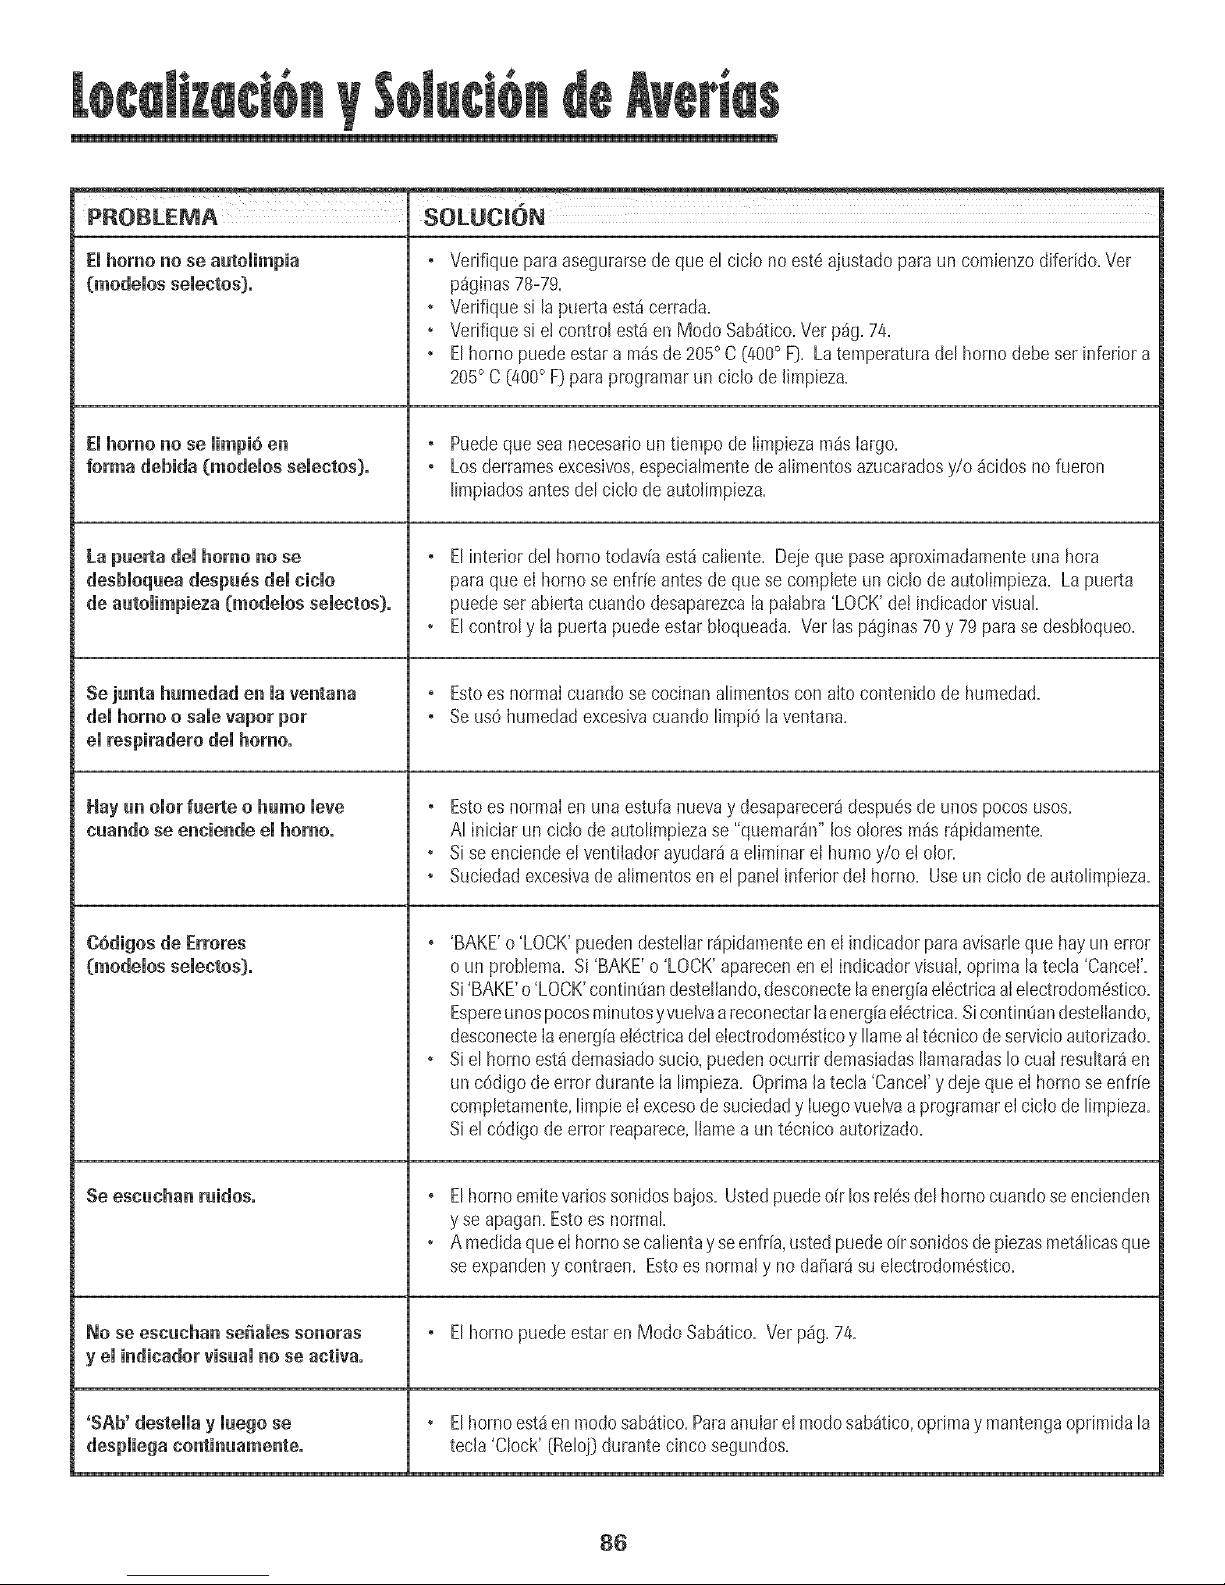
l
PROSLEMA SOLUC_ON
Emhomo no se automimpia + Verifiqueparaasegurarsedequee[ cic[onoest6ajustadoparaun comienzodiferido+Vet
(modelos selectos}, p%inas 78-79+
+ Verifiquesila puerta est_cerrada+
+ Verifiquesiel control est_en Modo Sab_tico+Verp_g+74+
+ Elhornopuedeestara m_sde205°C (400° F[}+Laternperaturadel homodebeset inferiora
205° C (400° F) parapragramarun ciclo delimpieza+
Elhomo no se limpi6 en , Puedeque seanecesariountiempo de Iimpiezam_slargo.
forma debida (modelos seleetos}. , Losderramesexcesivos,especialmentede alimentosazucaradosy/o 4cidosno fueran
limpiadosantesdelciclo deautolimpieza+
La puerta del homo no se , Elinteriordel hornotodav[aest_caliente+Dejequepaseaproximadamenteunahora
desbloqaea despu_s del ciclo paraqueel homo seenfr[eantesde quesecompleteun cic[ode auto[impieza+Lapuerta
de aatolimpieza (modelos selectos:, puedeser abiertacuando desaparezcaIapalabra'LOCK'deJindicadorvisual
• Elcontroly la puertapuedeestarbloqueada+Verlaspaginas70y 79 parasedesbloqueo+
Sejunta humedad en la ventana , Estoesnormaicuandosecocinanalimentosconaltocontenidode humedad.
del homo o sale vapor pot + Seus6humedadexcesivacuandolimpi6 laventana+
emrespiraderodemhomo.
Hay un omorfaerte o hamo leve + Estoesnormalenuna estufa nuevay desaparecer_despuesde unospocosusos.
euando se eneiende el homo, AI iniciar un ciclo de autolimpiezase"quemarSn"losoloresm_isr_ipidamente+
• Si seenciendeelventiladorayudar_a eliminar eIhumoy/o e!olor+
• Suciedadexcesivadealimentosenel panelinferiordel homo+Useun ciclo deautolimpieza+
C6digos de Errores , 'BAKE'o'LOCK'puedendestellarr_ipidamenteen el indicadorparaavisarleque hayun error
(modelos seleetos), o un problema. Si 'BAKE'o'LOCK'aparecenen e! indicadorvisuai,oprimalatecla 'Cancel'.
Si'BAKE'o'LOCK'contimiandestellando,desconectelaenergiaelectr+caaIelectrodom6stico.
Espereunospocosminutosyw+elvaareconectarIaenergiaet6ctrica.Sicontintiandestetlando,
desconecteIaenerg[ael6ctricadelelectrodom6sticoy IlameaIt6cnico deservicioautor+zado.
+ Siel hornoest_demas+adosucio,puedenocurr+rdemasiadasIlapaaradasIocuaIresultar_en
unc6digode errorduranteIa limpieza.Opr+malatecla 'Cance!'y dejeque eIhornose enfr[e
completamente,limpieeiexcesodesuciedady Iuegovuelvaaprogramarel ciclo delimpieza.
Si el cOdigodeerrorreaparece,Ilamea un t6cnico autorizado.
Se eseaehan ruidos, , Elhornoemitevadossonidosbajos. Ustedpuededr losrel_sdelhomocuandoseencienden
y se apagan.Estoesnormal.
• A medidaqueeIhornosecalientayseenfr[a,ustedpuedeoirsonidosdepiezasmet_licasque
seexpandeny contraen. Estoes normaly noda5ar_su electrodom6stico.
No se eseuehan se_ales sonoras + ElhornopuedeestarenModo Sab_tico. Verp_g. 74.
y el indieadorvisaal no se aetivao
'SAb' desteiia y iuego se , E[hornoest_en modosab_tico.Paraanulare[modosab_tico,optimay mantengaoprimida[a
tec[a'Clock' {Reloj}durantecinco segundos.
86
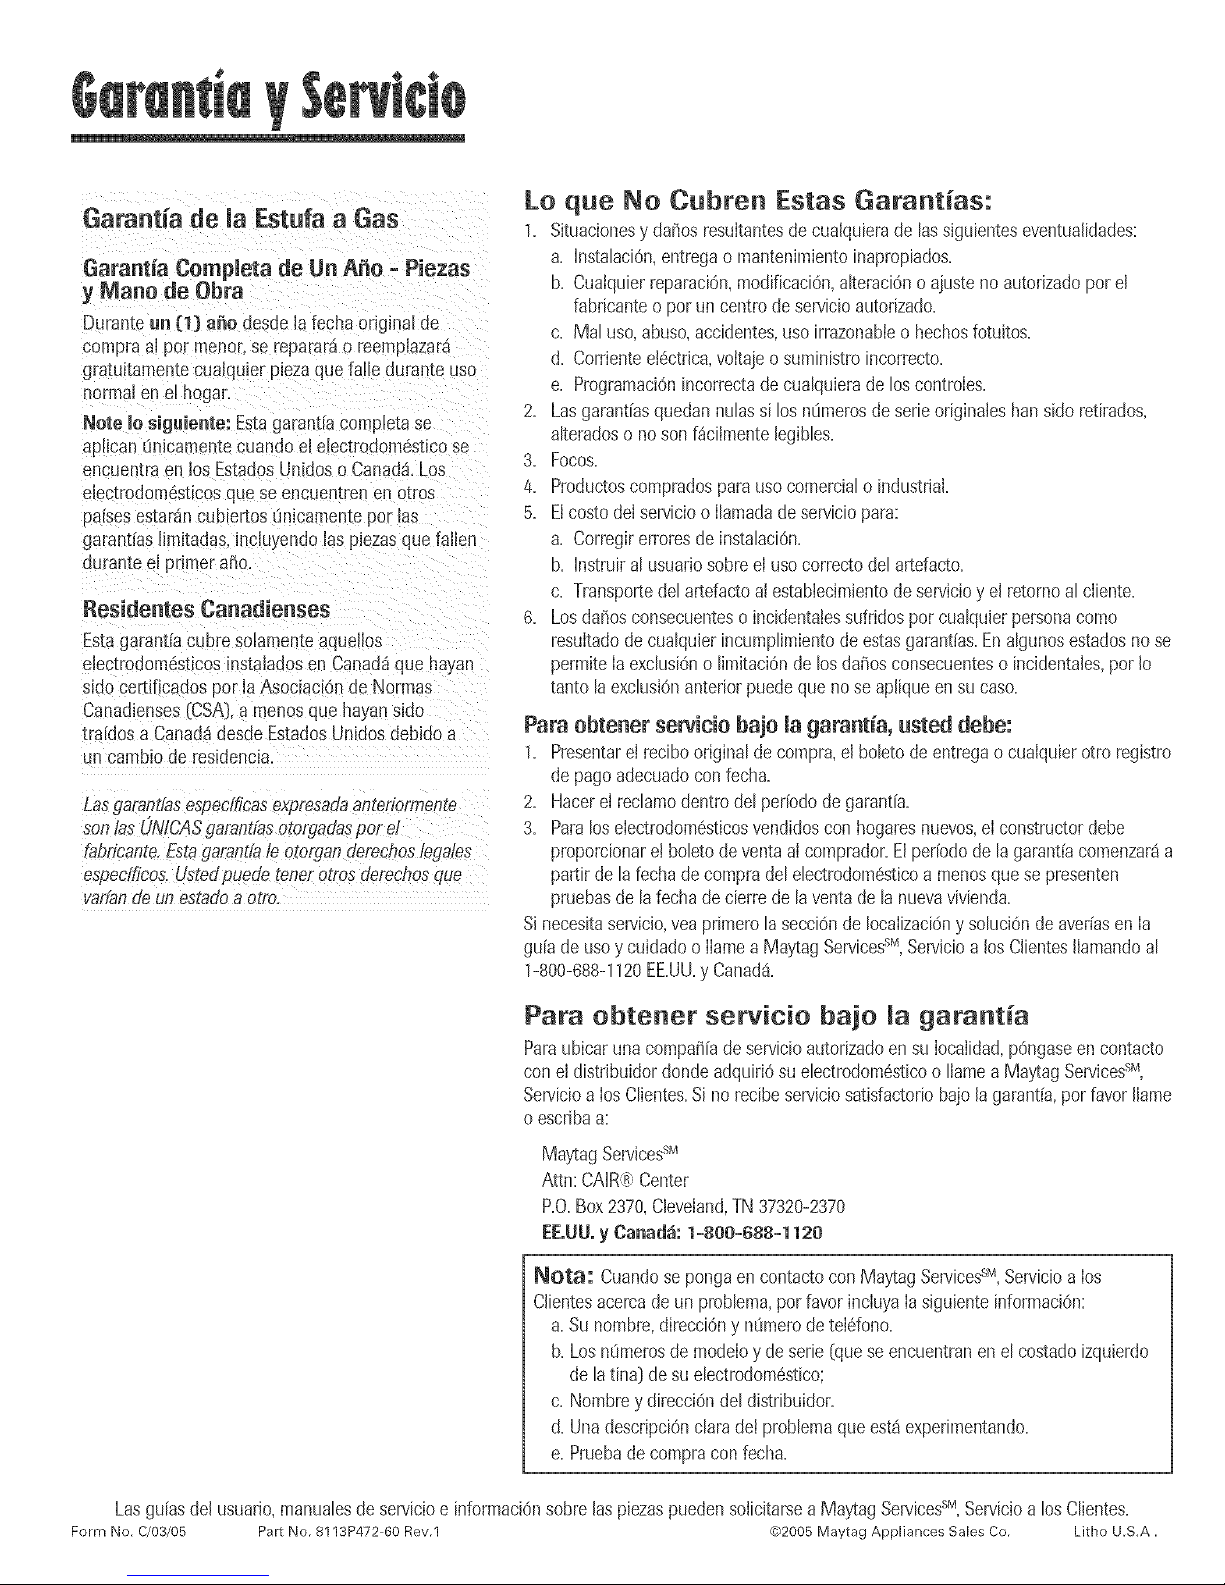
Garantia de ia Estufa a Gas
Garant_a Completa de Un A_o - Piezas
y Mane de Obra
Duranteun (1) a_o desdela fechaoriginal de
compraalper menor,sereparar_io reemplazar_
gra[ultamentecualquierpiezaquetaI/eduran[euse
norton en e!hogar.
Note Io siguiente: Es[agarant[acomp_e[ase
apllcanunlcamentecuandoel electrodom_sticose
encuentraen losEstadosUmdoso Canad_ Los
electrodom6sticosqueseencuentrenenotros
paisesestar_incub_ertos_Jnlcamemeper las
garantiaslimitadas,incluyendolasplezasquefallen
duranteel primer abe.
Residentes Canadienses
Estagarantiacubre solamenteaquNIos
electrodomcsttcusinstaladosen Canadaquehayan
sidecertificadosperlaAsoc_ac_Onde Normas
Canadlenses(CSA),amenosque hayanside
tra[dosa CanadadesdeEstadosUnidosdebidoa
un cambiode [esidencia.
Lasgarant/asespedficasexpresadaantenoffneme
son/asL/N/CASgaranttasotoroadasper el
fabric'ante.Estagarantfale etorganderechos/edales
especfficos.Ustedpuede tenorotrosderechosoue
vaffandeunestadoa otro.
Lo que No Cubren Estas Garantias:
1= Situacionesy da_osres_fltantesdecuNquierade lassiguienteseventuNidades:
a=InstalaciOn,entregao mantenimientoinapropiados=
b=Cuaiquierreparaci6n,modificaciOn,alteraci6no aiustenoautolizadoperel
fabricanteo perun centredeservicioautorizado=
c= Maluse,abuse,accidentes,use irrazonableo hechosfotuitos=
d=CorrienteN6ctrica,voItaieosuministroincorrecto=
e=Programaci6nincorrectadecualquieradeloscontroIes=
2= Lasgarant{asquedanhulassi losnOmerosdeserieoriginNeshartsideretirados,
Nteradoso nosonf_cilmentelegibles=
3. Focos,
4, Productoscomprados para uso comerciN o industriN,
5, EIcosto deIservicioo Ilamadade servicio para:
a. CorregirerroresdeinstalaciOn.
b. hstruir alusuariosobreel usecorrectodel artefacto.
c. TransportedN artefactoN establecimientodeservicioyel retornoal cliente.
6. Losda_osconsecuenteso incidentNessufridospercualquierpersonacome
resultadodecualquierincumplimientode estasgarant[as.EnNgunosestadosnose
permiteIaexclusiOnolimitaciOnde losdaisesconsecuenteso incidentales,perIo
tanto laexclusionanteriorpuedequenoseapliqueensu case.
Para obtener sewicio baje la garantia, usted debe:
1= PresentarN recibooriginaldecompra,el boletodeentregaocuNquierottoregistro
de pageadecuadoconfecha=
2= Hacerel reclamodentrodelper[eriedegaranth=
3= Paraloseiectrodom6sticosvenalitiescon hogaresnuevos,N constructordebe
proporcionare!boletode ventaai comprador=Elper[odede lagarant[acomenzar_a
partirde lafechadecompradel eledrodom6sticoa menosquesepresenten
pruebasdelafechadecierredelaventadelanuevavivienda=
Sinecesitaservicio,yeaprimerolasecci6ndeIocaiizacidny soluciOnde aver[asenia
guiadeusey cuidadoo iiamea MaytagSewicessM,Servicioa losClientesIlamandoal
1-800-688-1120EE.UU.y Canadi
Para obtener servicio bajo la garantia
Paraubicarunacompa_[ade sewicioautorizadoensu Iocalidad,pOngaseen contacto
conNdistribuidordondeadquiriOsuelectrodom6sticoo llameaMaytagServicessM,
Servicioa IosClientes=Si norecibesewiciosatisfactoriobajolagarant[a,perfavorIlame
o escribaa:
May¢agServicessM
Attn: CAIR® Center
P.O.Box 2370,Cleveland, TN 37320-2370
EE.UUoy Canada: 1-800-688-1120
Nora: Cuandosepongaen contactoconMa}d:agServices sM,Servioioa los
Clientesacercadeun problema,per favorincIuyaIasiguienteinformaciOn:
a=Su nombre,direccidny n0merodetNdono=
b=Losn0merosdemerinoy de serie(queseencuentranen el costadoizquierdo
delatina)de suelectrodom6stico;
c=Nombreydirecci6ndeldistribuidor=
d=UnadescripciOnclaradN problemaqueest_experimentando=
e=Pruebadecompraconfecha=
LasgalasdNusuarJo,manuNesdeservicioe informaci6nsobrelaspJezaspuedensolicitarseaMaytagServicessM,Servicioa los Clientes=
Form No. C/03/05 Pair No. 8113P472 60 Rev.1 ®b2005 Maytag Appliances Sales Co. Lithe U.S.A.
 Loading...