

Page 1
U
U
SER
SER
’
S
’
Electric Range WT-TOD
G
S
G
Table of Contents
Safety Instructions . . . . . . . . . . . 1-2
UIDE
UIDE
Installer: Please leave this manual with this appliance.
Consumer: Please read and keep this manual for
future reference. Keep sales receipt and/or cancelled check as proof of purchase.
Model Number
–– –– –– –– –– –– –– –– –– ––
Serial Number
–– –– –– –– –– –– –– –– –– ––
Date of Purchase
_______________________________
If you have questions, call:
1-800-688-1120 (U.S.A. and Canada)
1-800-688-2080 ( U.S. TTY for
hearing or speech impaired)
(Mon.-Fri., 8 am-8 pm Eastern Time)
Surface Cooking . . . . . . . . . . . . . 3-5
Clock and Timer . . . . . . . . . . . . . 6
Oven Cooking . . . . . . . . . . . . . . 7-8
Care & Cleaning . . . . . . . . . . . . 9-10
Maintenance . . . . . . . . . . . . . 11
Before You Call . . . . . . . . . . . . . . 12
Warranty . . . . . . . . . . . . . . . . . . 13
Guide de L’utilisateur . . . . . . . . 14
Guía del Usuario . . . . . . . . . . 26
In our continuing effort to improve the quality
and performance of our cooking products, it
may be necessary to make changes to the appliance without revising this guide.
For service information, see page 13.
Form No. A/08/01 Part No. 8113P302-60 74005902 Litho U.S.A.
Page 2
Important Safety Instructions
Read and follow all instructions before
using this appliance to prevent the poten-
tial risk of fire, electric shock, personal
injury or damage to the appliance as a
result of improper usage of the appliance.
Use appliance only for its intended purpose as described in this guide.
To ensure proper and safe operation: Appliance must be properly installed and
grounded by a qualified technician.
WARNING:
•
ALL RANGES CAN
TIP AND CAUSE INJURIES TO PERSONS
•
INSTALL ANTI-TIP
DEVICE PACKED
WITH RANGE
•
FOLLOW ALL INSTALLATION
INSTRUCTIONS
WARNING:
tipping of the appliance from abnormal usage or by excessive loading of the oven door, the appliance
must be secured by a properly installed anti-tip device.
To check if device is properly installed,
look underneath range with a flashlight to
make sure one of the rear leveling legs is
properly engaged in the bracket slot. The
anti-tip device secures the rear leveling
leg to the floor when properly engaged.
You should check this anytime the range
has been moved.
To reduce risk of
In Case of Fire
Turn off appliance and ventilating hood to
avoid spreading the flame. Extinguish
flame then turn on hood to remove smoke
and odor.
•
Cooktop: Smother fire or flame in a pan
with a lid or cookie sheet.
•
NEVER pick up or move a flaming pan.
•
Oven: Smother fire or flame by closing
the oven door.
Do not use water on grease fires. Use
baking soda, a dry chemical or foam-type
extinguisher to smother fire or flame.
General
Instructions
WARNING: NEVER use appliance door,
or drawer, if equipped, as a step stool or
seat as this may result in possible tipping
of the appliance, damage to the appliance,
and serious injuries.
If appliance is installed near a window,
proper precautions should be taken to
prevent curtains from blowing over surface elements.
NEVER use appliance to warm or heat the
room. Failure to follow this instruction
can lead to possible burns, injury, fire, or
damage to the appliance.
NEVER wear loose-fitting or hanging garments while using the appliance. Clothing could catch utensil handles or ignite
and cause burns if garment comes in contact with hot heating elements.
To ensure proper operation and to avoid
damage to the appliance or injury, do not
adjust, service, repair or replace any part
of the appliance unless specifically recommended in this guide. Refer all other
servicing to a qualified technician.
NEVER store or use gasoline or other
combustible or flammable materials in
the oven, near surface units or in the vicinity of this appliance as fumes could create
a fire hazard or an explosion.
To prevent grease fires, do not let cooking
grease or other flammable materials accumulate in or near the appliance.
Use only dry potholders. Moist or damp
potholders on hot surfaces may result in a
steam burn. Do not let potholders touch
hot heating elements. Do not use a towel
or other bulky cloth which could easily
touch hot heating elements and ignite.
Always turn off all controls when cooking
is completed.
NEVER heat unopened containers on the
surface unit or in the oven. Pressure buildup in the container may cause container to
burst resulting in burns, injury or damage
to the appliance.
NEVER use aluminum foil to cover an
oven rack or oven bottom. Misuse could
result in risk of electric shock, fire, or damage to the appliance. Use foil only as directed in this guide.
Many aerosol-type cans are EXPLOSIVE
when exposed to heat and may be highly
flammable. Avoid their use or storage near
appliance.
This appliance has been tested for safe
performance using conventional cookware. Do not use any devices or accessories that are not specifically recommended
in this manual. Do not use eyelid covers,
stove top grills or add-on oven convection
systems. The use of devices or accessories
that are not expressly recommended in
this manual can create serious safety hazards, result in performance problems, and
reduce the life of the components of this
appliance.
Cooktop
NEVER leave surface units unattended
especially when using high heat settings.
An unattended boilover could cause smoking and a greasy spillover can cause a fire.
This appliance has different size surface
elements. Select pans having flat bottoms
large enough to cover element. Proper
relationship of pan to element will improve cooking efficiency.
If pan is smaller than element, a portion of
the element will be exposed and could
ignite clothing or potholder.
1
Page 3

Only certain types of glass, glass/ceramic,
ceramic, earthenware, or other glazed
utensils are suitable for cooktop or oven
service without breaking due to the sudden change in temperature. Follow utensil
manufacturer’s instructions when using
glass.
Turn pan handle toward center of cooktop,
not out into the room or over another
surface element. This reduces the risk of
burns, ignition of flammable materials, or
spillage if pan is accidently bumped or
reached by small children.
Coil Elements
To prevent damage to removable heating
elements, do not immerse, soak or clean in
a dishwasher or self-clean oven. A damaged element could short resulting in a
fire or shock hazard.
Make sure drip bowls are in place as absence of these bowls during cooking could
damage wiring.
Protective Liners: Do not use aluminum
foil to line surface unit drip bowls or oven
bottoms, except as suggested in the
manual. Improper installation of these liners may result in a risk of electric shock or
fire.
Glass-Ceramic
Cooktop
NEVER cook on broken cooktop. If cooktop
should break, cleaning solutions and
spillovers may penetrate the broken cooktop
and create a risk of electric shock. Contact a
qualified technician immediately.
Clean cooktop with caution. Some cleaners
can produce noxious fumes if applied to a
hot surface. If a wet sponge, cloth or paper
towel is used on a hot cooking area, be careful to avoid steam burn.
Deep Fat Fryers
Use extreme caution when moving the
grease pan or disposing of hot grease.
Allow grease to cool before attempting to
move pan.
Oven
Use care when opening oven door. Let
hot air or steam escape before removing
or replacing food.
For proper oven operation and performance, do not block or obstruct oven vent
duct. When oven is in use, the vent and
surrounding area may become hot enough
to cause burns.
Always place oven racks in desired locations while oven is cool. If rack must be
moved while oven is hot, do not let
potholder touch hot heating element.
Heating Elements
NEVER touch surface or oven heating
elements, areas near elements, or interior surfaces of oven.
Heating elements may be hot even though
they are dark in color. Areas near surface
elements and interior surfaces of an oven
may become hot enough to cause burns.
During and after use, do not touch or let
clothing or other flammable materials contact heating elements, areas near elements,
or interior surfaces of oven until they
have had sufficient time to cool.
Other potentially hot surfaces include:
Cooktop, areas facing the cooktop, oven
vent, and surfaces near the vent opening,
oven door, areas around the door and
oven window.
Child Safety
NEVER leave children alone or unsupervised where appliance is in use or is hot.
CAUTION: NEVER store items of interest to children in cabinets above an appliance or on backguard of a range. Children
climbing on appliance, door or drawer to
reach items could damage the appliance
or be burned or seriously injured.
NEVER allow children to sit or stand on
any part of appliance.
Children must be taught that the appliance and utensils in or on it can be hot. Let
hot utensils cool in a safe place, out of
reach of children. Children should be
taught that an appliance is not a toy and
not to play with controls or other parts of
the unit.
Ventilating Hoods
Clean range hood and filters frequently to
prevent grease or other flammable materials from accumulating to avoid fires.
Turn the fan on when flambéing foods
(such as Cherries Jubilee) under the hood.
Important Safety
Notice and
Warning
IMPORTANT NOTICE REGARDING
PET BIRDS: Never keep pet birds in the
kitchen or in rooms where the fumes from
the kitchen could reach. Birds have a very
sensitive respiratory system. Fumes released during an oven self-cleaning cycle
may be harmful or fatal to birds. Fumes
released due to overheated cooking oil,
fat, margarine and overheated non-stick
cookware may be equally harmful.
Save These Instructions for Future Reference
2
Page 4
Surface Cooking
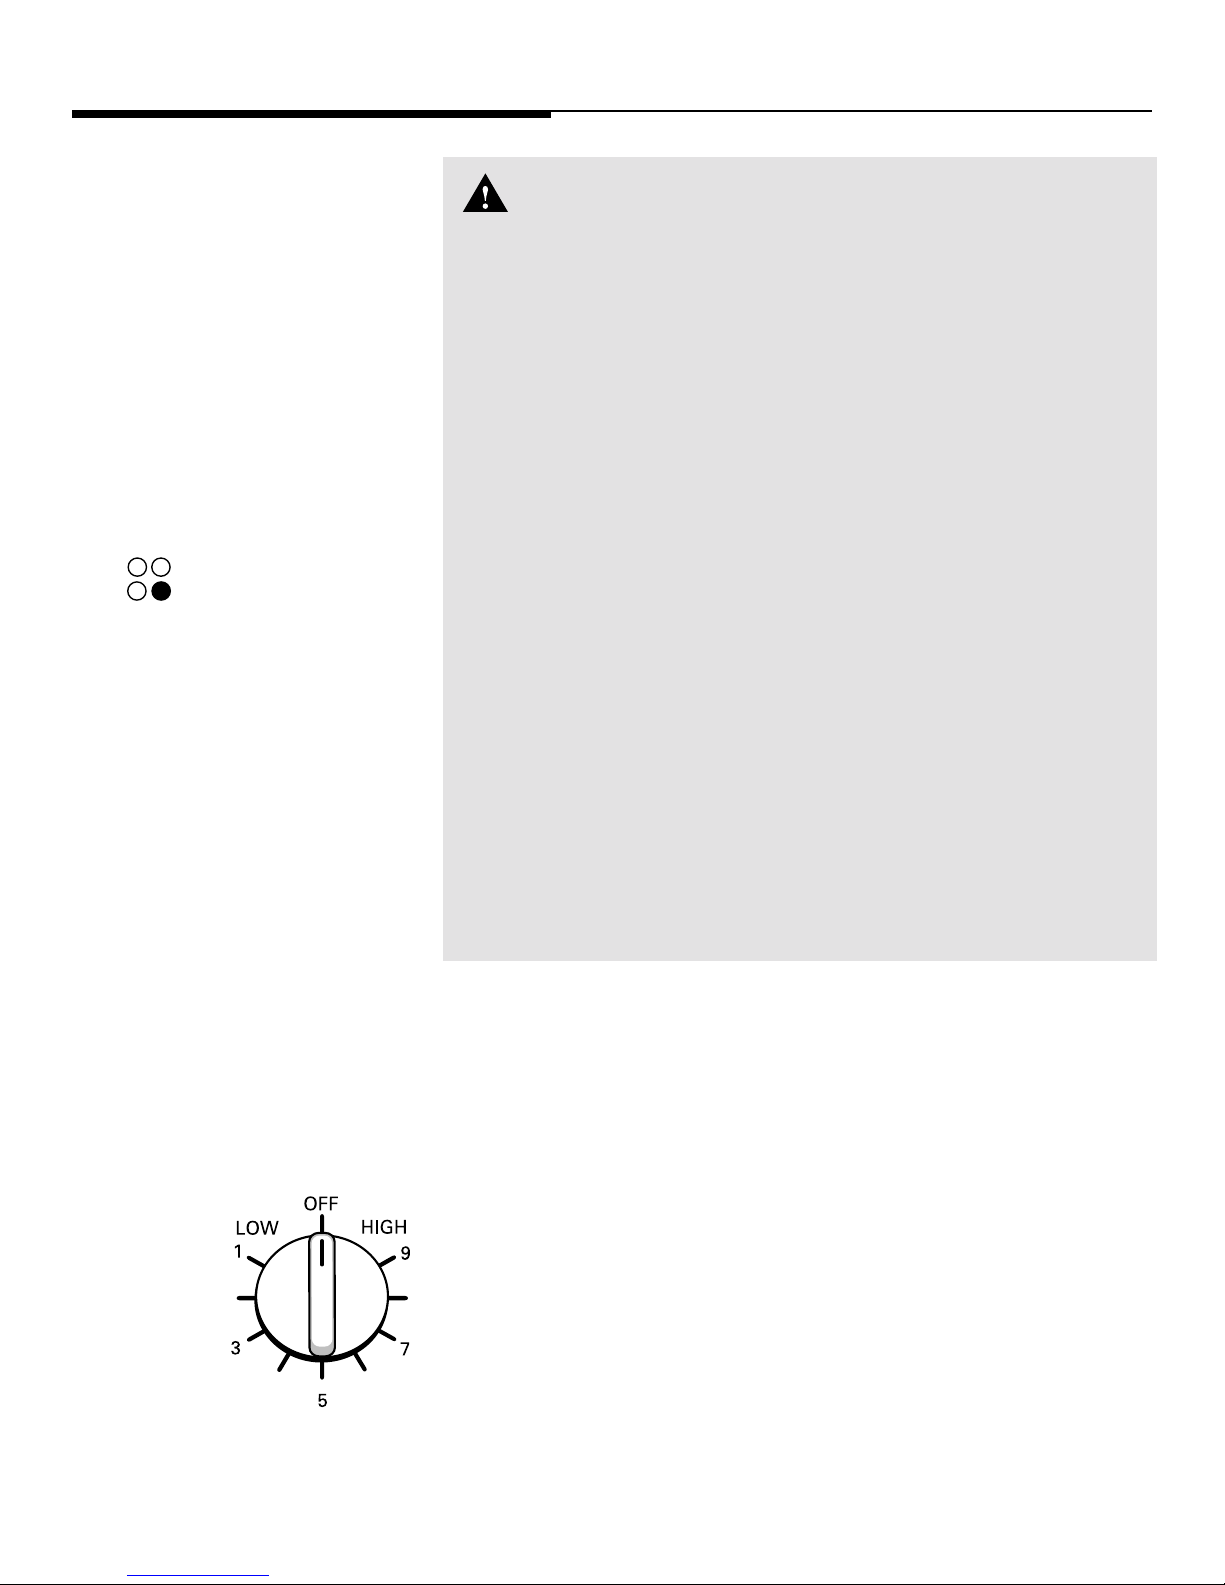
Surface Controls
Use to turn on the surface elements. An
infinite choice of heat settings is available
from LOW to HIGH. The knobs can be set
on or between any of the settings.
Setting the Controls
1. Place pan on surface element.
2. Push in and turn the knob in either
direction to the desired heat setting.
•
The backguard is marked to
identify which element the
knob controls. For example,
indicates right front
element.
3. There is an indicator light located on
the control panel. When any of the
surface control knobs are turned on,
the light will turn on. The light will
turn off when the surface elements are
turned off.
4. After cooking, turn knob to OFF. Remove pan.
Suggested Heat Settings
The size, type of cookware and cooking
operation will affect the heat setting. For
information on cookware and other factors affecting heat settings, refer to “Cook-
ing Made Simple” booklet.
Before Cooking
•
Always place a pan on the surface
unit before you turn it on. To prevent damage to range, never operate surface unit without a pan in
place.
•
NEVER use the cooktop as a storage area for food or cookware.
During Cooking
•
Know which knob controls which
surface unit. Make sure you turned
on the correct surface unit.
•
Begin cooking on a higher heat
setting then reduce to a lower setting to complete cooking. Never
use a high setting for extended
cooking.
•
NEVER allow a pan to boil dry.
This could damage the pan and
the appliance.
•
NEVER touch cooktop until it has
cooled. Expect some parts of the
cooktop, especially around the surface units, to become warm or hot
during cooking. Use potholders to
protect hands.
CAUTION:
After Cooking
•
Make sure surface unit is turned
off.
•
Clean up messy spills as soon as
possible.
Other Tips
•
If cabinet storage is provided directly above cooking surface, limit
it to items that are infrequently
used and that can be subjected to
heat.
Temperatures may be unsafe for
items such as volatile liquids,
cleaners or aerosol sprays.
•
NEVER leave any items, especially
plastic items, on the cooktop. The
hot air from the vent may ignite
flammable items, melt or soften
plastics, or increase pressure in
closed containers causing them
to burst.
•
NEVER allow aluminum foil, meat
probes or any other metal object,
other than a pan on a surface
element, to contact heating elements.
High: Use to bring liquid to a boil. Always reduce setting to a lower heat when
liquids begin to boil or foods begin to
cook.
Medium: Use to
maintain slow boil
for large amounts
of liquids and for
most frying operations.
Low: Use to keep
foods warm and melt
chocolate and butter.
3
Page 5
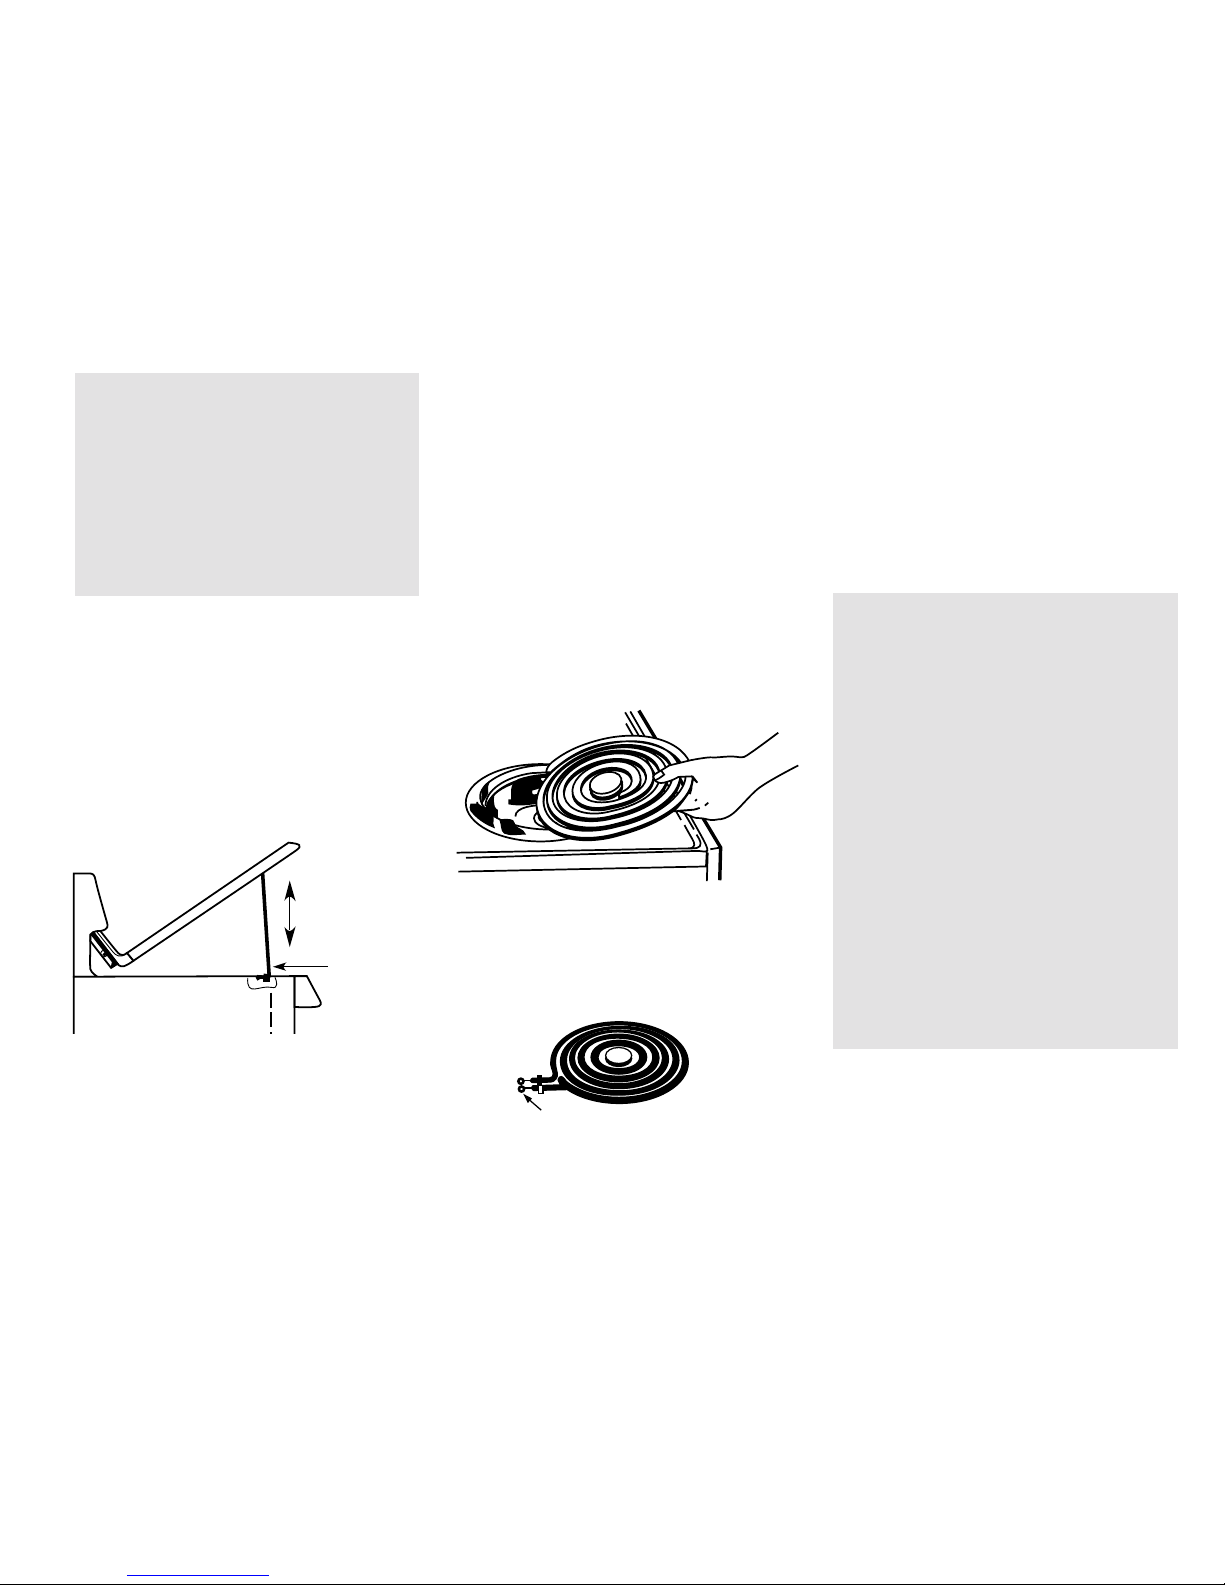
Coil Element
D
Surface
(select models)
Lift–up Porcelain
Cooktop
To lower cooktop: Hold the front edge
of the cooktop and carefully push back on
each support rod to release. Then gently
lower the top into place. The support rods
will slide into the range frame.
NOTE: The cooktop on slide-in and dropin ranges does NOT lift up.
Drip Bowls
The drip bowls, located under each surface element, are designed to catch
boilovers and must always be used. Absence of these bowls during cooking may
damage wiring or other parts underneath
the cooktop.
To prevent the cooktop from
discoloring or staining:
•
Clean cooktop after each use.
•
Wipe acidic or sugary spills as soon
as the cooktop has cooled as these
spills may discolor or etch the porcelain.
Freestanding ranges feature an upswept
porcelain cooktop that can be lifted up for
convenient access to the area under the
cooktop.
To lift cooktop: When cool, grasp the
front edge of the cooktop. Gently lift up
until the two support rods (if equipped) at
the front of the cooktop snap into place.
SUPPORT RO
Coil Elements
•
When an element is turned on, it will
cycle on and off to maintain the heat
setting.
•
Coil elements are self-cleaning.
•
Do not immerse in water.
To remove: When cool, raise element.
Carefully pull out and away from receptacle.
To replace: Insert terminals on the element into receptacle. Guide the element
into place. Gently press down on the outer
edge of the element until it sits level on the
drip bowl.
To prevent the risk of electric shock or fire,
never line drip bowls with aluminum foil.
Drip bowls will discolor (blue/gold stains)
or craze over time, if overheated. This
discoloration or crazing is permanent.
However, it will not affect cooking performance.
To protect drip bowl finish:
•
To lessen discoloration or crazing,
avoid using high heat settings for
long periods of time.
•
Do not use oversized cookware.
Pans should not extend more than
1-2 inches beyond the element.
•
When home canning or cooking with
oversized pans, use the Canning
Element (Model CE1). Contact your
dealer for details or call 1-800-688-
8408.
•
Clean frequently. (See cleaning section, pages 9-10.)
TERMINALS
4
Page 6

Surface Cooking
Glass-Ceramic
Surface
NOTES:
•
Cooktop may emit light smoke and
odor the first few times the cooktop
is used. This is normal.
•
When a control is turned on, a red
glow can be seen through the glassceramic surface. The element will
cycle on and off to maintain the preset heat setting.
•
Glass-ceramic cooktops retain heat
for a period of time after the unit is
turned off. When the HOT SURFACE
light turns off (see right), the cooking
area will be cool enough to touch.
•
NOTE: Do not attempt to lift the
cooktop.
Cooking Areas
The cooking areas on your range are identified by permanent patterns on the glass-ceramic surface. For most efficient cooking, fit
the pan size to the element size.
Pans should not extend more than
beyond the cooking area.
For more information on cookware, refer to
“Cooking Made Simple” booklet.
(select models)
1
/2 to 1-inch
Hot Surface Light
The Hot Surface Indicator Light is located either on the cooktop or on the
backguard. The light will be illuminated
when any cooking area is hot. It will
remain on, even after the control is turned
off, until the area has cooled.
Cookware
To achieve optimum cooking performance, use heavy-gauge, flat, smooth
bottom pans that conform to the diameter
of the cooking area. ( See “Cooking Made
Simple” for cookware characteristics and
recommendations.)
NOTES:
•
Tips to Protect the
Glass-Ceramic
Surface
•
Before first use, clean the cooktop. (See
Cleaning, page 9.)
•
Do not use glass pans. They may scratch
the surface.
•
Do not allow plastic, sugar or foods with
high sugar content to melt onto the hot
cooktop. Should this happen, clean immediately. (See Cleaning, page 9.)
•
Never let a pan boil dry as this will damage the surface and pan.
•
Never use cooktop as a work surface or
cutting board. Never cook food directly
on the surface.
, cont.
Glass ceramic surfaces retain heat.
Turn the elements off a few minutes before food is completely
cooked and use the retained heat
to complete the cooking.
Because of the heat retention characteristics, the elements will not
respond to changes in settings as
quickly as coil elements. In the
event of a potential boilover, remove the pan from the cooking
area.
•
Never place a trivet or wok ring between
the surface and pan. These items can mark
or etch the top.
•
Do not slide aluminum pans across a hot
surface. The pans may leave marks which
need to be removed promptly. (See Cleaning, page 9.)
•
Make sure the surface and the pan bottom
are clean before turning on to prevent
scratches.
•
To prevent scratching or damage, do not
leave sugar, salt or fats on the cooking area.
Wipe the cooktop surface with a clean cloth
or paper towel before using.
•
Never use a soiled dish cloth or sponge to
clean the cooktop surface. A film will remain which may cause stains on the cooking surface after the area is heated.
•
Do not use a small pan on a large element.
Not only does this waste energy, but it can
also result in spillovers burning onto the
cooking area which requires extra cleaning
•
Do not use non-flat specialty items that are
oversized or uneven such as round bottom
woks, rippled bottom and/or oversized
canners and griddles.
•
Do not slide heavy metal pans across the
surface since these may scratch.
•
Do not use foil or foil-type containers. Foil
may melt onto the glass. If metal melts on
the cooktop, do not use. Call an authorized
servicer.
•
If a spillover occurs while cooking, immediately clean the spill from the cooking area
while it is hot to prevent a tough cleaning
chore later. Using extreme care, wipe spill
with a clean dry towel.
•
Do not allow spills to remain on the cooking area or the cooktop trim for a long
period of time.
•
Do not use abrasive cleansing powders or
scouring pads which will scratch the
cooktop.
•
Do not use chlorine bleach, ammonia or
other cleansers not specifically recommended for use on glass-ceramic.
•
To retain the appearance of the glass-ceramic cooktop, clean after each use.
5
Page 7
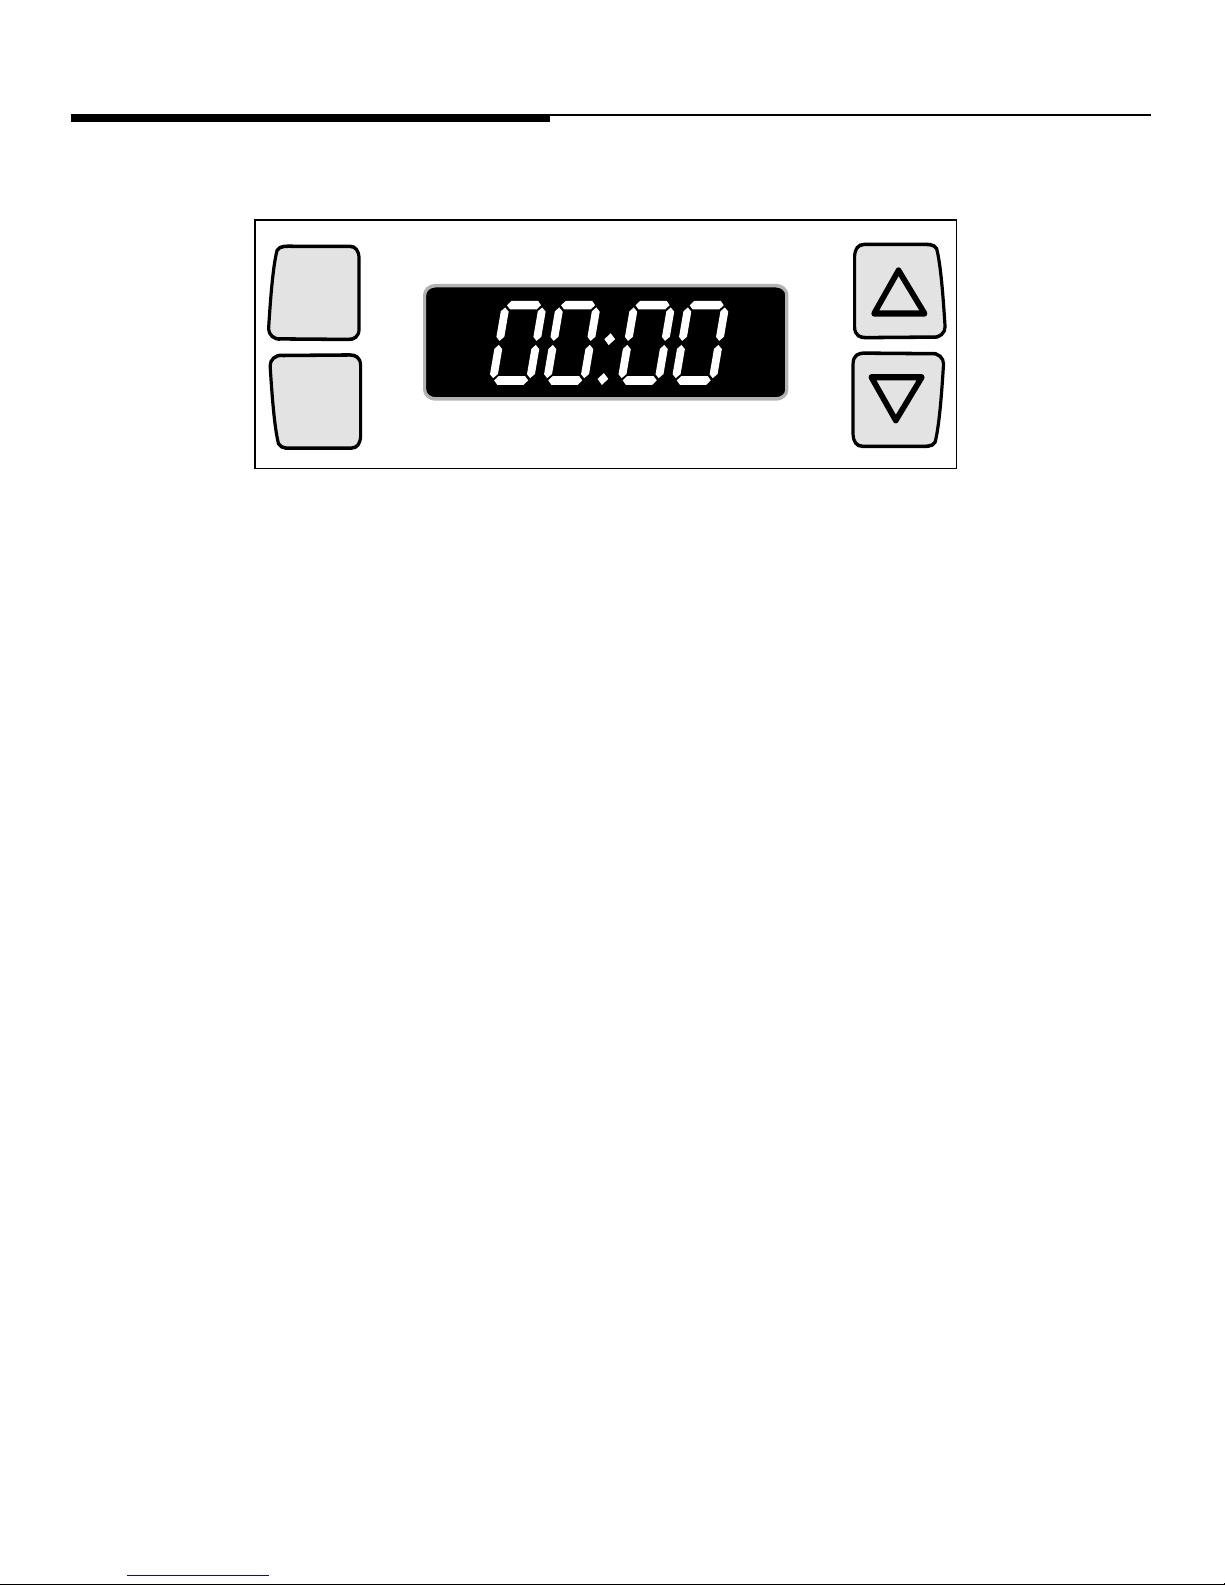
Clock and Timer
Clock and Timer Control (select models)
Clock
Timer
NOTE: The display will flash when electrical power is first supplied to the appliance or if there has been a power failure.
To Set the Clock:
1. Press the Clock pad.
• A beep will sound when the Clock
pad is pressed.
2. Press or press and hold the ▲ or ▼ pad
until the correct time of day appears in
the display.
• Press to change the time in one
minute increments.
• Press and hold to change the time
in10 minute increments.
To recall the time of day when the timer is
displayed, press the Clock pad.
To Set the Timer:
The timer can be set from one minute (0:01)
up to 12 hours (12:00). The timer does
NOT control the oven.
1. Press the Timer pad.
• A beep will sound when the Timer
pad is pressed.
• 0:00 will appear in the display.
2. Press or press and hold the ▲ or ▼ pad
until the correct time appears in the display.
• Press to change the time in one
minute increments.
• Press and hold to change the time
in 10 minute increments.
• Timer will start automatically after a
few seconds. The flashing colon indicates that the timer is in use.
• If the Clock pad is pressed, the
colon will continue to flash to indicate the timer is in use.
3. A beep will sound at one minute (0:01).
4. At the end of the timer operation, 0:00
will appear in the display and three
beeps will sound.
• One beep will sound every 10
seconds for 10 minutes or until the
timer operation is cancelled.
To Cancel the Timer:
Press the Timer pad and the current time
of day will reappear in the display.
NOTE: When 0:00 is displayed, pressing
either the Timer or Clock pad will also
cancel the timer operation.
6
Page 8

Oven Cooking
Baking, Roasting and Broiling
Oven Operation CAUTIONS:
•
Be sure all packing material is removed from oven before
turning on.
•
Do not use oven for storing food or cookware.
•
Prepared Food Warning: Follow food manufacturer’s
instructions. If a plastic frozen food container and/or its
For additional baking, roasting and broiling times and tips, see “Cooking Made Simple” booklet.
Oven Control
The Oven Temp knob is used to select
the oven temperature.
Always turn this knob just TO the desired temperature. To accurately set the
oven temperature, do not turn to a
higher temperature and then back.
3. Turn Selector knob (select models) to
Bake. NOTE: Oven will not operate if the
Selector knob is left in the Off position.
4. Place food in center of oven, allowing a
minimum of two inches between utensil
and oven walls.
5. Check food for doneness at minimum
time in recipe. Cook longer if necessary.
6. Remove food from the oven. Turn Oven
Temp and Selector knobs (select models)
to Off.
To set oven to broil:
1. Place oven rack on the recommended
rack position. (See chart below.)
2. Turn Oven Temp knob to Broil.
3. Turn Selector knob (select models) to
Broil. NOTE: Oven will not operate if the
Selector knob is left in the Off position.
cover distorts, warps, or is otherwise damaged during
cooking, immediately discard the food and its container. The food could be contaminated.
•
Follow the manufacturer’s directions when using oven
cooking bags.
4. If desired, preheat broil element three
minutes before placing food in the oven.
5. Broil with the oven door open to the first
stop position (about 4 inches).
6. Turn food once about halfway through
cooking.
7. Remove food from the oven. Turn Oven
Temp and Selector knobs (select mod-
els) to Off.
Oven Indicator Light
The OVEN indicator light turns on whenever the oven turns on. When the oven
reaches the preset temperature, the indicator light turns off. The OVEN indicator
light will then turn off and on as the oven
elements cycle off and on to maintain the
preset oven temperature.
The Selector knob (select models) determines the type of oven operation.
Turn this knob to the desired setting.
Each setting is identified by an indent
(stop) and a “click” sound.
To set oven to bake:
1. When cool, position rack in oven.
2. Turn Oven Temp knob to desired
temperature.
7
Broiling Chart
Total Cook Time
Type of Meat Rack Position* Doneness (Minutes)**
Bacon 4 Well Done 6-10 min.
Beef Steaks -- 1" thick 4 Medium 15-18 min.
4 Well 19-23 min.
Chicken -- Pieces 3 or 4 Well Done 28-38 min.
Fish -- Fillets 4 Flaky 8-12 min.
Steaks, 1" thick 4 Flaky 10-15 min.
Ground Beef -- Patties, 3/4" thick 4 Well Done 15-18 min.
Ham -- Precooked Slice, 1/2" thick 4 Warm 8-12 min.
Pork Chops -- 1" thick 4 Well Done 22-26 min.
* The top rack position is #5.
** Broiling times are approximate and may vary depending on the meat. Expect broil times
to increase and browning to be slightly lighter if appliance is installed on a 208 volt circuit.
Page 9
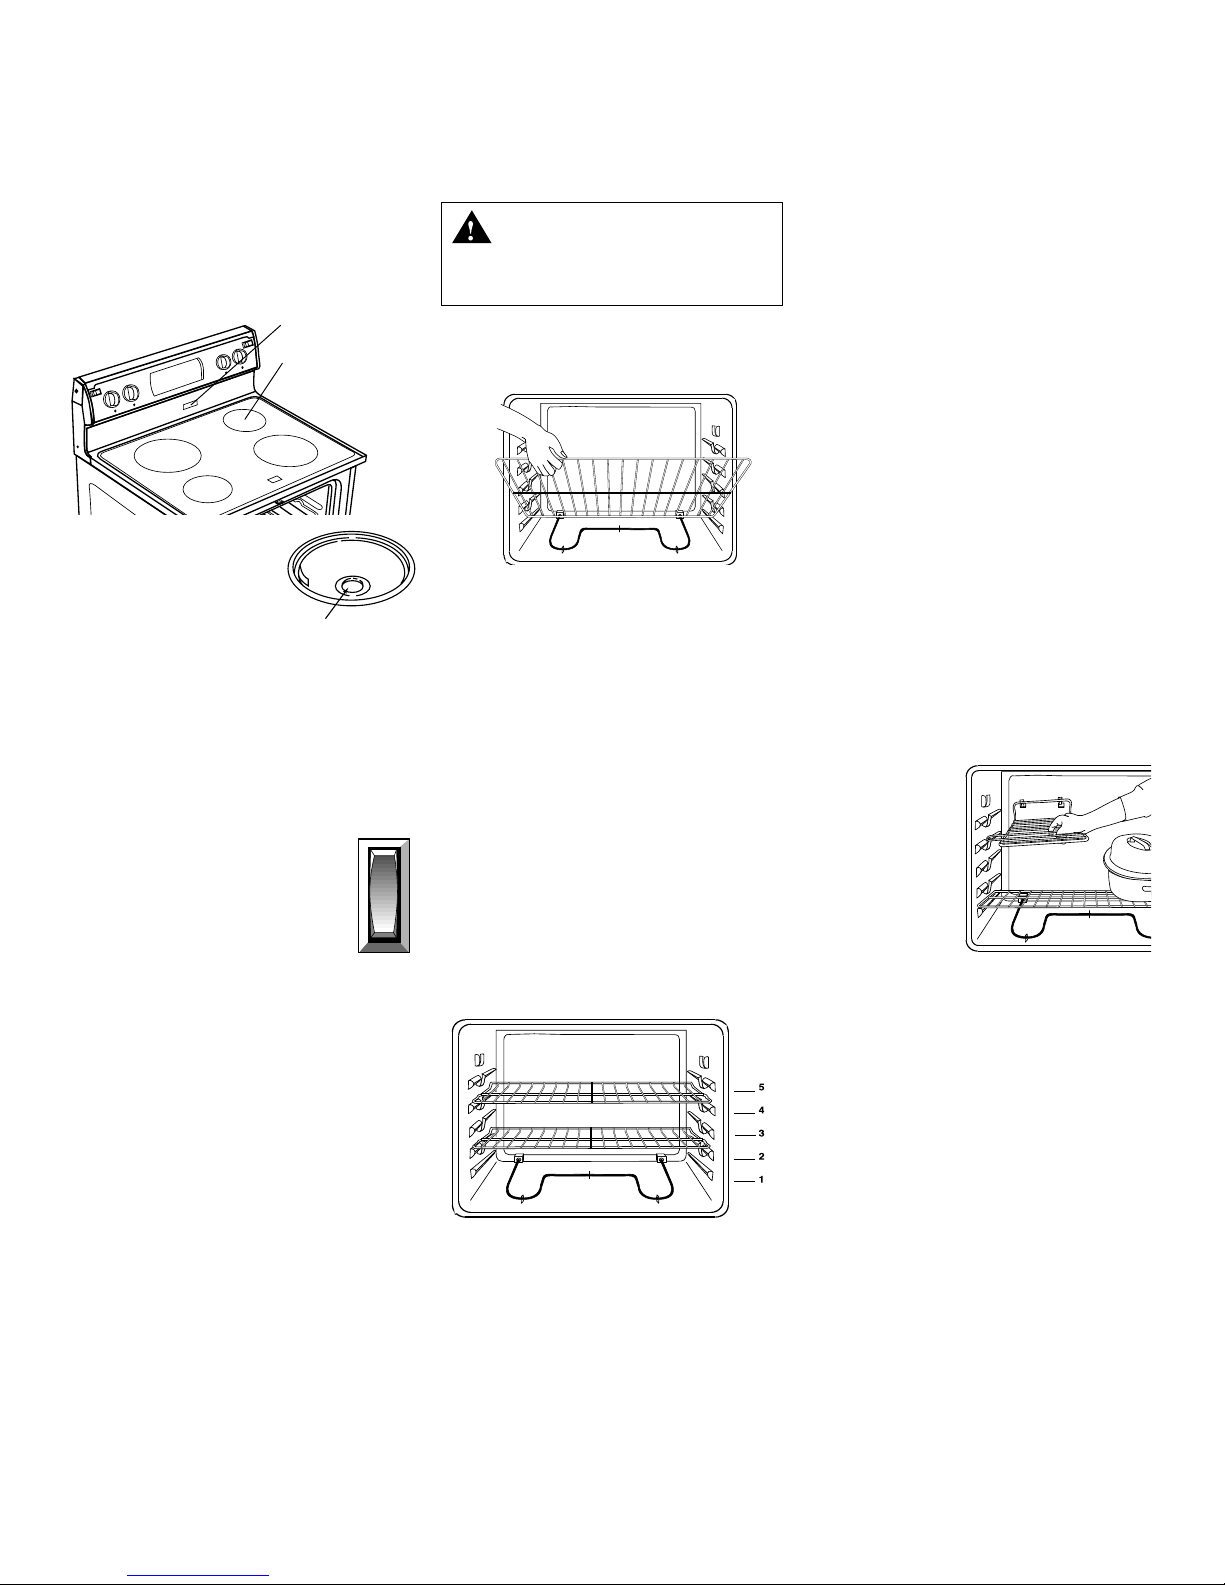
Oven Vent
When the oven is in use, the area near the
vent may become hot enough to cause
burns. Never block the vent opening.
OVEN VENT:
• GLASS-CERAMIC
SURFACE
• COIL ELEMENT
SURFACE
•
On a coil element
surface, be sure the
drip bowl in the vent
location has a hole in
the center. Do not
cover the drip bowl with aluminum
foil.
•
The oven vent is located at the back of
the cooktop for slide-in and drop-in
ranges.
OVEN VENT
OPENING
Oven Light
(select models)
Push the switch on the control
panel to turn the oven light on
and off.
Oven Racks
CAUTION:
change the rack position when the
oven is hot.
Your oven has two racks. They are designed with a lock-stop edge.
To remove: Pull rack straight out until
it stops at the lock-stop position; lift up on
the front of the rack and pull out.
To replace: Place rack on the rack
support in the oven; tilt the front end up
slightly; slide rack back until it clears the
lock-stop position; lower front and slide
back into the oven.
Do not cover an entire rack with aluminum foil or place foil on the oven bottom.
Baking results will be affected and damage may occur to the oven bottom.
Rack Positions
Do not attempt to
RACK 4:
Used for most broiling.
RACK 3:
Used for most baked goods on a cookie
sheet or jelly roll pan, layer cakes, fruit
pies, or frozen convenience foods.
RACK 2:
Used for roasting small cuts of meat,
casseroles, baking loaves of bread,
bundt cakes or custard pies.
RACK 1:
Used for roasting large cuts of meat
and poultry, frozen pies, dessert
souffles or angel food cake.
MULTIPLE RACK COOKING:
Two rack: Use rack positions 2 and 4,
or 1 and 4.
Half Rack Accessory
A half rack, to increase oven capacity, is available as an accessory. It fits in the
left, upper portion of the oven
and provides
space for a vegetable dish when a large
roaster is on the lower rack. Contact your
dealer for the “HALFRACK” Accessory
Kit or call 1-800-688-8408.
RACK 5 (highest position):
Used for toasting bread or broiling
thin non-fatty foods.
8
Page 10
Care and Cleaning
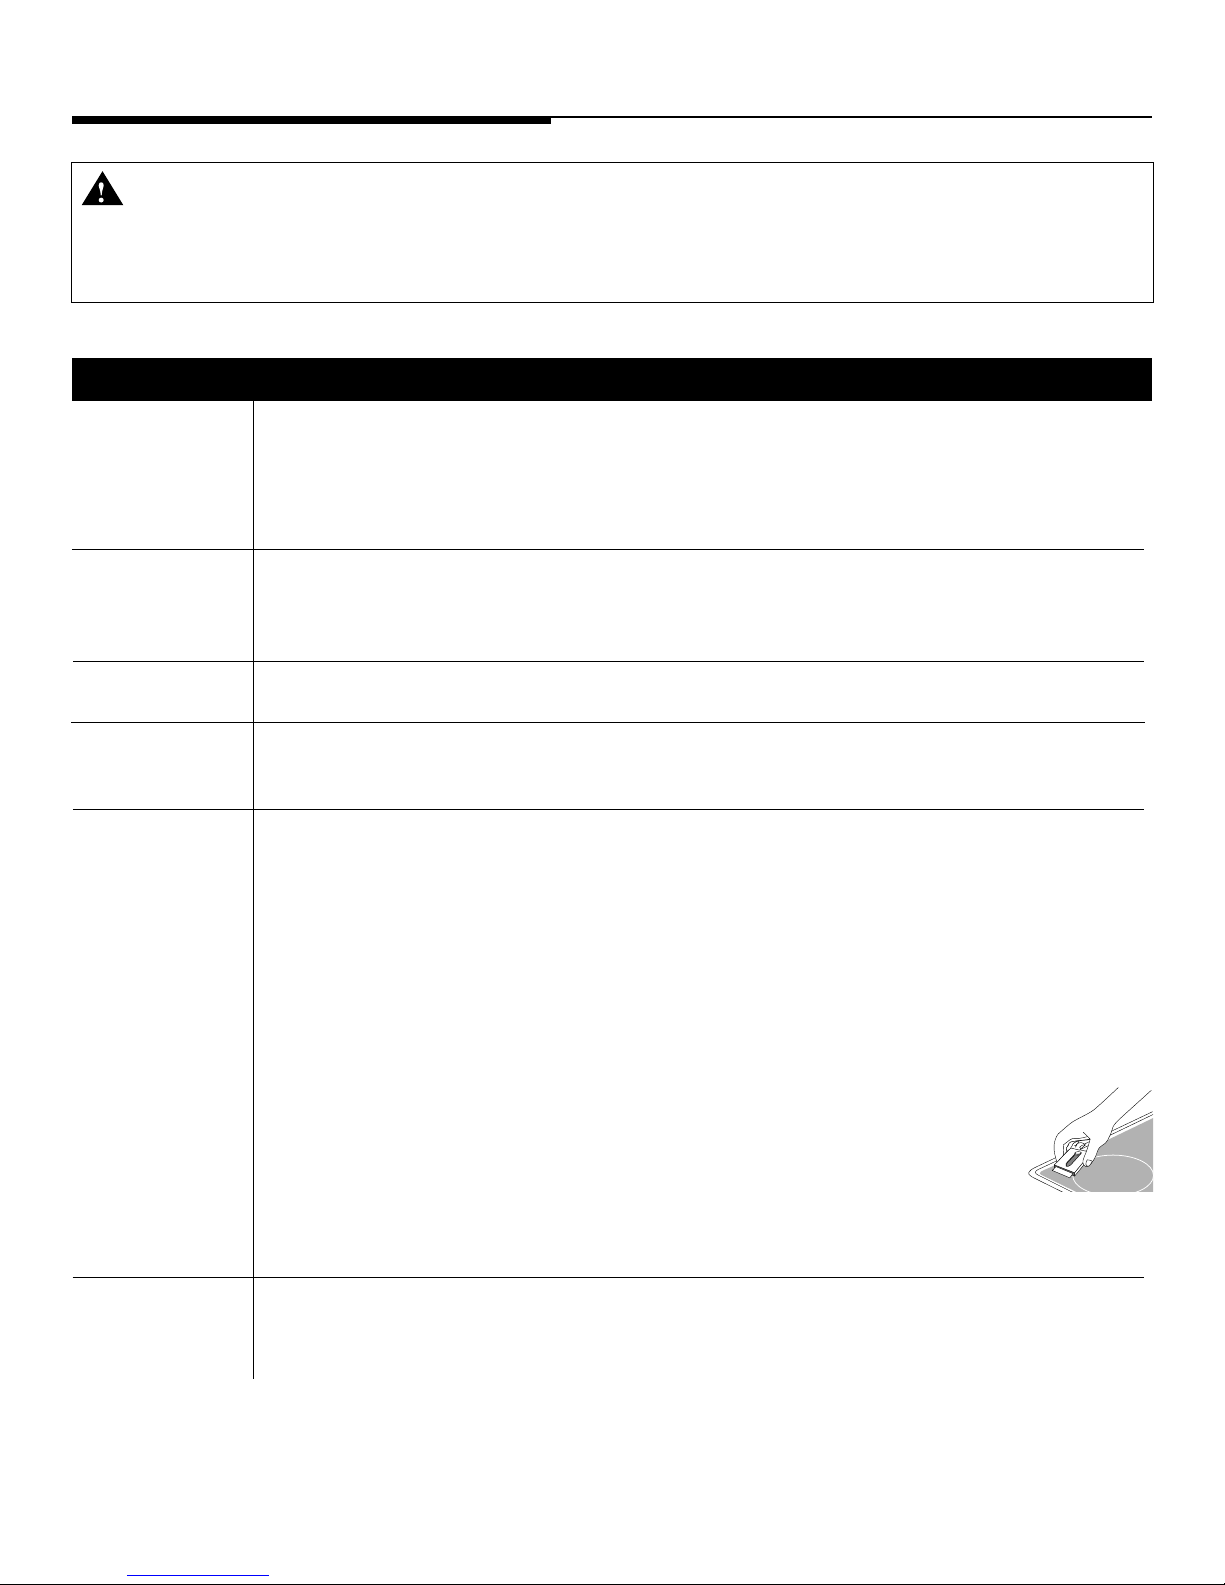
Cleaning CAUTIONS:
•
Be sure appliance is off and all parts are cool before•To prevent staining or discoloration, clean appliance
handling or cleaning. This is to avoid damage and after each use.
•
possible burns.
Cleaning Chart
Parts Cleaning Procedure
Backguard & Porcelain enamel is glass fused on metal and may crack or chip with misuse. It is acid resistant, not acid proof.
Cooktop, All spillovers, especially acidic or sugary spillovers, should be wiped up immediately with a dry cloth.
porcelain enamel
Broiler Pan Never cover insert with aluminum foil as this prevents the fat from draining to the pan below.
and Insert
(select models)
• When cool, wash with soapy water, rinse and dry.
• Never wipe off a warm or hot surface with a damp cloth. This may cause cracking or chipping.
• Never use oven cleaners, abrasive or caustic cleaning agents on exterior finish of range.
• Place soapy cloth over insert and pan; let soak to loosen soil.
• Wash in warm soapy water. Use soap filled scouring pad to remove stubborn soil.
• Broiler pan and insert can be cleaned in dishwasher.
If a part is removed, be sure it is correctly replaced.
Clock & Control Pad
Area (select models)
Control Knobs
• Wipe with a damp cloth and dry.
• Glass cleaners may be used if sprayed on a cloth first. DO NOT spray directly on control pad and display area.
• Remove knobs in the OFF position by pulling forward.
• Wash, rinse and dry. Do not use abrasive cleaning agents as they may scratch the finish.
• Turn on each element to be sure the knobs have been correctly replaced.
Cooktop,
glass-ceramic servicer if the glass-ceramic top should crack, break or if metal or aluminum foil should melt on the cooktop.
• Never use oven cleaners, chlorine bleach, ammonia or glass cleaners with ammonia. NOTE: Call an authorized
• Allow the cooktop to cool before cleaning.
• General – Always clean cooktop after each use with a damp paper towel and Cooktop Cleaning Creme (Part
No. 20000001)**. Then, buff with a clean dry cloth. NOTE: Permanent stains will develop if soil is allowed to cook
on by repeatedly using the cooktop when soiled.
• Heavy Soils or Metal Marks – Dampen a “scratchless” or “never scratch” scrubber sponge. Apply Cooktop
Cleaning Creme* and scrub to remove as much soil as possible. Apply a thin layer of the creme over the soil,
cover with a damp paper towel and let stand 30 to 45 minutes (2 to 3 hours for very heavy soil). Keep moist by
covering the paper towel with plastic wrap. Scrub again, then buff with a clean dry cloth. NOTE: Only use a
CLEAN, DAMP “scratchless” pad that is safe for non-stick cookware. The pattern and glass will be damaged if the pad
is not damp, if the pad is soiled, or if another type of pad is used.
• Burned-on or Crusty Soils – Scrub with a “scratchless” or “never scratch” scrubber sponge and
Cooktop Cleaning Creme*. NOTE: Hold a razor blade scraper at 30° angle and scrape any
remaining soil. Then, clean as described above. Do not use the razor blade for daily cleaning as it may
wear the pattern on the glass.
• Melted Sugar or Plastic – Immediately turn element to LOW and scrape sugar or plastic from hot surface to
a cool area. Then turn element OFF and allow to cool. Clean residue with razor blade scraper and Cooktop
Cleaning Creme*.
Drip Bowls,
chrome
(select models) scouring pad. Do not use abrasive cleaning agents.
* Brand names are registered trademarks of the respective manufacturers.
** To order call 1-800-688-8408.
• When cool, wash after each use, rinse and dry to prevent staining or discoloration.
• To clean heavy soil, soak in hot sudsy water, then use a mild abrasive cleaner such as Soft Scrub* and a plastic
9
Page 11

Cleaning Chart Continued
Parts Cleaning Procedure
Drip Bowls, Porcelain may discolor or craze if overheated. This is normal and will not affect cooking performance.
porcelain
(select models) dishwasher.
•
When cool,
•
To clean heavy soil, soak in hot sudsy water, then use a mild abrasive cleaner such as Soft Scrub* and a plastic
scouring pad.
•
For burned on soil, remove from range, place on newspapers and carefully spray with commercial oven cleaner.
(Do not spray surrounding surfaces.) Place in plastic bag and allow to soak several hours. Wearing rubber gloves,
remove from bag, wash, rinse and dry.
wash after each use, rinse and dry to prevent staining or discoloration. May be washed in the
Enamel, painted
Side panels cloth as this may damage the surface and may cause a steam burn.
Storage drawer
Oven door abrasive, caustic or harsh cleaning agents such as steel wool pads or oven cleaners. These products will
(select models) scratch or permanently damage the surface.
Door Handles NOTE: Use dry towel or cloth to wipe up spills, especially acidic or sugary spills. Surface may discolor or dull if
(select models) soil is not immediately removed. This is especially important for white surfaces.
Glass
Oven window
(select models)
Oven door damage glass.
(select models)
Metal Finishes
Trim parts
Oven Interior
•
When cool, wash with warm soapy water, rinse and dry. Never wipe a warm or hot surface with a damp
•
For stubborn soil, use mildly abrasive cleaning agents such as baking soda paste or Bon Ami*. Do not use
•
Avoid using excessive amounts of water which may seep under or behind glass causing staining.
•
Wash with soap and water. Rinse with clear water and dry. Glass cleaner may be used if sprayed on a cloth first.
•
Do not use abrasive materials such as scouring pads, steel wool or powdered cleaning agents. They will
•
Wash with soap and water, a glass cleaner, or mild liquid sprays.
•
To prevent scratching or dulling of the finish, do not use mildly abrasive, abrasive, harsh or caustic cleaners such
as oven cleaners.
•
Clean frequently using mild abrasive cleaners and a plastic pad.
•
Do not use metallic scouring pads because they will scratch the surface.
•
When using commercial oven cleaners follow the manufacturer’s instructions.
•
Wipe up acidic spills (tomato or milk based foods) as soon as possible with soap and water. If the spill is not wiped
up, it may discolor the porcelain.
To make cleaning easier, remove the oven door, if desired (see Maintenance section, page 11).
•
Oven Racks
Plastic Finishes
Door handles
(select models) NOTE: Never use oven cleaners, abrasive or caustic liquid or powdered cleansers on plastic finishes. These cleaning
Backguard trim agents will scratch or mar finish.
End caps NOTE: To prevent staining or discoloration, wipe up fat, grease or acid (tomato, lemon, vinegar, milk, fruit juice,
Clean with soapy water.
•
Remove stubborn soil with cleansing powder or soap-filled scouring pad. Rinse and dry.
•
When cool, clean with soap and water, rinse and dry.
•
Use a glass cleaner and a soft cloth.
marinade) immediately with a dry paper towel or cloth.
10
Page 12
T
Maintenance
Oven Door
CAUTIONS:
•
Do not place excessive weight
on or stand on an open oven
door. This could cause the range
to tip over, break the door, or
injure the user.
•
Do not attempt to open or close
door or operate oven until door
is properly replaced.
•
Never place fingers between
hinge and front oven frame.
Hinge arms are spring mounted.
If accidentally hit, the hinge will
slam shut against oven frame
and could injure your fingers.
To remove:
1. When cool, open the oven door to the
first stop position (opened about four
inches).
2. Grasp door at
each side. Do
not use the door
handle to lift
door.
3. Lift up evenly until door clears hinge
arms.
To replace:
1. Grasp door at each side.
2. Align slots in the door with the hinge
arms on the range.
3. Slide the door down onto the hinge
arms until the door is completely seated
on the hinges. Push down on the top
corners of the door to completely seat
door on hinges. Door should not appear crooked.
Oven Light
(select models)
CAUTIONS:
•
Disconnect power to range before replacing light bulb.
•
Use a dry potholder to prevent
possible harm to hands when
replacing bulb.
•
Be sure bulb is cool before
touching.
•
Do not touch hot bulb with a
damp cloth as this may cause
the bulb to break.
To replace light bulb:
1. Remove light bulb.
2. Replace with a 40 watt appliance bulb.
3. Reconnect power to range. Reset clock
if equipped.
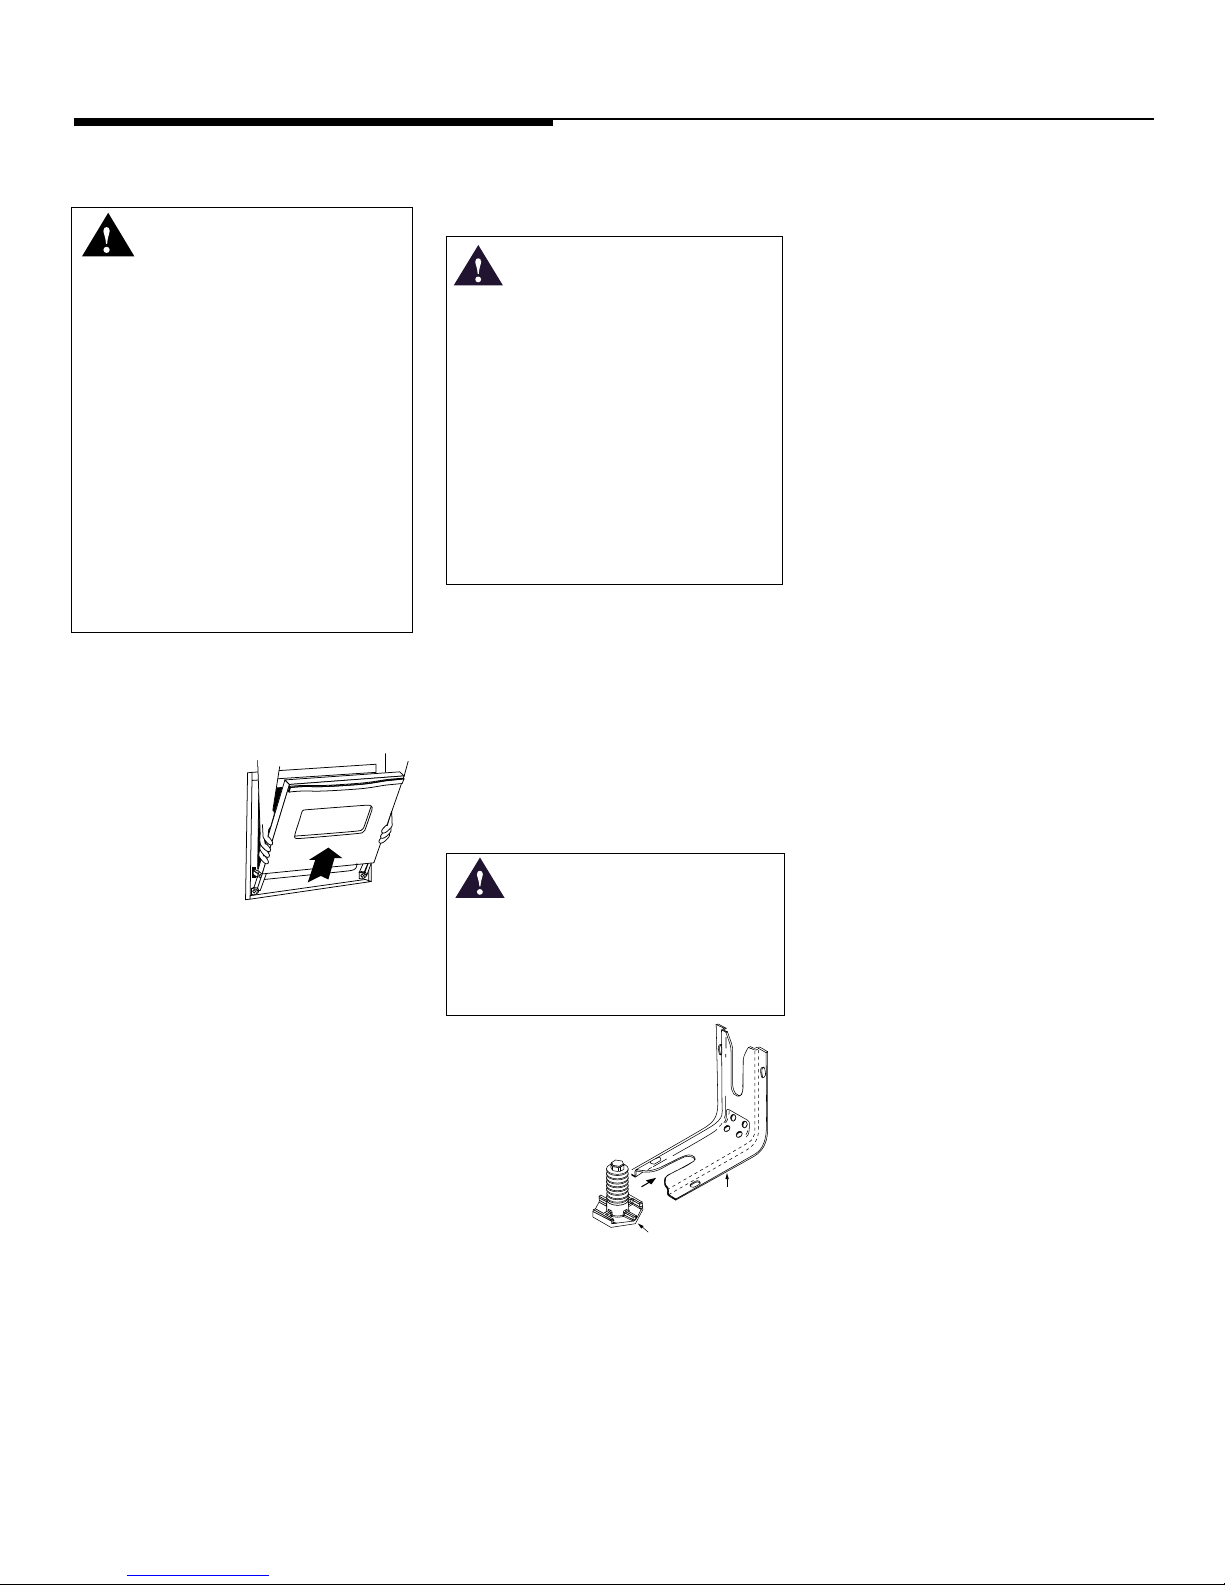
Leveling Legs
CAUTION:
•
Be sure the anti-tip bracket secures one of the rear leveling legs
to the floor to prevent the range
from accidentally tipping.
The range should be leveled
when installed. If the range is
not level, turn the plastic leveling legs, located at each
corner of the range,
until range is
level.
ANTI-TIP BRACKE
LEVELING LEG
Oven Window
(select models)
To protect the oven door window:
1. Do not use abrasive cleaning agents
such as steel wool scouring pads or
powdered cleansers as they may scratch
the glass.
2. Do not hit the glass with pots, pans,
furniture, toys, or other objects.
3. Do not close the oven door until the
oven racks are in place.
Scratching, hitting, jarring or stressing the
glass may weaken its structure causing an
increased risk of breakage at a later date.
Storage Drawer
(select models)
The storage drawer at the bottom of the
range is safe and convenient for storing
metal and glass cookware. DO NOT store
plastic, paperware, food or flammable
material in this drawer. Remove drawer
to clean under range.
To remove: Empty drawer then pull out
to the first stop position. Lift up front of
drawer and pull to the second stop position. Grasp sides and lift up and out to
remove drawer.
To replace: Fit the ends of the drawer
glides onto the rails. Lift up drawer front
and gently push in to first stop position.
Lift up and continue to slide drawer to the
closed position.
NOTE: The oven door on a new range
may feel “spongy” when it is closed.
This is normal and will decrease with
use.
11
Page 13

Before You Call for Service
For most concerns, try these
first:
•
Check if oven controls have been properly set.
•
Check to be sure plug is securely inserted
into receptacle.
•
Check or re-set circuit breaker. Check or
replace fuse.
•
Check power supply.
Part or all of appliance does
not work.
•
Check if surface and/or oven controls
have been properly set. See pgs. 3 & 7.
Glass-ceramic surface shows
wear.
1. Tiny scratches or abrasions.
•
Make sure cooktop and pan bottom
are clean. Do not slide glass or metal
pans across top. Make sure pan bottom is not rough. Use the recommended cleaning agents. See pg. 9.
2. Metal marks.
•
Do not slide metal pans across top.
When cool, clean with Cooktop
Cleaning Creme. See pg. 9.
3. Brown streaks and specks.
•
Spills not removed promptly. Wiping
with soiled cloth or sponge. Pan
bottom not clean.
4. Areas with a metallic sheen.
•
Mineral deposits from water and food.
5. Pitting or flaking.
•
Sugary boilovers that were not
removed promptly. See pg. 9.
Baking results not as expected
or differ from previous oven.
•
Make sure the oven vent has not been
blocked. See pg. 8 for location.
•
Check to make sure range is level.
•
Temperatures often vary between a new
oven and an old one. As ovens age, the
oven temperature often “drifts” and may
become hotter or cooler.
•
Check rack positions. See pg. 8.
•
See “Cooking Made Simple” for more
information on bakeware and baking.
•
Check the oven temperature selected.
Make sure oven is preheated when recipe
or directions recommend preheat.
Moisture collects in oven or on
oven window (select models).
•
•
There is a strong odor or light
smoke when oven is turned on.
•
•
•
Food not broiling properly or
smokes excessively.
•
Check oven rack positions. Food may be
too close to element.
•
Broil element was not preheated.
•
Aluminum foil was incorrectly used. Never
line the broiler insert with foil.
•
Oven door was closed during broiling.
Leave the door open to the first stop position (about 4 inches).
•
Trim fat from meat before broiling.
•
A soiled broiler pan was used.
This is normal when cooking foods high
in moisture.
Excessive moisture was used when cleaning the window.
This is normal for a new range and will
disappear after a few uses.
Turning on a ventilation fan will help
remove the smoke and/or odor.
There are excessive food soils on the oven
bottom.
12
Page 14

Range Warranty
Full One Year Warranty - Parts and
Labor
For one (1) year from the original retail
purchase date, any part which fails in
normal home use will be repaired or replaced free of charge.
Limited Warranties
Second Through Fifth Year - From the
original purchase date, parts listed below
which fail in normal home use will be
repaired or replaced free of charge for the
part itself, with the owner paying all other
costs, including labor, mileage and transportation.
• Ceramic Glass Surface: Thermal
breakage
• Ceramic Glass Heating Elements
Canadian Residents
The above warranties only cover an appliance installed in Canada that has been
certified or listed by appropriate test agencies for compliance to a National Standard of Canada unless the appliance was
brought into Canada due to transfer of
residence from the United States to
Canada.
The specific warranties expressed above are
the ONLY warranties provided by the manu-
facturer. These warranties give you specific
legal rights, and you may also have other
rights which vary from state to state.
What is Not Covered By These
Warranties:
1. Conditions and damages resulting from any of the following:
a. Improper installation, delivery, or maintenance.
b. Any repair, modification, alteration, or adjustment not authorized by the manufac-
turer or an authorized servicer.
c. Misuse, abuse, accidents, or unreasonable use.
d. Incorrect electric current, voltage, or supply.
e. Improper setting of any control.
2. Warranties are void if the original serial numbers have been removed, altered, or
cannot be readily determined.
3. Light bulbs.
4. Products purchased for commercial or industrial use.
5. The cost of service or service call to:
a. Correct installation errors.
b. Instruct the user on the proper use of the product.
c. Transport the appliance to the servicer.
6. Consequential or incidental damages sustained by any person as a result of any
breach of these warranties. Some states do not allow the exclusion or limitation of
consequential or incidental damages, so the above exclusion may not apply.
If You Need Service
•
Call the dealer from whom your appliance was purchased or call Maytag Appliances
Sales Company, Maytag Customer Assistance at 1-800-688-1120, USA and CANADA
to locate an authorized servicer.
•
Be sure to retain proof of purchase to verify warranty status. Refer to WARRANTY
for further information on owner’s responsibilities for warranty service.
•
If the dealer or service company cannot resolve the problem, write to Maytag
Appliances Sales Company, Attn: CAIR
37320-2370, or call 1-800-688-1120, USA and CANADA.
®
Center, P.O. Box 2370, Cleveland, TN
13
U.S. customers using TTY for deaf, hearing impaired or speech impaired, call
1-800-688-2080.
NOTE: When writing or calling about a service problem, please include the following
information:
a. Your name, address and telephone number;
b. Model number and serial number;
c. Name and address of your dealer or servicer;
d. A clear description of the problem you are having;
e. Proof of purchase (sales receipt).
•
User’s guides, service manuals and parts information are available from Maytag
Appliances Sales Company, Maytag Customer Assistance.
Page 15

G
G
UIDE
UIDE
DE
DE
L’
L’
Installateur: Remettre ce manuel au propriétaire.
Consommateur: Lire le manuel; conserver le manuel
pour consultation ultérieure. Conserver la facture
d’achat ou le chèque encaissé comme preuve de
l’achat.
Numéro de modèle
–– –– –– –– –– –– –– –– –– ––
Numéro de série
UTILISATEUR
UTILISATEUR
Cuisinière électrique WT-TOD
Table des matières
Instructions de sécurité
importantes . . . . . . . . . . . . . . . 15-16
Utilisation de la table
de cuisson . . . . . . . . . . . . . . . . 17-19
Horloge et minuterie . . . . . . . . . . . 20
Cuisson au four . . . . . . . . . . . . 21-22
Entretien et nettoyage . . . . . . 23-24
Entretien . . . . . . . . . . . . . . . . . . . . 25
Avant de contacter un
dépanneur . . . . . . . . . . . . . . . . . . . . 26
–– –– –– –– –– –– –– –– –– ––
_______________________________
Pour toute question, contacter Maytag à:
1-800-688-1120 (É.-U. et Canada)
(Lundi - vendredi, 8 h - 20 h – heure de l’Est)
Pour le service après-vente, voir page 28.
Date d’achat
Garantie . . . . . . . . . . . . . . . . . . . . . 28
Guía del Usuario . . . . . . . . . . 29
Dans le cadre de nos pratiques d’amélioration
constante de la qualité et de la performance de
nos produits de cuisson, des modifications de
l’appareil qui ne sont pas mentionnées dans ce
guide ont pu être introduites.
Page 16

Instructions de sécurité importantes
Lire toutes les instructions avant d’utiliser cet
appareil; observer toutes les instructions pour
éliminer les risques d’incendie, choc électrique,
dommages matériels et corporels que pourrait
susciter une utilisation incorrecte de l’appareil.
Utiliser l’appareil uniquement pour les fonctions
prévues, décrites dans ce guide.
Pour une utilisation adéquate et en sécurité, il
faut que l’appareil soit convenablement installé
par un technicien qualifié, et relié à la terre.
AVERTISSEMENT:
•
TOUTE CUISINIÈRE
PEUT BASCULER ET
PROVOQUER DES
BLESSURES.
•
INSTALLER LA BRIDE
ANTIBASCULEMENT
FOURNIE AVEC CETTE
CUISINIÈRE.
•
RESPECTER LES INSTRUCTIONS D’INSTALLATION.
AVERTISSEMENT:
risque de basculement de l’appareil à
l’occasion d’une utilisation anormale ou d’un
chargement excessif de la porte du four, il
faut que la bride antibasculement soit
convenablement installée.
Utiliser une lampe torche pour déterminer si la
bride antibasculement est convenablement
installée sous la cuisinière: L’un des pieds de
réglage de l’aplomb doit être convenablement
engagé dans la fente de la bride. Lorsque la
cuisinière est convenablement calée, la bride
antibasculement immobilise le pied arrière contre
le sol. Vérifier la parfaite immobilisation de la
cuisinière par la bride après chaque déplacement
de la cuisinière.
Pour réduire le
En cas d’incendie
Interrompre l’alimentation électrique de
l’appareil et de la hotte de ventilation pour
minimiser le risque d’extension des flammes.
Éteindre les flammes, puis mettre la hotte en
marche pour évacuer la fumée et l’air vicié.
•
Table de cuisson: Utiliser un couvercle ou une
tôle à biscuits pour étouffer les flammes d’un
feu qui se déclare dans un ustensile de cuisson.
•
NE JAMAIS saisir ou déplacer un ustensile de
cuisson enflammé.
•
Four: Fermer la porte du four pour étouffer les
flammes.
Ne pas projeter de l’eau sur un feu de graisse.
Utiliser du bicarbonate de sodium, ou un
extincteur à mousse ou à produit chimique sec
pour éteindre les flammes.
Instructions
générales
AVERTISSEMENT: NE JAMAIS utiliser la porte
du four ou le tiroir (le cas échéant) comme
tabouret/siège/escabeau; ceci pourrait susciter
un basculement de l’appareil et des dommages
matériels et corporels sérieux.
Si l’appareil est installé près d’une fenêtre, veiller
à ce que les rideaux ne puissent atteindre la table
de cuisson sous l’effet d’un courant d’air.
NE JAMAIS utiliser la cuisinière pour chauffer
la pièce. Le non-respect de cette instruction peut
être la cause de blessures, brûlures, incendie ou
détérioration de l’appareil.
NE JAMAIS porter des vêtements amples lors de
l’utilisation de l’appareil. Un vêtement trop ample
peut accrocher la poignée d’un ustensile ou
s’enflammer et provoquer des brûlures s’il touche un élément chauffant.
Pour garantir un fonctionnement adéquat et pour
éviter des dommages matériels ou corporels,
n’exécuter aucune opération de réglage/
réparation/remplacement de pièce de l’appareil
qui n’est pas spécifiquement recommandée dans
ce guide. Confier toute autre intervention à un
technicien qualifié.
NE JAMAIS remiser ou utiliser de l’essence ou
un autre produit combustible ou inflammable
dans le four, ou à proximité de la cuisinière, car
les vapeurs émises peuvent susciter un risque
d’incendie ou d’explosion.
Pour empêcher qu’un feu de graisse se déclare,
éviter toute accumulation de graisse ou autres
matières inflammables dans l’appareil ou au
voisinage.
Utiliser uniquement des maniques sèches.
L’application d’une manique humide sur une
surface chaude peut provoquer l’émission de
vapeur brûlante. Ne pas laisser les maniques
toucher les éléments chauffants chauds. Ne pas
utiliser une serviette ou un autre textile
volumineux qui pourrait facilement s’enflammer
au contact d’un élément chauffant.
Ramener chaque bouton de commande à la position d’arrêt après l’achèvement d’une cuisson.
NE JAMAIS faire chauffer un récipient non
ouvert dans le four ou sur un élément de la table
de cuisson; l’accumulation de pression dans le
récipient pourrait provoquer son éclatement et
des dommages matériels ou corporels.
NE JAMAIS garnir le fond du four ou une grille
du four avec de la feuille d’aluminium. Ceci
pourrait susciter un risque de choc électrique ou
d’incendie, ou une autre détérioration de
l’appareil. Utiliser de la feuille d’aluminium
uniquement selon les instructions de ce guide.
De nombreux flacons d’aérosol peuvent
EXPLOSER lorsqu’on les expose à la chaleur, et
ils peuvent contenir un produit très inflammable.
Éviter d’utiliser ou remiser un flacon d’aérosol à
proximité de l’appareil.
La sécurité de fonctionnement de cet appareil a
été testée à l’aide d’ustensiles de cuisson
conventionnels. Ne pas utiliser un ustensile ou
accessoire qui n’est pas spécifiquement
recommandé dans ce manuel. Ne pas utiliser de
couvre-élément, gril placé sur la table de cuisson
ou système de convection additionnel.
L’utilisation d’un dispositif ou accessoire qui
n’est pas expressément recommandé dans ce
manuel peut dégrader la sécurité de l’appareil ou
sa performance, ou réduire la longévité des
composants.
Table de cuisson
NE JAMAIS laisser un élément de la table de
cuisson allumé sans surveillance, particulièrement avec une puissance de chauffage élevée;
le débordement du contenu de l’ustensile pourrait
provoquer la génération de fumée abondante et
l’inflammation de la graisse.
Cet appareil comporte des éléments chauffants
de différentes tailles. Utiliser toujours un ustensile
à fond plat, de taille suffisante pour qu’il puisse
recouvrir complètement l’élément. Une bonne
adaptation entre l’ustensile utilisé et la taille de
l’élément maximisera l’efficacité de la cuisson.
Si un ustensile est plus petit que l’élément utilisé,
une partie de l’élément chauffant est exposée et
peut provoquer l’inflammation d’un vêtement
ou des maniques.
15
Page 17

Seuls certains matériaux de verre, vitrocéramique,
céramique, grès, ou certains ustensiles vitrifiés/
émaillés peuvent être utilisés sur la table de
cuisson ou dans le four sans risque de bris sous
l’effet du choc thermique. Observer les instructions du fabricant lors de l’utilisation d’un
ustensile de verre.
Orienter la poignée de chaque ustensile vers le
centre de la table de cuisson et non pas vers
l’extérieur ou vers un autre élément de la table de
cuisson; ceci réduira le risque de brûlure, inflammation de matière inflammable ou renversement
(un jeune enfant pourrait saisir/renverser un
ustensile dont le manche est orienté vers
l’extérieur).
Éléments en
spirale
Pour éviter de détériorer les éléments chauffants
amovibles, ne pas les immerger/tremper/
nettoyer dans un lave-vaisselle, ou dans un four
autonettoyant. Un élément chauffant endommagé
pourrait provoquer un court-circuit suscitant un
incendie ou un choc électrique.
Veiller à ce que la cuvette de récupération soit
toujours en place lors de l’utilisation d’un élément;
l’absence de la cuvette de récupération lors d’une
cuisson peut faire subir des dommages au câblage.
Garnitures de protection: Ne pas garnir les cuvettes de récupération sous les éléments ou le
fond du four avec de la feuille d’aluminium, sauf
lorsque ceci est suggéré dans le manuel. La mise
en place d’un tel garnissage peut susciter un
risque de choc électrique ou d’incendie.
Table de cuisson
en vitrocéramique
NE JAMAIS utiliser une surface de cuisson cassée
ou fêlée: les solutions de nettoyage et
renversements peuvent pénétrer dans la surface
de cuisson en entraînant un risque de choc
électrique. Prendre immédiatement contact avec
un technicien qualifié.
Nettoyer prudemment la surface de cuisson.
Certains produits donnent des fumées nocives
s’ils sont appliqués sur une surface chaude. Si
l’on utilise un linge, une éponge humide ou du
papier essuie-tout sur une surface de cuisson
chaude, faire preuve de prudence afin d’éviter de
se brûler par la vapeur.
Friteuses
Exercer une prudence extrême lors du
déplacement du récipient de graisse ou lors de
l’élimination de graisse chaude. Laisser la graisse
refroidir avant de déplacer l’ustensile.
Four
Ouvrir toujours la porte du four très prudemment.
Laisser l’air chaud ou la vapeur s’échapper avant
de retirer/introduire un plat.
Pour garantir une parfaite performance de
fonctionnement du four, ne pas obstruer le conduit de l’évent. Lorsque le four est utilisé, la zone
voisines de l’évent peuvent devenir suffisamment
chauds pour provoquer des brûleurs.
Placer les grilles à l’emplacement approprié dans
le four seulement lorsque le four est froid; s’il est
nécessaire de déplacer une grille alors que le four
est chaud, veiller à ne pas laisser la manique
toucher l’élément chauffant.
Éléments
chauffants
NE JAMAIS toucher les éléments chauffants
du four ou de la table de cuisson, ni les surfaces
voisines des éléments ou les surfaces intérieures
du four.
Un élément chauffant peut être encore chaud
même lorsque sa teinte est sombre. Une surface
voisine d’un élément chauffant à l’intérieur du
four ou sur la table de cuisson peut être
suffisamment chaude pour provoquer une
brûlure. Pendant/après l’utilisation, ne jamais
toucher un élément chauffant ou laisser un
vêtement ou autre matériau inflammable venir
au contact d’un élément ou d’une surface voisine,
ou d’une surface interne du four, avant que le
refroidissement complet ait pu se produire.
Autres surface potentiellement chaudes: table de
cuisson, surfaces voisines de la table de cuisson,
évent du four, surfaces proches de l’ouverture de
l’évent, porte du four, surfaces voisines de la
porte et du hublot.
Sécurité pour les
enfants
NE JAMAIS laisser des enfants seuls ou sans
supervision lorsque l’appareil est en service ou
chaud.
MISE EN GARDE: NE JAMAIS remiser sur le
dosseret d’une cuisinière ou dans une armoire
au-dessus des articles auxquels les enfants
peuvent s’intéresser. Un enfant tentant de grimper
sur l’appareil, sur la porte ou sur le tiroir pour
atteindre un objet, pourrait endommager
l’appareil ou subir de graves brûlures ou autres
blessures.
NE JAMAIS laisser un enfant s’asseoir ou se
tenir sur une partie quelconque de l’appareil.
Il est important d’enseigner aux enfants que la
cuisinière et les ustensiles placés dessus ou dedans
peuvent être chauds. Laisser refroidir les
ustensiles en un lieu sûr, hors d’atteinte des
enfants. Il est important d’enseigner aux enfants
qu’un appareil ménager n’est pas un jouet, et
qu’ils ne doivent toucher aucun organe de
commande ou autre composant de l’appareil.
Hotte d’extraction
Nettoyer fréquemment les filtres et la hotte pour
éviter l’accumulation de graisse et autres matières
inflammables susceptibles de s’enflammer.
Mettre le ventilateur en marche avant de faire
flamber un mets sous la hotte (par exemple crêpes
Suzette).
Avertissement et
avis important
pour la sécurité
AVIS IMPORTANT – OISEAUX FAMILIERS:
Les oiseaux ont un système respiratoire très sensible. Ne pas garder un oiseau familier dans la
cuisine ou dans une pièce où il pourrait être
exposé aux fumées. Les fumées émises durant
une opération d’autonettoyage peuvent être
dangereuses ou mortelles pour un oiseau, de
même que les fumées émises lors du chauffage
excessif de graisse, huile, margarine, par exemple
dans un ustensile à garnissage anti-adhésion.
Conserver ces instructions pour consultation ultérieure
16
Page 18

Utilisation de la table de cuisson
Boutons de
commande
MISE EN GARDE:
Pour l’utilisation des éléments chauffants de la
table de cuisson. Réglage continu de la puissance
entre les positions extrêmes LOW [MIN.] et HIGH
[MAX.] On peut régler un bouton à toute position
entre ces deux extrêmes.
Réglage des commandes
1. Placer l’ustensile sur l’élément.
2. Enfoncer/faire tourner le bouton jusqu’à la
position désirée (rotation dans un sens ou
dans l’autre).
•
Des marques sur le dosseret identifient
l’élément commandé par chaque bouton.
Par exemple, le symbole correspond à l’élément avant/droit.
3. Il y a un témoin lumineux situé sur le panneau
de commande. Lorsque l’un ou l’autre des
éléments correspondants est alimenté, le
témoin s’illumine. Le témoin s’éteint dès qu’on
interrompt l’alimentation de l’élément.
4. Après une cuisson, ramener le bouton à la
position d’ARRÊT (OFF). Retirer l’ustensile.
Suggestions pour le
réglage
On doit choisir la puissance de chauffage en
fonction de divers facteurs: taille/type de
l’ustensile, et opération de cuisson. Pour
l’information concernant les ustensiles et autres
facteurs affectant la puissance de chauffage à
utiliser, voir la brochure «La Cuisine Simplifiée».
High [Max.]: Pour l’ébullition d’un liquide. On
doit toujours réduire la puissance de chauffage
dès que la température d’ébullition est atteinte ou
pour la cuisson du mets.
Avant la cuisson
•
Placer toujours l’ustensile sur l’élément
avant d’alimenter l’élément. Pour éviter
que la cuisinière subisse des dommages,
ne jamais faire fonctionner un élément de
la table de cuisson sans y placer un
ustensile.
•
NE JAMAIS utiliser la table de cuisson
comme lieu de remisage d’aliments ou
d’ustensiles.
Durant la cuisson
•
Veiller à bien connaître la correspondance
entre les boutons de commande et les
éléments. Veiller à commander l’alimentation de l’élément correct.
•
Commencer la cuisson avec une puissance de chauffage supérieure au besoin,
puis réduire la puissance de chauffage
pour poursuivre la cuisson. Ne jamais
utiliser une puissance de chauffage élevée
pour une cuisson prolongée.
•
NE JAMAIS laisser le contenu d’un
ustensile s’évaporer complètement; ceci
pourrait faire subir des dommages à
l’ustensile et à l’appareil.
•
NE JAMAIS toucher la table de cuisson
avant qu’elle se soit complètement
refroidie. Certaines surfaces de la table de
cuisson, particulièrement au voisinage
des éléments chauffants, peuvent devenir
très chaudes durant une cuisson. Utiliser
des maniques.
Après la cuisson
•
S’assurer que l’élément est arrêté.
•
Éliminer dès que possible tous les résidus
de renversement/projections.
Autres conseils
•
S’il y a une armoire de rangement
directement au-dessus de la table de
cuisson, on ne doit y placer que des articles
peu fréquemment utilisés et qui peuvent
être exposés à la chaleur.
La chaleur émise par la cuisinière pourrait
susciter un problème pour des articles
comme liquides volatils, produits de
nettoyage et flacons d’aérosol.
•
NE JAMAIS laisser aucun article sur la
table de cuisson, particulièrement les articles de plastique. L’air chaud qui
s’échappe par l’évent du four pourrait
provoquer l’inflammation d’un article inflammable ou faire fondre/amollir un article de plastique, ou provoquer une augmentation de pression provoquant
l’éclatement d’un récipient fermé.
•
NE JAMAIS laisser de la feuille
d’aluminium, une sonde thermométrique
à viande ou un autre objet métallique autre
qu’un ustensile de cuisson sur la table de
cuisson, entrer en contact avec un élément
chauffant.
Medium [Moyen]: Pour le maintien de l’ébullition
contrôlée d’une grande quantité de liquide ou
pour la plupart des
opérations de
friture.
Low [Min.]: Pour
fusion de chocolat
ou beurre, ou le
maintien de la
température d’un
mets.
17
Page 19

Éléments de la
S
table de cuisson
(certains modèles)
Table de cuisson
émaillée soulevable
Abaissement: Maintenir le bord avant de la
table de cuisson et pousser chaque tige de support vers l’arrière pour la libérer. Ensuite, abaisser
doucement la table de cuisson. Le glissement des
tiges de support provoque leur remise en place.
REMARQUE: La table de cuisson en en les
cuisinères de glisser-dans et baisse-dans ne se
soulève pas vers le haut.
Pour éviter formation de taches/
changement de couleur sur la
table de cuisson.
•
Nettoyer la table de cuisson après chaque
utilisation.
•
Éliminer immédiatement un renversement
de produits sucrés ou acides sur la table de
cuisson, pour éviter une attaque chimique
ou un changement de couleur de l’émail.
Les cuisinières autonomes comporte une table de
cuisson émaillée soulevable. On peut la soulever
pour accéder à l’espace situé dessous.
Soulèvement: Après le refroidissement, saisir
le bord avant de la table de cuisson. Soulever
doucement jusqu’à la mise en place des deux tiges
de support (si l’équiper).
TIGE DE SUPPORT
Éléments chauffants
•
Lorsqu’un élément est utilisé, il est alimenté
par intermittence pour le maintien de la puissance de chauffage désirée.
•
Les éléments chauffants sont autonettoyants.
•
Ne pas les immerger dans de l’eau.
Dépose: Soulever l’élément refroidi. Tirer
prudemment pour extraire l’élément du bloc de
connexion.
Mise en place: Insérer les tiges de contact de
l’élément dans le bloc de connexion. Guider pour
la mise en place. Abaisser l’élément pour le placer
d’aplomb en appui sur la cuvette de récupération.
PIÈCES DE CONTACT
Cuvettes de
récupération
La cuvette de récupération doit toujours être en
place lors de l’utilisation de chaque élément de la
table de cuisson; sa fonction est de récupérer
toute matière renversée lors d’un débordement;
en son absence, le câblage et d’autres composants
sous la table de cuisson pourraient subir des
dommages.
Pour ne pas introduire un risque de choc électrique
ou d’incendie, ne jamais garnir les bols de
récupération de feuille d’aluminium.
Sous l’effet d’un fort rayonnement thermique, la
couleur des cuvettes de récupération change
progressivement (taches de couleur bleue/or ou
faïençage); ce changement de couleur ou faïençage
est permanent; cependant il n’affecte pas la performance de cuisson.
Pour protéger la finition des
cuvettes de récupération:
•
Pour minimiser le faïençage et le changement
de couleur, éviter d’utiliser la puissance de
chauffage maximum pendant une longue
période.
•
Ne pas utiliser un ustensile de trop grande
taille. L’ustensile ne devrait pas déborder
de plus 2,5 cm - 5 cm (1-2 pouces) au-delà de
la périphérie de l’élément.
•
Lors de l’utilisation d’un ustensile de grande
taille, par exemple pour la préparation de
conserves, utiliser l’élément spécial conçu
pour la préparation de conserves (modèle
CE1). Contacter le revendeur pour les détails,
ou téléphoner au 1-800-688-2002.
•
Nettoyer fréquemment (voir la section
Nettoyage, page 23).
18
Page 20

Utilisation de la table de cuisson
, suite
Surface de cuisson en
vitrocéramique (certains modèles)
REMARQUES:
•
Lors des premières utilisations de la surface de cuisson, l’appareil peut émettre
un peu de fumée et des odeurs. Ceci est
normal.
•
Lors de la mise sous tension d’un élément,
une luminescence rouge peut être visible
à travers la surface en vitrocéramique.
Pour le maintien de la puissance de
chauffage désirée, l’élément est alimenté
par intermittence.
Zones de cuisson
Les zones de cuisson de la cuisinière sont
représentées par un motif permanent dans la
plaque en vitrocéramique. Pour une efficacité
maximum, utiliser une zone de cuisson dont le
diamètre convient à l’ustensile.
Le récipient ne doit pas dépasser la zone de cuisson
de plus de 12 à 25 mm (1/2 à 1 po).
Pour plus de renseignements sur les récipients de
cuisine, se reporter à la brochure « La cuisson
simplifiée ».
Voyant de surface
chaude
Le voyant lumineux de surface chaude situé à la
table de cuisson ou à la dosseret, s’allume lorsque
l’appareil est en marche et continue à luire jusqu’à
ce que la surface de cuisson se soit refroidie.
Ustensiles
Pour obtenir des performances de cuisson maximum, utiliser des récipients à fond plat, lisse et
épais, de même diamètre que l’élément de
cuisson. (Voir dans «La Cuisson Simplifiée» les
recommandations et caractéristiques des
ustensiles de cuisine.)
•
La surface de cuisson en vitrocéramique
demeure chaude pendant quelque temps
après l’extinction d’un élément. Lorsque le
voyant HOT SURFACE (SURFACE CHAUDE)
s’éteint (voir ci-dessous), on peut toucher
la surface de cuisson sans danger.
•
REMARQUE: Ne pas tenter de soulever la
surface de cuisson.
Conseils de protection
de la surface
• Avant de s’en servir la première fois, nettoyer la
surface de cuisson. (Voir Nettoyage, page 23.)
• Ne pas utiliser de casseroles en verre. Elles
pourraient rayer la surface.
• Ne pas utiliser de plastique, de sucre ni
d’aliments riches en sucre fondre sur la surface
de cuisson. Si cela se produisait
accidentellement, nettoyer immédiatement.
(Voir Nettoyage, page 23.)
• Ne jamais laisser le contenu d’une casserole
bouillir jusqu’à ce qu’elle soit vide car cela
pourrait abîmer la surface de cuisson et la casserole.
• Ne jamais utiliser la surface de cuisson comme
surface de travail ou comme planche à découper.
Ne jamais cuire d’aliments directement sur la
surface de cuisson, sans récipient.
• Ne jamais utiliser de support métallique ou
anneau de wok entre un récipient et la surface
de cuisson. Ces objets peuvent marquer ou
rayer la surface.
• Ne pas glisser de récipients métalliques sur la
surface de cuisson brûlante. Ils pourraient laisser
sur le verre des marques qui doivent être
nettoyées immédiatement. (Voir Nettoyage,
page 23.)
• Veiller à ce que le fond des récipients et la zone
de cuisson soient propres avant d’allumer
l’élément, afin d’éviter les rayures.
• Pour empêcher que la surface de cuisson en
vitrocéramique se trouve rayée ou abîmée, ne
pas y laisser de sucre, de sel ou de graisse.
Prendre l’habitude d’essuyer la surface de
cuisson avec un linge propre ou un essuie-tout
avant de l’utiliser.
• Ne jamais utiliser de linge ou d’éponge sale pour
nettoyer la surface de cuisson. Ils laisseraient un
film invisible, ce qui pourrait décolorer la surface de cuisson lorsqu’elle est utilisée.
• Ne jamais utiliser un petit récipient sur un grand
élément. Non seulement il y a gâchis d’énergie
mais il peut en résulter des projections qui vont
brûler sur la surface de cuisson et devront être
nettoyées.
• Ne pas utiliser des récipients spéciaux non plats
qui seraient trop grands ou à fond inégal comme
les woks à fond rond, les grilles ou récipients de
grande taille à fond ondulé.
• Ne pas glisser de récipients métalliques épais
sur la surface au risque de la rayer.
• Ne pas utiliser de récipients en aluminium.
L’aluminium risque de fondre sur le verre. Si le
métal fond sur la surface de cuisson, ne pas
l’utiliser. Appeler un réparateur agréé.
• En cas de renversement lors de cuisson, nettoyer
immédiatement le produit renversé de la surface de cuisson pendant qu’elle est encore chaude
afin d’éviter un plus grand nettoyage par la
suite. User de prudence, essuyer les
renversements avec un linge propre et sec.
• Ne pas laisser les produits renversés sur la surface de cuisson ou sur la garniture de la surface
de cuisson pendant une longue durée.
• Ne pas utiliser de poudre de nettoyage abrasive
ou de tampons à récurer qui rayeraient la surface.
• Ne pas utiliser de javellisant, ammoniaque ou
autres produits de nettoyage non spécifiquement
recommandés pour la vitrocéramique.
• Pour maintenir l'aspect du cooktop verre-en
céramique, nettoyez après chaque utilisation.
REMARQUES:
•
Les surfaces en vitrocéramique conservent
la chaleur. Éteindre les éléments quelques
minutes avant que la nourriture soit
complètement cuite et se servir de la chaleur
restante pour terminer la cuisson.
En raison des caractéristiques de rétention
de la chaleur, les éléments ne répondent
pas aux changements de réglage aussi
rapidement que des éléments spiralés. Dans
le cas où un produit se renverse, retirer
l’ustensile de la zone de cuisson.
19
Page 21

Horloge et Minuterie
Commande d’horloge et de minuterie
(certains modèles)
Clock
Timer
REMARQUE : L’afficheur clignote lors de la mise sous tension initiale, ou après une interruption de l’alimentation.
Réglage de l’horloge :
1. Appuyer sur la touche Clock (Horloge).
•
Un signal sonore retentit dès que l’on appuie
sur la touche Clock.
2. Appuyer et maintenir la pression sur ▲ ou▼
jusqu’à ce que l’heure du jour paraisse à
l’afficheur.
•
Appuyer pour changer l’affichage par
intervalles d’une minute.
•
Appuyer et maintenir la pression pour
changer l’affichage par intervalles de 10
minutes.
Pour faire apparaître l’heure pendant l’affichage
de la minuterie, appuyer sur la touche Clock.
Réglage de la minuterie :
On peut sélectionner une période de décompte
de une minute (0:01) à 12 heures (12:00). La
minuterie NE commande PAS le fonctionnement du four.
1. Appuyer sur la touche Timer (Minuterie).
•
Un signal sonore retentit dès que l’on appuie
sur la touche Timer.
•
Les caractères 0:00 paraissent à l’afficheur.
2. Appuyer et maintenir la pression sur ▲ ou▼
jusqu’à ce que l’heure du jour paraisse à
l’afficheur.
•
Appuyer pour changer l’affichage par
intervalles d’une minute.
•
Appuyer et maintenir la pression pour
changer l’affichage par intervalles de 10
minutes.
•
La minuterie se met en marche automatiquement après quelques secondes. Le
clignotement du signe deux-points (:)
indique que la minuterie est en cours
d’utilisation.
•
Si l’on appuie sur la touche Clock, le signe
(:) continue à clignoter pour indiquer que la
minuterie est en cours d’utilisation.
3. Un signal sonore retentit après une minute
(0:01).
4. À la fin de l’opération de décompte, 0:00 paraît
à l’afficheur et trois signaux sonores retentissent.
•
Un signal sonore retentit toutes les 10
secondes pendant 10 minutes ou jusqu’à
l’annulation de la programmation de la
minuterie.
Pour annuler la minuterie :
Appuyer sur la touche Timer (Minuterie) et l’heure
du jour paraît à l’afficheur.
REMARQUE : Si l’affichage indique 0:00, appuyer
sur la touche Timer ou Clock pour annuler la
minuterie.
20
Page 22

Cuisson au four
Cuisson au four, rôtissage et cuisson au gril
Cuisson au four – MISE EN GARDE
•
Avant la mise en marche du four, vérifier que tous les matériaux
d’emballage en ont été enlevés.
•
Ne pas remiser des aliments ou ustensiles dans le four.
•
Mets préparés – Avertissement: Respecter les instructions du
On trouve dans la brochure «La Cuisine Simplifée» des conseils additionnels sur les opérations de cuisson au four, rôtissage et cuisson au gril.
REMARQUE: Le four ne fonctionnera pas si la
Régulateur
de four
Le bouton Oven Temp (Température du four)
sert à choisir la température dans le four.
Tourner toujours ce bouton VERS la température
désirée. Pour choisir une température précise du
four, ne pas tourner vers une température plus
élevée puis, revenir en arrière.
bouton Selector est laissée dans la position Off
(Arrêt).
4. Placer la nourriture au centre du four, en laissant
un minimum de 2 pouces (5 cm) entre l’ustensile
et les parois du four.
5. Vérifier le degré de cuisson de la nourriture au
temps minimum précisé dans la recette. Cuire
plus longtemps au besoin.
6. Retirer la nourriture du four. Mettre le bouton
de la température et choix du four (certains
modèles) sur Off (Arrêt).
Réglage du four pour une
cuisson au gril:
1. Placer la grille du four à la position
recommandée. (La tableau ci-dessous.)
2. Tourner le bouton de la température du four sur
Broil (Gril).
3. Tourner le bouton Selector (Choix du four,
certains modèles) sur Broil (Gril). REMARQUE:
fabricant. Si le contenant ou le couvercle de plastique d’un mets
surgelé se déforme ou est endommagé durant la cuisson, jeter
immédiatement le récipient et son contenu. Les aliments pourraient
être contaminés.
•
Lors de l’utilisation d’un sachet de cuisson au four, appliquer les
instructions du fabricant.
Le four ne fonctionnera pas si la bouton Selector
est laissée dans la position Off (Arrêt).
4. Au besoin, préchauffer l’élément de gril 3 minutes avant de placer la nourriture dans le four.
5. Passer la nourriture au gril avec la porte ouverte
jusqu’à la première position de butée ( environ 4
pouces ou 10 cm).
6. Retourner la nourriture une fois à mi-cuisson.
7. Retirer la nourriture du four. Mettre le bouton
de la température et choix du four (certains
modèles) sur Off (Arrêt).
Témoin lumineux
du four
Le TÉMOIN LUMINEUX DU FOUR s’allume dès
qu’on allume le four. Lorsque le four atteint la
température préétablie, le témoin s’éteint. Il s’éteint
et s’allume selon l’alternance de fonctionnement
des éléments du four pour maintenir la température
de four préétablie.
Le bouton Selector (Choix du four, certains
modèles) détermine le type d’exécution de four.
Tourner toujours ce bouton à la configuration
désirée. Chaque configuration est identifiée par
une indentation (arrêt) et un bruit de “click”.
Réglage du four pour une
cuisson normale:
1. Lorsque le four est froid, placer la grille dans le
four.
2. Tourner le bouton de la température du four à
la température souhaitée.
3. Tourner le bouton Selector (Choix du four,
certains modèles)sur Bake (Cuisson au four).
21
Tableau de cuisson au gril
Position de Degré de Temps de cuisson
Type de viande la grille* cuisson total (minutes)**
Bacon 4 Bien cuit 6-10 mn
Steaks -- épaisseur 2,5 cm (1 po) 4 Cuisson moyenne 15-18 mn
4 Bien cuit 19-23 mn
Poulet en morceaux 3 ou 4 Bien cuit 28-38 mn
Poisson -- Filets 4 La chair se détache 8-12 mn
Darnes, épaisseur 2,5 cm (1 po) 4 La chair se détache 10-15 mn
Boeuf haché -- steakettes, épaisseur 2 cm (
Jambon -- pré-cuit - tranche de 1,3 cm (
Cotelettes de porc -- épaisseur 2,5 cm (1 po) 4 Bien cuit 22-26 mn
* Grille supérieure à la position n° 5
** Temps de cuisson approximatifs, variables selon les caractéristiques de chaque pièce de viande. Si
l’appareil est alimenté par un circuit 208 volts le temps de cuisson nécessaire augmente et le brunissage
est légèrement réduit.
3
/4 po) 4 Bien cuit 15-18 mn
1
/2 po) 4 Tiède 8-12 mn
Page 23

Évent du four
Lorsque le four est utilisé, la zone voisine de
l’évent peuvent devenir suffisament chauds pour
provoquer des brûleurs. Ne jamais obstruer
l’ouverture de l’évent.
Surface en vitro/
céramique
Élément en spirale
•
Pour une table de cuisson
avec éléments chauffants
en spirale, vérifier que la
cuvette de récupération
placée sous cet élément
comporte un trou central.
Ne pas garnir la cuvette
de récupération avec de la
feuille d’aluminium.
•
Le évent du four est situe à la arrière de la table
de cuisson en en les cuisinères de glisser-dans
et baisse-dans.
OUVERTURE
CENTRALE DE LA
CUVETTE DE
RÉCUPÉRATION
Lampe du four
(certains modèles)
La lampe de four est commandée par
interrupteur situé sur la console de
commande.
Grilles du four
MISE EN GARDE: Ne pas
tenter de changer la position des
grilles lorsque le four est chaud.
Le four est doté de deux grilles; ces grilles
comportent un dispositif de calage.
Extraction: Tirer la grille en ligne droite jusqu’à
ce qu’elle s’arrête à la position de calage. Soulever
la grille à l’avant pour pouvoir l’extraire.
Réinstallation: Placer la grille sur les supports
dans le four; soulever légèrement l’avant; faire
glisser la grille vers l’arrière au-delà de la position de calage; abaisser la grille pour qu’elle
prenne appui sur les supports dans le four.
Ne pas recouvrir la totalité d’une grille avec de la
feuille d’aluminium, ni garnir le fond du four
avec de la feuille d’aluminium. Ceci modifierait
les résultats de cuisson au four, et le fond du four
pourrait subir des dommages.
Positions des grilles
POSITION N° 4:
Pour la plupart des cuissons au gril.
POSITION N
Pour la plupart des cuissons de pâtisseries sur
une tôle à biscuits — gâteaux à étages, tartes
aux fruits, mets surgelés.
POSITION N° 2:
Pour rôtissage de pièces de viande, mets en
sauce, cuisson de pain, gâteau léger en
couronne (baba) ou entremets.
POSITION N° 1:
Pour le rôtissage de grosses pièces de viande
ou volaille, tartes surgelées, soufflés ou
gâteaux des anges.
CUISSON SUR PLUSIEURS GRILLES:
Deux grilles: Placer les grilles aux positions 2
et 4 ou 1 et 4.
°
3:
Demi-grille
Une demi-grille est disponible en accessoire. Elle
augmente la capacité du four et s’accroche à
gauche, à la partie supérieure. Elle est utile pour
la cuisson d’un plat de légumes lorsqu’un gros
rôti se trouve sur la grille inférieure. Prendre
contact avec le revendeur pour demander
l’accessoire HALFRACK (demi-grille) ou pour
commander, composer le 1-800-688-2002.
POSITION N° 5: (la plus élevée):
Pour cuisson brève au gril — pain grillé ou
aliments minces contenant peu de graisse.
22
Page 24

Entretien et nettoyage
Nettoyage — MISES EN GARDE
•
Avant toute manipulation ou opération de nettoyage, vérifier que le
four est arrêté et que tous les composants sont froids, afin d’éviter des
dommages ou des brûlures.
•
Pour éviter la formation de taches ou un changement de couleur,
nettoyer l’appareil après chaque utilisation.
•
Après tout démontage de composants, veiller à effectuer un
remontage correct.
Tableau de nettoyage
Composants Méthode de nettoyage
Dosseret et table de
cuisson, surfaces
émaillées
Lèchefrite et sa grille
(certains modèles)•Recouvrir la lèchefrite et sa grille d’un torchon savonneux; laisser tremper pour détacher les résidus.
Surface de Cuisson Ne jamais utiliser de produits de nettoyage du four, javellisant, ammoniaque ou produits de nettoyage du verre contenant de en
Vitrocéramique l’ammoniaque. REMARQUE: Prendre contact avec un réparateur agréé si la surface en vitrocéramique se fendille, se casse ou si de
L’émail est un matériau à base de verre fondu sur le métal, qui peut se fissurer ou s’écailler. La couche d’émail possède une certaine résistance
aux composés acides, qui n’est pas illimitée. On doit éliminer immédiatement tout résidu de renversement avec un linge sec, particulièrement
les composés acides ou sucrés.
•
Sur une surface froide, laver avec de l’eau savonneuse, puis rincer et sécher.
•
Ne jamais essuyer une surface tiède ou chaude avec un linge humide; ceci pourrait provoquer fissuration ou écaillage.
•
Ne jamais utiliser sur la finition extérieure de la cuisinière un produit de nettoyage de four ou un produit de nettoyage abrasif ou caustique.
Ne jamais garnir la grille de lèchefrite avec de la feuille d’aluminium, car ceci empêcherait la graisse de s’écouler au-dessous.
•
Laver avec de l’eau savonneuse tiède. Utiliser un tampon à récurer savonneux pour éliminer les souillures tenaces.
•
On peut placer les deux composants de la lèchefrite dans un lave-vaisselle.
l’aluminium ou du métal fond sur la surface.
•
Laisser la surface de cuisson refroidir avant de la nettoyer.
•
Généralités – Toujours nettoyer la surface de cuisson après chaque emploi ou au besoin, avec du papier essuie-tout humidifié et un
produit de nettoyage pour vitrocéramique. Puis, essuyer avec un linge sec et propre. REMARQUE: Des marques permanentes vont se
produire si la saleté reste sur la surface de cuisson et est cuite de façon répétée.
•
Saleté épaisse ou marques métalliques – Humidifier une éponge à récurer «ne rayant pas». Appliquer du produit de nettoyage pour
surface de cuisson et frotter pour retirer autant de saleté que possible. Appliquer une mince Cooktop Cleaning Creme* (n° de pièce.
20000001)**, recouvrir avec du papier essuie-tout humidifié et laisser pendant 30 à 45 minutes (2 à 3 heures pour le sol très lourd). Conservez moite en couvrant la serviette de papier d’enveloppe en plastique. Frotter à nouveau, puis essuyer avec un linge propre et sec.
REMARQUE: N’utiliser qu’un tampon à récurer «ne rayant pas», propre et humide, sans danger pour les ustensiles de cuisine non adhérents. Le
verre et le motif seront endommagés si le tampon n’est pas humide, s’il est souillé ou si un autre type de tampon est utilisé.
•
Saletés cuites ou desséchées – Frotter avec un éponge à récurer «ne rayant pas» et Cooktop Cleaning Creme* (n° de pièce. 20000001)**.
REMARQUE: Tenir une lame de rasoir à un angle de 30° et gratter pour enlever toute saleté restante. Puis, nettoyer comme
il est décrit ci-dessus. Ne pas se servir de la lame de rasoir tous les jours, cela pourrait user le motif du verre.
•
Plastique ou sucre fondu – Régler immédiatement l’élément sur LOW et gratter le sucre et le plastique de la surface
chaude pour les pousser vers une zone moins chaude. Puis ÉTEINDRE l’élément et le laisser refroidir. Nettoyer le
résidu avec un grattoir à lame de rasoir et un produit de nettoyage pour vitrocéramique.
Zone de la console de•Essuyer avec un linge humide, puis faire sécher.
commande/horloge•On peut utiliser un produit de nettoyage du verre, pulvérisé d’abord sur un chiffon. NE PAS projeter le produit directement sur les touches
(certains modèles) de commande ou sur l’afficheur.
Boutons de
commande
Cuvettes de
récupération, chrome
(certains modèles)•Pour éliminer de grosses souillures, faire tremper dans de l’eau savonneuse chaude puis utiliser un produit de nettoyage peu abrasif comme
Cuvettes de
récupération,
porcelain
(certains modèles) laver les cuvettes au lave-vaisselle.
•
Placer chaque bouton à la position d’ARRÊT (OFF), et retirer chaque bouton (tirer).
•
Laver/rincer/faire sécher. Ne pas utiliser un agent de nettoyage abrasif susceptible de rayer la finition.
•
Faire fonctionner brièvement chaque élément pour vérifier que le bouton a été correctement réinstallé.
•
Après le refroidissement, laver après chaque utilisation, rincer et faire sécher pour éviter la formation de taches ou un changement de
couleur.
Soft Scrub* et un tampon à récurer en plastique. Ne pas utiliser un produit de nettoyage abrasif.
Un échauffement excessif provoque le faïençage et le changement de couleur de l’émail; ceci est normal et n’affecte pas la performance de
cuisson.
•
Après chaque utilisation, laisser refroidir puis laver/rincer/sécher pour éviter la formation de taches ou de changement de couleur. On peut
•
Pour enlever de grosses souillures, faire tremper dans de l’eau savonneuse, puis utiliser un produit de nettoyage légèrement abrasif comme
SoftScrub* avec un tampon de récurage de plastique.
•
Pour un résidu carbonisé, retirer la cuvette de récupération pour la placer sur un journal, et appliquer prudemment un produit commercial
pulvérisable de nettoyage de four (ne pas pulvériser sur la surface environnante). Placer la cuvette dans un sachet de plastique pendant
plusieurs heures pour laisser le produit agir. Porter des gants de caoutchouc, retirer la cuvette du sachet, puis laver/rincer/sécher.
23
Page 25

Tableau de nettoyage (suite)
Composants Méthode de nettoyage
Surfaces peintes,
Panneaux latéraux
Tiroir de remisage•Pour des souillures tenaces, utiliser un produit de nettoyage peu abrasif comme Bon Ami* ou une pâte de bicarbonate de sodium. Ne pas
Porte du four
(certains modèles) produits feraient subir des dommages permanents à la surface (rayures).
Poigneés de porte
(certains modèles) NOTE: Utiliser un essuie-tout ou un linge sec pour enlever les résidus de renversement de produits acides ou sucrés. Si ces résidus ne sont
Verre
Hublot du four
(certains modèles) sur un chiffon.
Porte du four
(certains modèles) feraient subir des dommages au verre.
Finition métallique•Laver avec eau et savon, un produit de nettoyage du verre, ou un produit liquide à pulvériser.
Pièces de garniture•Pour éviter de former des rayures ou de dégrader la finition, ne pas utiliser un produit de nettoyage abrasif ou peu abrasif, ou un
Intérieur du four•Nettoyer fréquemment avec un produit de nettoyage peu abrasif et un tampon de plastique.
Grilles du four
•
Après le refroidissement, laver avec de l’eau savonneuse/rincer et faire sécher. Ne jamais essuyer une surface tiède ou chaude avec un
linge humide; la surface pourrait subir des dommages, et la formation de vapeur pourrait provoquer des brûlures.
utiliser un produit de nettoyage abrasif caustique ou agressif comme un produit de nettoyage de four ou un tampon de laine d’acier; ces
pas enlevés immédiatement, la surface peut subir un changement de couleur ou une autre dégradation. Ceci est particulièrement important
pour une surface blanche.
•
Éviter d’utiliser une quantité excessive d’eau, susceptible de s’infiltrer derrière la plaque de verre et de former des taches.
•
Laver avec eau et savon. Rincer avec de l’eau propre et faire sécher. On peut utiliser un produit de nettoyage du verre, pulvérisé d’abord
•
Ne pas utiliser un produit de nettoyage abrasif comme tampon à récurer, laine d’acier ou produit de nettoyage en poudre. Ces produits
produit de nettoyage agressif ou caustique comme un composé de nettoyage de four.
•
Ne pas utiliser un tampon à récurer métallique, qui laisserait des rayures sur la surface.
•
Lors de l’emploi d’un produit de nettoyage de four commercial, appliquer les instructions du fabricant.
•
Éliminer dès que possible les résidus de produits alimentaires acides (tomates ou produits laitiers) avec de l’eau et du savon; sinon la surface
émaillée peut changer de couleur.
Pour faciliter le nettoyage, on peut enlever la porte du four (voir la section Entretien page 25).
•
Nettoyer avec de l’eau savonneuse.
•
Éliminer les souillures tenaces avec une poudre de nettoyage ou un tampon à récurer savonneux. Rincer et faire sécher.
Articles à finition de•Après le refroidissement, nettoyer avec de l’eau savonneuse, rincer et faire sécher.
plastique
Poignées de porte
(certains modèles) NOTE: Ne jamais utiliser sur les finitions de plastique un produit de nettoyage en poudre ou un produit de nettoyage abrasif ou caustique, ou
Garniture du dosseret un produit de nettoyage de four; ces produits détérioreraient la finition.
Embouts
*Les noms de marque mentionnés sont des marques de commerce déposées de leurs propriétaires respectifs.
**Pour commander, composer le 1-800-688-2002.
•
Utiliser un produit de nettoyage du verre et un linge doux.
NOTE: Pour éviter la formation de taches ou un changement de couleur, enlever immédiatement avec un chiffon ou un essuie-tout de papier
sec tout produit renversé contenant de la graisse ou des composants acides (tomate, citron, vinaigre, lait, jus de fruit, marinade).
24
Page 26

T
Entretien
Porte du four
Hublot du four
(certains modèles)
MISES EN GARDE:
•
Ne pas grimper sur la porte du four
ouverte, ou lui imposer une charge excessive. Ceci pourrait provoquer un
basculement de la cuisinière, le bris de la
porte ou des blessures pour la personne
concernée.
•
Ne pas tenter d’ouvrir ou fermer la porte
ou d’utiliser le four avant que la porte ait
été convenablement réinstallée.
•
Ne jamais placer les doigts entre la
charnière et le cadre avant du four. Les
bras de charnière sont montés sur ressort.
Une charnière pourrait se refermer
brutalement contre le cadre du four et
provoquer de sérieuses blessures.
Pour protéger le hublot de
la porte du four:
1. Ne pas utiliser un produit de nettoyage abrasif
susceptible de rayer le verre, comme laine
d’acier, tampon à récurer ou produit de
nettoyage en poudre.
2. Ne pas heurter le hublot de verre avec un
ustensile, un article de mobilier, un jouet, etc.
3. Ne pas fermer la porte du four avant que les
grilles soient en place dans le four.
Toute dégradation du hublot de verre – rayure,
choc, tension, etc. – peut affaiblir sa structure et
augmenter le risque de bris à une date ultérieure.
Lampe du four
Dépose de la porte:
1. Après le refroidissement du four, ouvrir la
porte – position de cuisson au gril (porte
entrouverte d’environ 10 cm [4 pouces]).
2. Saisir la porte de
chaque côté. Ne pas
utiliser la poignée
de porte pour la
soulever.
3. Soulever uniformément pour dégager la porte
des charnières.
(certains modèles)
MISES EN GARDE:
•
Débrancher la cuisinière du réseau
électrique avant de remplacer l’ampoule.
•
Utiliser une manique sèche pour protéger
les mains lors du remplacement de
l’ampoule.
•
Ne pas toucher l’ampoule avant qu’elle
se soit refroidie.
Tiroir de remisage
(certains modèles)
Le tiroir de remisage, en bas de la cuisinière, est
un endroit pratique et sûr pour le remisage des
ustensiles de métal et de verre. On NE DOIT PAS
y remiser des articles en plastique ou papier, ou
des produits alimentaires ou matériaux
inflammables. Retirer le tiroir pour nettoyer sous
la cuisinière.
Dépose: Vider le tiroir, puis tirer le tiroir jusqu’à
la position de la première butée. Soulever l’avant
et tirer jusqu’à la position de la seconde butée.
Saisir les côtés et soulever pour pouvoir retirer le
tiroir.
Réinstallation: Positionner les extrémités des
glissières du tiroir sur les rails. Soulever l’avant
du tiroir et pousser doucement jusqu’à la position de la première butée. Soulever et continuer
à pousser le tiroir jusqu’à la position de fermeture.
Pieds de réglage
de l’aplomb
MISE EN GARDE:
•
Vérifier que la bride antibasculement
agrippe convenablement l’un des pieds
arrière de réglage de l’aplomb, pour que
la cuisinière ne puisse basculer
accidentellement.
Réinstallation:
1. Saisir la porte de chaque côté.
2. Aligner les fentes avec les bras de charnière
sur la cuisinière.
3. Faire descendre la porte pour la positionner
correctement sur les charnières. Pousser sur
les angles supérieurs de la porte pour l’enfoncer
complètement sur les charnières. Il faut que la
porte soit parfaitement d’aplomb.
NOTE: On peut percevoir une certaine
«élasticité» lors de la fermeture de la porte du
four d’une cuisinière neuve; ceci est normal;
cet effet disparaît progressivement.
25
•
Ne pas toucher l’ampoule chaude avec
un linge humide; le choc thermique
pourrait la briser.
Remplacement de la
Il faut que la cuisinière soit
installée d’aplomb. Pour ajuster
l’aplomb, faire tourner les pieds
de réglage en plastique dans
les angles de la
cuisinière.
lampe du four:
1. Enlever l’ampoule.
2. Installer une ampoule de 40 watts pour
appareil ménager.
3. Rétablir l’alimentation de la cuisinière. Régler
de nouveau l’horloge si équiper.
ANTI-TIP BRACKE
BRIDE
D’ANTIBASCULEMENT
LEVELING LEG
PIED DE RÉGLAGE DE L’APLOMB
Page 27

Avant de contacter un dépanneur
Pour la plupart des problèmes
observés, essayer d’abord ce qui
suit:
•
Vérifier que les commandes du four sont
correctement réglées.
•
Vérifier que la fiche de branchement est correctement
insérée dans la prise de courant.
•
Inspecter/réarmer le disjoncteur. Inspecter/
remplacer les fusibles.
•
Contrôler la source d’alimentation électrique.
Non-fonctionnement de l’appareil –
total ou partiel.
•
Déterminer si les commandes des éléments de la
table de cuisson et/ou du four sont convenablement
réglées. Voir pages 17 et 21.
La surface de vitrocéramique
semble usée.
1. Petites éraflures ou abrasions.
•
Assurez-vous que la surface de cuisson et le
fond de la casserole sont propres. Ne glissez
pas les casseroles de verre ou de métal sur la
surface. Vérifiez que le fond de la casse role
n’est pas rugueux. Utilisez le produit nettoyant
recommandé. Consultez la page 23.
2. Marques de métal.
•
Ne glissez pas les casseroles de métal sur la
surface. Lorsque la cuisinière a refroidi, utilisez
le produit nettoyant recommandé. Consultez la
page 23.
3. Marques et taches brunes.
•
Il s’agit de dégâts qui n’ont pas été essuyés
immédiatement. Vous avez essuyé avec un
chiffon ou une éponge sale. Le fond d’une
casserole n’est pas propre.
4. Zones portant un lustre métallique.
•
Il s’agit d’un dépôt minéral causé par l’eau ou
un aliment.
5. Piqûres ou écaillage.
•
Il s’agit de dégâts d’un aliment sucré qui n’ont
pas été essuyés immédiatement. Consultez la
page 23.
Résultats de cuisson au four
différents des attentes ou de ceux
produits par le four antérieur.
•
Déterminer si l’évent du four est obstrué. Voir la
position à la page 22.
•
Vérifier le bon aplomb de la cuisinière.
•
Le réglage de température varie souvent entre un
four neuf et le four qu’il remplace. On observe souvent
une dérive du réglage de température d’un four à
mesure qu’il vieillit; il peut devenir plus chaud ou
moins chaud.
•
Déterminer la position des grilles. Voir à la page 22.
•
Pour d’autres informations au sujet de la cuisson au
four, voir la brochure «La Cuisine Simplifiée».
•
Contrôler la température sélectionnée pour la cuisson.
Veiller à préchauffer le four si ceci est demandé dans
la recette.
Résultats incorrects lors de la
cuisson au gril, ou émission excessive de fumée.
•
Déterminer la position des grilles. Les aliments
peuvent être trop près de l’élément du gril.
•
Élément du gril pas préchauffé.
•
Utilisation incorrecte de feuille d’aluminium. Ne
jamais garnir la lèchefrite avec de la feuille
d’aluminium.
•
Porte du four fermée durant la cuisson au gril. Laisser
la porte du four entrouverte d’environ 10 cm
(4 pouces) – première butée.
•
Enlever l’excès de graisse sur la pièce de viande
avant la cuisson au gril.
•
Utilisation d’une lèchefrite souillée.
Accumulation d’humidité dans le
four ou sur le hublot.
•
Ceci est normal durant la cuisson d’aliments
contenant beaucoup d’eau.
•
Utilisation excessive d’humidité lors du nettoyage
du hublot.
(certains modèles)
Émission d’une forte odeur ou de
fumée lors de la mise en marche du
four.
•
Ceci est normal pour une cuisinière neuve; cet effet
disparaît après quelques utilisations.
•
Faire fonctionner le ventilateur pour évacuer la fumée
ou l’odeur.
•
Présence d’une accumulation de résidus alimentaires
sur le fond du four. Exécuter une opération
d’autonettoyage.
26
Page 28

Remarques
27
Page 29

Cuisinière –
Ne sont pas couverts par cette garantie:
Garantie
Garantie complète d’une année – Pièces et
main-d’oeuvre
Durant une période d’un (1) an à compter de
la date de l’achat initial, toute pièce subissant
une défaillance dans les conditions normales
d’usage ménager sera réparée/remplacée
gratuitement.
Garantie limitée - pièces seulement
De la deuxième année à la cinquième année
à compter de la date de l’achat initial au
détail, les pièces de la liste ci-dessous subissant
une défaillance dans des conditions normales
d’usage ménager seront réparées ou
remplacées gratuitement (pièces seulement);
le propriétaire devra assumer tous les autres
frais, y compris les frais de main-d’oeuvre, de
déplacement et de transport.
•
Surface de cuisson en vitrocèramique -
Par suite de bris thermique.
•
Éléments chauffants électriques de la
surface de cuisson en vitrocèramique
Résidents canadiens
Les garanties ci-dessus couvrent un appareil
installé au Canada seulement s’il a été agréé
par les agences de test habilitées (vérification
de la conformité à une norme nationale du
Canada), sauf si l’appareil a été introduit au
Canada à l’occasion d’un changement de
résidence des États-Unis vers le Canada.
Les garanties spécifiques formulées ci-dessus sont
les SEULES que le fabricant accorde. Cette garantie
vous confère des droits juridiques spécifiques et
vous pouvez également jouir d’autres droits, variables d’une province à l’autre.
1. Les dommages ou dérangements dus à:
a. Mise en service, livraison ou entretien effectués incorrectement.
b. Toute réparation, modification, altération et tout réglage non autorisés par le fabricant ou par un
prestataire de service après-vente agréé.
c. Accidents, mauvaise utilisation ou usage abusif ou déraisonnable.
d. Alimentation électrique (tension, intensité) incorrecte.
e. Réglage incorrect d’une commande.
2. Les garanties ne peuvent être honorées si les numéros de série d’origine ont été enlevés, modifiés ou
ne sont pas facilement lisibles.
3. Ampoules.
4. Appareils achetés aux fins d’usage commercial ou industriel.
5. Les frais de visite d’un prestataire de service ou de service après-vente encourus pour les raisons
suivantes:
a. Correction d’erreurs de mise en service.
b. Initiation de l’utilisateur à l’emploi de l’appareil.
c. Transport de l’appareil aux locaux du prestataire de service.
6. Dommages secondaires ou indirects subis par toute personne suite au non-respect de la garantie.
Certaines provinces ne permettent pas l’exclusion ou la limitation des dommages secondaires ou
indirects; par conséquent les limitations ou exclusions ci-dessus peuvent ne pas s’appliquer à votre
cas.
Si l’intervention d’un dépanneur est
nécessaire
•
Contacter le revendeur chez qui l’appareil a été acheté, ou contacter Maytag Appliances Sales
Company/service-client au 1-800-688-1120 aux É.-U. et CANADA, pour obtenir les coordonnés d’une
agence de service agréée.
•
Veiller à conserver la facture d’achat pour justifier de la validité de la garantie. Pour d’autres
informations en ce qui concerne les responsabilités du propriétaire à l’égard du service sous garantie,
voir le texte de la GARANTIE.
•
Si le revendeur ou l’agence de service après-vente ne peut résoudre le problème, écrire à Maytag
Appliances Sales Company, attention CAIR
téléphoner au 1-800-688-1120 aux É.-U. et CANADA.
®
Center, P.O. box 2370, Cleveland, TN 37320-2370 ou
NOTE: Lors de tout contact concernant un problème, fournir l’information suivante.
a. Nom, adresse et numéro de téléphone du client;
b. Numéro de modèle et numéro de série de l’appareil;
c. Nom et adresse du revendeur ou de l’agence de service;
d. Description claire du problème observé;
e. Preuve d’achat (facture de vente).
•
Les guides d’utilisation, les manuels de service et les renseignements des pièces sont disponibles
auprès de Maytag Appliances Sales Company, service-client Maytag.
28
Page 30

G
G
UÍA
UÍA
DEL
DEL
U
U
Instalador: Por favor deje esta guía junto con el
electrodoméstico.
Consumidor: Por favor lea y conserve esta guía
para referencia futura. Conserve el recibo de venta
y/o el cheque cancelado como prueba de compra.
Número de Modelo
–– –– –– –– –– –– –– –– –– ––
–– –– –– –– –– –– –– –– –– ––
SUARIO
SUARIO
Número de Serie
Estufa Eléctrica WT-TOD
Tabla de Materias
Instrucciones de Seguridad . . 30-31
Cocinando en la Estufa . . . . . . 32-34
Reloj y Indicador de Tiempo . . . . 35
Cocinando en el Horno . . . . . . 36-37
Cuidado y Limpieza . . . . . . . . . 38-39
Mantenimiento . . . . . . . . . . . . . 40
Antes de Solicitar Servicio . . . . . . 41
Garantía . . . . . . . . . . . . . . . . . . . . . 43
_______________________________
Si tiene alguna pregunta, llame al:
1-800-688-1120 (EE.UU. et Canadá)
1-800-688-2080 (TTY en EE.UU. para personas
con impedimentos auditivos o del habla)
(Lunes – Viernes, 8:00 a.m. – 8:00 p.m. Hora del
Este)
Para información sobre servicio, ver página 43.
Fecha de Compra
En nuestro continuo afán de mejorar la calidad y
rendimiento de nuestros electrodomésticos,
puede que sea necesario modificar el
electrodoméstico sin actualizar esta guía.
Page 31

Instrucciones Importantes Sobre Seguridad
Lea y siga todas las instrucciones antes de usar
este electrodoméstico para evitar el riesgo
potencial de incendio, choque eléctrico, lesión
personal o daño al electrodoméstico como
resultado de su uso inapropiado. Utilice este
electrodoméstico solamente para el propósito que
ha sido destinado según se describe en esta guía.
Para asegurar funcionamiento correcto y seguro:
El electrodoméstico debe ser instalado
debidamente y puesto a tierra por un técnico
calificado.
ADVERTENCIA:
•
TODAS LAS ESTUFAS
SE PUEDEN VOLCAR
Y CAUSAR LESIONES
PERSONALES
•
INSTALE EL DISPOSITIVO ANTI-VUELCO
INCLUIDO CON LA
ESTUFA
•
SIGA TODAS LAS
INSTRUCCIONES DE INSTALACION
ADVERTENCIA:
el riesgo de vuelco del electrodoméstico
a causa de uso anormal o debido a peso
excesivo en la puerta del horno, es
necesario asegurar el electrodoméstico
mediante un dispositivo antivuelco
debidamente instalado.
Para verificar si el dispositivo está debidamente
instalado, mire debajo de la estufa con una linterna
para asegurarse de que uno de los tornillos
niveladores traseros esté debidamente enganchado
en la ranura del soporte. El dispositivo antivuelco
asegura el tornillo nivelador trasero al piso cuando
está debidamente enganchado. Esto debe
verificarse cada vez que la estufa sea movida.
Para reducir
En Caso de
Incendio
Apague el electrodoméstico y la campana de
ventilación para evitar que las llamas se dispersen.
Extinga las llamas luego encienda la campana
para expulsar el humo y el olor.
•
En la cubierta: Apague el fuego o la llama en
una sartén con una tapa o una bandeja de
hornear.
•
NUNCA levante o mueva una sartén en llamas.
•
En el horno: Apague el fuego o la llama cerrando
la puerta del horno.
No use agua en los incendios de grasa. Use
bicarbonato de soda, un producto químico seco o
un extinguidor del tipo con espuma para apagar
un incendio o la llama.
Instrucciones
Generales
ADVERTENCIA: NUNCA use la puerta del
electrodoméstico o la gaveta, si la tiene, como una
banqueta o asiento pues esto puede resultar en la
posible volcadura del electrodoméstico, daño al
electrodoméstico y lesiones graves.
Si el electrodoméstico está instalado cerca de una
ventana, se deben tener cuidado para evitar que
las cortinas pasen sobre los elementos superiores.
NUNCA use este electrodoméstico para calentar o
calefaccionar la habitación. El incumplimiento de
esta instrucción puede conducir a posibles
quemaduras, lesión, incendio o daño al
electrodoméstico.
NUNCA use ropas sueltas u holgadas cuando esté
usando el electrodoméstico. Las ropas pueden
enredarse en los mangos de los utensilios o
prenderse fuego y causar quemaduras si la ropa
entra en contacto con los elementos calefactores
calientes.
Para asegurar el funcionamiento debido y evitar
daño al electrodoméstico o lesión, no ajuste, repare
ni reemplace ninguna pieza del electrodoméstico
a menos que sea específicamente recomendado en
esta guía. Todas las otras reparaciones deben ser
hechas por un técnico calificado.
NUNCA almacene ni use gasolina u otros
materiales combustibles o inflamables en el horno,
cerca de los elementos superiores o en la vecindad
de este electrodoméstico pues los vapores pueden
crear un peligro de incendio o una explosión.
Para evitar incendios de grasa, no deje que se
acumule grasa de cocinar ni otros materiales
inflamables en la estufa o cerca de ella.
Use solamente tomaollas secos. Los tomaollas
húmedos o mojados al tocar las superficies calientes
pueden producir una quemadura por vapor. No
deje que los tomaollas toquen los elementos
calefactores calientes. No use una toalla ni otro
paño voluminoso pues puede fácilmente tocar los
elementos calefactores calientes y prenderse fuego.
Siempre apague todos los controles cuando haya
terminado de cocinar.
NUNCA caliente recipientes cerrados en los
elementos superiores o en el horno. La acumulación
de presión en el interior puede reventar el recipiente
causando quemaduras, lesión o daño al
electrodoméstico.
NUNCA use papel de aluminio para cubrir una
parrilla del horno o la parte inferior del horno. El
uso incorrecto puede resultar en un riesgo de
choque eléctrico, incendio o daño al
electrodoméstico. Use papel de aluminio
solamente como se indica en esta guía.
Muchos envases de tipo aerosol son EXPLOSIVOS
cuando son expuesto al calor y pueden ser
altamente inflamables. Evite su uso o su
almacenamiento cerca del electrodoméstico.
Se ha comprobado el rendimiento y
funcionamiento seguro de este electrodoméstico
usando baterías de cocina convencionales. No use
ningún dispositivo o accesorio que no haya sido
específicamente recomendado en esta guía. No
use cubiertas, rejillas superiores de la estufa o
sistemas de convección para hornos. El uso de
dispositivos o accesorios que no sean expresamente
recomendados en esta guía pueden crear peligros
graves de seguridad, afectar el rendimiento y
reducir la vida útil de los componentes de este
electrodoméstico.
Cubierta
NUNCA deje los elementos superiores sin
supervisión, especialmente cuando está usando
los ajustes de calor altos. Un derrame sin recibir
la debida atención puede causar humo y un
derrame de grasa puede causar un incendio.
Este electrodoméstico tiene diferentes tamaños de
elementos superiores. Seleccione utensilios que
tengan bases planas lo suficientemente grandes
para cubrir el elemento. La relación adecuada
entre el utensilio y el elemento mejorará la eficiencia
al cocinar.
Si el utensilio es más pequeño que el elemento, una
porción del elemento quedará expuesta y puede
encender la ropa o un tomaollas.
Solamente ciertos tipos de utensilios de vidrio,
vidrio/cerámico, cerámica, gres u otros utensilios
vidriados son convenientes para cocinar en la
superficie o en el horno sin quebrarse debido al
repentino cambio de temperatura. Siga las
instrucciones del fabricante del utensilio cuando
use vidrio.
30
Page 32

Instrucciones Importantes Sobre Seguridad,
cont.
Gire los mangos de los utensilios hacia el centro
de la cubierta, no hacia la habitación o sobre otro
elemento superior. Esto reduce el riesgo de
quemaduras, encendido de materiales inflamables
o derrames si el sartén es tocado accidentalmente
o alcanzado por niños pequeños.
Elementos
Tubulares
Para evitar daño a los elementos calefactores
removibles, no los sumerja, remoje ni lave en un
lavavajillas o en un horno autolimpiante. Un
elemento dañado puede producir un cortocircuito
resultando en un incendio o riesgo de choque
eléctrico.
Asegúrese de que los platillos protectores estén
en su lugar pues la ausencia de estos durante la
cocción puede dañar el alambrado.
Forros Protectores: No use papel de aluminio
para forrar los platillos protectores o la parte
inferior del horno, excepto como se sugiera en la
guía. La instalación incorrecta de estos forros
puede resultar en un riesgo de choque eléctrico o
incendio.
Cubierta de
Vidrio Cerámico
NUNCA cocine sobre una cubierta rota. Si la
cubierta de la estufa se rompe, los agentes de
limpieza y los derrames pueden penetrar la
cubierta rota y crear un riesgo de choque eléctrico.
Póngase en contacto con un técnico calificado
inmediatamente.
Limpie la cubierta con cuidado. Algunos
limpiadores pueden producir vapores nocivos si
se aplican a una superficie caliente. Si se usa una
esponja, paño o toalla de papel húmeda en una
área de la cubierta que esté caliente, tenga cuidado
para evitar quemaduras con el vapor.
Ollas Profundas
para Freír en Aceite
Use extremo cuidado cuando mueva la olla con
aceite o descarte la grasa caliente. Deje que la
grasa se enfríe antes de intentar mover la olla.
Horno
Tenga cuidado cuando abra la puerta del horno.
Deje que escape el aire o el vapor caliente antes de
sacar o volver colocar el alimento.
Para un funcionamiento y rendimiento apropiado
del horno, no bloquee ni obstruya el conducto de
ventilación del horno. Cuando el horno no esté
en uso, el área cerca del respiradero se calientan
lo suficiente como para causar quemaduras.
Siempre coloque las parrillas del horno en la
posición deseada cuando el horno esté frío. Si es
necesario mover una parrilla cuando el horno
está todavía caliente, no deje que el tomaollas
toque el elemento calefactor caliente.
Elementos
Calefactores
NUNCA toque la superficie o los elementos
calefactores del horno, las áreas cerca de los
elementos o las superficies interiores del horno.
Los elementos calefactores pueden estar calientes
aún cuando se vean de color obscuro. Las áreas
cerca de los elementos superiores y de las superficies interiores del horno pueden calentarse lo
suficiente como para causar quemaduras. Durante y después del uso, no toque ni deje que las
ropas u otros materiales inflamables entren en
contacto con los elementos calefactores, con las
áreas cerca de los elementos o con las superficies
interiores del horno hasta que no se hayan
enfriado completamente.
Otras superficies potencialmente calientes son: la
cubierta de la estufa, las áreas que están dirigidas
hacia la cubierta, el respiradero del horno y las
superficies cerca de la abertura del respiradero,
la puerta del horno, las áreas alrededor de la
puerta y la ventana del horno.
Seguridad para los
Niños
NUNCA deje a los niños solos o sin supervisión
cuando el electrodoméstico esté en uso o esté
caliente.
ATENCION: NUNCA guarde artículos de interés
para los niños en los armarios que están situados
sobre la estufa o en el protector trasero. Los niños
que se suben a la estufa, a la puerta o al gabinete
para alcanzar los artículos pueden dañar el
electrodoméstico, quemarse o lesionarse
gravemente.
NUNCA permita que los niños se sienten o se
paren en ninguna parte del electrodoméstico.
Se les debe enseñar a los niños que el electrodoméstico y los utensilios que están en él o sobre
él pueden estar calientes. Deje enfriar los
utensilios calientes en un lugar seguro, fuera del
alcance de los niños. Se les debe enseñar a los
niños que un electrodoméstico no es un juguete
y que no deben jugar con los controles u otras
piezas de la estufa.
Campanas
Extractoras
Limpie la campana de la estufa y los filtros con
frecuencia para evitar que la grasa u otros
materiales inflamables se acumulen y de tal modo
evitar incendios.
Encienda el ventilador cuando cocine alimentos
flameados (tal como ‘Cherries Jubilee’) bajo la
campana.
Aviso y
Advertencia
Importante Sobre
Seguridad
AVISO IMPORTANTE RESPECTO A LOS
PAJAROS DOMESTICOS: Nunca mantenga
los pájaros de jaula en la cocina o en habitaciones
hasta donde puedan llegar los humos de la cocina.
Los pájaros tienen un sistema respiratorio muy
sensitivo. Los humos producidos durante el
ciclo de autolimpieza del horno pueden ser
perjudiciales o mortales para los pájaros. Los
humos que despide el aceite de cocina, la grasa,
la margarina, cuando se sobrecalientan y la vajilla
antiaderente sobrecalentada pueden también ser
perjudiciales.
Conserve Estas Instrucciones para Referencia Futura
31
Page 33

Cocinando en la Estufa
Controles
Superiores
Use estos controles para encender los elementos
superiores. Se dispone de una selección infinita
de ajustes del calor desde ‘LOW’ (BAJO) hasta
‘HIGH’ (ALTO). Estas perillas pueden colocarse
en cualquiera de estos ajustes o entre ellos.
Programación de los
Controles
1. Coloque el utensilio sobre el elemento superior.
2. Oprima y gire la perilla en cualquier dirección
hasta el ajuste de calor deseado.
•
En el panel trasero se encuentra marcado
cual elemento controla cada perilla. Por
ejemplo, indica el elemento
derecho delantero.
3. Hay una luz indicadora situada en el panel de
control. Cuando una o ambas de las perillas
de control se encienden, la luz se iluminará.
La luz se apagará cuando el (los) elemento(s)
superior(es) se apague(n).
4. Después de cocinar coloque la perilla en la
posición ‘OFF’ (APAGADO). Retire el
utensilio.
Ajustes de Calor
Sugeridos
El tamaño, tipo de utensilio y la cocción afectarán
el ajuste del calor. Para información sobre los
utensilios y otros factores que afectan los ajustes
del calor, consulte el folleto “La Cocina Fácil”.
ATENCION:
Antes de Cocinar
•
Siempre coloque un utensilio en el
elemento superior antes de encenderlo.
Para evitar daño a la estufa, nunca
encienda un elemento superior sin tener
un utensilio sobre él.
•
NUNCA use la cubierta de la estufa como
una área para guardar alimentos o
utensilios.
Mientras Cocina
•
Asegúrese de que usted sabe cual perilla
controla cada elemento. Asegúrese de
que usted encendió el elemento correcto.
•
Comience a cocinar en un ajuste de calor
alto luego reduzca a un ajuste más bajo
para completar la operación. Nunca use
un ajuste de calor alto para cocinar durante un tiempo prolongado.
•
NUNCA permita que una olla hierva hasta
secarse. Esto podría dañar la olla y el
electrodoméstico.
•
NUNCA toque la superficie de la estufa
hasta que no se haya enfriado. Es de
esperar que algunas de las piezas de la
superficie, especialmente alrededor de
los elementos, se entibien o calienten
mientras está cocinando. Use tomaollas
para proteger sus manos.
Después de Cocinar
•
Asegúrese de que los elementos
superiores estén apagados.
•
Limpie cualquier derrame tan pronto
como sea posible.
Otras Sugerencias
•
Si existen armarios directamente sobre
la superficie de cocinar, coloque en ello
artículos de uso poco frecuente y que
pueden ser guardados con seguridad
en un área que estará sujeta al calor.
Algunas temperaturas pueden no ser
seguras para artículos tales como
líquidos volátiles, limpiadores o
rociadores en aerosol.
•
NUNCA deje ningún artículo,
especialmente artículos de plástico,
sobre la cubierta de la estufa. El aire
caliente proveniente del respiradero
puede encender los artículos
inflamables, derretir o ablandar los
plásticos o aumentar la presión en los
contenedores cerrados haciéndolos
reventar.
•
NUNCA permita que el papel de
aluminio, los termómetros de carne o
cualquier otro objeto de metal, a
excepción de una olla sobre el elemento
superior, tenga contacto con los
elementos calefactores.
‘High’ (Alto): Se usa para hacer hervir un líquido.
Siempre reduzca el ajuste a un calor más bajo
cuando los líquidos comiencen a hervir o cuando
los alimentos comiencen a cocinarse.
‘Medium’ (Mediano): Usado para mantener un
hervor lento para grandes cantidades de líquido
y para la mayoría de
las frituras.
‘Low’ (Bajo): Se
utiliza para mantener los alimentos
calientes y derretir
chocolate y mantequilla.
32
Page 34

Cocinando en la Estufa
, cont.
Superficie de los
ElementosTubulares
(modelos selectos)
Cubierta de Porcelana
Alzable
Para bajar la cubierta: Sujete el borde delantero
de la cubierta y cuidadosamente empuje hacia
atrás en cada varilla de soporte para soltarla.
Luego suavemente baje la cubierta a su lugar. Las
varillas de soporte se deslizarán dentro del marco
de la estufa.
NOTA: La cubierta resbalar-en y gota-en rangos
no levanta para arriba.
Para evitar que la cubierta se
descolore o se manche:
•
Limpie la cubierta de la estufa después de
cada uso.
•
Limpie los derrames ácidos o azucarados
tan pronto como la cubierta se haya
enfriado pues estos derrames pueden
descolorar o marcar la porcelana.
Las estufas autoestables tienes una cubierta de
porcelana que puede ser levantada para tener
acceso conveniente al área debajo de la cubierta.
Para levantar la cubierta: Cuando esté fría,
sujete la cubierta por el borde delantero.
Suavemente levántela hasta que las dos varillas (si
el equipar) de soporte en la parte delantera de la
cubierta entren en su lugar a presión.
VARILLA DE
SOPORTE
Elementos Tubulares
•
Cuando un elemento se enciende, pasa por
ciclos de encendido y apagado para mantener
el ajuste de calor seleccionado.
•
Los elementos tubulares son autolimpiables.
•
No los sumerja en agua.
Para sacar: Cuando esté frío, levante el elemento.
Cuidadosamente tire de él hacia afuera y sacándolo
del receptáculo.
Para volver a colocar: Inserte los bornes del
elemento en el receptáculo. Guíe el elemento
hasta que quede en su lugar. Oprima hacia abajo
en el borde exterior del elemento hasta dejarlo
nivelado sobre el platillo protector.
Platillos Protectores
Los platillos protectores debajo de cada elemento
recogen los derrames y deben ser usados siempre.
La ausencia de los platillos protectores cuando
esté cocinando puede dañar el alambrado u otras
parte debajo de la cubierta.
Para evitar el riesgo de choque eléctrico o de un
incendio, nunca forre los platillos protectores con
papel de aluminio.
Los platillos protectores se descolorarán (manchas
azules/doradas) y agrietamiento con el tiempo, si
se sobrecalientan. Esta descoloración o agrietamiento es permanente. Sin embargo, esto no afecta
la eficacia al cocinar.
Para proteger el acabado de los
platillos protectores:
•
Para disminuir la descoloración y agrietamiento, evite usar calor alto por períodos
de tiempo prolongado.
•
No use utensilios demasiado grandes. Los
utensilios no deben extenderse 2,5-5 cm
(1-2 pulgadas) más allá del elemento.
•
Cuando prepare conservas o cocine con
ollas grandes, use el Elemento para
Conservas (Modelo CE1). Póngase en
contacto con su distribuidor para los
detalles o llame al 1-800-688-8408.
•
Límpielos con frecuencia. (Ver sección
Limpieza, página 38.)
33
BORNES
Page 35

Superficie de Vidrio Cerámico
(modelos selectos)
• No deslice utensilios de aluminio a través de
NOTAS:
•
La cubierta de la estufa puede emitir un poco de humo y olor la primera vez que se utiliza.
Esto es normal.
•
Cuando se enciende un elemento se puede ver un reflejo rojo a través de la superficie de
vidrio de cerámico. El elemento se encenderá y apagará para mantener el ajuste de calor
preseleccionado.
•
Las cubiertas de vidrio cerámico retienen el calor por un cierto período después que se ha
apagado la estufa. Cuando la luz de SUPERFICIE CALIENTE se apaga (ver a continuación),
el área donde se cocina estará fría al tacto.
•
NOTA: No intente levantar la cubierta de la estufa.
Elementos Superiores
Los elementos superiores en su estufa están
identificados por diseños permanentes en la
superficie de vidrio cerámico. Para cocinar de
manera más eficiente, use un utensilio que sea
del mismo tamaño que el elemento.
Los utensilios no deben extenderse más allá de
1
/2 a 1 pulgada del tamaño del elemento.
Para mayor información sobre los utensilios de
cocina, consulte el folleto “La Cocina Fácil”.
Luz Superficial
NOTAS:
•
Las superficies de vidrio cerámico retienen
el calor. Apague los elementos unos
pocos minutos antes de que los alimentos
estén bien cocinados y use el calor
retenido para completar la cocción.
Debido a las características de retención
de calor, los elementos no responderán a
los cambios en los ajustes tan
rápidamente como lo hacen los elementos
tubulares. En caso de un posible derrame,
retire el utensilio del elemento.
Caliente
La luz de indicador, localizado en la superficie o
en el protector trasero, se adelantará cuando el
control es determinado y continuará brillando
intensamente hasta que el cooktop se ha
refrescado.
Utensilios de Cocina
Para obtener un máximo rendimiento al cocinar,
use utensilios gruesos, planos, cuya parte inferior sea suave y del mismo diámetro que el
elemento. (Ver “La Cocina Fácil” para las
características y recomendaciones de los
utensilios de cocina.)
Sugerencias para
Proteger la Cubierta
de Vidrio Cerámico
• Antes de usar por primera vez, limpie la
cubierta. (Ver Limpieza, Página 38.)
• No use utensilios de vidrio. Pueden rayar la
superficie.
• No deje que en la cubierta caliente se derritan
plásticos, azúcar o alimentos con alto contenido
de azúcar. Si esto sucede, limpie
inmediatamente. (Ver Limpieza, Página 38.)
• Nunca deje que una olla hierva hasta quedar
seca pues esto dañará la superficie y el utensilio.
• Nunca use la cubierta como una superficie de
trabajo ni como una tabla de cortar. Nunca
cocine alimentos directamente sobre la cubierta.
• Nunca coloque un soporte o un aro de wok
entre la cubierta y el utensilio. Estos artículos
pueden marcar o rayar la cubierta.
una cubierta caliente. Los utensilios pueden
dejar marcas que deben ser limpiadas
inmediatamente. (Ver Limpieza, Página 38.)
• Asegúrese de que la cubierta y la parte inferior
del utensilio estén limpias antes de encender la
estufa a fin de evitar rayaduras.
• Para evitar las rayaduras o daño a la cubierta de
vidrio cerámico, no deje azúcar, sal o grasas
sobre los elementos. Limpie la cubierta con un
paño limpio o con toallas de papel antes de
usarla.
• Nunca use un paño o una esponja sucia para
limpiar la cubierta de la estufa. Esto puede
dejar una película que puede manchar la
cubierta después que el área se calienta.
• No use un utensilio pequeño en un elemento
grande. Esto no sólo desperdicia energía sino
que también pueden producirse derrames
calientes sobre la cubierta los cuales requieren
limpieza adicional.
• No use utensilios no-planos de la especialidad
que son de gran tamaño o desiguales por
ejemplo woks inferiores redondos, los
conserveros ondulados y las planchas inferiores
y/o de gran tamaño.
• No deslice utensilios de metal pesados a través
de la cubierta pues pueden rayarla.
• No use aluminio ni contenedores del tipo de
aluminio. El aluminio se puede derretir en la
cubierta de vidrio cerámico. Si el metal se derrite
en la cubierta, no use la estufa. Llame a un
técnico autorizado.
• Si se produce un derrame cuando esté
cocinando, límpielo inmediatamente de la
cubierta cuando ésta esté caliente para evitar
una limpieza más difícil después. Tenga mucho
cuidado, limpie el derrame con una toalla seca
y limpia.
• No deje que los derrames permanezcan sobre
la cubierta o sobre la moldura de la cubierta por
un período de tiempo prolongado.
• No use polvos de limpieza abrasivos ni esponjas
de restregar que puedan rayar la cubierta.
• No use blanqueador a base de cloro, amoníaco
ni otros limpiadores que no hayan sido
específicamente recomendados para usar en el
vidrio cerámico.
• Para conservar el apperance del cubierta de
vidrio cerámica, limpie después de cada uso.
34
Page 36

Reloj y Indicador de Tiempo
Control del Reloj y del Indicador de Tiempo
(modelos selectos)
Clock
Timer
NOTA: El indicador visual destellará cuando el electrodoméstico ha sido enchufado por primera ve z o cuando ha habido una interrupción de la corriente
eléctrica.
Programación del Reloj:
1. Oprima la tecla ‘Clock’.
• Se escuchará un sonido corto cuando se
oprima la tecla ‘Clock’.
2. Oprima u oprima y mantenga oprimida la
tecla ▲ o la tecla ▼ hasta que aparezca la
hora correcta del día en el indicador visual.
• Oprima para cambiar la hora en
incrementos de un minuto.
• Oprima y mantenga oprimida para
cambiar la hora en incrementos de 10
minutos.
Para desplegar la hora del día cuando el
indicador de tiempo está activo, oprima la tecla
‘Clock’.
Programación del
Indicador de Tiempo
(‘Timer’):
El indicador de tiempo puede ser programado
desde un minuto (0:01) hasta 12 horas (12:00). El
indicador de tiempo no controla el horno.
1. Oprima la tecla ‘Timer’.
• Se escuchará una señal sonora cuando se
oprima la tecla ‘Timer’.
segundos. Los dos puntos destellando
indican que el indicador de tiempo está
en uso.
• Si se oprime la tecla ‘Clock’, los dos
puntos seguirán destellando para mostrar
de que el indicador de tiempo está en uso.
3. Se escuchará un sonido en un minuto (0:01)
4. Cuando termina la cuenta del indicador de
tiempo, 0:00 aparecerá en el indicador visual y se escucharán tres sonidos cortos.
• 0:00 se desplegará en el indicador visual.
• Se escuchará una señal sonora cada 10
2. Oprima u oprima y mantenga oprimida la
tecla ▲ o la tecla ▼ hasta que aparezca la hora
correcta del día en el indicador visual.
• Oprima para cambiar la hora en
incrementos de un minuto.
• Oprima y mantenga oprimida para
cambiar la hora en incrementos de 10
minutos.
• El indicador de tiempo se activará auto-
máticamente después de unos pocos
segundos durante 10 minutos o hasta que
se cancele el indicador de tiempo.
Para Cancelar el Indicador
de Tiempo:
Oprima la tecla ‘Timer’ y la hora correcta del
día reaparecerá en el indicador visual.
NOTA: Cuando aparezca 0:00, si se oprime ya
sea la tecla ‘Timer’ o la tecla ‘Clock’ se
desactivará el indicador de tiempo.
35
Page 37

Cocinando en el Horno
Horneado, Asado y Asado a la Parrilla
ADVERTENCIAS para el Funcionamiento del Horno:
•
Asegúrese de que todos los materiales de empaque hayan sido
sacados del horno antes de encenderlo.
•
No use el horno para guardar alimentos o utensilios de cocina.
•
Advertencia Sobre Alimentos Preparados: Siga las instrucciones
del fabricante de los alimentos, si un recipiente plástico de
Para los tiempos y sugerencias adicionales sobre horneado, asado y asado a la parrilla, vea el folleto “La Cocina Fácil”.
alimento congelado y/o su tapa se deforma, comba o se daña de
otra manera la cocción, descarte inmediatamente el alimento y su
envase. El alimento puede estar contaminado.
•
Siga las instrucciones del fabricante cuando use bolsas para
cocinar en el horno.
Control del Horno
La perilla ‘Oven Temp’ (Temperatura del Horno)
se usa para seleccionar la temperatura del horno.
Siempre gire esta perilla a la temperatura deseada.
Para programar la temperatura exacta del horno, no
gire la perilla a una temperatura más alta para luego
volver a una más baja.
funcionará si la perilla del selector se deja en la
posición de reposo.
4. Coloque el alimento en el centro del horno,
dejando un mínimo de dos pulgadas entre el
utensilio y las paredes del horno.
5. Verifique la cocción del alimento cuando haya
transcurrido el tiempo mínimo indicado en la
receta. Hornee por más tiempo si es necesario.
6. Retire el alimento del horno. Coloque las perillas
‘Oven Temp’ y ‘Selector’ (modelos selectos) en
la posición ‘Off’ (apagado).
Ajuste del horno para asar
a la parrilla:
1. Coloque la parrilla del horno en la posición
recomendada. (Ver la tabla abajo).
2. Gire la perilla ‘Oven Temp’ a ‘Broil’ (Asar a la
Parrilla).
3. Gire la perilla ‘Selector’ (modelos selectos) a
‘Broil’ (Asar a la Parrilla). NOTA: El horno no
Tipo de Carne la Parrilla* Cocción Cocción (Minutos)**
funcionará si la perilla del selector se deja en la
posición de reposo.
4. Si lo desea, precaliente el elemento del asador
durante tres minutos antes de colocar el alimento
en el horno.
5. Ase a la parrilla con la puerta del horno abierta en
la primera posición de tope (cerca de 4 pulgadas).
6. De vuelta el alimento una vez cuando esté a medio
asar.
7. Retire el alimento del horno. Coloque las perillas
‘Oven Temp’ y ‘Selector’ (modelos selectos) en la
posición ‘Off’ (apagado).
Luz Indicadora del Horno
La luz indicadora del horno ‘OVEN’ se ilumina cada
vez que el horno se encienda. Cuando el horno llega
a la temperatura preprogramada, la luz indicadora
‘OVEN’ se apaga. Después la luz ‘OVEN’ se encenderá
y apagará a medida que los elementos del horno
pasan por ciclos de encendido y apagado para
mantener la temperatura programada del horno.
Tabla para Asar a la Parrilla
Posición de Término de Tiempo Total de
La perilla del selector (modelos selectos) determina
el tipo de operación del horno.
Dé vuelta a esta perilla a la configuración deseada.
Cada configuración es identificada por un
sangrado de márgenes (parada) y un sonido del
click.
Ajuste del horno para
horneado:
1. Cuando el horno esté frío, coloque la parrilla en
el horno.
2. Gire la perilla ‘Oven Temp’ a la temperatura
deseada.
3. Gire la perilla ‘Selector’ (modelos selectos) a
‘Bake’ (Horneado). NOTA: El horno no
Tocino 4 Bien Asado 6 a 10 min.
Bistecs -- 2, 5 cm (1") de grosor 4 Medio 15 a 18 min.
Pollo -- Presas 3 o 4 Bien Asado 28 a 38 min.
Pescado -- Filetes 4 Desmenuzado 8 a 12 min.
Bistecs, 2, 5 cm (1") de grosor 4 Desmenuzado 10 a 15 min.
Carne de Res Molida -- Hamburguesas,
Jamón -- Rebanadas Precocidas, 1,3 cm (
Chuletas de Cerdo -- 2, 5 cm (1") de grosor 4 Bien Asado 22 a 26 min.
* La posición de la parrilla superior es #5
** Los tiempos de cocción son aproximados y pueden variar dependiendo de la carne. Los tiempos de
asado a la parrilla aumentarán y el dorado será ligeramente menor si la estufa está
instalada en un circuito de 208 voltios.
2 cm (3/4") de grosor 4 Bien Asado 15 a 18 min.
1
/2") de grosor 4 Tibio 8 a 12 min.
4 Bien Asado 19 a 23 min.
36
Page 38

Cocinando en el Horno
, cont.
Respiradero del
Parrillas del Horno
Horno
Cuando el horno esté en uso, el área cerca del
respiradero puede sentirse caliente bastante por
causa quemaras. Nunca bloquee la abertura del
respiradero.
•
En un elemento tubular
superior, asegúrese de
que el platillo protector
en la ubicación del
respiradero tenga un
agujero en el centro. No cubra el platillo protector con papel de aluminio.
•
El respiradero del horno esta localizando en la
detrás de la cubierta de resbalar-en y gota-en
rangos.
RESPIRADERO DEL
HORNO:
• Superficie de Vidrio
Cerámico
• Superficie con
elementos tubulares
ABERTURA DEL
RESPIRADERO
DEL HORNO
Luz del Horno
(modelos selectos)
Oprima el interruptor en el panel de
control para encender y apagar la luz
del horno.
cambiar la posición de las parrillas
cuando el horno esté caliente.
Su horno tiene dos parrillas. Han sido diseñadas
con un tope de enganche en el borde.
Para sacar: Tire de la parrilla derecho hacia
afuera hasta que se detenga en la posición del
tope; de enganche; levante el frente de la parrilla
y tírela hacia afuera.
Para volver a colocar: Coloque la parrilla en
el soporte de la parrilla en el horno; incline
levemente hacia arriba el extremo delantero;
deslice la parrilla hacia atrás hasta que pasa sobre
los topes de enganche; baje el frente de la parrilla
y deslícela hacia adentro del horno.
No cubra una parrilla completa con papel de
aluminio ni coloque papel de aluminio en la
parte inferior del horno. Se afectarán los
resultados del horneado y se puede dañar la
parte inferior del horno.
ATENCION: No intente
PARRILLA 4:
Se usa para la mayoría de los asados a la
parrilla.
PARRILLA 3:
Se usa para hornear alimentos en una bandeja
de hornear galletas o un molde para rollo de
mermelada, para pasteles, pays de frutas o
alimentos congelados.
PARRILLA 2:
Se usa para asar cortes de carne pequeños,
cacerolas, hornear baguetas de pan, pasteles
en moldes de tubo o flanes.
PARRILLA 1:
Se usa para asar pedazos grandes de carne y
carne de ave, pays congelados, suflés de postre
o pasteles esponjosos.
HORNEADO CON VARIAS PARRILLAS:
Dos parrillas: Use las posiciones 2 y 4, o 1 y 4.
Media Parrilla
Se dispone, como accesorio, de una media parrilla
para aumentar la capacidad del horno. Se instala
en la sección superior del lado izquierdo del
horno y ofrece espacio para una plato de verduras
cuando se ha colocado una asadera grande en la
parrilla inferior. Póngase en contacto con su
distribuidor para
obtener el accesorio
“HALFRACK” o
para solicitar, llame
al 1-800-688-8408.
37
Posiciones de la
Parrillas
PARRILLA 5 (posición más alta):
Se usa para tostar pan o asar a la parrilla
alimentos delgados no grasosos.
Page 39

Cuidado y Limpieza
PRECAUCIONES para la Limpieza:
•
Asegúrese de que la estufa esté apagada y que todas las piezas
estén frías antes de manipularla o limpiarla. Esto es para evitar
daño y posibles quemaduras.
•
Para evitar manchas o decoloración limpie la estufa después de cada
uso.
•
Si se retira alguna pieza, asegúrese de que la vuelve a colocar en la
forma correcta.
Tabla de Limpieza
Piezas Procedimiento de Limpieza
Protector Trasero La porcelana esmaltada es vidrio fusionado con metal y puede agrietarse o picarse con el mal uso. Es resistente al ácido pero no es a prueba
y Cubierta, de ácido. Todos los derrames especialmente los derrames ácidos o azucarados deben ser limpiados inmediatamente con un paño seco.
porcelana esmaltada•Cuando esté fría, lave con agua jabonosa, enjuague y seque.
•
Nunca limpie la superficie caliente o tibia con un paño húmedo. Esto puede causar agrietamiento o picadura.
•
Nunca use limpiadores de horno, agentes de limpieza abrasivos o cáusticos en el acabado exterior de la estufa.
Asadera e Inserto Nunca cubra el inserto con papel de aluminio pues esto evita que la grasa se escurra a la bandeja inferior.
(modelos selectos)•Coloque un paño enjabonado sobre el inserto y la bandeja; deje remojar para soltar la suciedad.
•
Lave en agua jabonosa tibia. Use una esponja de fregar con jabón para quitar la suciedad persistente.
•
La bandeja de asar y el inserto pueden ser lavados en el lavavajillas.
Cubierta - Vidrio•Nunca use limpiadores de horno, blanqueador con cloro, amoníaco o limpiadores de vidrio que contenga amoníaco. NOTA: Llame a un
Cerámico reparador autorizado si la cubierta de vidrio cerámico se agrieta, quiebra o si el metal o el papel de aluminio se derrite sobre la cubierta.
•
Deje que la cubierta se enfríe antes de limpiarla.
•
Generalidades – Siempre limpie la cubierta después de cada uso o cuando sea necesario con una toalla de papel húmeda y con Cooktop
Cleaning Creme* (número de parte 20000001)**. Luego lustre con un paño limpio y seco. NOTA: Se desarrollarán manchas permanentes si la
suciedad se deja que se cocine una y otra vez usando la cubierta cuando esté sucia.
•
Manchas Rebeldes o Marcas de Metal – Humedezca una esponja de goma que no deje marcas. Aplique Cooktop Cleaning Creme* y frote
para sacar tanta suciedad como sea posible. Aplique una capa delgada de crema, cubra con una toalla de papel húmeda y déjela reposar
durante 30 a 45 minutos ( 2 a 3 horas para el suelo muy pesado). Mantenga húmedo cubriendo la toalla de papel con el abrigo plástico.
Restriegue nuevamente, luego limpie con un paño seco y limpio. NOTA: Solamente use esponjas LIMPIAS, HUMEDAS y que no rayen y que sean
seguras para utensilios con acabado antiadherente. Se dañará el diseño y el vidrio si la esponja no está mojada, si la esponja está sucia o se usa otro tipo
de esponja.
•
Suciedades Quemadas o Pegadas – Restriegue con una esponja de goma que no deje marcas y Cooktop Cleaning Creme*. NOTA: Sostenga
un restregador con hoja de afeitar a un ángulo de 30° y restriegue cualquier suciedad que permanezca. Luego limpie como se
describió anteriormente. No use la hoja de afeitar para limpieza diaria pues puede desgastar el diseño del vidrio.
•
Plástico o Azúcar Derretida – Inmediatamente encienda el elemento a temperatura BAJA y restriegue y raspe el azúcar
o el plástico de la superficie caliente hacia un área fría. Luego apague el elemento y deje que se enfríe. Limpie el residuo
con un raspador con hoja de afeitar y Cooktop Cleaning Creme*.
Area de la Tecla del • Limpie con un paño húmedo y luego seque.
Reloj y Control • Se pueden usar limpiadores de vidrio si es que se rocía el paño primero. NO rocíe directamente en la tecla de control ni en el área del
(modelos selectos) indicador visual.
Perillas de Control • Retire las perillas de control en la posición ‘OFF’ tirando de ellas hacia adelante.
• Lave, enjuague y seque. No use agentes de limpieza abrasivos pues pueden rayar la superficie.
• Encienda cada uno de los elementos para asegurarse de que las perillas han sido reinstaladas correctamente.
Platillos Protectores, • Cuando estén fríos, lave después de cada uso, enjuague y seque para evitar manchas y decoloración.
Cromo • Para limpiar suciedad excesiva, remoje en agua caliente con jabón, luego use un limpiador abrasivo suave tal como Soft Scrub* y una esponja
(modelos selectos) de fregar de plástico. No use agentes de limpieza abrasivos.
Platillos Protectores, La porcelana se puede descolorar o agrietarse si se sobrecalienta. Esto es normal y no afectará el rendimiento al cocinar.
Porcelana • Cuando se enfríe, lave después de cada uso, enjuague y seque para evitar manchado o descoloración. Los platillos pueden ser lavados en
(modelos selectos) el lavavajillas.
• Para limpiar suciedad excesiva, remoje en agua caliente con jabón, luego use un limpiador abrasivo suave tal como ‘Soft Scrub’* y una esponja
plástica de fregar.
• Par suciedad quemada, sáquelos de la estufa, colóquelos sobre periódicos y cuidadosamente rocíe con un limpiador de horno comercial. (No
rocíe las superficies adyacentes.) Coloque en una bolsa de plástico y deje remojar durante varias horas. Poniéndose guantes de goma, sáquelos
de la bolsa, lave, enjuague y seque bien.
*Los nombres de los productos son marcas registradas de sus respectivos fabricantes.
**Para solicitar pedidos, llame al 1-800-688-8408.
38
Page 40

Cuidado y Limpieza
, cont.
Tabla de Limpieza – Continuación
Piezas Procedimiento de Limpieza
Esmalte, pintado•Cuando esté frío, lave con agua jabonosa, enjuague y seque. Nunca lave una superficie caliente o tibia con un paño húmedo pues
Paneles laterales esto puede dañar la superficie y puede causar una quemadura por vapor.
Gaveta de
almacenamiento No use agentes de limpieza abrasivos, cáusticos o ásperos tales como esponjas de acero o limpiadores de horno. Estos productos
Puerta del horno Estos productos rayarán o dañarán permanentemente la superficie.
(modelos selectos)
Manija de la puerta NOTA: Use toallas secas o un paño para limpiar los derrames, especialmente derrames ácidos o azucarados. La superficie se puede
(modelos selectos) descolorar u opacar si la suciedad no es extraída inmediatamente. Esto es especialmente importante para las superficies blancas.
•
Para las manchas persistentes, use agentes de limpieza abrasivos suaves tales como una pasta de bicarbonato de soda o Bon Ami*.
Vidrio
Ventana del horno•Lave con agua y jabón. Enjuague con agua limpia y seque. El limpiador de vidrio se puede usar si primero se rocía en el paño.
(modelos selectos)•No use materiales abrasivos tales como esponjas para fregar, agentes de limpieza en polvo o lana de acero. Dañarán el vidrio.
Puerta del horno
(modelos selectos)
Acabados de metal•Lave con agua y jabón, limpiador de vidrio o sprays líquidos suaves.
Guarniciones
Interior del Horno•Limpie con frecuencia usando limpiadores abrasivos suaves y una esponja de plástico.
Parrillas del Horno•Limpie con agua jabonosa.
Acabados de Plástico•Cuando esté frío, limpie con agua y jabón, enjuague y seque.
Manijas de la puerta•Use un limpiador de vidrio y un paño suave.
(modelos selectos)
Guarnición trasera NOTA: Nunca use limpiadores de horno, limpiadores en polvo abrasivos o líquidos cáusticos en los acabados de plástico. Estos agentes de
Tapas de extremo limpieza rayarán o marcarán el acabado.
•
Evite usar cantidades excesivas de agua que pueda escurrirse debajo o detrás del vidrio causando manchas.
•
Para evitar rayar u opacar el acabado, no use abrasivos suaves, abrasivos, limpiadores cáusticos o ásperos tales como
limpiadores de horno.
•
No use esponjas de fregar metálicas porque rayarán la superficie.
•
Cuando use limpiadores de horno comerciales siga las instrucciones del fabricante.
•
Limpie los derrames ácidos (alimentos a base de tomate o leche) tan pronto como sea posible con agua y jabón. Si el derrame no
es limpiado, puede descolorar la porcelana.
Para facilitar la limpieza, saque la puerta del horno, si lo desea (ver Sección Mantenimiento, página 40).
•
Saque las manchas persistentes con limpiador en polvo o una esponja de fregar con jabón. Enjuague y seque.
NOTA: Para evitar manchas o descoloración, limpie los derrames de grasa, manteca o ácido (tomate, limón, vinagre, leche, jugo de fruta,
escabeche) inmediatamente con una toalla de papel o un paño seco.
*Los nombres de los productos son marcas registradas de sus respectivos fabricantes.
39
Page 41

ANTI-TIP BRACKET
LEVELING LEG
Mantenimiento
Puerta del Horno
Ventana del Horno
(modelos selectos)
ADVERTENCIAS:
•
No coloque peso excesivo ni se pare en
la puerta del horno. Esto podría hacer
volcar la estufa, quebrar la puerta o
lesionar al usuario.
•
No intente abrir o cerrar la puerta ni
hacer funcionar el horno hasta que la
puerta no ha sido debidamente
reemplazada.
•
Nunca coloque los dedos entre la bisagra
y el marco delantero del horno. Los
brazos de articulación son montados a
resorte. Si se golpea accidentalmente
la bisagra se cerrará bruscamente contra el marco del horno y puede lesionar
sus dedos.
Para sacar:
1. Cuando esté fría, abra la puerta del horno
hasta la posición tope de asar a la parrilla
[abierta aproximadamente 10 cm (cuatro
pulgadas)].
2. Sujete la puerta de
cada lado. No use
la manija de la
puerta para
levantarla.
3. Levante uniformemente hasta que la puerta
se salga de los brazos de articulación.
Para volver a colocar:
1. Sujete la puerta de cada lado.
2. Alinee las ranuras de la puerta con los
brazos de articulación de la estufa.
3. Deslice la puerta hacia los brazos de
articulación hasta que esté completamente
asentada en las bisagras. Empuje hacia
abajo las esquinas superiores de la puerta
para asentarla completamente en las
bisagras. La puerta no debe quedar torcida.
Para proteger la ventana de la
puerta del horno:
1. No use agentes de limpieza abrasivos tales
2. No golpee el vidrio con ollas, sartenes,
3. No cierre la puerta del horno hasta que las
Al golpear, rayar, hacer vibrar o esforzar el
vidrio puede debilitar su estructura causando
un mayor riesgo de rotura en una fecha posterior.
Luz del Horno
(modelos selectos)
ADVERTENCIAS:
Para reemplazar el foco:
1. Saque el foco.
2. Reemplace con un foco para electrodomésticos
3. Vuelva a enchufar la estufa. Vuelva a
como esponjas de fregar de lana de acero o
limpiadores en polvo pues pueden rayar el
vidrio.
muebles, juguetes u otros objetos.
parrillas del horno no estén en su lugar.
•
Desconecte la energía a la estufa antes
de reemplazar el foco.
•
Use un tomaollas seco para evitar posible
daño a sus manos cuando esté
reemplazando el foco.
•
Asegúrese de que el foco esté frío antes
de tocarlo.
•
No toque el foco caliente con un paño
húmedo pues esto puede quebrar el foco.
de 40 wats.
programar el reloj si equiparando.
Tornillos
Niveladores
ATENCION:
•
Verifique si el soporte antivuelco
está asegurando al piso uno de los
tornillos niveladores traseros para
evitar que la estufa se vuelque
accidentalmente.
La estufa debe ser nivelada cuando se
instala. Si la estufa no está nivelada, gire
los tornillos niveladores de plástico
ubicados en cada esquina de la
estufa hasta que quede
nivelada.
DISPOSITIVO
ANTIVUELCO
TORNILLO NIVELADOR
Gaveta de
Almacenamiento
(modelos selectos)
La gaveta de almacenamiento se encuentra en
la parte inferior de la estufa y es segura y
conveniente para guardar utensilios de cocina
de metal y vidrio. NO almacene plástico,
artículos de papel, alimentos o materiales
inflamables en esta gaveta. Saque la gaveta
para limpiar debajo de la cocina.
Para sacar: Vacíe la gaveta y luego tírela hacia
afuera hasta la primera posición de tope.
Levante el frente de la gaveta y tírelo a la
segunda posición de tope. Sujete los lados y
levántela hacia arriba y hacia afuera para sacar
la gaveta.
Para volver a colocar: Deslice los extremos de
la gaveta en los rieles. Levante la parte delantera
de la gaveta y suavemente empújela a la primera
posición de tope. Levántela y continúe
deslizando la gaveta hasta la posición cerrada.
NOTA: La puerta del horno en una estufa
nueva puede sentirse “esponjosa” cuando
se cierra. Esto es normal y disminuirá con
el uso.
40
Page 42

Antes de Solicitar Servicio
Para la mayoría de los problemas, haga esto primero:
•
Revise si los controles del horno están
debidamente ajustados.
•
Verifique si el enchufe está firmemente insertado
en el tomacorriente.
•
Verifique o vuelva a reponer el disyuntor.
Verifique o reemplace el fusible.
•
Verifique el suministro de energía eléctrica.
Toda la estufa o parte de ella
no funciona.
•
Revise si la superficie y/o los controles del horno
están debidamente ajustados. Ver páginas 32 y 36.
La superficie de vidrio
cerámica muestra
desgaste.
1. Pequeños rayones o abrasiones.
•
Revise para asegurarse que la superficie
para cocinar y el fondo de la bandeja estén
limpios. No deslice sartenes de vidrio o de
metal por la cubierta. Asegúrese que el fondo
del sartén no sea áspero. Utilice los agentes
de limpieza recomendados. Consulte la
página 38.
2. Marcas de metal.
•
No deslice los sartenes de metal por la
cubierta. Si aparecen marcas de metal, limpie
cuando ya esté frío con la Cooktop Cleaning
Creme. Consulte la página 38.
3. Rayones o manchas de color café.
•
Los derrames no se limpiaron de inmediato.
Se limpio con una tela o esponja sucia. El
fondo del sartén no estaba limpio.
4. Áreas con brillo metálico.
•
Depósitos minerales de agua y alimento.
5. Picaduras o escamas.
•
Derrames de azúcar que no se quitaron de
inmediato. Consulte la página 38.
Los resultados del horneado
no son como se esperaban o
son distintos a los del horno
anterior.
•
Asegúrese de que el respiradero del horno no
esté bloqueado. Ver página 37 para la ubicación.
•
Verifique para asegurarse de que la estufa está
nivelada.
•
Las temperaturas a menudo varían entre un
horno nuevo y uno antiguo. A medida que pasa
el tiempo, la temperatura del horno cambia y
puede hacerse más caliente o más fría.
•
Verifique las posiciones de las parrillas del horno.
Ver página 37.
•
Consulte el folleto “La Cocina Fácil” para mayor
información sobre los utensilios de hornear y el
horneado.
•
Verifique la temperatura del horno que se
seleccionó. Asegúrese de que el horno haya sido
precalentado cuando la receta o las instrucciones
indican que debe precalentarse.
Los alimentos no se asan a la
parrilla en forma debida o sale
demasiado humo.
•
Verifique las posiciones de las parrillas del horno.
El alimento puede estar muy cerca del elemento.
•
El elemento de asar no fue precalentado.
•
El papel de aluminio se usó de manera incorrecta.
Nunca forre el inserto del asador con papel de
aluminio.
•
La puerta del horno estaba cerrada mientras se
asaba a la parrilla. Deje la puerta abierta en la
primera posición [alrededor de 10 cm (4
pulgadas)].
•
Recorte el exceso de grasa de la carne antes de
ponerla a asar a la parrilla.
•
Se usó una asadera sucia.
Se acumula humedad en el
horno o en la ventana del
horno.
•
Esto es normal cuando se cocinan alimentos con
alto contenido de humedad.
•
Se usó humedad excesiva cuando limpió la
ventana.
(modelos selectos)
Hay un fuerte olor o humo
leve cuando se enciende el
horno.
•
Esto es normal en una estufa nueva y
desaparecerá después de unos pocos usos. Si se
inicia un ciclo de limpieza el olor se “quemará”
más rápidamente.
•
Encendiendo un ventilador ayudará a extraer el
humo y/o el olor.
•
Hay suciedad excesiva de alimentos en la parte
inferior del horno.
41
Page 43

Notas
42
Page 44

Garantía de la
Lo Que No Cubren estas Garantías:
Estufa
Garantía Completa de Un Año – Piezas y
Mano de Obra
Durante un (1) año desde la fecha original de
compra al por menor, se reparará o
reemplazará gratuitamente cualquier pieza
que falle durante uso normal en el hogar.
Garantías Limitadas – Piezas Solamente
Desde el Segundo Hasta el Quinto Año – A
partir de la fecha original de compra, se
reparará o reemplazará gratuitamente las
piezas indicadas a continuación que fallen
durante uso normal en lo que respecta a las
piezas y el propietario deberá pagar todos los
otros costos incluyendo mano de obra,
kilometraje y transporte.
•
Superficie de Vidrio Cerámico - Debido a
rotura térmica.
•
Elementos Calefactores de la Superficie
de Vidrio Cerámico
Residentes Canadienses
Las garantías anteriores cubren solamente
aquellos electrodomésticos instalados en
Canadá que han sido certificados o aprobados
por las agencias de pruebas correspondientes
para cumplimiento con la Norma Nacional
de Canadá a menos que el electrodoméstico
haya sido traído a Canadá desde los EE.UU.
debido a un cambio de residencia.
Las garantías específicas expresadas anteriormente
son las UNICAS garantías provistas por el
fabricante. Estas garantías le otorgan derechos
legales específicos y usted puede tener además
otros derechos que varían de un estado a otro.
1. Situaciones y daños resultantes de cualquiera de las siguientes eventualidades:
a. Instalación, entrega o mantenimiento inapropiados.
b. Cualquier reparación, modificación, alteración o ajuste no autorizado por el fabricante
o por un centro de servicio autorizado.
c. Mal uso, abuso, accidentes o uso irrazonable.
d. Corriente eléctrica, voltaje o suministro incorrecto.
e. Programación incorrecta de cualquiera de los controles.
2. Las garantías quedan nulas si los números de serie originales han sido retirados, alterados
o no son fácilmente legibles.
3. Focos.
4. Productos comprados para uso comercial o industrial.
5. El costo del servicio o llamada de servicio para:
a. Corregir errores de instalación.
b. Instruir al usuario sobre el uso correcto del artefacto.
c. Transporte del artefacto al establecimiento de servicio.
6. Los daños consecuentes o incidentales sufridos por cualquier persona como resultado del
incumplimiento de esta garantía. En algunos estados no se permite la exclusión o
limitación de daños consecuentes o incidentales, por lo tanto la limitación o exclusión
anterior puede no aplicarse en su caso.
Si Necesita Servicio
•
Llame al distribuidor donde compró su electrodoméstico o llame a Maytag Appliances
Sales Company, Maytag Customer Assistance al 1-800-688-1120, EE.UU. y Canadá para
ubicar a un técnico autorizado.
•
Asegúrese de conservar la prueba de compra para verificar el estado de la garantía.
Consulte la sección sobre la GARANTIA para mayor información sobre las
responsabilidades del propietario para servicio bajo la garantía.
•
Si el distribuidor o la compañía de servicio no pueden resolver el problema, escriba a
Maytag Appliances Sales Company, Attn: CAIR®‚ Center, P.O. Box 2370, Cleveland, TN
37320-2370 o llame al 1-800-688-1120, EE.UU. y CANADA.
Los clientes de EE.UU. que usan TTY para personas con impedimentos auditivos o del
habla deben llamar al 1-800-688-2080.
Form No. A/08/01 Part No. 8113P302-60 74005902 Litho U.S.A.
NOTA: Cuando llame o escriba acerca de un problema de servicio, por favor incluya la
siguiente información.
a. Su nombre, dirección y número de teléfono;
b. Número de modelo y número de serie;
c. Nombre y dirección de su distribuidor o técnico de servicio;
d. Una descripción clara del problema que está experimentando;
e. Prueba de compra (recibo de compra).
•
Las guías del usuario, manuales de servicio e información sobre las piezas pueden
solicitarse a Maytag Appliances Sales Company, Maytag Customer Assistance.
 Loading...