

Page 1
HDUS_T-170SW,170SB,171S-_ 2003 8_26 5:30 PM _11°_"_2
Microwave Oven
Use and Care Manual
Table o£ Contents
Introduction ............................................. 1
Precautions to Avoid Possible
Exposure to Excessire Microwave
Energy ....................................................... 1
Important Safety Instructions ........... 2-3
Installation Recommendations .............. 4
Control Panel ....................................... 5-6
Oven Features at a Glance ..................... 7
Operating Basics ............................... 8-12
Special Features ............................... 12-17
Care and Cleaning .......................... 18-20
Questions and Answers ....................... 21
Before You Call ...................................... 22
Warranty ................................................. 23
I IMPORTANT SAFETY INSTRUCTION
Never operate _e oven when it is empty or
without the glass turntable.
Page 2
HDUS-T*170SW,I 70SB,171S-_ 2C03 a26 5:30 PM _II°_I
Introduction
Congratulations on your purchase of an over-the
range microwave oven. For best results, WC
suggest reading this guide carefully. You will
find instructions on the proper operation and
maintenance of your microwave.
PRECAUTIONS
TO AVOID
POSSIBLE
EXPOSURE TO
EXCESSIVE
MICROWAVE
ENERGY
A. Do not attempt to operate this oven
with the door open since open-door
operation can result in harmful
exposure to microwave energy. It is
important not to defeat or tamper with
the safety interlocks.
B. l)o not place any object between the
oven front face and the door or allow
soil or cleaner residue to accumulate
on sealing surfaces.
C. Do not operate the oven if it is
damaged. It is particularly important
that the oven door close properly and
that there is no damage to the: (1) door
(bent), (2) hinges and latches (broken
or loosened), (3) door seals and sealing
surfaces.
D. The oven should not be adjusted or
repaired by anyone except properly
qualified service personnel.
Page 3
HDUS-T-170SW,170SB,171£-_ 2003.8,26 5:30 P_
IMPORTANT SAFETY INSTRUCTIONS
When using electrical appliances, basic safety
precau_c_ abmddbe foil.owed,md_ the full_iug:
A_ WARKqNG - To reduce the risk ofburns,
electric shock, fire, injury to persons or
exposure in excessive microwave energy:
1.1_1 ag insecure before using t_ sppil_a¢_.
2. Read and follow the specific "PRECAUTIONS TO
AVOID POSSIBLE EXPOSURE TO EXCESSIVE
MICROWAVE ENERGY" found onpage 1.
3.This op#imace m,._t be gmunde& Connect ontyto
properly grounded outlet. See "GROUNDING
INSIRUCTIONS" onpage 4.
4. lnstellodocge thk oppliance in ac.ootden_ withtbe
providedins_dlafioninstru_ons. Do not mount over
ash_
5.This over-the-range ovm was designed for use
over ranges no wider than 30 inches. It may be
installed over both gas and electric cooking
ec_ipraeot.
6.For best operation, plug this appliance into its
own dectrical outlet, to prevent flickering of
lights, blowing of fuse or tripping of circuit
brt_d_.
7. Some products such as whole eggs and sealed
containers - for example, dosed jars - are able to
explede and should not be heated in this overLIn
rareins'lances, poached eggs have been known to
explode. Cover poached eggs and allow standing
time of one minutebeforetotting intotherct
&Foeds withmthrokenctaer "skin" such as potRtoes,
satLsages,tomatot:s, apples, chicken livers and other
ga"olots,and egg yolks (see pre_ous caution) shodd
be pitar,ed to aliow steam to escape daringcooking.
"Boilable" cooking pouches and tightly closed
plastic bags shouldbe slit,pieF..edorvented_
9.Do not he.nt,store or use flammable mg_rMs in cf
near the oven. Fumes can create a fire hazard or
explosion.
Ill.Use this appliance only for its intended use as
described in this manual. Do not tree corrosive
chemicals or vapors m this spplia_ce. This type of
oven is speciticagy designed to heat, cook or d_rmt
food. It is not designed for in&retrial,laboratory or
commer_al use. it is intended for home use tidy.
ll.As with any appliance, close supervision is
necessa_ wben used by chikk_.
1ZDo not operate this appliance if it has a damaged
eccdor plug, if it is not wod_ pr_y orif it has
berndemag_orthq_ed.
13.Tiffs applinneeshould be serviced only by qualified
service peTsonneLContact ne_eg auth(aized servine
faciiny forexamination,repulr ct edjusame_
14.Donot cover orblock anyopenmgson theappliance.
l& Do not use or store this appliance outdoom.Do not
use this product near water - for example, near a
lthaben sink, in a wet basmgm ornear a swthuning
pool, orsimilar locatiorts.
16.Do notmamn'se c,tmt ct plug in warn-.
17.Keep cord away from heated suKac_s.
I&DO notlet cordhang over edge oftable orcouuter.
19.When deaaaingsurfaoesofdoorandoventhatcome
together on dosing the door, use only mild, non-
abrasive soaps or detergems_pplied with a sponge
orsoft chtK
20.To reduce the ri.__koffirein the oven cavity:
a. Do not ov¢_ook food_Carefully attend _plim_e
when pap_, plastic or othercombustible mat_als
are placed inside the oven to facilitate cooking.
Avoid using rt:cyeled paper pro&m_ Do not use
newspaper or otht_r pnnted paper in the oven.
Such products sometimes contain impurities
which could ignite.
b. Rernovewiretwlst-des from paper or plastic bags
befc_ pla_ragff_m mo, mL
c.If mgenals inside the ovenignite, keep oven door
closed, turn oven off and disconnect the powt_
cord or shut offpower at the fuse or circuit
breabt= p,_el.
d. Do not use the oven for storage. Do not leave
paper products, cooking utensils or food in the
overtwhen notin use.
e.Donot poppoI_om exexptin a micmveaveapproved
popcorn popper or in a commeroial package
£ DOnot overcook potatoes. They may dehyda_te
and catab fire.
g. Do not use fro"daying clothes, lino_s,newspaper
orsimilarnon.food typeittang
21. Do not opoate the oven when mtpty or with an
empty utensil in avoid damage to the oven and
dang_ of lil'e.
22. Do not l_anon the overtdo_. The door isdesigned
to close tightly and seal prol_y f_"safe op_anon.
Lem_g tmthe doormay ",nmpot bre_ tbehinge&
...11101"_
2
Page 4
DUS-T-170SW,170SB,171S-_ 2003.8.26 5:30P_
IMPORTANT SAFETY INSTRUCTIONS cont.
33.To avoid _ to dang_as high voltage, DO
NOT REMOVE THE SPLATTER SHIELD
i_id_ _ m,enca,_iy.
24. Liquids, such as water, coifs, or tea are able to
be overheated beyond the bffding point without
appeanng to be boiling doe to surface tension of
the liquid_ V'lSa'blebubbling or boiling when the
container is removed frem the microwave oven is
not always present. THIS COULD RESULT IN
VERY HOT LIQUIDS SUDDENLY BOILING
OVER WHEN A SPOON OR OTHER
UTENSIL IS INSERTED INTO THE LIQUID.
To reduce the risk ofinjmy topersons:
Do not overheat the liquid.
_Stir the liquid both before and halfway
through heating it
(_)Do not use straight-sided containers with
naiTow neck&
@After heating, allow the container to stand in
the microwave oven for a short time before
removing the container.
(_)Use exta'eme care when inserting a spoon or
otherutensil into the conlainer.
25. Read and follow specific microwave oven
preparation instructions on food packages or
cmtaine_ (especially baby feed). Above all, this
isa cook_tg eppgance designed to prepare food.
2_ Use only cooking utxmsilsand aexx&mnesmede fo*
use in the microwave and specifically descnqx_lin
thismanual.
27. Microwave oven manufaetmta_ do not recormnend
deep fat fi3migor fryingth a microwave oven. HOt
oil can damage oven parts and utensils and even
result in skinbuwx
28. Plasdc wrap : Use only those types designed for
mio-owave oven use and avoid fommag_a air-fight
seal. Fnld back a small comer o_ eta a small slit to
allow steam te escape.
29. Staynear the a_olianee whlie it is inuse and check
conldog progress frequeady. Leaving the _opliance
unattended may reslut in overcooked food and
po_s_ly a firein yo_ ov_a.
30. Foeds cooked in liquilh (such as pasta) may tend
to boil ovcxmore rapidlythan foods cont_oing less
moisture. Should this eccm, refer to the Care and
Cleamng sectitm for instar_ons on how to d_a the
il_de oftbe _
31. Do not use a thermometer in food you are
mierowaving male_ the thetmonx:ter is designed or
recotmneeded thr use in the microwaveove_.
32. Plasticcook-w'm_designedformiox_wavecooking is
very useful, but should be used carefully. Even
microwave-safe plastic may not be as tolerant of
overcooking conditions as are gla_s or ceramic
materials and may soften or char if subjected to
shortperiods of o_ldng. Inlonger exposanesto
overcooking_the food and eookware could ignite.
For these reasons:l) Use microwave-safe plastics
only and use them in strict compliance with the
cookware mamffacmrer's recommetnlatinns. 2) Do
not subject empty cook-wareto miczovcaving.3) Do
notpcnmtchil&_a to use plasticcookwarewithout
completesupervision.
33.Do not store anythig directly on top of the
microwave oven surface when the oven is in
operation.
34.TV d_nnersmay be microwaved in foil t_ys less
th_ 3/4" deep;remove tep thil cover and retinatray
to boy- Whenusing metal in microwave ova, keep
metal at least I inch away from the sides of the
oven.
35.DO not defrost frozen boverages in narrow necked
bottles.
36.Cookware may become hot because of heat
transferred from the beated foed. Potholders maybo
needed to ]mdle the cookwam.
37.Do not tJyte melt paraffin wax in the oven. ParmTm
wax will not melt in a nfierowave oven became it
allows microwaves topass through it.
3&Nev_ use _ed ute_ls in or neacthe over_
39.HOt foeds and steam can cause burns. Be carethl
when opening containers of hot food, including
popcorn bags, cooking pouches and boxes. To
prevent possible injury, direct steam away from
hands and face.
40. Cle_a tbe vent hood oflett DOnct allow grease te
build ep on thehoed or tbefilter.
41. Use care when cleaning the vent hood filter.
Conmive cleaning agents, such as lye-ba._doven
clemae_ may dmnagethe filt_.
42. When flaming foeds are under the hoed, turn the
fan o[ Thefan, ifoperanng mayspread dm flame.
SAVE THESE INSTRUCTIONS
Page 5

HDUS-T-170SW,1705B,171S-_ 2003 _26 5:BO PM =lJo]q_4
Installation Recommendations
Removeallpackingmaterialsbothoutsideandimid¢the
ovenbeforeusingtheoven.The ovenrequiresfree
moveanentofair for properoperation.Do NOT blockair
roots locatedby die topair ghll and tmdemeadidie ovets
Grounding Instructions
Thisappliancemustbe grounded_Intheeventofan
electricalshortcircuit,groundingreducestheriskof
electricshockby providingan escapewireforthe
eieclriccurrent.Thisapplianceiseqtuppedwitha
cordhavingagroundingwirewithagroundingplug.
The plugmustbepluggedintoa120v,15amp.outlet
thatisproperlyinstalledandgrounded.
_. WARNING - Improper use of the grmmc_g
plug can result in a risk ofeiearic shock.
Consult a qualified electrician or service technician if
the grounding instructions are not completely
understood or if doubt exists as to whether the
• ppllance is properly grounded.
Where standard two-prong wall receptacle is
encountered, it is your personal reponsibility and
obligation to have it replaced with a properly
grounded dime-prong wall receptacle.
Do not under any circumstance cut or remove the
third (ground) prong from the power cord_ Do not use
an adapter plug with 'this aFpliance. See pages I and
2 of die Installation Manual for acceptable extension
cordspecifications.
Interference Note
Microwave ovens ge_aerateradio frequency energy
during operation and if not installed properly may
cause interference to radiomad television recepdorL
You can determine if this unit is causing interference
by turning it on and off whihi the interference is
occurring. If interference occurs, it may be corrected
by one or more of the following measures:
• clean door and seal surfaces oftha over_
• reorient die television or radio receiving antenna;
• the oven widi respect to the tehivision or radio
receiver, and/or
• Phig die oven into a different oulotso diat it and die
television or radioVeceiveTare on different circuits.
If die interference pea_ists, you may want to consult
an experienced radio/television technician for
additional
Automatic Fan Protection feature
Cooking appli_ces installed unda" die microwave oven
may, under some heavy usage conditions, cause
temperatures high enough to overheat some internal
parts ofdie microwave oven.
To prevent overheating from taking place, the exhaust
fan is designed to amomaficallyturn on at ahiw speed if
excessive temperatures occ_. Should this happen, die
fan cannot be manually turned off, but it will
automatically mm off when the internal parts have
cooled-Tha fannmy stay on for up to mahour after die
range and microwave oven controlshave been turned
off.
Microwaving Tips
• Make sureall cookwale used hi your nficrowave
oven issuitable for microwaving.Most glass coaldng
dishes,meaaumg cups, custardcups,pottery or china
dinnerware,which doesnot have metallictrim or
ghzewidimetallicshaen,canhause_
• Ifyc_aam notaweifadishismicrowavwsafe,use
thistest:Placeindieovendiedishyouaretsaingand
aglassmeastsmgcepfilledwidionecupofwa_.
Setdierrteastmngcupeidierdiornexttothedish.
Microwave 1 minute at high. If the dish heats, it
should not be used for microwaving. If the dish
remains cool and onlydie water hi die cop heats,dien
die dish ismira)wave-safe.
• Papertowels, w_ed peper andplastic wr_ canbe
used to cover dishe_hi order to retainmoisture mad
prevent spatt_ Be stweto vent plastic wrap so
steam c_ escape.
4
Page 6
HDUS-T-170SW,170SB,171S-_ 2003.8.265:30PM _°l_B
Touch Control Panel
The Touch Control Pand allows you m set the oven controls with the touch of a finger.
It's designed to be easy to use and undcrstan_
1. DISPLAYWINDOW- Displays timeof day,
time or tomperatur¢duringcookingfunctions,
power level being used, cooking mode and
insVactions.
2. POPCORN - Touch this pad to cook
prepackaged microwave popcorn weighing 1.75
or 3.5 ounces. The oven wiU star automatically.
(Page 12)
3. BEVERAGE - Touch this pad to reheat a
beverage. The oven will start automatically.
(Page 13)
4. FROZEN VEGETABLE - Touch this pad to
cook frozen vegetables. The oven will start
automatically. (Page 14)
5. FAVORITE CHOICE - Touch this pad to
recall three cooking instructions placed in
memory and to program sound level of signals,
scroll speed and disable dock display. (Page 13)
6. BAKED POTATO - Touch thispad to cook l_l
potatoes. The oven will start automatically. (Page
13)
7. DINNER PLATE - Touch this pad to reheat a
dinner plate full of chilled leftovers. (Page 13)
& FROZEN PIZZA - Touch this pad to heat
frozen pi_. The oven will start automatically.
(Page 13)
9. SNACK - Touch this pad to warm a variety of
snack foods by means of the automatically preset
microwave power and cook time. (Page 15)
l& SENSOR COOK - Will automatically etmapute
the microwave power and cook time. Refer to
Senses-Cook Guide. (Page 14)
11. COOK TIME - Microwave for a selected
amount of time.
• PowerLevelI0(High)isautomaticbutlower
heatlevelsmaybeprogrammed.(Page8)
12.AUTO DEFROST -Touchthispad and enter
foodweight,then START. The oven auto-
maticallysetspowerlevelsanddefrosgngtime.
O_e lO)
13. ADD MINUTE -Touch thispad for 1 minute of
cook time, to add 1 minute of cook time as the
timer is counting down or for an "instant on" for
I minute. (Page 9)
14. POWER - Touch this pad if you want to change
from antomatic Power Level 10 (High) for
cooking. (Page 8-9)
15. NUMBER PADS - Touch these pads to enter
cookingtime, defrosting time,time of dey, power
level or food weights for Auto Defrost
16. WARM - Touch this pad and safely keep food
warm for up to 30 minutes. (Page 13)
17. TIMER - This feature uses no microwave
energy. It functions as a kitchen timer, as a
holding period after defrost or as a delay timer
before time cooking. (page 9)
l& DISPLAY (Multi-Language) - Touch this pad
to select the user a language.(page 16)
19. TURNTABLE - Touch this pad to torn the
torntable on and oiT (page 16)
20- HELP - Touch this pad if you want to know the
feature of key pad on the control panel. (page 16)
21. CANCEUOFF - When touched once, it pauses
the oven operatiotLWhen touched twice, it shuts
off the oven and erases all settings (_cept time
ofdsy)
22. _ - Touch this pad to enter time of day or
check time of day while microwamng. (Page 8)
23. START - After all selections are made, touch
this pad to start the oven or tirner.
24. VENT FAN - Touch this pad if you want to
know the feature of key pad on the control panel.
(Page 17)
25. LIGHT - Touch this pad to turn on or off the
surface light and night light. (Page 17)
Page 7
.HDUS-T170SW,170SB,1715-_ 2003.8.265rBOPM =11o_6
<KOT-17ZS>
<KOT-170SW, KOT-170SB>
I'IFCOM _ RIOZB F4VORITE
CJlIICE
NHEI Hi_ |
PII]Ti PIBI
_EH CNK ILIrl'O gig
| | lmilT iiRL
m 1 3i
! TUN
[_]
moel
• When you plug in the oven, the display will scroll "TOUCH CLOCK
PAD TO ENTER TIME OF DAY". If power is disrupted at any time,
the above sequence rcctl_.
• Each time a pad is touched, a BEEP will sound.
• When CANCEL/OFF Pad is touched during oven operation, the oven
will stop, however, all programmed information is retained. To clear
all information, touch the CANCEL/OFF Pad again.
I NOTE: Styling and features may differ slightly depending on model I
6
Page 8
I_D US-T-I 70S W, 170 SB,171S-_ 2033.a26 5"30 PM _II °JO_7
Oven Features at a Glance
1. DOOR HANDLE - Pull to open door. Door
must be securdy latched for oven to operate.
2. DOOR LATCHES
3. WINDOW with METAL SHIELD -
Screen allows cooking to be viewed while
keeping microwaves confined in oven.
4. TOUCH CONTROL PANEL and DIGI-
TAL DISPLAY - For detailed information
on each feature, see Touch Control Panel
section, page5.
5. HOOD CONTROLS
Vent Fan - Press High, Low or Off
Light - Press On, Night or Off
6. GREASE FILTERS
7. COOKTOP LIGHT
8. TURNTABLE - Composed of glass tray
and roller guide. The roller guide is placed
first in the bottom of the microwave and
supports the glass tray. Both parts must be
in place when using the microwave oven.
9. DATA PLATE - Located on the inside wall
of the microwave oven.
10. OVEN SHELF - May be used when cooking
more than one item at a time.
7
Page 9

HDUS-T-170SW,170SB,171S-_ 2003.8.Z6 5:30PM _°_8
Operating Basics
l_me-of-Day Clock
Basic Instructions
l. To,aeh the CLOCK Pad. "CLOCK
ENTER TIME" Will be displayed.
2. Set the time of day by touching the
appropriate numbers. The selected time
appears attd "PRESS CLOCK AGAIN"
will be displayed.
3. Touch the CLOCK Pad again. The colon
will flash.
• Afer plugging in the oven or after a power
outage, the Display will scroll 'q'OUCH
CLOCK PAD TO ENTER TIME OF DAY".
Touch the CANCEL/OFF Pad and set the
clock following the directions above.
• The "time-ofMay" clock is a 12bel_ clock-
• If set, the time of day will always be displayed
when no other cooking function is being used.
• The time of day returns to tbe cmrent dme
when the oven turns off
Cook _meJPower Level
Basle InstrutCdons
1. Touch the COOK TIME Pad. "ENTER
COOKING TIME" Will be displayed.
2. Enter *.he cooking time by using the
nttmber pads.
For example, for 5 minutes touch number
5,0,0. The selected time and "PRESS
START" will be displayed.
3. Touch the START Pad again. "COOK
TIME" and selected time will be dis-
played.
• The cooking time will appear in the
Display window.
• The oven will start cooking and time
countdown will begin.
• The ovco will stop automatically when
the time is done and beep three times.
• Whe_ the cook time ends, "END COOK"
appears in the Display.
• Start with the shortest reconmaended time and
add mote time as needed.
• Check the food as it cooks.
• The oven door can be openedany time during
operation. It will automa_cally stop and
maintain die time setting until the door is
closedmadthe START Pad is touchedagain.
• If die START pad is touchedand the ovendoes
not operate,checkthe areabetween the door
anddoor sea]for obsmactiorts.The oven will
not startuntil the door is con_pletelydosed.
Note, ..
• Fullpower is automatic, lfyou wish to use
a different power level, touch the POIyER
pad before touching START Pa d
"POWER LEVEL IS H1 [10]. TOUCH 1-9
FOR NEW pOIVER LEVEL. PRESS
START" will be displayed. Enter the Fower
level desired by touching the appropriate
number pad, The seleeted power level and
"PRESS START" will be displayed. (See
Cooking Guide on page 9).
Page 10

HDUS_T-170SW,170SB,171S-_ 2003,8.26 5:30 PM _ °_'_9
Operating Basics
Power Level Cooking Guide
The power I_vels Oil your microwave oven can
be compared to the surface units on a range.
High (power level 10) or full power is the fastest
way to cook and gives you 100%power.
Each power level gives you microwave energy
for a certain perrmaat of time, for example, power
level 7 is microwave energy 70% of the time.
Most of your cooking will be done on High
(Power Level 1O). a lower setting will cook
more evenly and with less attention given to
stirring or rotating the food. Some foods may
have better flavor, texture or appearance if one
of the lower settings is used. You may wish to
use a lower power level when cooking foods that
have a tendency to boil over, such as scalloped
potatoes. Cooking times will increase as power
level decreases.
Power Level Best Uses
High 10 Fish, bacon, vegetables,
boiling liquids.
Medium 7 Gentle cooking of meat and
Poultry, baking casseroles
and reheating.
Medium 5 Slow cooking and
tenderizing for stews
and less tender cuts of meat.
Low 3 Defrosting, simmering,
' delicate sauces.
Warm 1 Keeping food warm without
' overcooking, softening
butto_
Add Minute
The ADD MINUTE Pad provides a convenient
way to heat foods at figl power with one touch
of a pad or add an extra minute to your cooking
cycle while in progress.
The microwave starts automatically aller the pad
is touehad.
Basic Instructions
1. Touch the ADD MINUTE Pad. The
Display will show "PRESS AGAIN TO
ADD M]N".
ADD MINUTE cannot be used with ONE
TOUCH COOKING FUNCTIONS, SENSOR
COOK, AUTO DEFROST, TIMER, FAVO-
RITE CHOICE or WARM. Each time the pad
is touched the oven will add 1 minute to the time
tip to 99 minutes.
Basic Instructions
1. Touch the TIMER Pad. The Display will
show "ENTER TIME".
2. Enter desired time. The Display will show
the selected time and "PRESS STAR'If'.
3. Touch the START Pad. The Display will
show "TIMER" and selected time.
• The timer can be programmed up to 99
minutes and 99 seconds.
• Three beeps signal the end of the timing
operation.
• To stop the timer once it has started, touch the
CANCEL/OFF Pad twice. Display will return
to the time of day or cooking program.
• The timer cannot be set while cooking.
• The door must be shut for the timer to operate.
9
Page 11

HDUS-T-170SW,170SB,171S-_ 2003.8.26 5:30 PM Itll o_'_10
Auto Defrost
Use the defrost setting for defrosting meats,
poultry and fish from 0.5 pounds to 6.5 pounds.
Basic Instructions
I. • Touch theAUTO DEFROST Pad once for
meat. "MEAT DEFROST ENTER FOOD
WEIGHTIN LBS" Will be c_sphy_L
• Touch the AUTO DEFROST Pad twice for
poultry. "POULTRY DEFROST ENTER
FOODWEIGHTIN LBS" willbe displayed.
• Touch the AUTO DEFROST Pad three
times for fish. "FISH DEFROST ENTER
FOOD WEIGHT1N LBS"will be d_playe0_
2.Touch number pads to enter the weight. *The
defrosting time and power levels are amoma-
fically calculate&
&Touch the START Pad. "DEFROST TIME"
and timeappear in theDisplay.
* Enter the weight in pounds and tenths ofa pound
See Conversion Chartbelo,_
• During defrosting, the oven will beep a series
of short beeps to signal that the food needs to
be turned or rearranged_'q'URN FOOD
OVER" vdll be displayed. Oven will continue
operation if food isnot tomed or rearranged.
Three beeps signal the end of defrosting.
"END DEFROST" appears in the Display.
• During defrosting meat and fish, the food
needs to be turned or rearranged twice During
defrosting poultry, the food needs to be turned
or rearranged once.
Conversion Chart
If weight is in then weight is converted
ounces- to tenths-of-a-poundi
1 to 2-oz, 0.1
3 to 4-oz. 0.2
S-oz. 0.3
6 to 7-oz. 0.4
8-oz. 0.5
9 to 10-oz. 0.6
11 to 12-oz. 0.7
13-oz. 0.8
14to 15-oz. 0.9
10
Defrost by "Hme
Basic Instructions
I. Touch the TIME Pad. "ENTER COOKING
TIME" Wdl be displayed.
2. Enterdefrosting time desired.
3. Touch the POWER Pad. "POWER LEVEL
IS Hi [10]" will be displayed.
4. Touch NUMBER "3" Pad. "PL-30 PRESS
START" will be displayed_
5. Touch the START Pad.
Note...
• Three short beeps indicate an incorrect
entry.
• Seepage 1 l for addiaonal defros_ng aps
for both Auto and Time Defrost.
Page 12

HDUS-T-170SW,170SB,1715-_ 20038265:30 P_
Operating Basics
Defrost by _me Guide (Power Level 3)
ltems and Weight
Time
Beef
GroundBeef!l lb.
Gmued Beef/2lbs.
BeefRoast, hnnelw_s/3Ibs.
Steaks/1"thick
Pod_
PorkRoast,boneless/3lbs.
PorkChopgtl Ib
Gro_d Pork/l lb.
Sparen_s/l 1/2 llbs.
Whole C"aick_31_.
ChickenBreastshnneless/1lb.
ChickenT'alghs/2_s.
Fish
FishFillets/1lb.
D_osting Standing
Time
10-12rain.
18-20rain.
7_-28mirL
7-8 min.
20°22rain.
7-8rain.
10012rain.
15-16rain.
20022rain.
7-8min.
18-23mth.
10011mill
Procedur_ and Techniques
5rain. Breakapartandremove thawedpothonswith fork.
8-12miIL Breakapart aedremove thawedportinnswith forlc
7-10mirL Tt_n overpmlway.Shieldendsorththner areaswiththil
5-7rain. Separateandrearrangeonce.
10015mirt Tmn overpartway.shieldends ordithm_am_s withfoil.
5-7 min. Separateandmanange once.
5-7 rain. Breakapart andremovethawedportions with fork.
5-7 min. Turnmeat overandrearrange, separateonce.
10015mitL Ttan chicken over.shieldwing _ps,leg ends aedbreast
measwithfoil.Breastsidedown.
5-7 mi_ Sepmateaedrearrangeonce.
8-13mirL Separateaed narrangeonce.
5-7rain. SeFumeandreanange once.Shieldasneeded.
General Defrosting lips
I. Do not defrost covered rmaL Covering might allow
coddng to take place. Always remove out_ wrap
a_d tray. Place food o, a mica_wave-safe rack in a
dish_
2. Begin defrosting whole poultryhreaat-sideMowrL
Begh defrostingroasts fat-side_owrl
3. The shape of the packagealters die defrostingtime.
Shallow rectangular shapes defrost more quickly
thmaa deepbiotic
4. Auto Defrostis progran'aned for specificweights.
Defrost results will be affected if you enter an
incorrectweight
5. Amo Defrost is programmed for frozm food st 0' F.
If food is stored at a higher temperature, expect
shorter defrosttim_.
& After 1/3 of the defrosttime has elapsed, check the
food. You may wish to turn over, break apart,
rearrange orremove thawedpotions ofthn food.
7. During AutoIlefrost, the ove_ will wompt yon to
turn file food over. At this point,_ oven door
and check the food. Follow the techniques listed
hnlow for optimumdefroatresults. Then, cl_e oven
door, touch the START Pad to con_pletedefrosthag.
• Turu Owx : Roast, fibs, whole poultry, turkey
breaats,hot dogs,smx_ages,st_.s, ordlops.
• Rearrange : Break apartor separatesteakg chops,
hamburger patties, ground meat, chicken or
s_afoodpieces, chunks ofmeat such as_ bee£
• Shield : Use small strips of aluminum foil to
protectthin areas or edges of tmevenly shaped
foods such as chiek_ wings. To prevwi arching,
do not allow foil to come within 1-insh of oven
walls_ door.
• Remove : To preveot cooking thawed protJons
shouldbe removed from the oven at this point.
This may shormn defrost time for foods weighing
lessthan3-1b&
& AKer defrosting,allow food to stand 5 to 10minut_
if them areany icy _ fringe sofid masts, such
as sirloin tip or nmap roasts, are not completely
thawed after standing, return roast to oven and
program Auto IK_'ost for I lb.
11
Page 13

HDUS-T-170SW,170SB,171S-_ 200B.8.265:30PM _11°I_12
Two Stage Cooking
This feature lets you program two sequential using two different power levels. It automatically
operatinnssuchas depravingaedcooking_ coddng changespowersettingsandcookingtime.
Basic Instructions
1. Touch the COOK TIME Pad. "ENTER
COOKING TIME" will be displayed.
2. Touch the appropriate number pads to enter
the cooking time. The selected time and
"PRESS START" will be displayed.
3. Touch the POWER Pad. *"POWER
LEVEL IS HI [10]. TOUCH 1-9 FOR
NEW POWER LEVEL---PRESS START
4. Touch the number pad for the power level
you desire. *The selected power level and
"PRESS START'' will be displayed.
5. Touch the COOK TIME Pad again.
"ENTER SECOND COOKING TIME"
will be displayed.
6. Touch the appropriate number pads to enter
the cooking time for the second stage of
cooking. The selected time and "PRESS
START" will be displayed.
7. Touch the POWER Pad. *"POWER
LEVEL IS HI [10]. TOUCH 1-9 FOR
NEW POWER LEVEL--PRESS START"
will be displayed.
8. Touch the number pad for the power level
you desire. * The selected power level and
"PRESS START" will be displayed.
9. Touch the START PaIL
• Three beeps signal the end of cooking. "END
COOK" appears in the Display.
• The audible beep between stages can serve as
a reminder to add foods or ingredients.
* Sl_p steps 3 and 4 or 7 and 8 iffidlpower is
desired.
Special Features
Popcorn
Basic Instructions
1. Touch the POPCORN Pad once for 3.5
oz. package. The Display will show "3.50
OZ BAG OF POPCORN" or
2. Touch the POPCORN Pad twice for 1.75
oz. package. The Display will show "1.75
OZ BAG OF POPCORN".
• The POPCORN Pad has been automatically
set for the correct cook time for a 3.5 oz. or
1.75 oz. bag ofpopoom.
• Listen as the popcorn pops mad stop the
microwave when the popping slows down to
3 seconds apart.
• Do not Ia2€to repop tmpoppod kernels or rettse
abag.
• Pop only one package at a time.
CAUTION: If prepackaged popcorn is a
different weight than the recommended
weight, do not use the POPCORN Pad.
Inadequate popping or a fire may occur.
Follow manufacturer's instructions.
12
Page 14
HDUS-T-I 70SW 170SB 171S-_o 2009._26 5:30 PM _il oP_kl 3
Special Features
Dinner Plate
Basic Instructions
Display will show' DINNER PLATE"
1. Touch the D_R PLATE Pad. The
• Theprogrammedlime(2:40)will showin the Display.
• Place meat a_d dense vegetables to the
outside of the plate.
• Place delicate foods in the center of the plate.
• Cover the plate with wax paper to hold steam
around most foods except rare meats or
vegetables with crisp exteriors.
Frozen Pizza
Basic Instructions
1. Touch the FROZEN PIZZA Pad. The
Display will show '_PlZZA"
• Theprogramrncdtime(3:00) will showin thel_play.
• Time set is for a 6.0-7.5 o_ pizza.
• Cook only one pizza at a time.
• Follow manufacturer's directions,
• Use only frozen pizza labeled microwavcable.
• If cheese pizza does not melt suff]cienfl y,
cook a few seconds longer.
Beverage
Basic Instructions
1. Touch the BEVERAGE Pad once for I cup
(7 oz.)/mug. The Display will show
"ICUP'.
2. Touch the BEVERAGE Pad twice for 2 cups
(14 oz.)/mugs. The Display will show
"2CUPS'.
3. TouchtheBEVERAGEPadthree firn_ for3cups
(21 o_)!mugs.The Disphy will show"3CUPS'.
Baked Potato
Basic Instructions
1. Touch the BAKED POTATO Pad:
• once for 1 medium potato (7 oz.)
• twice for 2 medium polatoes (14 oz.)
• three times for 3 medium potatoes (21 oz.)
• four times for 4 medittm potatoes (28 oz.)
• The Display wig show"l EA POTATO"
"2 EA POTATO", "3 EA POTATO" or
"4 EA POTATO"
Warn3
Basic Instructions
1. Touch the WARM Pad. The Display will
show '_V?d_vl PRESS START".
2. Touch the START Pad.
• The microwave oven will safety keep cooked
foods warm for _ to 30 minutes.
• Opening the door or touching the CANCEL/
OFF Pad cancels the WARM setting.
• Foods that were covered during cooking
should be covered during warrmng.
• Complete meals on a dinner plate should be
covered.
Favorite Choice
To Program Favorite choice Setting:
1. Touch the COOK TIME Pad. Enter cooking time.
2. Touch the Power Pad.
3. Enter powerlevel. Example "5" for50% powerlevel,
4. Touch the FAVORITE CHOICE Pad.
5. Touch the CANCEL/OFF Pad to place in memory.
When a program has been entered, "MEMO"
will appear in the Display to let you know that
the program has been entered.
[ NOTE: Repeat steps l-S for FAVORlTE ]CHOICE Programs 2 and 3.
To Change Favorite Choice Setting:
• Touch and hold FAVORITE CHOICE Pad
for3 seconds or until abeop sounds. Display
shows "PROG- 1". Previously set information
will be erased.
• Follow previous steps 1-5 to program new
settings.
To Use Favorite Choice:
1. Pat food in oven and close door.
2. Touch FAVORITE CHOICE Pad. "PROG-
1" will appear in the Display.
€. To select program 2 or 3 press FAVORITE
CHOICE Pad until desired program
number appears in the Display,
3. Touch the START Pad.
13
Page 15

I_D US-T-170SW, 170 SB, 171S-_ 2003 _26 5:30 PM I_ °_ 14
To Program Favorite Choice Signal Sound,
_croll Sl_ed and Clock Display:
Touch FAVORITE CHOICE Pad four times
'?ROG-4 SELECT TYPE ENTER I-6" will be
displayed.
To Change Signal Sound:
• Touch number pad l. "BUZZER ON" will be
displayed. Touch CANCEL/OI_ pad.
• Touch number pad 2. ''BUZZER OFF" and
"MIYI_" will be displayed. "MUTE" will
remain in the Display until the buzzer is
turned on. Touch CANCEL/OFF Pad.
To Change Scroll Speed:
• Touch number pad 3. "FAST SCROLL
SPEED" will be displayed. Touch
CANCEL/OFF Pad.
• Touch number pad 4. "NORMAL SCROLL
SPEED" will be displayed. Touch
CANCEL/OFF Pad.
• Touch nurnberpad 5. "SLOW SCROLL
SPEED" will be displayed. Touch the
CANCEL/OFF Pad.
To Turn Clock Display On/Off:
• Touch number pad 6. Signal will sound and
the Display will go blank. To recall the time
of day, touch the START Pad and the current
time of day will be displayed for 10 seconds.
Frozen Vegetable
Basic Instructions
1. Touch theFROZEN VEGETABLE Pad once
for 8 oz. frozen vegetable. The Display will
show % OZ FROZENVF33ETABLW
2.Touch the FROZEN VEGETABLE Pad
twice for 10 07, frozen vegetable. The Display
will show "I0 OZ FROZEN VEGETABLE".
3. Touch the FROZEN VEGETABLE Pad three
times for 16 oz. frozen vegetable. The Display
will show "16 OZ FROZEN VEGETABLE".
4. Touch the I¢ROZEkNVEGETABLE Pad four
times for 20 oz. frozen vegetable. The Display
will show "20 OZ FROZEN VEGETABLE".
Sensor Cook
Basic Instractions
I. Touch die SENSOR COOK Pad until the
desired food is displayed. *
2. Touch the START Pad.
* See the following chart or the Cool_ng Guide
Label on the front of the oven cavity.
• SENSOR COOK will amomafically
customize the cook time for food in four
categories - soup, fresh vegetables, muffins
and fish fillets.
Sensor Cook Guide
IOIIClt III_PIAY
FOOD SENSORCOOK GUIDE QUANTITY
PAll
"K)UP
Sottp Once FRESS 8-320_.
START'
Ft_a Twice VE6ET_ 4-16_.
Vegetables PRE_ START'
Muffins Three PRF_S 24
Tir_ START'
.................. ;'FISH '
Fish Four FKI.ETS 4-16oz.
Fillets Times 'P,F_START
Cooking lips and Techniques
• For best results, cover container with plastic
wrap and turn back one edge of the wrap to
farm a 1/2-inch slot where steam can escape,
• After cooking fresh vegetables, allow 3-5
minutes of stand time before serving. This
will allow the food to finish cooking without
ovcreooking.
• When prepmaug fresh-cegctables, add 112 cup
of water per 1/2 pound of fresh vegetables.
Page 16
.HDUS-T-170SW,.170SB, 171S-°1¢ 2003 &26 5:30 PM _ °]_15
Special Features
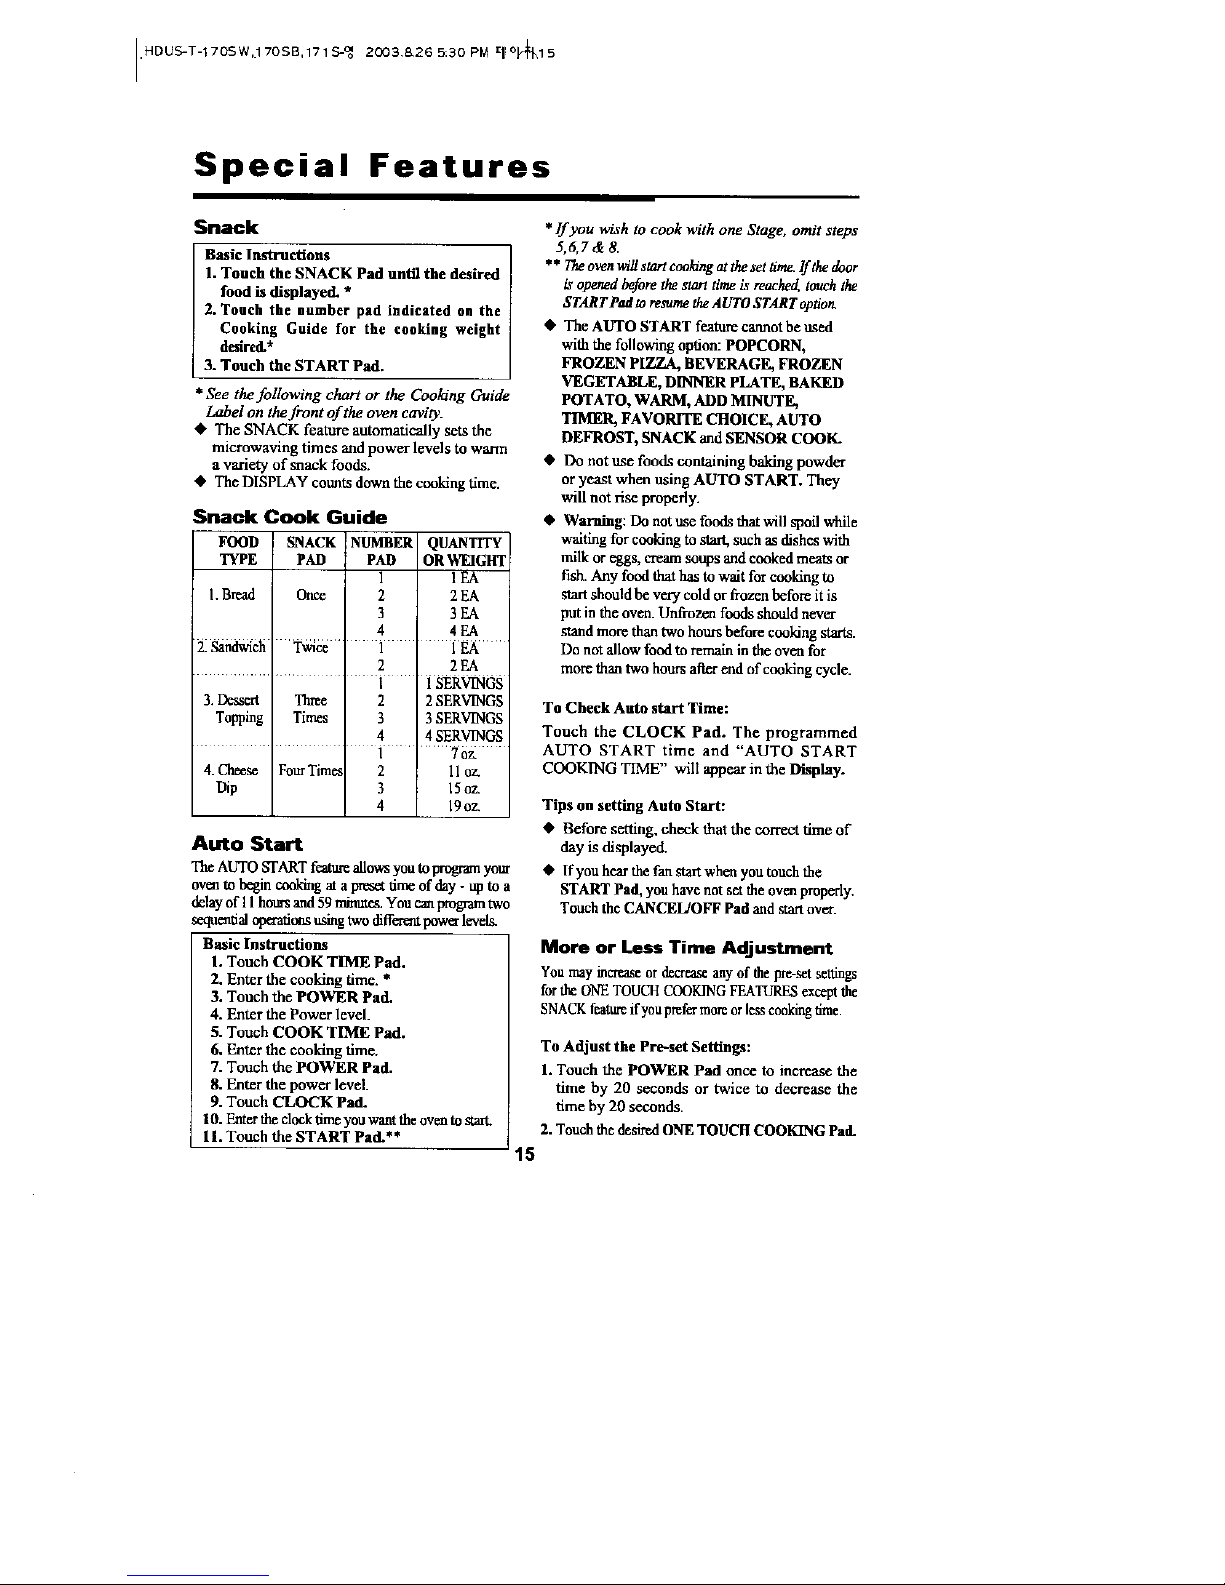
Snack
Basic Instructions
1. Touch the SNACK Pad until the desired
food is displayed. *
2. Touch the number pad indicated on the
Cooking Guide for the cooking weight
desired.*
3. Touch the START Pad.
* See the following chart or the Cooling Guide
Label on the front of the oven catty.
• The SNACK feat,am automatically sets the
microwavthg times and power levels to warm
a variety of snack foods.
• The DISPLAY counts down the cooking time.
Snack Cook Guide
F(X)D SNACK I_ER QU_TrrY
TYPE PAD PAD ORWEIGHT
1 lEA
I. Bread Once 2 2 EA
3 3EA
4 4EA
2 2EA
I 1SERVINGS
3. Der,sert Three 2 2 SERVINGS
Topping Times 3 3 SERVINGS
4 4 SERVINGS
I 7oz.
4.Cl_s_ Four Tim_ 2 lloz.
Dip 3 15oz.
4 19oz.
Auto Start
The AUTO START featu_ ailows you to program yo_
oven to begin cooking a_a presatdine of day - up to a
delayof I 1botts and 59 rnm_ You c_atm3gramtwo
sequential olxeafiom using two diffcnmt pow_ levelg
Basic Instructions
1. Touch COOK TIME Pad.
2. Enter the cooking time. *
3. Touch the POWER Pad.
4. Enter the Power level.
5. Touch COOK TIME Pad.
6. Enter the cooking time.
7. Touch the POWER Pad.
8. Enter the power level.
9. Touch CLOCK Pad.
10. Entsr the clocktimeyou want the oven tostsrt.
11. Touch the START Pad.**
* If you wish to cook with one Stage, omit steps
5,6,7&8.
** TheovenNil start ceolgngat ate set tinm If the door
is opened before the start time is reached,touch the
STARTPad to resuraethe AUTO START op_oa
• The AUTO START feature cannot be used
with the following option: POPCORN,
FROZEN PIZZA, BEVERAGE, FROZEN
VEGETABLE, DINNER PLATE, BAKED
POTATO, WARM, ADD MINUTE,
TIMER, FAVORITE CHOICE, AUTO
DEFROST, SNACK and SENSOR COOK.
• Do not use foods containing baking powder
or yeast when using AUTO START. They
will not rise properly.
• Warning: Do not use foods that will spoil while
waiting for cooking to sta_ such _s dishes with
milk or eggs, cream soups and cooked meats or
fish. Any food that has to wait for cooking to
start should be very cold orfrozen before it is
put in the oven. Unfrozen foods should never
stand more than two hours before cooking starts.
Do not allow food to remain in the oven for
more than two hours afterend of cooking cycle.
To Check Auto start Time:
Touch the CLOCK Pad. The programmed
AUTO START time and "AUTO START
COOKING TIME" will appear in the Display.
Tips on setting Auto Start:
• Before setting, check that the correct time of
day is displayed.
• If you hear the fan start whca you touchthe
START Pad, you have not set the oven propcrl3_
Touch the CANCEL/OFF Pad and start owr.
More or Less Time Adjustment
You may increase or decrease anyof thepre-setsettings
for the ONETOUCHCOOKINGFEATURESexcept the
SNACKfeatureif youprefer moreor less cookingtime.
To Adjust the Pie-set Settings:
1. Touch the POWER Pad once to in_ the
time by 20 seconds or twice to decrease the
time by 20 seconds.
2. Touch the desired ONE TOUCH COOKING Pad.
15
Page 17
HDUS-T-170SW 170SB,171S-me 2C038265:30 P_
Tumtable On/Off
For best cooking results, leave the turntable on.
When using larger dishes, it can be turned off.
• Press TURNTABLEPad toturntheturntableonoroff
• Display will show the T/T OFF indicator light,
• TURNTABLE cannot be turned off.with the
following options: POPCORN,
BEVERAGE, BAKED POTATO,
DINNER PLATE, FROZEN PIZZA,
FROZEN VEGETABLE, SNACK,
SENSOR COOK.
Control Lockout
The oven operation can be locked to prevent the
microwave from accidentally being turned on.
All oven functions can be locked.
To Set:
Touch and hold the CANCEL/OFF Pad for
three seconds. The Display shows "LOCKED"
and the oven beeps.
To Cancel:
Touch and hold the CANCEL/OFF Pad for
three seconds. '%OCKED" disappears from the
Display and the oven beeps.
Display
Basic InstrucUons
I. Touch the DISPLAY Pad until the
user's language is selected.
2. Touch the START Pad.
• This featxtre provide you with three languages
which are used for showing you menu, instructions,
cooking guides and any other terms of microwaving
cooking in the displaywindow. You can select one
ofthe languages; English, French, Spanish.
HELP
Basic Instructions
1. Touch the HELP Pad.
2. Touch the Pad which has the function
you want to know.
• The HELP feature show you the brief
function guide for the selected key pad_
16
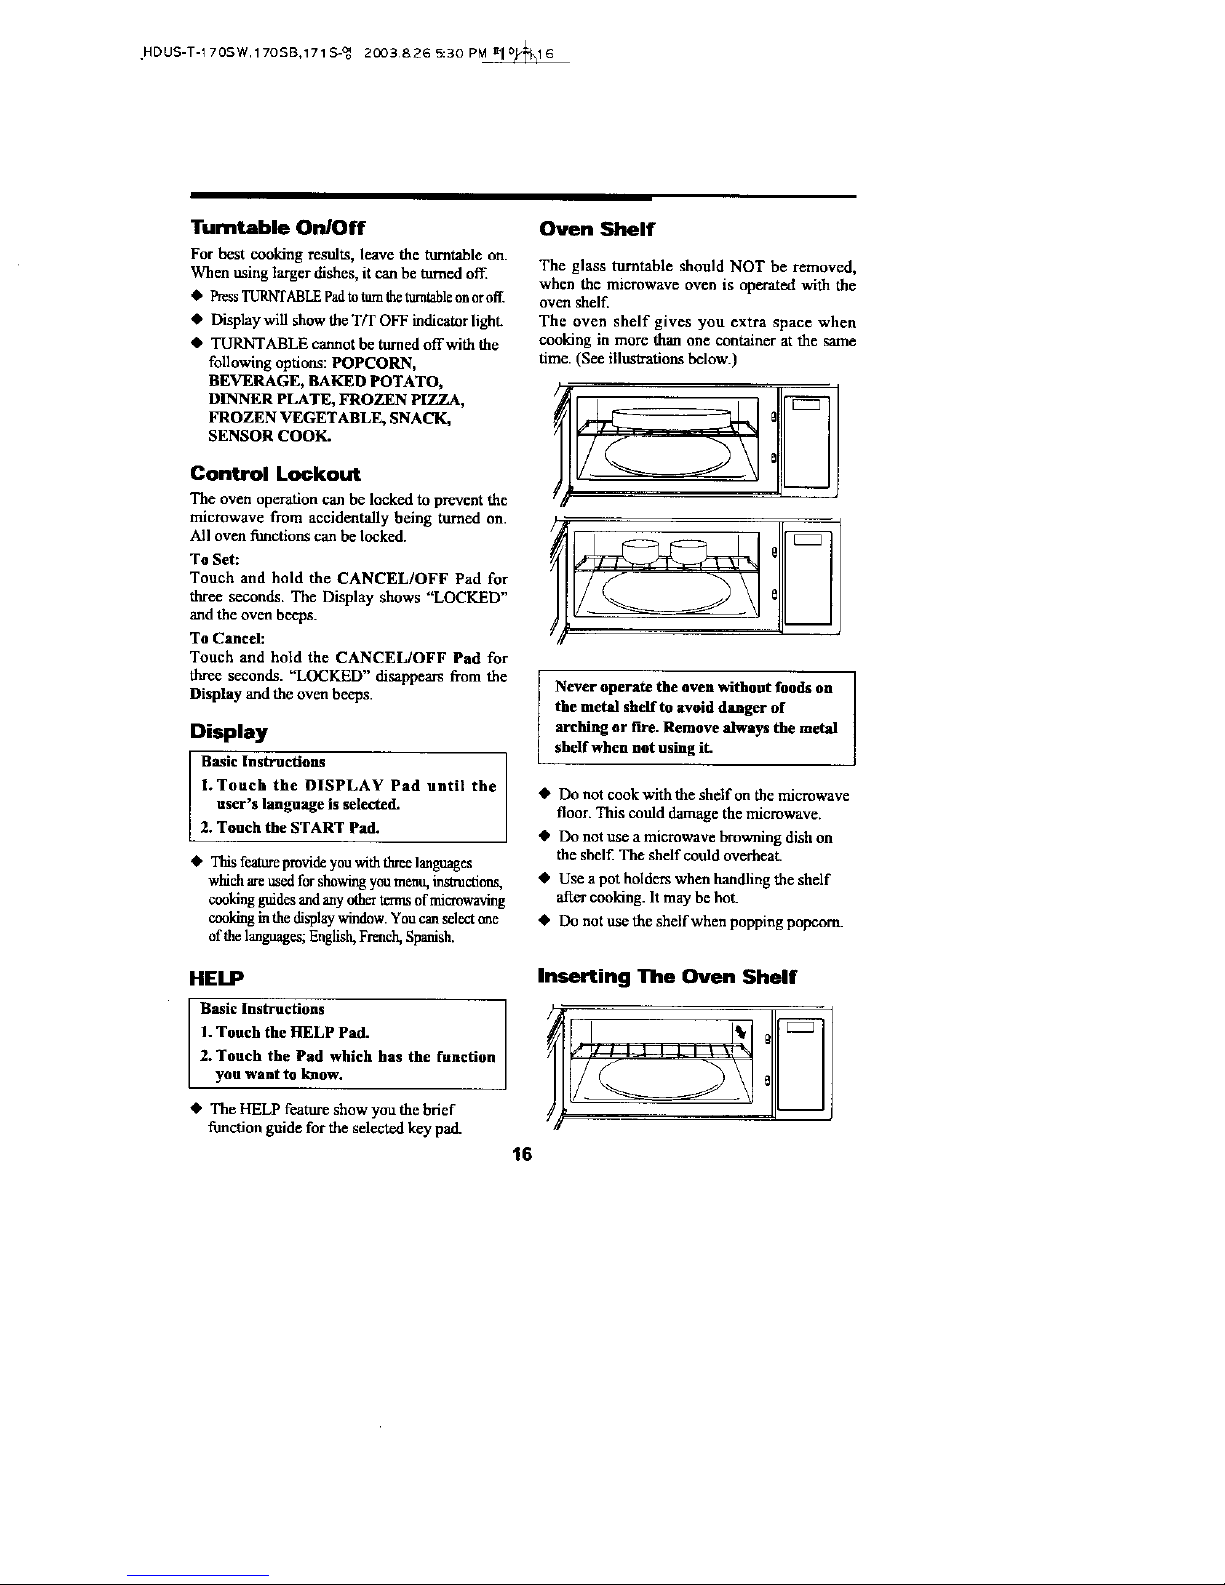
Oven Shelf
The glass turntable should NOT be removed,
when the microwave oven is operated with the
oven shelf.
The oven shelf gives you extra space when
cooking in more than one container at the same
time. (See illustrations below.)
/
m
Never operate the even without foods on
the metal shelf to avoid danger of
arching or rwe. Remove always the metal
shelf when not using it.
• Do not cook with the shelf on the microwave
floor. This could damage the microwave.
• Do not use a microwave browning dish on
die shelf. The shdf could overheat.
• Use a pot holders when handling the shelf
after cooking. It may be hot_
• Do not use the shelf when popping popcorn.
Inserting The Oven Shelf
/
Page 18
HDUS-T-170SW,170SB, 171S-_ 2003.8.26 5:30 PM _1[°,_17
Special Features
Using the Vent Fan
You cancontrol the2-speed fanby touchingthe
VENT FAN Pad.
Basic Instructions
I. Touch the VENT FAN Pad once for
HIGH speed.
The Display will scroll "HIGH VENT
FAN".
2. Touch the VENT FAN Pad twice for
LOW speed.
The Display will scroll "LOW VENT
FAN".
3. Touch the VENT FAN Pad three times
for turning vent fan off.
The Display will scroll "OFF VENT
FAN".
To Set Fan to Run for a Specific Time:
1. Start fan by touching the VENT FAN Pad.
2. Program run time.
• Touch the TIMER Pad and hold for
3 seconds. Display will show "FAN".
3. Enter desired time.
4. Touch the START Pad.
To Cancel Timer:
• Touch CANCEL/OFF Pad twice.
• If the temperaturegets too hot around the
microwaw oven, the exhaust fml in the vent
hood will automatically turn on the Low
setting to protoct the oven. It may stay on up
to an hour to cool the oven. When this ocou_,
the Fan OffPad will not tm'n the fan off.
• If both the fan and light are operating and
the TIMER Pad is touched and held, both
the fan and light will bc controlled by the
timer. The Display will altcmato between
"FAN" and '%IGHT" one time.
• Canceling the timer will cause the timer to
shut off; however, canceling the timer will
not cancel the fan. The fan will continue to
operato until turned off.
Using the Cooktop Light
You can control the cooktop light by touching
the LIGHT pack
Basic Instructions
1. Touch the LIGHT Pad once for turning
the cooktop light on.
The Display will scroll "ON LIGHT".
2. Touch the LIGHT Pad twice for turning
the night light on.
The Display will scroll "NIGHT
LIGHT".
3. Touch the LIGHT Pad three Umes for
turning the cooktup light or night light
off. The Display will scroll "OFF
LIGHT".
To Set Light to be on for a Specific Time:
1. Ttml on light by touching the LIGHT Pad.
2. Program "ON" time.
• Touch the TIMER Pad and hold for 3
seconds. Display will show '%IGHT".
3. Enter desired time.
4. Touch the START Pad.
To Cancel Timer:
• Touch CANCEL/OFF Pad twice.
Note...
• If both the fan and light are operating and
the TIMER Pad is touched and held, both
the fan and light will be controlled by the
timer. The Display will alternate between
"FAN" and "LIGHT" one time.
• Canceling the timer will cause the timer to
shut off; however, canceling the timer WIU
not cancel the light. The light will continue
to operate until turned off.
17
Page 19
HDUS-T-170SW 170SB 171S-_ 200B.&265:30PM =11°_I_18
Care and Cleaning
Microwave Oven Interior
The oven interior should be cleaned after each
use with a damp cloth to keep it free from
grease and soil buildup. Stubborn soils can be
removed with a plastic serub pad. When
cleaning interior surfaces and surfaces of door
and oven that come together when the door is
closed, use only mild, non-abrasive soaps or
detergents applied with a sponge or soft cloth.
Odors can be eliminated from the inside of the
oven by boiling a solution of one cup of water
and several tablespoons of lemon juice in the
oven for 5-7 minutes. This also helps loosen any
dried soil in the oven. Wipe off excess moisture
after use.
Note...
• Do not spray or pour liquid cleansers
directly onto a surface. Spray or pour
cleanser onto a cloth or sponge and then
clean.
• Do not use abrasive cleaners, oven
cleaners, abrasive cleaning pads or steel
wool, as they can scratch or dull oven
surfaces.
• Do not remove or insert knife around the
stirrer cover to clean, it may damage the
cover or affect the cooking performance of
your oven.
Ovtm Bottom
Wash oven bottom with hot sudsy water, rinse
and dry. Do not use excessive amounts of water
when cleaning the oven, especially aroued the
turntable. Do not allow water or cleaning agents
to seep into turntable gears located underneath.
Glass Tray/Turntable
Allow to cool before removing and cleaning.
Wash in soapy water or dishwasher.
Roller Guide
Clean frequently to prevent excessive noise.
Wash in soapywater or dishwasher.
Overt Eatterier
Wipe the outside of your oven with a soapy
cloth, rinse and dry. Do not use abrasive
cleaners. They may scratch the surface.
Light Compartment
Clean off the grease and dust on the light
compartment cover on the bottom side of the
microwave oven often with warm water and
detergent.
Control Panel
Wipe with a damp cloth. Dry. Do not spray
cleaners directly on panel. Spray cleaners on
cloth and then wipe.
18
Page 20

HDUS-T-170SW 170SB,171S-_ 2003,8.26 5:30P_
Care and Cleaning
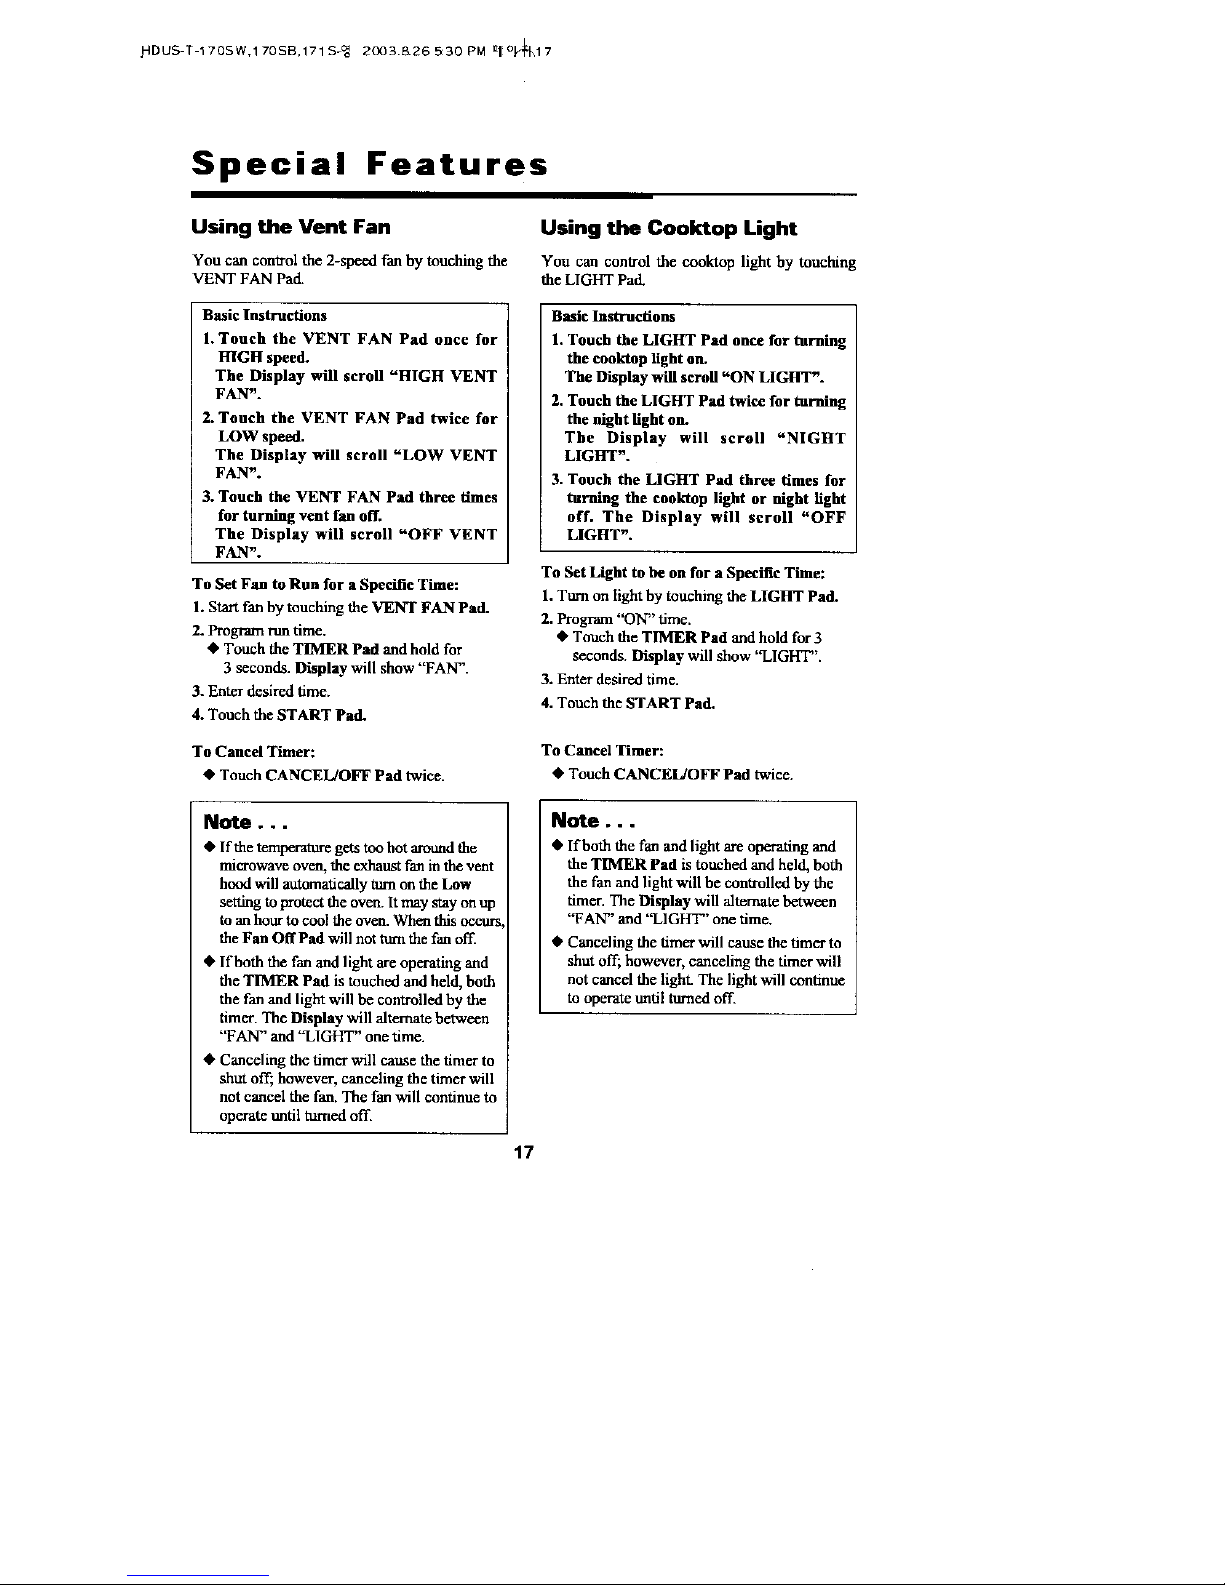
The Exhaust Feature
The exhaust hood feature on your microwave
oven is equipped with two metal filters which
collect grease. When the fan is opemfiong, air is
drawn up through the filters and is then
discharged through the venting to the outside or
through the charcoal filters if not vented to the
outside.
To Remove Grease Filter
To remove grease filter, grasp the "finger hold"
on the filter and slide to the rear. Then pull filter
downward and to the front. The filter will drop
out.
!l J
METAL CCOKTOP METAL
FILTER LIGHT FILTER
Reusable Grease Filters
The reusable grease filters should be cleaned at
least once a month. Never operate the
microwave without the filters in place. In
situations where flaming might occur on
surfaces below the hood, filters will stop the
entry of flames into the mail
To clean Grease Filter
To clean grease filters, soak and then agitate
filter in solution of hot water real detergent. Do
not use ammonia or mnmonia products because
they will darken the metal. Light brushing can
be used to remove embedded dirt. Rinse, shake
and remove moisture before replacing.
To Replace Grease Filter
To replace grease filter, slide the filter in the
frame slot on the back of the opening. Pull filler
upward and to the front to lock into place.
19
Page 21

,HDUS-T-170SW,170SB,171S-_ 2003.8.26 5:30 PM Xll °J_2.0
Light Bulb Replacement
Cooktop Light
To replace the combination cooktop light/
night light:
1. Disconnect power at main fuse or circuit
breaker or pull plug.
2. Remove screw on left side of light compart-
ment cover and lower cover until it stops.
(See Figures 1 an(l 2.)
3. Gently unscrew the bulb(s). Be sure bulb(s)
to be replaced are cool before removing.
4. Replace with 30-watt incandescent bulb(s)
available from your authorized dealer. High
intensity 30-watt b_b(s) which are available
in supermarkets and hardware stores, may
also be used for replacements.
5. Raise light compartment cover and replace
SCI'_W,
6. Connect electrical power to microwave oven.
CSS3
FIGURE 1
Oven Light
To replace oven light:
1. Disconnect power at main fuse or circuit
breaker or pull plug.
2. Remove the top grill by taking out the 2
screws that hold it in place. (See Figures 3.)
3. Remove charcoal filter.
4. Pull out the Lamp cover. (See Figure 4.)
5. Replace the light bulb with a 30-watt bulb.
6. Replace light housing to original position
7. Replace charcoal filter.
8. Replace top grill and secure with screws.
9. Connect elee_cal power.
i
FIGURE 3
[
FIGURE 2
FIGURE 4
20
Page 22

°HDUS-T-170S W,1 70SB, 171S-_ 2003.8.26 5:30 P_
Common Questions and Answers
QsA
Q.Can I open the door when the oven is
operating?
A.The door can be opened anytime during
the cooking operation. The oven will
automatically stop cooking and the time
setting will maintain until the door is
dosed and the START Pad is touched.
Q.What causes the oven interior light and
display to dim when using a Variable
Power Level?
A.This is normal and indicates the oven is
operating and cycling properly.
Q.Why does steam and/or vapor escape
around the door and moisture droplets
form on the inside of the oven door?
A.This in normal occurrence - as food cooks,
steam is given off.
Q. What do the various beeps mean?
A. Short becp = any pad is touched.
Three short beeps = incorrect entry.
One long bcop= oven plugged in.
Three long beeps = end of cooking
(microwave will turn off).
Series of three short beeps - check food to
see if toming or rearranging is needed_
Q.Can the oven be used with the glass tray
or roller guide removed?
A.No. Both the glass tray and roller guide
must always be used in the oven when
cooking.
All these things are normal with ]four microwave oven.
• Steam or vapor escapingfrom aroundthe door.
• Light reflection around the door or outer case.
• Dimming oven light and change in blower sound may occur while operating at power levels other
than high.
• Dull thumping sound while oven is operating.
Charcoal Filter Kit
There is a re.circulatingcharcoal filter kit included for models that are not vented to the outside. See
installationguide for details.
21
Page 23
.HDUS-T-170SW,170SB,171S_ 2009.8.26 5:30 F'M _11o_22
Before You Call
Check the following to be sure a service call is necessary:
If noting on the oven operates:
• check for a blown circuit fuse or a tripped
main circuit breaker.
• check if oven is properly connected to electric
circuit in house.
If the interior of oven collects moisture:
• this is normal, Food gives offmoisture when
cooking and the steam collects on the door
and the oven surface. Wipe offexees_
moisture from oven aftereach use.
• check that controls are set properly.
• check that thecooking time is set.
lftbe oven interior light does not work:
• The light bulb may be loose or defective. See
page 20 or call a qualified servicer.
If oven will not cook:
• check that control panel was programmed
correcdy.
• check that door is firmly closed.
• check that START Pad was touched.
• Auto Start may have been set.
• the Control Lockout may have been set
• check the area between the door and seal for
obstructions.
If oven takes longer than normal to cook or
cooks too rapidly:
• be sure the Power Level is programmed
properly.
• check instructions on food density, etc.
• verify that voltage to the microwave oven is
not low.
If the time-of-day clock does not always keep
correct time:
• check that the power cord is fully inserted into
the outlet receptacle.
• check that the oven is properly grounded.
• try plugging the oven into an outlet on a
separate electrical circuit.
If oven floor or glas tray are hot:
• this is normal The floor is absorbing heat
from the food.
If food cooks unevenly:
• refer to your recipe for proper cooking
procedures.
• be sure food is evenly shaped.
• be sure food is completely defrosted before
cooking.
• checkplacement ofaIuminum strips used to
prevent overcooking,
If food is undercooked:
• check recipe to be sure all directions (amount,
time, and power levels) were correctly
followed.
• check household voltage.
• tryplugging the oven into an outlet on a
sepm-atcelectrical ci_uit
• be sure food was completely defrosted before
cooking.
If food is overcooked:
• check recipe to be sure all directions (amount,
time, and power levels) were correctly
followed_
• the initial temperature of food may have been
higher than nomud.
If arring (sparks) occur:
• be sure microwave-safe dishes were used.
• be sure wire twist ties were not used.
• be sure oven was not operated when empty.
lfthe display shows a time counting down but
the oven is not cooldng:
• check that door is firmly closed.
22
Page 24

,HDUS-T-170SW,170SB,171S-_ 2003 &26 5:30 PM _11°_23
Microwave Oven Warranty
DAEWOO ELECTRONICS COPORATION OF AMERICA warrants each new microwave oven
memufactured by it to be free from defective material and worlonanship and agrees to remedy any such
defect or to filmish a new part (at the Company's option) in exchange for any par_ of any unit of its
manufacture which under normal installation, use, and service. To establish and receive warranty
service from us or authorized service facilities, prouf of purchase/dated sales invoice is required.
Return authorization must be obtained before any merchandise is returned to the factory.
This warranty does not extend to any ufour microwave ovens which have been subjected to misuse,
neglect, accident, incorrect wiring not our own, improper installation, unauthorized modification, or to
use in violation of instructions furnished by us, nor units which have been repaired or altered outside
of our factory, nor to cases where the serial number thereof has been removed, defaced, or change&
This wmranty is in lieu of all warranties expressed or implied and no representative or person is
authorized to assume for us any other liability in connection with the sale of our microwave ovens.
Model Parts Labor Magnetron
KOT- 170SW / 170SB / 172S 1 year 1 year 8 years
For Service or Assistance, please call 1-800-5534355 or visit webslte www.magicehe f-ewave.€om
23
 Loading...