

Page 1
Gas Range
with
Self-Cleaning Oven
f
IMPORTANTSAFETYINSTRUCTIONS ......... 1-4 Automaticovencooking ............
CLOCK,TIMER,OVEN CONTROL . 5-6 Broilingandchart ...................
SURFACECOOKING ........................ 7-10 SELF-CLEANOVEN .................
Selectingflamesize ......................... 8 MAINTENANCE .....................
Aboutthe surfaceflame ........................ 8 Cooktop ..........................
Sealedsurfaceburners,selectmodels........... 9 Ovendoor ........................
Cookware................................... 10 Doorlook lever ....................
Canning .................................. 10 Ovenbottom ............ _........
Ovenracks .................
OVENUSE ................................. 11-18 Storagedrawer ...................
Pilotless gnitionSystem ........ : ....... 11 Levelinglegs .....
Ovenburner................................ 11 .......
Howtoset ovento bakeor roast............... 12 Electricalconnection ...............
Commonbakingproblems . . . 14 Howtoobta nservice .............
Roastingandchart ........................... 15 Troubleshootingchart ...............
't
FOR CUSTOMER ASSISTANCE CALL 1-800-323-1965
Page 2
IMPORTANTSAFETYINSTRUCTIONS
Read all instructions before using this appliance.
Thank You for purchasingourcooking
appliance.Tohelpyouobtainthe maximumin cooking WARNING: If the information
satisfaction,weofferthesesuggestions: manual is not followed exactly,
explosion may result causing
[]_=Readthismanualbeforeusingtheappliance, damage, personalinjury or deatl
Reviewallsafetyandcautioninstructions.
- Do not store or use gasoline
ReviewtheTroubleshootingCharton flammable vapors and liquid
pages30and31 ifservicebecomesnecessary, vicinity of this or any other apl:
[E7 Includethemodelandserialnumbersofyour - WHAT TO DO IF YOU SMELL G
appliancewhenrequestingservice.
• Proofof purchasesuchas salesreceipt • Donot try to light anyappUa
will be neededforwarrantyservice. • Do not touch any electrical,'
lET'Youcancontactusat: not use any phone in your b
National CustomerRelationsManager • Immediately call your gas
619 ChicagoAvenue from a neighbor,s phone. F
Chicago,Illinois60671 gas supplier's instructions.
1-800-323-1965
• If you cannot reach your ga
In our continuing effortto improvethequalityand
performanceof our cookingappliances,it maybe call the fire department.
necessarytomakechangestothe appliancewithout
revisingthismanual. - Installation and service
performedbya qualifiedinstall
agencyor the gassupplier.
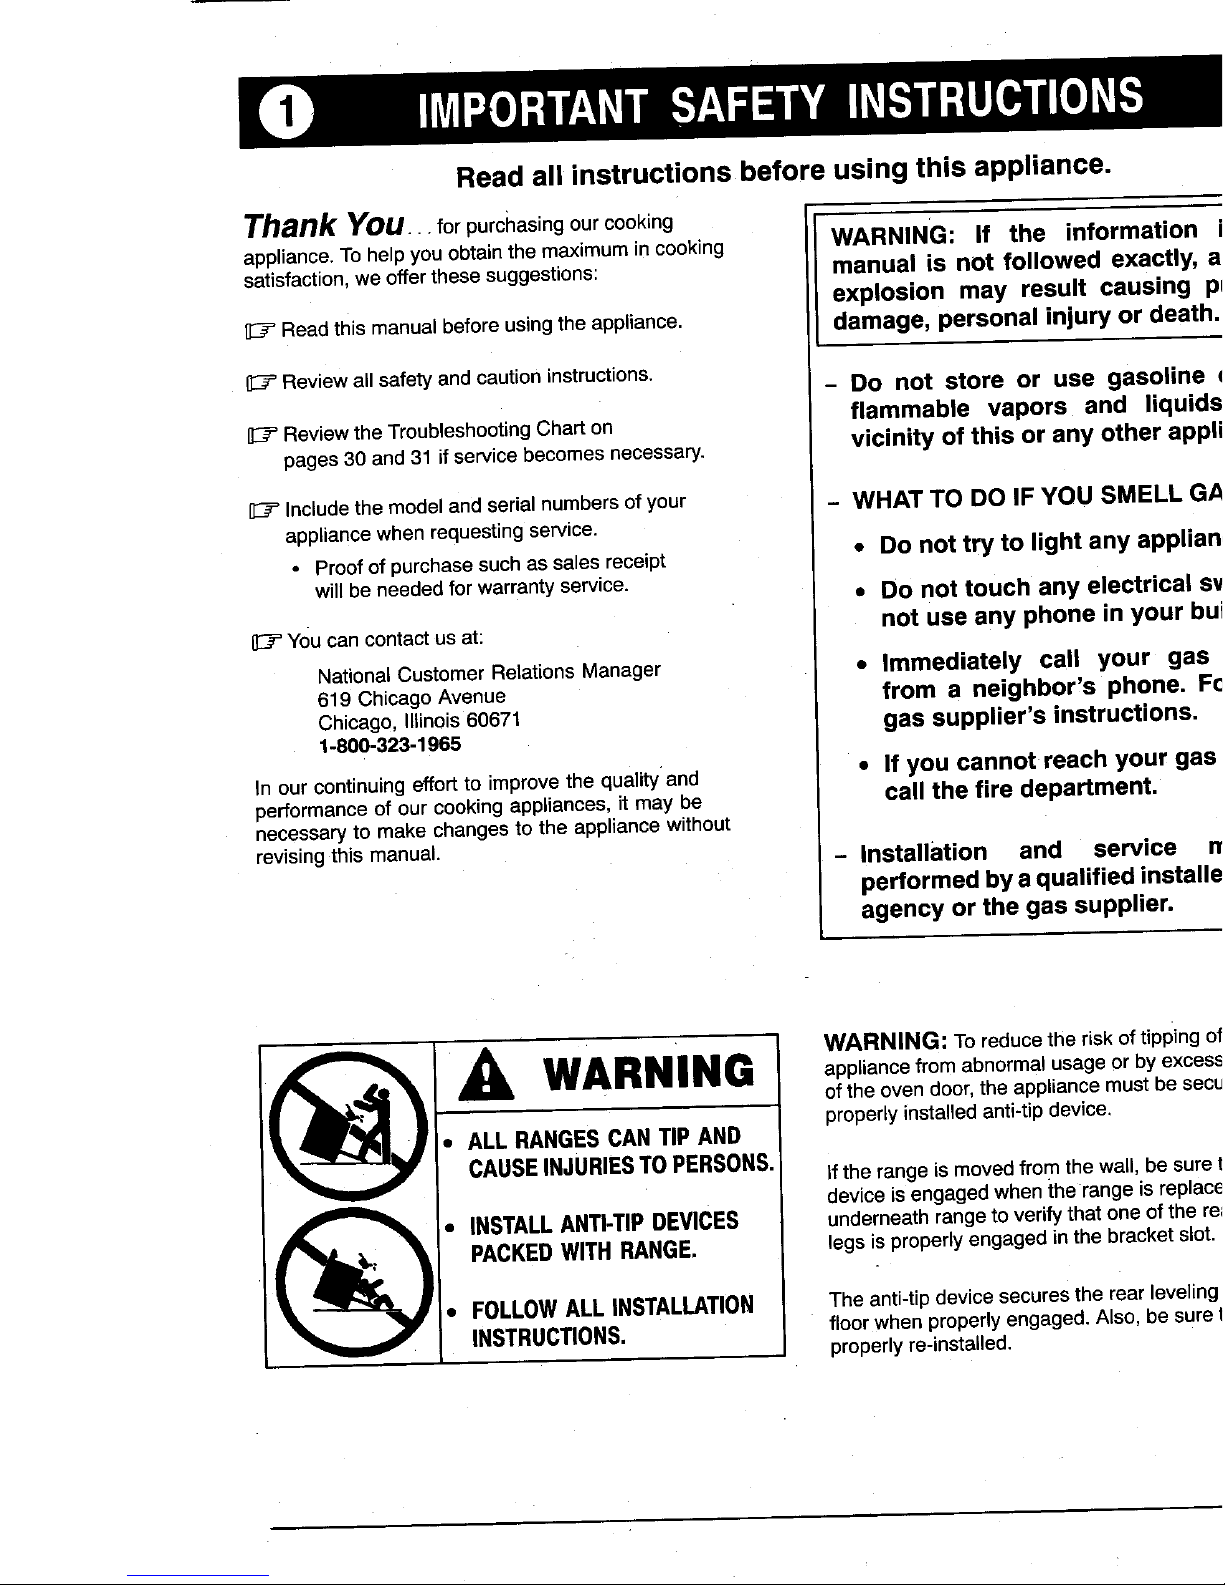
' WARNING:Toreducethe risk oftipping
WARNING appliancefrom abnormalusage or byexce
i of theovendoor,the appliancemustbese,
properly
installed
anti-tip
device,
• ALLRANGES_,ANTIPAND
I CAUSE TO PERSONS. If therangeismovedfromthewall,besur_
INJURIES
deviceisengagedwhentherange isrepla(
• INSTALLANTI-TIP DEVICES underneathrangetoverifythatoneof the
PACKEDWITHRANGE. legsisproperlyengagedinthe bracketslo
t
• FOLLOWALL iNSTALLATION Theanti-tipdevicesecuresthe rearlevelin
INSTRUCTIONS. floorwhenproperlyengaged.Also, be sun
properlyre-installed.
Page 3
IMPORTANTSAFETYINSTRUCTIONS
Thefollowinginstructionsare basedonsafety Turnoff applianceandventilatinghoodto
considerationsand must be strictly followedto eliminate theflame.Extinguishflame thenturn onh_
thepotential risksoffire,electricshock, or personalinjury, smokeand odor.
• Haveyour applianceinstalledand properlygrounded by a Usedry chemicalorfoam-type extinguish{
qualifiedinstalleraccordingto the installationinstructions, sodato smotherfire or flame. Neveruse
Havethe installershowyouthe locationofthe gasshut off greasefire.
valve andhowto shutit off in anemergency.
Iffire is inthe ovenor broilerpan, smother
Always disconnectpowerto appliance beforeservicing, ovendoor.
Iffire is in a panon the surfaceburner,cm
Toensureproper operationand avoid possibleinjuryor
damageto unitdo notattempt to adjust, repair,service,or attemptto pickupor movea flamingpan.
replaceany partof yourappliance unlessit isspecifically
recommendedinthis book.All other servicingshouldbe
referredto aqualifiedinstallerorservicer.
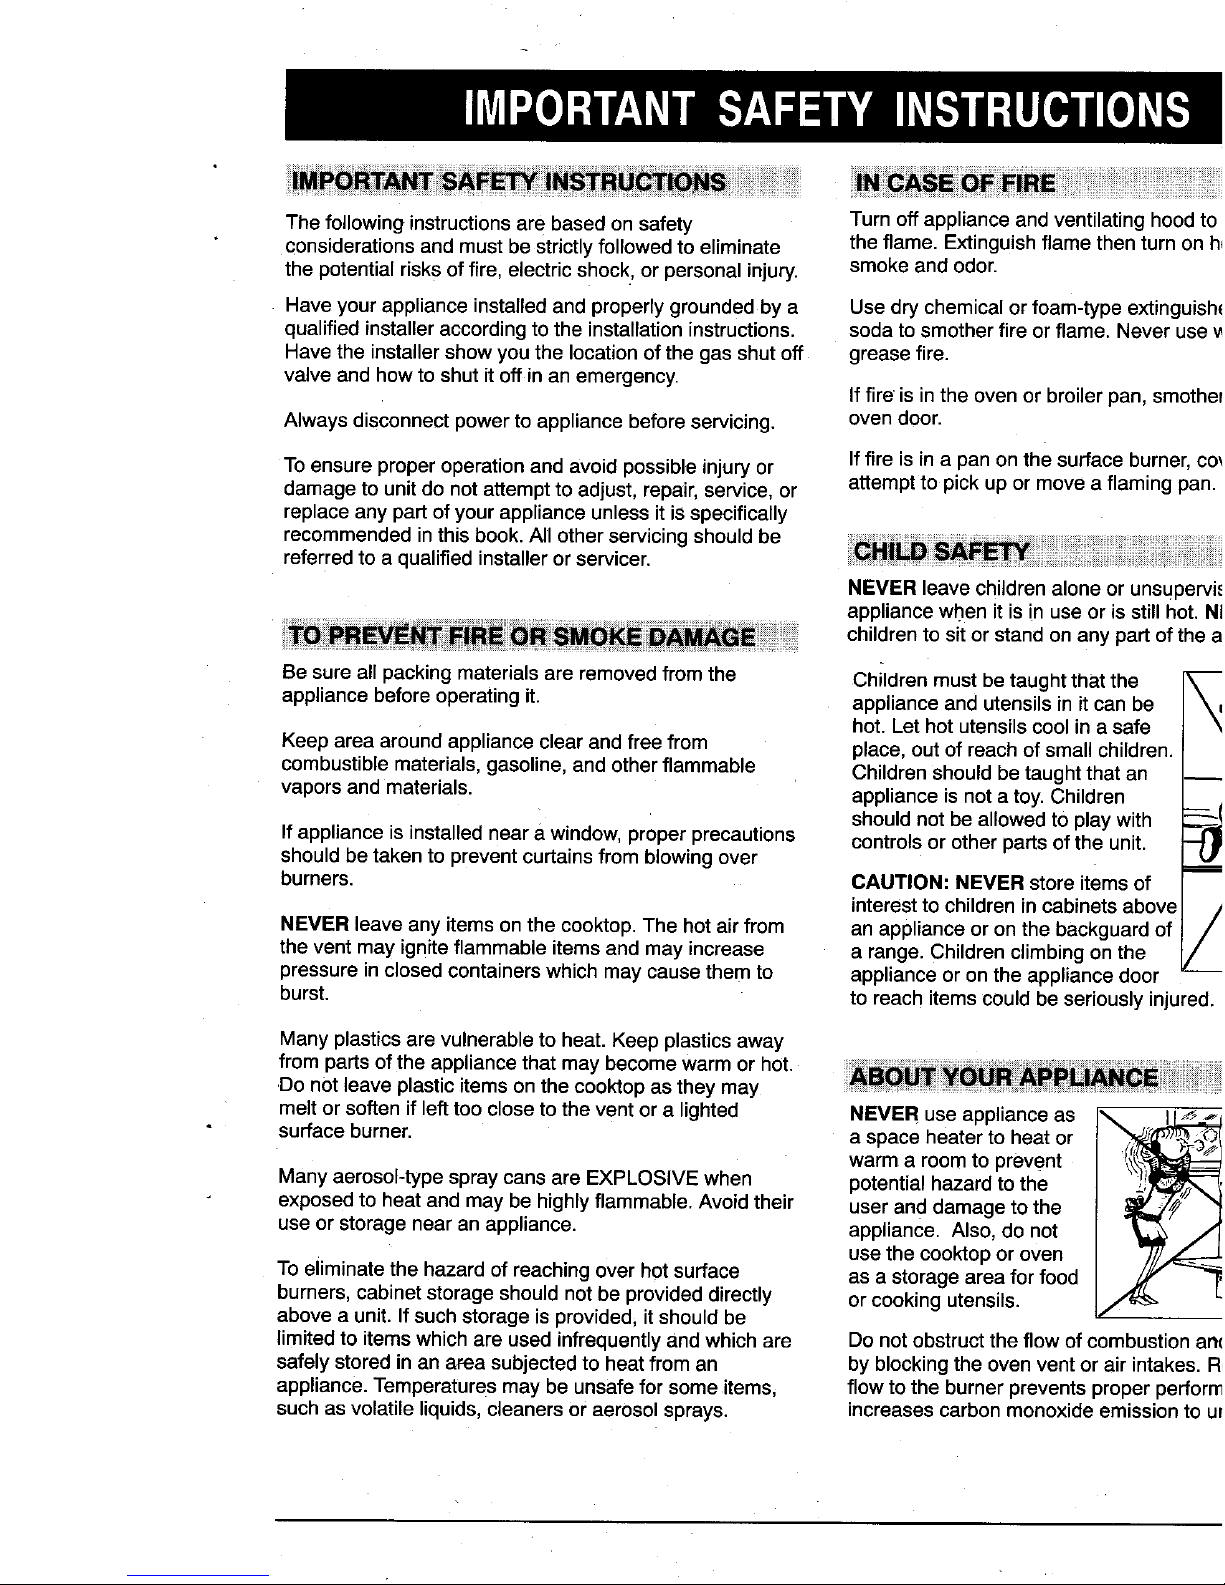
NEVERleavechildren alone or unsuPervi_
appliancewhen it is !n use or is still hot. NI
'_ childrentositor standonany partof the a
Besure all packingmaterialsare removedfromthe Childrenmust betaughtthat the _-_
appliancebeforeoperatingit. applianceand utensils init can be I \t
hot. Lethot utensilscool in asafe I \
Keeparea aroundapplianceclear and free from place, out of reachof small children. |
combustiblematerials,gasoline,and other flammable Childrenshouldbetaught that an I_
vaporsand materials, applianceis nota toy.Children L__t
shouldnot be allowedto play with
Ifapplianceis installedneara window,proper precautions controlsor otherpartsofthe unit.
shouldbe takento preventcurtains fromblowingover
burners. CAUTION:NEVER storeitems of |
interestto childrenin cabinetsabovel /
NEVERleaveany itemson the cooktop.The hot airfrom an applianceor on the backguardof | /
the vent may igniteflammableitemsand mayincrease a range. Childrenclimbing on the _'
pressurein closedcontainerswhich maycausethemto applianceor on the appliancedoor
burst, to reachitemscould beseriouslyinjured.
Manyplasticsare vulnerableto heat. Keepplasticsaway
frompartsof theappliancethat maybecomewarm or hot.
Do not leave plasticitems onthe cooktopasthey may
meltor soften if lefttoo closeto the vent or a lighted NEVERuse applianceas ,. II___j
surfaceburner, a spaceheaterto heator
warma room toprevent _r;
Manyaerosol-typespraycansare EXPLOSIVEwhen potentialhazardto the _!_.
exposedto heatand maybe highlyflammable.Avoidtheir userand damageto the
useor storagenear an appliance, appliance. Also, do not
usethe cooktopor oven
Toeliminatethe hazardof reachingover hotsurface as a storagearea for food
burners, cabinetstorageshould notbe provideddirectly orcooking utensils.
abovea unit. Ifsuchstorage isprovided, it should be
limitedto itemswhichareused infrequentlyandwhich are Donotobstructthe flow ofcombustionan(
safelystored in anarea subjectedto heat from an by blockingthe oven ventor air intakes.R_
appliance.Temperaturesmay be unsafefor someitems, flowto the burner preventsproperperform
suchas volatileliquids,cleaners or aerosolsprays, increasescarbonmonoxideemissionto ur
Page 4
0 IMPORTANTSAFETYINSTRUCTI()NS
Avoidtouchingovenventarea whileovenison andfor. NEVERheat an unopenedcontaineronthe
severalminutesafterovenis turnedoff.Somepartsof the burnerorin theoven.Pressurebuild-upma
ventandsurroundingareabecomehotenoughtocause containertoburstresultinginseriousperso
burns.Afterovenisturnedoff,donottouchthe ovenvent damagetotheappliance.
orsurroundingareasuntilthey havehadsufficienttimeto
cool. Usedry,sturdypotholders.Damppothold¢
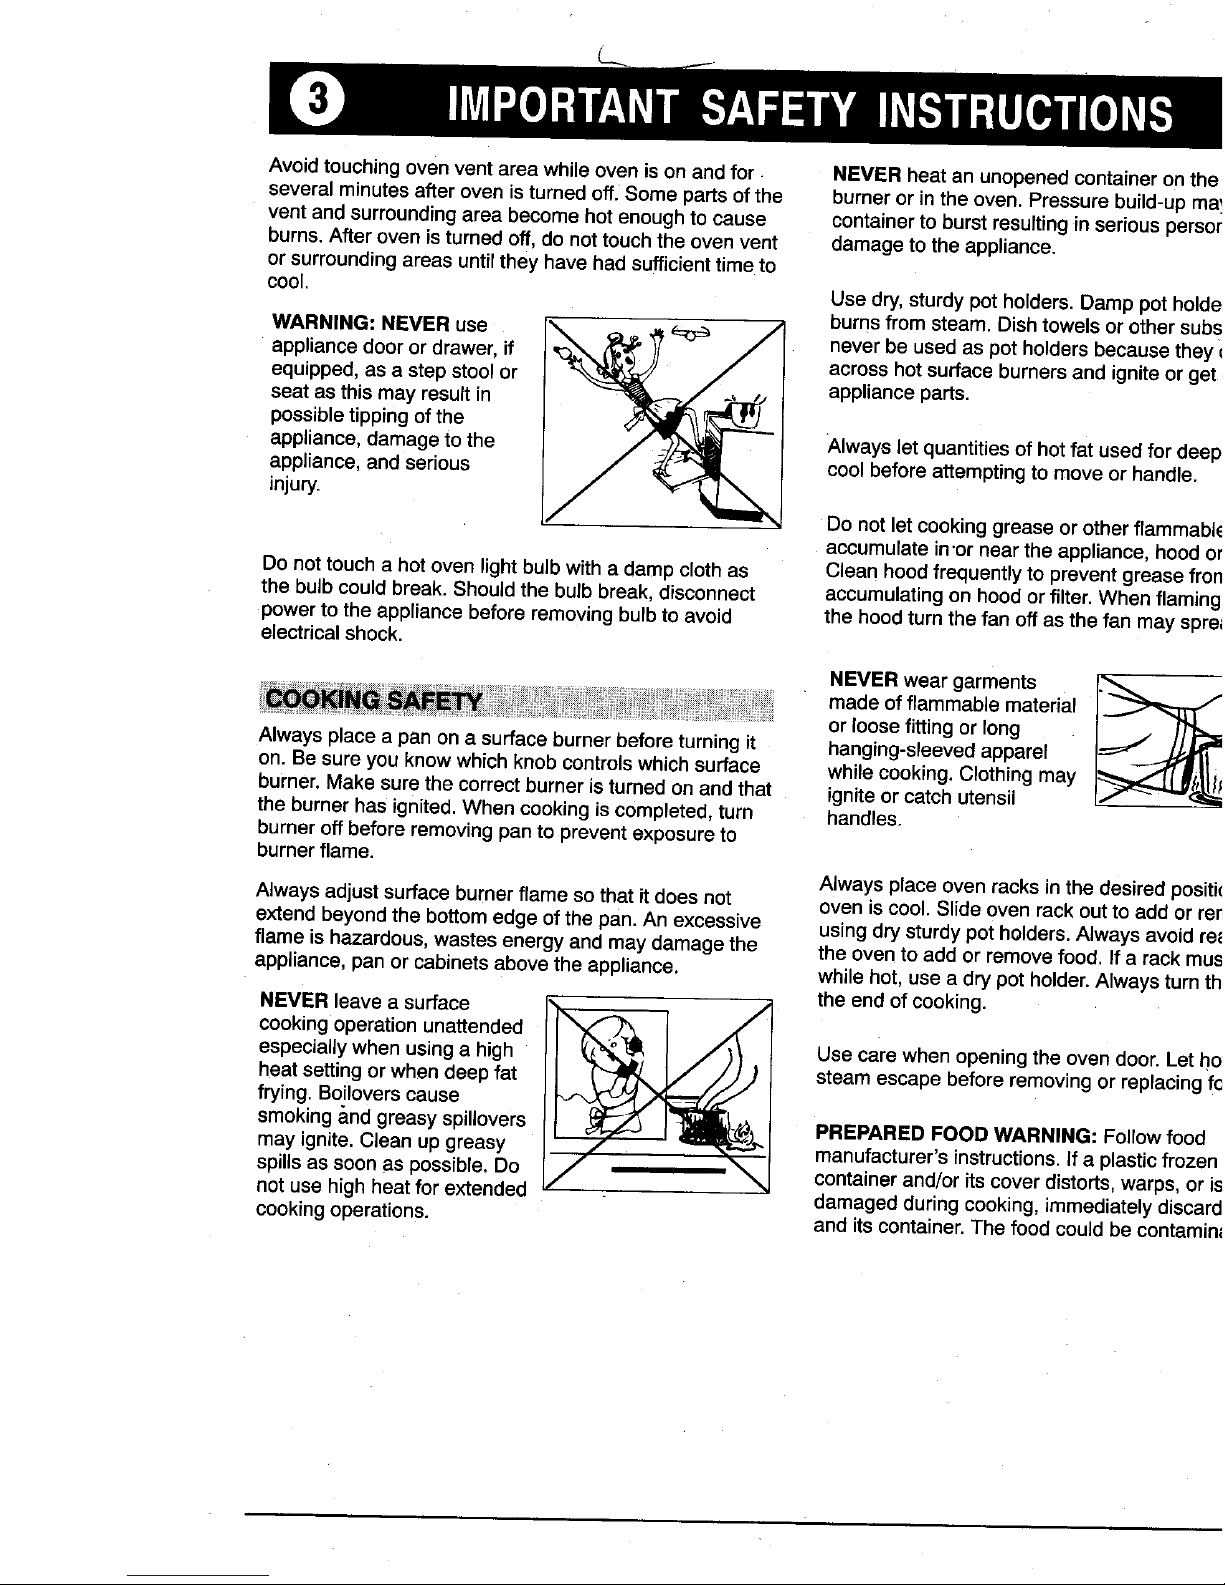
WARNING:NEVERuse _c_\ _ =._.._=., burnsfromsteam.Dishtowelsorothersub=
appliancedooror drawer,if _ neverbe usedaspotholdersbecausethey
equipped,asa stepstoolor acrosshotsurfaceburnersandigniteorgel
seatasthismayresultin applianceparts.
possibletippingofthe
appliance,damagetothe Alwaysletquantitiesof hotfat usedfordeel:
appliance,andserious coolbeforeattemptingtomoveor handle.
injury.
Donotletcookinggreaseorotherflammabl
accumulatein'orneartheappliance,hoodo
Donottoucha hotovenlightbulbwitha dampclothas Cleanhoodfrequentlytopreventgreasefro1
the bulbcouldbreak. Shouldthe bulbbreak,disconnect accumulatingonhoodorfilter.Whenflaminc.
powerto the appliancebeforeremovingbulbto avoid the hoodturnthe fan off asthe fan may spr_
electricalshock.
NEVERwear garments .'__
madeof flammablematerial
or loosefitting or long
Always placea pan on a surface burnerbefore turning it hanging-sleevedapparel
on. Besureyou know whichknob controlswhichsurface whilecooking.Clothingmay
burner.Makesure the correctburner is turned on and that igniteor catch utensil
theburner has ignited.Whencookingis completed,turn handles.
burneroff before removingpan to preventexposureto
burnerflame.
Always place ovenracksin the desiredpositi
Alwaysadjustsurface burnerflame so that it doesnot oven is cool. Slide oven rackoutto add or re
extendbeyondthe bottomedge ofthe pan.An excessive usingdry sturdypot holders.Always avoidre
flameis hazardous,wastesenergyand may damagethe theoven to addor removefood. Ifa rack mu_
appliance,panor cabinetsabove the appliance, whilehot, usea drypotholder.Alwaysturntl
NEVERleavea surface ___ the endofcooking.
cookingoperationunattended
especiallywhenusinga high Usecarewhenopeningtheovendoor.Leth_
heatsettingorwhendeepfat steamescapebeforeremovingor replacingT,
frying.Boiloverscause
smokingandgreasyspillovers PREPAREDFOODWARNING:Followfood
mayignite.Cleanupgreasy manufacturer'sinstructions.Ifa plasticfrozen
spillsassoonas possible.Do , containerand/oritscoverdistorts,warps,ori=
not usehigh heatforextended damagedduring cooking,immediatelydiscarc
cookingoperations, and its container.The food couldbe contami_
Page 5
IMP()RTANTSAFETYNSTRUCTIONS
Use panswithflatbottomsand handlesthatare easily Turn offallcontrolsand waitfor appliance
graspedand staycool.Avoid usingunstable,warped, beforetouching orcleaningthem. Do nottq
easilytippedor loosehandledpans. Alsoavoid using gratesor surroundingareasuntilthey have
pansespeciallysmallpans,with heavy handlesasthey time to cool.
couldbe unstableandeasilytip. Pansthat are heavyto
movewhen filledwithfood may also be hazardous. Cleanappliancewith caution.Use careto
burnsif a wet spongeor cloth is usedto wi
Besure utensilislargeenoughto properlycontainfood hot surface.Somecleanerscan producen
• andavoidboilovers.Pan sizeis particularlyimportantin appliedto a hotsurface.
deepfatfrying.Besurepanwillaccommodatethe volume
offoodthat istobe addedas wellas the bubbleactionof
fat.
Cleanonlypartslistedinthismanual.Dou
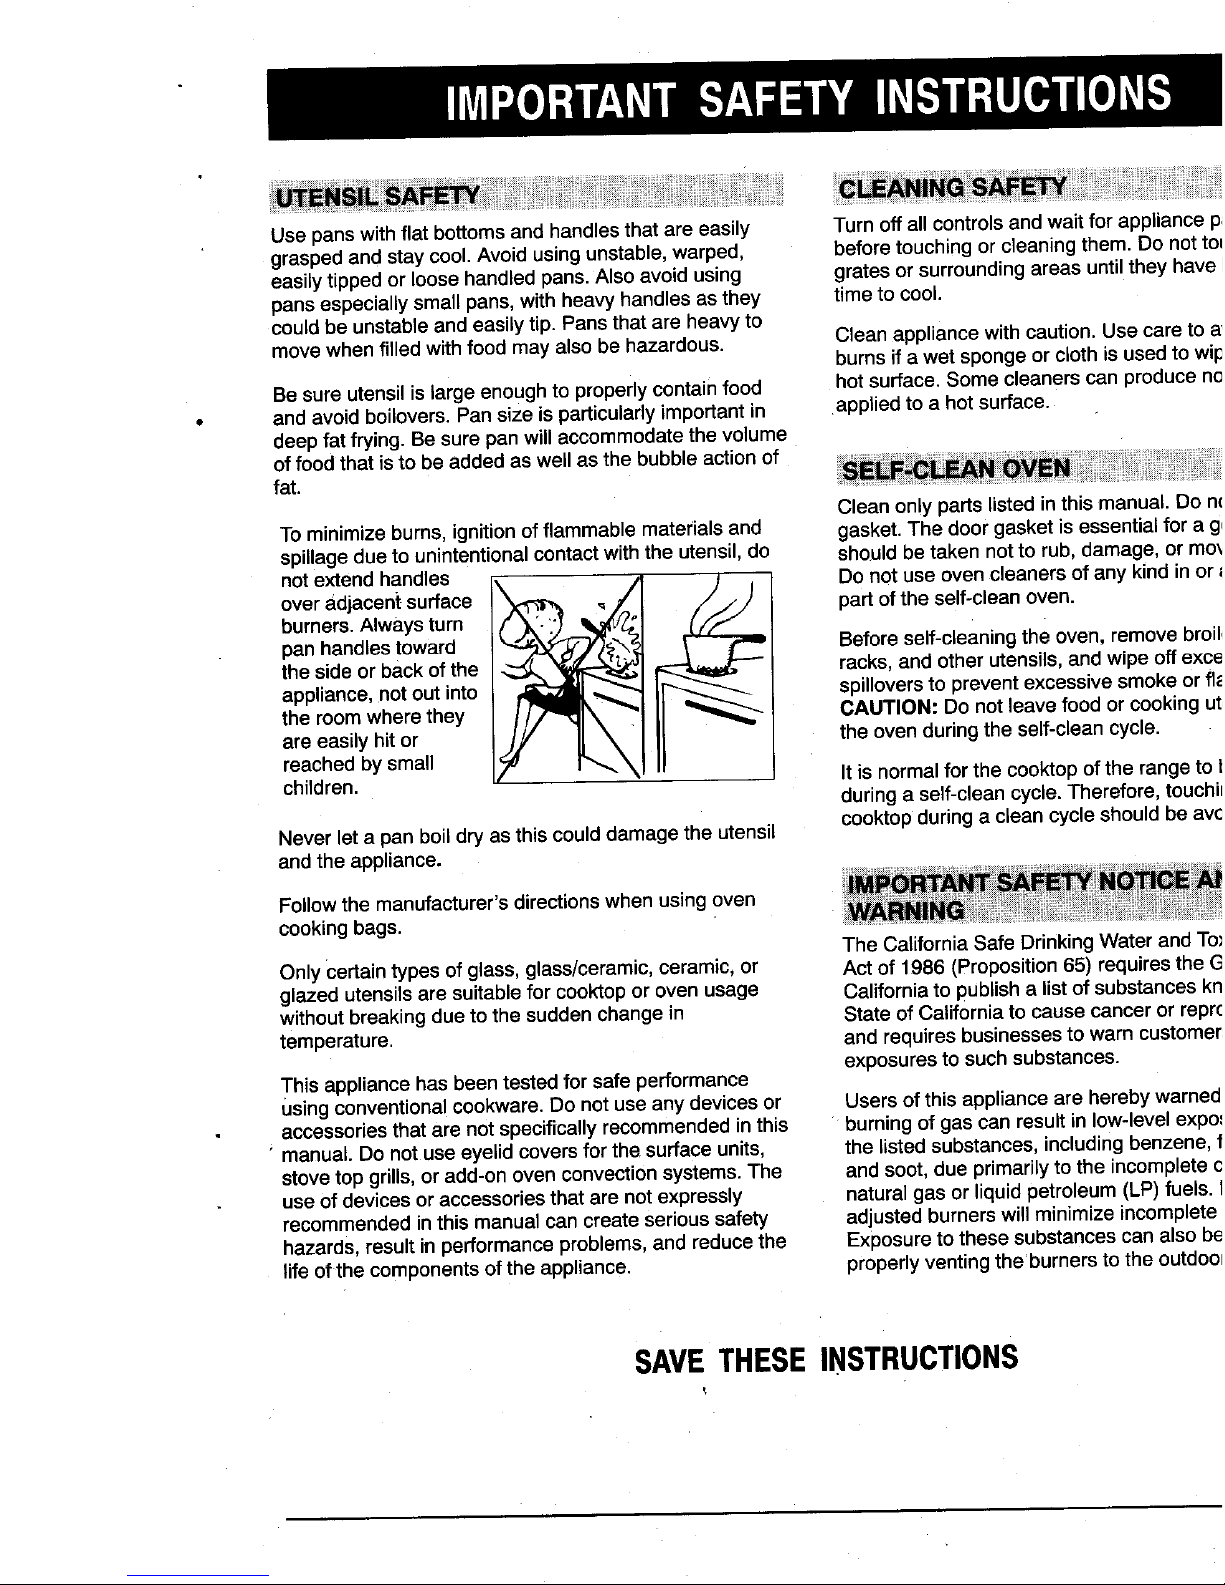
Tominimizeburns,ignitionofflammablematerialsand gasket.Thedoorgasketisessentialfor a
spillageduetounintentionalcontactwiththeutensil,do shouldbetakennottorub,damage,or m(
notextend handles F t , Donotuse oven cleanersofany kind inou
overadjacent surface _-_ __ _ partofthe self-cleanoven.
burners.Alwaysturn _._
pan handlestoward Beforeself-cleaningthe oven, removebro
theside or backof the _.,_ _--_. racks,and otherutensils,andwipe offexc
appliance,not out into _ spilloversto prevent excessivesmokeor f
theroomwhere they CAUTION: Do notleavefood orcooking L
areeasily hit or the ovenduringthe self-cleancycle.
reachedby small
children. It is normalfor the cooktopofthe ranget¢
during a self-cleancycle.Therefore, toucl
Never leta panboil dryasthis coulddamagethe utensil cooktopduringa cleancycle shouldbe a_
andthe appliance.
Followthe manufacturer'sdirectionswhen usingoven
cookingbags.
The CaliforniaSafe DrinkingWater and
OnlyCertaintypesof glass,glass/ceramic,ceramic,or Act of 1986(Proposition65) requiresthe,
glazedutensilsare suitablefor cooktopor ovenusage Californiato publisha listofsubstancesk
withoutbreakingduetothesuddenchangein StateofCaliforniato causecancerorrepa
temperature, andrequiresbusinessestowarncustome
exposurestosuchsubstances.
Thisappliancehasbeentestedforsafeperformance
Usingconventionalcookware.Donotuseanydevicesor Usersofthisapplianceareherebywarne
accessoriesthatare notspecificallyrecommendedinthis burningofgascan resultinlow-levelexp
• manual.Donotuseeyelidcoversfor the surfaceunits, thelistedsubstances,includingbenzene,
stovetop grills, or add-onovenconvectionsystems.The and soot,due primarilyto the incomplete
useofdevices oraccessoriesthat are not expressly naturalgas or liquidpetroleum(LP)fuels
recommendedin this manualcan createserioussafety adjustedburnerswill minimizeincomplet_
hazards,resultinperformanceproblems,and reducethe Exposureto these substancescanalsoI:
lifeofthecomponentsoftheappliance, properlyventingtheburnersto theoutdo,
SAVETHESEINSTRUCTIONS
Page 6
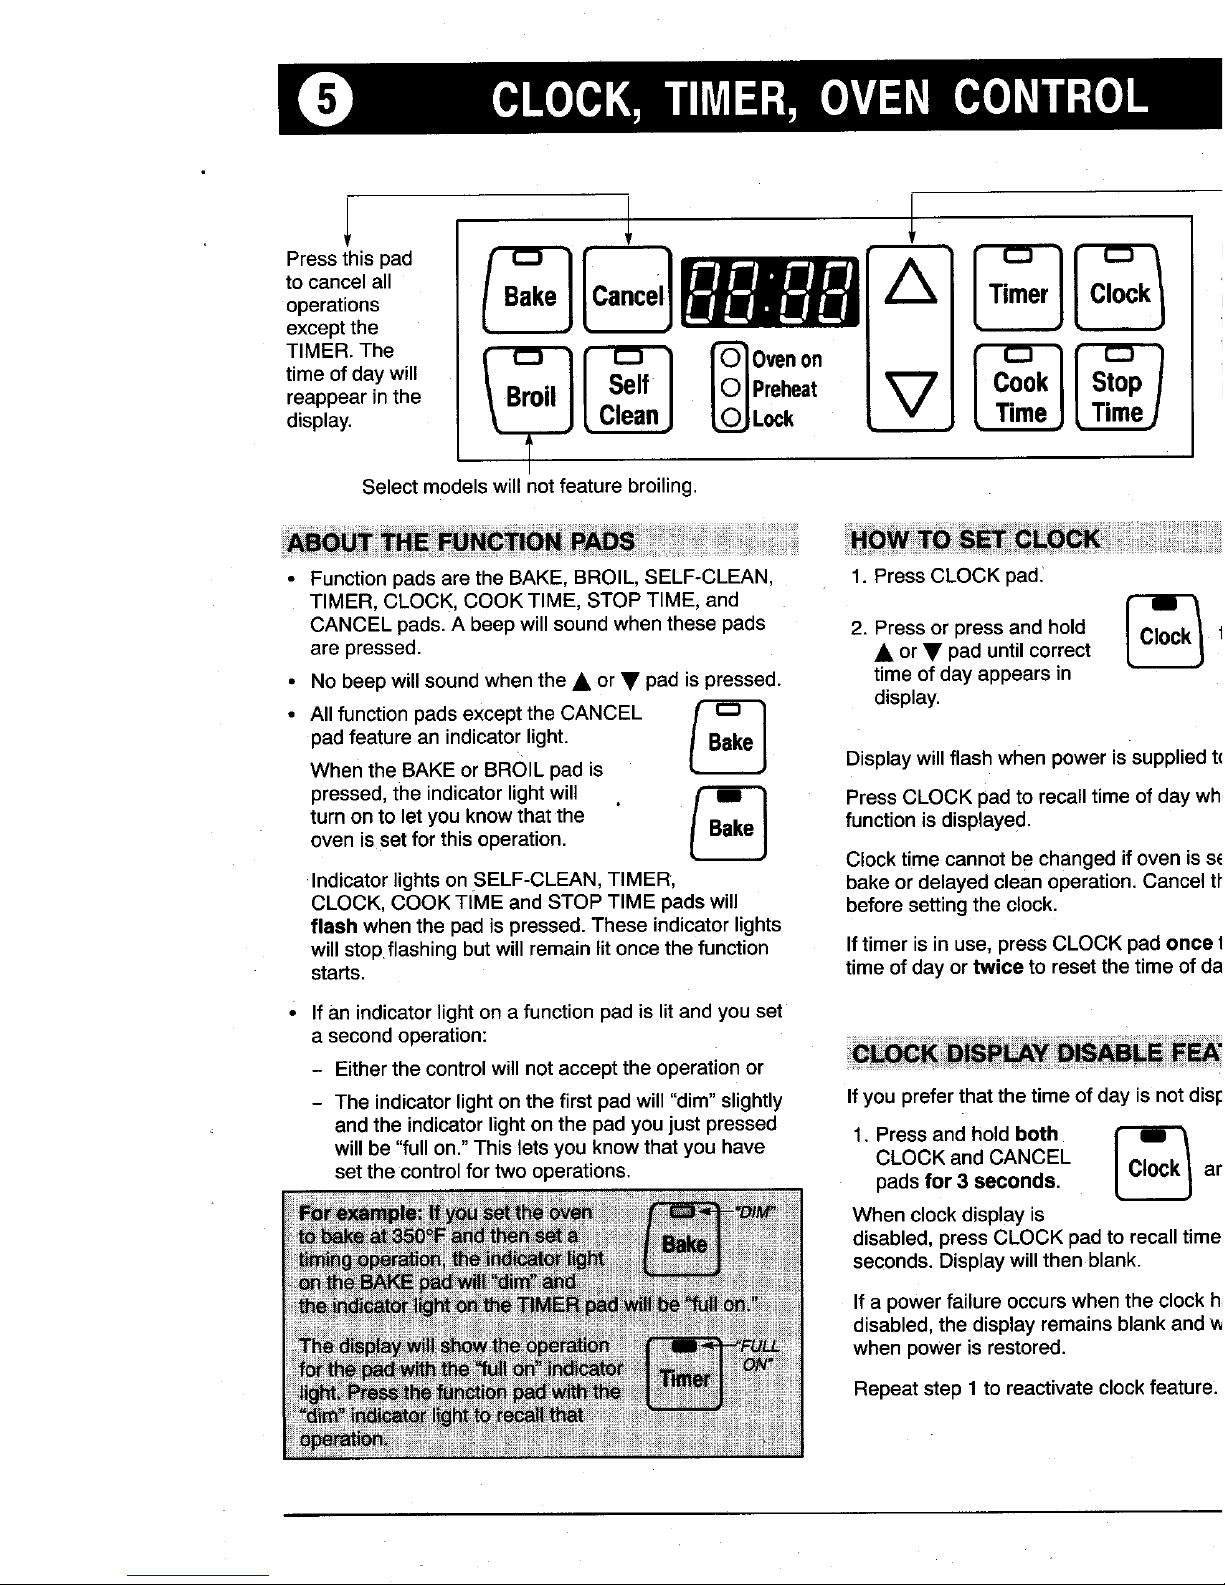
1 l 1
timeofdaywill =r _,Pr:heat Cook
reappearinthe
display, L_LOck Time
Selectmodelswillnotfeaturebroiling.
• Functionpadsare theBAKE,BROIL,SELF-CLEAN, 1. PressCLOCK pad.
TIMER CLOCK COOKTIME, STOPTIME, and r-_
CANCELpads.A beepwillsoundwhenthesepads 2. Pressor pressand hold [ Clock/ t
arepressed. • or• paduntilcorrect
• Nobeepwillsoundwhenthe• or• padispressed, timeofdayappearsin
• AllfunctionpadsexcepttheCANCEL _ display.
padfeatureanindicatorlight.
I-eJ
when theBAKEorBROILpadis Displaywillflashwhenpowerissuppliedt(
pressed,the indicatorlightwill _ PressCLOCK padto recalltime ofdaywh,
turn onto letyou knowthat the _ functionisdisplayed.
oven is setfor this operation.
Clocktime cannot be changedif oven iss_
Indicatorlights on SELF-CLEAN,TIMER, bakeor delayedclean operation. Cancel ti"
CLOCK,COOKTIME and STOPTIME padswill beforesettingtheclock.
flash whenthe padis pressed.These indicator lights
will stopflashing butwill remainlit once thefunction Iftimer is in use,press CLOCKpadonce t
starts, timeof dayor twice to reset the timeof da
' If anindicatorlight ona function padis lit andyou set
a secondoperation:
- Eitherthe controlwill not acceptthe operationor
- The indicatorlightonthe first padwill "dim"slightly Ifyou preferthatthe time of day is not disl:
andthe indicatorlightonthe pad youjust pressed 1. Pressand holdboth
willbe"fullon."Thisletsyouknowthatyouhave CLOCKandCANCEL
setthe controlfortwooperations, padsfor 3 seconds, ar
Whenclockdisplayis
disabled,pressCLOCKpadto recalltime
seconds.Displaywillthenblank.
Ifa powerfailureoccurswhentheclockh;
disabled,thedisplayremainsblankandw
whenpowerisrestored.
Repeatstep1toreactivateclockfeature.
Page 7
CLOCK,TIMER, OVEN CONTR()L
1.PressTIMER pad. _ The Control Lock-Outfeature preventstheo4
2. Pressor pressand hold r'_ L__ beingturned on.
• or • paduntilcorrect
I,,oerJ
time appearsindisplay, then Toactivate:
1. Pressandholdboth
STOPTIMEand
CANCELpadsfor 3
Thetimerfeaturedoesnotoperatethe oven, seconds.
Thetimercanbesetfrom1 minute[0:01]upto9 hours 2. "OFF"willappearindisplay
and50 minutes[9:50]. whenthisfeatureisactivated.Onlythecl
Thetimerwillstartautomatically.TheTIMERindicatoron timerfunctionswilloperatewhenControl
theTIMER padwill lightwheneverthe timeris inuse.One featureis activated.
longbeepand"End"willbe brieflydisplayedtosignalthe Repeatstep1todeactivate,
endofthetimeroperation,
Tocanceltimer:PressandholdIIMER padfor 3
seconds.Time ofdaywill reappearinthedisplay.
Youhavea choiceofthree"endof cooking'
beepsforthe AutomaticOvenTimerfeature
The 12 HourEnergySaverfeatureautomaticallyturnsoff • Option 1: Fourbeepsthenonebeepeve
theovenif itwasaccidentlyleftonfor 12 hours.To forthe next5 minutesor untilCANCEL
deactivatethisfeaturesotheovenwillNOT turnoff pressed,(Defaultoption,)
automaticallyat the endof 12hours: • Option2: Fourbeeps,Thereareno oth
1. PressandholdCLOCKpad l Cl°¢kI n_'_ • Option3".Fourbeepsthenonebeepev
for 3 seconds. _ thenext 12 hoursor untilCANCELpad
2. Press• or• paduntil8:88 the Nowto selectthe desiredoption:
iv]
appearsinthedisplay.
Currenttimeofdaywill 1. Pressandholdboth
reappearinthe displayafter COOKTiME and CLOCK
Icoo,
4 seconds, padsfor 3 seconds. _.Time
Repeatsteps1and2 to reactivatethe12 HourEnergy • A singlebeepwillsound.
Saverfeature.12:00willappearindisplaytoindicatethe o,Displaywillshowcurrent
EnergySaverfeatureis restored, option.
2. Press• or• padto
selectthe optionnumber
youwish.Thecurrenttime
ofdaywillreappearin the
displayafter4 seconds,
Page 8
SURFACECOOKINE
Yourrangeis equippedwith pilotlessignition.Be sureall Topreventdamage tothe cooktop or pan, nev
surfacecontrolsare setin the OFFpositionprior to surfaceburner withouta pan in place, never
supplyinggas totheappliance, to boildryand neveroperatea surface bume=
for extendedperiods of time.
IMPORTANT:Whenthe applianceis firstinstalled,the To lightsurface burner:
surfaceburnersmaybe difficulttolightduetoairin the 1. Placea panontheburnergrate.
gasline.Thismay alsooccuriftheappliancehasbeen
NOTE:Theburnerflamemayliftoffthebu
disconnectedfromthe maingassupplyorif ithasnot
anda "roaring"soundmaybeheardifa pa
beenusedforseveraldaysorweeks.
placedonthe gratebeforelightingthe burr
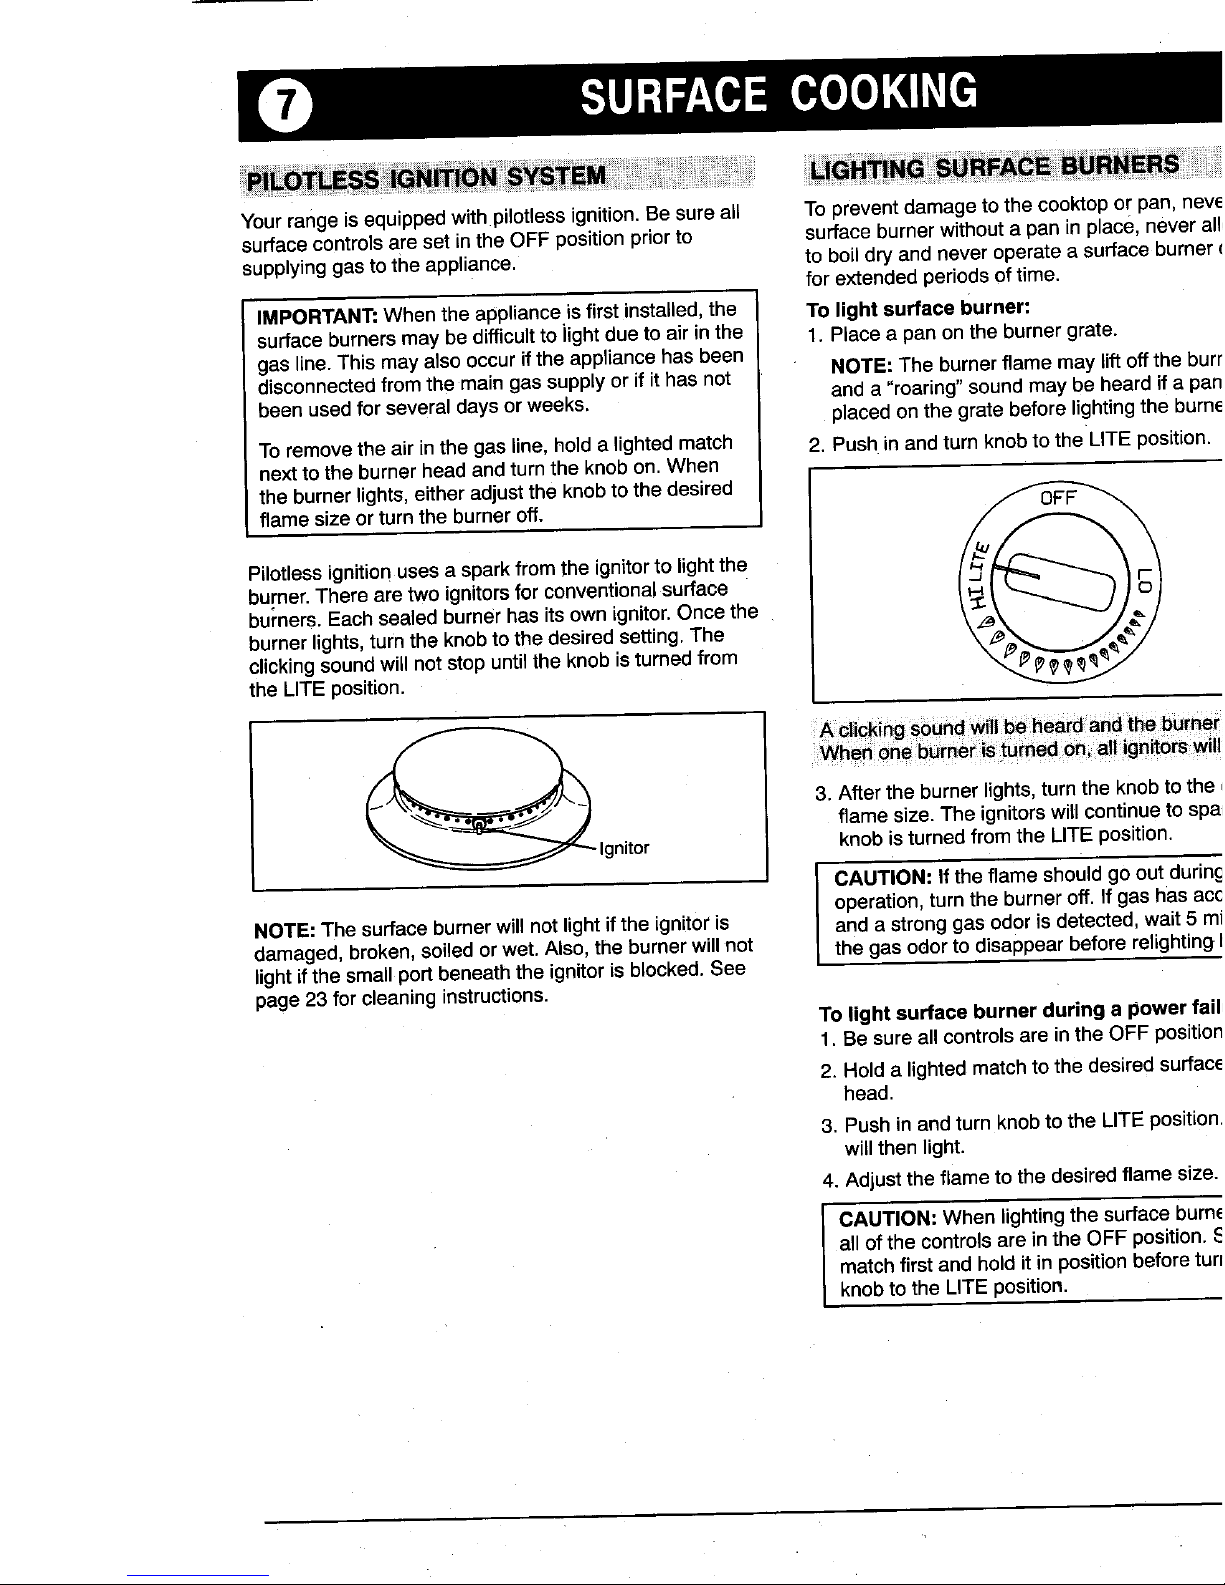
Toremovetheair inthegas line,holda lightedmatch 2. Pushinandturnknobtothe LITE position.
nexttotheburnerheadandturntheknobon.When
theburnerlights,eitheradjustthe knobtothe desired
flamesizeor turn the burneroff.
Pilotlessignitionusesa sparkfromthe ignitorto lightthe
burner.Therearetwo ignitors for conventionalsurface
burners.Eachsealedburner has its own ignitor.Oncethe
burnerlights,turnthe knobto the desired setting.The
clickingsoundwillnot stop untiltheknob isturnedfrom
the LITEposition.
il be hearda_d_heburne
w eo bune! i,ed wi
3. Aftertheburnerlights,turntheknobtoth{
flamesize.The ignitorswillcontinuetosp
Ignitor knobisturnedfromthe LITEposition.
CAUTION:If theflameshouldgooutdurir
operation,turntheburneroff.ifgas has ac
NOTE:The surfaceburnerwillnotlightifthe ignitor is and a stronggas odorisdetected,wait5 n
damaged,broken,soiled orwet. Also,the burnerwill not the gasodortodisappearbeforerelighting
light ifthesmallportbeneaththe ignitor is blocked.See
page23 for cleaninginstructions.
To lightsurface burnerduring a powerfai
1, Besureallcontrolsare inthe OFF positi(
2. Holdalightedmatchtothedesiredsurfa(
head.
3. Pushin andturn knobto the LITEpositioJ
willthen light.
4. Adjusttheflame tothe desiredflame size
I CAUTION:When lightingthe surfaceburr
allofthe controlsareintheOFF position.
matchfirstandholditinpositionbeforetu
knobtothe LITE position.
Page 9
SURFA(;ECOOKING
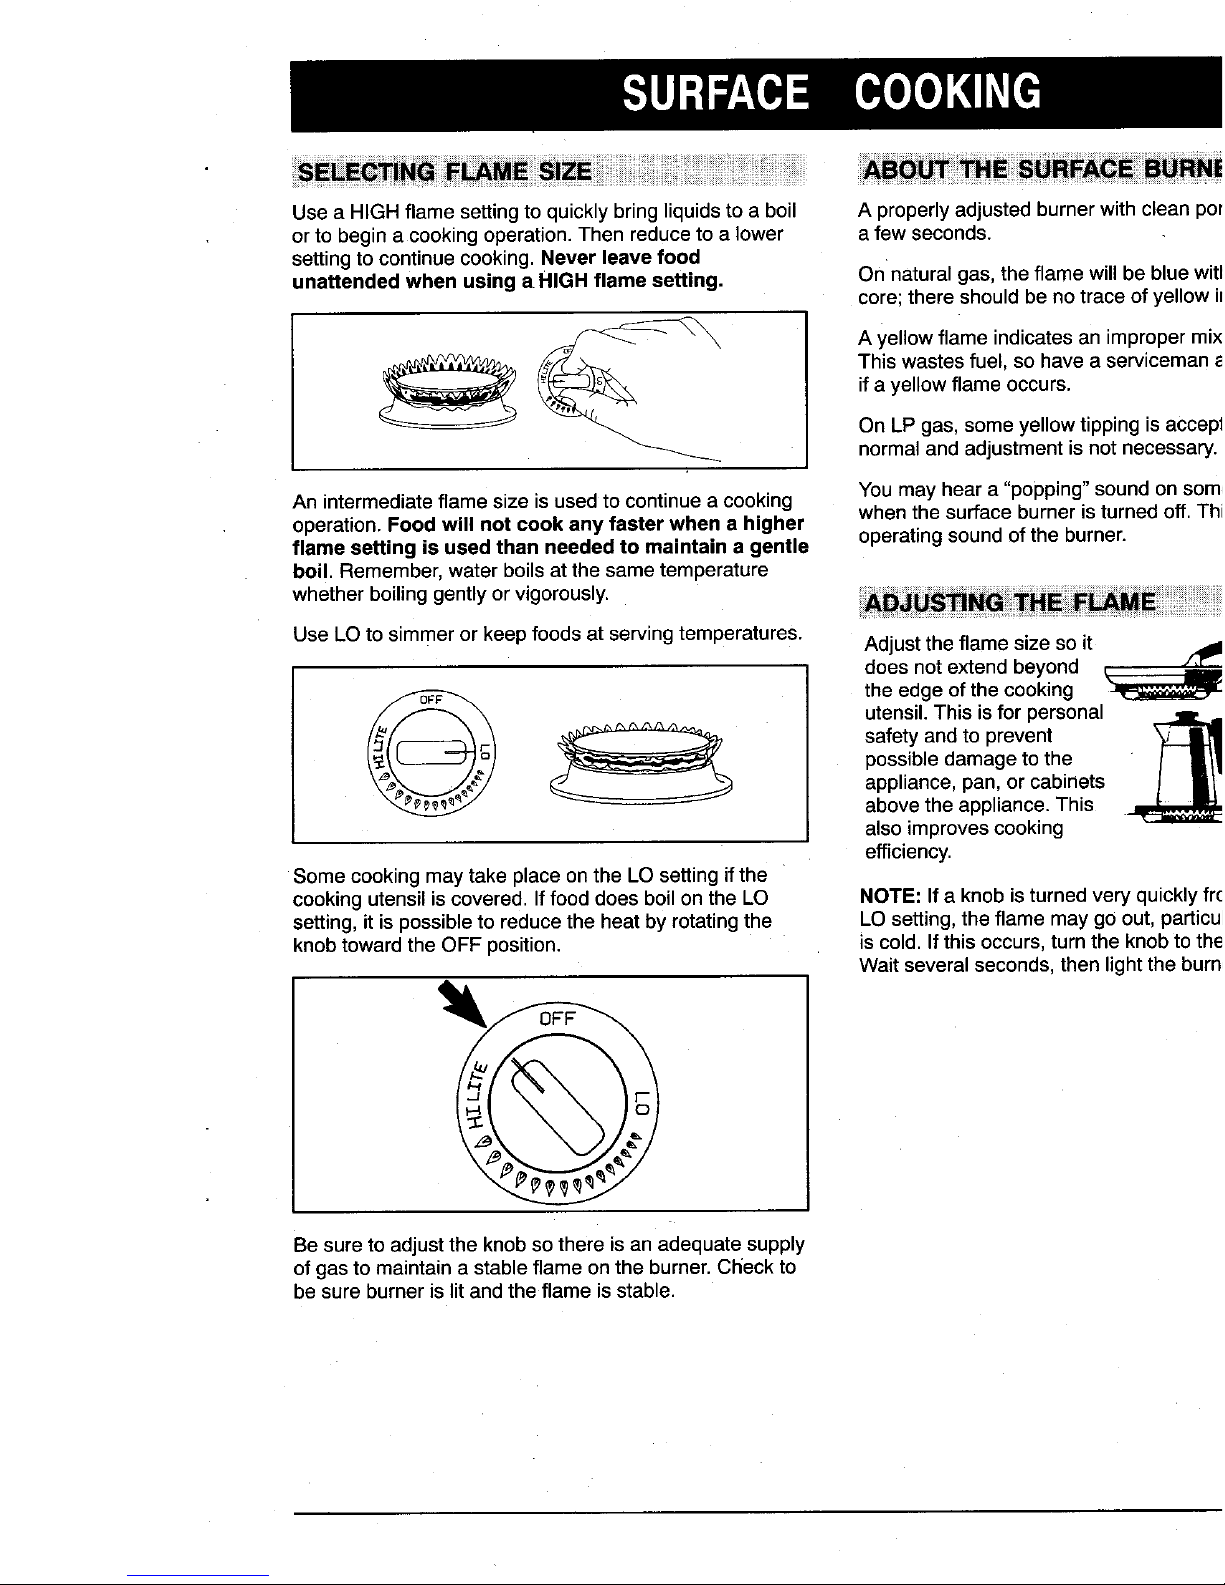
Usea HIGHflamesettingto quicklybringliquidsto a boil A properlyadjustedburnerwith clean por
orto begina cookingoperation.Thenreduceto a lower a few seconds.
settingto continuecooking.Never leave food
unattendedwhen usinga HIGH flamesetting. On naturalgas,the flamewill be bluewitl
core;thereshouldbenotraceofyellowiu
A yellowflame indicatesan impropermix
Thiswastesfuel, so havea servicemana
if ayellow flameoccurs.
On LPgas, someyellow tipping isaccept
normaland adjustmentis notnecessary.
An intermediateflamesize is usedto continuea cooking Youmay heara "popping"soundonsomq
whenthe surface burneris turnedoff. Thi
operation.Foodwill not cook any faster whena higher
flame settingis usedthan neededto maintain a gentle operatingsoundoftheburner.
boil.Remember,waterboilsatthesametemperature
whetherboilinggentlyorvigorously.
UseLO to simmerorkeep foodsat servingtemperatures. Adjusttheflamesize so it
does not extendbeyond
theedge ofthecooking
O _ utensil.This isfor personal _
safety andto prevent
possibledamagetothe
appliance,pan,or cabinets
abovethe appliance.This
also improvescooking
efficiency.
Somecookingmaytake placeonthe LO setting ifthe
cookingutensil iscovered.Iffooddoes boil on the LO NOTE:Ifa knobis turnedvery quicklyfro
setting,it is possibleto reducethe heatby rotatingthe LOsetting,the flame maygo out, particul
knobtoward the OFF position, iscold. Ifthis occurs,turn the knobto the
Waitseveralseconds,then lightthe burn,
Besure to adjustthe knob sothere isan adequatesupply
of gasto maintaina stableflame onthe burner.Check to
besure burnerislit andthe flame is stable.
Page 10
SURFA(',ECOOKING
Undernocircumstancesarethe surfaceburner Theporcelainonthe burnerisdurablebut o_
assembliestobe taken apartfor cleaning.The surface with use may graduallyloseitsshine.
burnerassemblycan beremovedto cleanthe burnerbox
area. Thesealed surface burnersare securedtott-
Thetwo surface burnerassembliesaresecured inplace andare NOTdesignedto beremovedbythe
duringtransportationwith screws.Oncethe range is
installed,thesescrews may beremovedto allow quick Selectmodelsfeatureone or two specialSUI
and easy removalofthe burnerassemblies. SPEEDsealedburners located at the right-fr,
left-rear.Usetheseburnersto quickly bring
__ andwhenusing largerpans. Seeinformation
Plate,located on the lowerrangefront frame
broilerdooror lowerpanel,to determineif yol
featuresthese burners.
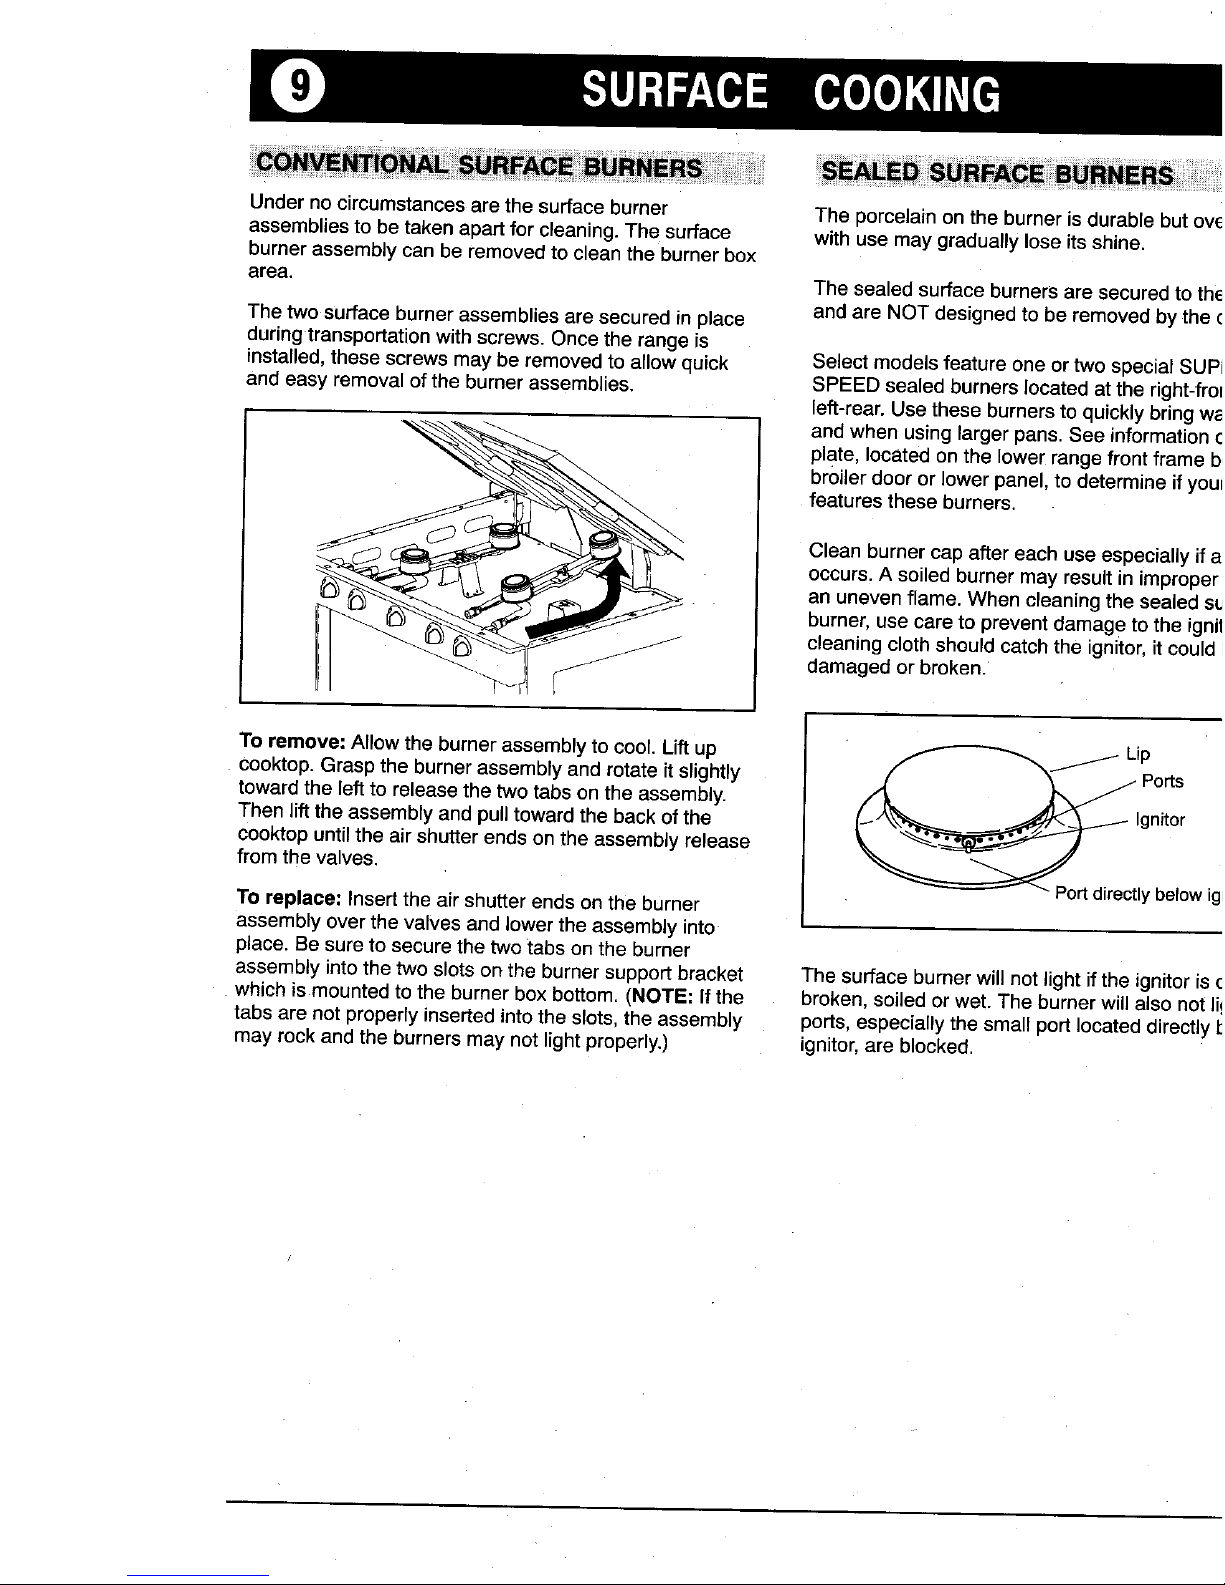
Clean burnercap after eachuseespeciallyif
__ occurs.A soiled burnermay resultin imprope
an unevenflame.Whencleaningthe sealed.,
t_ ____'r'___'_->__ burner,usecare to preventdamage to the igr
cleaningcloth shouldcatch the ignitor,it coulc
damagedor broken.
Toremove:Allowthe burnerassemblytocool.Liftup _ __ Lip
Cooktop.Graspthe burnerassemblyand rotateit slightly [ "_ j Ports
towardtheleft to releasethetwo tabson theassembly. _--__/'__'_ e
Then lift the assemblyand pulltoward the backof the (__ Ignitor
cooktopuntilthe air shutterends on the assemblyrelease
fromthe valves. ---Portdirectlyb lowi
Toreplace: Insertthe airshutterends onthe burner
assemblyover the valvesand lowerthe assemblyinto
place.Besureto securethe twotabs on the burner
assemblyinto thetwo slotson the burnersupportbracket Thesurface burnerwill not lightif the ignitor is
which is mountedto the burnerbox bottom. (NOTE:If the broken,soiledor wet. Theburnerwill also not
tabsare notproperly insertedintothe slots, the assembly ports,especiallythe small port locateddirectly
mayrockand theburners may not lightproperly.) ignitor,are blocked.
Page 11

SURFA(;E COOKING
Cookwarewhichextendsmorethantwoinches beyond The panmaterialdetermineshowever
thegrate,restsontwo grates,ortouchesthecooktopmay isconductedfromtheheatsourcetotf
causea buildupof heatwhichmayresultindamageto widelyusedpanmaterialsare:
thetheburnergrate,burnerorcook'top.
Cookware,suchas a wokwithasupportring,which Aluminum- excellentheatconductor.
restrictsair circulationaroundtheburnerwillcauseheat causeitto darkenorpit. Oftenuseda_¢
toimprovethe heatingof otherpanme
tobuildupandmayresultit1damagetotheburnergrate,
burnerorcooktop. Copper - excellentheatconductor.Di=
Foodscookfasterwhenthecookwareiscoveredbecause requiresconstantpolishing.Oftenuse¢
moreheatisretained.Lowertheflamesizewhen coatingto improvethe heatingofother
cookwareis covered.
StainlessSteel - slowconductorofhE
The cookingperformanceisgreatlyaffectedbythetypeof spotsandproducesunevencookingre_
cookwareused.Propercookwarewillreducecooking attractive,easytocleanand stainresis
times, useless energyandproducemore evencooking heat betterifothermetals (aluminumOl
results.For bestresultsuse a heavy gauge metalpan combinedor sandwichedtogether as a
with a smoothflat bottom,straightsides and a tight fitting
lid. CastIron - slowheat conductor.Cook=
Cookwarewithuneven,warped,or grooved bottomsdo temperature isreached.Heavy.Needs
notmakegoodcontact withthe heatingsurface,will cleaningeasierandto preventsticking
reduceheatconductivityand resultin slower,less even
heating. Glass - slow heat conductor.Easyto c
mayonlybe usedin theoven.
Todeterminethe flatnessof thebottomof a pan, placethe
edgeof a ruleracrossthe bottomof theutensil. Holdit up Porcelain Enamel - glass-likesubstan
to thelight. Littleornolight shouldbe visibleunderthe Heatingcharacteristicsdependon bas_
ruler, clean.
Acceptablewater-bath or pressurecannersshould not
beoversizedandshould notreston two burnergrates.
They shouldalso haveflat bottoms.
When canning,usethe HIsettingjust until the water
comesto a boilor pressureis reachedin a pressure
canner,then reduceto a settingthat maintainsthe
pressureora boil.
Prolongeduseof the HI setting,the useof incorrect
canningutensils,or the use of impropercanning
techniquesmay produceexcessiveheatand result in
permanentdamageto the appliance.
NOTE:Foradditional canninginformationcontactyour
localCountyExtensionOffice.Or,contactAIItrista
ConsumerProductsCompany,marketer of Ballbrand
homecanningproductsat 800-240-3340or write:
Alltrista Corp., ConsumerAffairsDept., P.O.Box2729,
Muncie,IN47307-0729.
Page 12

Besureoven controlisset in theOFF positionprior to Theoven ventis locatedat the baseofthe ba
supplyinggasto the appliance. Whenthe ovenis in use,this area mayfeel w,
thetouch.Topreventbakingproblems,do not
Yourappliancefeaturespilotless ignition.A glo bar will ventopeningin anyway.Also,do notplace pl
light theoven burner.Withthis type of ignitionsystem,the thevent openingas heatfrom the vent could(
oven will notoperate duringa powerfailure or ifthe oven melt theplastic.
isdisconnectedfromthe wall outlet. No attempt should
be madeto operate oven during a powerfailure.
• Do not lockoven doorduringa cookingop_
The sizeand appearanceof a properlyadjustedoven - If thedoor islockedthe LOCK
burnerflame shouldbe asshown: indicatorwill light andthe C:
E,
operationwill be canceled.
Unlockthe door then reset the
operation.
- Ifoven temperatureis above 400°F,the i
lockingmechanismwillengageand the (
! ! Cone in center is smatter be unlockeduntilthe oven hascooled.
• The oven burnercycles on and offto maintE
i temperaturefor baking.The broil burnercy¢
offto maintaintemperaturesfor broiling.
-_I_ _<--- Coneapprox.1/2-inoh NOTE: Selectmodels do not featurebroilin(
• If you pressBAKE or BROIL pad and do no1
oventemperatureor broilsetting within30 s
Theoventemperature is maintainedby cyclingthe burner programwill automaticallycancel.The time
onand off. Afterthe oventemperaturehas beenset, there reappearinthe display.
willbe about a45 seconddelay beforethe burnerignites. • Tochange oventemperatureor broilsettin(
Thisisnormal andno gasescapesduringthisdelay, cooking:
Duringthe cleancycle,and someextendedovencooking - Iftemperature is displayed, press
operations,you may heara "popping"sound whenthe • or• padto selectthe new
burnercycles off.This is a normal operatingsound ofthe temperature.
burner.
- If anotherfunctionisdisplayed, press
BAKEor BROIL padthen press
• or• pad to selectnew temperature.
Page 13

ABOUTYOURRANGE theoven
1. PressBAKEpad. INDICAToRBAKE----I_
• BAKEindicatoronthe BAKEpadwilllight. LIGHT
• 000will light in display.
2. Pressor pressand hold• or• padto selectoven
temperature.
• 350° willlightwhen eitherpadis pressed.
• Oventemperaturecan besetfrom 170°to 550°.
3. Therewill bea 4 seconddelay beforethe oventurns
on.Whenthe oventurnson: _O"_Ovenon
• OVENON indicatorwilllight. _O Preheat
• PREHEATindicatorwilllight. Lock
• Thepreselectedtemperaturewillremainindisplay.
4. Allow8to 15minutesfor the ovento preheat.
• A singlebeepwillindicatethat the ovenhas i=1o.,on
preheated. I_1 Preheat
• The OVENON indicatorwillremainlit. L_.JLock
• The PREHEATindicatorwillturnoff.
5. Placefoodinthe oven. NOTE: TheoventemperaturecanI
anytime. Ifthetemperatureis chan
PREHEATindicatorwillturnbacko
temperatureisreached.A beepwill
newtemperature hasbeen reache¢
6. Checkcookingprogress atthe minimumcooking NOTE:Seepages13, 14,and 15f(
time. Cook longer ifneeded, informationon baking and roasting.
,P__C,NCL0a0an,re ove.oo,.rot.eoven
• The BAKE indicatoronthe BAKEpad willturnoff.
• The OVEN ON indicatorwill turn off.
NOTE: If you forget to turn off the
• Timeofday willreappearin display, automaticallyturn offat the endof
youwishto deactivatethisenergy
see page 6.
Page 14

OVEN U,c;E
Ovencharacteristics: Eachoven has itsownpersonal • If usingheat-proof glassware,ordark pan.,
bakingcharacteristics.Therefore,donotexpectthatyour Baker'sSecretor Wilton reducetheovent_
newovenwillperformexactlylikeyourpreviousoven.You by25°Fexceptwhenbakingpies orbread.L_
mayfindthatthecookingtimes,oventemperatures,and same bakingtimeas calledfor intherecipe.
cookingresultsdiffersomewhatfromyourpreviousrange.
Allowa periodofadjustment. Allow hotair to flow freely throughthe oven
optimumbakingresults.Improperplacementof
Usea reliablerecipeandaccuratelymeasurefresh theovenwillblockairflowandmay resultinunq
ingredients,Carefullyfollowdirectionsforoven browning.Foroptimumbrowningandevencool
temperatureandcookingtime. results:
Usethe correctrack position.Bakingresultsmaybe • Donotcrowda rackwithpans.Neverplacer
affectedifthewrongrackisused.Foroptimumresults, onecookiesheet,one13x9x2-inchcakepan
bakefoodsononerack.Selecta rackpositionthat 9-inchroundcakepansononerack.
locatesthefood inthe centerof theoven.If baking ontwo • Staggerpanswhenbakingon two racks so o
racks,selectrackpositions#2 and4, #1 and4 or#2 and
5. notdirectlyoveranotherpan.
• Allowtwoinchesbetweenthe panandtheov
• Top browningmay be darker if foodislocated
towardthetopof theoven. Checkthe cooking progressat the minimum
recommendedintherecipe.If necessary,contir
• Bottombrowningmaybedarkeriffoodislocated checkingat intervalsuntilthefoodisdone.Ifth(
towardthebottomoftheoven. doorisopenedtoofrequently,heatwillescapet
thiscanaffectbakingresultsandwastesenerg_
• Whenusingtworacksfor baking,allowenoughspace
betweentheracksforproperaircirculation.Browning If you add additionalingredientsoralterther
andcookingresultswillbeaffectedifairflowis expectcookingtimesto increaseordecreasesl
blocked.
Cookwarematerialplaysanimportantpartin baking
results.Alwaysusethetypeandsizeofpancalledforin
Preheatingisnecessaryfor baking.Allowabout
therecipe.Cookingtimesorcookingresultsmaybe
affectedifthewrongsizeis used. minutesfortheovento preheat.A singlebeepv
indicatethattheovenispreheated.It isnotnec,
• A shiny metal pan reflectsheatawayfromthefood. preheatfor roasting.
Thistype of pan produceslighterbrowninganda softer Selectingatemperaturehigherthan desiredwill
crust.Use shinypansfor bakingcakes or cookies, preheatthe ovenany faster, andmay havea ne
effecton bakingresults.
• A dark metal, dull,anodizedorsatin-finishpan
absorbsheatand producesdarkerbrowningwitha
crispercrust.Usedarkpansforpies,piecrustsor
bread.
Do netcoveran entirerack withfoilor placet
• Foroptimumbakingresults,bakecookiesandbiscuits undercool<ware.Tocatchspillovers,placea pie_
onaflat cookiesheet.Ifthepanhassides,suchas a littlelargerthanthe pan,ontherackbelowthep
jellyrollpan,browningmaynotbeeven. placefoilon theovenbottom.
Page 15

OVEN ;E
COMMON BAKING PROBLEMS AND WHY THEY HAPPEN
PROB_M POSSIBLECAUSES
Cakesare uneven. • Panstoo closeor touchingeach otheror ovenwalls. • Batterunevenin I
• Temperaturesettooloworbakingtimetooshort.• Ovennotlevel.* Un(
• Too much quid.
.... peraturesettoo hgh, Bakngt metoo ong • Overmxng _Toom_
• Panstouchingeachotherorovenwa s * ncorrectrackpositon.;
Cake falls. =Toomuchshorteningorsugar.• Toomuchortoolittleliquid.• Temperatl
low.• Oldortoolittlebakingpowder.• Pantoosmall.. Ovendooropened
• Addedincorrecttypeofoiltocakemix.=Addedadditionalingredientsto
recipe.
;Cakes, cookies, biscuits _incorrectra_
properlyOrproperlYattachedtc
F0t 6ptimum_esu_ bake onOnerack ffbak ngc_es on tworockspiac
Cakes, cookies, biscuits • Oven notpreheated.• Panstouchingeachotherorovenwalls.• Incorre
too brown on bottom, position•• Incorrectuseofaluminumfoil.• Placed2cookiesheetsonone
glass,dark,stainedwarpedordullfinishmetalpans,(Usea shinycookie
Followcookwaremanufacturer'sinstructionsforoventemperature.Glassy
cookwaresuchas Ecko'sBaker'sSecretmayrequireloweringthe ovente
25°1=.
Excessive shrinkage. • Toolittleleavening.• Overmixing.• Pantoo large.• Temperaiuresettoo
• Bakingtimetoolong.• Panstooclosetoeachotherorovenwalls.
Cakeshave tunnels. • Notenoughshortening.• Toomuchbakingpowder., Overmixingorat to
speed.• Temperaturesettoo high.
Pie crust edges too • Temperaturesettoo high.• Panstouchingeachotherorovenwalls.• Ed
brown, toothin;shieldwithfoil.
Pies havesoaked crust. • Temperaturetoolowatstartofbaking.• Fillingtoojuicy.• Usedshinyme
Page 16

OVEN USE
Roasting isthe method for cooking large, tender cuts of basted naturally, eliminating the need for additi,
meat uncovered, without adding moisture. Most meats are basting.
roasted at 325°F. It is not necessary to preheat the oven.
Place the roasting pan on either of the two lowest rack The cooking time is determined by the weight c
positions, and the desired doneness. For more accurate r
a meat thermometer. Insert it so the tip is in thF
Use tender cuts of meat weighing three pounds or more. the thickest part of the meat. It should not touc
Some good choices are: Beef rib, ribeye, top round, high bone.
quality tip and rump roast, pork Ioin roast, leg of lamb,
veal shoulder roast and cured or smoked hams. Remove the roast from the oven when the thet
registers the desired internal temperature.
Season meat, if desired, either before or after roasting.
Rub into the surface of the roast if added before cooking. NOTE: For more information about food saf_
USDA's Meat & Poultry Hotline at 1-800-535
Place the meat fat-side-up on a rack in a shallow roasting cooking information call or write to the Natiol
pan. Placing the meat on a rack holds it out of the men's Beef Association, 444 North Michigan
drippings, thus allowing better heat circulation for even Chicago, Illinois60611, or call 1-800-368-31
cooking. As the fat on top of the roast melts, the meat is
Approximate Oven App
Weight Temperature Internal Roa:
Cut of Meat (pounds) in °F Temperature (mit
Beef
RibRoast(cut-side-down) 4 to8 325°F 145°F(medium/rare) :
160°F(medium)
RibEye Roast 4 to 6 350°F 145°F(medium/rare)
160°F(medium)
LoinTenderloinRoast 2 to 3 400°F 145°F(medium/rare)
Pork,Fresh
ShoulderBladeRoast,(boneless) 4 to 6 325°F 160°F
ShoulderBladeRoast 4 to 6 325°F 160°F :
LoinBladeor Sirloin Roast 3 to 4 325°F 160°F :
BonelessPorkLoin 6 to 8 I 325OF 160OF
Pork,Smoked
Ham, Half(fullycooked)** 5 to 7 325°F 140°F
Ham,Half (cook-before-eating) 5 to 7 325°F 140°F
Poultry
Turkey,unstuffed*** 12to 16 325°F . 180°-185°F
16to 20 325°F 180°-185°F
20 to24 325°F 180%185°F
Turkey,Breast 3to 8 325°F 180°F
Chicken Fryer 2 1/2to3 1/2 350-375° 180°F
Chicken, Roaster 4 to 6 350-375°F 180°F
Lamb
Leg (boneless) 2 to 3 325°F 160°F
170°F
Whole Leg 5 to 7 325°F 160°F
* Cookingtimes areapproximateandmay vary dependingonth'eshapeofthe roast.A meatthermometeris themo,_
to determinedoneness.
** Add waterand followpackagedirections.
*** Stuffedturkeyrequiresadditionalroasting time.Shieldlegs andbreast with foil to preventoverbrowninganddryinc
Page 17

AB()UTYOURRANGE the oven
AUTOMATIC OVEN TIMER CONTROL Theclockmustbefunctioningandsetat the
ofdayforthisfeaturetooperateproperly.
TheAutomaticOven-rimerControlisusedt,
ovenonandoffata presettimeof day.This
• Highlyperishablefoodssuchasdairyproducts, be usedforeitherovencookingorself-clear
pork,poultry,seafoodor stuffingarenot • Immediatestart: Oventurnsonimrnedia
recommendedfora delayedcookingoperation, automaticallyturnoffat a presettime.
• Bakingisnot recommendedbecausepreheatingis • Delayedstart: Delaysthestartof cookin!
required. . andautomaticallyturnsoffata presettim,
Cooktimecanonlybe setforupto 11hours
minutes(11:59).
HOW_TOS_TIMED COOKOPERATION
1.PressCOOKTIME pad.
• COOKTIME indicatoronthe COOKTIME padwill
_ then
flash.
• 0:00willlightin display•
2. Pressor pressand hold• orV padto enter cooking
time.
3: Press BAKEpad.
• BAKE indicatoronBAKE padwilllight. I /_ I
'_ then
• 000 willlightin display.
4. Pressor pressandhold• orV padtoenteroven
temperature.
NOTE:Beepswillsoundand000willflashindisplay
iftheBAKEpadisnotpressedwithin4 seconds.
5. IFYOU WISHTO DELAYTHESTARTOF
COOKING (ifnot,skipto#6):
a. PressSTOPTIMEpad. [ TS_°PeJ [_,]
• STOPTIME indicatoronSTOPTIME pad will
flash, then then
b. Pressorpressand hold • orV padto entertime
of dayyou wish ovento turnoff.
c. PressCLOCKpad.
• Timeof daywill reappearin display.
6. Whentheoven turnsonlthe OVEN ON indicatorwill _ NOTE:Itisnotnecessaryto se
light.The oventemperaturewillappearinthedisplay. [ _.OmO;J Controlwilldeterminewhento
Pressthe COOKTIME padtorecallthe remaining onbasedonthe cooktimeyOL
cooktime.
7. Ovenwillautomaticallyturn off.Fourbeeps willsound NOTE: Seepage6 if youwishtochange th,
and"End"willlightindisplay.A beepwillsoundevery cookingreminderbeeps.
30 secondsforthenext5 minutes.
8. PressCANCELpad andbeepswill stop. Remove
food fromoven.
[cnce,J
Page 18

1. PressBROILpad. BROIL _,
• BROILindicatoron the BROILpad willlight. INDICATOR
j
LIGHT
• 000 will light indisplay.
2. Pressthe • padto selectHI (high)broil or the• pad _ -,,- HI
to select LO(low)broil.
• SelectHI broil for normal broiling.
• Select LO broilfor lowtemperaturebroiling of
longercookingfoodssuchas poultry. ., LO
3. Therewillbe an 8 seconddelaybeforetheoven turns I-_Ovenon
on.When the oventurns on: i_lPreheat
• TheOVEN ON indicatorwill light. I,._.JLock
4. Placefood in theoven. The oven dooris closedfor NOTE:See page18for broiling instru
broiling, broilingchart.
5. Turnmeatonce about halfwaythrough cooking.
6. PressCANCELpad.Removefoodand broiler pan
fromthe oven.
• The OVEN ON indicatorwill turnoff. I^ ,I _ ,L-J, I
L .noe,j j
• The BROIL indicatoron theBROIL padwill turn off.-
- Timeof daywillreappearindisplay.
Page 19

OVEN USE
Broiling is a method of cooking tender meats by direct the broiler insert with aluminum foil as this pre
heat. The cooking time is determined by the distance from draining into pan below.
between the meat and the broil burner, the desired degree
of doneness and the thickness of the meat. Trim excess fat and slash remaining fat to helI
from curling and to reduce smoking and spatk
Season meat after cooking.
Broiling requires the use of the broiler pan and insert. The
broiler insert must be in place to allow fat and liquid to Place oven rack in the correct rack position wl
drain to the pan below to prevent spatters, smoke and cool. For darker browning, place meat closer t
flare-ups. Improper use may cause grease fires, burner. Place meat further down if you wish m
well done or if excessive smoking or flaring o¢
For easier clean up, line the broiler pan with foil and spray See Care and Cleaning Chart on page 21 for i
the insert with a non-stick vegetable spray. Do not cover on cleaning the broiler pan and insert.
TOT_
TYPE OFMEAT RACK POSITION* DONENESS (MIN
BACON #4 WellDone 6
BEEF STEAKS
1-inchthick #4 Medium 15
#4 WellDone 20
CHICKEN LO
Pieces #3or#4 WellDone 30
FISH
Fillets #4 Flaky 8
Steaks, 1-inchthick #4 Flaky 12
GROUNDBEEF PArrIES
3/4-inchthick #4 WellDone t5
HAM SUCE, precooked
1/2-inchthick #4 Warm 8
PORK CHOPS
1-inchthick #4 Well Done 20
* Thetoprackpositionisposition#5.
** Broilingtimes are approximateandmayvary dependingonthe meat.
Page 20

ABOUTCLEANING self-cleanoven
1. Movedoorlockleverto lockedposition.
2. PressSELF-CLEANpad.
• CLEANindicatoronthe SELF-CLEANpadwill
flash.
• 3:00will lightin display.
• If dooris notlocked,"dr" willappear indisplay.
Lockdoor.
3. Press• or• padtoselectcleantime.
• Youcanselectfrom2 upto 4 hours.
• Ovenwillautomaticallycleanfor3 hours.Or,
• Select2 hoursforlightsoil.
• Select4 hoursforheavysoil.
4. IFYOU WISH TO DELAYTHE STARTOF
CLEANING(ifnot,skipto#5):
a. PressSTOPTIME pad. _ _] I
b. Press• padto selectthetimeof dayyouwishthe then
oventoturnoff.
• PressCLOCKpadandtimeofdaywillreappear
indisplay.
• PressSTOPTIMEpadto recallthetimeyouset.
5.When the oventurnson:
• TheOVENON indicatorwilllight, lelo.,on
• LOCKindicatorwilllightwhenoven heatsto 400o. _ Preheat
• Internallockwillengage.Doorcannotbe unlocked Lock._ LIGHTTUR,
andopenedwhenLOCKindicatorislit. OVENREA(
6. Aboutonehourafterthe clean cycleends,the LOCK r-_-_oren
I_1
on
indicatorwillturn off.The ovendoorcanbe unlocked iu lPreheat
and opened.
L._JLock
TO CANCELCLEAN CYCLE:
1.PressCANCELpad. _ I_Oven on
2. IfLOCKindicatoris NOT lit,unlockandopenoven I_1Preheat
door. L._JLock"= WHEN
OFF, U,
If LOCK indicatoris lit,allow ovento coolabout one OPENJ
hourthen unlockand openoven door.
Page 21

SELF-CLEANOVEN
• It isnormalfor.partsof the rangeto becomehot
dudnga cleancycle.
• Avoidtouchingcooktop,door,window,oroven
vent area duringa clean cycle.
• Topreventdamageto ovendoor,do not attempt
to unlockthedoorwhenthe LOCKindicatoris
displayed.
BEFORECLEANCYCLE DURINGCLEANCYCLE AFTER CLEANCYCLE
• Removepans,broilerpan,and • Asovenheats,theLOCKindicator • The LOCKindicatorwi
ovenracks.Racksmaydiscolor willlightinthedisplay.Atthis aboutonehouraftercl
andnotslideeasilyaftercleaning, point,the doorcannotbe ends.The doorcan be
unlockedandopened, andopened.Use care
• Cleanovenframeanddoorframe, maystillbe hot.
Theseareasarenotexposedto - Topreventdamagetodoororlock • A graypowderyash m
cleaningtemperatures;soilmay lever,donotforcedooropen onthe ovenbottomor
bake onduringcleancycle, whenthe LOCKindicatoris isnormal.Usea damp
displayed_ removeash.
• Topreventdamage,do not clean
gasketlocated on oven door. * Ifsoil remains,the cle_
Gasketseals in heatduring the • Some smoke and odormay be may nothave beenlot
cleancycle, detectedthe firstfew timesthe
oven is cleaned.This isnormal • Wipe oven rackswith
amountof vegetableo
• TopreventexcessivesmokeOr and will lessen intime. notslide easilyafter clq
flare-ups,wipe upexcess grease
orspilloversfromoven bottom. ° Smokemay occurif ovenis • Cleanaroundoven vel
heavilysoiledor if broilerpan was thereis a depositfrom
• Porcelainisacid resistant,not left inoven. ventedduringcleaning
acid proofand maydiscolor during • Finelinesmay appear
theclean cycle.Topreventor • As ovenheats,you mayhear porcelain. This is norm
reducediscoloration,wipe up sounds of metalpartsexpanding results from the heatin!
sugaror acid spills (lemon,milk, and contracting.Thisis normal cooling of the finish.Tt
barbecuesauce,cheese), andwill not damageoven. affectoven performan(
Page 22

CAREANDCLEANINGCHART
• Be sureapplianceis offand allpartsare coolbeforehandlingor
cleaning.Thisistoavoiddamageandpossibleburns.
• If a partisremoved,besureitiscorrectlyreplaced.
• Topreventstainingor discoloration,cleanapplianceafter each use.
CLEANING CHART
Broilerpan • Soapandwater Never cover insert with aluminumfoil as this prevents
and insert • Plasticorsoap drainingto pan below.
filledscouringpad 1. Removefromovenafteruse.Coolthenpouroffgrease.
• Dishwasher 2. Placesoapyclothoverinsertandpan;letsoakto loosen,,
3. Washin warmsoapy water.Use soap filledscouringp_
stubbornsoil.
4. Broilerpanandinsertcanbecleanedinthedishwasher.
Burner box • Soap and water NOTE:Sealedburner cooktopdoesnotlift up.
(conventional • Pasteofbaking 1. Burnerbox, for cooktopswithconventionalburners,is I;
surfaceburners sodaandwater lift-upcooktop.
only) • Non-abrasiveplas- 2. Cleanfrequentlytoremovespillovers.Ifsoilisnotremoved
ticpadorsponge toaccumulate,it maydamagethefinish.
• Liquidcleaner 3. Tocleanremovegratesand surfaceburnersand cleanv
• Glasscleaner water,rinseand dry.
Controlknobs • Soapandwater Forease ofcleaning,turnoffknobandremovebypullingfor
• Mildliquidsprays 1. Wash,rinse,anddry.Donotuseabrasivecleaningagents
• Glasscleaners scratchthe finishandremovethe markings.
2.Turnoneachelementtobesureknobshavebeencorrect
Drip bowls, • Soapandwater Donot coverdrip bowlswith aluminum foil.
chrome • Plasticscouring NOTE:Bowlscan permanentlydiscolorovertime,ifexposed
(selectmodels) pads heat,or if soilis allowedto bakeon. The discolorationwilli
• Mildabrasive cookingperformance.
cleaners 1.Aftereachuse,wash,rinseanddry.
• Flitz MetalPolish 2. If heavilysoiled,gentlyscrubwith plasticscouringpad.If s
to burnon,it may be impossibleto remove.
3. A non-abrasivemetalpolishsuch as Flitz may be used to
blue/gold heat stains. Flitz is available in many aufomotiv
hardwarestores.Thesestainsarecausedby overheating,
occurovera periodoftime.Theyareusuallypermanent.Fo
directions.
Page 23

CAREANDCLEANINGCHART
Enamel, painted • Soap and water NOTE:Usedrytowelorclothto wipeupspills,especiallyacid(i
• Ovendoor • Mildliquidcleaner juice,fruit,mustard,tomatosauce)orsugaryspills.Surfacemay
• Sidepanels • Glasscleaner dullifsoilisnotimmediatelyremoved.Thisisespeciallyimporta
• Storagedrawer surfaces.
or lowerpanel 1.When cool,washwithwarmsoapywater,rinseanddry.Ne
warmorhotsurfacewitha dampclothasthismaydamage1
andmaycausea steamburn.
2. Forstubbornsoil,usemildlyabrasivecleaningagentssuch
sodapasteor BonAmi.
3. Donotuseabrasive,causticorharshcleaningagentssucha,,
pads or oven cleaners.These productswill scratchor pq
damagethesurface.
Glass • Soapandwater Topreventstainingofthe oven window,avoidusingexcessi
• Ovenwindow • Glasscleaner amountsofwaterwhichmayseepunderorbehindglass.
• Pasteofbaking 1.Washwithsoapandwater.Removestubbornsoilwithpastq
sodaandwater sodaandwater.Rinsewithclearwateranddry.
2. Do not useabrasivematerialssuchas scouringpads,st_
powderedcleaningagents.Theywilldamageglass.
Grates • Soapandwater NOTE:Neveroperateburnerwithouta grateinplace.Toprote_
• Non-abrasive celainfinishonthegratefromexcessiveheat,neveroperatesL
plasticpad burnerwithouta cookingutensilonthegrate.It is normalforgr
losetheirshineovera periodoftime.
1.Gratesaremadeof porcelain-coatedsteel.Theycan becle=
sinkwithsoapandwaterorinthedishwasher.
2. Tocleanbakedonsoil,placea dampsoapypapertowelov(
and letstandfor30 minutes.Usea non-abrasiveplasticp_
stubbornsoil.
Metalfinishes • Soapandwater 1.Washwithsoapandwaterora glasscleaneranda softclott
suchas brushed • Glasscleaner -2.Topreventscratchingordullingofthefinish,donotusemildl
aluminum,or • Plasticornon- abrasive,or harshcleaners,orcausticCleanerssuchasove_
chrome abrasivepador 3. Tocleanbrushedaluminum:Useonlysoapandwateroras¢
• Backguard sponge glasscleanertopreventscratchingor dullingof thefinish.
• Cooktop 4. Tocleanbrushedchromecooktopordoor:
• Manifoldpanel • Usea pasteofbakingsodaandwateranda softcloth.
• Ovendoor • Rubwiththegraintopreventscratching,dullingorstreaki
• Storagedoor finish.
• Trim parts • Usea softcloth and mineral0ilto restorelusterorto rem(
fingerprintsor smudges.
• Cleanwith an automotive chromecleaneror polisher.
Oven interior Porcelainenamel is acid resistant,notacidproof.Therefore,wl
wipe up sugaryor acidspills (milk,fruit, tomato,etc.)as theyo(
pages 19-20for self-cleanoven.
Oven racks • Soapand water 1.Cleanwithsoapywater.
• Plasticscouring 2. Removestubbornsoilwithcleansingpowderorsoap-filledscq
pad Rinseanddry.
• Cleansingpowders Rackswillpermanentlydiscolorandmaynotslidesmoothlyifleft
• Soap-filled duringa self-cleanoperation.Ifthisoccurs,wipethe rackand
scouringpad rack supportswitha small amountof vegetableoil to resto
movement,then wipeOffexcessoil.
Page 24

CAREANDCLEANINGCHART
Plastic finishes • Soapandwater NOTE: To preventstainingor discoloration,wipeup fat, !
• Doorhandles • Non-abrasive (tomato,lemon,vinegar,milk,fruitjuice,marinade)immediz
• Backguardtrim plasticpador papertowelorcloth.
• Knobs sponge 1.Whencool,cleanwithsoapandwater,rinse,anddry.
• End caps • Glasscleaner 2. Use a glasscleaner anda softcloth.
NOTE: Never use oven cleaners,abrasive or causticliquic
cleansers on plasticfinishes. Thesecleaning agents will.,
finish.
Porcelain enamel • Soap andwater Porcelainenamelisglassfusedonmetalandmaycrackorch
• Cooktop • Pasteof baking It is acid resistant, not acid proof. All spillovers, especially
• Backguard sodaand water spillovers,shouldbewipedupimmediatelywithadrycloth. Tt-
• Non-abrasive important aroundthe vent openingfor smoothtop cooktop
plasticpador discoloror dull if soil is not removed.
sponge 1. Whencool, washwith soapywater,rinse anddry.
2. Neverwipe off awarmor hotsurfacewith a dampcloth.T
crackingandchipping.
3. Neveruseovencleaners,abrasiveorcausticcleaningage
finishof range.
Surfaceburners • Soapandwater All burners:Foreaseofcleaning,cleanburnerseachtime
• Conventional • Pasteofbaking usedwithwarmsoapywater.Ifa boiloveroccurs,remove
• Sealed sodaandwater burner;coolburnerandclean.Toremovestubbornsoil,use
• Plasticscouring mildlyabrasivecleanser.Usecaretopreventcleanerfromc
spongeor pad Burnermustbedry beforeuse.NOTE: Yellowtippingor di
• Mildlyabrasive flamemayoccuruntiltheburneriscompletelydry.
cleanser Cleanburner ports witha straightpin orsmallmetalpap_
enlargeor distortports.Donotusea woodentoothpickas it
andclogport.Ifportsarecloggedorsoiled,theburnermayno
ortheflamemaynotbe even.
Conventionalburners: Dryburnersintheovensetat 170°1
Sealed burners: Sealed burnercan not be removedby tl
Whencleaningburner,usecaretopreventdamagetothe ic
burnerwillnotlightproperlyif ignitorisdamaged,broken,_,
Whencleaningtheports,besuretocleantheportdirectlybel
READTHEMANUFACTURER'SINSTRUCTIONStobe Non-AbrasiveCleaners - BonAmi, paste,
surethecleanercanbesafelyusedonthisappliance, andwater.
Carefullyfollowmanufacturer'sdirections. MildlyAbrasivePowderor LiquidAll Pur
Testa smallinconspicuousareausinga verylight Cleansers - Ajax,BarkeepersFriend,Cam
pressureto see if thesurface mayscratchordiscolor. SoftScrub.
Thisis particularlyimportantfor porcelainenamel,highly Non-Abrasiveor ScratchlessPlastic or N
polishedorshinymetalorplasticsurfaces,andpainted ScouringPadsorSponges- ChoreBoyF
surfaces. CleaningPuff,ScrungeScrubSponges,or
GlassCleaners- BonAmi, Cinch,GlassPlus,Windex. NoScratch,CookwareorKitchenSponge.
DishwashingLiquid Detergents- Dawn,Dove,Ivory, AbrasiveScouring Pads- S.O.S., Brillo$1
Joy. Soap,Scotch-BritePads.
(Brandnamesfortheabovec/eaningproductsar
Mild LiquidSpray Cleaners- Fantastik,Formula409. trademarksoftherespectivemanufacturers.)
Page 25

MAINTENANCE
The cooktopfeaturingconventionalsurfaceburnerslifts' Burnergratesmustbepropedy
upfor easy cleaningof the burner box area. positionedbefore cooking.Burnergrates
are durablebut may graduallylosetheir
Toraise the "lift-up" ¢ooktop: Whencool,graspthe shine dueto usageand high
frontedgeof the cooktop andgentlylift up untilthe two temperatures.
supportrodsat the frontof thecooktop snapintoplace.
Gratesfor the porcelaincooktopare
_c_ square.Wheninstallingsquare grates,
placeindentedsidestogether sostraight
sidesare atfrontand rear.
I CAUTION: Do not operatea surface burn_
panonthe grate.The porcelainfinishon t_
chipwithouta pan to absorbthe intenseh_
burnerflame.
Tolowerthe top: Holdthe front edgeof the cooktop and
carefullypushback oneachsupport rodto releasethe
notchedsupport.Then gently lowerthe top intoplace.The
supportrodswillslideintothe cooktopframe. CAUTION:Before replacingthe lightbulb
DISCONNECTPOWERTORANGE.Be
is cool. Do nottouch a hot bulb witha dar
the bulb may break.
The sealedburnercooktopisdesignedwithtwo contour
wellsto catchand contain spills.Becauseof this designit Toturn on ovenlight: Pushtherockersw
isnotnecessaryto liftupthecooktoptoclean the backguard.
underneath.Topreventdamagetothegastubingortop, To replaceoven lightbulb:
donotattempttoliftorremovethe cooktop.
1. Disconnectpowertorange.
2. Holdbulbcoverinplacethen slidewirer
cover.NOTE:Bulbcoverwillfall ifnot h,
whileremovingwireretainer.
3. Removebulbcover.
4. Removelightbulbandreplacewitha 40
bulb.
5. Replacebulbcoverand securewith wir_
6. Reconnectpowerto range.Resetclock
BULB COVER
WIRE
RETAINER
Page 26

MAINTENANI:E
Do notplaceexcessiveweighton anopenovendooror - The ovendoor islockedfor a self-cleanope
standon an open ovendoor as,in some cases,it could notmovethe doorlock leverto the rightor I(
causethe rangeto tip over, breakthe door orcause during a cookingoperation.Ifthe door is loci
seriousinjuryto the user. operationwill automaticallybecancelledan(
appearin the display.Ifthe oven is hotenou
Whenopeningthe oven door,allow steam and hotair to the internallock,the oven doorwill not open
escapebeforereachinginovento check,add or remove oven to coolfor upto an hour,then unlocka
food. door.
Donot attemptto openor closedoor untilthe door is
completelyseatedon thehingearms. Neverturn on the
oven unlessdoor is properly in place.Whenbaking,be
surethe dooris completelyclosed. Bakingresultswill be
affectedif the door isnot securelyclosed. Protectoven bottomagainst excessivespillo,
acidor sugaryspilloversasthey maydiscolo_
Whenthe rangeis new the door mayfeel"spongy"when
youclosethedoor.Thisis normalandwillbecomeless Toprotect ovenbottom:
"spongy"withuse. • Usethecorrectsizecookingutensiltoav(
TOremovelift-off door: Openthedoortothe "stop" • Neverplacecookwareoraluminumfoil dif
position(openedabout6 inches)andgraspthe doorwith ovenbottom.
bothhandsateachside.Donotusethedoorhandletolift ° Placea pieceofaluminumfoilthatis sligh
thedoor.Liftupevenlyuntilthedoorclearsthehinge thepanonthe ovenrackdirectlybelowth
arms.
Toreplacedoor: Graspthe doorateach side,alignslots
inthedoorwiththehingearmsandslidethedoordown
ontothehingearmsuntildooris seatedonhinges.Push To remove: Whencool,removetheovenra
downontopcornersofdoortocompletelyseatdooron twocatches,locatedateachrearcornerofth_
hinges.The doorisnotcompletelyseatedonthe hingesif towardthefrontoftheoven.
onesideishigherorifthedoorappearstobecrooked.
Liftthe rear edge of the oven bottomslightl!
backuntilthe frontedgeof the ovenbottomcl
CAUTION:Hinge arms are springmountedand will front frame. Removeoven bottomfromoven.
slamshut againstthe rangeif accidentlyhit. Never
PlaCehand or fingersbetweenthe hingesand the To replace:Fit thefrontedge of the ovenb,
front oven frame. Youcouldbeinjuredifhingesnaps ovenfrontframe.Lowertherearoftheovenb¢
back. thetwocatchesbacktolocktheovenbottom
Page 27

MAINTENANq:E
Thetwo ovenracksare designedwitha safetylock-stop It is importantthatair can circulate freelywit_
positionto keepthe racksfrom accidentlycoming andaroundthe food. To helpensurethis, pl_
completelyout of the ovenwhen pullingthe rackout to the centerof theoven rack.Allow two inche_,
addor removefood. edgeof the utensil(s)andthe ovenwalls.
CAUTION:Do notattemptto changetherack positions For optimumbakingresults of cakes, cook=
whenthe oven ishot. useonerack.Positiontheracksothe foodis
the oven.Use eitherrack position3 or2.
Toremove: Besurethe rack is cool. Pullthe rack straight
outuntilit stopsat thelock-stop position.Tilt the front end if cookingonmore than one rack,staggertt
ofthe rackup andcontinuepullingthe rackout ofthe ensureproperairflow.
oven.
Toreplace: Place therackon'the racksupportsandtilt If cookingontwo racks, userackpositionsz
thefrontendoftherack upslightly.Slideitbackuntilit cakesand rackpositions4 and 1whenusin
clearsthelock-stopposition.Lowerthefrontandslidethe sheets.Neverplacetwocookiesheetson(
rackstraightin,Pulltherackoutto thelock-stopposition
tobe sureitispositionedcorrectlyandthenreturnitto its If roastinga largeturkey,placetheturkeyo
normalposition, roastingpositionandthe sidedishesonra¢
RACK5 Usedfor toasting bread,or for two-rack baking.
(highestposition)
RACK4 Usedfor mostbroilingandtwo-rackbaking.
RACK3 Usedformostbakedgoodsona cookiesheetor 5
jelly rollpan, orfrozenconveniencefoods. 4
RACK 2 Usedfor roastingsmall cutsof meat,large "
casseroles,bakingloavesof bread,cakes (in
eithertube,bundt, or layerpans)or two-rack
baking.
RACK1 Usedfor roastinglarge cuts of meatand large
poultry,pies, souffles,or angelfoodcake, orfor
two-rackbaking. ROASTING
POSITION
ROASTING Usedfor roastingtaller cutsof meator turkey.
POSITION Placeboth ovenracks,oneabovetheother,on
theraisedsidesoftheovenbottom.
Page 28

MAINTENAN('E
The storagedraweratthe bottomoftherangeissafe and
convenientforstoringmetalandglasscookware.DO Followtheseprocedurestoremoveapplian
NOTstoreplastic,paperware,foodorflammablematerial
orservicing:
inthisdrawer.Removedrawertocleanunderrange.
1. Shut-offgassupplyto appliance.
2. Disconnectelectricalsupplytoappliance
3. Disconnectgassupplytubingto applian(
4. Sliderangeforwardto disengagerange'
bracket.(See InstallationInstructionsfor
bracket.)
5. Reverseproceduretoreinstall.Ifgasline
disconnected,checkforgasleaksafterr_
qualifiedservicershoulddisconnectand
Toremove: Pulldraweroutto thefirststopposition.Lift
gassupply.(SeeInstallationInstructions
upfrontofdrawerand pulltothesecondstopposition, test method.)
Graspsidesand liftupandout.
Toreplace:Fitthe rollerslocatedattheendsofthe NOTE:A qualifiedservicershoulddisconne
drawerglidesintothe railsonthe range.Liftupdrawer reconnectthegas supply.
frontand gentlypushintofirststopposition.Liftup
draweragainandcontinuetoslidedrawertotheclosed Topreventrangefromaccidentlytipping,ra4
securedtothefloorbyslidingrearlevelingI
position, anti-tipbracketsuppliedwiththerange.
WARNING: Possiblerisksmayresultfror
usage,includingexcessiveloadingofthe
Somefloorsarenotlevel. I " andofthe risk oftipover,shouldtheappli
Forproperbakingyour
rangemustbelevel, reinstalledaccordingtothe installationins
Levelinglegsare located
oneachcornerat thebase
oftherange.Levelby
turningthelegs. To
preventrangefrom
accidentlytipping,rangeshouldbesecuredtothefloorby
slidinga rearlevelingleg intotheanti-tipbracketsupplied
withtherange.
Page 29

S"RVICE INF(iRMATI()N
Appliances which require electrical power are The LOWsettingshouldproducea stableflal
equippedwith a three-pronggroundingplugwhich turningtheknobfromHI to LO.Theflamesh_
mustbe pluggeddirectlyintoa properlygrounded inchor lowerandmustbestableonall ports
three-hole120voltelectricaloutlet, setting.
Toadjust: OperateburneronHIfor about5 i
preheatburnercap.Turnknobbackto LO;re
andinsertasmallscrewdriverintothe center
(_i -_, stem.Adjustflame sizebyturningadjustmen
_ _ eitherdirection.
Always disconnectpower to appliancebefore servicing.
Thethree-pronggroundingplug offersprotectionagainst
shock hazards.DO NOTCUT OR REMOVETHETHIRD
GROUNDINGPRONG FROMTHE POWERCORD
PLUG. Flamemustbeof sufficientsizeto bestable
ports.Ifflameadjustmentisneeded,adjustC
Ifanungrounded,two-holeorothertypeelectricaloutletis LOsetting.Neveradjustflamesizeona high
encountered,it is the personalresponsibilityof the
applianceownerto havethe outletreplacedwith a NOTE:Allgasadjustmentsshouldbe doneL
properlygroundedthree-holeelectricaloutlet, serviceronly.
Page 30

SERVI(:E INFORMATION
You can adjust the oven temperature if you feel the 1. Contactyour nearestCompanyStoreor l
temperatureistoo hot ortoo cool. ServiceCenter. Ifyou do not knowthe Io_
neareststore or center,consultthe Yellm
To adjustthe oven temperature: yourtelephonedirectoryunderAPPLIAI_'
1. PressBAKEpad. r-'A-_..,__ usat1-800-323-1965,
2. Press• paduntil550°is _ [__7 1 2. Whenrequestinginformationorservice,
displayed, then informationwill beneeded.
a. Model and serial numbers. (Seeratin!
3. Pressand hold BAKEpad onthe rangefront frame.)
for 3 secondsuntil 00° b. Yourname, addressand telephone nl
appearsin display, c. Dealeror servicer's name,addressa0
[_ number.
4. Pressand holdthe • d. Briefdescriptionof theproblemand s
or• pad to selectthe _ e. Forwarrantyservice,proof of purcha,,
temperaturechange L._ then receipt)will be needed.
youwish.
• Theoven temperature 3. Ifyou are notableto Satisfactorilyresolv
canbe increasedor decreased complaintwith the local response,call or
by 5°to 35°. NationalCustomerRelationsManag
• Ifthe oventemperaturewas previouslyadjusted, 619 ChicagoAvenue
Chicago,Illinois 60671
thechangewillbedisplayed. 1-800-323-1965
4. Ifyou stilldo not receivesatisfactoryse_
the MajorAppliance ConsumerAction F
letter.Includethe informationlistedin #,'
5. Timeofday will automaticallyreappearindisplay. MajorAppliance ConsumerAction F
It is not necessaryto readjustthe oventemperatureifthere 20 NorthWacker Drive
is a power failure or interruption, Broiling and cleaning Chicago, IL60606
temperaturescannotbeadjusted. MACAPis anindependentagencysponso=
trade associationsas a courtof appealson
complaintswhich havenotbeenresolved
within a reasonableperiod oftime.
If afault codeappearsin the displayand continuous
beepssound,pressthe CANCELpad.Then, reprogram
the cookingoperation. Ifthefault codereappearsinthe
display,callan authorizedservicer.Do notusethe oven
untiltheappliancehas been serviced.
NOTE:Ifthe ovenis heavilysoiled,excessivesmokeand
flaring may resultina faultcodeduringa self-cleancycle.
Ifthis occurs,pressthe CANCEL padand allowthe oven
to coolfor an hour.
Page 31

SERVICEINFORMATI()N
Surface burner fails to light a. powersupply notconnected a. connectpower,checkc
breakerorfusebox
b.air inthegas line b. see page7forinstructi
bleedingairfromtheg=
c. cloggedburnerport(s) c. cleanportswithstraigl"
d. surface control not completely d. turncontroltothe LITE
turnedtotheLITEpositionorturned theburnerignites,ther
tooquicklyfromthe LITEposition todesiredflamesize
e. powerfailure e. see page7 tolightbur
powerfailure
f. sealedburnermodels:Burnerwill f. cleananddryburnerhE
not light if the ignitoris damaged, ordamaged,calla set
soiled, wet or if the port directly
belowthe ignitoris blocked.
Burnerflame uneven a. cloggedburnerport(s) a. cleanportswithstraigl
Surface burnerflame a. air/gasmixturenotproper a. callservicemantoadjl
• liftsoffport b.nopan inplace b. always place pan on
• yellow incolor lighting burner.
NOTE: Lifting of flame is normal for NOTE: Be sure insta
sealed burners. Some yellow tipping adjustedrange attimeof
with LP gas is normaland acceptable,
Surface burner ignitor a. controlknobis in theLITEposition, a. besureALLsurfaceb
productingclickingsound NOTE:The lifeofthe ignition knobsareintheOFFp
systemmay be shortenedifthe adjustedto thedesire(
knob is left inthe UTE position, setting
b. surfacecontrolswitch ismoist as a b. allow switchto dryth_
resultof cleaningthe range, burner
c. malfunctioningswitch c. callservicemantoch_
Oven burnerfailsto light a. powersupply notconnected a. connect power, c
breakerorfuse box
b. powerfailure b. ovenwillnot operate¢
failure
c. oven incorrectlyset c. See pages5 or 12
d. AutomaticOven Cookingfeature d. See page 16
incorrectlyset
Popping soundheard when This is a normalsoundthatoccurswith sometypesofgaswhen a hotb_
burnerextinguishes off.Thepoppingsoundisnota safetyhazardandwillnotdamagethe
Clockand/or oven light a. powersupplynotconnected a. connectpowersuppl!
doesnot work breakerorfusebox
b.bulbmaybelooseor burnedout b. tightenorreplaceligt
c. malfunctioningswitch,starteror c. callservicemantoch
ballast d. call servicemanto ch
d. malfunctioningclockor loosewiring
Page 32

SERVICE NFORMATI(IN
Moisture condensation on a. itisnormalforthewindowtofogdur- a. leavedoorajarfor on_
ovenwindow ingthefirstfewminutestheovenis utesto allowmoisture
on b. Useadampclothtocle
b. clothsaturatedwithwaterisusedto preventexcesswater
cleanthewindow betweenthe panelsof
Bakingresultsnot a. ovennotpreheated a. preheatoven8 to 15 r
satisfactory b. incorrectrackposition b. seepage26
• foodtakestoo longor c. incorrect useofaluminumfoil c. seepage 13
cookstoo fast d. ovenbottom incorrectlyreplaced d. replaceovenbottomc
• palebrowning e. door incorrectlyreplaced e. see page25
• food over-doneon outside See ProblemCharton p;
and under-donein center Seebakingtips onpage
• over browning
Oven smokes excessively a.foodtoocloseto burner a. move broiler pan do'
duringa broiloperation position
b. meathastoomuchfat b.trimfat
c. sauceappliedtooearlyormarinade c, applysauceduringlas
notcompletelydrained ofcooking,Ifmeatha_
marinated,drainthorc
cooking
d. soiledbroilerpan d.alwayscleanbroilerp
aftereach use
e. broilerinsertcoveredwithaluminum e. nevercover insertwil
foil preventsfat from dr_
below
"F" plusa numberor This iscalleda FAULTCODE. Ifa fault codeappearsin the displayandbeepss_
letters appearin anypad exceptthe CANCELand• or • pads.Ifthe fault codeand beepscorrl
display, disconnectpowertotheapplianceandcallan authorizedservicer.
Iftheovenisheavilysoiled,excessiveflare-upsmayresultina faultcodeduring
cycle.PressanypadexcepttheCANCELand• or• padsandallowoventoc
hourthenresetthe cleancycle.
 Loading...