

Page 1
Magic Chef °
MODEL NUMBER
CYE2000A¥
Dryer Operating Instructions CYG2000AW
m
m_OWW * kl_tB_ll_t
&WARNING: To reduce the risk of
fire, explosion, electric shock, or
personal injury, read the IMPORTANT
SAFETY INSTRUCTIONS before
operating your dryer,
FOR YOUR SAFETY
Do not store or use gasoline or other
flammable vapors or liquid in the
vicinity of this or any other appliance.
FOR YOUR SAFETY
If you smell gas
1. Open windows.
2. Don't touch electrical switches.
3. Extinguish any open flame.
4. Immediately call your gas supplier
READ THESE OPERATING
INSTRUCTIONS CAREFULLY BEFORE
YOU USE THE DRYER AND RETAIN
FOR FUTURE REFERENCE.
Before operating your dryer be sure
that all installation requirements are met.
SEE INSTALLATION INSTRUCTIONS.
TO OPERATE:
1. CHECK LINT FILTER. Be sure the
lint screen is clean and properly
replaced. Never use the dryer
without the Lint Filter in position.
2. LOAD. Generally, items that are
washed together can be dried
together, but the drying load should
be sorted by weight, texture and
bulk of fabrics within practical limits.
Overloading restricts tumbling
action and results in uneven drying
as well as excessive wrinkling of
some fabrics.
3. CLOSE LOADING DOOR.
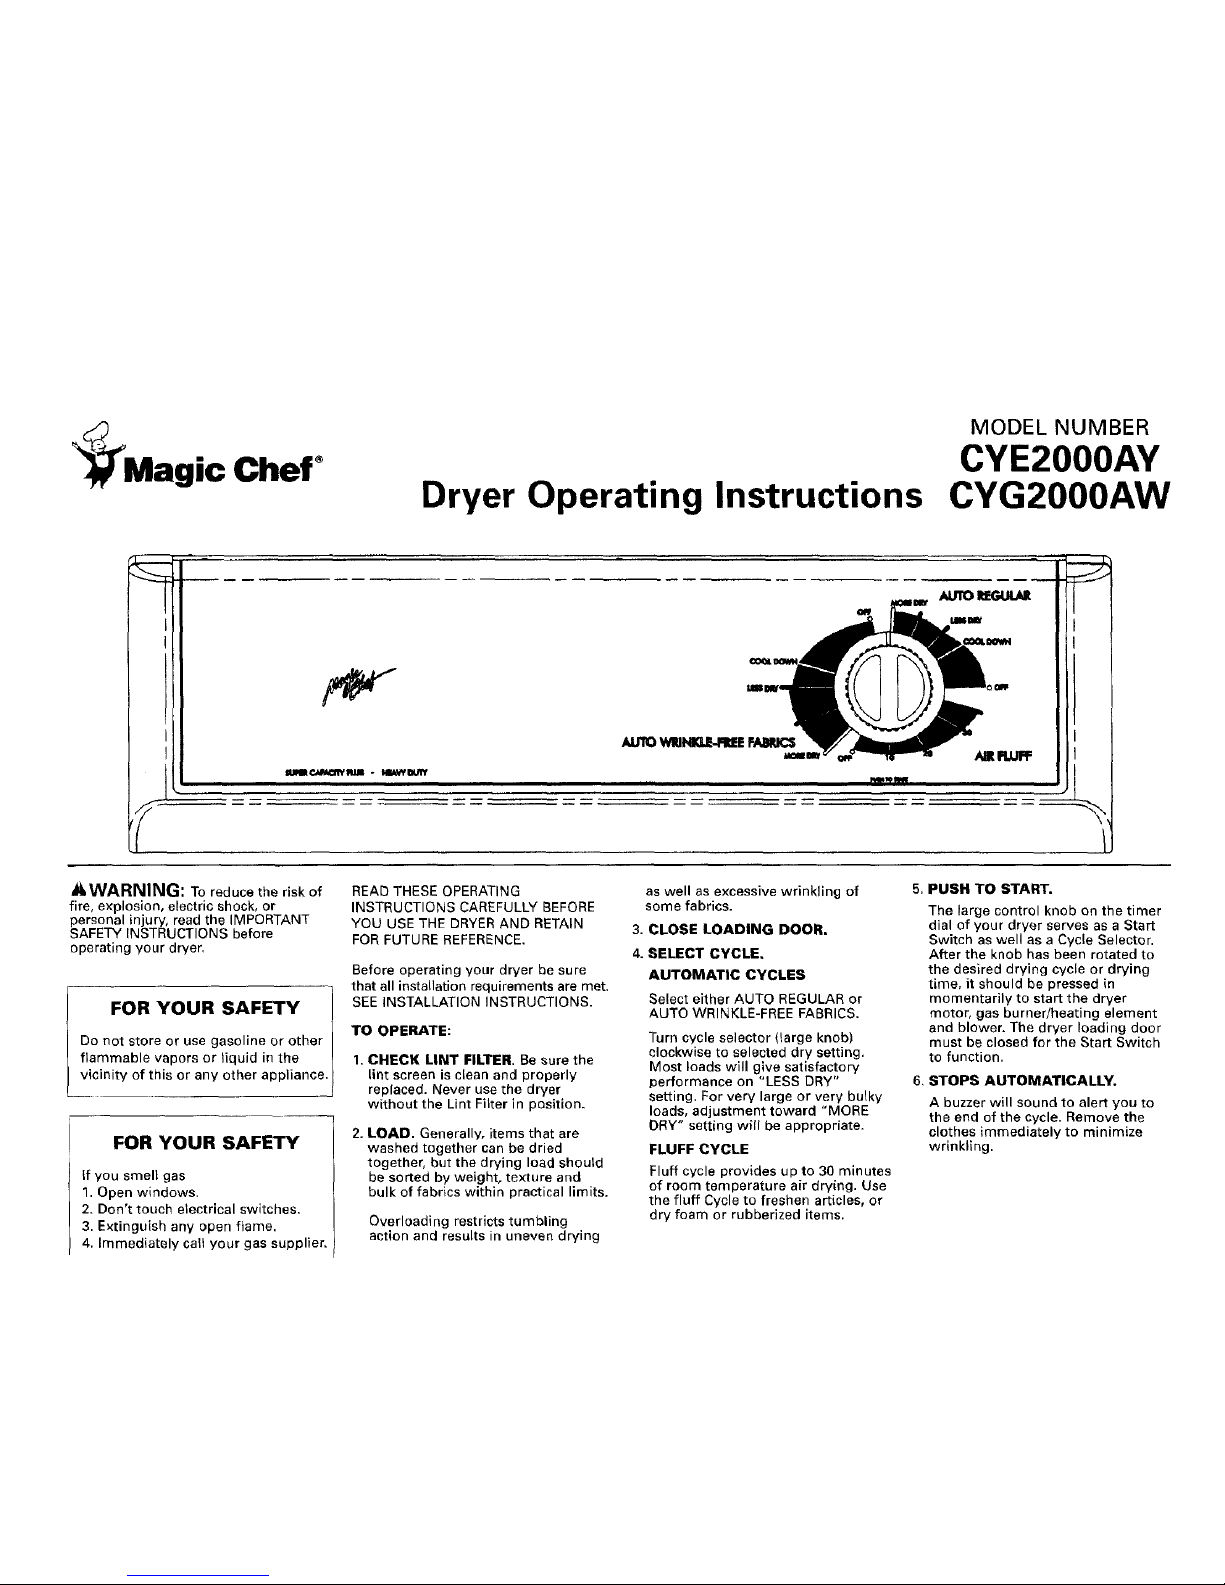
4. SELECT CYCLE,
AUTOMATIC CYCLES
Select either AUTO REGULAR or
AUTO WRINKLE-FREE FABRICS.
Turn cycle selector (targe knob)
clockwise to selected dry setting,
Most loads will give satisfactory
performance on "LESS DRY"
setting. For very large or very bulky
loads, adjustment toward "MORE
DRY" setting will be appropriate.
FLUFF CYCLE
Fluff cycle provides up to 30 minutes
of room temperature air drying. Use
the fluff Cycle to freshen articles, or
dry foam or rubberized items.
5. PUSH TO START.
The large control knob on the timer
dial of your dryer serves as a Start
Switch as well as a Cycle Selector.
After the knob has been rotated to
the desired drying cycle or drying
time, it should be pressed in
momentarily to start the dryer
motor, gas burner/heating element
and blower. The dryer loading door
must be closed for the Start Switch
to function.
6, STOPS AUTOMATICALLY.
A buzzer will sound to alert you to
the end of the cycle. Remove the
clothes immediately to minimize
wrinkling.
Page 2
FEATURES
AUTO WRINKLE-FREE FABRICS CYCLE
is designed to dry all synthetic fabrics,
Double }<nits and Permanent Press
fabrics automatically. The Auto
Wrinkle-Free Fabrics Cycle also
provides an automatic extended cool
down to minimize wrinkles in
Permanent Press fabrics. This feature
allows the clothes to tumble without
heat for about thirty minutes after the
drying cycle is complete.
A signal buzzer sounds after 12
minutes of cool down, then every four
minutes until the clothes are removed.
The dryer will stop automatically when
the coot down period is completed,
Clothes can be removed at anytime
throughout cool down.
When the clothes are removed during
the cool down period, turn the timer to
the off position to shut off the buzzer.
AUTO REGULAR CYCLE is designed
to dry most cottons and linens
automatically.
DEGREE OF DRYNESS:
Two levels of dryness can be preset on
the automatic cycles by setting the
cycle selector at the desired start dry
settings.
1. LESS DRY: This setting to be used for
delicate fabrics or items to be damp
ironed or finished hanger dried.
2. MORE DRY: This setting to be used
for heavy or bulky fabrics that
require longer drying times.
FLUFF
The Fluff Cycle is designed to freshen
articles, dry foam or rubberized
articles, some sweaters and tennis
shoes, it provides room temperature
air for drying. This, of course, means
DOOR SAFETY SWITCH
As soon as the loading door is opened,
the dryer will stop operating; the dryer
drum will stop tumbling, the heaters will
turn off. Inquisitive youngsters cannot
see, much less touch, the drying drum
while it is in motion. This safety
feature will serve also as a practical
convenience. It permits an over-looked
item to be added.., or a delicate gar-
ment to be withdrawn if it dries before
the rest of the load.., or the progress
of drying to be tested by hand. Once
the drying door has been opened, the
Start Switch must be activated by
pressing in the Cycle Control knob,
When this is done, the original drying
cycle will resume until it is completed.
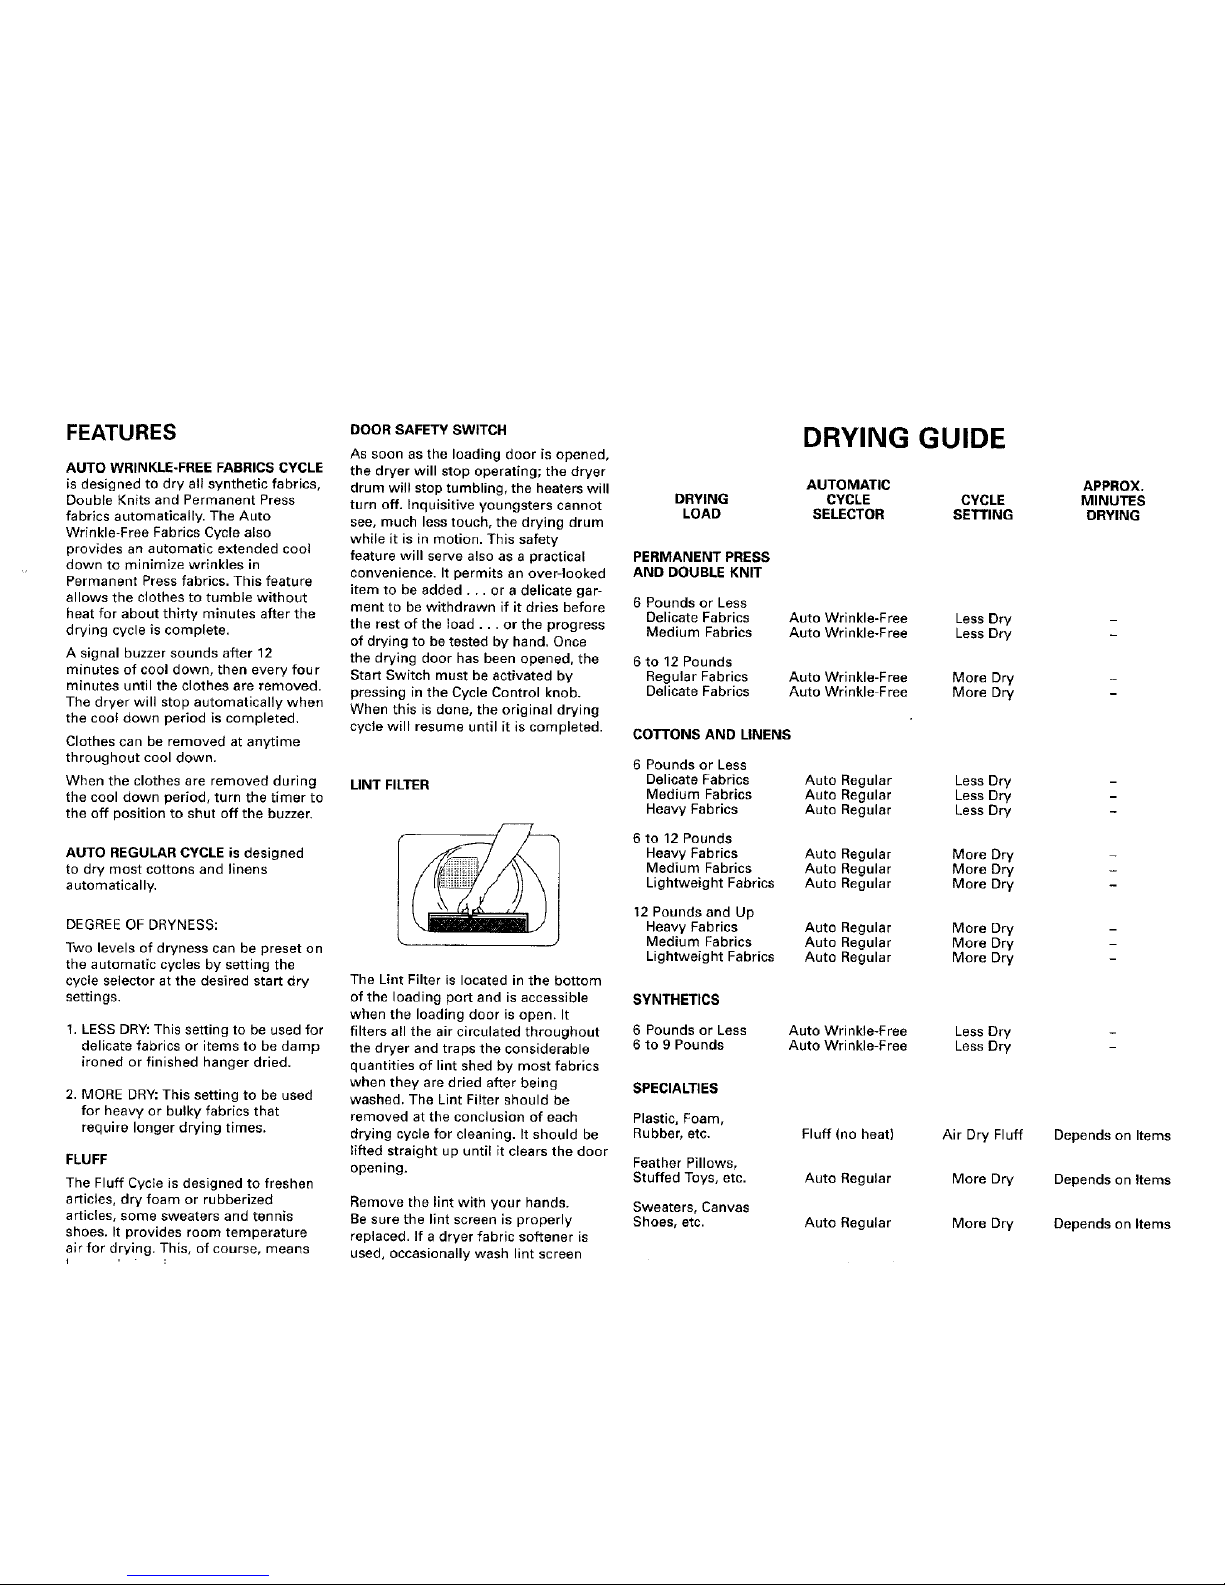
LINT FILTER
The Lint Filter is located in the bottom
of the loading port and is accessible
when the loading door is open. It
filters all the air circulated throughout
the dryer and traps the considerable
quantities of lint shed by most fabrics
when they are dried after being
washed. The Lint Filter should be
removed at the conclusion of each
drying cycle for cleaning. It should be
lifted straight up until it clears the door
opening,
Remove the lint with your hands.
Be sure the lint screen is properly
replaced. If a dryer fabric softener is
used, occasionally wash lint screen
DRYING GUIDE
DRYING
LOAD
AUTOMATIC APPROX.
CYCLE CYCLE MINUTES
SELECTOR SETTING DRYING
PERMANENT PRESS
AND DOUBLEKNIT
6 Pounds or Less
Delicate Fabrics
Medium Fabrics
6 to 12 Pounds
Regular Fabrics
Delicate Fabrics
Auto Wrinkle-Free Less Dry
Auto Wrinkle-Free Less Dry
Auto Wrinkle-Free More Dry
Auto Wrinkle Free More Dry
COTTONS AND LINENS
6 Pounds or Less
Delicate Fabrics
Medium Fabrics
Heavy Fabrics
Auto Regular Less Dry
Auto Regular Less Dry
Auto Regular Less Dry
6 to 12 Pounds
Heavy Fabrics Auto Regular More Dry
Medium Fabrics Auto Regular More Dry
Lightweight Fabrics Auto Regular More Dry
12 Pounds and Up
Heavy Fabrics Auto Regular More Dry
Medium Fabrics Auto Regular More Dry
Lightweight Fabrics Auto Regular More Dry
SYNTHETICS
6 Pounds or Less
6 to 9 Pounds
Auto Wrinkle-Free Less Dry
Auto Wrinkle-Free Less Dry
SPECIALTIES
Plastic, Foam,
Rubber, etc. Fluff (no heat) Air Dry Fluff
Feather Pillows,
Stuffed Toys, etc. Auto Regular More Dry
Sweaters, Canvas
Shoes, etc. Auto Regular More Dry
Depends on Items
Depends on Items
Depends on Items
Page 3

IF YOU HAVE A GAS DRYER:
AUTOMATIC IGNITION
At the beginning of each drying period
the burner is automatically lighted by
an electric ignitor. The burner is turned
off and on to maintain the selected
temperature in the drum.
DRYER MAINTENANCE AND CARE
1.Occasionally wipe exterior with a
clean damp sponge or cloth. Polish
with a soft dry cloth. If desired,
occasionally polish, being careful
NOTto use polish on plastic parts.
2. After every load, clean lint filter and
screen.
3. Lifetime lubrication is done at the
factory, so your dryer never needs
to be oiled or greased.
4. Do not lay heavy or sharp objects
on top of your dryer.
5. The top of both washer and dryer
should not be used for removing
stains from garments. Some stain
removers, such as rust remover,
will mar the finish.
6. Remove pins, buckles or other
sharp objects from clothes to
prevent scratching interior parts.
7. Clothes should not be stored in
dryer.
8. Remove all spills with a damp, soft
cloth, as some laundry products
will remove the glossy finish.
9. Once every year check exhaust
system for clogged lint and clean if
necessary,
10. Do not overload for best results and
long use.
11. CLEANING THE DRUM - Keep dryer
drum clean at all times. After drying
a load of heavily starched, newly-
dyed or tinted fabrics, or non-
colorfast garments, wipe the drum
with warm soapy water and rinse
with a damp cloth to remove starch
or dye.
DO NOT POUR WATER INTO THE
DRUM.
12. Check the drum after each load for
loose buttons, buckles, etc. which
may have fallen off in the tumbling
process.
BEFORE YOU CALL FOR SERVICE
Review Operating Instructions
If dryer will not start, or there is no heat:
is the electrical cord plugged in
correctly?
has the fuse blown or isthe circuit
breaker tripped?
are the controls set correctly?
is dryer door closed?
is lint screen in correctly?
If articles are slow to dry:
is llnt screen or exhaust pipe
clogged?
is timer dial set correctly?
is clothing unusually wet or bulky?
If dryer is noisy:
are there foreign objects, such as
buttons, coins, or nails in the dryer.
Not only do they cause noise, they
may damage clothing as well as the
dryer.
KEY FACTS:
BRAND NAME:
MODEL NO.:
Type
Dimensions:
Cabinet Height
w/Backguard
Width
Depth
Clearance Required
For Loading Door
Electrical Requirements:
Volts
Frequency & Phase
Type & Size of Circuit
Fuse Size
Supply Cord
Dryness Control
Heat Selections;
Number/Types of Cycles;
Gas Requirements:
Rated Input
Type:
Inlet Connection Size
Type of Ignition System:
Venting
Outside Venting
AUTOMATIC DRYER
MAGIC CHEF
CYE/CYG2000A
Electric Dryer Gas Dryer
36" (91.4 CM)
44" (111.7 CM)
27" (68.5 CM)
27" (68.5 CM)
36" (91.4 CM)
44" (111.7 CM)
27" (68.5 CM)
27" (68.5 CM)
50" (127 CM) 50" (127 CM)
240V 120V
60 HZ 60 HZ
No. 10 AWG Copper No. 12 AWG Copper
30 AMP 15 AMP Time Delay
None Supplied Supplied
Thermostatic Thermostatic
Programmed in ]]mer
3 Cycles -
Auto Regular Auto Wrinkle-Free Fluff
Rear, Bottom, Right
or Left Side
4" Diameter Duct
Recommended
18,000 BTU/HR.
Natural Gas
3/8" - 18 N.S.
Intermittent
Rear, Bottom or
Right Side
4" Diameter Duct
Required
Page 4

A Safety Precautions
IMPORTANT SAFETY INSTRUCTIONS FOR THE OPERATION OF YOUR CLOTHES DRYER
&WARNING: TOREDUCETHE
RISK OF FIRE, EXPLOSION,
ELECTRIC SHOCK, OR PERSONAL
INJURY WHEN USING YOUR
DRYER, FOLLOW BASIC SAFETY
PRECAUTIONS INCLUDING THE
FOLLOWING;
1. READ ALL INSTRUCTIONS BEFORE
USING THE DRYER. RETAIN ALL
INSTRUCTIONS FOR FUTURE
REFERENCE.
2. PROPERLY INSTALL AND LOCATE in
accordance with the Installation
Instructions.
INSTALL OR STORE dryer where it will
NOT be exposed to the weather.
CONNECT to a properly rated, protected,
and sized power supply circuit. See
Electrical Requirements.
HAVE A QUALIFIED SERVICE
TECHNICIAN install your dryer.
MUST BE PROPERLY GROUNDED- See
Installation Instructions.
SHOULD ANYONE get an ELECTRIC
SHOCK from the dryer, disconnect
electrical power. DO NOT OPERATE
until it has been repaired by a qualified
service technician.
3. TO PREVENT INJURY TO CHILDREN:
DO NOT ALLOW children to play inside,
on, or with the dryer.
CLOSE SUPERVISION of children is
necessary when using dryer.
WH=N ('Nil IhR_:N are mature enough,
DESTROY THE CARTON AND PLASTIC
BAGS after unpacking the dryer.
REMOVE THE DOOR to the drying
compartment before the dryer is
removed from service or discarded.
4. DO NOT TAMPER with the operating
controls.
5. DO NOT REACH INTO THE DRYER IF
THE DRUM IS MOVING. If the drum
does not stop moving when the door
is opened, disconnect the electrical
power to the dryer. Do not operate the
dryer until it has been repaired by a
qualified service technician.
6. TO PREVENT PERSONAL INJURY
AND DAMAGE TO THE DRYER, DO NOT
repair or replace any part of the dryer
or attempt any servieing. SERVICING
should be referred to a qualified
service technician.
7. KEEP PETS AWAY FROM DRYER,
and keep dryer door closed at all times
except while loading or unloading. Pets
may enter the dryer unnoticed when
the door is open and become
entrapped when the door is closed.
8. LUBRICATION - All moving parts of
the dryer are permanently lubricated
and require no lubrication or oiling.
9, DO NOT USE FABRIC SOFTENERS or
products to eliminate static (unless
recommended for use in clothes dryers
by the manufacturer of the fabric
softener or product).
10. DO NOT DRY FIBERGLASS
ARTICLES unless recommended by the
manufacturer,
11, DRY ONLY ARTICLES WHICH
HAVE BEEN WASHED IN WATER -
Articles which have been cleaned,
washed, soaked, or spotted with
gasoline, dry cleaning solvents, oil,
waxes, chemical solvents, alcohol,
household cleaners, spot removers,
turpentine, or other flammable or
explosive materials wilt retain these
substances, DO NOT DRY ARTICLES
which still contain these flammable or
explosive substances as they give off
vapors that could ignite or explode.
12. DO NOT USE HEAT to dry articles
containing foam rubber, plastics or
similarly textured rubberlike materials.
13, KEEP AREA AROUND AND
UNDERNEATH DRYER free from the
accumulation of combustible
materials (such as lint, paper and
rags); gasoline; and all other
flammable vapors and liquids,
14. DO NOT ALLOW storage of any
material to obstruct the ventilation air
openings of the dryer.
15. TO PREVENT extended drying
time and risk of fire, CLEAN LINT
SCREEN EACH LOAD.
THI:€;I: INRTRIIP.TIONR
FIRE HAZARD
16. THE INTERIOR of the dryer and the
exhaust duct should be cleaned
periodically by a qualified service
technician.
17. THE EXHAUST SYSTEM should be
periodically examined for damage to
the exhaust duct and for free
operation of the exhaust deflector.
Keep the area around the exhaust
opening and surrounding areas free
from the accumulation of LINT, DUST,
and DIRT.
18, Recent studies have shown that if
vegetable oil contaminated materials
are incompletely washed, a carry-over
and buildup of the oil may contribute
to a chemical reaction Isponteneous
combustion) that could cause a load
to catch fire by itself. This would be
more likely to happen if the load was
left in the dryer after tumbling
stopped or if items were folded and
stacked while warm.
FOR GAS DRYERS
19. GAS DRYERS are equipped to
operate on natural gas only. To
convert a gas dryer for operation with
other gases, the services of a qualified
service technician must be obtained.
For service, call or write the authorized dealer in your area or write:
Maytag Appliances Sales Company
Attn: CAIR sMCenter
P.O. Box 2370
Cleveland, TN 37320-2370
1-800-688-1120
PRINTED IN U.S.A.
Part No. 53-3518
 Loading...