

Page 1

SAFETY INSTRUCTIONS
WARNING: Ifthe information in this manual is not
followed exactly, a fire or explosion may result
causing property damage, personalinjuryor death.
- Do notstore or usegasoline or other flammable
vapors and liquids in the vicinity of this or any
other appliance.
- WHAT TO DO IF YOU SMELL GAS
• Do not try to light any appliance.
• Do not touch any electrical switch; do not
use any phone in your building.
• Immediately call your gas supplier from a
neighbor's phone. Follow the gas supplier's
instructions.
• Ifyoucannotreachyour gas supplier, callthe
fire department.
- Installation and service must be performed by a
qualified installer, service agency or the gas
supplier.
GENERAL
Nocookingappliance shouldbeusedas Havethe installershowyouthe location Misuse of appliance doors, such as
aspace heater.Thisinstructionisbased ofthe,gasshutoff valve and howto shut stepping, leaningor sitting on thedoor,
on safety considerations to prevent pc- it off in an emergency, may result in possible tipping of the ap-
tential hazard to the consumer aswell pliance orbreakageof doorandserious
as damageto the appliance, injuries.
Your appliance is vented through the
trim above the control panel. Never
_, _,_1 _ / block oven vent or air intakes. Do not
_ • • obstruct the flow of combustion and
w,_.E,,,- the burner :)revents proper perform-
__ ventilation air. Restriction of air flow to
__ Avoid touching oven vent area while
If appliance is installed near a window, enough to cause burns.
proper precautionsshould be taken to
prevent curtains from blowing over IN CASE OF FIRE:
burnerscreating a FIRE HAZARD.
Keep area around appliance clear and foodorcookingutensils,Thisinstruction 2. Smother fire or flame with baking
free from combustible materials, gaso- is based on safety considerations to soda, dry chemical, or a foam-type
line, and other flammable vapors and prevent potential hazard to userandto extinguisher. Do not use water on
materials, the appliance, grease fires.
ance.
oven ison andfor several minutes after
oven is turned off. Some parts of the __
vent and surroundingarea become hot
Do not use oven as a storage area for 1.Turn off appliance controls.
-1-
Page 2
SAFETY INSTRUCTIONS
CHILD SAFETY CLEANING COOKING SAFETY
Do notleave childrenaloneorunsuper- Turn offall controlsand wait for appli- Use cautionwhen wearing garments
visednear the appliancewhen it is in anoe parts to coolbefore touchingor made of flammable material to avoid
useor isstill hot.Childrenshould never cleaningthem. clothingfires. Loosefittingorlong hang-
beallowed to sit or stand on any part of ing-sleeved apparel should notbeworn
theappliance. Children must be taught Touching a hot oven light bulb with a while cooking. Clothing may ignite or
that the applianceand utensils in itcan damp cloth could cause the bulb to catch utensil handles.
be hot. Children should be taught that break. Should the bulb break, discon-
an appliance is not a toy. They should nect powerto the range beforetrying to Never heat an unopened container in
not be allowed to play with controls or remove the bulb to avoid electrical the oven. Pressurebuild-up maycause
other parts of the unit. Let hot utensils shock, container to burst resulting in serious
coolinasafe place,out of reachofsmall Clean appliance with caution. If a wet personal injuryor damageto the range.
children.
sponge orcloth isused to wipe spillson Slide oven rack out to add or remove
steam burns. Some cleaners can pro- food, using dry, sturdy pot holders. AI-
duce noxious fumes if applied to a hot ways avoid reaching into oven to place
surface, or remove food.
Use dry, sturdy pot holders. Damp pot
holders may cause burns from steam.
Dish towels or other substitutes should
never be used as pot holders because
a hot cooking area, becareful to avoid
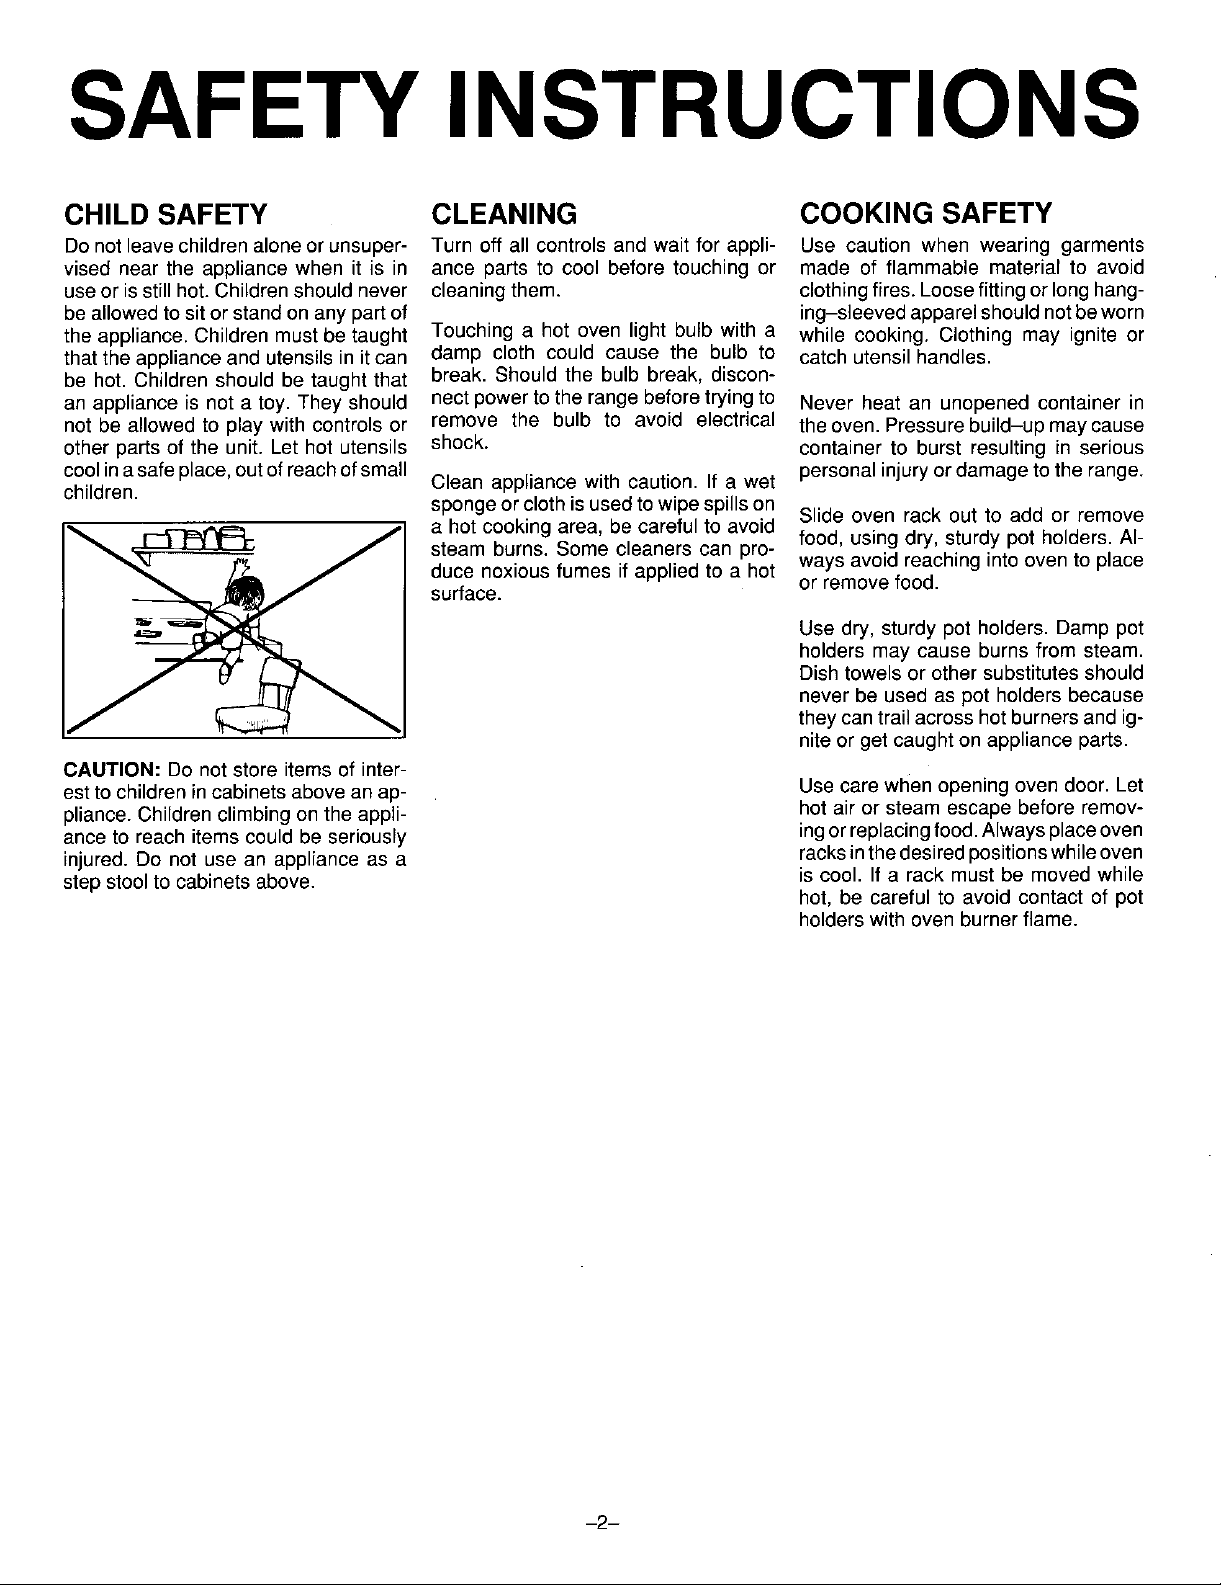
CAUTION: Do notstore items of inter-
est to children incabinets above an ap- Use care when opening oven door. Let
pliance. Childrenclimbing on the appli- hot air or steam escape before remov-
ance to reach itemscould be seriously ingor replacingfood. Alwaysplaceoven
injured. Do not use an appliance as a racksinthedesired positionswhileoven
step stoolto cabinets above, hot, be careful to avoid contact of pot
theycantrail across hot burnersand ig-
nite or get caught on appliance parts.
is cool. Ifa rack must be moved while
holders with oven burnerflame.
-2-
Page 3
SAFETY INSTRUCTIONS
STORAGE ABOVE OVEN AEROSOL SPRAYS IMPORTANT SAFETY
Toeliminatethe hazardof reachingover Many aerosol-type spray cans are EX- NOTICE AND WARNING
hotburners,cabinetstorage should not PLOSIVE when exposed to heat and The California Safe Drinking Water and
beprovided directlyabove a unit. Ifsuch may be highly flammable. Avoid their Toxic Enforcement Act of 1986 (Propo-
storage is provided,itshould be limited use or storage near anappliance, sition 65) requiresthe Governor of Cali-
toitemswhichareusedinfrequentlyand fornia to publish a list of substances
which are safely stored inan area sub- knownto theState ofCaliforniatocause
jected to heatfrom an appliance. Tem- SELF CLEAN OVEN
peratures in storage areas above the Do notcleandoorgasket.The doorgas- quires businessestowarn customers of
unitmaybeunsafeforsomeitems, such ket is essential for a good seal. Care potential exposures to such sub-
as volatile liquids, cleaners or aerosol shouldbe taken not to rub, damage, or stances.
sprays, move the gasket. Do not use oven
cleaners of any kind in or around any
ALUMINUM FOIL partof the selfclean oven. Clean only Users of this appliance are hereby
Use aluminumfoilONLY as instructed cleaningthe oven, removebroilerpan, sultinlow-fevelexposuretosomeofthe
in this book. Improperuse of aluminum ovenracks,andother utensils,andwipe listed substances, including benzene,
foil may causedamage to the oven, af- off excessive spillovers, formaldehyde and soot, clueprimarilyto
fect cooking results,and can also result the incomplete combustion of natural
in shock and/orfire hazards, gasor liquidpetroleum (LP)fuels.Prop-
partslistedin this booklet. Beforeself warned that the burningof gas can re-
PLASTICS these substances can also be mini-
Many plastics are vulnerable to heat. mized byproperlyventingtheburners to
Keepplastics away fromparts oftheap- the outdoors.
pliance that maybecome warm or hot.
cancer or reproductive harm, and re-
edy adjusted burners will minimize in-
complete combustion. Exposure to
PREPAREDFOODWARNING: Follow
food manufacturer's instructions. If a
plastic frozen food container and/or its
filmcover distorts,warps orisotherwise
damaged during cooking, immediately
discard the food and itscontainer. The
food could be contaminated.
-3-
Page 4
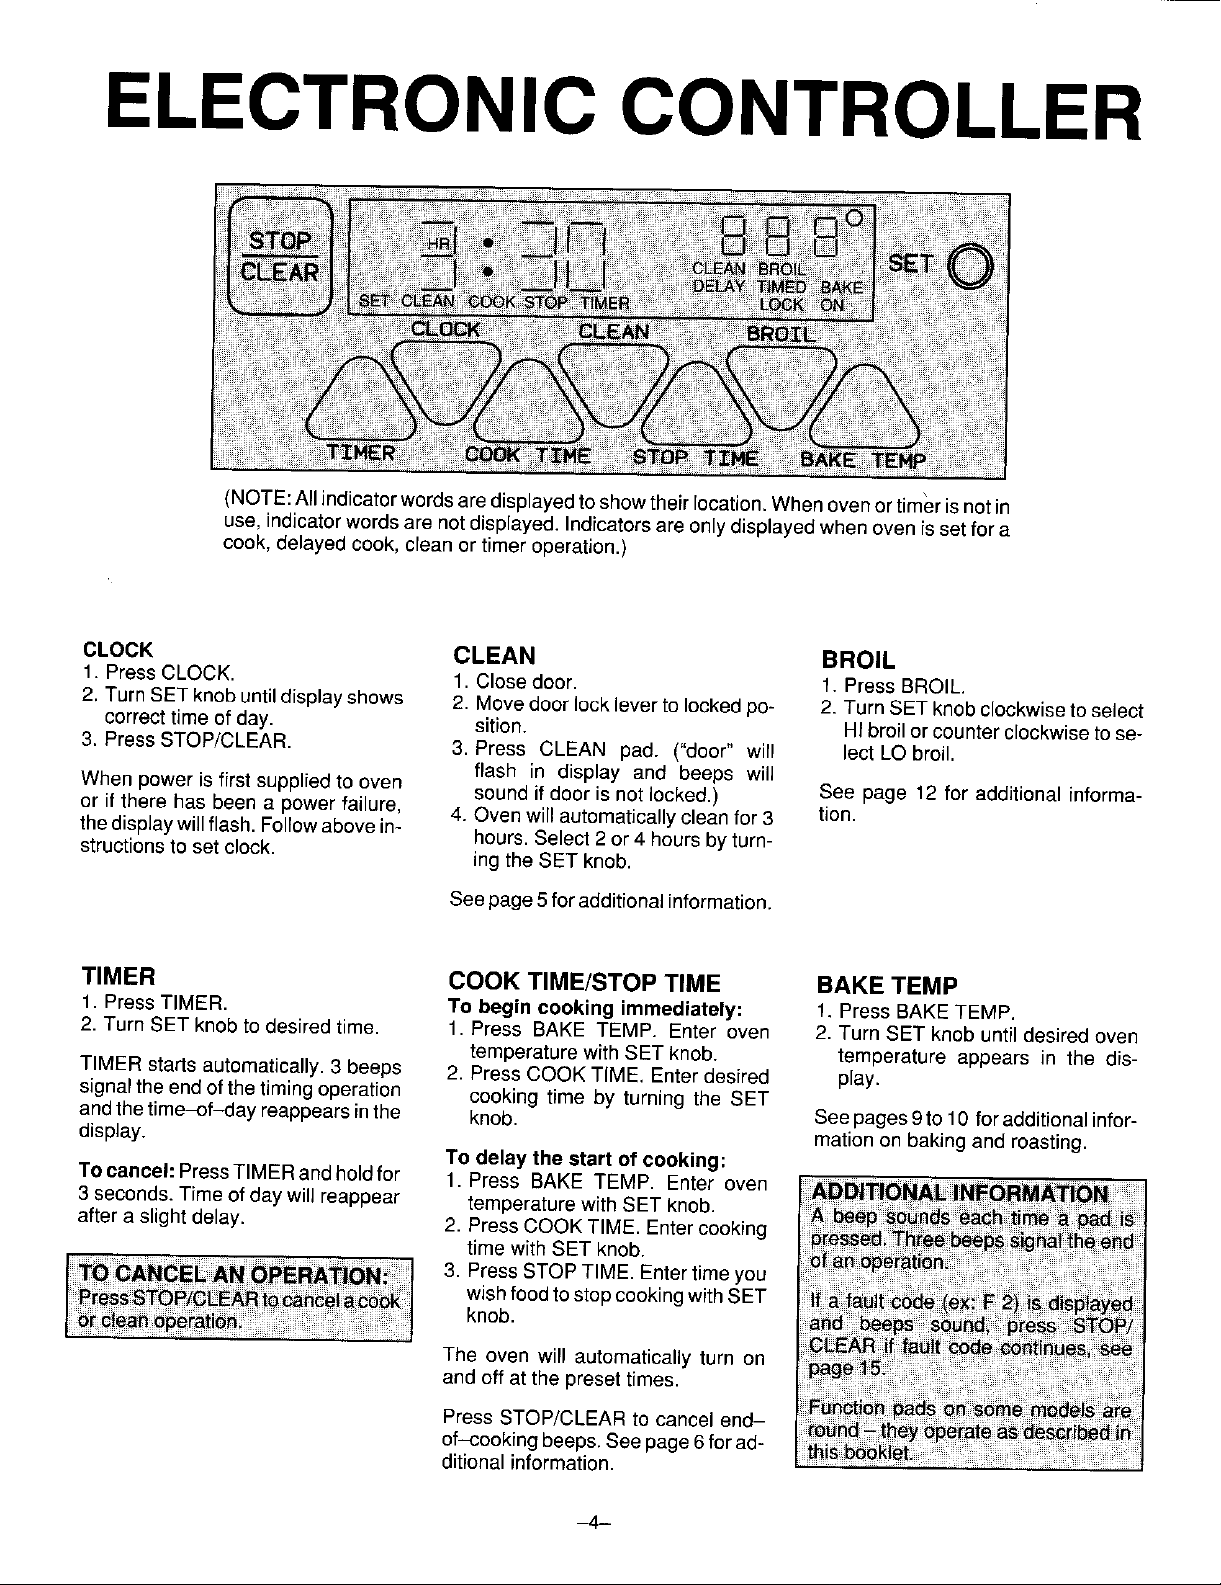
ELECTRONIC CONTROLLER
\
(NOTE:Allindicatorwordsare displayedto showtheirlocation.Whenoven ortimer isnot in
use, indicatorwordsare notdisplayed. Indicatorsare only displayedwhen oven issetfor a
cook,delayed cook, clean or timer operation.)
CLOCK CLEAN BROIL
1. Press CLOCK. 1. Close door. 1. Press BROIL.
2. TurnSET knob until displayshows 2. Movedoor lock leverto locked po- 2. Turn SET knob clockwiseto select
correct time of day. sition. Hi broil or counterclockwise to se-
3. Press STOP/CLEAR. 3. Press CLEAN pad. ("door" will lect LO broil.
flash in display and beeps will
When power is first supplied to oven sound if door is notlocked.) See page 12 for additional informa-
or it there has been apower failure, 4. Oven will automaticallyclean for 3 tion.
thedisplaywill flash. Followabovein- hours. Select 2 or 4 hours by turn-
structions to set clock, ing the SET knob,
See page5for additional information.
TIMER COOK TIME/STOP TIME BAKE TEMP
1. PressTIMER. To begin cooking immediately: 1. Press BAKETEMP.
2. TurnSET knobto desiredtime. 1. Press BAKE TEMP. Enter oven 2. Turn SET knobuntildesired oven
temperature with SET knob. temperature appears in the dis-
TIMER starts automatically. 3 beeps 2. PressCOOK TIME. Enterdesired play.
signalthe end ofthe timing operation cooking time by turning the SET
andthetime-ot-day reappears inthe knob. Seepages9to 10 for additional infer-
display, mation on baking and roasting.
To delay the start of cooking:
Tocancel: PressTIMERand holdfor 1.Press BAKE TEMP. Enter oven
3 seconds. Timeof day will reappear temperature with SET knob.
after a slight delay. 2. Press COOK TIME.Entercooking
time with SET knob.
3. PressSTOP TIME. Entertime you
wishfoodtostopcookingwithSET
knob.
The oven will automatically turn on
and off at the preset times.
Press STOP/CLEAR to cancel end-
of-cooking beeps. Seepage 6forad-
ditionalinformation.
-4-
Page 5
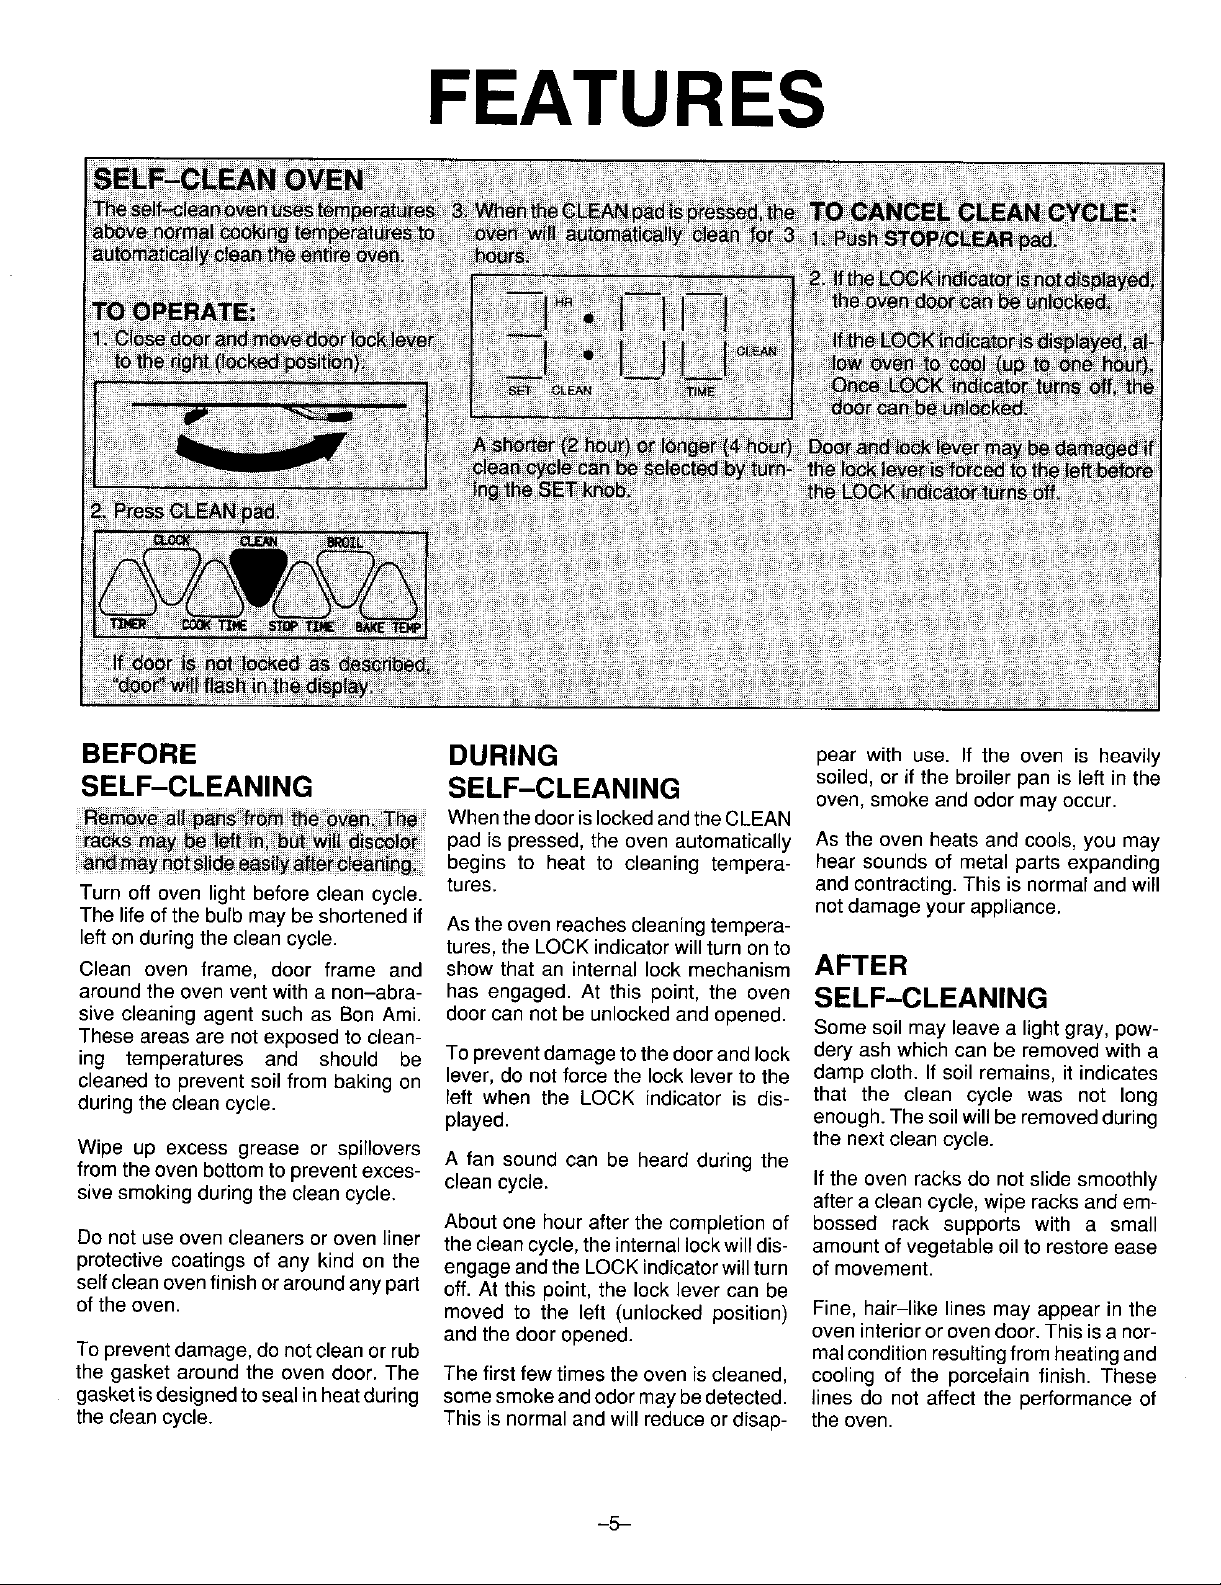
FEATURES
BEFORE DURING pear with use. If the oven is heavily
soiled,or if the broilerpan is leftin the
SELF-CLEANING SELF-CLEANING oven, smokeand odormay occur.
Turn off ovenlight beforeclean cycle, tures, and contracting.This is normalandwill
The lifeofthebulb may be shortenedif Astheovenreachescleaningtempera- notdamageyourappliance.
leftonduringthe cleancycle, tures,theLOCK indicatorwillturnonto
Clean oven frame, door frame and showthat an internallock mechanism AFTER
aroundthe ovenventwitha non-abra- has engaged. At this point, the oven SELF-CLEANING
sivecleaningagent such as NonAmi. doorcan not be unlockedandopened.
These areasare notexposedtoclean- Somesoilmay leavea lightgray, pow-
ing temperatures and should be Topreventdamagetothedoorandlock dery ash whichcan be removedwitha
cleanedto preventsoilfrom bakingon lever,donotforce the locklevertothe damp cloth. If soilremains,it indicates
duringthe cleancycle, left when the LOCK indicatoris dis- that the clean cycle was not long
Wipe up excess grease or spillovers A fan sound can be heard duringthe the nextcleancycle.
fromtheovenbottomtopreventexces- cleancycle. If the oven racksdo notslidesmoothly
sivesmokingduringthe creancycle, after a cleancycle,wiperacks andem-
Do notuse ovencleanersorovenliner thecleancycle,theinternallockwilldis- amountof vegetableoilto restoreease
protectivecoatingsof any kind on the engageandthe LOCKindicatorwillturn of movement.
selfcleanovenfinishoraroundanypart off. At this point,the locklever can be
oftheoven. moved to the left (unlockedposition) Fine, hair-like linesmay appear in the
Topreventdamage,do notcleanorrub realconditionresultingfromheatingand
the gasket aroundthe ovendoor. The The firstfew timesthe ovenis cleaned, coolingof the porcelain finish. These
gasketisdesignedtosealinheatduring somesmokeandodormay bedetected, lines do notaffect the performanceof
theclean cycle. Thisis normaland willreduceordisap- the oven.
WhenthedoorislockedandtheCLEAN
pad is pressed,the ovenautomatically As the oven heatsand cools,you may
begins to heat to cleaning tempera- hear sounds of metalparts expanding
played, enough.The soilwillberemovedduring
Aboutone hourafter thecompletionof bossed rack supports with a small
andthedooropened, oveninteriororovendoor.Thisisa nor-
-5-
Page 6

FEATURES
AUTOMATIC OVEN COOKING
Automatic cooking feature is used toturn the oven on and
off at the preset time-of-day. This feature can be used to
delay the start of a cooking operation.
The automatic cookingfeature will not operate unlessthe
clock is functioning and isset at the correct time-of-day.
TO BAKE BY TIME with immediate START: GENERAL
1. Press BAKE TEMP load. "BAKE" INFORMATION
lights in the display. I(-I • _11--1 um 0 un°/
2. Enter oven temperature with the "_j such as dairy products, pork, poultry,
SET knob. 0_o04 cuz_ _0zt.
IU • J U IMPORTANT: Highly perishable foods
seafoods or stuffing are not recom-
3. Press COOK TIME pad. "SET "rz_J_ co= Tz_ s_rmTZ.E 8*xE_,_ that cook for the same length of time
_(_(_(_(_(_A mended for delayed cooking. If cook-
COOK TIME" flashes in the display, and at the same oven temperature.
ing more than one food, select foods
.. • rqi-[ 9S0°
4. Enter cooking time (how long you ,_ _Ul_, L
wish food to cook) with the SET
knob. CLOCK O-E^N _OZ¢.
"TIMED BAKE ON" lights in the dis-_/)A__
play. The oven automatically turns T_.ER CO=TZMZSTOPTZ_ ._E "r_,_, TO reset or cancel the program: Press
on and the display begins to count the STOP/CLEAR pad.
down. _ .. • Z,,--, 3_o_,
5. At the end of the preset cooking ct.oo_ CLE^. e_OZL time-of-day will reappear in the dis-
off. BAKE" or "DELAY TIMED BAKE" and
time, the oven automatically turns (_(_(_(_(_(_(_ play. "TIMED BAKE ON", "DELAY
6. Press STOP/CLEAR pad to cancel display as a reminder that the oven is
end-of-cooking beeps, set for a cooking operation.
I o__11__/ o After setting the Automatic Cooking
TZ,E, Co=TZ,_ STOPTZ_ B,,_E_ the oven temperature will remain in the
.,o
feature, press the CLOCK pad and the
At end of cooking, continuous beeps
willsound. Press STOP/CLEAR pad to
cancel beeps.
TO BAKE BY TIME with delayed START:
1. Follow steps 1,2, 3 and 4 above.
2. Press STOP TIME pad. "SET STOP
TIME" flashes in the display. J__ ,, •I--I[--I.LIII_ T_E _D_ _°
3. Enter the time you wish the oven to
turn off by turning the SET knob. De- =.co. CLEAN BROXL
pending on your model, either "DE-__A(_LAY TIMED BAKE" or "DELAY
BAKE" will light in the display and TZ.CR COOKTZMCSTOPTZ.E _*K¢T.___._
the time of day will then reappear.
The oven will automaticafly turn on [ I1_ : --II--r _ u_°l
in time to have the food cooked by Jl_l ....... j
the preselected STOP TIME. The
oven will automatically turn off at the o.oc_ ct_E_ BROZL
preset stop time. (_(_(_(_)(_)_(_
4. Press STOP/CLEAR pad to cancel Tz_ co(_(TZldESTOPTZI_EBAKETE3_P
end--of-cooking beeps.
--6--
Page 7

USING YOUR OVEN
PILOTLESSIGNITION OVENDOOR OVENBOTTOM
GIo bar-type ignition When opening oven door, allow steam Protectoven bottom againstexcessive
With this type of ignition system, the and hotairto escape beforereachingin spillovers especiallyacid or sugaryspil-
oven willnotoperateduring apowerfail- oven to check, add or removefood. lovers. Use the correct size cooking
ure or if oven is disconnected from the utensil to avoid boilovers.
wall outlet. No attempt should be made
to operate oven during a power failure. To remove door: Open door to the
"stop"position (opened about4 inches) To remove: When cool, remove the
and graspdoor with both hands at each oven racks. Slide the two catches, Io-
OVEN CANNOT BE side. Do not usedoor handle to lift door. cated at each rear corner of the oven
USED DURING A arms.
POWER FAILURE
Your oven is vented through the trim 2'_
above the control panel. Do not block
this opening. It is importantthat the flow
of hot air from the oven and fresh air to
ow,
the ovenburnerbe unrestricted.Donot
touch the vent opening or nearbysur-
faces during oven operation as they
may be hot.
Liftup evenlyuntildoor clearsthe hinge bottom,toward the front of the oven.
Lift the rear edge of the oven bottom
FAN slightly, then slide it back until the front
edgeoftheoven bottomclears the oven
This oven is equippedwith a fan which front frame. Remove oven bottom from
automatically turns on whenever the
oven isset forcooking orcleaning.The oven.
fan will automatically turn off when the
unit has cooled. To replace: Fit front edge of oven bot-
tom intofront frame. Lower rearof oven
To replace door: Grasp door at each bottom and slide the catches back to
side, align slots in the door with the lock oven bottom into place.
hinge arms and slide door down onto
the hinge arms until completely seated
on hinges.
-7-
Page 8

USING YOUR OVEN
OVEN
CHARACTERISTICS OVEN RACKS HINTS
Thetwo oven racksaredesigned witha NEVER place pansdirectly on theoven
"lock-stop" position tokeep racksfrom bottom. Do not cover entire rack with
accidentally coming completely out of aluminum foil. Do notplace foil directly
the oven. onoven bottom or place foil directly un-
der utensil. To catch spillovers, cut a
piece of foil a little larger than the pan
To remove: Be sure rack is cool. Pull and place it on the rack below the rack
rackout to the "lock-stop" position. Tilt containing the utensil.
up and continue pulling until rack re-
leases.
Ifcooking on two racks,staggerpans so
OVEN BURNER one is not directlyover the other. Use
The size and appearance of a properly To replace: Place rack on rack sup- rack positions 2 and 4, or 2and 5, de-
adjusted oven burner flame should be ports, tilt up and push toward rear of pending on baking results,when cook-
as shown: oven. Pull rackout to "lock-stop" posi- ing on two racks.
tionto besurerack iscorrectly replaced.
RACK POSITIONS: PREHEATING
cooking of oven meals.
-- RACK 2 used for two-rack baking or It is not necessary to preheat oven for
Coneincenterissmaller broiling thicker cuts of meat. roasting. It is not necessary to preheat
RACK3 usedfor most one-rack baking for broiling unless darker browning is
and roasting some meats, steaks. Allow broilelement to preheat3
RACK 1 (top of oven) used for 2 rack
_ Coneapprox.1/2-inch RACK 4 usedforone or two rackbaking to 5 minutes.
Theoven temperature is maintained by cake or pie shells, sired will NOT preheat the oven any
cycling the burner on and off. After the RACK5 usedfor roastingturkey or bak- ture may have a negative effecton bak-
oven temperature has been set, there ingangel food cakeor pie shells, ingresults.
will be about a 45 second delay before
the burner ignites. This is normal, and
nogas escapes during this delay. ,- __ . To preheat: Set oven for bakingand al-
During the clean cycle, and some ex- your model,either75 or 100will appear
tended oven cooking operations, you in the display until the oven reaches
may hear a "popping" sound when the 100°F. Ifthe oven temperature isabove
burnercyclesoff. Thisisa normaloper- -'_ _ 100°, the display will show the actual
ating sound of the burner, oven temperature. The display willthen
and roasting large meats, cooking
larger foods and for baking angel food Selecting temperature higher than de-
i the preset temperature. Dependingon
_ 1 lowthe oven tOheatuntildisplay shows
desired or if cooking thin (3/4-inch)
faster. Preheating at a higher tempera-
show the oven temperature in 5° incre-
ments untiltheoven reaches the preset
temperature.
Once the preset temperature is
reached,andtheoventemperature has
stabilized, a single beep will sound.
_ _i _ _ _@_ _!_ _ preheating, a beep will signal that the
adj_r_t _te_ii _ oven has reachedthe newtemperature
-8-
Ifthe oventemperature ischangedafter
setting.
Page 9

USING YOUR OVEN
TO SET OVEN:
cator turns on. preheated to set temperature. I • JIJ
1.PressBAKETEMPpad. BAKEindi- 4. Placefoodinovenwhenovenhas I _1. ZII--I 35un_ °]
2. Turn SET knob until desired tern- 5. Check food at minimum time. Cook
perature is displayed, longer if necessary, o_ocK _E^. t_OZL
3. BAKE ON indicator and ovenimme-diatelyturn on. 6. Press STOP/CLEAR pad tocanceltheoperation. _)__A
Preheat oven for all baking opera- "rz_,_ co= "rz,,E _op _'z_ _'E
tions.
COMMON BAKING PROBLEMS AND WHY THEY HAPPEN
Cakesare uneven. Pans touching each other or Cakes don't brown on top. Incorrectrack position.
Cake high in middle. Temperature set too high. Overmixing.
Cake falls. Too much shortening or sugar. Uneven texture. Too much liquid.
Cakes, cookies, biscuits Incorrectrack position.
don'tbrown evenly. Oven door notclosed properly. Cakes crack on top. Batterovermixed.
oven walls. Temperature set too low.
Batter uneven inpans. Overmixing.
Temperature set too low or Too much liquid.
baking time too short. Pan size too large or too little
Oven not level, batter in pan.
Undermixing. Ovendoor opened too often.
Too much liquid.
Excessiveshn)_kage, Too littleleavening,
Baking time too long. Pan too large.
Overmixing. Temperature set too high.
Too much flour. Bakingtime too long.
Pans touching each other or Panstoo close to each other
oven walls, or oven walls.
Incorrect rack position.
Too much or too little liquid. Undermixing.
Temperature set too low. Temperature set too low.
Old or too little baking powder. Bakingtime too short.
Pan too small.
Oven door openedfrequently. Cakes have tunnels. Notenough shortening.
Added incorrect type of oil to Too much baking powder.
cake mix. Overmixing or at too high a
Added additional ingredients speed.
to cake mixor recipe. Temperature set too high.
Door gasket notsealing Temperature set too high.
properly. Too much leavening.
Incorrect use of aluminum foil. Incorrect rack position.
Oven notpreheated.
Pans darkened, dented or
warped. Cakenot done inmiddle. Temperature set too high.
Pan too small.
Bakingtime too short.
Cakes,cookies, biscuits too Oven notpreheated.
brown on bottom. Panstouching each other or
ovenwalls.
Incorrect rack position, Pie crust edges too brown. Temperature settoo high.
Incorrect use of aluminum foil. Panstouching each other or
Placed2 cookiesheets on one oven walls.
rack. Edgesof crust too thin.
Used glass, darkened, stained,
warped or dull finish metal
pans. (Use a shiny cookie Pies don't brown onbot- Used shiny metal pans.
sheet.) tom. Temperature set too low.
Pies have soaked crust. Temperature too low at start of
baking.
Fillingtoo juicy.
Used shiny metal pans.
-9-
Page 10

USING YOUR OVEN
HOW TO BROIL
Broiling is a method of cooking tender TO BROIL: 6. Press STOP/CLEAR pad to cancel a
meats by direct heat under the burner. 1. Remove excess fat and slash remain- broil operation.
The cooking time is determined by the ing fat. To help keep meat from curl-
distance between the meat and the ing.
burner, the desired degree of doneness 2. Place broiler pan on any ofthe recom-
and the thickness of the meat. mended rack positions. Generally,
Broiling requires the use of the broiler
pan and insert. The correct position of
the insert in the pan is very important, burner. Place further down if you
The broiler insert should be placed in want meat well done.
the pan so grease will drain freely. Im- 3. Broiling should be done with oven
proper use may cause grease fires, door closed.
The broiler insert CANNOT be covered chart. Meat should be turned once When broiling longer cooking foods
with aluminum foil as this prevents fat about half way through cooking, such as pork chops, poultry or thick
from draining into pan below. However, 5. Check doneness by cutting a slit in steaks, select LO BROIL. Lowtempera-
for easier cleaning, the broiler pan can meat near center for desired color, ture broiling allows food to cook to the
be lined with foil.
Do not use disposable broiler pans. browning. Cooking time may increase if
They do not provide a separate tray. LO BROIL is selected.
for brown exterior and rare interior,
the meat should be close to the
4. Follow suggested times on broiling Use HI BROIL for most broil operations.
well done stage without excessive
BROILING CHART
BACON
CHICKEN LO BROIL
LAMB CHOPS
1-inch thick #2 Medium 12 to 15 minutes
Well Done 16to 20 minutes
1 1/2-inch thick #3 Medium 15 to 19 minutes
WIENERS, precooked
Hot dogs, smoked or Polish sausage, Bratwurst, etc. #2 8 to 12 minutes
-10-
Page 11

MAINTENANC
ELECTRICAL HOW TO REMOVE OVEN OVEN LIGHT
CONNECTION FOR CLEANING AND Toturn on oven light, press "oven"
Appliances which require electrical SERVICING rocker switch, located on controlpanel.
powerareequippedwithathree-prong When necessary,follow these proce-
groundingplugwhichmustbe plugged duresto removeapplianceforcleaning To replace oven light: Beforereplac-
directlyintoaproperlygroundedthree- orservicing: ing light bulb,DISCONNECT POWER
hole120 vortelectricaloutlet. TO OVEN. Be surebulbiscool.Do not
1.Shut-off gas supplyto appliance, touchahotbulbwithadampclothasthe
2. Disconnectelectrical supplyto appli- and carefully unscrew bulb cover and
_ ancei, bulb.
pliance.
bulb may break. Use a dry potholder
__ 3. Disconnect gas supply tubing to ap-
= from cabinet. -
A/ways disconnect power to app/i-
ance before servicing. 5. Reverseproceduretoreinstall.Ifgas
If an ungrounded,two-hole or other Replacewitha 40 wattappliancebulb.
type electricaloutletis encountered,IT Reconnect power to oven and reset
ISTHE PERSONAL RESPONSIBILITY clock.
OF THE APPLIANCE OWNER TO NOTE: A trained serviceman should
HAVE RECEPTACLE REPLACED makethegasinstallation, disconnection
WITH A PROPERLY GROUNDED and re-connection of gas supplyto ap-
THREE HOLE ELECTRICAL OUTLET. p!iance.
Thethree-prong grounding plug is pro-
videdfor protection against shock haz-
ards. DO NOT CUTORREMOVETHE WARNING: Possible risks may result
THIRD GROUNDING PRONG FROM from abnormal usage, including exces-
THE POWERCORD PLUG. siveloading ofthe oven door and of the
ance to cabinet. Remove appliance ___j
4. Remove screws that secure appli- _ _
line has been disconnected,check
forgasleaksafterreconnection.(See
InstallationInstructionsfor gas leak
test method.)
risk oftip over, shouldthe appliance not
be reinstalled according to the installa-
tion instructions.
-11-
Page 12

CARE AND CLEANING
Baked Enamel Soap & water. Paste of Useadry towelor clothto wipeupspills, especially acid spills,as soonasthey occur. (Thisisespe-
Oven door baking soda & water, cially importantfor white surfaces.) When surface is cool, wash with soap andwater. Do not use
Glass Soap & water. Paste of Washwithsoap and water. Remove stubbornsoil with paste of bakingsoda and water. To avoid
Oven window baking soda & water, insidestaining of oven door glass, do notoversaturate cloth. Do notuse abrasivematerialssuch as
Window cleaningfluid, scouringpads,steel wool or powdered cleaning agents. They will damage glass. Rinsewith clear
abrasive or harsh cleaning liquids and powders oroven cleaners. Thesewill scratch and perma-
nentlydamage the finish. Dry with asoft cloth.
water and dry.
Oven racks Soap &water. Cleansing Cleanwith soapywater. Remove stubbornsoil with cleansing powder or soap filled scouringpad.
Porcelain finish Soap &water. Pasteof Porcelain enamel is glass fused on metal. It may crack or chip with misuse.Clean with soap and
See page 5 for baking soda & water, waterwhen partsare cool. Allspillovers,especially acidor sugar spillovers,should be wipedup im-
self-clean oven Non-abrasive plastic mediately witha dry cloth. Surface maydiscoloror dull ifsoil is not removed. Whensurface is cool,
powders & plastic pads. Rinseand dry.
Soap filledscouring pad.
pad or sponge, cleanwith warm soapywater. NEVERWIPEOFF AWARM OR HOTENAMEL SURFACEWITH A
DAMP CLOTH. THIS MAY CAUSE CRACKINGAND CHIPPING. Never use abrasive or caustic
cleaning agentson exterior finish of oven. Do not use oven cleaner on self-clean oven.
-12-
Page 13
SERVIC
BEFORE CALLING A SERVICE TECHNICIAN, CHECK THE FOLLOWING:
1. Bumerflame uneven, a. cloggedburnerport(s), a. clean portswith straightpin. Be
sureignitorsarenotsparking.
2. Burnerfailstolight, a. powersupplynotconnected, a. connect power, check circuit
b. controllerincorrectlyset. b. see page 4.
3. Oven temperatureinaccurate, a. ovennotpreheated, a. preheatoven 10minutes.
• foodtakestoo longorcooksto b. incorrectrackposition, b. see page8.
fast. c, incorrectuse of foil. c. see page8.
• pale browning, d. oven bottom incorrectly re- d. replaceoven bottomcorrectly.
• foodover-doneonoutsideand placed.
under-doneincenter, e. oventhermostatsensingdevice e. reinsertsensingdevicesecurely
• overbrowning, outof holdingclip(s), intoclip(s).
breakerorfusebox.Ovenwillnot
operateduringa powerfailure.
4. Clockand/orlightdo notwork. a. powersupplynotconnected, a. connectpowersupply,checkcir-
b. burnedout lightbulb. b. replacelightbulb.
c. malfunctioningswitch, c. callservicemantocheck.
d. malfunctioningclockorloosewir- d. callservicemantocheck.
ing.
&Controlwillnotacceptan entry. Thismay indicatea "stuck"pad.Presseach of the sevenpads to disengagethe
pad.Then, pressSTOP/CLEARpad and reprogramthe operation.Ifthecontrol
stilldoesnotacceptanentryaftercheckingeachpad,call the servicer.
Fplus a numberappears inthedis- This is called a FAULT CODE. If a fault code appears inthe display, press the
playandacontinuous beepsounds. STOP/CLEAR pad. Ifthe fault code reappears, disconnect powerto the unitand
(Example: F 1) call theservicer.
cuitbreakerorfusebox.
EXPLANATION OF FAULT CODES DURINGNORMALOVENCOOKING
Yourapplianceis equippedwithan electroniccontrol featur- Ifa fault code appears in thedisplay and continuous beeps
ingbuilt-in, self-diagnostic software.This software continu- sound, press the STOP/CLEARpad. Then, reprogram the
ously monitorsthe control to insure safe and proper opera- cooking operation.
tion. Ifthe softwareshoulddetecta questionable situation, a
FAULT CODE (F plus a number) will appear in the display Ifthe fault code reappears in the display,call aservicer. Do
and continuous beepswill sound, not use the oven until the control has been serviced. The
surface unit can beused.
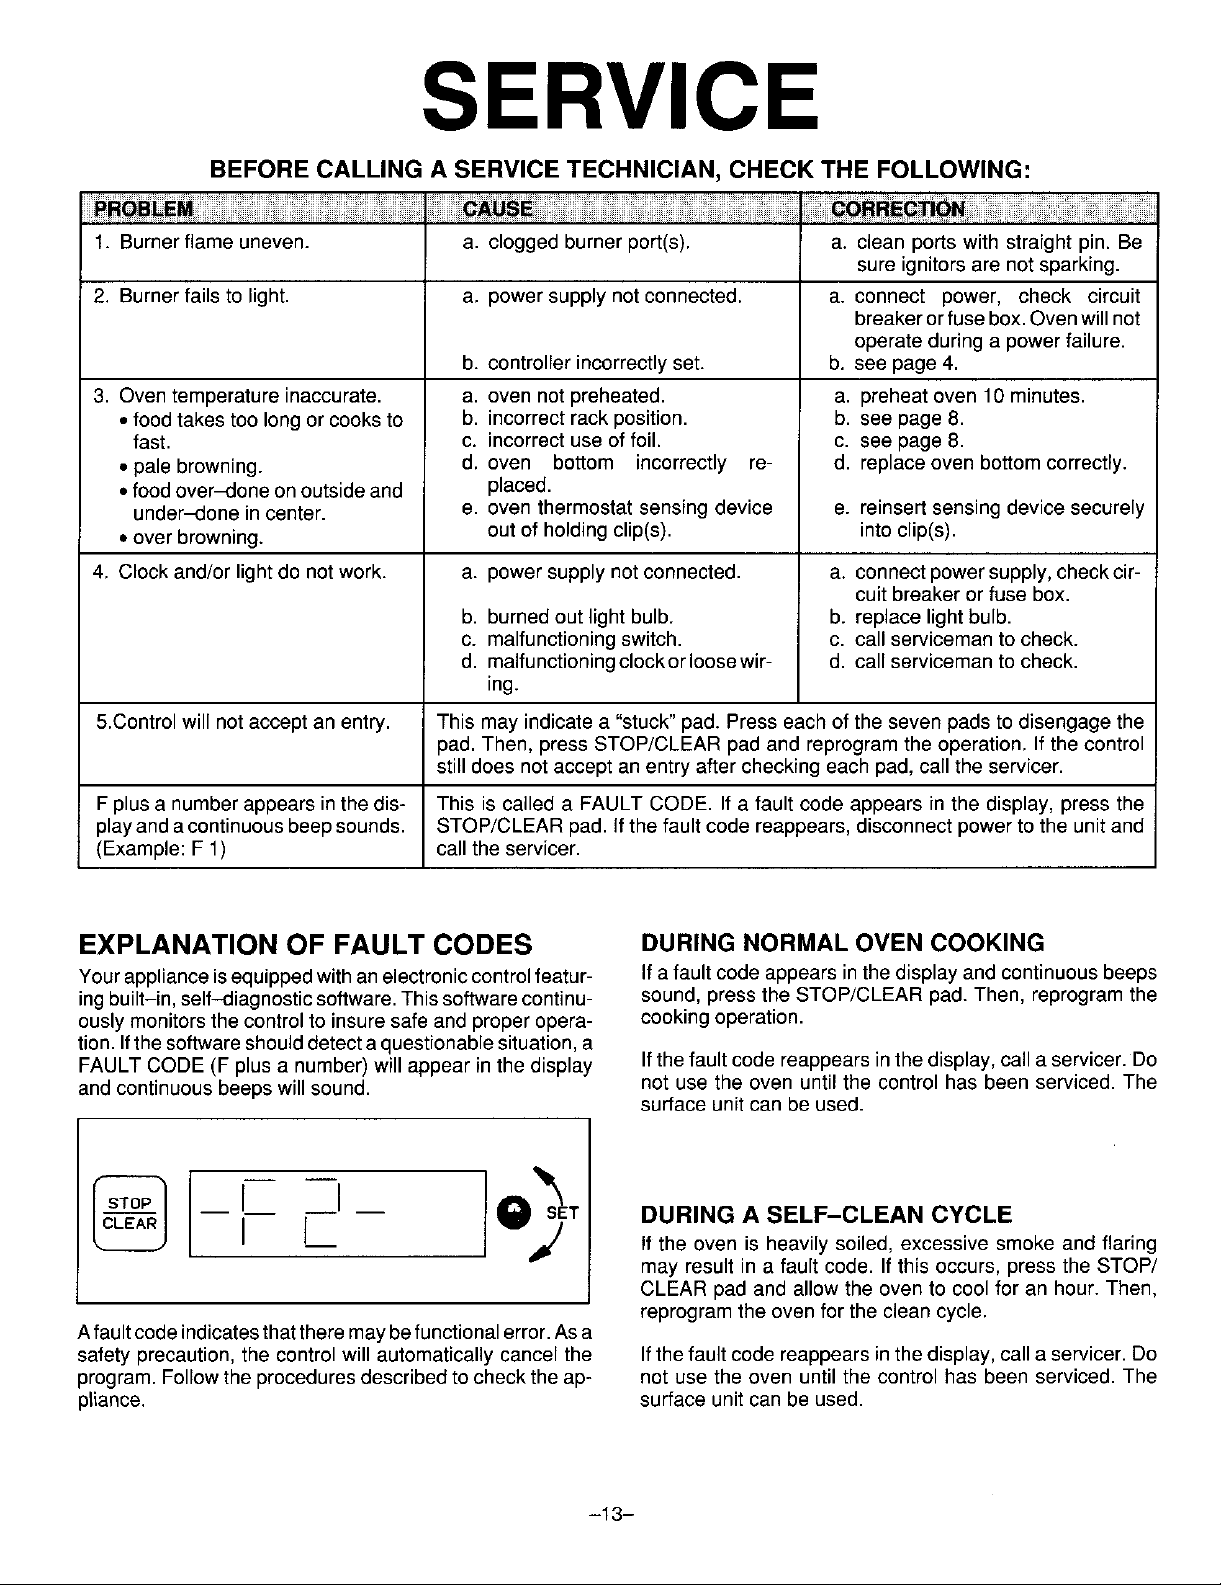
_ I I I _T DURING A SELF_CLEAN CYOL E
Afault codeindicatesthatthere maybe functionalerror.Asa
safety precaution, the control will automatically cancel the Ifthe faultcode reappears in the display, calla servicer. Do
program. Followthe procedures described tocheck the ap- not use the oven until the control has been serviced. The
pliance, surface unitcan be used.
I I if the oven is heavily soiled, excessive smoke and flaring
may result in a fault code. Ifthis occurs, press the STOP/
CLEAR pad and allow the oven to cool for an hour.Then,
reprogram the oven for the clean cycle.
-13-
Page 14

SERVIC
SERVICE cover for locationof your modeland se- Ifyou did not receivesatisfactoryserv-
Do not attempt to service the appli- rial numbers.) icethrough your serviceror Maycoryou
ance yourself unless directed to do sumerAction Panelby letter including
so in this book. Contact the dealer Ifyouareunabletoobtainservice,write your name, address, and telephone
who soldyou the appliancefor serv- tous. Ouraddressisfoundontherating number,aswellas themodelandserial
ice. plate.Seefrontcoverfor locationofrat- numbersof theappliance.
ingplate.
HOW TO OBTAIN
may contactthe MajorAppliance Con-
SERVICE Ifyouare notsatisfiedwiththe localre- MajorApplianceConsumerActionPanel
When your appliancerequiresservice sponse to your service requirements, Chicago,IL 60606
or replacement parts, contact your callor writeMAYCORApplianceParts
DealerorAuthorizedServicer.Useonly and Service Company, 240 Edwards
genuine factoryor Maycorparts if re- Street, S.E., Cleveland, TN 37311,
placementpartsarenecessary.Consult (615) 472-3500. Includeor haveavail- MACAP (Major Appliance Consumer
theYellowPages inyourtelephonedi- able the complete model and serial ActionPanel)isanindependentagency
rectoryunderapplianceforthe service numbersoftheappliance,thenameand sponsoredby three trade associations
center nearestyou.Be sureto include addressof the dealer from whom you asacourt ofappealsonconsumercorn-
your name, address, and phonenum- purchasedthe appliance,the date of plaintswhich have not been resolved
bet, along with the model and serial purchaseand details concerningyour satisfactorilywithinareasonable period
numbers of the appliance.(See front problem, oftime.
20NorthWackerDrive
-14-
Page 15

FULL ONE-YEAR WARRANTY
DOMESTIC GAS OR ELECTRIC RANGE
4aycorApplianceParts&Service Companywillrepairor replace,withoutcharge,any partofyourproductwhichhas
defect in materialor workmanship during thefirst yearafter the date ofthe originalinstallation.This warrantyextends
to any owner during the one-year warranty period.
LIMITED 5 YEAR WARRANTY
Onelectricrangesequipped withsolid discorsmoothtop heatingelements,and ongas rangeswith sealedburners,for
anadditional4year periodbeyondthefirstyearof thegeneralcoverage ofthiswarranty, Maycorwill replaceany ofthe
soliddisc orsmoothtopheatingelements, or sealed burnerswhich fail to heatasa result ofdefective workmanshipor
material. Additionally, Maycor will replace any smoothtop cooking surface which cracks or breaks during normal
householdcooking. These partsmust be installedby aqualifiedperson. Any laborcharge required for replacement is
not coveredby this warranty.
HOWTO OBTAIN SERVICE
To obtain the repair or replacement of a defective part under these warranties, you should contact the dealer from
whom you purchased the appliance or a servicer he designates.
WHAT IS NOT COVERED BY THESE WARRANTIES
1. Conditionsanddamage resulting from improper in- 5. Any product used for other than normal household
stallation, delivery, unauthorized repair, modifica- use. It does not extend to products purchasedfor
tion,ordamage not attributable to a defect in mate- commercial or industrial use.
rial or workmanship.
2. Conditionsresultingfrom damage, such as: (1)im- stallation errors or to instructyou onhow to use the
proper maintenance, (b) misuse, abuse, accident, products.
or (c)incorrect electrical current orvoltage.
3. Warranties are void if theoriginal serial numberhas SUSTAINED BYANY PERSON ASA RESULTOF
been removed, altered, or cannot be readilydeter- ANY BREACHOF THESEWARRANTIESOR ANY
mined. IMPLIED WARRANTY. Some states do not allow
4. Light bulbs, apply to you.
6. Any expenseincurred for service calls to correct in-
7. CONSEQUENTIAL OR INCIDENTAL DAMAGES
the exclusion or limitation of consequential or inci-
dental damages, so the above exclusion may not
ADDITIONAL HELP
If you are notsatisfied with the local response to your service requirementsandwish to contact Maycor, please ad-
dressyourletter totheCustomer RelationsDepartment, MaycorParts& ServiceCompany, 240Edwards Street,S.E.,
Cleveland,TN37311 or call (615) 472-3500. Tosavetime, your letter should includethe complete modeland serial
numbersofthewarranted appliance,the nameandaddressof thedealer fromwhom you purchasedtheappliance,the
date of purchase and details concerning your problem.
These warranties are the only written or expressed warranties given by Maycor. No one is authorized to increase,
alter,or enlarge Maycor's responsibilities or obligations underthese warranties. These warranties giveyou specific
legal rights, and you may also have other rightswhich vary from state to state.
810gP059-60
(6/91)
 Loading...