

Page 1
Instructions for your Chateau Smoothtop Range with “T” Clock
CONTENTS
SAFETY INSTRUCTIONS 1-3......................
ELECTRONIC CONTROLLER 4....................
USING YOUR SMOOTHTOP 5-7...................
Cooking areas 5................................
Surface controls 5..............................
Signal lights 5..................................
Hot surface light 5..............................
Retained heat 5................................
Hints 5........................................
Cookware 6....................................
Heat setting chart 6.............................
Care information 7..............................
Cleaning chart 7................................
Problem solving chart 7..........................
USING YOUR RANGE 8-9.........................
Back panel light 8...............................
Lower oven light 8..............................
Upper oven light 8..............................
Oven door 9...................................
Storage drawer 9...............................
Leveling legs 9.................................
Anti-tip brackets 9...............................
Eye-level oven 9................................
USING YOUR OVEN 10-12........................
Oven characteristics 10..........................
Fan 10........................................
Oven racks 10..................................
Hints 10.......................................
Preheating 10..................................
To set oven 11.................................
Common baking problem chart 11.................
How to broil 12.................................
Cooking tips 12.................................
AUTOMATIC OVEN COOKING 13-14...............
To bake by time with immediate start 13............
To bake by time with delayed start 14..............
CARE AND CLEANING CHART 15.................
CONTINUOUS CLEANING OVEN 16................
SELF-CLEAN OVEN 17-18........................
SERVICE 19-21..................................
Troubleshooting chart 19.........................
Fault code 20...................................
How to obtain service 21.........................
WARRANTY 22..................................
INSTALLER
manual with this appliance.
CONSUMER
energy and money, read and keep
this manual for future reference.
Please leave this
To save you time,
The model and serial numbers of your appliance are found on the rating
plate which is located behind the storage drawer on the front frame.
Retain these for your record.
Model number:
Serial number:
Date of purchase:
8113P029-60
(10/92)
Page 2
SAFETY INSTRUCTIONS
Information in the Safety Instruction section covers
allelectriccookingappliances.You may find some
information that does not pertain to your particu-
lar appliance.Please review thissection before us-
ing your cooking appliance.
The following instructions are based on safety considerations and must be strictly followed to eliminate the
potentialrisks of fire, electric shock, or personal injury.
PROPER INSTALLATION - Be sureyour appliance is
properly installed and grounded by a qualified technician.
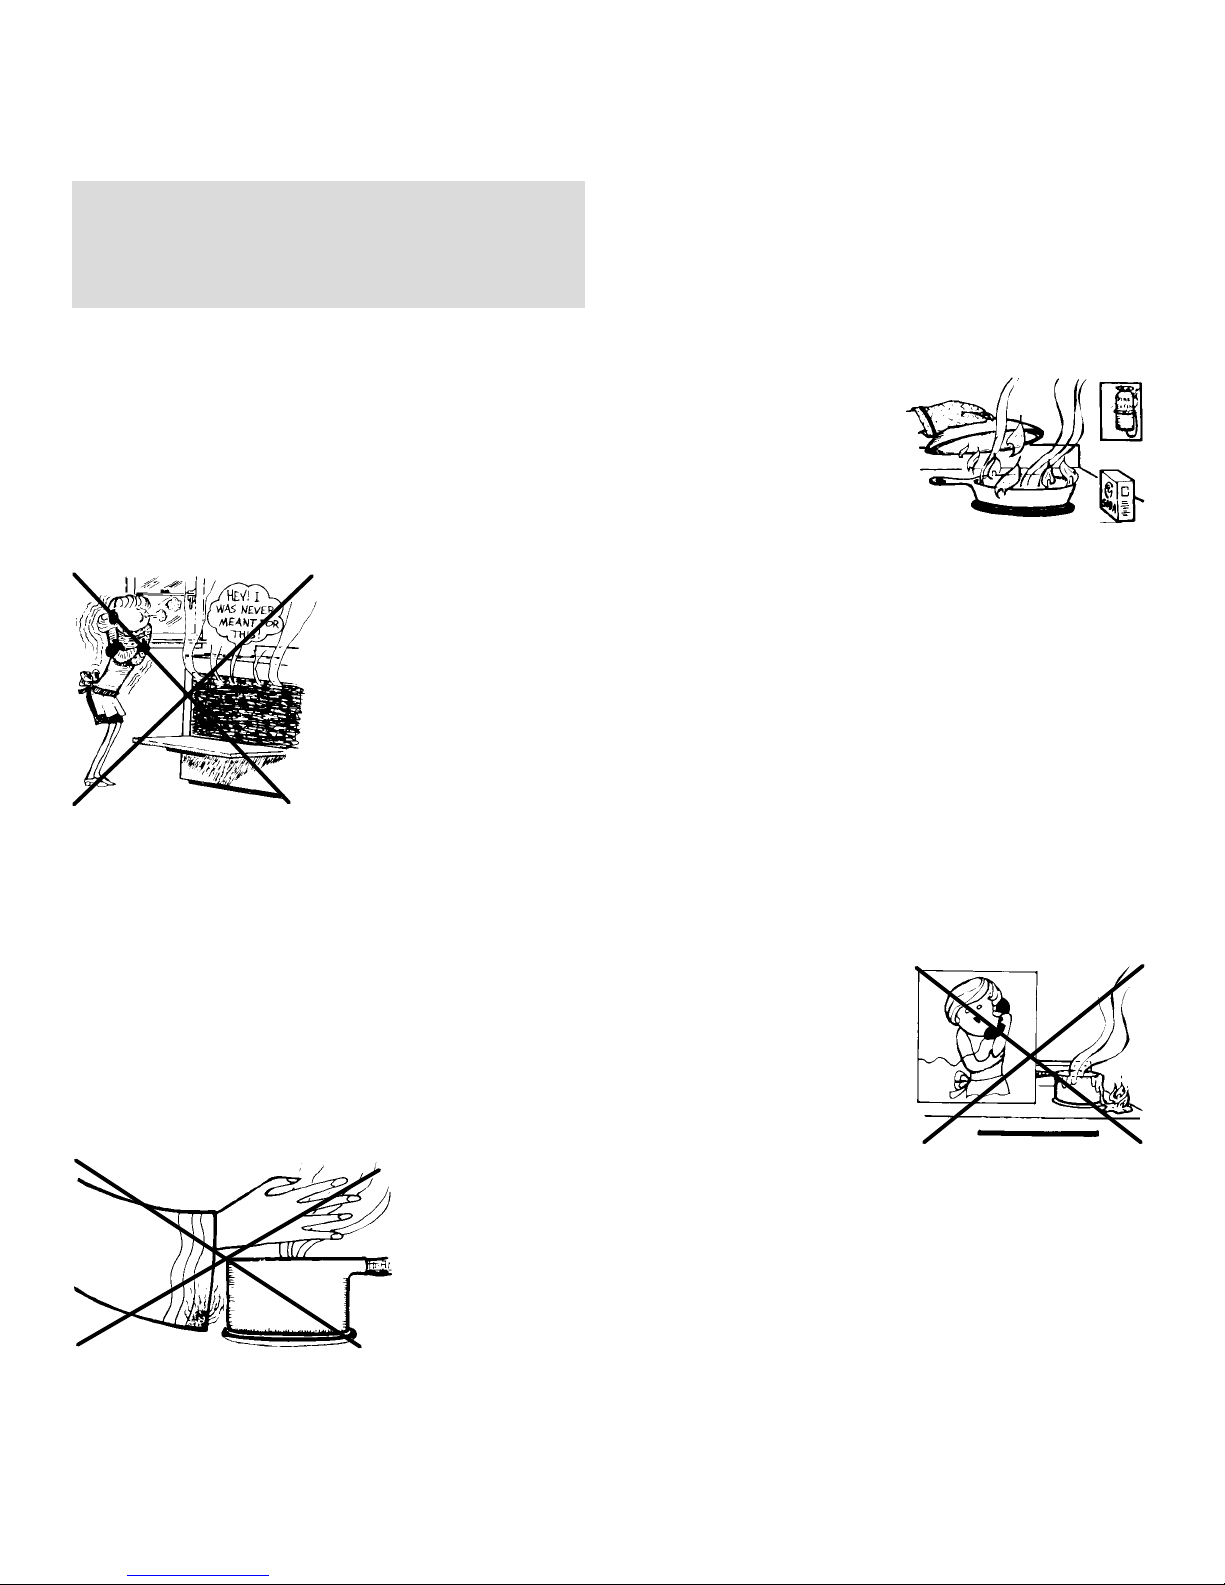
NEVER USE YOUR
APPLIANCE FOR
WARMINGORHEATING THE ROOM.
STORAGE ABOVE RANGE - Toeliminate thehazard
ofreachingover hotsurfaceelements, cabinetstorage
should not be provided directly above a unit. If provided, storage should be limited to infrequently used
items that can be safely stored in an area subjected to
heat. Temperatures may be unsafe for some items
such as volatile liquids, cleaners, or aerosol sprays. If
cabinet storage is provided, installation of a range
hoodthat projects atleast 5-inchesbeyond thebottom
of the cabinet will reduce the hazards associated with
such storage.
STORAGE IN, ON OR NEAR APPLIANCE - Do not
storeoruse gasolineor otherflammable materials,vaporsandliquids in theoven,near surfaceunitsor inthe
vicinity of this or any other appliance. The fumes can
createafirehazardorexplosion.Donotusecooktopor
oven as a storage area for food or cooking utensils.
DO NOT USE WATER
ON GREASE FIRES -
Smother fire or flame or
usedry chemicalorfoamtype extinguisher, if available or sprinkle heavily
with baking soda.
USE ONLY DRY POTHOLDERS - Moist or damp
potholders on hot surfaces may result in burns from
steam. Do not let potholder touch hot heating elements. Do not use a towel or other bulky cloths.
SURFACE COOKING UNITS:
USE PROPER PAN SIZE -This applianceis equipped
with one or more surface elements of different sizes.
Select utensils having flat bottoms large enough to
cover the surface element. The use of undersized
utensils will expose a portion of theheating element to
direct contact and may result in ignition of clothing.
Proper relationship of utensil to element will also improve efficiency.
NEVER LEAVE SURFACE
UNITS UNATTENDED AT
HIGH HEAT SETTINGS -
Boilover causes smoking
and greasy spillovers that
may ignite.
WEAR PROPER
APPAREL -
Loose-fitting or
hanging garments
should never be
worn while using
the appliance.
USER SERVICING - Do not repair or replace any part
of the appliance unless specifically recommended in
the Use and Care Book. All other servicing should be
referred to a qualified technician. Always disconnect
unit or cut-off power to unit before any servicing.
TO PREVENT DAMAGE TO RANGE,neveroperatea
surface unit without a pan in place and never allow a
pan to boil dry.
MAKE SURE DRIP BOWLS ARE IN PLACE -Absence of these bowls during cooking may subject wiring or components underneath to damage.
PROTECTIVE LINERS - Do not use aluminum foil to
linesurfaceunit drip bowls or oven bottoms, except as
suggested inthe Use and Care Book. Improper installation of these liners may result in a risk of electric
shock, or fire.
-1-
Page 3
SAFETY INSTRUCTIONS
GLAZED COOKING UTENSILS - Only certain types
of glass, glass/ceramic, ceramic, earthenware, or
otherglazed utensilsare suitablefor range-topservice
without breaking due to the sudden change in temperature.
UTENSIL HANDLES
SHOULD BE
TURNED INWARD
AND NOT EXTEND
OVER ADJACENT
SURFACE UNITS -To
reduce the risk of
burns, ignition of flammable materials, and
spillage due to unin-
tentionalcontactwiththeutensil,thehandleofautensil
should be positioned so that it is turned inward, and
does not extend over adjacent surface elements.
DO NOT SOAK REMOVABLE HEATING ELE-
MENTS -Heatingelementsshouldneverbeimmersed
in water. Immersing element in water would damage
insulating material inside element.
OVENS:
USE CARE WHEN OPENING DOOR - Let hot air or
steam escape before removing or replacing food.
DO NOT HEAT UNOPENED FOOD CONTAINERS -
Build-upof pressure maycause container to burstand
result in injury.
PREPARED FOOD WARNING: Follow food manufacturer’sinstructions. Ifaplasticfrozenfoodcontainer
and/or its film cover distorts, warps, or is otherwise
damaged during cooking, immediately discard the
food and its container. The food could be contaminated.
KEEP OVEN VENT DUCTS (located under rear element; rear corner of cooktop; between oven door and
control panel of wall oven or on backguard) UNOB-
STRUCTED. Blockage of vent prevents proper oven
air circulation and will affect oven performance. Avoid
touching oven vent area while oven is on and for severalminutesafter oven isturnedoff. Some parts ofthe
vent and surrounding area become hot enough to
cause burns.
PLACEMENT OF OVEN RACKS -Always placeoven
racksindesiredlocationwhileovenis cool.Ifrackmust
be moved while hot, use care to avoid contact of
potholder with oven element.
VENTILATING HOODS:
CLEAN VENTILATING HOODS FREQUENTLY -
Grease should not be allowed to accumulate on hood
or filter. When flaming foods under the hood, turn the
fan off. The fan, if operating, may spread the flame.
IMPORTANT SAFETY NOTICE AND WARNING
TheCaliforniaSafe DrinkingWaterand ToxicEnforcement Act of 1986 (Proposition 65) requires the Governor of California to publish a list of substances known
to the State of California to cause cancer or reproductiveharm, and requiresbusinesses towarn customers
of potential exposures to such substances.
Users of this appliance are hereby warned that when
the appliance is engaged in the self-clean cycle there
may be some low-level exposure to some of the listed
substances, including carbon monoxide. Exposure to
these substances can be minimized by properly venting the appliance to the outdoors during the self-clean
cycle.
DEEP FAT FRYERS:
Useextreme cautionwhenmoving thegreasekettleor
disposing of hot grease.
DO NOT TOUCH SURFACE ELEMENTS OR OVEN
ELEMENTS, AREAS NEAR ELEMENTS OR INTE-
RIOR SURFACES OF OVEN - Elements may be hot
eventhough they aredark incolor. Areas nearsurface
elements and interior surfaces of oven may become
hot enough to cause burns. During and after use, do
not touch or let clothing or other flammable materials
contactheatingelements, areas nearelementsorinteriorsurfaces of ovenuntil theyhave had sufficienttime
to cool. Among these areas are the cooktop, surfaces
facing the cooktop, oven vent opening and surfaces
near this opening, oven door, and oven window. Also,
do not allow aluminum foil, meat probes or any other
metalobject, otherthanautensil onasurfaceelement,
to contact heating elements.
ANTI-TIP BRACKET:
WARNING: To reduce the risk of tipping of the appli-
ance from unusual usage or by excessive loading of
the oven door, the appliance must be secured by a
properly installed anti-tip device. To check if device is
installed properly: Use a flashlight and look underneath range to see that one of the rear leveling legs is
engagedinthe bracketslot. When removingappliance
for cleaning, be sure anti-tip device is engaged when
range is replaced. The anti-tip devicesecures the rear
leveling leg to the floor, when properly engaged.
-2-
Page 4

SAFETY INSTRUCTIONS
ADDITIONAL INFORMATION:
Afterapplianceisinstalled,becertainallpackingmaterials are removed from the appliance before operating
the unit. If appliance is installed near a window, take
steps to prevent curtains from blowing over surface
elements creating a fire hazard.
Care should be given to location of appliance. Be sure
floorcovering underappliance, wallsadjacent toappliance,cabinetryadjacent toappliance,and othermaterials adjacent to appliance can withstand prolonged
heat. This isa heavy appliance and can settle into soft
floor coverings such as cushioned vinyl. Use care
when moving range on this type of floor covering.
OVEN DOOR
Do not place excessive
weight on an open oven
door or stand on an open
oven door as, in some
cases, it could cause the
range to tip over, breakage of the door or serious
injury.
CIRCUIT BREAKER OR FUSE - Locate and mark
breaker or fuse. Never replace a blown fuse or reset a
breaker until you know what has caused the problem.
Always replace a blown fuse with one of the correct
amperage, do not use a substitute.
CONTROL KNOBS - Turn offcontrolatthecompletion
of a cooking operation.
SELF-CLEANING OVEN:
Donot cleandoor gasket. Thedoor gasket isessential
for a good seal. Care should be taken not to rub, damage, or move the gasket. Do not use oven cleaners or
oven liner protective coating of any kind in or around
any part of the self-clean oven. Clean only parts listed
in this booklet. Before self-cleaning the oven, remove
broiler pan, oven racks, and other utensils.
CAUTION: DO NOT LEAVE FOOD OR COOKING
UTENSILS, ETC., IN OVEN DURING THE SELFCLEANING MODE OF OPERATION.
ATTENTION: NE LAISSER AUCUN ALIMENT, USTENSILE DE CUISINE, ETC., DANS LE FOUR
DURANT LE CYCLE D’AUTONETTOYAGE.
On some models, a fan should be heard during the
self-clean cycle. If not, cancel clean cycle and call a
servicemanbeforeself-cleaningagain.(Refer toCONTENTSon front coverfor locationof self-clean instructions and fan information.)
SMOOTHTOP COOKTOP:
Do not cook on broken cooktop. If cooktop should
break,cleaningsolutions and spilloversmaypenetrate
the broken cooktop andcreate a risk of electric shock.
Contact a qualified technician immediately. Clean
cooktopwithcaution. Ifawet spongeorcloth isusedto
wipe spills on a hot cooking area, be careful to avoid
steam burn. Some cleaners can produce noxious
fumes if applied to a hot surface.
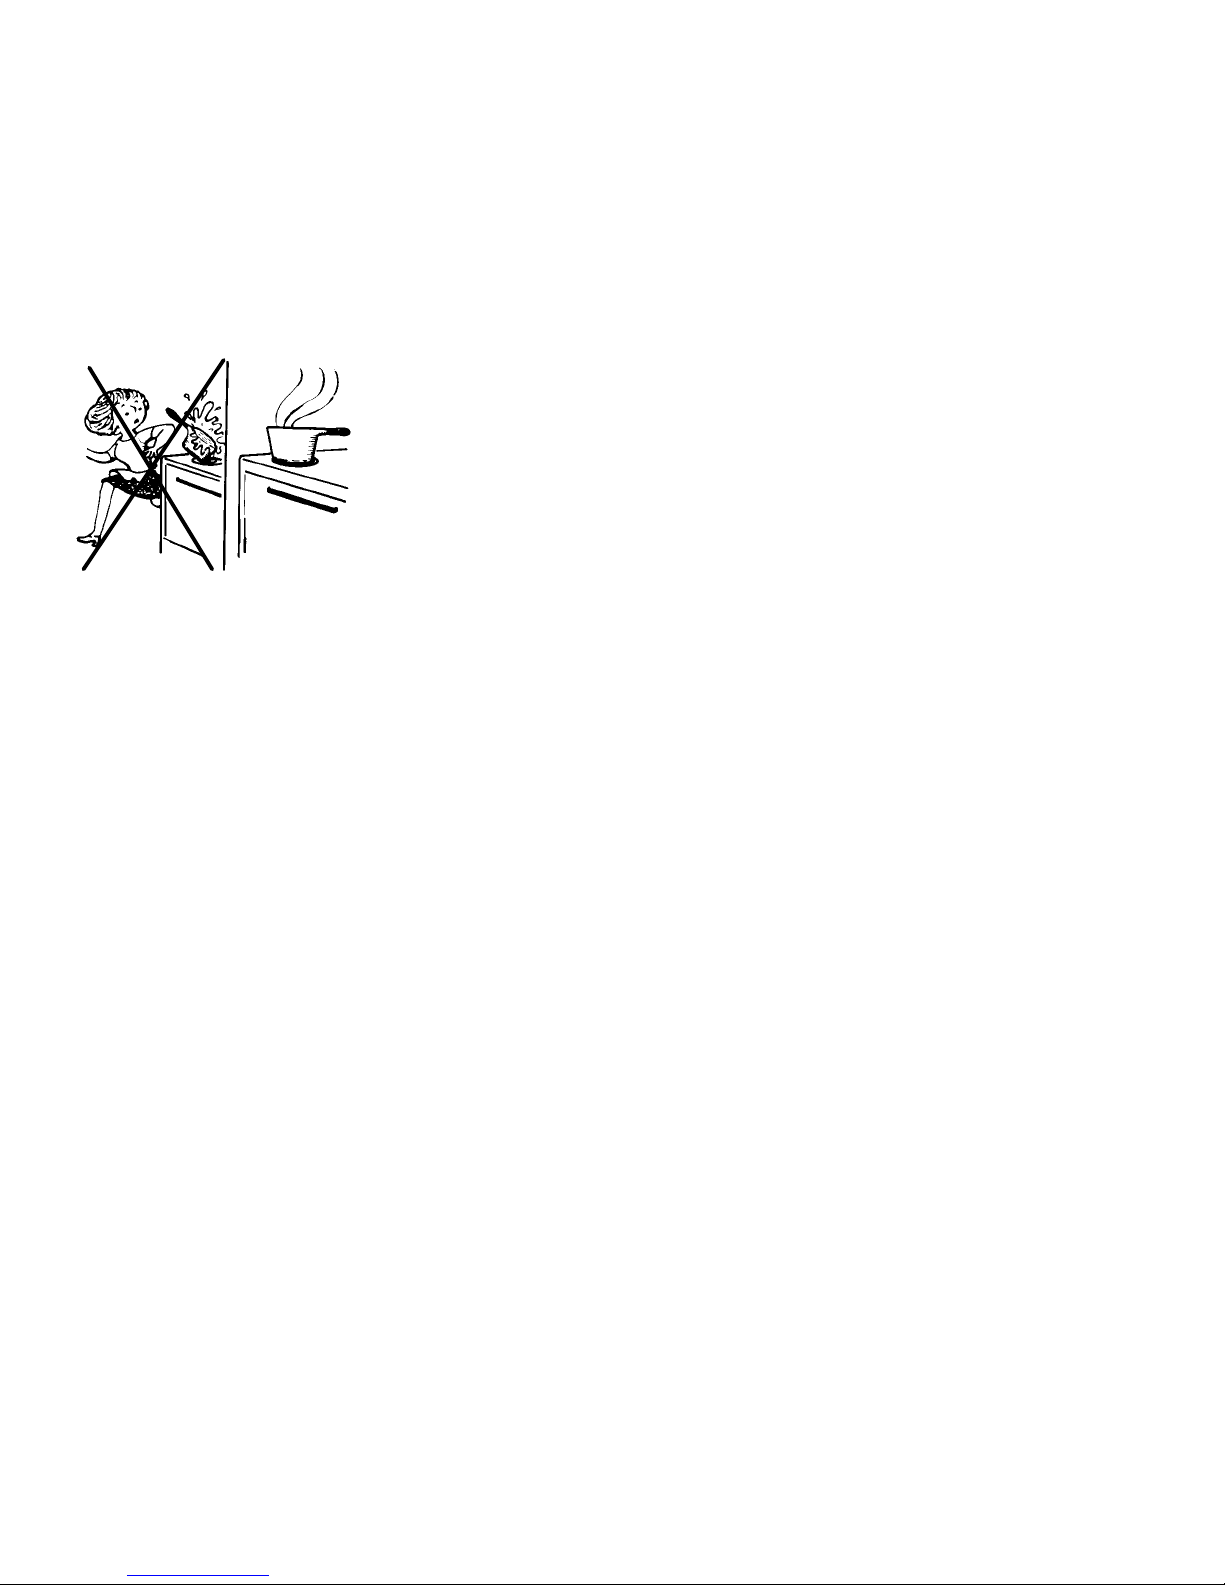
DO NOT LEAVE CHILDREN ALONE - Children
should not be left alone or unattended in area where
applianceisinuse. Theyshouldnever beallowedto sit
or stand on any part of the appliance. CAUTION: Do
notstore itemsof interest tochildren incabinets above
an appliance or on the backguard of a range.
Children climbing on the applianceto reachitems couldbeseriously injured. Children must be
taught that the appliance and
utensilsinor on itcanbehot. Children should be taught that an appliance is not a toy. They should
not be allowed to play with controls or other parts of the unit.
IN CASE OF FIRE:
1. Turn off appliance and ventilating hood.
2. Use dryor foam-typeextinguisher orbaking soda
to smother flame. Never use water on a grease
fire.
3. If fire is in oven, smother by closing oven door.
4. If fire is in a pan on the surface unit, cover pan.
---SAVE THESE INSTRUCTIONS ---
-3-
Page 5

ELECTRONIC CONTROLLER
HR
CLEAN
CLEAN COOK STOP TIMER
SET
(NOTE: All indicator words are displayedto show their location.When ovenor timeris notin
use, indicator words are not displayed. Indicators are only displayed when oven is set for a
cook, delayed cook, clean or timer operation.)
DELAY
BROIL
TIMED
LOCK
BAKE
ON
CLOCK
1. Press CLOCK.
2. Turn SET knob until display shows
correct time of day.
3. Press STOP/CLEAR.
When power is first supplied to oven
or if there has been a power failure,
thedisplay willflash. Follow above instructions to set clock.
TIMER
1. Press TIMER.
2. Turn SET knob to desired time.
TIMER starts automatically. 3 beeps
signal the end of the timing operation
and the time-of-day reappears in the
display.
To cancel: PressTIMER and hold for
3 seconds. Time of day will reappear
after a slight delay.
TO CANCEL AN OPERATION:
PressSTOP/CLEAR to cancelacook
or clean operation.
CLEAN
1. Close door.
2. Move door lock lever to locked position.
3. Press CLEAN pad. (“door” will
flash in display and beeps will
sound if door is not locked.)
4. Oven will automatically clean for 3
hours. Select 2 or 4 hours by turning the SET knob.
Seepages 17- 18for additionalinformation.
COOK TIME/STOP TIME
To begin cooking immediately:
1. Press BAKE TEMP. Enter oven
temperature with SET knob.
2. Press COOK TIME. Enter desired
cooking time by turning the SET
knob.
To delay the start of cooking:
1. Press BAKE TEMP. Enter oven
temperature with SET knob.
2. Press COOK TIME. Enter cooking
time with SET knob.
3. Press STOP TIME. Enter time you
wish food tostop cooking with SET
knob.
The oven will automatically turn on
and off at the preset times.
Press STOP/CLEAR to cancel endof-cooking beeps. See pages 13 - 14
for additional information.
BROIL
1. Press BROIL.
2. Turn SET knob clockwise to select
HI broil or counter clockwise to select LO broil.
See page 12 for additional information.
BAKE TEMP
1. Press BAKE TEMP.
2. Turn SET knob until desired oven
temperature appears in the display.
Seepages10- 11 foradditionalinformation on baking and roasting.
ADDITIONAL INFORMATION
A beep sounds each time a pad is
pressed. Three beeps signal the end
of an operation.
If a fault code (ex: F 2) is displayed
and beeps sound, press STOP/
CLEAR if fault code continues, see
pages 20 and 21.
Function pads on some models are
round - they operate as described in
this booklet.
-4-
Page 6
USING YOUR SMOOTHTOP
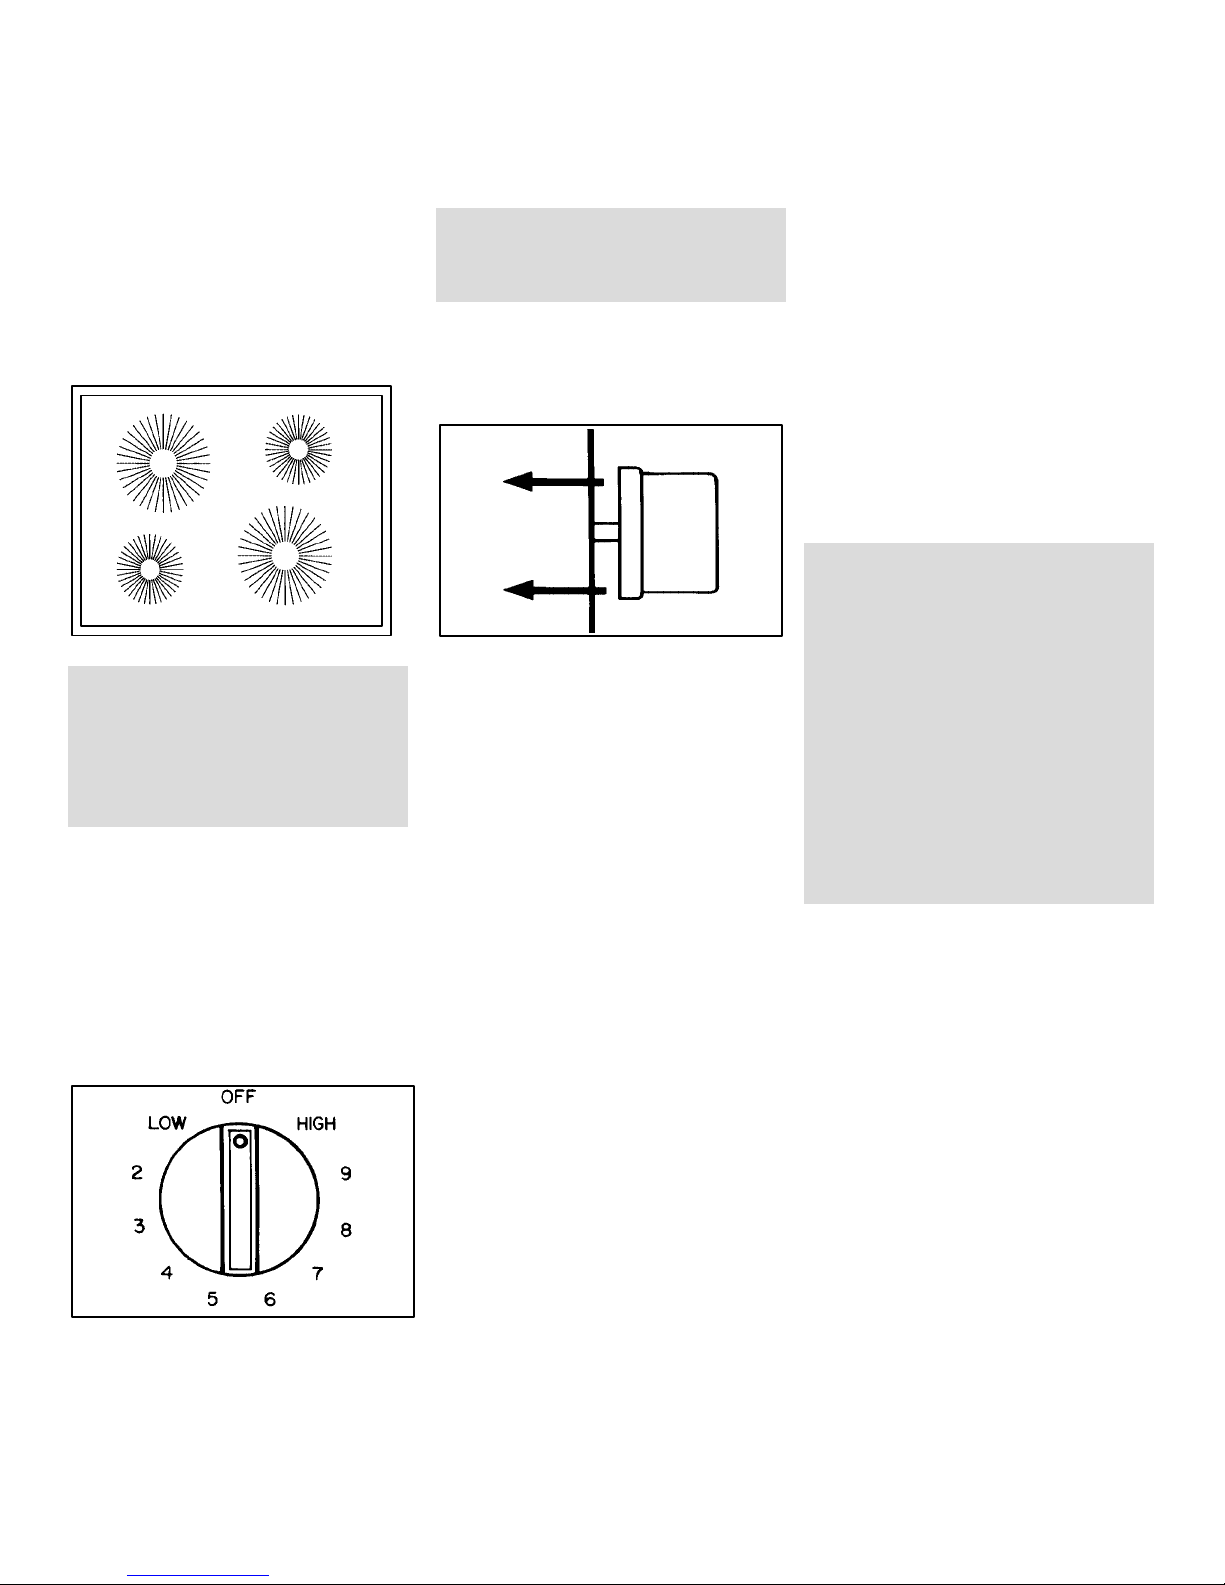
COOKING AREAS
The four surface cooking areas on your
range are identified by permanent patternsinthecooktop. There aretwolarge
andtwosmall areas.Use the smallerareas for small cooking utensils and the
larger areas for large utensils. This conserves energy.
When a cooking area is turned ON,
the coil element under the cooktop
will heat up and glow red. The element will cycle on and off to maintain
the heat setting. When the element
cycles on, it is normal to see a red
glow through the smoothtop.
SURFACE CONTROLS
The cooking area controls are called INFINITE controls. This type of control
provides an infinite choice of heat settings from LOW to HIGH. The control
can be set either on any of the numbered settings or between the numbered settings.
Knobs on your range may not look like
this knob but they operate as described
in this booklet.
Always place pan on the surface element before turning element on as
heat from exposed element may damage backguard or range parts.
To operate: Push in and turn knob, in
either direction, to the desired heat setting.
SIGNAL LIGHTS
Ranges are equipped with one to four
signal lights to indicate when a surface
element is on. The light will remain on
until the element is turned off. After a
cooking operation, be sure element and
signal light are off.
HOT SURFACE LIGHT
Therangeis equipped with a HOTSURFACE light. This red light will turn on to
indicate that the cooking area is hot and
will remain on until the area has cooled.
RETAINED HEAT
We suggest that you start with a lower
heat setting then gradually increase the
setting until you find the optimum setting. Boilovers are more likely to occur if
youstartout on HIGH thenreduce to the
lower setting.
The smoothtop cooking area retains
heat for a period of time after the elementhas beenturned off. Put this residual heat to good use. Turn the element
off a few minutes before food is completely cooked and use the retained
heat to complete the cooking operation.
After 30 minutes, the cooktop may be
too cool to keep foods warm; however,
the TOP MAY STILL BE TOO WARM
TO TOUCH. When the HOT SURFACE
indicator light turns off, the top will be
cool enough to touch.
-5-
HINTS
If food is cooking too fast or if boilovers
occur, remove lid and reduce to a lower
setting. Allow enough time for the cooking area to adjust to the new setting.
To help keep cooktop clean be sure
cooking area and utensil bottom are
clean and dry before use.
Do not allow plastic objects, aluminum
foil, sugar, or foods with highsugar contentto melt onto the hot cooktop. Melted
materials can cause permanent damage to the cooktop.
IMPORTANT: Watchsugarysolutions
carefully to avoid boilover. If sugar solution (such as jam, jelly, candy) is allowed to boilover, it may pit the glass.
Turn element to LOW and clean sugary boilovers immediately.Usea
wooden-handled metal spatula to
scrape boilover to a cooler area of the
cooktop or use several layers of dry
paper towels to wipe up spillover. If a
papertowelisused,becarefultoavoid
steam burns. Turn element off. When
cool, use a single-edge razor blade
suchasWidgetbyGillettetoscrapeoff
soil. Clean with Elco Cooktop Cleaning Creme, rinse and dry.
To protect the top, it is not recommendedtousethetopasa work surface
or as a cutting board or to cook food directly on the cooktop without a utensil.
Do not use a trivet or metal stand (such
as a wok ring) between the utensil and
the cooktop. These items can mark or
etch the surface and affect cooking efficiency.
Thin gauge aluminum cookware, aluminum foil or foil containers such as popcorn poppers are NOT recommended
for use on the cooktop. They will leave
metal marks.
Do not slide glass items across the
cooktop. They may scratch or damage
the top.
Do NOT slide aluminum cookware
across the cooktop. This may result in
aluminummarkswhich then must be immediately removed with a recommended cooktop cleaner.
Page 7

USING YOUR SMOOTHTOP
COOKWARE
Cookingperformance is greatly affected
by the type of cookware used. Pans
should have a flat bottom. The flat bottom allows good conductivity between
the utensil and the cooking area to provide uniform cooking results, faster
heating and more efficient use of energy.
Pans with uneven, warped, or grooved
bottoms do not make good contact, reduce heat conductivity and result in
slower, less even heating.
Be sure utensil is large enough to properly contain food and avoid boilovers.
Pan size is particularly important in
deep frying. Be sure pan will accommodate the volume of food that is to be
addedaswellasthebubbleaction of fat.
Never leave a deep fat frying operation unattended.
Acceptable water-bath or pressure canners should not be oversized and must
have a flat bottom.
Donotuse specialty itemsthat are oversized, have an uneven bottom or do not
meet proper utensil specifications.
SPECIAL PRECAUTIONS FOR
COOKING UTENSILS:
· Aluminum foil will damage the
smoothtop if it melts onto the
glass. Do not use aluminum foil or
foil-type containers under any circumstances.
· Aluminum utensils will cause
metal marks on the glass if you
slide them across the ceramic
cooktop. Remove any metal
marks immediately.
· Glass ceramic, earthenware,
heat-proof glass or glazed uten-
sils may scratch the smoothtop
cooktop if you slide them across
the top.
SUGGESTED HEAT SETTINGS
Use the following chart as a GUIDELINE until you become
morefamiliar with yourcooktop. Keep inmindthatdifferent
types of cookware materials require different heat settings
for the same cooking operation.
HEAT SETTINGS USES
HI
Medium-High
9
8
7
Medium
6-5
Medium-Low
4
3
2
To bring liquid to a boil, blanch, preheat skillet, or bring pressure up in pressure cooker. (Note:
Always follow instructions inpressure cooker useand care book.) Always reduce to a lower heat
setting when liquids just begin to boil or food begins to cook.
To brown or sear meat, heat oil for deep fat frying, scald.
To fast saute or fry. Maintain fast boil for large amounts of liquids.
For slower frying or sauteing operation.
To maintain moderate to slow boil for large amounts of liquids.
To continue cooking uncovered foods and for most frying operations.
Tocontinuecookingcoveredfoodsandtomaintainboilpressureinmostpressure cookers.Stew,
braise or steam operations.
To maintain boil for small amounts of liquid, poach, steam or simmer.
We suggest that you experiment to find the heat setting
that best suits your particular cooking needs. Chart is
based on heavy gauge aluminum cookware. Lower the
heat setting if using other materials.
LO
NOTE: Refer to cookware manufacturer’s recommendations for suggested heat settings. Some manufacturers do not recommend the use of HIGH or the use of HIGH for extended cooking operations.
To keep foods warm before serving.
-6-
Page 8

USING YOUR SMOOTHTOP
CARE INFORMATION
Clean smoothtop after each use. Use
only cleaning agents recommended in
the cleaning chart. Other materials
may damage the finish of the smoothtop.
Carefully blot up spillovers around the
outside of the cooking area as they occur with dry paper towels. BE CAREFUL NOT TO BURN HANDS WHEN
WIPING UP SPILLS. DO NOT USE A
DAMP CLOTH WHICH MAY CAUSE
STEAM BURNS.
Whensurface is cool, cleanasdirected
inthechart.DO NOT USE thefollowing
cleaning agents.
· Abrasives (metal scouring pads,
cleansing powders, scouring cleaners or pads) will scratch thesmoothtop.
· Chemicals (oven cleaners, chlorine
bleaches, rust removers or ammonia) may damage the finish of the
smoothtop.
· Cleaningagents designed for glassware which contain ammonia may
harm the smoothtop.
· Soiled cloth or sponge will leave an
invisible film on the cooktop which
may cause discoloration the next
time the cooktop is used.
CAUTION:
If metal melts onto the smoothtop, DO
NOT USE TOP. CALL AN AUTHORIZEDSERVICER.Do not attempt to repair cooktop yourself.
To prevent permanent damage to the
cooktop, do not allow cookware to boil
dry.
Do not place plastics on a warm or hot
cooking area. They will melt and adhere to the smoothtop. The smoothtop
may chip or pit in attempting to remove
melted plastic from the top.
Topreventscratchingordamagetothe
smoothtop: Do not leave sugar, salt,
sand, soil, shortening or other fats on
the cooking area. Be sure area is free
from these before turning on cooking
area.
CLEANING CHART
WARNING: BEFORE CLEANING, BE CERTAIN ALL ELEMENTS ARE
TURNED OFF AND THE COOKTOP IS COOL.
Daily cleaning,
light to moderate stains.
Heavy stains,
burned on food.
Burned on or
crusty soil.
Brown or gray
stains from
HARD WATER
or metal marks.
Elco Cooktop Cleaning
Creme.Liquiddishwashing detergent. Paste of
baking soda and water.
Elco Cooktop Cleaning
Creme. Paste of baking
soda and water.
Single-edge razor blade
such as Widget by Gillette.
Elco Cooktop Cleaning
Creme.
Gentlyapply with a non abrasiveplastic
brush,nylon orplasticpad,orpapertoweling, rinse completely and dry.
Gentlyscourwith paste andpapertowel
toremoveasmuchaspossible.Thenreapply paste and let stand for 30 to 45
minutes. Cover with damp paper toweling to keep paste moist. Scour to removeremainingstain.Rinsecompletely
and dry.
Whencooktop iscool:Placeedgeofsingle edge razor on ceramic cooktop at a
° angle. Very CAREFULLY scrape
30
off soil. Clean remaining soil with Elco
Cooktop Cleaning Creme.
Gently scour with paste to remove as
muchaspossible.Reapplypasteandlet
stand for 30 minutes. Scour with additional paste to remove remaining stain.
Rinse completely and dry.
PROBLEM SOLVING CHART
PROBLEM CAUSE TO PREVENT
Tiny scratches
or abrasions
Metal-marking
Brown streaks
and specks
Areas of discoloration with a
metallic sheen
Pitting or flaking.
Coarse particles (dust
salt and sand) between
cookware bottom and
cooktop.Incorrectcleaning materials. Sliding
glassware or metal
acrosstopor usingcookwarewithroughbottoms.
Slidingor scraping metal
utensils or oven racks
across cooktop.
Boilovers, incorrect
cleaningmaterials,used
soiled cloth or sponge,
soiled cookware.
Mineral deposits from
water and foods.
Sugary boilovers from
sugar syrups, c andy,
jams, jellies, dessert
sauces, etc.
Tiny scratches are not removable and
do not affect cooking. In time, the
scratches will become smoother and
less visible. Be sure cookware bottoms
and cooktop are clean before use. Use
cookware with a smooth, non -scratching bottom. Do not slide cookware
across cooktop.
Do not slide metal object across cooktop. Clean immediately with Elco Cooktop Cleaning Creme.
Remove boilovers before reusing the
cooktop. Use a clean cloth or sponge.
Be sure cookware, especially bottoms,
are clean and dry.
Use cookware with bottoms that are
clean and dry. Use correct heat setting
to prevent boilovers.
Use correct heat setting and large
enough utensil. Watch cooking operation to prevent boilovers or spattering.
See “HINTS” on page 5 for cleaning instructions.
-7-
Page 9

USING YOUR RANGE
BACK PANEL LIGHT
On conventional upper oven only. To
turn on light, press button marked
“BACK PANEL” which is located at the
base of the control panel.
On microwave oven model: Press “ON”
pad located at base of microwave control panel.
To replace fluorescent surface light:
Before replacing light, DISCONNECT
POWER TO RANGE. Be sure bulb and
range parts are cool. Do not touch a hot
bulb with a damp cloth as the bulb may
break.
On conventional upper ovens: Remove three screws holding trim piece
along top edge of glass OR two screws
holding trim piece along side edge of
glass. Support glass while removing
screws so glass will not fall forward. Remove bulb and replace. Restore power,
check light operation prior to replacing
glass panel. Reset clock.
LOWER OVEN LIGHT
To turn on oven light, press rocker
switch, located onmanifold panel, tothe
“ON” position.
To replace oven light: Before replacing light bulb, DISCONNECT POWER
TORANGE. Be surebulb is cool. Donot
touchahotbulbwith a damp cloth asthe
bulb may break. Use a dry potholder
and carefully unscrew bulb cover and
bulb.
Replace with a 40 watt appliance bulb
and bulb cover. Reconnect power to
range and reset clock.
UPPER OVEN LIGHT
On conventional oven only. To turn on
oven light, push in button, located at
base of control panel.
On microwave oven, oven light turns on
whenever the door is opened or the
oven is in a cook or defrost operation.
To replace conventional oven light:
Before replacing light bulb, DISCONNECT POWER TO RANGE. Be sure
bulb is cool. Use a dry potholder and
very carefully remove bulb. Replace
witha40wattAPPLIANCEbulb.Reconnect power tothe range and reset clock.
On microwave oven model, refer to the
separate microwave oven use and care
booklet for instructions on removing the
oven light bulb.
On microwave oven model, refer to the
separate microwave oven use and care
booklet for instructions on removing the
cooktop light bulb.
-8-
Page 10

USING YOUR RANGE
OVEN DOOR
Do not place excessive weight on an
open oven door or stand on an open
oven door as, in some cases, it could
cause the range to tip over, breakage of
the door or serious injury.
When opening oven door, allow steam
and hot air to escape before reaching in
oven to check, add or remove food.
To remove lift-off door: Open door to
the “stop” position (opened about 4
inches) and grasp door with both hands
at each side. Do not use door handle to
lift door. Lift up evenly until door clears
the hinge arms.
CAUTION:
Hinge arms are spring mounted and
willslam shutagainst therange ifaccidently hit. Never place hand or fin-
gers between the hinges and the
front oven frame. You could be in-
jured if hinge snaps back.
To replace door: Grasp door at each
side, align slots in the door with the
hinge arms and slide door down onto
the hinge arms until completely seated
on hinges.
STORAGE DRAWER
The storage drawer at the bottom of the
range is safe and convenient for storing
metal and glass cookware. DO NOT
store plastic, paperware, food or flammable material in this drawer. Remove
drawer to clean under range.
To remove: Empty drawer then pull
drawer out to the first stop position. Lift
upfront ofdrawer and pullto the second
stopposition.Graspsides andliftupand
out to remove drawer. Gently move
drawer side-to-side as you pull the
drawer out.
To replace: Fit ends of drawer glides
ontorails. Liftup drawer front and gently
push in to first stop position. Gently
move drawer side-to-side as you push
in the drawer. Lift up drawer again and
continue to slide drawer to the closed
position.
LEVELING LEGS
Some floors are not level. For proper
baking, your range must belevel. Leveling legs are located on each corner of
thebase of therange. Place alevel horizontally on an oven rack and check
front-to-back and side-to-side. Level
range by turning the legs.
ANTI-TIP BRACKETS
To prevent range from accidently tipping, range should be secured to the
floor by sliding rear leveling leg into the
anti-tip bracket supplied with the range.
EYE-LEVEL OVEN
The upper oven will either be a conventional oven or a microwave oven.
Donotuseupper oven for cookingitems
that are heavy or bulky to handle, especially if considerable amounts of hot fats
or liquids are involved. Removing such
foods from the oven is difficult and can
be hazardous.
Conventional Oven: This oven featuresthe continuous cleaningoven.The
size of this oven makes itconvenient for
cookingsmaller quantities offood. However, it does have some limitations. Do
not use a large cookie sheet, pan or
other utensils which will block air flow in
the oven. For optimum results, use the
lower oven for critical cooking or delicate baking.
Microwave Oven: Refer to the separate use and care booklet for information on the microwave oven.
Do not attempt to open or close door
until door is completely seated on
hingearms.Never turn on ovenunless
door is properly in place. When baking,be sure door is completely closed.
Bakingresults willbeaffected if door is
not securely closed.
-9-
Page 11

USING YOUR OVEN
OVEN
CHARACTERISTICS
Every oven has its own characteristics. You may find that the cooking
times and temperatures you were accustomed to with your previous range
may need to be altered slightly with
your new range. Please expect some
differences with this new range.
IMPORTANT
DO NOT MOVE DOOR LOCK
LEVERTOTHERIGHT DURING
A COOKING OPERATION. If the
door lock lever is moved to the
lock position, the cooking operation will automatically be cancelled and “door” will appear in
the display.
FAN
This range is equipped with a fan which
automatically turns on whenever the
oven is set for cooking or cleaning. The
fan will automatically turn off when the
unit has cooled.
RACK POSITIONS:
RACK 1 (top of oven) used for broiling
thin non-fatty foods such as fish.
RACK 2 used for two-rack baking or
broiling thicker cuts of meat.
RACK 3 used for most one-rack baking
and for roasting some meats.
RACK 4 used for oneor two rackbaking
and roasting large meats, cooking
larger foods and for baking angel food
cake or pie shells.
RACK 5 used for roastingturkey orbaking angel food cake or pie shells.
For optimum baking results of cakes,
cookies or biscuits, use one rack. Positionracksofoodisinthecenterofthe
oven. Allow 2 inches between edge of
utensil and the oven sides or adjacent
utensils.
NEVER place pans directly on the oven
bottom.
Do not cover entire rack with aluminum
foilor place foildirectly under cookware.
To catch spillovers, cut a piece of foil a
little larger than the pan and place it on
the rack below the rack containing the
pan.
PREHEATING
Preheatingisnecessaryfor baking. Allow oven to heat for 10 to 15 minutes
before adding food.
It is not necessary to preheat oven for
roasting. It is not necessary to preheat
for broiling unless darker browning is
desired or if cooking thin (3/4-inch)
steaks. Allow broil element to preheat 3
to 5 minutes.
OVEN RACKS
The two oven racks are designed with a
“lock-stop” position to keep racks from
accidentally coming completely out of
the oven.
To remove: Be sure rack is cool. Pull
rack out to the “lock-stop” position. Tilt
up and continue pulling until rack releases.
To replace: Place rack on rack supports, tilt up and push toward rear of
oven. Pull rack out to “lock-stop” positiontobesure rack is correctlyreplaced.
HINTS
Ifcookingontwo racks, stagger pansso
one is not directly over the other. Use
rack positions 2 and 4 or 2 and 5, when
cooking on two racks.
Use racks 2 and 4 when baking layer
cakes. Use racks 2 and 5 when baking
cookies or biscuits on a cookie sheet.
Selecting temperature higher than desired will NOT preheat the oven any
faster. Preheating at a higher temperature may have a negative effect on baking results.
To preheat: Set oven for baking and allow the oven to heat until display shows
the preset temperature. Depending on
your model, either 75 or 100 will appear
in the display until the oven reaches
100°F. If the oven temperature is above
100°, the display will show the actual
oven temperature. The display will then
show the oven temperature in 5° increments until the oven reaches the preset
temperature.
Once the preset temperature is
reached, and the oven temperature has
stabilized, a single beep will sound.
Iftheoventemperatureischangedafter
preheating, a beep will signal that the
oven has reached the new temperature
setting.
-10-
Page 12

USING YOUR OVEN
TO SET OVEN:
1. Press BAKE TEMP pad. BAKE indicator turns on.
2. Turn SET knob until desired temperature is displayed.
3. BAKE ON indicator and oven immediately turn on.
4. Place food in oven when oven has
5. Check food at minimum time. Cook
6. Press STOP/CLEAR pad to cancel
COMMON BAKING PROBLEMS AND WHY THEY HAPPEN
PROBLEM
Cakes are uneven.
Cake high in middle.
Cake falls.
Cakes, cookies, biscuits
don’t brown evenly.
Foroptimumresults,bakeononerack.Ifbakingcakeson
two racks, stagger pans so one is not directly over another.
Cakes, cookies, biscuits
too brown on bottom.
Follow utensil manufacturer’s instructions for oven temperature. Glassware and dark utensils such as Ecko’s
Baker’sSecretrequireloweringthe oven temperatureby
25
° F.
Pans touching each other or
oven walls.
Batter uneven in pans.
Temperature set too low or
baking time too short.
Oven not level.
Undermixing.
Too much liquid.
Temperature set too high.
Baking time too l ong.
Overmixing.
Too much flour.
Pans touching each other or
oven walls.
Incorrect rack position.
Too much shortening or sugar.
Too much or too little liquid.
Temperature set too low.
Old or too little baking powder.
Pan too small.
Oven door opened frequently.
Added incorrect type of oil to
cake mix.
Added additional ingredients
to cake mix or recipe.
Incorrect rack position.
Oven door not closed properly.
Door gasket not sealing
properly.
Incorrect use of aluminum foil.
Oven not preheated.
Pans darkened, dented or
warped.
Oven not preheated.
Pans touching each other or
oven walls.
Incorrect rack position.
Incorrect use of aluminum foil.
Placed 2 cookie sheets on one
rack.
Used glass, darkened, stained,
warped or dull finish metal
pans. (Use a shiny cookie
sheet.)
Preheat oven for all baking operations.
preheated to set temperature.
longer if necessary.
the operation.
PROBLEM
Cakes don’t brown on top.
Excessive shrinkage.
Uneven texture.
Cakes have tunnels.
Cakes crack on top.
Cake not done in middle.
If additional ingredients wereadded to mix or recipe, expect cooking time to increase.
Pie crust edges too brown.
Pies don’t brown on bottom.
Pies have soaked crust.
CAUSECAUSE
Incorrect rack position.
Temperature set too low.
Overmixing.
Too much liquid.
Pansizetoolargeortoolittle
batter in pan.
Oven door opened too often.
Too little leavening.
Overmixing.
Pan too large.
Temperature set too high.
Baking time too l ong.
Pans too close to each other
or oven walls.
Too much liquid.
Undermixing.
Temperature set too low.
Baking time too short.
Not enough shortening.
Too much baking powder.
Overmixing or at too high a
speed.
Temperature set too high.
Batter overmixed.
Temperature set too high.
Too much leavening.
Incorrect rack position.
Temperature set too high.
Pan too small.
Baking time too short.
Temperature set too high.
Pans touching each other or
oven walls.
Edges of crust too thin.
Used shiny metal pans.
Temperature set too low.
Temperature too low at s tart of
baking.
Filling too juicy.
Used shiny metal pans.
-11-
Page 13

USING YOUR OVEN
HOW TO BROIL
Broiling is a method of cooking tender
meats by direct heat under the broil element. The cooking time is determined
by the distance between the meat and
the element, the desired degree of
doneness and the thickness of the
meat.
Broiling requires the use of the broiler
pan and insert. The correct position of
the insert in the pan is very important.
The broiler insert should be placed in
the pan so grease will drain freely. Improper use may cause grease fires.
The broiler insert CANNOT be covered
with aluminum foil as this prevents fat
from draining into pan below. However,
for easier cleaning, the broiler pan can
be lined with foil.
Do not use disposable broiler pans.
They do not provide a separate tray.
COOKING TIPS
Prepare meat by removing excess fat
and slashing remaining fat, being careful not to cut into meat. This will help
keep meat from curling.
Place broiler pan on any of the recommended rack positions. Generally, for
brown exterior and rare interior, the
meat should be close to the element.
Placefurther down ifyou want meat well
done.
Broiling should be done with oven door
opened to the broil stop position.
Follow suggested times on broiling
chart. Meat should be turned once
about half way through cooking.
Checkdoneness bycutting a slit inmeat
near center for desired color.
TO BROIL:
1. Press BROIL pad. “Broil” lights in the
display.
2. Turn SET knob clockwiseto select HI
for normal broiling.
Or, turn SET knob counter clockwise
to select LO for special low temperature broiling.
3. Press STOP/CLEAR pad to cancel a
broil operation.
Use HI BROIL for most broil operations.
When broiling longer cooking foods
such as pork chops, poultry or thick
steaks, selectLO BROIL.Low temperature broiling allows food to cook to the
well done stage without excessive
browning. Cooking time may increase if
LO BROIL is selected.
BROILING CHART
TYPE OF FOOD RACK POSITION DONENESS BROIL SETTING TOTAL TIME
BACON #2 Well Done Hi 6 to 10 minutes
BEEF STEAKS
1-inchthick #2 Rare Hi 10to14minutes
1 1/2-inch thick #2 Rare Hi 18 to 20 minutes
CHICKEN
Whole, split #3 Well Done Lo 45 to 60 minutes
Pieces #3 Well Done Lo 30 to 45 minutes
FISH STEAK OR FILLET
1/2-inch thick #2 Flaky Hi 10 to 12 minutes
GROUND BEEF PATTIES
3/4 to 1-inch thick #2 Rare Hi 10 to 14 minutes
HAM SLICE, precooked
1-inchthick #2 Hi 12to16minutes
1 1/2-inch thick #2 Hi 21 to 26 minutes
LAMB CHOPS
1-inch thick #2 Medium Hi 12 to 15 minutes
1 1/2-inch thick #3 Medium Hi 15 to 19 minutes
PORK CHOPS
3/4-inch thick #2 Well Done Hi 15 to 20 minutes
1-inch thick #2 Well Done Hi 20 to 25 minutes
#2 Medium Hi 15 to 18 minutes
#2 Well Done Hi 19 to 22 minutes
#2 Medium Hi 22 to 24 minutes
#3 Well Done Hi 25 to 30 minutes
Medium Hi 14 to 18 minutes
Well Done Hi 18 to 20 minutes
Well Done Hi 16 to 20 minutes
Well Done Hi 25 to 30 minutes
-12-
Page 14

AUTOMATIC OVEN COOKING
Automatic cooking feature is used to
turn the oven on and off at the preset
time of day. This feature can be used to
delay the start of a cooking operation.
The automatic cooking feature will not
operate unless the clock is functioning
and is set at the correct time of day.
NOTE: On eye level models, only the
lower oven can be programmed.
1. Press BAKE TEMP pad.
“BAKE” lights in the display.
IMPORTANT: Highly perishable foods
such as dairy products, pork, poultry,
seafoods or stuffing are not recommended for delayed cooking. If cooking
more than one food, select foods that
cook for the same length of time and at
the same oven temperature.
Ifyoudelay in entering a completeprogram, the oven may turn on. Just continue entering the program as described.
TO BAKE BY TIME
WITH IMMEDIATE START:
To reset or cancel the program: Press
the STOP/CLEAR pad.
Aftersetting theAutomatic Cookingfeature,press theCLOCK pad and thetime
of day will reappear in the display.
“TIMED BAKE ON”, “DELAY BAKE” or
“DELAY TIMED BAKE” and the oven
temperaturewill remain inthedisplay as
a reminder that the oven is set for a
cooking operation.
Atend of cooking,continuous beepswill
sound.Press STOP/CLEARpadtocancel beeps.
2. Enter oven temperature with the
SET knob.
3. Press COOK TIME pad.
“SET COOK TIME” flashes in the
display.
4. Enter cooking time (how long you
wish food to cook) with the SET
knob.
“TIMED BAKE ON” lights in the display. The oven automatically turns
on and the display begins to count
down.
5. At the end of the preset cooking
time, the oven will automatically
turns off.
6. Press STOP/CLEAR pad to cancel
end-of-cooking beeps.
-13-
Page 15

AUTOMATIC OVEN COOKING
TO BAKE BY TIME
WITH DELAYED START:
1. Press BAKE TEMP pad.
“BAKE” lights in the display.
2. Enter oven temperature with the
SET knob.
3. Press COOK TIME pad.
“SET COOK TIME” flashes in the
display.
4. Enter cooking time (how long you
wish food to cook) with the SET
knob.
5. Press STOPTIME pad. “SET STOP
TIME” flashes in the display.
6. Enter the time you wish the oven to
turn off by turning the SET knob.
Depending on your model, either
“DELAY TIMED BAKE” or “DELAY
BAKE” will light in the display. The
time of day will then reappear.
The oven will automatically turn on
in time to have the food cooked by
the preselected STOP TIME.
EXAMPLE
Food is to cook for 2 hours and 30
minutes at 350°F.You wishthe food
to be cooked by 6:00.
1. Press BAKE TEMP pad.
2. Turn SET knob until 350° appears in the display.
3. Press COOK TIME pad.
4. Turn SET knob until 2:30 (2
hours,30 minutes) appearsin the
display.
5. Press STOP TIME pad.
6. TurnSETknob until 6:00 appears
in the display.
The oven will turn on at 3:30; cook
the food for 2 1/2 hours, and will
automatically turn off at 6:00.
The oven will automatically turn off
at the preset stop time.
7. Press STOP/CLEAR pad to cancel
end-of-cooking beeps.
-14-
Page 16

CARE AND CLEANING
PARTS
Broiler pan & insert
Baked Enamel:
Side panels
Backguard
Oven door
Storage drawer
Control knobs Mild detergent & water.
Glass:
Backguard
Oven window
See page 9 for
smoothtop instructions
Metal finishes:
Aluminum - backguard base.
Chrome & stainless
steel - trim parts
CLEANING AGENTS DIRECTIONS
Soap & water. Plastic
scouring pad. Soap
filled scouring pad.
Soap & water. Paste of
baking soda & water.
Soap & water. Paste
of baking soda &
water. Window cleaning fluid.
Soap & water. Paste of
baking soda & water.
Be sure all parts are cool before cleaning.
Be sure all parts are properly replaced after cleaning.
Remove from oven after use. Cool then pour off grease. Place soapy
cloth over insert and pan; let soak to loosen soil. Wash in warm soapy
water. Use soap filled scouring pad to remove stubborn soil. Clean in
dishwasher if desired.
Use a dry paper towel or cloth to wipe up spills, especially acid spills, as
soon as they occur. (This is especially important for white surfaces.)
When surface is cool, wash with soap and water. Do not use abrasive or
harsh cleaning liquids and powders or oven cleaners. These will scratch
and permanently damage the finish. Dry with a soft cloth.
Toremove knobs,gently pull forward. Wash inmilddetergent andwater.
Donotuseabrasive cleaning agents.Theywillscratch finishandremove
markings. Rinse, dry and replace. Turn each element ON to see if knobs
have been replaced correctly.
Wash with soap and water. Remove stubborn soil with paste of baking
soda and water. Do not use abrasive materials such as scouring pads,
steel wool or powdered cleaning agents. They will damage glass. Rinse
with clear water and dry. To prevent staining of oven window, never use
excessive amounts of water which may seep under or behind glass.
Wash with soap and water. Remove stubborn soil with paste of baking
soda and water. Do not use oven cleaners, abrasive or caustic agents.
They will damage the finish.
Oven Elements
Oven racks Soap & water. Cleans-
ing powders & plastic
pads.Soap filled scouring pad.
Plastic finishes:
Door handle, Trim,
Backguard trim,
Overlay, Knobs, or
End caps
Porcelain enamel:
See pages 17-18
for self-clean oven
and page 16 for
continuous cleaning
oven
Soap & water. Paste
of baking soda and
water. Non-abrasive
plastic pad or sponge.
Mild liquid cleaners,
detergent or soap &
water. Cleansing powders and non abrasive
nylon or plastic pads.
Elements are self-cleaning. Soil will burn off as elements are used. Do
not spray oven cleaner on elements, electrical hook up or connection.
Clean with soapy water. Remove stubborn soil with cleansing powder or
soap filled scouring pad. Rinse and dry.
Do not use oven cleaner, powder or liquid cleansers, abrasive or caustic
cleaningagents on plasticfinishes. Thesecleaning agents will scratch or
marr finish. To prevent staining or discoloration, wipe up fat, grease or
acid (tomato, lemon, vinegar, milk, fruit juice, marinade) immediately
withadry paper towelorcloth. When surfaceiscool, clean withsoapand
water; rinse, and dry.
Porcelain enamel is glass fused on metal. It may crack or chip with misuse. Clean withsoap and water when parts are cool. All spillovers, especially acid or sugar spillovers, should be wiped up immediately with a dry
cloth. Surface may discolor or dullif soil is not removed. Whensurface is
cool, clean with warm soapy water. NEVER WIPE OFF A WARM OR
HOT ENAMEL SURFACE WITH A DAMP CLOTH. THIS MAY CAUSE
CRACKING AND CHIPPING. Never use oven cleaners, abrasive or
caustic cleaning agents on exterior finish of range.
-15-
Page 17

CONTINUOUS CLEANING OVEN
(Conventional Upper Oven Only)
WHAT IS THE CONTINUOUS
CLEANING OVEN?
The finish of the Continuous Cleaning
Oven is identified by its dark gray color,
white stipple and rough, porous texture.
The rough texture prevents grease
spatters from forming beads which run
down the walls leaving unsightly
streaks. Rather, the rough texture absorbs spatters and allows them to
spread, thus exposing a larger area to
the hot oven air. The catalyst, when exposed to heat, speeds the oxidation of
soil.
Cleaning action automatically begins
whenever the oven is turned on for baking or roasting. The oven MUST be “on”
for cleaning to take place. No cleaning
will occur when theoven is off. The special catalytic finish must be exposed to
hot oven air before soil will begin to
gradually reduce in size.
FACTORS AFFECTING LENGTH OF
CLEANING TIME
The higher the oven temperature, the
faster the cleaning action. The length of
cleaning time will depend on these factors: Type of soil, amount or size of soil,
oven temperature and length of time
ovenisinuse. Time may varyfromafew
minutesto severalhours. Soil deposited
at the end of a cycle may stillbe visible.
This will usually fade with continued
oven use until the soil gradually disappears or can be wipedup manually.The
oven will appear presentably clean,
even though somespatters may be present.
MANUALLY CLEANING
HEAVY SPILLOVERS
The special finish will clean most spatters during normal oven use unless
there is a heavy buildup of soil. Heavy
spillovers such as pie or casserole
boilovers will not clean effectively without some manual help. The crusty or
varnish-like stains that form from these
spillovers clog the pores and prevent
the special finish from being exposed to
the hot oven air. This greatly reduces
the cleaning effectiveness of the finish.
These crusty orvarnish-like stains must
either be removed or broken up before
cleaning can effectively take place.
TO MANUALLY CLEAN
HEAVY SPILLOVERS
Brush off heavy soil with a nylon brush
or plastic pad. DO NOT USEpaper towels, cloths or sponges for the oven walls
are porous and particles of these materials will rub off on the walls. Rinse area
with clear water only.
HINTS
Brittle crusts or stains can be loosened
byGENTLYtappingstainwithawooden
or plastic utensil. Brush away any loose
soil that flakes off. Varnish type stains
usually need to be softened with a small
amountofwater or damp cloth.Remainingsoil will gradually reduce withcontinued oven use at normal baking temperatures.
DO NOT USE ANY TYPE OF OVEN
CLEANER, POWDERED CLEANSERS, SOAP, DETERGENT OR PASTE
ON ANY CONTINUOUS CLEANING
SURFACE. ALSO, DO NOT USE ANY
ABRASIVE MATERIALS, STEEL
WOOL, SHARP INSTRUMENTS OR
SCRAPERS FOR THEY WILL DAMAGE THE FINISH.
Avoid spillovers by using utensils that
are large enough to hold food. A cookie
sheet or piece ofaluminum foil,just alittlelarger thanthe pan, can be placedon
the rack directly below the rack holding
the utensil to catch spills.
Over a period of time, wear marks may
appearon the embossed rack supports.
This is normal and results from sliding
the racks in and out of the oven. Wear
marks will not affect the cleaning action
of the oven.
-16-
Page 18

S E L F --- C L E A N O V E N
Theself-cleanoven usestemperatures
above normal cooking temperatures to
automatically clean the entire oven.
TO OPERATE:
1. Close door and move door lock lever
to the right (locked position).
2. Press CLEAN pad.
If door is not locked as described,
“door” will appear in the display.
3. WhentheCLEAN padis pressed,the
oven will automatically clean for 3
hours.
HR
TO CANCEL CLEAN CYCLE:
1. Push STOP/CLEAR pad.
2. IftheLOCKindicator is not displayed,
the oven door can be unlocked.
3. If the LOCK indicator is displayed, allow oven to cool (up to one hour).
Once LOCK indicator turns off, the
door can be unlocked.
Door and lock lever may be damaged
if the lock lever is forced to the left before the LOCK indicator turns off.
CLEAN
CLEAN
SET
A shorter (2 hour) or longer (4 hour)
cleancycle can be selected by turning
the SET knob.
TIME
-17-
Page 19

S E L F --- C L E A N O V E N
BEFORE
SELF-CLEANING
Remove all pans from the oven.The
racks may be left in, but will discolor and may not slide easily after cleaning.
Turn off oven light before clean cycle.
The life of the bulb may be shortened if
left on during the clean cycle.
Clean oven frame, door frame and
around the oven vent with a non-abrasive cleaning agent such as Bon Ami.
These areas are not exposed to cleaning temperatures and should be
cleaned to prevent soil from baking on
during the clean cycle.
Wipe up excess grease or spillovers
from the oven bottom to prevent excessive smoking during the clean cycle.
Do not use oven cleaners or oven liner
protective coatings of any kind on the
self-clean oven finishor around any part
of the oven.
To prevent damage, do not clean or rub
the gasket around the oven door. The
gasket is designedto sealin heat during
the clean cycle.
DURING
SELF-CLEANING
Whenthedooris lockedandtheCLEAN
pad is pressed, the oven automatically
begins to heat to cleaning temperatures.
As the oven reaches cleaning temperatures, the LOCK indicator will turn on to
show that an internal lock mechanism
has engaged. At this point, the oven
door can not be unlocked and opened.
To prevent damage tothe door and lock
lever, do not force the lock lever to the
left when the LOCK indicator is displayed.
The first few times the oven is cleaned,
somesmokeand odor may bedetected.
This is normal and will reduce or disappear with use. If the oven is heavily
soiled, or if the broiler pan is left in the
oven, smoke and odor may occur.
It is normal for the cooktop of the range
to become hot during a clean cycle.
Thereforetouching the cooktopduringa
self-clean cycle should be avoided.
As the oven heats and cools, you may
hear sounds of metal parts expanding
and contracting. This is normal and will
not damage your appliance.
AFTER
SELF-CLEANING
About one hour after the completion of
thecleancycle, the internal lock will disengage and the LOCK indicator willturn
off. At this point, the lock lever can be
moved to the left (unlocked position)
and the door opened.
Some soil may leave a light gray, powdery ash which can be removed with a
damp cloth. If soil remains, it indicates
that the clean cycle was not long
enough. The soil will be removed during
the next clean cycle.
If the oven racks do not slide smoothly
after a clean cycle, wipe racks and embossed rack supports with a small
amount of vegetable oil to restore ease
of movement.
Fine, hair-like lines may appear in the
oven interior or oven door. This is a normalcondition resulting from heating and
cooling of the porcelain finish. These
lines do not affect the performance of
the oven.
-18-
Page 20

SERVICE
TROUBLESHOOTING CHART
Before calling a service technician, check the following:
PROBLEM SOLUTION
PART OR ALL OF YOUR
RANGE DOES NOT OPERATE
CONTROL WILL NOT ACCEPT AN ENTRY
SURFACE ELEMENTS FAIL
TO TURN ON OR HEAT FOOD
PROPERLY
FOOD NOT BAKING SATISFACTORILY
OVEN DOES NOT OPERATE
OVEN LIGHT DOES NOT
WORK
F PLUS A NUMBER APPEARS
IN THE DISPLAY AND A CONTINUOUS BEEP SOUNDS.
(EXAMPLE: F 2)
Is the range plug disconnected from the electrical outlet? · Are house fuses blown or
circuit breakers tripped? · Is the range plug loose or improperly plugged in? Has
power supply to your home been interrupted? · Was oven properly set?
This may indicate a “stuck” pad. Press each of the seven pads to disengage the pad.
Then,press STOP/CLEARpad and reprogram the operation.If the controlstill doesnot
accept an entry after checking each pad, call the servicer.
Is range plug disconnected from the electrical outlet? · Check circuit breaker or fuse
boxfortrippedcircuitbreakersorblownfuses. · Iselementproperly pluggedintoreceptacle? · Was incorrect utensil used? · For optimum results, utensil SHOULD HAVE A
FLAT bottom. See page 6 for additional information. (NOTE: Expect cooking times to
increase if range is connected to 208 volts). · Have serviceman check element.
Are racks properly in place and in correct position for what you are baking? · Is range
level? · Are you usingtheproper pan? · Is it bright,notsoiled or darkcolored? · Have
youusedfoilincorrectly? · Are you using standard measuring utensils? · Did youpre-
heat if recommended? · Oven temperature is incorrectly set - too low or too high.
Is the range disconnected from the electrical power? · Was oven properly set?
Is bulb loose or burned out?
This is called a FAULT CODE. If a fault code appears in the display, press the STOP/
CLEARpad. If the fault codereappears, disconnect power tothe range andcall the servicer. See page 20 for additional information.
-19-
Page 21

SERVICE
EXPLANATION OF FAULT CODES
Yourappliance isequipped with an electronic control featuring built-in, self-diagnostic software. This software continuously monitors the control to insure safe and proper operation.If thesoftware should detect a questionable situation, a
FAULT CODE (F plus a number) will appear in the display
and continuous beeps will sound.
Afaultcodeindicates thatthere may be functional error.Asa
safety precaution, the control will automatically cancel the
program. Follow the procedures described to check the appliance.
DURING NORMAL OVEN COOKING
If a fault code appears in the display and continuous beeps
sound, press the STOP/CLEAR pad. Then, reprogram the
cooking operation.
If the fault code reappears in the display, call a servicer. Do
notusetheovenuntilthecontrolhasbeenserviced.Thesurface unit can be used.
DURING A SELF-CLEAN CYCLE
If the oven is heavily soiled, excessive smoke and flaring
may result in a fault code. If this occurs, press the STOP/
CLEAR pad and allow the oven to cool for an hour. Then,
reprogram the oven for the clean cycle.
If the fault code reappears in the display, call a servicer. Do
notusetheovenuntilthecontrolhasbeenserviced.Thesurface unit can be used.
-20-
Page 22

SERVICE
Do not attempt to service the appliance yourself unless directed to do
so in this book. Contact the dealer
who sold you the appliance for service.
HOW TO OBTAIN
SERVICE
When your appliance requires service
or replacement parts, contact your
Dealer or Authorized Servicer. Use only
genuine factory or Maycor parts if replacementparts are necessary. Consult
the Yellow Pages in your telephone directory under appliance for the service
center nearest you. Be sure to include
your name, address, and phone number, along with the model and serial
numbers of the appliance. (See front
SERVICE
cover for location of your model and serial numbers.)
If you are unable to obtain service, write
tous. Ouraddress is found onthe rating
plate. See front cover for location of rating plate.
If you are not satisfied with the local response to your service requirements,
call or write MAYCOR Appliance Parts
and Service Company, 240 Edwards
Street, S.E., Cleveland, TN 37311,
(615) 472-3500. Include or have available the complete model and serial
numbersoftheappliance, the name and
address of the dealer from whom you
purchased the appliance, the date of
purchase and details concerning your
problem.
If you did not receive satisfactory service through your servicer or Maycor you
may contact the Major Appliance Consumer Action Panel by letter including
your name, address, and telephone
number, as well as the model and serial
numbers of the appliance.
Major Appliance Consumer Action Panel
20 North Wacker Drive
Chicago, IL 60606
MACAP (Major Appliance Consumer
Action Panel) is anindependent agency
sponsored by three trade associations
asa court ofappeals on consumercomplaints which have not been resolved
satisfactorily within a reasonable period
of time.
-21-
Page 23

FULL ONE-YEAR WARRANTY
DOMESTIC GAS OR ELECTRIC RANGE
MaycorApplianceParts&ServiceCompanywillrepair or replace, without charge,anypartofyour product which hasa
defectinmaterialorworkmanshipduringthefirstyearafter the date of the original installation. Thiswarrantyextends to
any owner during the one-year warranty period.
LIMITED 5 YEAR WARRANTY
Onelectric ranges equipped withsoliddiscor smoothtop heating elements, andongasrangeswithsealedburners, for
anadditional4yearperiod beyond the firstyearof the general coverageofthis warranty, Maycorwillreplace any of the
solid disc or smoothtop heating elements, or sealed burners which fail to heat as a result of defective workmanship or
material. Additionally, Maycor will replace any smoothtop cooking surface which cracks or breaks during normal
household cooking. These parts must be installed by a qualified person. Any labor charge requiredfor replacement is
not covered by this warranty.
HOW TO OBTAIN SERVICE
To obtain the repair or replacement of a defective part under these warranties, you should contact the dealer from
whom you purchased the appliance or a servicer he designates.
WHAT IS NOT COVERED BY THESE WARRANTIES
1. Conditions and damage resulting from improper installation, delivery, unauthorized repair, modification, or damage not attributable to a defect in material or workmanship.
5. Any product used for other than normal household
use. It does not extend to products purchased for
commercial or industrial use.
6. Any expense incurred for service calls to correct in-
2. Conditions resulting from damage, such as: (1) improper maintenance, (b) misuse, abuse, accident,
or (c) incorrect electrical current or voltage.
3. Warranties are void if the original serial number has
been removed, altered, or cannot be readily determined.
4. Light bulbs.
stallation errors or to instruct you on how to use the
products.
7. CONSEQUENTIAL OR INCIDENTAL DAMAGES
SUSTAINED BY ANY PERSON AS A RESULT OF
ANYBREACH OF THESE WARRANTIES ORANY
IMPLIED WARRANTY. Some states do not allow
the exclusion or limitation of consequential or incidental damages, so the above exclusion may not
apply to you.
ADDITIONAL HELP
If you are not satisfied with the local response to your service requirements and wish to contact Maycor, please addressyour letter to the CustomerRelationsDepartment, Maycor Parts&Service Company, 240EdwardsStreet, S.E.,
Cleveland, TN 37311 or call (615) 472-3500. To save time, your letter should include the complete model and serial
numbersofthewarrantedappliance, the name and address of the dealerfromwhomyoupurchasedtheappliance,the
date of purchase and details concerning your problem.
Thesewarrantiesaretheonlywrittenorexpressed warranties givenbyMaycor.Nooneisauthorizedtoincrease,alter,
or enlarge Maycor’s responsibilities or obligations under these warranties. These warranties give you specific legal
rights, and you may also have other rights which vary from state to state.
8109P059-60
(6/91)
 Loading...