

Page 1

Owner’s Guide
Electronic Controller & Self- Clean Oven
(Keep these instructions for future reference)
TABLE OF CONTENTS
IMPORTANT SAFETY INSTRUCTIONS 1-3.......
CLOCK AND OVEN CONTROL 4...............
COIL COOKTOP 5............................
Cooktop
Surface elements
Drip bowl
SMOOTHTOP COOKTOP 6-7...................
Cooking areas 6.............................
Hot surface light
Retained heat
Cooking tips
Cookware
To protect smoothtop
Care information 7...........................
COOKTOP USE 8.............................
Control knobs
Indicator lights
Cooking tips
Cookware
Canning
Heat setting guide
OVEN USE 9-14...............................
Oven characteristics 9........................
Fan
Oven racks
Use of aluminum foil
Preheating
Door lock lever
Oven operation 10...........................
Automatic oven cooking feature 10-11..........
Baking tips 12...............................
Roasting tips
Common baking problems chart 13.............
Broiling 14..................................
MAINTENANCE 15............................
Cooktop light
Oven light
Oven door
Storage drawer
Leveling legs
SELF-CLEAN OVEN 16-17.....................
CARE AND CLEANING CHART 18..............
SERVICE INFORMATION 19-21.................
Before you call for service 19..................
Explanation of fault codes 20..................
Fuses (Canada Only)
Adjusting oven temperature
How to obtain service 21......................
WARRANTY 22...............................
8113P068-60
(12/93)
Page 2
ABOUT YOUR NEW RANGE
Congratulations onyour choice ofthis range. As you use
your new range, we know you will appreciate the many
features that provide excellent performance, ease of
cleaning, convenience and dependability.
New features have dramatically changed today’s cooking appliances and the way we cook. Itis therefore very
important tounderstand howyour newelectric rangeoperates BEFORE you use it for the first time.
In this Owner’s Guide, you will find a wealth of informationregardingall aspects ofyour range. Byfollowing the
instructions carefully, you will be able to fully enjoy and
properly maintain your new range.
Should you have any questions about using your new
electric range, please write to us at this address:
MAYTAG CUSTOMER SERVICE
240 Edwards Street, S.E.
Cleveland, TN 37311
Be sure to include the model and serial numbers of your
range. For your convenience, we have provided space
belowto record this information.
IMPORTANT INFORMATION
For future reference we suggest you retain this
manual after recording the information in the
spacesprovided. Thisinformationcan befoundon
the rating data plate located on the range front
frame around the storage drawer. Open the storage drawer to see the rating plate. For drop-in
models, the rating data plate is located on the left
side of the side panel. Open the oven door tosee
theratingplate.
MODEL NUMBER:
SERIAL NUMBER:
DATE OF PURCHASE:
IMPORTANT: Retain the proof of purchase documents for warranty service.
DEALER FROM WHOM PURCHASED:
ADDRESS:
CITY:
PHONE:
AUTHORIZED SERVICE CONTRACTOR:
ADDRESS:
CITY:
PHONE:
Page 3
IMPORTANT SAFETY INSTRUCTIONS
Read all instructions before using this appliance.
The following instructions are based on
safety considerations and must be
strictly followed to eliminate the potential risks of fire, electric shock, or personal injury.
Proper installation -- Be sure your
appliance is properly installed and
grounded by a qualified technician.
Care should be given to location of
appliance -- Be sure floor covering un-
der appliance, walls adjacent to appliance, cabinetry adjacent to appliance,
and other materials adjacent to appliance can withstand prolonged heat.
This is a heavy appliance and can settle into soft floor coverings such as
cushioned vinyl. Use care when moving
range on this type of floor covering.
After appliance is installed -- B e c e r tain all packing materials are removed
from the appliance before operating the
unit. If appliance is installed near a window, take steps to prevent curtains
from blowing over sur face elements
creating a fire hazar d.
Never use your appliance for warming or heating the room.
Storage above range -- To eliminate
the hazard of reaching over hot surface
elements, cabinet storage should not
be provided directly above a unit. If provided, storage should be limited to infrequently used items that can be safely
stored in an area subjected to heat.
Temperatures may be unsafe for some
items such as volatile liquids, c leaners,
or aerosol sprays. If cabinet storage is
provided, installation of a range hood
that projects at least 5--inches beyond
the bottom of the cabinet will reduce the
hazards associated with such storage.
Wear proper apparel -- Loose--fitting
or hanging garments should never be
worn while using the appliance.
User servicing -- Do not repair or replace any part of the appliance unless
specifically recommended in the Owner’s Guide. All other servicing should
be referred to a qualified technician. Always disconnect unit or cut--off power
to unit before any serv icing.
Storage in, on or near appliance --
Do not store or use gasoline or other
flammable materials, vapors and liquids
in the oven, near surface units or in the
vicinity of this or any other appliance.
The fumes can create a fire hazard or
explosion. Do not use cooktop or oven
as a storage area for food or cooking
utensils.
Use only dry potholders -- Moist or
damp potholders on hot surfaces may
result in burns from steam. Do not let
potholder touch hot heating elements.
Do not use a towel or other bulky
cloths.
Use proper pan size -- This appli-
ance is equipped with one or more surface elements of different sizes. Select
utensils having flat bottoms large
enough to cover the surface element.
The use of undersized utensils will expose a portion of the heating element to
direct contact and may result in ignition
of clothing. Proper relationship of utensil to element will also improve efficiency.
Never leave surface units
unattended at high heat settings -- Boilovers cause smoking and
greasy spillovers may ignite.
To prevent damage to range --
Never operate a surface unit without a
pan in place and never allow a pan to
boil dry.
Make sure drip bowls are in
place -- Absence of these bowls during
cooking may subject wiring or components underneath to damage.
Protective liners -- Do not use alumi-
num foil liners to line surface unit drip
bowls or oven bottom, except as suggested in the Owner’s Guide. Improper
installation of these liners may result in
a risk of electric shock, or fire.
Glazed cooking utensils -- O n l y c e r tain types of glass, glass/ceramic, ceramic, earthenware, or other glazed
utensils are suitable for range--top
service without breaking due to the
sudden change in temperature.
(continued next page)
PAGE 1
Page 4
IMPORTANT SAFETY INSTRUCTIONS (continued)
Utensil handles should be turned inward and not extend over adjacent
surface units -- To reduce the risk of
burns, ignition of flammable materials,
and spillage due to unintentional contact with the utensil, the handle of a
utensil should be positioned so that it is
turned inward, and does not extend
over adjacent surface elements.
Do not soak removable heating elements -- Heating elements should
never be immersed in water. Immersing
element in water would damage insulating material inside element.
Use care when opening door -- Let
hot air or steam escape before removing or replacing food.
Do not heat unopened food containers -- Build--up of pressure may cause
container to burst and result in injury.
Keep oven vent ducts unobstructed -- The v ent is located at the
right rear element for coil cooktops or
at the base of the backguard for the
smoothtop cooktop. Blockage of vent
prevents proper oven air circulation
and will affect oven performance. Avoid
touching oven vent area while oven is
on and for several minutes after oven
has been turned off. Some parts of the
vent and surrounding area become hot
enough to cause burns.
Placement of oven racks -- A l w a y s
place oven racks in desired location
while oven is cool. If rack must be
moved while hot, use care to avoid
contact of potholder with oven element.
Do not cover oven racks, the oven
bottom or any other par t of the oven
with aluminum foil -- This will cause
overheating of the oven. Use aluminum
foil only as directed in this manual.
Clean ventilating hoods frequently -Grease should not be allowed to accumulate on hood or filter. When flaming
foods under the hood, turn the fan off.
The fan, if operating, may spread the
flame.
Deep fat fryers -- Use extreme caution
when moving the grease kettle or disposing of hot grease.
Do not touch surface elements or
oven elements, areas near elements
or interior surfaces of oven -- E l e -
ments may be hot even though they
are dark in color. Areas near sur face
elements and interior surfaces of oven
may become hot enough to cause
burns. During and after use, do not
touch or let clothing or other flammable
materials contact heating elements, areas near elements, or interior surfaces
of oven until they have had sufficient
time to cool. Among these areas are
the cooktop, surfaces facing the cooktop, oven vent opening and surfaces
near this opening, oven door, and oven
window. Also, do not allow aluminum
foil, meat probes or any other metal object, other than a utensil on a surface
element, to contact heating elements.
Smoothtop cooktop -- Do not cook on
broken cooktop. If cooktop should
break, cleaning solutions and spillovers
may penetrate the broken cooktop and
create a risk of electric shock. Contact
a qualified technician immediately.
Clean cooktop with caution. If a wet
sponge or cloth is used to wipe spills on
a hot cooking area, be careful to avoid
a steam burn. Some cleaners can produce noxious fumes if applied to a hot
surface.
Oven door -- Do not place excessive
weight on an open oven door or stand
on an open oven door as, in some
cases, it could cause the range to tip
over, breakage of the door, or serious
injury.
Anti-tip bracket warning:
To reduce the risk of tipping of the appliance from unusual usage or by excessive loading of the oven door, the
appliance must be secured by a pr operly installed anti--tip device. To check if
device is installed properly: Use a
flashlight and look underneath range to
see that one of the rear leveling legs is
engaged in the bracket slot. When removing appliance for cleaning, be sure
anti--tip device is engaged when range
is replaced. The anti--tip device secures
the rear leveling leg to the floor, when
properly engaged.
PAGE 2
(continued next page)
Page 5
IMPORTANT SAFETY INSTRUCTIONS (continued)
Circuit breaker or fuse -- Locate and
mark breaker or fuse. Never replace a
blown fuse or reset a breaker until you
know what has caused the problem.
Always replace a blown fuse with one
of the correct amperage, do not use a
substitute.
Control knobs -- Turn off control at the
completion of a cooking operation.
Self- cleaning oven -- Do not clean
door gasket. The door gasket is essential for a good seal. Care should be
taken not to rub, damage, or move the
gasket. Do not use oven cleaners or
oven liner protective coating of any kind
in or around any part of the self--clean
oven. Clean only parts listed in this
manual. Before self--cleaning the oven,
remove broiler pan, oven racks, and
other utensils. Slide--in and drop--in
models: Listen for a fan. A fan noise
should be heard during a cleaning
cycle. If not, cancel clean cycle and call
a qualified technician before self--cleaning again.
CAUTION: DO NOT LEAVE FOOD OR
COOKING UTENSILS, ETC., IN OVEN
DURING THE SELF--CLEANING
MODE OF OPERATION.
ATTENTION: NE LAISSER AUCUN
ALIMENT, USTENSILE DE CUISINE,
ETC., DANS LE FOUR DURANT LE
CYCLE D’AUTONETTOYAGE.
Do not leave children alone -- Children should not be left alone or unattended in an area where appliance is in
use. They should never be allowed to
sit or stand on any part of the appliance. CAUTION: Do not store items of
interest to children in cabinets above
an appliance or on the backguard of a
range.
Children climbing on the appliance to
reach items could be seriously injured.
Children must be taught that the appliance and utensils in or on it can be
hot. Children should be taught that an
appliance is not a toy. They should not
be allowed to play with controls or other
parts of the unit.
IN CASE OF FIRE:
1. Turn off appliance and ventilating
hood.
2. Use dry chemical or foam--typeextinguisher or baking soda to
smother fire or flame. Never use
wateronagreasefire.
3. If fire is in oven, smother by closing
oven door.
4. If fire is in a pan on the surface unit,
cover pan.
This appliance has been tested for
safe performance using conventional cookware. Do not use any devices
or accessories that are not specifically
recommended in this manual. Do not
use eyelid covers for the surface units,
stove top grills, or add--on oven convection systems. The use of devices or
accessories that are not expressly recommended in this manual can create
serious safety hazards, result in performance problems, and reduce the life of
the components of the appliance.
Prepared food warning -- Follow food
manufacturer’s instructions. If a plastic
frozen food container and/or its film
cover distorts, warps, or is otherwise
damaged during cooking, immediately
discard the food and its container. The
food could be contaminated.
Important safety notice and
warning: The California Safe Drinking
Water and Toxic Enforcement Act of
1986 (Proposition 65) requires the Governor of Californiato publish a list of substances known to the State of California
to cause cancer or reproductive harm,
and requires businesses to warn customers of potential exposures to such
substances.
Users of this appliance are hereby
warned that when the appliance is engaged in the self--clean cycle there may
be some low--level exposure to some of
the listed substances, including carbon
monoxide. Exposur e to these substances can be minimized by properly
venting the appliance to the outdoors
during the self--clean cycle.
PAGE 3
Page 6
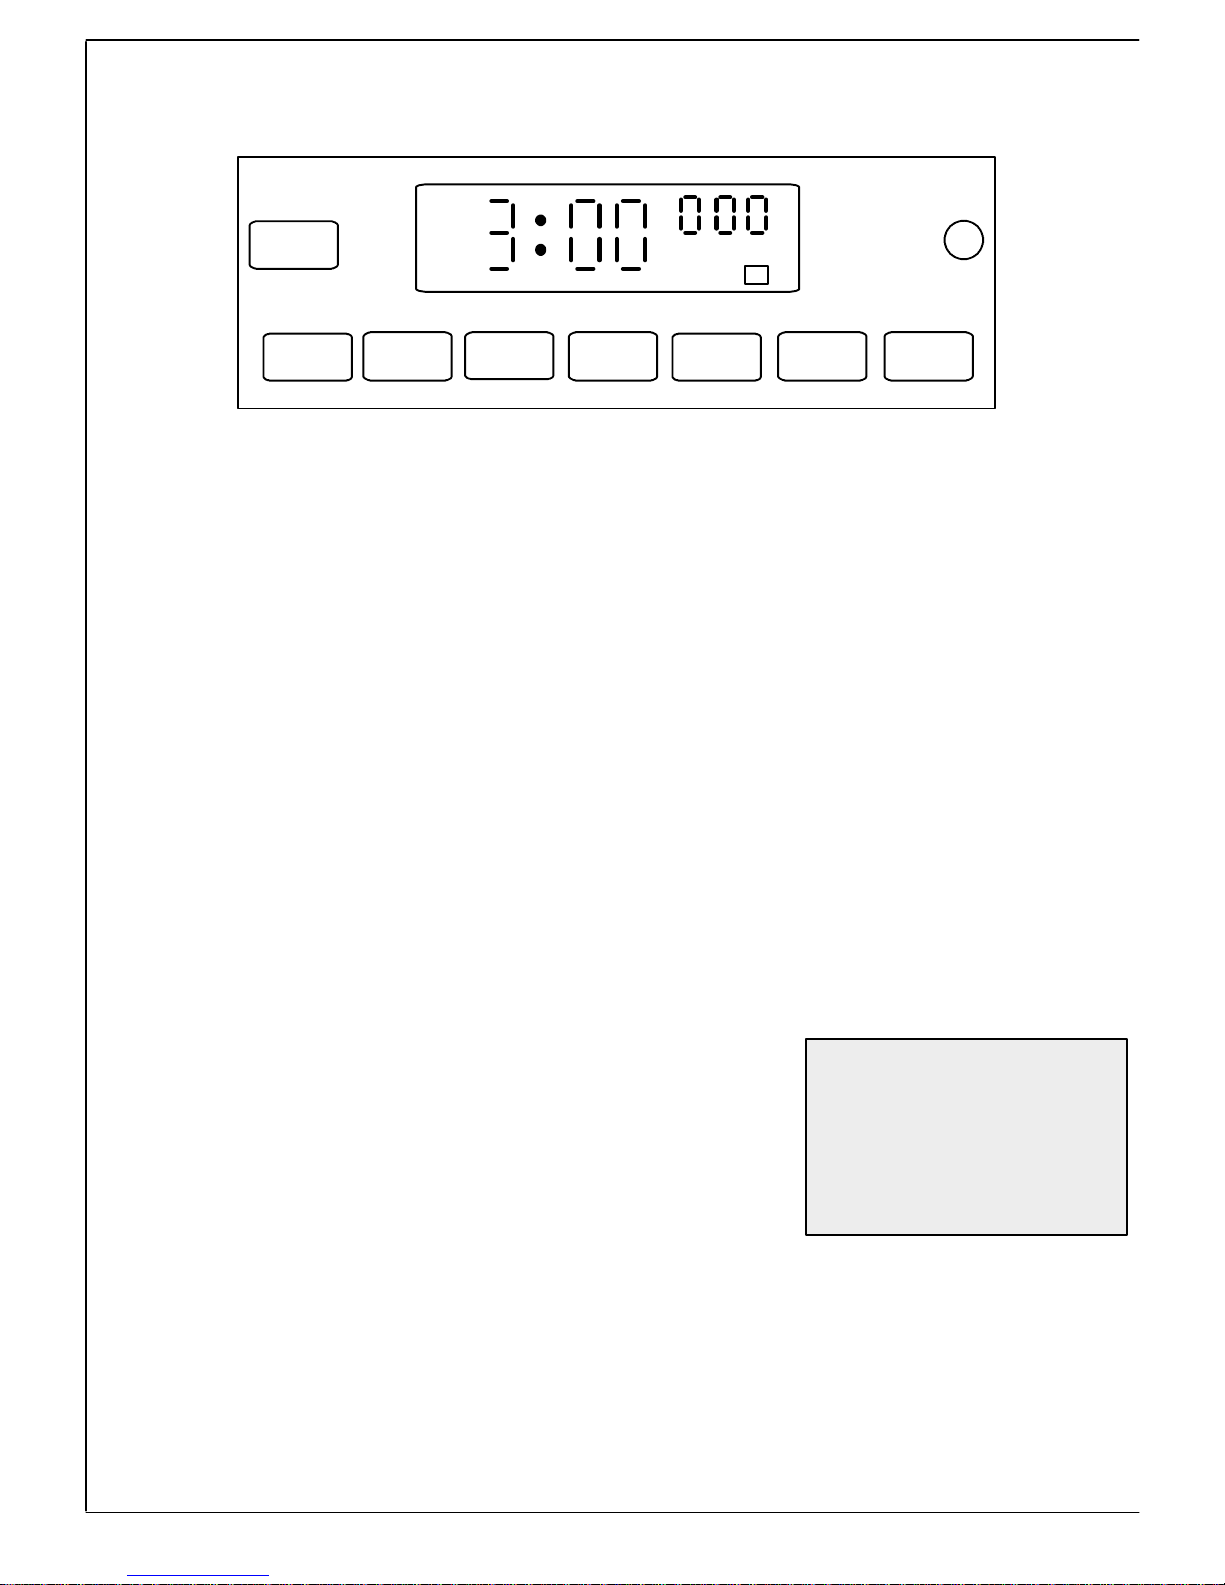
CLOCK AND OVEN CONTROL
STOP
CLEAR
TIMER CLOCK
(Note: All indicator words are displayed to show their location. Function pads on
some models are round. Round pads will operate as described in this manual.)
STOP/CLEAR
Press this pad to cancel all programming except the Clock and Timer.
TIMER
1. Press TIMER.
2. Turn SET knob to desired time.
TIMER can be set from 1 minute
(0HR:01) up to 9 hours and 50 minutes (9 HR:50).
The timing operation will start automatically. Colons will flash in the display to indicate a timing operation.
Onelong continuous beepsignals the
end of the timing operation and “End”
briefly appears in the display. The
time of day will automatically reappear in the display. The TIMER does
not control the oven.
To cancel: PressTIMERand holdfor
3 seconds. Time of day will reappear
after a slight delay.
CLOCK
1. Press CLOCK.
2. TurnSET knob until display shows
correct time of day.
When power is first supplied to oven
or if there has been a power failure,
the display will flash. Follow above
instructions to set clock. Clock time
cannot be changed when oven is set
for a cook or self-clean operation.
Cancel operation to set clock.
HR
BROIL
TIMED
TIMER
STOP
TIME
LOCK
BAKE
ON
SET CLEAN COOK
COOK
TIME
CLEAN BROIL
CLEAN
DELAY
STOP
CLEAN
1. Press CLEAN.
2. Close and lock oven door.
3. Oven will automatically clean for 3
hours. Select 2 or 4 hours by turning SET knob.
“door” will appear in display until the
dooris properly locked. Seepages 16
and 17 for additional information.
COOK TIME/STOP TIME
To begin cooking immediately:
1. Press COOK TIME. Enter desired
cooking time by turning the SET
knob.
2. Press OVEN TEMP. Enter oven
temperature with SET knob.
To delay the start of cooking:
1. Press COOK TIME. Enter cooking
time with SET knob.
2. PressSTOP TIME. Enter the time
you wish the oven to turn off with
SET knob.
3. Press OVEN TEMP. Enter oven
temperature with SET knob.
The oven will automatically turn on
and off at the preset times. 3 beeps
will signal the end of cooking. “End”
will appearin the display and continuous beeps will prompt you to remove
the food from the oven.
Press STOP/CLEAR to cancel endof-cooking beeps.
SET
OVEN
TEMP
SET KNOB
Turn this knob in either direction to
enter time or temperature. This knob
is also used to select HI or Lo broil.
OVEN TEMP
1. Press OVEN TEMP.
2. Turn SET knob until desired oven
temperature appears in the display.
See pages 9 to 13 for additional information on baking and roasting.
BROIL
1. Press BROIL.
2. Turn SET knob clockwise to select
HI broil or counter clockwise to select Lo broil.
See page 14 for additional information.
ADDITIONAL INFORMATION
A beep sounds each time a pad is
pressed.
If afault code (example: F 2) is displayed and beeps sound, press
STOP/CLEAR. If fault codecontinues, see page 20.
Press CLOCK to recall time of day
when another function is displayed.
PAGE 4
Seepages 10and 11foradditionalinformation.
Page 7
COIL COOKTOP
Cooktop
Freestanding rangeswitha coil-typecooktop willfeature
an “upswept” cooktop.
(NOTE: Thecooktop on a slide-in or drop-in range does
NOT lift up. The cooktop on a Canadian freestanding
range does NOT lift up.)
To raise the “upswept” cooktop: When cool, grasp
the front edge of the cooktop and gently lift up until the
two support rods at the front of the cooktop snap into
place.
To lower the top: Holdthefrontedge ofthe cooktopand
carefully push back on each support rod to release the
notched support. Then gently lower the top into place.
The support rods will slide into the range frame.
Surface Elements
S Surface elements are self-cleaning.
Indicator Lights
Rangesareequipped withtwoindicatorlights whichglow
when a surface element is on. The indicator light will remain on until the element is turned off. After a cooking
operation, besure the elementand indicator light areoff.
Drip Bowls
S Be sure drip bowls, located under each element, are
in place.
S Absence of these bowls during cooking may subject
wiring or component parts underneath the cooktop to
damage.
S To prevent risk of electricshock orfire, do not linedrip
bowls with aluminum foil.
Your range will be equipped with either chrome plated
steel drip bowls or porcelain coated steel drip bowls.
Chrome drip bowls will turn blue or gold over time or if
overheated. This type of discoloration is permanent and
will not affect cooking performance.
To protect the chrome or porcelain finish, avoid using
high settings for long periods of time. Reduce to a lower
setting once food begins cooking. Do not useoversized
cookware. Pan should not extend more than 2 inches
from the element.
S Do not immerse elements in water.
S When an element is turned on, it will cycle on and off
to maintain the heat setting.
S To preventdamageto therange, NEVERoperatesur-
face element without apan in placeand NEVERallow
a pan to boil dry.
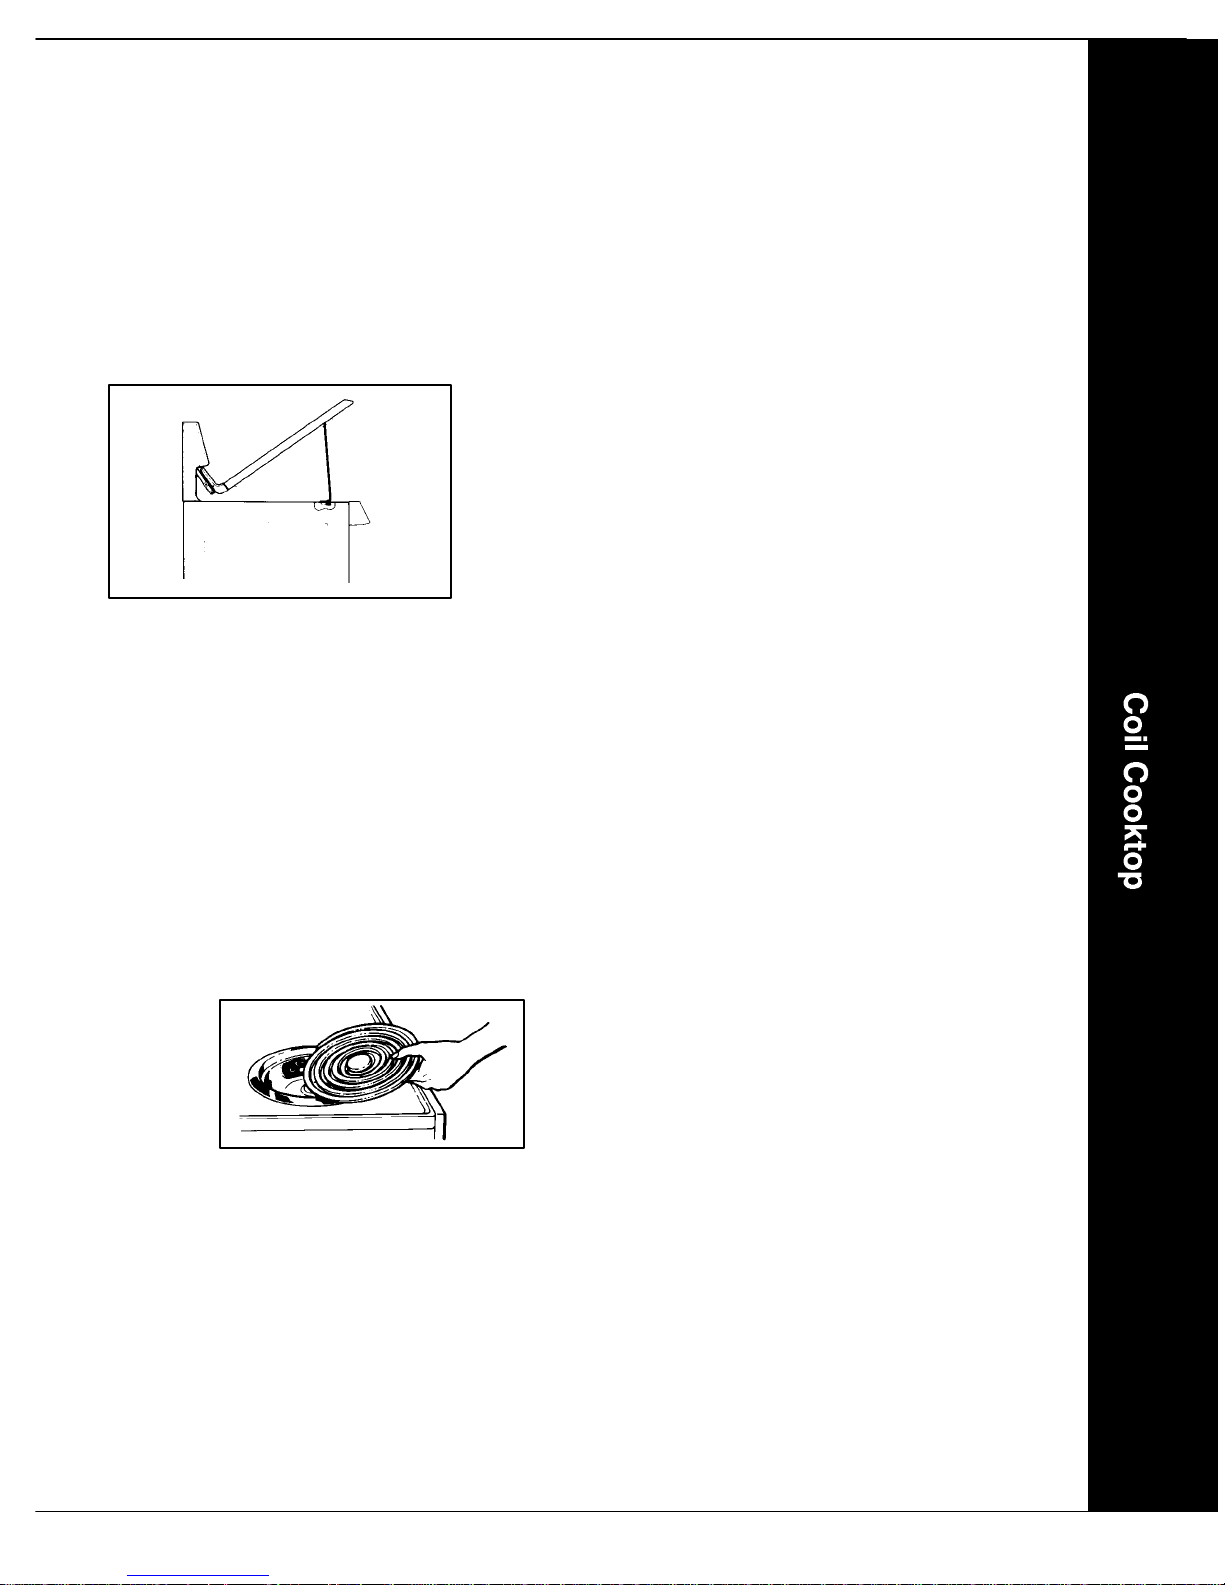
To remove: When
cool, raise element
and carefully pull
out and away from
the receptacle.
To replace: Insert the terminals on the element into the
receptacle. Gentlylift uponouteredgeof element(opposite terminal-side of element) while inserting terminals
into receptacle. Gently press down on outer edge of element until element sits level on drip bowl.
Be sure drip bowland chrometrim ring, if equipped, are
properly installed. Notch on trim ring should be centered
over the screw securing the receptacle to the maintop. If
trim ring is notinstalled properly and rests on this screw,
the trim ring and drip bowl will “rock”.
Clean bowls after each use with soap and water. Removestubborn stainswithbaking sodapaste andplastic
scouring pad.Porcelain drip bowlscan becleaned witha
mild cleanser. To prevent scratching the porcelain or
chrome finish, do not use abrasive cleaning agents.
Rinse, dry and replace.
NOTE: Theovenvent islocated attheright rearelement.
Be sure the drip bowl for this element has a hole in the
centertoallowproperoven venting. Neverblock thevent
opening by placing a solid drip bowl in this location or by
coveringthe holeinthe centerof thedripbowlwithaluminum foil. Blocking the vent will restrict proper ovenventing which will affect baking results.
PAGE 5
Page 8
SMOOTHTOP COOKTOP
Cooking Areas
On Canadian models only: The surface units will not operate during a clean cycle. This is normal.
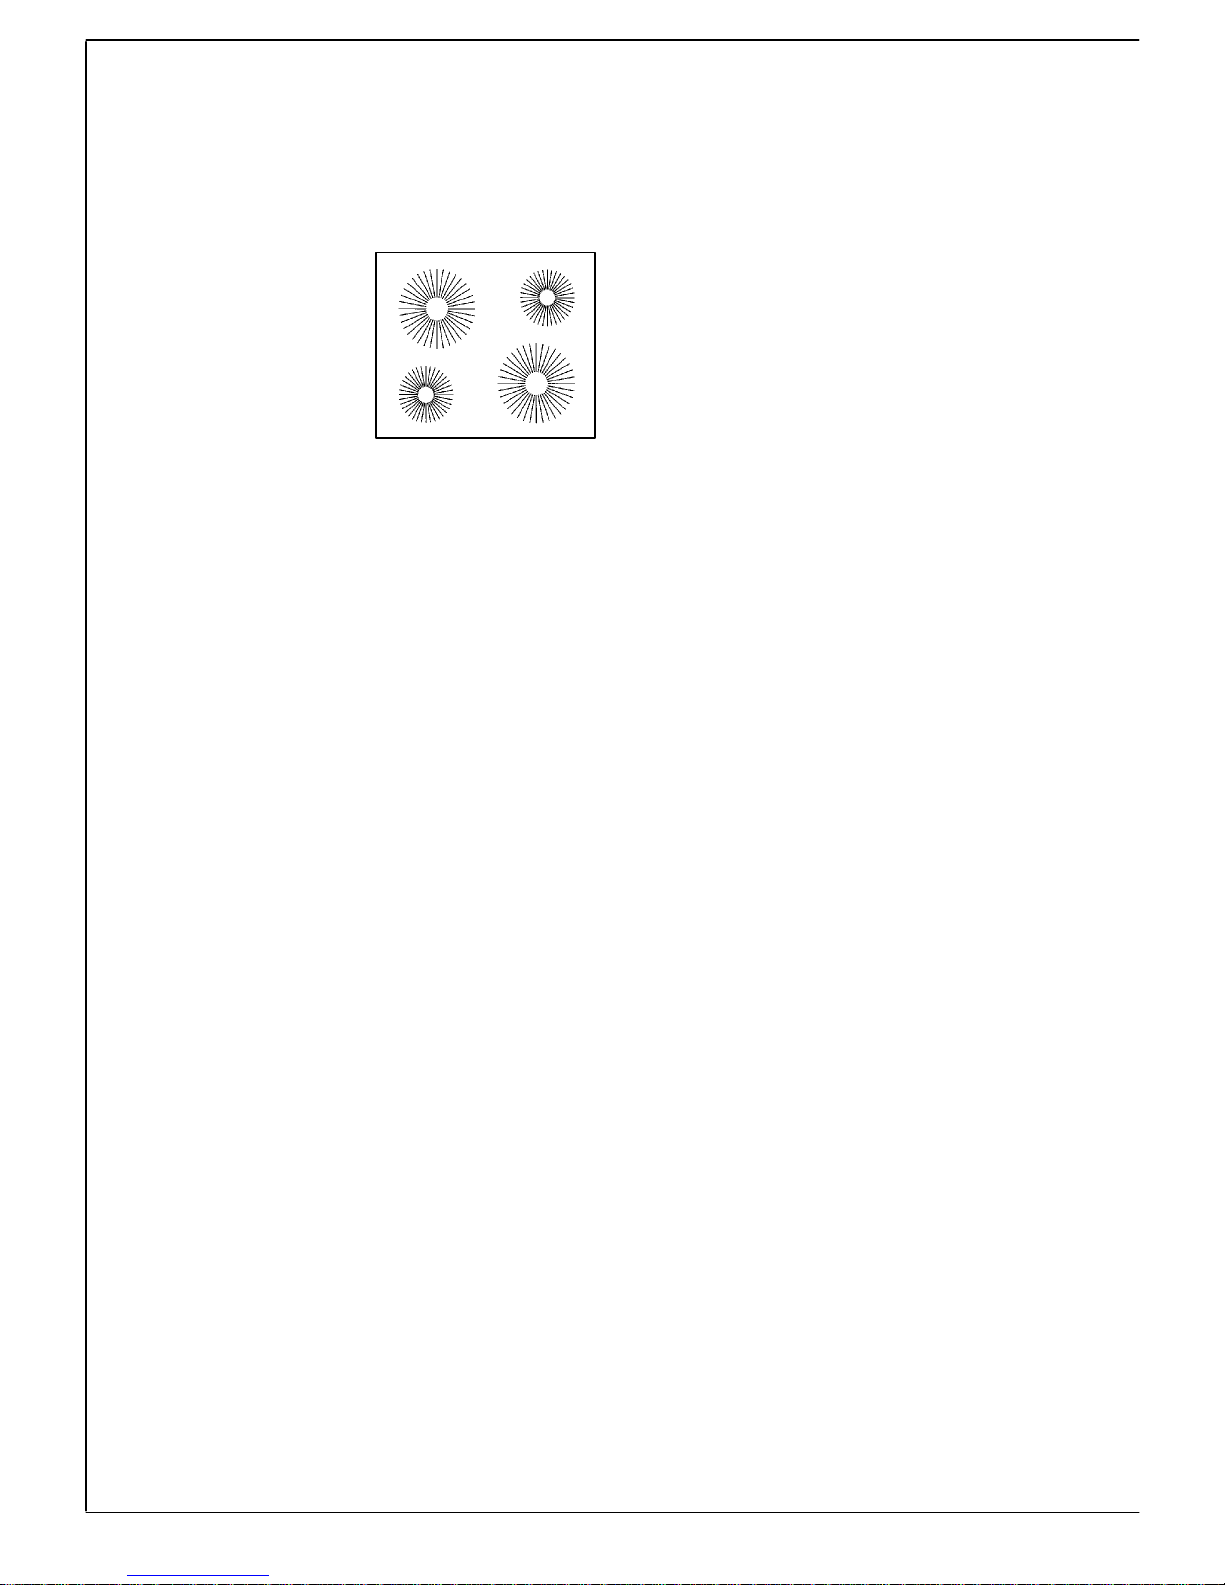
The four cooking areas on
your range are identified by
permanent patterns in the
cooktop. There are two
large (8-inch) andtwo small
(6-inch) areas. The patterns on your cooktop may
not look like the cooktop in
this illustration but your
cooktop will operate as described in this manual.
Before using the cooktop for the first time, clean it thoroughly as directed on the cleaning chart on page 7. This
will protect the smoothtop and will guarantee a clean
cooktop when the elements are turned on.
During the first few hours of use, youmaynotice thatthe
cooktop emits a slight burning odor and a light smoke.
Both of these conditions are normal and are caused by
the insulation material of the heating elements.
Whena cookingarea isturnedon, thecoil elementunder
the cooktop will heat up and glow red. To maintain the
heat setting the elementwill cycle onand off. It is normal
to see a red glow through the smoothtop when the element cycles on.
Indicator Lights
Rangesareequipped withtwoindicatorlights whichglow
when a surface element is on. The indicator light will remain on until the element is turned off. After a cooking
operation, besure the elementand indicator light areoff.
Hot Surface Light
Your range is equipped with a HOT SURFACE light located at the center-back ofthe smoothtop. This red light
will turn onto indicate that the smoothtop is hot and will
remain on until the top has cooled.
Retained Heat
The smoothtop cooking area retains heat for a period of
time after the element has beenturned off. Turn the element off afew minutesbefore foodis completely cooked
andusetheretainedheat tocompletethecookingoperation. After 30 minutes, the cooktop may be too cool to
keep foods warm. However, the TOP MAY STILL BE
TOO WARM TO TOUCH. When the HOT SURFACE
light turns off, the top will be cool enough to touch.
Cooking Tips
When cooking delicate foods which easily scorch or
overcook, start with a lower heat setting then gradually
increase the setting until you find the optimum setting.
Boiloversare morelikely tooccurif youstartout onHIGH
then reduce to the lower setting. If you do begin cooking
onHIGH, reduceto alowersettingbefore liquidscome to
a full boil.
If food is cooking too fast or ifa boilover occurs, remove
lid orremovecookware fromcooking areaand reduce to
alowersetting.Allowenoughtime forthecooking areato
adjust to the new setting.
Cookware
Aluminum foil will damage the smoothtop if it melts
onto the glass. Donot use aluminum foil or foil-type disposable containers such as popcorn poppers under any
circumstances.They mayleavemetalmarks ormay permanently meltontothe smoothtop. Do not usecooktopif
aluminum foil melts onto the smoothtop. Call an authorized servicer. Do not attempt to repaircooktop yourself.
Aluminum cookware will cause metal marks on the
glass if you slide them across the smoothop. Remove
any metal marks immediately using Cooktop Cleaning
Creme.
Glass ceramic, earthenware, porcelain over metal,
heat-proof glass or glazed cookware may scratchthe
smoothtop cooktop if you slide them across the top.
To Protect Smoothtop
S Do not use the top as a work surface or as a cutting
board. Do not cook food directly on the cooktop.
S Do not use atrivet or metal stand (such as a wok ring)
betweentheutensiland thecooktop. These items can
mark oretch the surfaceand affect cookingefficiency.
S Do not place plastics on a warm or hot cooking area.
They will melt and adhere to the smoothtop. The
smoothtop may chip or pit in attempting to remove
melted plastic from the top.
S To preventscratchingor damagetothe smoothtop,do
not leave sugar, salt, sand, soil, shortening or other
fats on the cooking area. Be sure area is free from
these before turning on cooking area.
S Do not slide metal or glass items across the smooth-
top. They may scratch top or leave metal marks.
S Donot allowa pantoboil dry. Thiscould causeperma-
nent damage to the smoothtop.
(continued on next page)
PAGE 6
Page 9

Care Information
To help keep cooktop clean, be sure
cookingarea andcookwarebottomare
clean and dry before each use.
To prevent possible damage to the
cooktop, always rinse the bottom of
cookware to completely remove any
cleaning agent residue. This is especiallyimportant whenusinga copperor
aluminum cleaner. In the presence of
heat, the cleaning residue may stain,
discolor or etch the smoothtop.
Carefully blot up spillovers around the
outside of the cooking areaas they occur with dry paper towels. BE CAREFUL NOT TO BURN HANDS WHEN
WIPING UP SPILLS. DONOT USE A
DAMP CLOTH WHICH MAY CAUSE
STEAM BURNS.
Whensurfaceiscool,cleanas directed
in the chart. DO NOT USE the following cleaning agents.
· Abrasives (metal scouring pads,
cleansing powders, scouring cleanersor pads) willscratch thesmoothtop.
· Chemicals (oven cleaners, chlorine
bleaches, rust removers or ammonia) may damage the finish of the
smoothtop.
· Glass cleaners containingammonia
may harm the smoothtop.
· Soiled cloth or sponge will leave an
invisible film on the cooktop which
may scratch or cause discoloration
the next time the cooktop is used.
IMPORTANT: Watch sugary solutions
carefully to avoid boilovers.
If a sugar solution (such as jam, jelly,
candy) is allowed to boilover, it may pit
the smoothtop. Turn element to LOW
and clean sugary boilovers immedi-
ately.
Cleaning Chart
CAUTION: Before cleaning, be certain all elements are turned off and the
cooktopis cool.Use onlycleaningagentsrecommended inthe cleaningchart.
Other materials may damage the finish of the smoothtop.
Daily c leaning,
light to moderate stains.
Burned on or
heavy stains.
Brown or g ray
stains from
HARD WATER
or metalmarks.
Cooktop Cleaning
Creme.Liquid dishwashing detergent. Paste of
baking soda and water.
Single-edge razor blade
such as Widget by Gillette.
Cooktop Cleaning
Creme.
Gently apply with a soft cloth or a non
abrasive plastic brush, nylon or plastic
pad,or paper toweling,rinsecompletely
and dry.
When cooktop is cool, place edge of
single edge razor on cooktop at a 30
angle. Very CAREFULLY scrape off
soil. Clean remaining soil with Cooktop
Cleaning Creme.
Gently scour with creme to remove as
muchaspossible.Reapplypaste,cover
with a damp cloth and let stand for 30
minutes. Scour with additional paste to
remove remaining stain. Rinse completely and dry.
Problem Solving Chart
PROBLEM CAUSE TO PREVENT
Tiny scratches
or abrasions
Metal-marking
Brown streaks
and specks
Areas of discoloration with a
metallic sheen
Coarseparticles(dust salt
and sand) between cookwarebottomand cooktop.
Incorrect cleaning materials. Sliding glassware or
metal across top or using
cookware with rough bottoms.
Sliding or scraping metal
utensils or oven racks
across cooktop.
Boilovers,incorrectcleaning materials, used soiled
cloth or sponge, soiled
cookware.
Mineraldeposits from water and foods.
Tinyscratchesarenotremovableand
do not affect cooking. In time, the
scratches will become smoother and
less visible. Be sure cookware bottoms and cooktop are clean before
use. Use cookware with a smooth,
non-scratching bottom. Do not slide
cookware across cooktop.
Donotslidemetalobjectacross cooktop. Clean immediately with Cooktop
Cleaning Creme.
Remove boiloversbefore reusing the
cooktop.Use a cleanclothorsponge.
Be sure cookware, especially bottoms, are clean and dry.
Use cookware with bottoms that are
clean and dry. Use correct heat setting to prevent boilovers.
°
Use a wooden spoon or a woodenhandled metal spatula to scrape boil-
Pittingor flaking.
over to a cooler area of the cooktop or
use several layers of dry paper towels
to wipe up spillover. If a paper towel is
used, be careful to avoid steam burns.
Turn element off. When cool, use a
single-edge razor blade to scrape off
soil. Clean with Cooktop Cleaning
CAUTION: Do not use top if the smoothtop is cracked or broken or if metal
melts onto cooktop. Call an authorized servicer. Do not attempt to repair the
cooktop yourself.
Creme, rinse and dry.
Sugary boilovers from
sugar syrups, candy,
jams, jellies, dessert
sauces, etc.
Use correct heat setting and large
enoughutensil. Watchcookingoperationtoprevent boilovers or spattering.
PAGE 7
Page 10

COOKTOP USE
Control Knobs
Yourcooktop isequipped withcontrolknobs that provide
an infinite choice of settings from LOW to HIGH. The
knob canbe set on or between any ofthe numbered settings.
To operate push in and turn the knob in eitherdirection
to the desired setting.
To remove knobsforcleaning, gentlypullforward. Wash
knobs in mild detergent and water. Do not use abrasive
cleaning agents as they will scratch the finish and remove markings. Rinse, dry and replace. Turn on each
element to be sure knobs have been replaced correctly.
Cooking Tips
To prevent damage to the range, backguard or utensil,
neveroperatesurface unitwithout apan inplace, never
allowa panto boil dry andnever operate anelementon
HIGH for extended periods of time.
Food will not cook any faster at a higher setting than
neededto maintain agentle boil.Water boilsat thesame
temperature whether boiling gently or vigorously. If a
high setting is used, excessive spattering will occur and
food may stick or burn onto the bottom of the pan.
Cookware
Cooking performance is greatly affected by the type of
cookware used. Proper cookware will reduce cooking
times, use less energy and produce more even cooking
results. For best results use a heavy gauge metal pan
with a smooth flat bottom and a tight fitting lid.
Cookware with uneven, warped, or grooved bottoms do
not make good contact with the heating surface, will reduce heat conductivity and result in slower, less even
heating.
Different types of cookware materials require different
heat settings for the same cooking operation. The chart
below is based on heavy gauge aluminum cookware.
Lower the heat setting if using a thinner gauge metal or
other materials.
Oversized cookware or cookware that rests across two
elements are not recommended as they may trap
enough heat to cause damage to the cooktop or elements. This is especially important when canning.
Do not use woks equipped with round metal rings. The
ring, whichis designedto support the wokabove the element, will trap heat and may damage the element and
the cooktop.
If ahigher heatsettingis used tobring liquidtoaboil orto
begincooking, always reduce toa lowersettingonceliq-
uid comes to a boil or food begins cooking. Never leave
food unattended during a cooking operation.
Fit the size of the cookware to the size of the element.
This conserves energy.
SUGGESTED HEAT SETTING GUIDE
HEAT SETTINGS
HIGH
Medium-High
7-9
Medium
4-6
Medium-Low
1-3
USES
To bring liquid to a boil, blanch, preheat skillet, or reach pressure in a pressure cooker.
Always reduce to a lower heat setting when liquids just begin to boil or foods begin to cook.
To brown or sear meat; heat oil for deepfat frying; scald; to saute or fry. Maintain fast boilfor
large amounts of liquids.
To maintain moderate to slow boil for large amounts of liquids.
To continue cooking uncovered foods and for most frying operations.
To continue cooking covered foods and to maintain pressure in most pressure cookers. Stew,
braise or steam operations. To maintain boil for small amounts of liquid, poach, steam or
simmer.
Canning
Use the HIGH setting just until water comes to a boilor
pressure is reached in the pressure canner. Then, re-
duce to the lowest heat setting that maintains the boil or
pressure. Prolonged use of the HIGH setting, or the use
of incorrect canning utensils produces excessive heat.
Excessive heat can cause permanent damage to the
porcelain cooktop, coil element and the drip bowl.
LOW
NOTE: Refer to cookware manufacturer’s recommendations for suggested heat settings. Some manufacturers donot
recommend the use of HIGH, or the use of HIGH for extended cooking operations.
To keep foods warm before serving. Melt chocolate.
PAGE 8
Page 11

OVEN USE
Oven Characteristics
Everyoven hasits owncharacteristics.You mayfindthat
the cooking times and temperatures you were accustomed to with your previous range may need to be altered slightly with your new range. It is normal to notice
some differences between this rangeand your previous
range.
Fan
Slide-in and drop-in ranges are equipped with a fan
whichautomaticallyturns onwhenevertheovenis setfor
a cooking or a cleaning operation. Thefan will automatically turn off when the unit has cooled.
Oven Racks
The two oven racks are designed with a lock-stop position to keep racks from coming completely out of the
oven. Do not attempt to change rack positions when the
oven is hot.
To remove: Besurerack iscool.Pull rackout tothelockstop position. Tilt the front end up and continue pulling
rack out of the oven.
To replace: Place rackon racksupports, tiltup andpush
toward rearof oven. Pull the rackout to the lock-stop position to besure rack iscorrectly replaced. Then return it
to its normal position.
It is important that air can circulate freely within the oven
and around the food. To help ensure this, place food in
the center of the oven rack. Allow two inches between
the edge of the utensil(s) and the oven walls. If cooking
on two racks, stagger the food to ensure proper airflow.
RACK POSITIONS:
5
4
3
2
1
Rack 5 (top ofoven) usedfor broilingthin non-fatty foods
such as fish.
Rack 4 used for two-rack baking or most broiling.
Rack 3 used for most one-rack baking of cookies and
biscuits on a cookie sheet.
Rack 2 used for baking cakes, bundt cakes or breads,
two-rack baking, roasting meats, or cooking larger
foods.
Rack 1 usedforroastingturkey, baking angelfoodcake,
pie shells, frozen pies, souffles or bread.
Use of Aluminum Foil
Do not cover entire rack with aluminum foil or place foil
directly under cookware. To catch spillovers, place a
piece of foil a little larger than thepan onthe rack below
the pan. Donot place aluminum foil across thebottom of
the oven.
For optimumbaking resultsof cakes, cookiesor biscuits,
use onerack. Position rack so food isin the center ofthe
oven. Use either rack position 3 or 2.
If cooking on two racks, use rack positions 4 and 2 for
cakes and rack positions 4 and 1 when using cookie
sheets. Never place two cookie sheets on one rack.
If roasting alarge turkey, place turkeyon rack 1 andside
dishes on rack 5.
Preheating
Preheating is necessary for conventional baking. Allow
about 10 to 15 minutes for the oven to preheat. It is not
necessary to preheat the oven for roasting.
Selecting a temperature higher than desired will NOT
preheat the oven anyfaster. Preheating at a higher temperature may affect baking results.
A single beep will indicate that the oven is preheated.
Door Lock Lever
The oven door is locked for self-clean operations only.
Do not move the door lock lever to the right or locked
position during acooking operation. If the door islocked,
the operation will automatically be cancelled and “door”
will appearin the display. If the ovenis hot enoughtoengage theinternal lock, the oven door willnot open.Allow
the oven to cool for up to an hour, then unlock and open
the door.
(continued on next page)
PAGE 9
Page 12

OVEN OPERATION
Basic Instructions
1. Position oven racks.
2. Press OVEN TEMP pad.
3. Turn SET knob to desired temperature.
To set oven for baking or roasting:
1. Press OVEN TEMP pad.
S 000° and BAKE indicator words will appear in the
display.
S The display will return to the current time of day if
the oven temperature is not entered within 30 seconds.
2. Toenter theoventemperature, turn theSET knobuntil the desired temperature is displayed.
S 350° will appear in the display when the SET knob
is turned one click in either direction. The temperature can be set from 170 to 550°.
S The oven willturnon within a fewseconds. TheON
indicator word and 75° or the actual oven temperature, whichever is higher, will appearin the display.
S The temperature inthedisplay willincreasein 5° in-
crements untiltheoven reaches thepresettemperature. A single beep will signal that theoven is preheated. Allow 10 to 15 minutes for the oven to preheat.
3. Place food in the oven. Check food at the minimum
cooking time. Cook longer if needed.
4. At the end of cooking, remove food and press the
STOP/CLEAR pad to cancel the operation. The current time of day will reappear in the display.
Automatic Oven Cooking Feature
The Automatic OvenCooking feature is used to turn the
oven on and off at a preset time of day. This feature can
beusedforaconventionalcook oraself-cleanoperation.
See page17 for instructions on delayinga self-clean operation.
TheAutomaticOvenCookingfeaturewill notoperateunless the clock isfunctioning and isset at the correct time
of day.
Highly perishable foods such as dairy products, pork,
poultry, stuffing, seafoods, or baked goods are not recommended for delay start cooking. If cooking more than
one food, select foods that cook for the same length of
time and at the same oven temperature.
Basic Instructions
Example: Food is to cook for 2 hours and 30 minutes
(2:30) at an oven temperature of 350°F. You wish the
food to be cooked by 6 o’clock (6:00).
1. Press COOK TIME pad.
2. Turn SET knob until 2:30 (2hours and 30 minutes)
is displayed.
3. Press STOP TIME pad.
4. Turn SET knob until 6:00 (6 o’clock) is displayed.
5. Press OVEN TEMP pad.
6. Turn SET knob until 350° is displayed.
7. PressCLOCKpadand timeof dayreappears inthe
display.
Theovenwill turnonat 3:30;will cookthe foodfor 21/2
hours at 350°F, andwill automatically turn off at6:00.
NOTE: If you wish cooking to begin immediately, omit
steps 3 and 4.
To recall the preset temperature during preheat, press
the OVEN TEMP pad.
To change the preset temperature, turn the SET knob
until the desired temperature is displayed.
The oven will automatically turn off if it is left on for 12
hours.
PAGE
10
(continued on next page)
Page 13

To set oven for immediate start:
1. Press COOK TIME pad.
To set oven for delayed start:
1. Press COOK TIME pad.
S 0 HR:00 will appear inthe display and SET COOK
TIME will flash in the display.
2. Turn the SET knob to enter the cooking time.
S 0 HR:00 will appear inthe display and SET COOK
TIME will flash in the display.
2. Turn the SET knob to enter the cooking time.
S The display willshow cookingtime inHOURS:MIN-
UTES. Cooking time can be set from 10 minutes
(0:10) up to 11 hours and 55 minutes (11:55).
S If you delay in entering the cooking time, the pro-
gram will automatically cancel and the time of day
will reappear in the display.
S If you set the cooking time but delay in enteringthe
oventemperature,beeps willsoundand thedisplay
will flash SET BAKE and 000°.
3. Press OVEN TEMP pad.
4. Enter oven temperature with the SET knob.
S If you press the OVEN TEMP pad but delay in en-
tering thetemperature, the program willcanceland
the display will return to the time of day.
5. Press CLOCK pad and the time of day will reappear
in the display. TIMED BAKE ON indicator words will
remain in the display to show that the oven has been
set for Automatic Oven Cooking.
6. After a few seconds, the oven will turn on and the display will begin to count down.
7. Atthe endof the presetcookingtime, theoven will automatically turn off,
and3 beepswill signalthe endofcooking.Continuous
beeps will prompt you to remove food from the oven.
8. PressSTOP/CLEAR tocancel thebeeps and remove
food from the oven.
“End” will appear in the display
S The display willshow cookingtime inHOURS:MIN-
UTES. Cooking time can be set from 10 minutes
(0:10) up to 11 hours and 55 minutes (11:55).
3. Press STOP TIME pad.
S SET STOP TIME will flash in the display.
4. Turn the SET knob to enter the stop time.
S If you delay in entering the stop time, beeps will
sound and the display will flash SET BAKE and
000°.
5. Press OVEN TEMP pad.
6. Enter oven temperature with the SET knob.
7. Press CLOCK padtoreturn thecurrent timeof day to
the display. DELAY BAKE and the preset oven temperature will appear in the display to show that the
ovenhas beenset fora delaystart cookingoperation.
8. The oven willautomatically turn on atthe preset time
and TIMED BAKE ON will appear to indicate that the
food is cooking.
9. The ovenwillautomatically turn off at the preset stop
“End”will appearin thedisplay andcontinuous
time.
beeps will signal the end of cooking.
10.Press STOP/CLEAR to cancel the beeps and re-
move food from the oven.
Additional Information
If you delay more than 30seconds between touching a
pad and turning the SET knob,the display will either return to the previous setting or the time of day will reappear and the program will cancel.
To recall thepresetstoptimeorcooktime,justpress
the corresponding pad.
To reset or cancel the program, press the STOP/
CLEAR pad.
At the end of the cooking operation, continuous beeps
will sound until the STOP/CLEAR pad is pressed.
PAGE 11
Page 14

Baking Tips
Useareliablerecipeand accurately measure fresh in-
gredients. Carefully follow directionsfor oventemper-
ature and cooking time. Preheat oven if recommended.
Use the correct rack position. Baking results may be
affected if the wrong rack is used.
* Top browning may be darker if food is located
toward the top of the oven.
* Bottom browning may be darker if food is located
toward the bottom of the oven.
* When using two racks for baking, allow enough
space between the racks for proper air circulation.
Browning and cooking results will be affected if air
flow is blocked.
Cookware material plays animportantpart inbaking results. Always use the type and size of pan called for in
the recipe. Cooking times or cooking results may be affected if the wrong size is used.
* Shiny metal pan reflects heat away from the food,
produces lighter browning and a softer crust. Use
shiny pans for baking cakes or cookies. For optimum baking results, bake cookies and biscuits on
a flat cookie sheet. If the pan has sides, such as a
jelly roll pan, browning may not be even.
and acrisper crust. Use this typeof pan for pies,pie
crusts or bread.
* Ifusingoven-proof glassware,ordark pans such
as Baker’s Secret reduce theoven temperature by
25°F except when baking pies or bread. Use the
same baking time as called for in the recipe.
Allow hot air to flow freely through the oven for optimum baking results. Improper placement of pans in the
oven will block air flow and may resultin unevenbrowning. For optimum browning and even cooking results:
* Do not crowd a rack with pans. Never place more
than one cookie sheet, one 13x9x2-inch cake pan
or two 9-inch round cake pans on one rack.
* Stagger pans when baking ontwo rackssoone pan
is not directly over another pan.
* Allow two inches between the pan and the oven
walls.
Check the cooking progress at the minimum time
recommended in the recipe. If necessary, continue
checking at intervals until the food is done. If the oven
door isopened too frequently, heat willescape theoven;
this can affect baking results and wastes energy.
* Dark metal pan or a pan with an anodized (dull)
bottom absorbs heat, produces darker browning
Roasting Tips
Roasting is the method for cooking large, tender cuts of
meat uncovered, without adding moisture. Most meats
are roasted at 325°F. It is not necessary to preheat the
oven. Place the roasting pan on either of the two lowest
rack positions.
Use tender cuts of meatweighing three pounds ormore.
Somegood choices are: Beef rib, ribeye, top round,high
quality tip and rump roast, pork loin roast, leg of lamb,
veal shoulder roast and cured or smoked hams.
Season meat, if desired, either before or after roasting.
Rubinto the surface ofthe roast ifadded before cooking.
Placethe meatfat-side-upona rackin ashallowroasting
pan. Placing the meat on a rack holds it out of the drippings,thus allowingbetter heatcirculationfor evencook-
If you add additional ingredients or alter the recipe,
expect cooking times to increase or decrease slightly.
ing. As the fat on top of the roast melts, the meat is
bastednaturally, eliminatingthe needfor additionalbasting.
Thecooking timeisdeterminedby theweight of themeat
and the desired doneness. For more accurate results,
use ameat thermometer. Insert it sothe tipis in the center of the thickest part of the meat. It should not touchfat
or bone.
Remove the roast fromthe oven when the thermometer
registers approximately 5°F below the doneness
wanted. As the meat stands, the temperature will rise.
NOTE: For more information on cooking meat
and poultry, contact the USDA Meat & Poultry
Hotline at 1-800-535-4555.
PAGE
12
Page 15

Common Baking Problems And Why They Happen
PROBLEM
Cakes are uneven.
Cake high in middle.
Cake falls.
Cakes, cookies, biscuits
don’t brown evenly.
Foroptimumresults,bakeononerack.Ifbakingcakeson
tworacks,place pans towardfrontof oven on upper rack
and pans toward back of oven on lower rack.
CAUSE
Pans too close or touching
each other or oven walls.
Batteruneven in pans.
Temperatureset too low or
baking timetoo short.
Oven not level.
Undermixing.
Too much liquid.
Temperatureset too high.
Baking timetoo long.
Overmixing.
Too much flour.
Pans touching each other or
oven walls.
Incorrectrack position.
Too much shorteningor sugar.
Too much or too little liquid.
Temperatureset too low.
Old or too little baking powder.
Pan too small.
Oven door opened frequently.
Added incorrecttype of oil to
cake mix.
Added additionalingredients
to cake mix or recipe.
Incorrectrack position.
Oven door not closed properly.
Door gasket not sealing
properly.
Incorrectuse of aluminum foil.
Oven not preheated.
Pans darkened, dented or
warped.
PROBLEM
Cakes don’t brown on top.
Excessive shrinkage.
Uneven texture.
Cakes have tunnels.
Cakes crack on top.
Cake not done in middle.
CAUSE
Incorrectrack position.
Temperatureset too low.
Overmixing.
Too much liquid.
Pansizetoolargeortoolittle
batter in pan.
Oven door opened too often.
Too little leavening.
Overmixing.
Pan too large.
Temperatureset too high.
Baking timetoo long.
Pans too close to each other
or oven walls.
Too much liquid.
Undermixing.
Temperatureset too low.
Baking time too short.
Not enough shortening.
Too much baking powder.
Overmixingor at too high a
speed.
Temperatureset too high.
Batter overmixed.
Temperatureset too high.
Too much leavening.
Incorrectrack position.
Temperatureset too high.
Pan too small.
Baking time too short.
Cakes, cookies, biscuits too
brown on bottom.
Follow cookware manufacturer’s instructions for oven
temperature. Glassware and dark cookware such as
Ecko’sBaker’s Secret require lowering the oven temperature by 25
° F.
Oven not preheated.
Pans touching each other or
oven walls.
Incorrectrack position.
Incorrectuse of aluminum foil.
Placed 2 cookie sheets on one
rack.
Used glass, dark, stained,
warped or dull finish metal
pans. (Use a shiny cookie
sheet.)
Ifadditionalingredients were added to mix or recipe,expect cooking time to increase.
Pie crust edges too brown.
Pies don’t brown on bottom.
Pies have soaked crust.
Temperatureset too high.
Pans touching each other or
oven walls.
Edges of crust too thin.
Used shiny metalpans.
Temperatureset too low.
Incorrectrack position.
Temperaturetoo low at start
of baking.
Filling too juicy.
Used shiny metalpans.
PAGE 13
Page 16

Broiling
Broiling is a method of cooking tender meats by direct
heat. Thecooking time isdeterminedby the distancebetweenthe meatandthe broilelement, thedesired degree
of doneness and the thickness of the meat.
Broiling Tips:
Broilingrequires theuseof thebroiler panand insert.The
broiler insert must be in place to allow fat and liquid to
drain to the pan below to prevent spatters, smoke and
flare-ups. Improper use may cause grease fires.
Do not cover the broiler insert with aluminum foil as this
prevents fat from draining into pan below. For easier
clean up, thebroiler pancan be lined with foil and spray
the insert with a non-stick vegetable spray.
Remove excess fat and slash remaining fat to help keep
meat from curling. This also reduces smoking and spattering.
Placeovenrack inthecorrect rackpositionwhen oven is
cool. For darker browning, place meat closer to the broil
element. Place meat further down if you wish meat to be
well done or if excessive smoking and flaring occurs.
SeeCare andCleaning Chart onpage 18for instructions
on cleaning the broiler pan and insert.
To set oven to broil:
1. Press BROIL pad.
000° and BROIL indicator words will appear in the
display.
2. Turn SET knob clockwise to select HI for normal
broilingor counter clockwise toselect Lofor lowtemperature broiling.
3. Foroptimumresults, removebroilerpan andpreheat
broil element 3 to 5 minutes.
4. Broilwiththeoven dooropenedtothe broilstopposition (opened about6-inches). Turn meat once about
half way through cooking. Check for doneness by
cutting a slit in the meat near the center for desired
color.
5. Atthe endof cooking, pressSTOP/CLEAR tocancel
the broil operation. The current time of day will reappear in the display.
Use HI BROIL for most broil operations. Select Lo
BROIL when broiling longercooking foods suchas poultry. Thelower temperature allowsfood tocook tothewell
done stage without excessive browning. Cooking time
may increase if Lo BROIL is selected.
Broil times may needto beincreased if rangeis installed
on a 208-volt circuit.
Broiling Chart
TOTAL TIME
TYPE OF MEAT RACK POSITION* DONENESS (MINUTES)**
BACON #4 Well Done 6 to 10
BEEF STEAKS
1-inch thick #4 Rare 10 to 14
1 1/2-inch thick #4 Rare 18 to 20
CHICKEN LO BROIL
Whole, split #3 Well Done 45 to 60
Pieces #3 Well Done 30 to 45
FISH STEAK OR FILLET
1/2-inch thick #4 Flaky 10 to 12
GROUND BEEF PATTIES
3/4 to 1-inch thick #4 Rare 10 to 13
HAM SLICE, precooked
1-inch thick #4 12 to 16
1 1/2-inchthick #4 21 to 26
LAMB CHOPS
1-inch thick #4 Medium 12 to 15
1 1/2-inchthick #3 Medium 15 to 19
PORK CHOPS
3/4-inch thick #4 Well Done 15 to 20
1-inch thick #4 WellDone 20 to 25
* The bottom rack positionis position #1.
** Times are approximate and may vary depending on the meat.
#4 Medium 15 to 18
#4 Well Done 19 to 22
#4 Medium 22 to 24
#3 Well Done 25 to 30
Medium 12 to 15
Well Done 15 to 18
Well Done 16 to 20
Well Done 25 to 30
PAGE
14
Page 17

MAINTENANCE
Cooktop Light, If equipped
Before replacing the cooktop light bulb, DISCONNECT
POWER TO RANGE. Be sure the bulb is cool. Do not
toucha hotbulbwith adamp clothas thebulb maybreak.
To turn on cooktop light: Pressand hold rockerswitch
untilthelight turns on.Theoven light switchis located on
thebackguard forfreestandingranges andon thecontrol
panel for slide-in or drop-in ranges.
To replace cooktop light: Grasp the top trim of the
backguard with your thumbs under the front edge and
pull outward while lifting to release trim from catches at
each end.
Remove fluorescent tube and replace with an 18 watt
fluorescent tube. Snap top trim back into place and restore power. Reset the clock.
Oven Light
To turn on the oven light, push the rocker switch located
on the backguard or on the control panel.
To replace oven light: Be sure bulb is cool. Do not
toucha hotbulbwith adamp clothas thebulb maybreak.
Use a dry potholder, toprevent possible harm to hands,
and very carefully unscrew bulb cover and bulb.
Do not attempt to open or close door until the door is
completely seated on the hinge arms. Neverturn on the
oven unless door is properly in place. When baking, be
sure the dooris completely closed. Baking results willbe
affected if the door is not securely closed.
To remove lift-off door: Openthedoor to the “stop” position (opened about 6 inches) and grasp the door with
bothhands ateachside. Donotuse thedoor handleto lift
the door. Lift up evenly until the door clears the hinge
arms.
CAUTION: Hingearmsare springmountedand willslam
shut against the range if accidently hit. Never place
hand or fingers between the hinges and the front
oven frame. You could be injured if hinge snaps back.
To replace door: Grasp the door at each side, align
slots in the door with the hinge arms and slide the door
down onto the hinge arms until completely seated on
hinges.
Storage Drawer
Thestoragedrawerat thebottomof therangeis safeand
convenient for storing metal and glass cookware. DO
NOT store plastic, paperware, food or flammable material inthis drawer. Remove drawer toclean under range.
To remove: Empty drawer then pull drawer out to the
first stop position. Lift up front of drawer and pull to the
second stop position. Grasp sides and lift up and out to
remove drawer.
To replace: Fit the ends of the drawer glides onto the
rails. Lift up drawer front and gently push in to first stop
position. Lift up drawer again and continue to slide
drawer to the closed position.
Replace with a 40 watt appliance bulb. Replace bulb
cover and reconnect power to range. Reset clock.
Oven Door
Do not place excessive weight on an open oven door or
stand on anopen oven door as, in some cases, it could
causetherange to tip over, breakthe door or causeserious injury to the user.
When opening the oven door, allowsteam and hot air to
escape before reaching inoven to check, add orremove
food.
Leveling Legs
Some floors are not level.
For proper baking, your
range must be level. Levelinglegsare locatedoneach
corner of the base of the
range. Level by turning the
legs.
To prevent range from accidently tipping, range should
be secured to the floor by sliding a rear leveling leginto
the anti-tip bracket supplied with the range.
PAGE 15
Page 18

SELF-CLEAN OVEN
The self-clean oven uses temperatures above normal
cookingtemperatures toautomatically cleanthe oveninterior.
Basic Instructions
1. Close oven door.
It is normal for the cooktop of the range to become hot
during a clean cycle. Therefore, during a clean cycle,
avoid touching thecooktop or oven vent area located at
thebase ofthe backguardon smoothtopcooktopsandat
the right rear element for coil cooktops. Avoid contact
with the oven door and window as these areas also become warm during a self-clean cycle.
It is better to clean the oven regularly rather than to wait
until there is a heavy build-up of soil in the oven.
NOTE: On Canadian models only, the smoothtop surface units willNOT operate during a clean cycle. This is
normal.
Before Self-Cleaning
Remove all pans and the oven
racks from the oven. The racks
will discolor and may not slide
easily after a clean cycle.
Turnoff oven lightbeforeclean cycle.
The life of the bulb may be shortened
if left on during the clean cycle.
Clean oven frame, door frame and
aroundthe ovenventwith anon-abrasive cleaning agent such as Bon Ami
or soap and water. These areas are
not exposed to cleaning temperatures and should be cleaned to prevent soil from baking on during the
clean cycle.
Wipe up excess grease or spillovers
from the oven bottom to prevent excessive smoking and flare-ups during
the clean cycle.
Wipe up acid spillovers such as lemon juice, tomato sauce or milk-based
sauces and sugary spillovers. Porcelain enamel is acid resistant, not acid
proof. The porcelain finish may discolorif acid spillsare not wiped upimmediately.
Do not use oven cleanersor ovenliner protective coatings of any kind on
the self-clean oven finish or around
any part of the oven.
To prevent damage, do not clean or
rub the gasket aroundthe oven door.
Thegasket isdesigned to sealin heat
during the clean cycle.
During Self-Cleaning
When the CLEAN padis pressed and
the door is locked, the oven will automatically begin to heat to cleaning
temperatures.
As the oven reaches cleaning temperatures, the LOCK indicator will
turn on to show that an internal lock
mechanism has engaged. At this
point,theovendoor cannot belocked
and opened.
To prevent damage to the door and
lock lever, do not forcethe door open
when the LOCK indicator is displayed.
Thefirstfewtimestheovenis
cleaned, some smoke and odor may
be detected. This is normal and will
reduce or disappear with use. If the
oven is heavily soiled, orif the broiler
pan is left in the oven, smoke and
odor may occur.
Asthe ovenheats andcools, youmay
hearsounds ofmetal parts expanding
and contracting. This is normal and
will not damage your appliance.
2. Move the door lock lever to the right or locked
position.
3. Press CLEAN pad.
4. Turn SET knob to select cleaning time.
S Light soil - 2 hours
S Average soil - 3 hours
S Heavy soil - 4 hours
After Self-Cleaning
About one hour after the end of the
clean cycle, the internal lock will disengage and the LOCK indicator will
turn off. At this point, thedoor canbe
unlocked and opened. Move the door
lock lever to the left or unlocked position and open the door.
Some soil may leave a light gray,
powdery ash which can be removed
witha damp cloth.If soilremains,it indicates that the clean cycle was not
longenough. The soilwill beremoved
during the next clean cycle.
Iftheovenracksdonotslidesmoothly
after a clean cycle, wipe racks and
embossed rack supports with a small
amount of vegetable oil to restore
ease of movement.
On smoothtop cooktops: Clean
around the vent opening at the base
of the backguard if there is a deposit
from the fumes vented during the
clean cycle. Use soap and water and
a cloth or non-abrasive pad.
Fine, hair-like lines may appearin the
oven interior or oven door. This is a
normal condition resulting from heatingand cooling ofthe porcelain finish.
These lines do not affect the performance of the oven.
PAGE
16
Page 19

To set oven for a self-clean cycle:
1. Remove oven racks and close the oven door.
To delay the start of a clean cycle:
1. Remove oven racks and close the oven door.
2. Move the door lock lever to the right or locked position.
3. Press the CLEAN pad.
S 3 HR:00will appearin thedisplay, andSETCLEAN
TIME will flash in the display. After a few seconds
delay, the oven will automatically turn on. CLEAN
and ON will appear in the display.
S If you wish to change the cleaning time, press the
CLEAN pad and turn the SET knob to select 2
hours for light soil or 4 hours for heavy soil.
S “door” will appear in the display and continous
beeps will sound if the oven door is not locked.
S If thedoor is notlocked or the clean time is not en-
tered within 30 seconds of pressing the CLEAN
pad, the program will automatically be cancelled.
4. Press CLOCK pad and the current time of day will
reappearin the display.CLEANand ONwillremainin
the display to show that the oven is in a clean cycle.
About one hour after the clean cycle ends, the LOCK indicator will turn off and the oven door can be opened.
The oven doorand door lock lever will bedamaged if the
oven door is forced to openwhen the LOCK indicator is
still displayed.
2. Move the door lock lever to the right or locked position.
3. Press CLEAN pad.
4. Turn SET knob to select cleaning time.
5. Press STOP TIME padandturnSET knobto thetime
ofday youwishthe ovento turnoff. Thestop timeand
CLEAN DELAY STOP TIME will appear in the display.
6. Press CLOCK pad and the current time of day will
reappearin the display.CLEANDELAY willappear in
the display to show that the oven is set for a delayed
clean operation.
7. At the end of a clean cycle, continuous beeps will
sound. Press STOP/CLEAR to cancel the beeps.
To cancel clean cycle:
1. Push STOP/CLEAR pad.
2. If the LOCK indicator is displayed, allow oven to cool
up to one hour. Once LOCK indicator turns off, the
door can be unlocked and opened.
If the LOCK indicator is not displayed the oven door
can be unlocked and opened.
PAGE 17
Page 20

CARE AND CLEANING CHART
Many different cleaning agents are recommended for the various parts of the range. The following brands may help
you to make an appropriate selection: Mild abrasive cleaners (Bon Ami, Cameo, Soft Scrub, Comet or Ajax); mild
liquid sprays (Fantastik, Formula 409); glass cleaners (Windex, Glass Plus, Cinch); non-abrasive scouring pad
(Tuffy).If acleaningproductisrecommendedfor useonplastic,glass orporcelain, itcanbeusedonthesameappliance
finish.
PARTS
Broiler pan & insert
Baked enamel:
Side panels
Backguard
Oven door
Storage drawer
Glass:
Oven window
See pages 6 and
7 for smoothtop
instructions
Metal finishes
and trim
CLEANING AGENTS DIRECTIONS
Soap & water. Plastic
scouring pad. Soap
filled scouring pad.
Dishwasher.
Soap & water. Paste of
baking soda & water.
Glass cleaner.
Soap & water. Paste
of baking soda & water. Glass cleaner.
Soap & water. Paste of
baking soda & water.
Removefrom ovenafter use. Coolthen pour off grease. Placesoapy
clothover insertand pan;let soakto loosensoil. Washin warmsoapy
water. Use soap filled scouring pad to remove stubborn soil. Broiler
pan and insert can be cleaned in the dishwasher.
Use adry paper towel or cloth to wipe upspills, especially acid spills,
as soon as they occur. (This is especially important for white surfaces.) When surface is cool, washwith soap and water. Do notuse
abrasive or harsh cleaning liquids and powders or oven cleaners.
Thesewill scratchandpermanentlydamage thefinish. Drywitha soft
cloth. On smoothtop cooktops, clean vent opening area after each
oven use.
Wash with soap and water. Remove stubborn soil with paste of baking soda and water. Do not use abrasive materials such as scouring
pads, steel wool or powdered cleaning agents. They will damage
glass.Rinse withclearwateranddry.Topreventstainingof ovenwindow,never useexcessive amountsof waterwhichmayseepunderor
behind glass.
Wash with soap and water. Remove stubborn soil with paste of baking soda and water. Do not use oven cleaners, abrasive or caustic
agents. They will damage the finish.
Be sure all parts are cool before cleaning.
Be sure all parts are properly replaced after cleaning.
Oven and Coil
Elements
Oven racks Soap & water. Cleans-
ing powders. Soap
filled scouring pad.
Plastic finishes:
Door handle, trim,
knobs, end caps,
control panel
Porcelain enamel:
Cooktop trim
Cooktop,
coil models.
See pages 16 and
17 for self-clean
oven.
Soap & water. Paste of
baking soda & water.
Non abrasive plastic
pad or sponge.
Mild liquid cleaners,
detergent or soap &
water. Cleansing powders and non abrasive
nylon or plastic pads.
Elements are self-cleaning. Soil will burn off as elements are used.
Donot sprayoven cleaneron elements,electrical hookupor connection. Do not immerse coil-type surface elements in water.
Cleanwithsoapywater. Removestubborn soilwithcleansingpowder
or soap filled scouring pad. Rinse and dry. Racks will permanently
discolor if left in the oven during a self-clean operation.
Do not use oven cleaner, powder or liquid cleansers, abrasive or
caustic cleaning agents on plastic finishes. These cleaning agents
will scratch or marr finish. To prevent staining or discoloration, wipe
up fat, grease or acid(tomato, lemon, vinegar, milk, fruit juice, marinade) immediately with a dry paper towel or cloth. When surface is
cool, clean with soap and water; rinse, and dry.
Porcelain enamel is glass fused on metal. It may crack or chip with
misuse. Porcelain enamel is acid resistant, not acid proof. All spillovers, especially acid or sugar spillovers, should be wiped up immediately with a dry cloth. Surface may discolor or dull if soil, especially acid soil, is not removed. Never wipe off a warm or hot surface
with adampcloth. This may causecracking andchipping. Never use
oven cleaners, abrasive or caustic cleaning agents on exterior finish
of range or in the self-clean oven.
PAGE
18
Page 21

BEFORE YOU CALL FOR SERVICE
Check these points if . . .
Part or all of your electric range does not operate
S Is the range pluglooseor disconnectedfrom theelec-
trical outlet?
S Are anyhousefusesblownorcircuitbreakerstripped?
S Has the power supply to the home been interrupted?
S Are the oven controls properly set?
S Was the electronic control correctly set?
S Was thedoorleftinthelockedpositionfollowingaself-
clean cycle?
S Is the oven set for automatic oven cooking?
S ON CANADIAN MODELS ONLY: Check to see if a
fuse has blown (See page 20).
Surface elements fail to turn on or heat the food
properly.
S Is the range plug loose or disconnect from the electri-
cal outlet?
S If the range has coil elements, are they properly
plugged into the receptacles?
S Were appropriate utensils used? (See Cookware or
Cooking Tips Sections)
S Are the surface element controls properly set?
S Is voltage to the house reduced?
S CANADIAN MODELS ONLY: The smoothtop cook-
top willnot operate duringa self-clean operation. This
is normal.
Baking results differ from previous oven
S Oven thermostat calibration may differ between old
and new oven. The newer oven thermostat may be
more accurate than the one on you previous oven.
Followa reliable recipe andreview baking information
onpages12 to13.Ifyoustillfeel theoventemperature
is incorrect see page 20 for information on adjusting
the oven thermostat.
Food does not broil correctly
S Was the control set properly for broiling? (See page
14).
S Was the proper rack position used? (See page 14).
S Did you allow time for the broil element to preheat?
S Did you use the broiler pan that came with the range?
S Was aluminum foil used on the broiler insert, blocking
the slits for fat drainage?
Oven light does not operate
S Is the bulb loose or burned out?
S Is the light switch in the On position?
Oven will not self-clean
S Is the self-clean control set properly? (See pages
16-17).
S Is the oven set for a delayed clean operation?
S Is the oven door properly locked?
S Was the oven heavily soiled?
Food not baking or cooking correctly
S Are the oven racks properly placed for baking?
S Have you used aluminum foil correctly?
S Was the oven preheated as recommended?
S Are the controls properly set?
S Is there 1 to 2 inches of space between pans andthe
oven walls? Are the range and oven racks level?
S Was good cookware/bakeware of the proper size
used?
S Was the oven vent covered or blocked on the range
surface?
S Are you using a tested recipe from a reliable source?
Oven door will not unlock
S Has the self-clean cycle been completed for at least
one hour?
S Was the door correctly unlocked?
“F” plus a number appears in the display
S This is a fault code. If a fault code appears in the dis-
play anda continuous beep sounds, press the STOP/
CLEAR pad. See page 20 for additional information.
PAGE 19
Page 22

SERVICE INFORMATION
Explanation Of Fault Codes
Your appliance is equipped with an electronic control
featuring built-in, self-diagnostic software. This software
continuously monitors the control to insure safe and
proper operation. If the software should detect a questionablesituation, aFAULTCODE(F plus anumber)will
appear in the display and continuous beeps may sound.
A fault code indicates that there may be a functional error. As a safety precaution, thecontrol will automatically
cancel the program.
During Normal Oven Cooking
If a fault code appears in the display and continuous
beeps sound, press the STOP/CLEAR pad. Then,
reprogram the cooking operation.
If the fault code reappears in the display, call anauthorized servicer. Do not use the oven until the control has
been serviced. The cooktop can be used.
Adjusting Oven Temperature
Your new appliance has been factory tested for oven
temperature accuracy. Even though your range has
been tested, you may find that the cooking results with
your new oven are different from your previous oven.
If you have carefully followed the recipe, reviewed the
bakingtips onpage12and stillfeelcookingresults donot
meetyour expectations, youcanadjust theoven temperature. DO NOT ADJUST THE TEMPERATURE if only
one or two items are not baking properly.
If you think the oven should be hotter orcooler, you can
adjust it yourself. To decide how much to change the
thermostat,set theoventemperature 25°Fhigher orlower than the temperature in your recipe, then bake. The
results of the “test” should give you anidea of how much
to adjust the thermostat.
To adjust the thermostat:
1. Press OVEN TEMP pad.
2. Turn SET knob until 550° is displayed.
3. Press and hold the OVEN TEMP pad for several seconds until 00° appears in the display.
S If 00° does not appear in the display, press the
STOP/CLEAR pad and begin again.
During A Self-Clean Cycle
If theoven isheavilysoiled, excessivesmoke andflaring
mayresult inafault code.If this occurs,presstheSTOP/
CLEARpad andallow the ovento coolforan hour.Then,
reprogram the oven for the clean cycle.
If the fault code reappears in the display, call anauthorized servicer. Do not use the oven until the control has
been serviced. The cooktop can be used.
Fuses (Canadian Ranges Only)
Your range is equipped with seven (7) type “P” fuses.
The fuses are located on the back wall of the range. Remove the storage drawer for access to the fuses.
LOCATION OF
7 FUSES
S If the oven temperature was previously adjusted,
the change will be displayed. For example, if the
temperature was reduced by 15°,-15° will be dis-
played.
4. Turn the SET knob to select the temperature change
desired.
S The oven temperature can be increased up to 35°
or reduced by as much as 35° (-35°)in5° incre-
ments.
S NOTE: If you delay in selecting a temperature, the
program will automatically cancel and 00° will disappear. Begin again if the program cancels.
5. Press the STOP/CLEAR pad and the time of day will
reappear inthe display. The ovenwill now bake at the
adjusted temperature.
It is not necessary to readjust the oven temperature if
there is a power interruption. This adjustment willnot
affect broil or clean temperatures.
If part of your range does not operate, check to see if a
fuse hasblown. Agap inthe fusestrip oradarkenedwindow indicates a blown fuse. Replace with the same type
and amperage type “P” fuse.
PAGE
20
Page 23

SERVICE INFORMATION
Do not attempt to service the appliance yourself unless directed to do so in this book. Contact the
dealer who sold you the appliance for service.
How To Obtain Service
If your appliance should require service or replacement
parts, contact your Dealer or Authorized Servicer. Use
only genuine factory parts if replacement parts arenecessary. Consult the Yellow Pages in your telephone directory underappliance fortheauthorized service center
nearest you.Be sure toinclude your name,address,and
phone number, alongwiththe model and serialnumbers
of the appliance. (See inside front cover for location of
your model and serial numbers.)
If you are not satisfied with the local response to your
service requirements, call or write Maytag Customer
Service, 240 Edwards Street, S.E., Cleveland, TN
37311, (615) 472-3500. Include or have available the
complete modeland serialnumbers ofthe appliance,the
name and address of the dealer from whom you purchased the appliance, the date of purchase and details
concerning your problem.
If you do not receive satisfactory service, you may contact the Major ApplianceConsumer Action Panel by letter including your name, address, and telephone number, aswell asthe modeland serial numbersof theappliance.
Major Appliance Consumer Action Panel
20 North Wacker Drive
Chicago, IL 60606
MACAP (Major Appliance Consumer ActionPanel) isan
independent agency sponsored by three trade associations as a court of appeals on consumer complaints
which have not been resolved satisfactorily within a reasonable period of time.
PAGE 21
Page 24

COOKING APPLIANCE
ONE YEAR - FULL WARRANTY
Maytag Customer Service will repair or replace, without charge, any part of your appliance whichhas adefect inmaterial
or workmanship during the first year after the date of theoriginal installation. This warranty extends to any owner during
the one year warranty period when the appliance is located in the United States or Canada.
ADDITIONAL FOUR YEAR - LIMITED WARRANTY
For an additional four year period beyond the first year of the FULL warranty coverage:
- Maytag Customer Servicewill replace, atno charge, anysmoothtop heatingelement, soliddisc heating element, or gas sealed surface burner which fails to heat as a result of defective workmanship or materials.
- Maytag Customer Servicewill replace,at nocharge, anysmoothtop cookingsurface whichcracksor breaks
during the normal household cooking.
These parts must be installed by anauthorized servicer. Any labor charge required for replacement isNOT covered by
this limited warranty. This warranty extends to any owner during the additional four year warranty period when the appliance is located in the United States or Canada.
WHAT IS NOT COVERED BY THESE TWO WARRANTIES:
1. Conditions and damages resulting from any of the following:
a. Improper installation, delivery, or maintenance.
b. Any repair, modification, alteration or adjustment not
authorized by Maytag Customer Service, or an au-
thorized servicer.
c. Misuse, abuse, accidents or unreasonable use.
d. Incorrect electrical current, voltage or supply.
e. Improper setting of any control.
2. Warranties are void if the original serial numbers have
beenremoved, altered,or cannotbe readilydetermined.
3. Light bulbs.
4. Products purchased for commercial or industrial use.
5. The cost of service or service call to:
a. Correct installation errors.
b. Instruct theconsumer on the proper useof the prod-
uct.
c. Transport the appliance to a servicer.
6. CONSEQUENTIAL OR INCIDENTAL DAMAGES
SUSTAINED BY ANY PERSON AS A RESULT OF
ANY BREACH OF THESE WARRANTIES. Some
states do not allow the exclusion or limitation of consequential or incidental damages, so the above exclusion
may not apply to you.
HOW TO RECEIVE WARRANTY SERVICE
1. Contact the dealer from whom you purchased the appliance or any authorized servicer to receive
warranty service under these warranties.
2. Should you not receive satisfactory warranty service from your local servicer, contact:
Maytag Customer Service
240 Edwards Street, S.E.
Cleveland, TN 37311
(615) 472-3500
3. Have the following information available when requesting warranty service:
- Your name and address.
- The model and serial numbers of your appliance.
- The name and address of your dealer or servicer.
- The purchase date of your appliance.
- A clear description of the problem.
The two warranties described above are the only written or expressed warranties given by Maytag Customer Service. No one is authorized to increase,
alter,orenlarge MaytagCustomer Service’s responsibilities orobligations underthese twowarranties. Thesetwo warranties give youspecific legalrights,
and you may also have other rights which vary from state to state.
(12/93)
 Loading...