

Page 1

ABOUTYOURNEW ABOUTTHISBOOKLET:
The features covered in this
COOKINGAPPLIANCE book,etareforsevera,model
Congratulations on your choice of and the way we cook. it is therefore ranges. You may find informa-
this cooking appliance! As you use very important to understand how tion pertaining to features that
your new appliance we know that you your new appliance operates before arenot on your particular range.
will appreciate the many features that you use it. On the following pages,
provide excellent performance, ease you will find a wealth of information In our continuing effort to
of cleaning, convenience and de- regarding all aspects of your improve the quality of our
pendability, appliance. By following the instruc- products, it may benecessaryto
tigris carefully, you will be able to make changes to the products
New features have dramatically fully enjoy and properly maintain without revising this booklet.
changed today's cooking appliances your new appliance. For example, the knob on your
range may not look like the
illustration in this book.
CONTENTS
SAFETYINSTRUCTIONS.......... 1-4 Oven Racks .................. 8
Preheating.................... 8
LEVELINGLEGS.................. 4 How to Bake ................. 9
STORAGEDRAWER................ 4 How to Roast ............... 10
ELECTRONICCONTROLLER......... 5 How to Broil ................ 11
SURFACECOOKING............. 6-7 AUTOMATICOVENCOOKING....... 12
Cooktop...................... 6 SELFCLEANOVEN............... 13
Burner Grates ................ 6 MAINTENANCE.................. 14
Surface Burners .............. 6 Oven Bottom
Selecting Flame Size .......... 7 Oven Door
USINGYOUROVEN............ 8-11 Light Replacement
Oven Characteristics .......... 8 CLEANINGCHART................ 16
OvenVent .................... 8
SERVICE....................... 17
MODELIDENTIFICATION
If you have a question, or need
service, have this information ready:
1.Complete model and serial num-
bersfrom the rating plate whichis MODELNUMBER
located under the lift-up cooktop
on the right side.
2. Purchase or installation date from SERIALNUMBER
your sales slip.
Copy this information in these PURCHASE/INSTALLATIONDATE
spaces. Keep this book, your
warranty, and the salesslip together
in a handy place. SERVICECOMPANY& PHONENUMBER
Page 2

SAFETYINSTRUCTIONS
IMPORTANT
INSTRUCTIONS
Thefollowing instructionsare based
onsafetyconsiderationsandmustbe
strictly followed to eliminatethe
potentialrisksof fire, electricshock
or personalinjury.
FORYOURSAFETY FORYOURSAFETY IN CASEOFFIRE:
DONOTSTOREORUSE IF YOUSMELLGAS: 1.Turnrangecontrolsandventi-
GASOLINEOR OTHER I.TURNALLRANGECON- lating hood,if equipped,off
immediately.
FLAMMABLEVAPORSAND TROLSOFF. 2. Smotherfire or flame,usedry
LIQUIDSINTHEVICINITY 2.EXTINGUISHANYOPEN chemical,orafoam-typeextin-
OFTHISORANYOTHER FLAMEORCIGARETTE. guisher.
APPLIANCE. 3.0PEN WINDOWS. • If the fire is in the oven,
smotherit byclosingtheoven
4.DONOTTOUCHELEC- door.
TRICAL SWITCHES. (DO • If the fire is in a pan on a
surfaceburner,coverthepan.
NOT TURN ANY ELEC- • Bakingsodaisalsoeffective,if
TRICALSWITCHESON available.
OR OFF. SPARKS MAY • Do not use water on grease
INSTALLATION IGNITETHEGAS). fires.
Installation of the appliancemust 5. IMMEDIATELY CALL
conformwith local codesor, if no YOUR GAS SUPPLIER. GASTYPE
codesexist,withthecurrentNational
Fuel Gas Code. Installationand Allmodelsareadjustableforusewith
adjustmentoftheappliancemustbe NATURALor LP (bottled)gas. An
performed ONLY by a qualified Have the installer show you the applianceadjustedfor one type of
installerorservicemaninaccordance locationofthegasshutoff valveand gasCANNOTbeusedwiththeother
withtheInstallationInstructions.See howto shutit off in an emergency, typeuntiladjustmentsaremadebya
accompanyingInstallationInstruc- qualifiedserviceman.
tions. Becertainall packingmaterialsare
removed from the range before
operating,to preventfire or smoke GAS ODOR
Be sure floor coveringunderyour
rangecanwithstandprolongedheat. damageshouldthe packingmaterial If gasodoris detected,cutoffthegas
ignite, supplyto the appliance.Then,call
This is a heavyapplianceandcan yourinstallerorlocalgascompanyto
settleintosoftfloorcoverings,such Observeall instructionsforminimum havetheleakchecked.NEVERUSEA
clearances to any combustible MATCHOROTHERFLAMETOLOCATE
ascushioned-vinyl.Whenmovingon
surfaces. These should be in A GASLEAK.
thistypeof floor,usecare.
accordancewith informationon the
A range shouldNOT be installed rating plate and with nationalfire
directlyoverkitchencarpetingunless laws. SERVICING
an insulatingpad or 1/4-inchthick Electrical supply must be dis-
pieceof plywoodis placedbetween connectedbeforeservicingappliance.
the rangeandcarpet.
Donot repairor replaceanypart of
If rangeis installedneara window, your range unlessspecificallyre-
properprecautionsshouldbetakento commendedinthismanual.All other
preventcurtainsfrom blowingover servicingshouldbe referredto a
burnerscreatinga FIREHAZARD. qualifiedtechnician.
Page 3
SAFETYINSTRUCTIONS
GENERAL COOKINGSAFETY
Neveruseyour rangetowarmorheat Ifflameshouldgooutduringcooking, Usecarewhenopeningovendoor.Let
the room. turn burner off. IF GAS HAS hot air or steam escape before
COLLECTEDAND A STRONGGAS removingor replacingfood.Always
Nocookingapplianceshouldeverbe ODORISDETECTED,WAIT5MINUTES place oven racks in the desired
usedas aspaceheater.Thisinstruc- FOR GAS ODOR TO DISAPPEAR positionswhileoveniscool.If a rack
tion is basedon safety considera- BEFORERELIGHTINGBURNER. mustbemovedwhilehot,becareful
tionsto preventpotentialhazardto to avoidcontactof potholderswith
theconsumeras well as damageto Never leave a surface cooking ovenburnerflame.
theappliance, operation unattended especially
whenusinga highheatsetting.Boil- Slideovenrackouttoaddorremove
Keepareaaroundapplianceclearand overs cause smokingand greasy food,usingdry, sturdypotholders.
free from combustiblematerials, spilloversmayignite. Alwaysavoid reachingintoovento
gasoline,andotherflammablevapors placeor removefood.
andmaterials. Be sure you know which knob
controls which surface burner. Use aluminum foil ONLY as
In the eventof a prolongedpower Alwaysmakesurethecorrectburner instructed.Improperuseofaluminum
failure, the surfaceburnercan be isturnedonandthattheburnerhas foil maycausedamagetotherange,
manuallylightedwith a match.The ignited.Whencookingis completed affectcookingresultsadverselyand
oven cannotbe operatedduringa turn burneroff. canalsoresultinshockand/orFIRE
powerfailure. HAZARDS.
Do not use cooktopor oven as a
storage area for food or cooking Donot coverbroilerinsertwithfoil.
CHILD SAFETY utensils.Thisinstructionisbasedon To minimizechanceof greasefires
1. Donotleavechildrenaloneor safety considerationsto prevent use a broilerpanthat allowsgrease
unsupervisednear the appli- potentialhazardto userand to the to drip belowtheinsert,away from
ancewhenit isinuseorisstill appliance, the broilerflame.
hot.
Usecautionwhenwearinggarments
2. Children should never be madeofflammablematerialto avoid GREASE
allowedto sit orstandon any clothing fires. Loosefitting or long- Use extreme caution when moving
partof the appliance, hanging-sleevedapparelshouldnot thegreasekettleor disposingof hot
bewornwhilecooking.Clothingmay grease.
3. ChildrenMUSTbetaughtthat igniteor catchutensilhandles.
theapplianceandutensilsinor Hot grease is flammable. Avoid
onit canbe hot. Usedry,sturdypotholders.Damppot lettinggreasedepositscollectaround
holdersmaycauseburnsfromsteam, appliance,rangehood,orventfan.Do
4.Childrenshouldbetaughtthat Dish towels or other substitutes notleavecontainerof greasearound
anapplianceisnotatoy.They shouldneverbeusedas potholders a cooking appliance.Always let
shouldnotheallowedto play becausethey can trail acrosshot quantitiesofhotfatusedfordeepfat
withcontrolsor otherpartsof surface burnersand ignite or get fryingcoolbeforeattemptingto move
the unit. caughton rangeparts, or handle.In theeventof a grease
fire, DONOTattemptto movepan.
5.Lethotutensilscoolin a safe Neverheatanunopenedcontaineron Coverpan with a lid to extinguish
place,out of reachof small the surfaceburneror in the oven. flameandturnsurfaceburneroff.Oo
children. Pressure build-up may cause notdouseflamewithwater.Useadry
containerto burstresultinginseriuus chemical or foam-type fire
6.CAUTION:Donotstoreitemsof personalinjury or damageto the extinguisher,if available,orsprinkle
interesttochildrenincabinets range, heavilywithbakingsoda.
abovean appliance.Children
climbingon the applianceto Spills or boiloverswhich contain
reachitemscouldbeseriously greaseshouldbecleanedupassoon
injured.An applianceshould as possible.If they are allowedto
notbeusedasa stepstoolto accumulate,theycouldcreatea FIRE
cabinetsabove. HAZARD.
Page 4
SAFETYINSTRUCTIONS
VENTING SELFCLEANOVEN COOKINGUTENSILS
Neverblockovenvent orair intakes. (if equipped) ALUMINUM. Conductsheat quickly
Do notobstructtheflow of combus- Do not cleandoorgasket.Thedoor and evenly.The heavierthe gauge
tionandventilationair.Restrictionof gasketis essentialfor a goodseal. (thickness) the more durable.
airflowtotheburnerpreventsproper Care should be taken not to rub, Aluminummaydiscolorfromalkaline
performance, damage,or movethegasket.Donot foodsand pit from acidfoods.
useovencleanersof anykindinor
Avoidtouchingovenventareawhile aroundany part of the self clean COPPER• Verygoodheatconductor,
ovenis on and for severalminutes oven.Cleanonlypartslistedin this butdiscolorseasily.Usedprimarily
afterovenisturnedoff.Somepartsof booklet. Before self cleaning the for bottom coatingsand gourmet
the vent and surroundingarea oven,removebroilerpan,ovenracks, cookware.
becomehotenoughto causeburns, and other utensils,and wipe off
excessivespillovers. STAINLESSSTEEL- Aloneit is a poor
CLEANING conductor,developshot spots and
producesuneven cooking results.
Turn off all controlsand wait for PLASTICS However,it isdurable,easytoclean,
rangepartstocoolbeforetouchingor Manyplasticsare vulnerabletoheat. andsomewhatstainresistant.Coat-
cleaningthem. Do not touch the Keepplasticsawayfrompartsofthe ing stainlesssteelwith a copperor
burnergrates or surroundingareas appliancethat may becomewarmor aluminumbottomresultsin aneasy-
untiltheyhavehadsufficienttimeto hot. to-clean, durable, even cooking
cool. utensil.
Touchingahotovenlightbulwitha AEROSOLSPRAYS CASTIRON-Slowtoconductheat,but
dampclothcouldcausethebulb to Many aerosol-typespray cans are retainstheheatwell.Heavyto handle
break. Should the bulb break, dis- EXPLOSIVEwhenexposedtoheatand and mustbe kept well seasonedto
connectpowerto the range before maybehighlyflammable.Avoidtheir preventstickingand rusting.
.trying to removethe bulb to avoid useor storageneara hot appliance.
electricalshock. GLASS/GLASS-CERAMICTransfers
heatslowly andunevenly,butholds
Cleanrange with caution.Jfa wet heat well.
sponoeor clothis usedtowipespills
ona hotcookingarea,becarefulto Only certain types of glass,
avoid steam burns.Somecleaners glass/ceramic, ceramic, earthen-
canproducenoxiousfumesif applied ware, or other glazedutensilsare
to a hot surface, suitableforrangetopservicewithout
breakingduetothesuddenchangein
temperature. Check and follow
manufacturer'srecommendeduseor
limitationsfor such utensils.
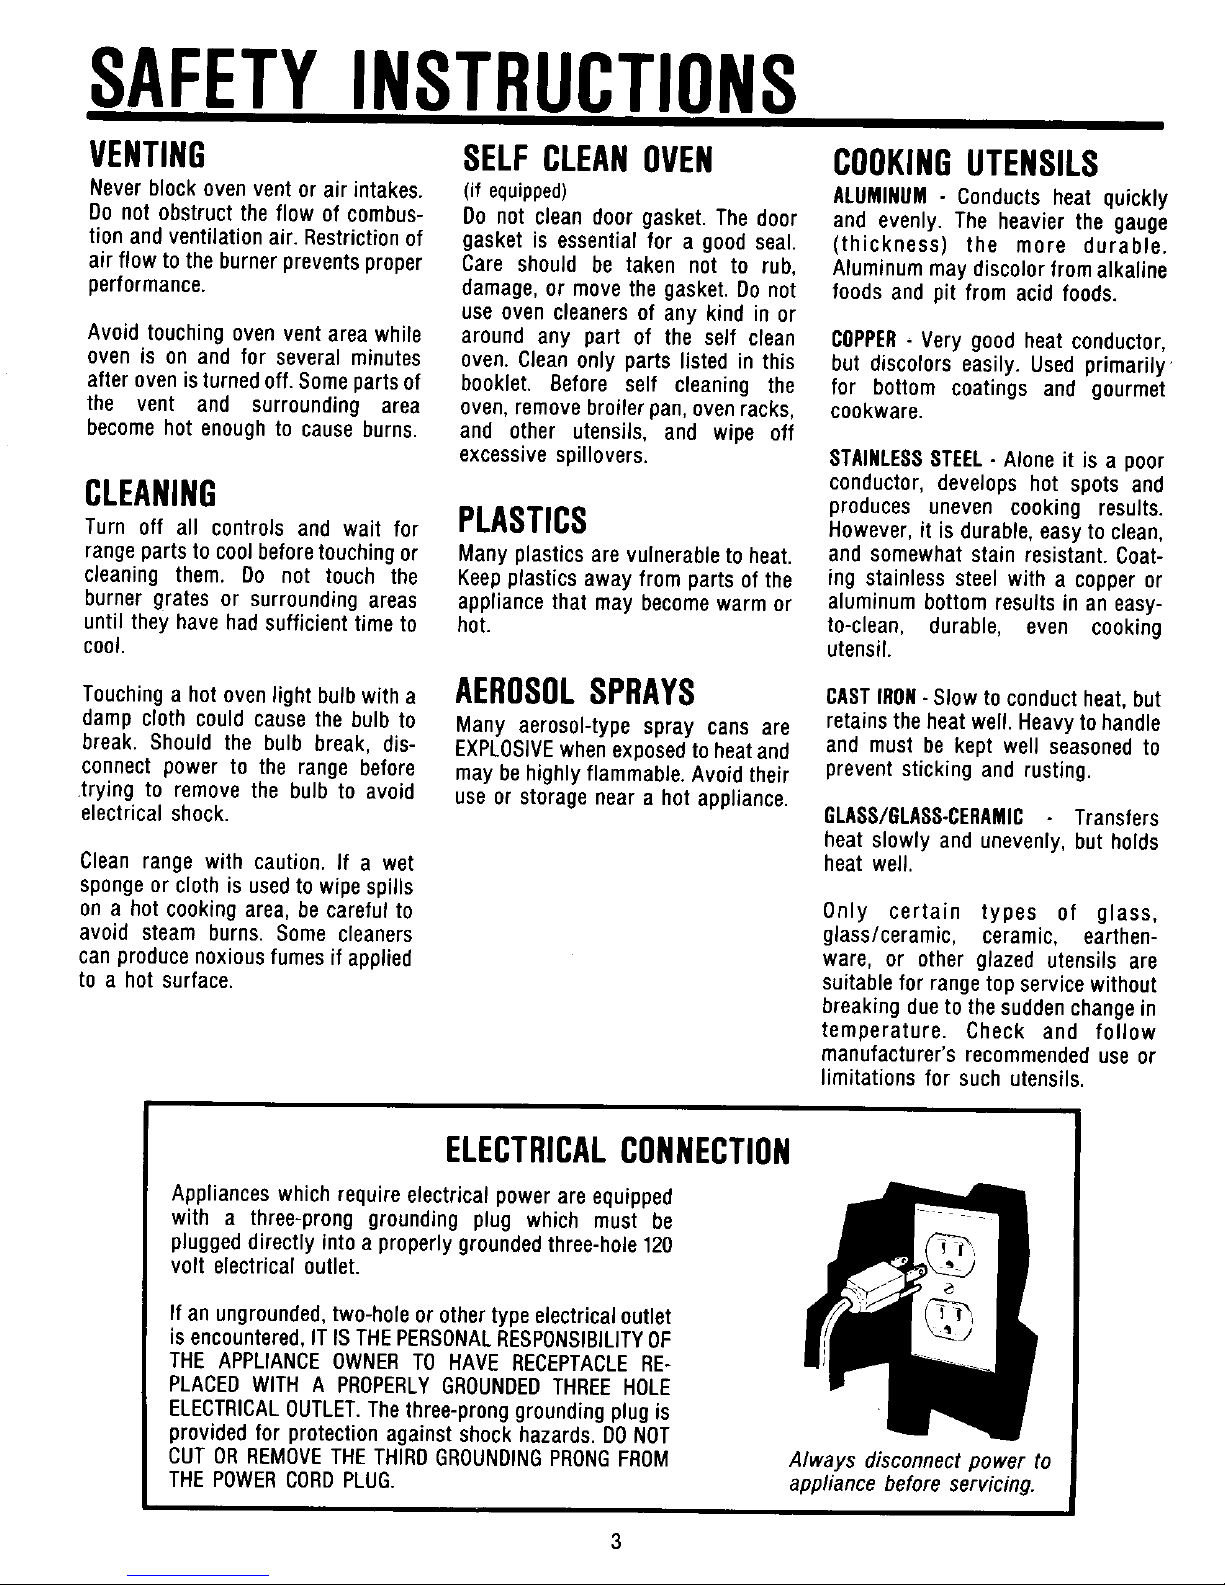
ELECTRICALCONNECTION
Applianceswhichrequireelectricalpowerare equipped
with a three-pronggroundingplug which must be
pluggeddirectlyintoaproperlygroundedthree-hole120
volt electricaloutlet.
Ifan ungrounded,two-holeorothertypeelectricaloutlet
isencountered,ITISTHEPERSONALRESPONSIBILITYOF
THE APPLIANCEOWNERTO HAVE RECEPTACLERE-
PLACEDWITHA PROPERLYGROUNDEDTHREEHOLE
ELECTRICALOUTLET.Thethree-pronggroundingplugis
providedfor protectionagainstshockhazards.DONOT
CUTORREMOVETHETHIRDGROUNDINGPRONGFROM Always disconnectpower to
THEPOWERCORDPLUG. appliancebeforeservicing.
3
Page 5
SAFETYINSTRUCTIONS
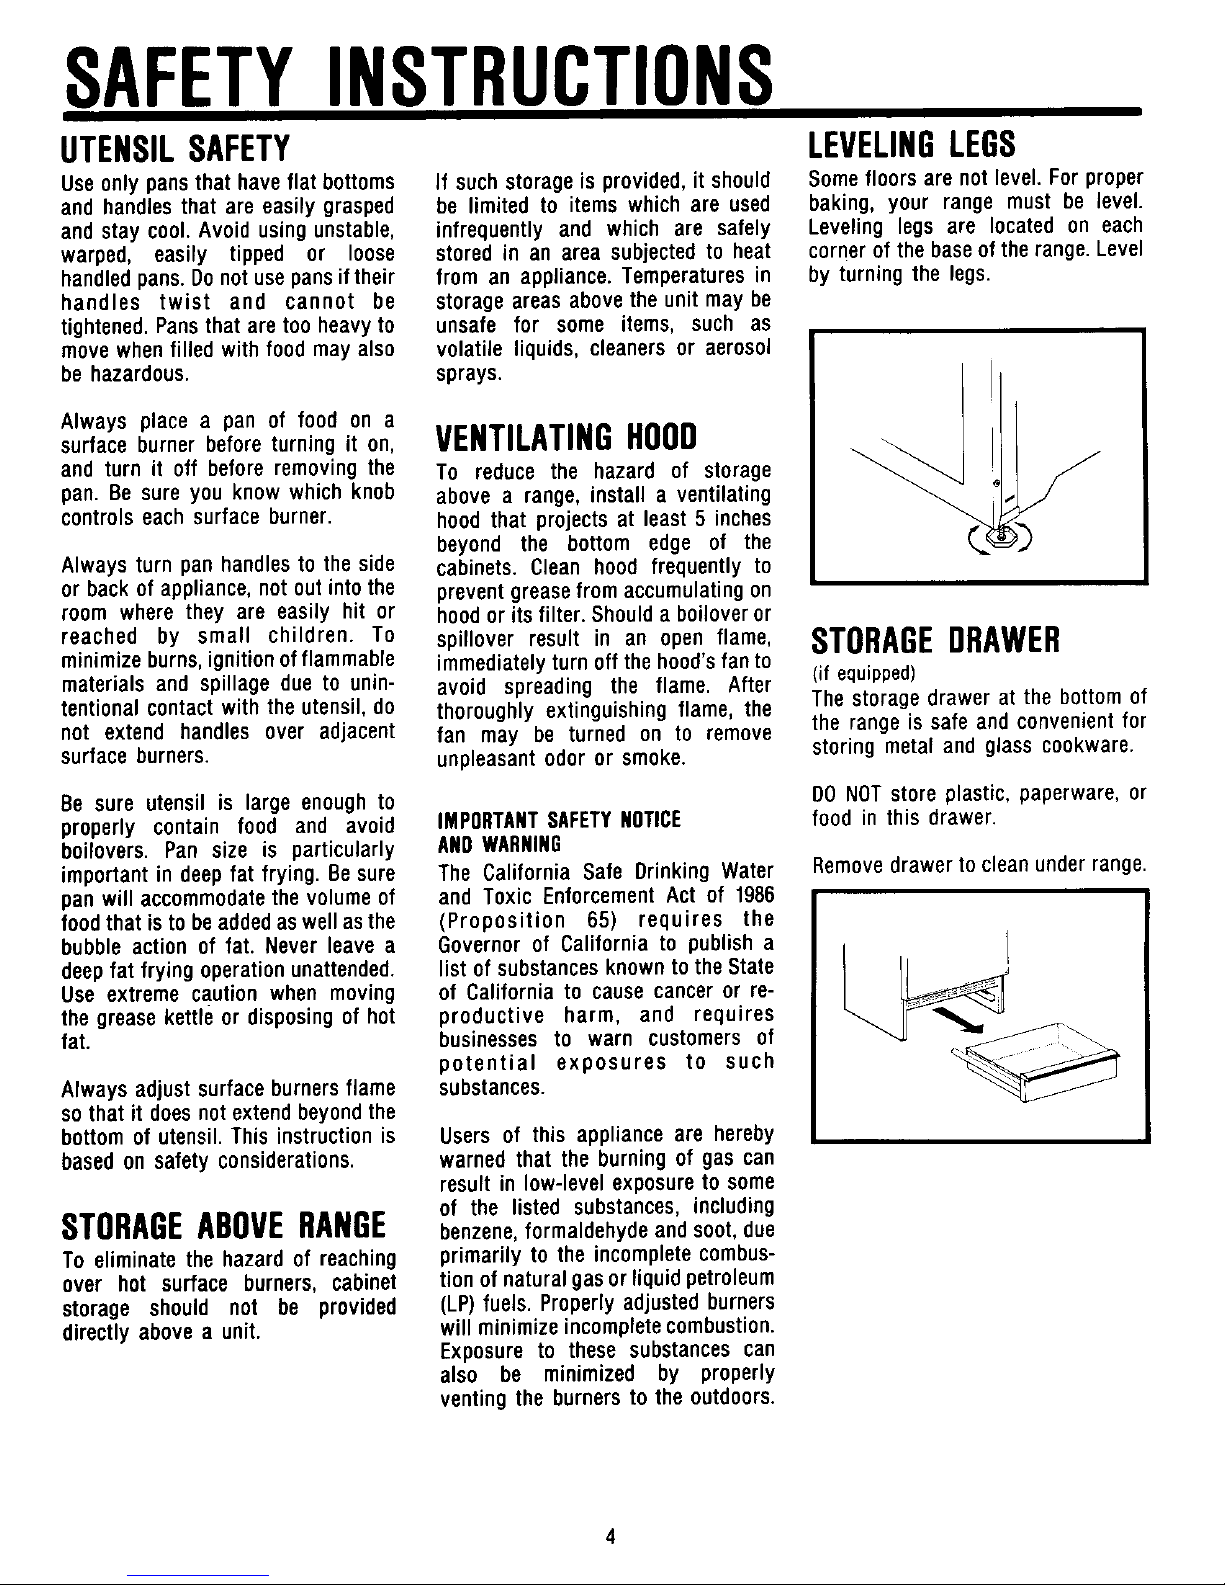
UTENSILSAFETY LEVELINGLEGS
Useonly pansthathaveflatbottoms If suchstorageisprovided,it should Somefloorsarenotlevel.For proper
and handlesthat are easilygrasped be limited to itemswhich are used baking, your range must be level.
and stay cool.Avoid usingunstable, infrequently and which are safely Leveling legs are located on each
warped, easily tipped or loose stored in an area subjectedto heat cornerof thebaseoftherange.Level
handledpans.Donotusepansif their from an appliance.Temperaturesin by turning the legs.
handles twist and cannot be storageareasabovethe unit maybe
tightened.Pansthataretoo heavyto unsafe for some items, such as
movewhenfilled with foodmayalso volatile liquids, cleanersor aerosol
be hazardous, sprays.
Always place a pan of food on a 1
surfaceburnerbeforeturning it on, VENTILATING HOOD
and turn it off beforeremovingthe To reduce the hazard of storage
pan. Besureyou knowwhichknob above a range,installa ventilating
controls eachsurfaceburner, hood that projectsat least5 inches
beyond the bottom edge of the (,,
Alwaysturn panhandlesto the side cabinets. Clean hood frequently to
or backof appliance,not outintothe preventgreasefrom accumulatingon
room wherethey are easily hit or hoodor its filter.Shouldaboiloveror
reached by small children. To spillover result in an open flame, STORAGE DRAWER
minimizeburns,ignitionofflammable immediatelyturnoff thehood'sfanto (if equipped)
materials and spillage due to unin- avoid spreading the flame. After
tentionalcontactwith the utensil,do thoroughly extinguishingflame, the Thestoragedrawerat the bottomof
not extend handles over adjacent fan may be turned on to remove the rangeis safe andconvenientfor
surfaceburners, unpleasantodoror smoke, storing metaland glass cookware.
Be sure utensil is largeenoughto DONOTstore plastic, paperware,or
properly contain food and avoid IMPORTANTSAFETYNOTICE food in this drawer.
boilovers. Pan size is particularly ANDWARNING
importantin deepfat frying. Besure The California Safe Drinking Water Removedrawertocleanunderrange.
pan will accommodatethevolumeof and Toxic EnforcementAct of 1986
foodthat isto beaddedaswellasthe (Proposition 65) requires the
bubble action of fat. Never leavea Governorof California to publisha
deepfat frying operationunattended, list of substancesknownto theState
Use extreme caution when moving of Californiato causecanceror re-
the greasekettleor disposingof hot productive harm, and requires
fat. businesses to warn customers of
potential exposures to such
Alwaysadjust surfaceburnersflame substances.
so that it doesnot extendbeyondthe
bottom of utensil.This instructionis Users of this applianceare hereby
basedon safety considerations, warnedthat the burningof gas can
result in low-levelexposureto some
of the listed substances,including
STORAGE ABOVE RANGE benzene,formaldehydeandsoot,due
To eliminatethe hazardof reaching primarily to the incompletecombus-
over hot surface burners, cabinet tion ofnaturalgasorliquidpetroleum
storage should not be provided (LP)fuels. Properlyadjustedburners
directlyabovea unit. will minimizeincompletecombustion.
Exposureto thesesubstancescan
also be minimized by properly
ventingthe burnersto the outdoors.
4
Page 6
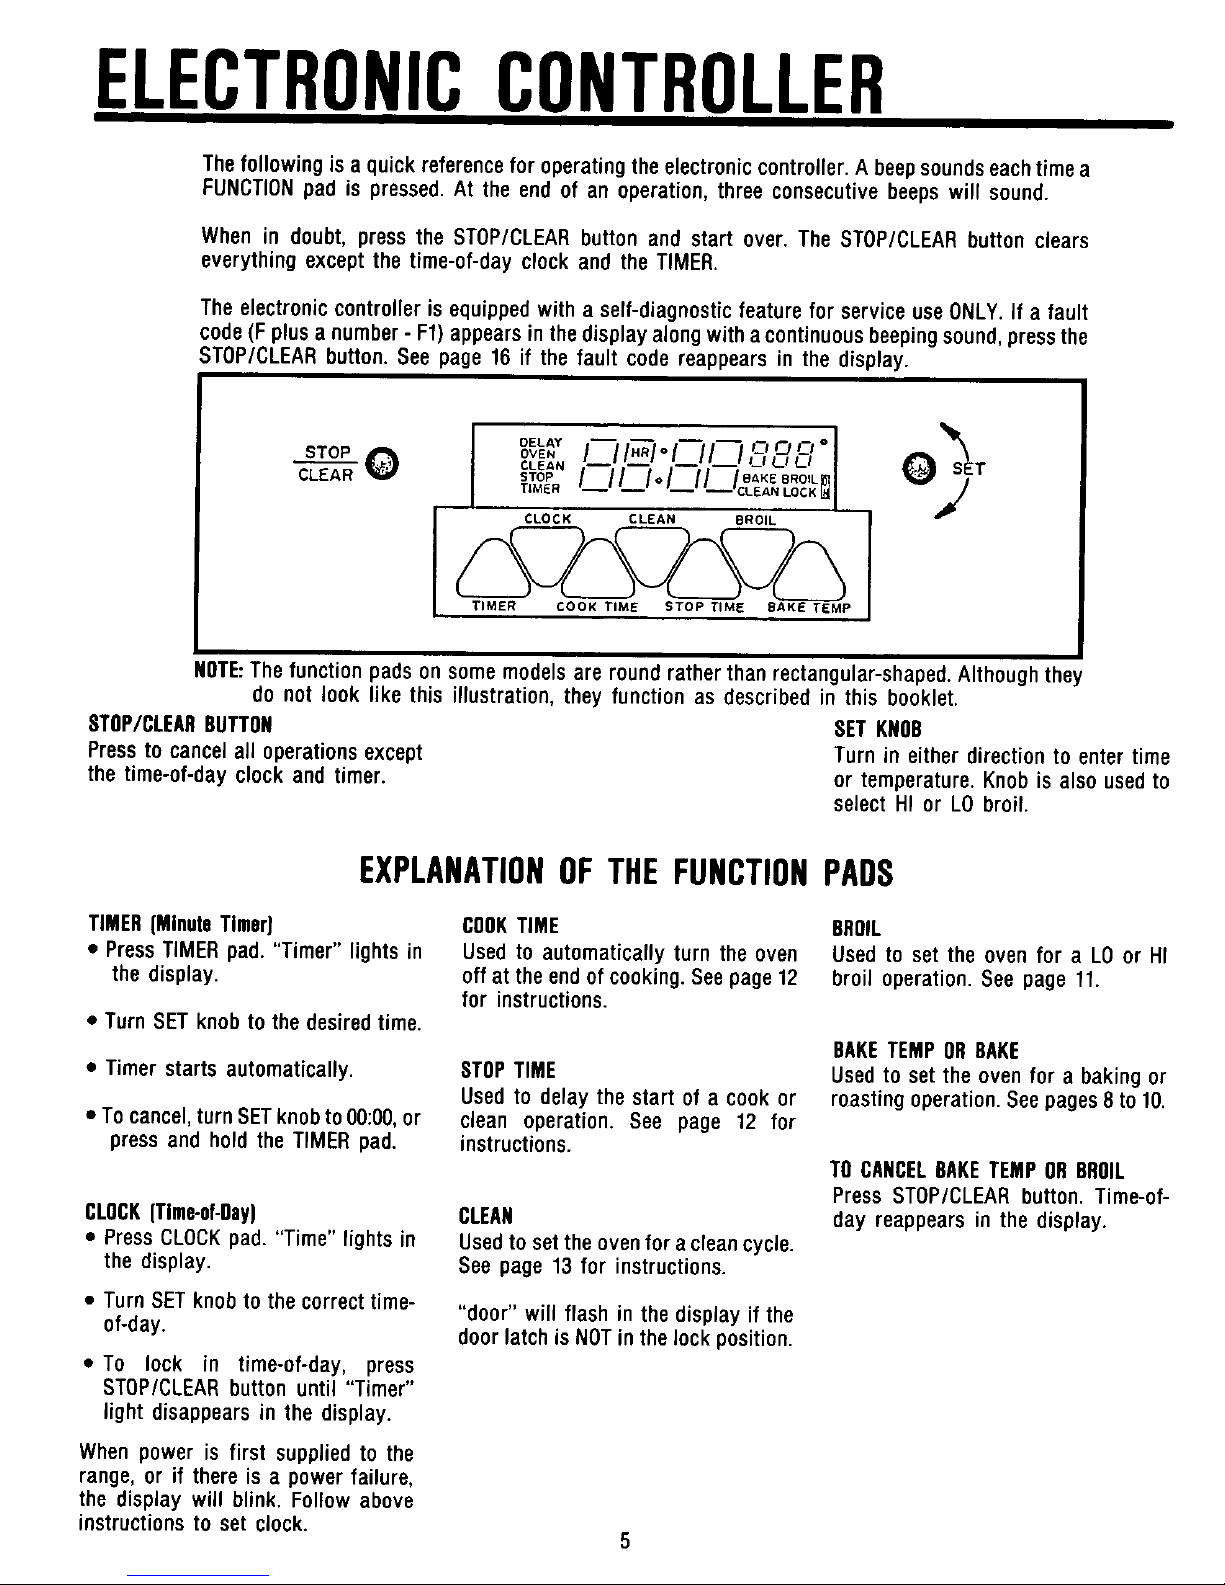
ELECTRONICCONTROLLER
Thefollowingis aquickreferenceforoperatingtheelectroniccontroller.Abeepsoundseachtimea
FUNCTIONpadis pressed.At theendof an operation,threeconsecutivebeepswill sound.
Whenin doubt,pressthe STOP/CLEARbuttonandstartover.TheSTOP/CLEARbuttonclears
everythingexceptthetime-of-dayclockand theTIMER.
Theelectroniccontrollerisequippedwitha self-diagnosticfeaturefor serviceuseONLY.if a fault
code(Fplusa number-Ff) appearsinthedisplayalongwithacontinuousbeepingsound,pressthe
STOP/CLEARbutton.Seepage16 if thefault codereappearsin the display.
STOP DELAY oJ
cLEA.Q CLE..OVE"/__//.R/o/.i/---'/;----"8S', O
STO+'I SET
TIMER -- CLEAN LOCK I_ I
I CLOCK CLEAN BROIL [
TIMER COOK TIME STOP TIME BAKE TBMP
NOTE:Thefunctionpadsonsomemodelsare roundratherthanrectangular-shaped.Althoughthe
do notlooklikethisillustration,theyfunctionas describedinthis booklet.
STOP/CLEARBUTTON SETKNOB
Presstocancelalloperationsexcept Turnin eitherdirectionto entertime
the time-of-dayclockandtimer, ortemperature.Knobisalsousedto
selectHIor LObroil.
EXPLANATIONOFTHEFUNCTIONPADS
TIMER(MinuteTimer] COOKTIME BROIL
• PressTIMERpad."Timer"lightsin Usedto automaticallyturntheoven Usedto settheovenfor a LOor HI
thedisplay, offattheendofcooking.Seepage12 broiloperation.Seepage11.
for instructions.
• TurnSETknobto thedesiredtime.
BAKETEMPORBAKE
• Timerstartsautomatically. STOPTIME Usedto settheovenfora bakingor
Usedto delaythe startofa cookor roastingoperation.Seepages8to10.
• Tocancel,turnSETknobtoOO:OO,or clean operation.See page 12 for
pressand holdtheTIMERpad. instructions.
TOCANCELBAKETEMPORBROIL
PressSTOP/CLEARbutton.Time-of-
CLOCK(Time-of-Day) CLEAN day reappearsinthe display.
• PressCLOCKpad."Time"lightsin Usedtosettheovenforacleancycle.
thedisplay. Seepage 13for instructions.
• TurnSETknobto thecorrecttime- "door" will flash in the display if the
of-day, doorlatchisNOTinthelockposition.
• To lock in time-of-day, press
STOP/CLEARbuttonuntil "Timer"
light disappearsin the display.
Whenpower is first suppliedto the
range,or if thereis a powerfailure,
the display will blink. Followabove
instructionsto set clock.
5
Page 7

SURFACECOOKING
COOKTOP SURFACEBURNERS LIGHTINGSURFACE
TOremoveceoktop:When cool, first All surfaceburnersare securedin BURNERS
remove grates and drip bowls, if place during transportation with
equipped. Grasp two front burner either a shippingscrew or a spring Yourrangeis equippedwith pilotless
wells and lift up. clip.Oncethe rangeisinstalled,these ignition which eliminatesthe con-
mustberemovedto allowquickand stantstandingpilot.
Thetop can becompletelyremoved easyremovalof theburner. To lightburner:
of, if equippedwitha metalsupport 1.Placeutensilonburnergrate.
rod,canrestontherod.Supportrod Toremovetheonepieceunlburner: 2. Pushinandturnknobto theLITE
is locatedacrossthe front of the position.A clickingsoundwill be
burnerbox. heardand the burnerwill light.
Aftertheburnerlights,turnknobto
thedesiredflame size.
I
Allowburnertocool.Lift cooktop.To
removeuniburner,lift upslightlyand
pullout.Undernocircumstancesare If flame shouldgo out during a
BURNER GRATES burners to be taken apart for cooking operation,turn the burner
Your range will be equippedwith cleaning, off. iF GASHASACCUMULATEDAND
A STRONGGASODORIS DETECTED,
eitherroundor squaregrates. Toremovestandardsingleburner: WAIT5 MINUTESFORTHEGASODOR
TO DISAPPEARBEFORERELIGHTING
CAUTION:Burner grates must be __ BURNER.
properlypositionedbeforecooking. _ ,___ OPERATINGRANGEDURINGA POWER
Whenreinstallingroundgrates,place __ FAILURE
pinsin slotssogratesstayinplace. 1.Holda lightedmatchtothedesired
surfaceburnerhead.
__ 2.Turnknobto LITE.Theburnerwill
thenlight.
3.Adjust the flame to the desired
level.
Removeor support cooktop.Grasp
burner headand tilt to releasetab CAUTION:When lighting surface
from slot near igniter. Lift up and burners,besureall controlsareinthe
toward back of cooktop until air OFFposition. STRIKEMATCHFIRST
shutter end of burner releasesfrom and hold in position beforeturning
When reinstalling square grates, valve, knob on.
place indented sides together so
straightsidesare at front and rear.
6
Page 8

SURFACECOOKING
SELECTINGFLAMESIZE
If a knobisturnedveryquicklyfrom UseHIGHto quickly bringfoodsto a UseWARM(low) to simmeror keep
HJGHtoWARMsetting,theflamemay boil or to begina cookingoperation, foodsat servingtemperatures.Some
goout,particularlyif burneris cold.It Reduceto a lowersettinga continue cookingmaytake placeif the utensil
this occurs,turnthe knobto theOFF cooking.Neverleavefoodunattended is covered.
position.Wait severalseconds,then when usinga HIGHflamesetting.
light again. .__
To obtain a lower flame size, turn
UseSIMMER(medium)to continuea knob back toward the OFF position
cookingoperation.Foodwill notcook until the desired flame size is
any faster when a higher flame reached.The lowest flame setting is
setting is used than needed to locatedadjacentto theOFFposition.
Flameshouldbeadjustedso it does maintaina gentle boil. This is not a preset position.
not extend beyond the edge of
cookingutensil.This is for personal _T..........:_
safety and to prevent damage to __j_ --"_,, Q,
cabinetsabovecooktop.
7
Page 9

USINGYOUROVEN
OVENCHARACTERISTICS IMPORTANT
Every oven has its own character- To replace: Place rack on rack
istics.Youmayfindthatthecooking supports,tilt upandpushtowardrear DO NOT MOVE DOORLOCK
times and temperaturesyou were of oven.Pullrackoutto "lock-stop" LEVERTO THE RIGHTDURING
accustomedto with your previous positionto be surerackis correctly BROILINGDR BAKING.Range
rangemayneedtobealteredslightly replaced, door may lock, burnersmay
with yournew range.Pleaseexpect turnoff,andthedoormaystay
somedifferenceswiththisnewrange. To remove:Besurerack iscool.Pull lockeduntil oven cools.Turn
rack outto the"lock-stop"position, oven off if lock lever is
Tiltupandcontinuepullinguntilrack accidentlymovedto theCLEAN
OVENCANNOTBE releases, t positionthenresetoven
USEDDURINGA
POWERFAILURE Theelectroniccontrolautomatically
I keeps the oven at the desired
z temperatureby cycling the oven
OVEN VENT 3 burneron and off. After the oven
temperaturehas beenset,therewill
Yourovenisventedthroughaductat 4 beabouta 45seconddelaybeforethe
the baseof the backguard.Do not burnerignites.Thisisnormal,andno
blockthis opening.It is important gasescapesduringthisdelay.
thattheflowof hotairfromtheoven
and freshair to the ovenburnerbe
unrestricted.Do nottouchthe vent PREHEATING
openingsor nearbysurfacesduring Preheatingis necessaryonly for
ovenoperationas they may be hot. baking.It is notnecessarytopreheat
RACKPOSITIONS: forbroilingor roasting.Allowovento
OVENRACKS RACKI (topof oven)usedfor broiling heat for about 10 minutesbefore
thin foods, placingfoodin theoven.
Thetwoovenracksaredesignedwith
a "lock-stop"positionto keepracks RACK2 usedfor one-rackbakingor Selectinga temperaturehigherthan
fromaccidentallycomingcompletely broilingthickercutsof meat. desiredwillNOTpreheattheovenany
outof theoven. faster. Preheating at a higher
RACK3usedfor mostone-rackbaking temperaturemay have a negative
NEVERplacepans directly on the andfor roastingsomemeats, effecton bakingresults.
ovenbottom.Donotcoverentirerack
with aluminumfoil or place foil RACK4usedforroastinglargemeats, Topreheal:Set ovenfor bakingand
directly under utensil. To catch cookinglargerfoodsandfor baking allowthe ovento heatuntil display
spillovers,cut a pieceof.foila little angelfoodcakeor pieshells, showsthe presettemperature(100
largerthanthepanandplaceitonthe will appearin the displayuntilthe
rack belowthe rack containingthe ovenreachesIO0°F.Thedisplaywill
utensil. HINTS: thenshowtheoventemperaturein5°
Ifcookingontworacks,staggerpans incrementsuntiltheovenreachesthe
sooneis notdirectlyovertheother, presettemperature).
Userackpositions1and3,2and4,or
1and4, dependingonbakingresults, Once the preset temperature is
whencookingon tworacks, reached,and the oventemperature
has stabilized,a single beep will
Placefoodintheovenonthecenterof sound.
therack.Allow1or2inchesbetween
edgeofutensilandtheovensidesor If the oventemperatureis changed
adjacentutensils, after preheating,a beepwill signal
that the ovenhas reachedthe new
temperaturesetting.
Page 10

USINGYOUROVEN
HOWTOBAKE
1.When cool, position rack in oven 3.Place food in center of oven, PressSTOP/CLEARbuttontocancela
dependingon whatyouarebaking, allowing a minimum of 2 inches baking operation.
between utensiland oven walls.
2.Tosetoven:PressBAKETEMPpad. If you have carefully followed the
"Bake" lights in the display. 4.Check food for doneness at basic instructionsand still experi-
minimum time in recipe. Cook ence poor results,thesesuggestions
TurnSETknobtothe desiredoven longer if necessary.Removefood may be helpful:
temperature. "ON" lights in the from the oven.
display. The oven immediately
turns on and beginsto heat. The
display will register the oven
temperaturestarting at IO0°F.
COMMONBAKINGPROBLEMSANDWHYTHEYHAPPEN
PROBLEM CAUSE PROBLEM CAUSE
Cakesareuneven. Panstouchingeachotheror Excessiveshrinkage. Toolittle leavening.
ovenwalls. Overmixing.
Batterunevenin pans. Pantoo large.
Oventemperaturetoolowor Oventemperaturetoohigh.
bakingtimetoo short. Bakingtimetoolong.
Rangenotlevel. Panstooclosetoeachother
Undermixing. orovenwalls.
Toomuchliquid.
Crumblyordry texture. Impropermeasurementof sugar,
Cakehigh in middle. Temperaturetoo high. bakingpowder,liquidor fat.
Bakingtimetoolong. Oldbakingpowder.
Overmixing. Oventemperaturetoo high.
Toomuchflour. Bakingtimetoolong.
Panstouchingeachotheror
ovenwalls. Uneventexture. Toomuchliquid.
Undermixing.
Cakefalls. Toomuchshorteningorsugar. Oventemperaturetoo low.
Toomuchor too little liquid. Bakingtimetoo short.
Temperaturetoo low.
Oldor too little bakingpowder. Cakeshavetunnels. Notenoughshortening.
Pantoo small. Toomuchbakingpowder.
Ovendooropenedfrequently. Overmixing.
Oventemperaturetoo high.
'akesdon'tbrownevenly Ovennot preheated.
onbottom. Pansdarkened,dentedor warped. Cakescrack ontop. Batterovermixed.
Oventemperaturetoo high.
akesdon'tbrown ontop. Oventemperaturetoolow. Toomuchleavening.
Overmixing.
Toomuchliquid. Cakenot donein middle. Temperaturetoo high.
Incorrectpansizeortoolittle Pantoosmall.
batterin pan.
Ovendooropenedtoo often. Piecrustedgestoobrown. Oventemperaturetoo high.
Panstouchingeachother
Cakes,cookies,biscuitstoo Ovennot preheated, orovenwalls.
brownonbottom, Panstouchingeachother or Edgesof crusttoothin.
ovenwalls.
Usingglass,darkened,warped Piesdon'tbrownon bottom. Usingshinymetalpans.
or dull finish metal pans.
Incorrectrack position. Pieshavesoakedcrust. Temperaturetoo lowat start
Incorrectuse of aluminumfoil. of baking.
Placed2 cookiesheetson one Fillingtoojuicy.
rack. Usingshinymetalpans.
Page 11

USINGYOUROVEN
HOWTOROAST
To set ovenfor roastingseepage9, Cookingtime is determinedby the Frozenmeat may be cookedin the
#2. weightof the meatand thedesired samewayasfreshmeatif themeatis
doneness.Usethechartgivenbelow thawed first, it is also possible,
Roastingisthecookingoftendercuts as a guidein determiningcooking however,to cook meat from the
of meatwithdry heat. Nowateris times.Forthemostaccurateresults, frozen state. Follow the same
added nor is the cookingutensil use a meatthermometer.Insertthe roasting instructionsbut increase
covered.Searingis unnecessary,if thermometersothetipisinthecenter cookingtimeapproximately10to 25
desired,seasonmeatwith salt and of thethickestpartofthemeatandis minutes per pound. When using
pepper, nottouchingboneor fat. frozen packaged meat, follow
packagedirections.Frozenpoultry
Checkweightofmeatandplacemeat Aftercooking,removemeatfromthe shouldalways be thawed before
fat-side-upon a rack in a shallow ovenandletstand15to 20minutes cooking except when package
roastingpan. for easiercarving.Rareor medium directionsrecommendcookingfrom
raremeatsshouldbe removedfrom the frozenstatesuchas for frozen
Place ovenrack in one of the two the ovenwhentheinternaltempera- turkey rolls. DO NOT REFREEZE
bottomrackpositionsbeforeovenis ture is 5 to 10° lessthanthe final MEATS THAT HAVE NOT BEEN
turnedon.Preheatingisunnecessary desiredtemperaturesincemeatwill COOKEDFIRST.
for roastingmeats, continue to cook slightly while
standing. PORK
Most meats are roasted at 325°F Porkshouldalwaysbecookedto an
except tenderloin at 425°F and internaltemperatureof 170° (well
smallerpoultryat 375°Fto 400°F. done)throughout.
ROASTINGCHART
APPROXIMATE
CUTOFMEAT WEIGHT INTERNALTEMP. TEMP. TIME
BEEF
StandingRib 6 to 8 Ibs. 140°F(rare) 23to 25 min/Ib.
160°F(medium) 300-325°F 27to 30 rain/lb.
170°F(well done) 32to 35 rain/lb.
4 to 6 Ibs. 140°F(rare) 26to 32 min/Ib.
160°F(medium) 300-325°F 34to 38 min/Ib.
170°F(well done) 40to 42 rain/lb.
RolledRib 5 to 7 Ibs. 140°F(rare) 32 rain/lb.
160°F(medium) 300-325°F 38 min/Ib.
170°F(well done) 48rain/lb.
Rib Eye 4 to 6 Ibs. 140°F(rare) 18to 20 min/Ib.
160°F(medium) 350°F 20to 22 min/Ib.
170°F(well done) 22to 24 min/Ib.
ir
Tenderloin,Whole 4 to 6 Ibs. 140°F(rare) 425°F 40to 60 minutes
(total time)
2 to 3 Ibs. 140°F(rare) 425°F 45to 50 minutes
(total time)
SirloinTip 3 to 4 Ibs. 140- 170°F 325-350°F 35 to 40 min/Ib.
(highquality) 6 to 8 Ibs. 140- 170°F 30 to 35 min/Ib.
RolledRump 4 to 6 Ibs. 150- 170°F 325-350°F 25 to 30 rain/lb.
(high quality)
PO'RKLOIN
Center 3 to 5 Ibs. 170°FThroughout 325°F 30to 35 min/Ib.
Half 5 to 7 Ibs. 170°FThroughout 35to 40 min/Ib.
LAMB,LEG 5 to 9 Ibs. 160°F(medium) 325°F 25to 30 rain/lb.
170- 180°F(well) 30 to 35 min/Ih.
10
Page 12

,SINgYO,RO,VENHOW TO BROIL o B NOTE:Beloware recommendedrack
positions.Remember,the closer to
Broilingisamethodofcookingtender 1. Preparemeatby removingexcess
theflame,thequickerthefoodcooks.
foodsbydirectheatundertheburner, fat and slashingremainingfat, Youcanchoosepositionaccordingto
Thedegreeofdonenessisdetermined beingcarefulnotto cutintomeat. the desireddoneness.
bythedistancebetweenthemeatand This will help keep meat from
theburner,andthelengthof broiling curling. Tosetoven:
time. • PressBROILpad."Broil" lightsin
2. Placebroilerpanonanyof there- the display.
Broilingrequirestheuseofthebroiler commendedrack positions.Gen-
panandinsert.Thecorrectpositionof erally,for brownexteriorandrare • TurnSETknobclockwiseoneor
the insert in the pan is very interior,the meatshouldbeclose two clicksto selectHIfor normal
important.Thebroilinginsertshould to theburner.Placefurtherdownif broiling or LO for speciallow
beplacedinthepansothegreasewill youwantmeatwell done. temperaturebroiling.
drainfreely.Improperusemaycause
greasefires. 3. Broilingshouldbedonewithoven • "ON"lightsinthedisplay.Theoven
doorclosed.Donotlockovendoor. immediatelyturnsonandbeginsto
ThebroilerinsertCANNOTbecovered heat.
with aluminumfoil asthis prevents 4. Followsuggestedtimesonbroiling
fat from draininginto pan below, chart.Meatshouldbeturnedonce Use HI BROIL for most broil
However,for easier cleaning,the abouthalf way throughcooking, operations.When broiling longer
broilerpancanbelinedwithfoil.Oo cookingfoodssuchas porkchops,
notusedisposablebroilerpans.They 5. Checkdonenessbycuttingaslitin poultry or thick steaks,selectLO
do notprovidea separatetray. meatnearcenterfordesiredcolor. BROIL.Low temperaturebroiling
allowsfoodto cooktothewelldone
6. Press STOP/CLEARbutton to stage without excessivebrowning.
cancela broiloperation. Cookingtime may increaseif LO
BROILINGCHART BROILis selected.
RACK
TYPEOFFOOD TEMP. POSITION* DONENESS TOTALTIME
BACON,Thickslice HI 2 Crisp 4 to 6 min.
HAMBURGERPATTIES
3/4-inch HI 2 140°FRare 10to 12 min.
HI 2 160°FMedium 12to 15 min.
HI 2 170°FWell 15to 18 min.
STEAKS
1-inch HI 2 140°FRare 8 to 10 rain.
HI 2 160°FMedium 12to 14 min.
HI 2 170°FWell 18to 20 min.
l_h-inch HI 2 140°FRare 14to 16rain.
HI 2 160°FMedium 18to 20 min.
HI 2 170°FWell 25 to 30 min.
CHICKENBREASTHALVES LO 3 185°FWell 30to 40 rain.
FISHFILLETS,freshor thawed
HI 2 Flaky 10to 15min.
HAMSLICE,Precooked
1/2-inch HI 2 140°F 8 to 12 rain.
PORKCHOPS
1/z-inch HI 2 170°FWell 15to 20 min.
• Toprackpositionis#1. 11
Page 13

AUTOMATICOVENCOOKING
Automatic cooking feature is used to turn the ovenon and off at a presettime-of-day. Thisfeature
can be used to delay the start of a cooking operation or a self-clean cycle.
Theautomatic cooking feature will not operate unless the rangeclock isfunctioning and is setat the
correct time-of-day.
IMPORTANT:Highly perishable foods such as dairy products, pork, poultry, seafoods or stuffing are
not recommendedfor delayed cooking. If cooking more than onefood, select foods that cookfor the
same length of time and at the same oven temperature.
TOBAKEBYTIME TOBAKEBYTIME EXAMPLE
(with immediatestart) (with delayedstart) Food is to cook for 2hours and30
1. Press COOKTIMEpad. "Oven" and 1. Press COOKTIME pad. "Oven" and minutes at 350°F. You wish the
"Time" light in the display. "Time" light in the display, food to be cooked by 6:00.
2. Enter cooking time with SETknob.
3. Press STOPTIMEpad."Stop Time" 1. Press COOKTIME pad.
i o_. ,,/'_11--135_'" lights in the display.
I. II iw, nJ 2. Turn SET knob until 2:30 (2
i -- -- hours, 30 minutes) appears in
I %l t°s0a
_. _---'7• --/17 3. Press STOPTIME pad.
,,= I II I 4. Turn SET knob until 6:00
__._,] appears in the display.
5. Press BAKE TEMPpad.
2. Enter cooking time (how long you 6. Turn SET knob until 350°F
wish food to cook) with the SET appears in the display.
knob.
3. Press BAKE TEMP pad. "Bake" 4. Enter the time you wish the ovento Theoven will turn on at 3:30,cook
lights in the display. Enter oven turn off by turning the SET knob. the food for 2_/2hours and will
temperature with the SETknob. "Delay Oven" lights in the display, automatically turn off at 6:00.
4. "ON"lights in the display. Theoven 5.Press BAKE TEMP pad. "Bake" J
automatically turns on and begins lights in the display.
to heat. The display begins to ADDITIONALINFORMATION
count down. 1.The ElectronicController will con-
'_o,_._ 1"_.I--II--13S_"] tinuously beep if you delay in
At the end of the preset cooking time, _ I__°1._111.`'_ J entering a complete program. If
the oven automatically turns off. _o,. _L,,. ..=L you hear the beeps, just continue
entering the program as described
above. The beeps will stop.
EXAMPLE 2. To reset or cancel the program:
Food is to cook for one hour and Press the STOP/CLEARbutton.
30 minutes at 350°F. 6. Enter oven temperature with the 3. After setting the Automatic
SET knob. Cooking feature, press the CLOCK
1.Press COOKTIME pad. pad and the time-of-day will
2.Turn SET knob until 1:30 (1 Theoven will automatically turn onin reappear in the display. "Delay
hour, 30 minutes) appears in time to have the food ready by the Oven" and the preset oven temp-
the display, preselected STOPTIME. erature will remain in the display
3. Press BAKETEMPpad. as a reminder that the oven is set
4.Turn SET knob until 350°F for a delayed cooking operation.
appears in the display.
Oventurns on immediately.
12
Page 14

SELFCLEANOVEN
Theself cleanovenusestemperaturesabovenormalcookingtemperaturestoautomaticallyclean
theentireoven.Theseparatecleancycleeliminatessoilcompletelyorreducesittoa grayashwhich
is easilywipedupwith a dampclothwhentheovenis cool.
PREPAREOVENFOR 2PressCLEANpadthedoorisnot TOCANCELCLEANCYCLE:
SELFCLEANING locked as described,"door" will PushSTOP/CLEARbutton.IftheLOCK
flash in the display, lighthasnotturnedon,theovendoor
Removeall pansfromtheoven.The
racksmay beleftin,butwilldiscolor can be opened.
and may not slide easily after _ _,1-/1-/
cleaning. __--/.IIll If the LOCKlighthasturnedon,allow
-- theoventocool(upto 1 hour).Once
c_o¢, :_, ,,=L LOCKlightturnsoff,ovendoorcanbe
Cleanoven frame, doorframe and /__'-_k_,M=_,_
opened.
aroundthe ovenvent with a non-
abrasivecleaningagentsuchas Don "'" _°°"""
Ami.Theseareasare notexposedto AFTER SELF CLEAN
cleaningtemperaturesandshouldbe WhentheCLEANpadis pressed,the
cleanedto preventsoilfrombaking ovenwill automaticallycleanfor 3 CYCLE
on duringthe cleancycle, hours.Ashorter(2hours)orlonger(4 Aboutonehourafterthecleancycle
hours)cleancyclecanbeselectedby is completed,the internallock will
Wipeupexcessgreaseorspillovers turningtheSETknob. disengageandthedoorlatchcanbe
from the oven bottomto prevent returnedto its original(unlocked)
excessivesmokingduringtheclean To preventaccidentlychangingthe position.TheLOCKlightwill turnoff
cycle, clean cycle, press CLOCKpad to whenthedoorlatchismovedto the
returndisplaytotime-of-day, left.
DO NOT USEOVENCLEANERSOR
OVENLINERPROTECTIVECOATINGS Some soil may leave a light gray,
OF ANY KINDONTHESELF-CLEAN DURING SELF CLEAN powderyashwhichcanbe removed
withadampcloth.If stainremains,it
OVENFINISHORAROUNDANYPART CYCLE indicatesthatthecleancyclewasnot
OFTHEOVEN.
The oven automatically beginsto long enough. The stain wiff be
heat up when the CLEANpad is removedduringthenextcleancycle.
Topreventdamage,donotcleanor
rubthegasketaroundthefrontoven pressedandthedoorislocked.Asthe
frame.Thegasketisdesignedtoseal ovenreachescleaningtemperatures, If the oven racks do not slide
in heatduringthecleancycle, the LOCKlight will turnon. At this smoothly after a clean cycle, wipe
point, the oven door can not be racksand embossedrack supports
manuallyopened.A blowersound with a smallamountof vegetableoil
TOOPERATE canbeheardduringthe cleancycle, to restoreeaseof movement.
SELF CLEAN CYCLE The first few times the oven is Fine,hair-likelinesmayappearinthe
1.Closedoor.Movedoorlatchtothe cleaned,somesmokeandodormay oveninterioror ovendoor.Thisis a
right until it rests in the lock be detected.Thisis normalandwill normal condition resulting from
position, reduceor disappearwith use.If the heatingandcoolingof theporcelain
ovenis heavilysoiled,orifthebroiler finish.Theselinesdonot affectthe
pan is left in the oven,smokeand ,erformanceof theoven.
odormay occur. TODELAYTHESELFCLEANCYCLE:
1.Locktheovendoor.
Astheovenheatsandcools,youmay 2. PressSTOPTIMEpad.
hearsoundsof metalpartsexpanding 3.Turn SETknob until the time
andcontracting.This is normaland
you wish the ovento turn off
will not damageyour range, appearsin the display.
4. PressCLEANPAD.
13
Page 15

MAINTENANCE
OVENBOTTOM CAUTION:
To remove:Whencool, removethe Hingearmsare springmountedand To replacefluorescentsurfacelight:
oven racks.Slidethe two catches, will slam shutagainstthe rangeif Graspthetoptrimof backguardwith
locatedat eachrear cornerof the accidentlyhit. Neverplacehandor thumbsunderfront edge and pull
ovenbottom,towardthefrontof the flngerebetweenthehlngeoandthefront outwardwhileliftingto releasetrim
oven. ovenframe.Youcould be injuredif fromcatchesat eachend.
hingesnapsback.
Lifttherearedgeoftheovenbottom Removebulbandreplacewithan18
slightly,then slideit backuntil the To replacedoor:Graspdoorat each watt fluorescenttube.Snaptoptrim
holesin the front edgeof the oven side,alignslotsinthedoorwiththe backintoplaceandrestorepower.
bottomclearthepinsintheovenfront hingearmsandslidedoordownonto
frame. Removeoven bottomfrom the hinge arms until completely
oven. seatedon hinges.
Toreplace:Fitholesontopins,lower Donotattemptto openor closedoor
rear of oven bottomand slidethe until door is completelyseatedon
catchesbacktolockovenbottominto hinge arms. Never turn on oven
place, unlessdooris properlyin place.
LIGHTREPLACEMENT
Before replacing light bulb, DIS-
CONNECTPOWERTORANGE.Besure Toreplaceovenlight:SelfCleanoven
bulbis cool.Donottoucha hotbulb modelsonly. Remove4 screwsand
with a dampclothas the bulbmay platesas illustratedbelow.Usecare
break, whenremovinggasket,it maytear.
Replacewith a 40 watt appliance
ToreplaceIncandescentsuHecelight:Re- bulb.(Notcoveredby warranty).Re-
move clockknob,two screwsand connectpowerto range and reset
tworetainerstrips.Carefullyremove clock.
OVENDOOR glasspanelandlightbulbs.Replace
with a 15 watt incandescentlight
Toremovelift-offdoor:Opendoortothe bulb.Replacepartsandrestorepower
"stop" position (opened about 4 to appliance. _ _,
inches)and grasp door with both - _',L_f "
handsateachside D° n°t used°°r I__ I
handletoliftdoor.Lift upevenlyuntil _.
doorclearsthe hingearms. j
!
14
Page 16

CLEANINGCHART
_ARTS CLEANINGAGENTS DIRECTIONS
Broilerinsert & pan Soap & water Removefrom broiler after use.Allow to cool,thenpouroff Grease.Placesoapyclothover
Plasticscouringpad tray and pan,let soak to loosensoil. Wash in soapy water. Usesoap filledscouringpad
Soap filled scouringpad to remove stubbornsoil. Clean in dishwasherif desired.
Burnerbox Soap& water Burnerbox, locatedunder cooktop,shouldbe cleanedfrequentlyto removespiltovers.If
Appliancewax soil is notremovedand is allowed to accumulate,it may damagethe finish. To clean,
removesurface burners andclean with soap and water, rinse and dry. If desired,an
application of wax can be used.
Controlknobs Mild detergent& water To removeknobs for cleaning,gently pullforward. Washin mild detergentandwater. Do
not useabrasive cleaningagents.They will scratchfinish and remove markings.Rinse,
dry and replace. Turn each burnerON to see if knobs have been replacedcorrectly.
Backguard- glass Soap & water Wash with cloth wrung out in soapywater. Remove stubbornsoil with paste of baking
oven window Paste of bakingsoda soda and water. To avoid inside stainingof oven door glass,do not oversaturatecloth.
& water Do not useabrasive materials such as scouring pads,steel wool or powderedcleaning
Windowcleaningfluid agents. They will damage glass. Rinsewith clean water and dry.
or ammonia
Drip bowls,chrome Soap & water Clean bowlsafter each use with soap and water. Removestubbornstains with baking
Paste of bakingsoda soda pasteand plasticscouringpad.To preventscratchingthefinish, do notuseabrasive
& water cleaningagents.Rinse,dry and replace.NOTE:Ringscanpermanentlydiscolorif exposed
Plastic scouringpad to excessiveheat or if soil is allowed to bake on.
End panels, polyester Soap & water Wash with soap and warm water. Oo not use abrasive cleaning materials.They will
scratchfinish. Never use oven cleaners.
Grates Detergent& water Gratesare madeof porcelaincoatedsteel. Theycan becleanedat thesink withdetergent
Soap filled scouring pad and water or in the dishwasher.Cleanstubbornsoil with soap filled scouringpad.
Metal finishes- Soap & water Wash with soap and water. Removestubbornsoil with pasteof bakingsodaand water.
Aluminum- backguard Pasteof baking soda Donot use abrasive or caustic agents. They will damage the finish.
& control panel & water
Chrome& stainless
steel - trim parts
Ovenracks Soap & water Clean with soapy water. Removestubbornsoil with cleansing powderor soap filled
Cleansingpowders& scouringpad. Rinseand dry.
plastic pads
Soap filled scouringpad
Exterior porcelainfinish Mild soap & water Porcelain enamel is glass fused on metal. It may crack or chip with misuse.Cleanwith
Paste of baking soda soapand water when parts are cool.All spillovers,especially acid spillovers,shouldbe
& water wiped up immediatelywith a dry cloth. When surface is cool, clean with warm soapy
water. NEVERWIPEOFFA WARMORHOTENAMELSURFACEWITHA DAMPCLOTH.THIS
MAY CAUSECRACKINGAND CHIPPING.Never use abrasiveor caustic cleaningagents
on exterior finish of range.
Interiorporcelainfinish Follow self cleaninginstructionsonpage 13. DONOTUSEOVENCLEANERS.Do not clean
See page 13 for self braidedgasket aroundoven frame.
clean oven instructions)
;urface burners Soap& water Clean as necessary with warm soapy water. Removestubborn soil by scouringwith a
Paste of baking soda non-abrasiveplastic scouringpadand a pasteof bakingsoda andwater. Cleanports with
& water a straight pin. 0o not enlargeor distortthe ports.Do notuse a wooden toothpick.It may
Plasticscouring pad break off and clog port. DONOTCLEANBURNERSWITHTHEFOLLOWINGcaustic cleaners:
suchas Tufty® steel wool, abrasive cleaningagents,dishwasherdetergent,or metal polishes.Thesewill
damagefinish. Donot clean burners in dishwasher.Burnerscan bedried in the ovenset
at 140°F. CAUTION:Burner and burner tube must be dry before use.
Vinyl finishes Soap & water Never use abrasive or caustic agents on vinyl finishes.
Doorhandles
Manifold panel
15
Page 17

SERVICE
BEFORECALLINGA SERVICETECHNICIAN,CHECKTHEFOLLOWING:
PROBLEM CAUSE CORRECTION
1.Surfaceburnerfails to light a. powersupplynot connected a. connectpower,checkcircuit
(Pilotlessignition) breakeror fusebox
b.cloggedburnerport(s) b. cleanportswith straight pin
2. Burnerflame uneven a. cloggedburnerport(s) a. cleanportswith straightpin
b. burnernot properlypositioned b. seepage6to correctlyreplace
burner
3. Surfaceburnerflame a. air/gasmixturenot proper a. call servicemanto adjustburner
• liftsoff port primaryair
• yellowin color
4. Ovenburnerfails to light a. powersupplynotconnected a. connectpower,checkcircuit
(Pilotlessignition) breakeror fuse box
b. electronicclockincorrectlyset b. seepage5
5. Oventemperatureinaccurate a. ovennot preheated a. preheatoven10minutes
• foodtakestoolongorcooks b. incorrectrackposition b. seepage8
toofast c. incorrectuseof foil c. seepage9
• palebrowning d. ovenbottomincorrectlyreplaced d. replaceovenbottomcorrectly
• food over-doneonoutsideand e. oventhermostatsensingdevice e. reinsertsensingdevicesecurely
under-donein center outof holdingclip(s) intoclip(s)
• over browning
6. Clockand/orlight doesnotwork a. powersupplynotconnected a. connectpowersupply,check
circuitbreakeror fusebox
b. burnedoutlightbulb b. replacelight bulb
c. defectiveswitch,starteror ballast c. callservicemanto check
d. defectiveclockor loosewiring d. call servicemantocheck
7.Fplusanumberappearsinthedis- ThesearecalledFAULTCODES.If a faultcodeappearsin thedisplayanda con-
play. (ExampleF 1) Continuous tinuousbeepsounds,presstheSTOP/CLEARbutton.Ifthefaultcodereappears,
beepssound, disconnectpowerto the rangeandcall the serviceagency.
SERVICE
Do not attempt to service the If you are not satisfied with the local MajorApplianceConsumerActionPanel
appliance yourself unless directed to response to your service require- 20 North WackerDrive
do so in this book. Contactthe dealer ments, call or write MAYCORParts Chicago,IL 60606
who sold you the appliance for and Service Co., P. 0. Box 2370,
service. Cleveland, TN 37311,(615) 472-3333. MACAP (Major Appliance Consumer
Include or have available the corn- Action Panel) is an independent
plete model and serial numbers of the agency sponsored by three trade
HOW TO OBTAIN SERVICE appliance, the name and address of associations as a court of appeals on
Whenyour range requires serviceor the dealer from whom you purchased consumercomplaintswhichhave not
replacement parts, contact your the appliance, the date of purchase been resolvedsatisfactorily within a
Dealeror AuthorizedServiceAgency. and details concerningyourproblem, reasonableperiod of time.
Consult the Yellow Pages in your
telephonedirectory under rangesfor If you did not receive satisfactory
the service source nearest you. Be servicethrough your serviceagency
sure to includeyour name, address, or Maycor you maycontacttheMajor
and phone number, along with the ApplianceConsumerAction Panelby
model and serial numbers of the letter includingyour name, address,
appliance. (See inside cover for and telephonenumber,as well as the
location of your model and serial model and serial numbers of the
numbers), appliance.
16
Page 18

SAFETYINSTRUCTIONS
FORYOURSAFETY FORYOURSAFETY WARNING
DONOTSTOREORUSE IF YOUSMELLGAS: Improperinstallation,ad-
GASOLINEOR OTHER I.OPENWINDOWS. justment,alteration,ser-
FLAMMABLEVAPORS 2.DONOTTOUCHELEC- vice or maintenancecan
ANDLIQUIDSIN THE TRICALSWITCHES. causeinjuryorproperty
damage.Refer to this
VICINITYOFTHISOR 3.EXTINGUISHANY manual.Forassistanceor
ANYOTHERAPPLIANCE. OPENFLAME. additionalinformationcon-
4.IMMEDIATELYCALL suit a qualifiedinstaller,
INSTALLATION YOURGASSUPPLIER. serviceagency,manufac-
Have the installer show you the turer (dealer)or thegas
location of the gas shutoff valve and supplier.
how to shut it off in an emergency. IN CASE OF FIRE:
1.Turn off oven controls and venti-
Be certain all packing materials are lating hood, if equipped. GENERAL
removed from the oven before 2. Smother fire or flame with baking Nocookingapplianceshouldbe used
operating, to prevent fire or smoke soda, dry chemical,orafoam-type as a space heater.This instructionis
damage shouldthe packing material extinguisher.Do not usewater on based on safety considerations to
ignite, grease fires, prevent potential hazard to the
• If the fire is in the oven, smother it consumer as well as damage to the
Observe all instructions for minimum by closing the oven door. appliance.
clearances to any combustible
surfaces. These should be in L.._,
accordance with information on the GAS TYPE
rating plate and with national fire All models, are adjustable for use
laws. with NATURALor LP (bottled) gas. An
appliance adjusted for one type of
SERVICING gas CANNOTbe used with the other
Electrical supply must be dis- type until adjustmentsare madebya
connectedbeforeservicingappliance, qualified serviceman.
Do not repair or replaceany part of
your oven unless specificallyrecom- Keepareaaround applianceclear and
mended in this manual. All other free from combustible materials,
servicing should be referred to a gasoline,andotherflammablevapors
qualified technician, and materials.
In the event of a prolongedpower
failure, the ovencannot be operated
during a power failure.
Never blockovenvent or air intakes.
Do not obstruct the flow of com-
bustion and ventilation air. Restric-
tion of air flow tothe burnerprevents
proper performance. Avoid touching
oven vent area while oven is on and
for several minutes after oven is
turned off. Somepartsoftheventand
surrounding area become hot enough
to cause burns.
 Loading...