

Page 1
FETY INS l RUG ! IONS
WARNING: If the information in this manual is not
followed exactly, a fire or explosion may result
causing property damage, personal injury or death.
- Do not store or use gasoline or other flammable
vapors and liquids in the vicinity of this or any
other appliance.
- WHAT TO DO IF YOU SMELL GAS
• Do not try to light any appliance.
• Do not touch any electrical switch; do not
use any phone in your building.
• Immediately call your gas supplier from a
neighbor's phone. Follow the gas supplier's
instructions.
• If you cannot reach your gas supplier, call the
fire department.
Installation and service must be performed by a
qualified installer, service agency or the gas
supplier.
GENERAL
No cooking appliance should be used as
a space heater. This instruction is based
on safety considerations to prevent po-
tential hazard to the consumer as well
as damage to the appliance.
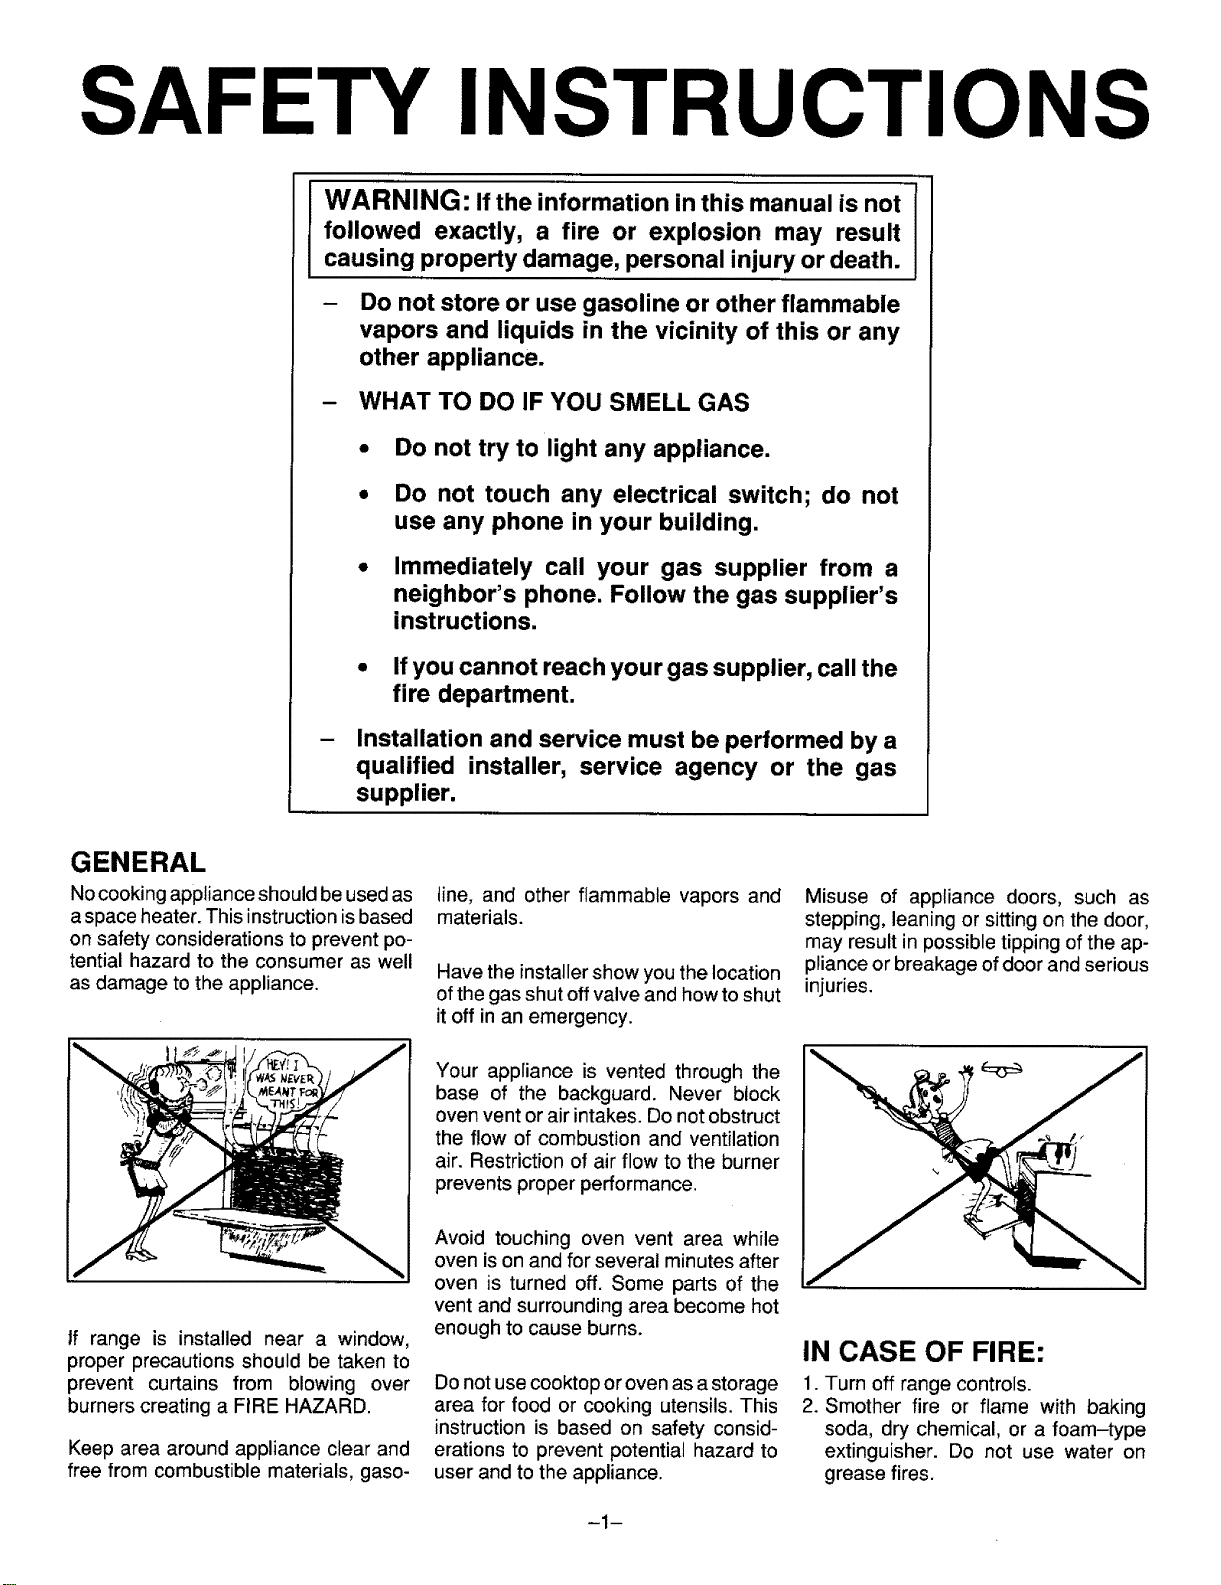
If range is installed near a window,
proper precautions should be taken to
prevent curtains from blowing over
burners creating a FIRE HAZARD.
Keep area around appliance clear and
free from combustible materials, gaso-
line, and other flammable vapors and
materials.
Have the installer show you the location
of the gas shut off valve and how to shut
it off in an emergency.
Your appliance is vented through the
base of the backguard. Never block
oven vent or air intakes. Do not obstruct
the flow of combustion and ventilation
air. Restriction of air flow to the burner
prevents proper performance.
Avoid touching oven vent area while
oven is on and for several minutes after
oven is turned off. Some parts of the
vent and surrounding area become hot
enough to cause burns.
Do not use cooktop or oven as a storage
area for food or cooking utensils. This
instruction is based on safety consid-
erations to prevent potential hazard to
user and to the appliance.
Misuse of appliance doors, such as
stepping, leaning or sitting on the door,
may result in possible tipping of the ap-
pliance or breakage of door and serious
injuries.
IN CASE OF FIRE:
1. Turn off range controls.
2. Smother fire or flame with baking
soda, dry chemical, or a foam-type
extinguisher. Do not use water on
grease fires.
-1-
Page 2
FETY INS ! RUC ! IONS
CHILD SAFETY
Do not leave children alone or unsuper-
vised near the appliance when it is in
use or is still hot. Children should never
be allowed to sit or stand on any part of
the appliance. Children must be taught
that the appliance and utensils in it can
be hot. Children should be taught that
an appliance is not a toy. They should
not be allowed to play with controls or
other parts of the unit. Let hot utensils
cool in asafe place, out of reach of small
children.
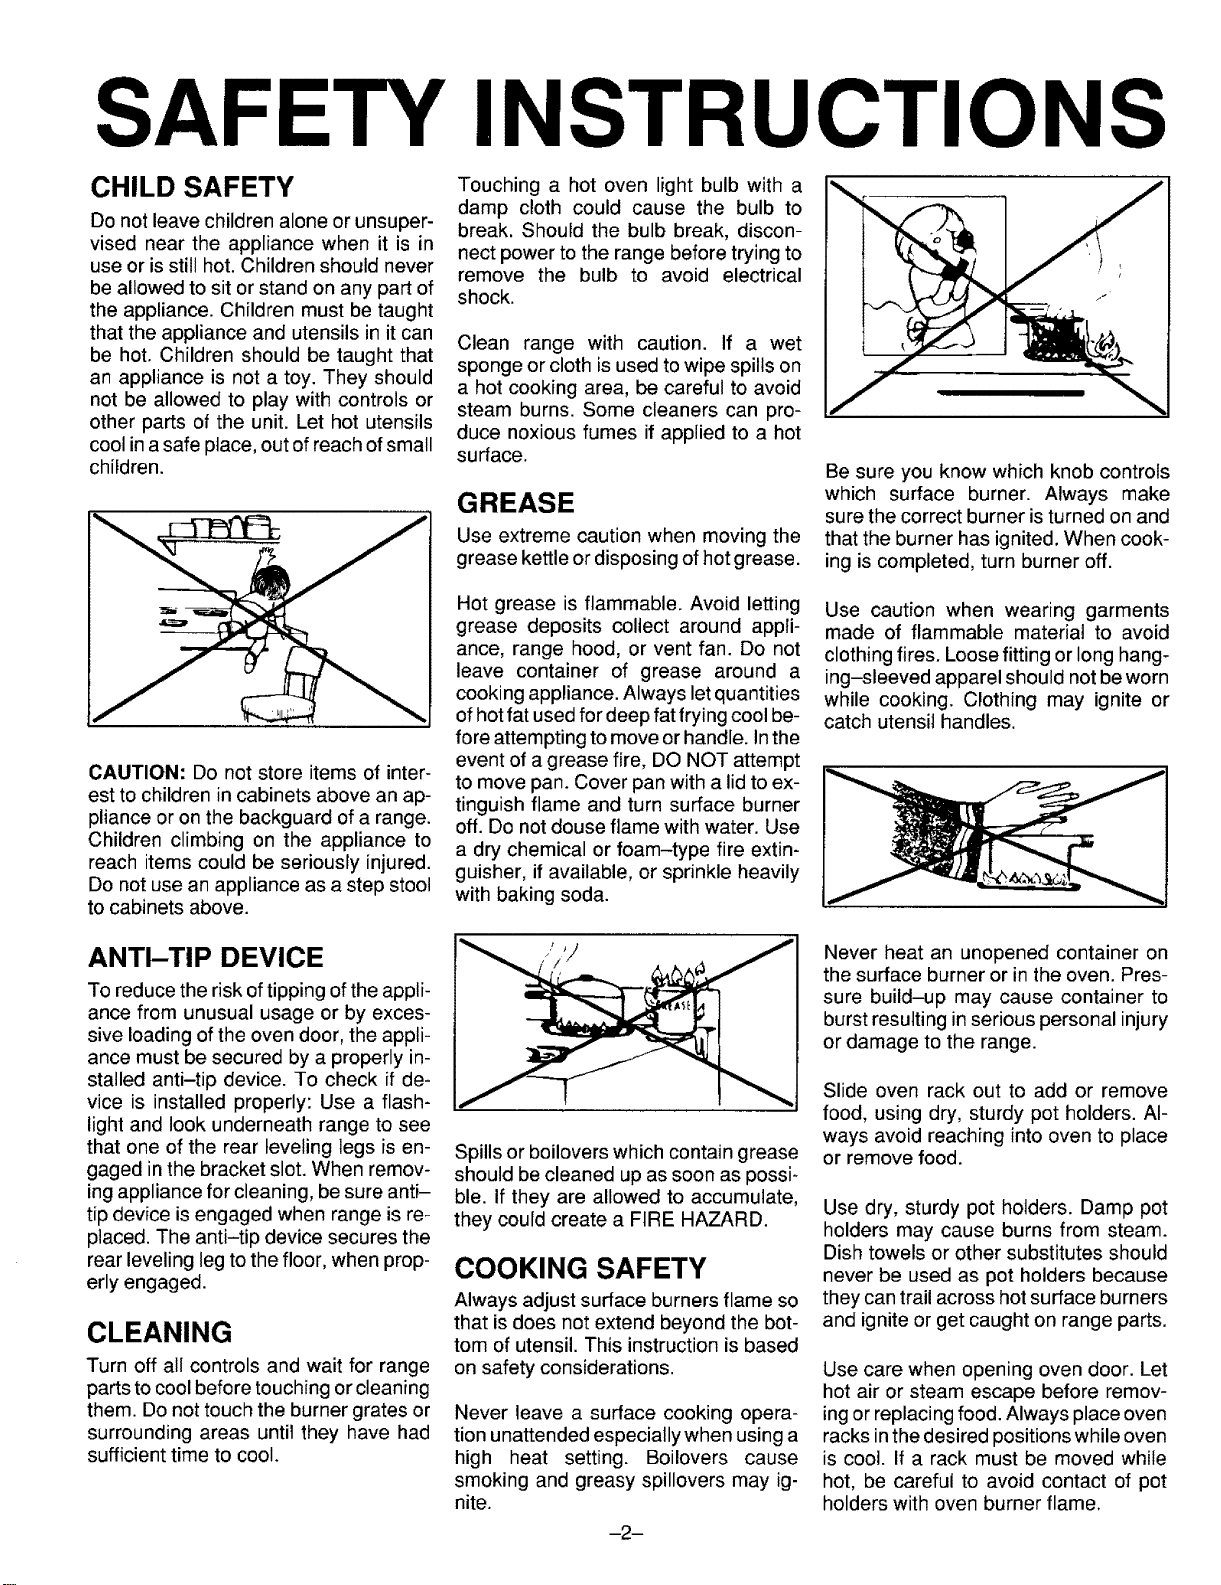
CAUTION: Do not store items of inter-
est to children in cabinets above an ap-
pliance or on the backguard of a range.
Children climbing on the appliance to
reach items could be seriously injured.
Do not use an appliance as a step stool
to cabinets above.
Touching a hot oven light bulb with a
damp cloth could cause the bulb to
break. Should the bulb break, discon-
nect power to the range before trying to
remove the bulb to avoid electrical
shock.
Clean range with caution. If a wet
sponge or cloth is used to wipe spills on
a hot cooking area, be careful to avoid
steam burns. Some cleaners can pro-
duce noxious fumes if applied to a hot
surface.
Use extreme caution when moving the
grease kettle or disposing of hot grease.
Hot grease is flammable. Avoid letting
grease deposits collect around appli-
ance, range hood, or vent fan. Do not
leave container of grease around a
cooking appliance. Always let quantities
of hot fat used for deep fat frying cool be-
fore attempting to move or handle. In the
event of a grease fire, DO NOT attempt
to move pan. Cover pan with a lid to ex-
tinguish flame and turn surface burner
off. Do not douse flame with water. Use
a dry chemical or foam-type fire extin-
guisher, if available, or sprinkle heavily
with baking soda.
Be sure you know which knob controls
which surface burner. Always make
sure the correct burner is turned on and
that the burner has ignited. When cook-
ing is completed, turn burner off.
Use caution when wearing garments
made of flammable material to avoid
clothing fires. Loose fitting or long hang-
ing-sleeved apparel should not be worn
while cooking. Clothing may ignite or
catch utensil handles.
ANTI-TIP DEVICE
To reduce the risk of tipping of the appli-
ance from unusual usage or by exces-
sive loading of the oven door, the appli-
ance must be secured by a properly in-
stalled anti-tip device. To check if de-
vice is installed properly: Use a flash-
light and look underneath range to see
that one of the rear leveling legs is en-
gaged inthe bracket slot. When remov-
ing appliance for cleaning, be sure anti-
tip device is engaged when range is re-
placed. The anti-tip device secures the
rear leveling leg to the floor, when prop-
erly engaged.
CLEANING
Turn off all controls and wait for range
parts to cool before touching or cleaning
them. Do not touch the burner grates or
surrounding areas until they have had
sufficient time to cool.
Spills or boilovers which contain grease
should be cleaned up as soon as possi-
ble. If they are allowed to accumulate,
they could create a FIRE HAZARD.
COOKING SAFETY
Always adjust surface burners flame so
that is does not extend beyond the bot-
tom of utensil. This instruction is based
on safety considerations.
Never leave a surface cooking opera-
tion unattended especially when using a
high heat setting. Boilovers cause
smoking and greasy spillovers may ig-
nite.
-2-
Never heat an unopened container on
the surface burner or in the oven. Pres-
sure build-up may cause container to
burst resulting in serious personal injury
or damage to the range.
Slide oven rack out to add or remove
food, using dry, sturdy pot holders. Al-
ways avoid reaching into oven to place
or remove food.
Use dry, sturdy pot holders. Damp pot
holders may cause burns from steam.
Dish towels or other substitutes should
never be used as pot holders because
they can trail across hot surface burners
and ignite or get caught on range parts.
Use care when opening oven door. Let
hot air or steam escape before remov-
ingor replacing food. Always place oven
racks inthe desired positions while oven
is cool. If a rack must be moved while
hot, be careful to avoid contact of pot
holders with oven burner flame.
Page 3

SAFETY INS l RUC lIONS
STORAGE ABOVE
RANGE
To eliminate the hazard of reaching over
hot surface burners, cabinet storage
should not be provided directly above a
unit. If such storage is provided, it
should be limited to items which are
used infrequently and which are safely
stored in an area subjected to heat from
an appliance. Temperatures in storage
areas above the unit may be unsafe for
some items, such as volatile liquids,
cleaners or aerosol sprays.
UTENSIL SAFETY
Use only pans that have flat bottoms
and handles that are easily grasped and
stay cool. Avoid using unstable,
warped, easily tipped or loose handled
pans. Do not use pans if their handles
twist and cannot be tightened. Pans that
are heavy to move when filled with food
may also be hazardous.
Be sure utensil is large enough to prop-
erly contain food and avoid boilovers.
Pan size is particularly important in
deep fat frying. Be sure pan will accom-
modate the volume of food that is to be
added as well as the bubble action of fat.
Never leave a deep fat frying operation
unattended.
Never let a pan boil dry as this could
damage the utensil and the appliance.
ALUMINUM FOIL
Use aluminum foil ONLY as instructed
in this book. Improper use of aluminum
foil may cause damage to the oven, af-
fect cooking results, and can also result
in shock and/or fire hazards.
PLASTICS
Many plastics are vulnerable to heat.
Keep plastics away from parts of the ap-
pliance that may become warm or hot.
IMPORTANT SAFETY
NOTICE AND WARNING
The California Safe Drinking Water and
Toxic Enforcement Act of 1986 (Propo-
sition 65) requires the Governor of Cali-
fornia to publish a list of substances
known to the State of California to cause
cancer or reproductive harm, and re-
quires businesses to warn customers of
potential exposures to such sub-
stances.
Users of this appliance are hereby
warned that the burning of gas can re-
sult in low-level exposure to some of the
listed substances, including benzene,
formaldehyde and soot, due primarily to
the incomplete combustion of natural
gas or liquid petroleum (LP) fuels. Prop-
erly adjusted burners will minimize in-
complete combustion. Exposure to
these substances can also be mini-
mized by properly venting the burners to
the outdoors.
Always place a pan of food on a surface
burner before turning it on, and turn it off
before removing the pan.
Always turn pan handles to the side or
back of appliance, not out into the room
where they are easily hit or reached by
small children. To minimize burns, igni-
tion of flammable materials and spillage
due to unintentional contact with the
utensil, do not extend handles over ad-
jacent surface burners.
!
AEROSOL SPRAYS
Many aerosol-type spray cans are EX-
PLOSIVE when exposed to heat and
may be highly flammable. Avoid their
use or storage near an appliance.
SELF-CLEAN OVEN
Do not clean door gasket. The door gas-
ket is essential for a good seal. Care
should be taken not to rub, damage, or
move the gasket. Do not use oven
cleaners of any kind in or around any
part of the self-clean oven. Clean only
parts listed in this booklet. Before self-
cleaning the oven, remove broiler pan,
oven racks, and other utensils, and wipe
off excessive spillovers.
It is normal for the cooktop of the range
to become hot during a self-clean cycle.
Therefore, touching or lifting the cook-
top during a clean cycle should be
avoided.
VENTILATING HOOD
To reduce the hazard of storage above
a range, install a ventilating hood that
projects at least 5 inches beyond the
bottom edge of the cabinets. Clean
hood frequently to prevent grease from
accumulating on hood or its filter.
Should a boilover or spillover result inan
open flame, immediately turn off the
hood's fan to avoid spreading the flame.
After thoroughly extinguishing flame,
the fan may be turned on to remove un-
pleasant odor or smoke.
-3-
Page 4

ELECTRONIC CON rROL! ER
CLOCK (time-of-day)
1. Press CLOCK pad.
2. Turn SET knob until display shows
correct time-of-day.
3. Press STOP/CLEAR pad to lock in
time.
When power is first supplied to oven
or if there has been a power failure,
the display will flash. Follow above in-
structions to set clock.
SET CLEAN COOK STOP TIMER LOCK ON
Press to cancel all
operations except
clock and time I or LO broil.
CLOCK CLEAN BROIL
CLEAN
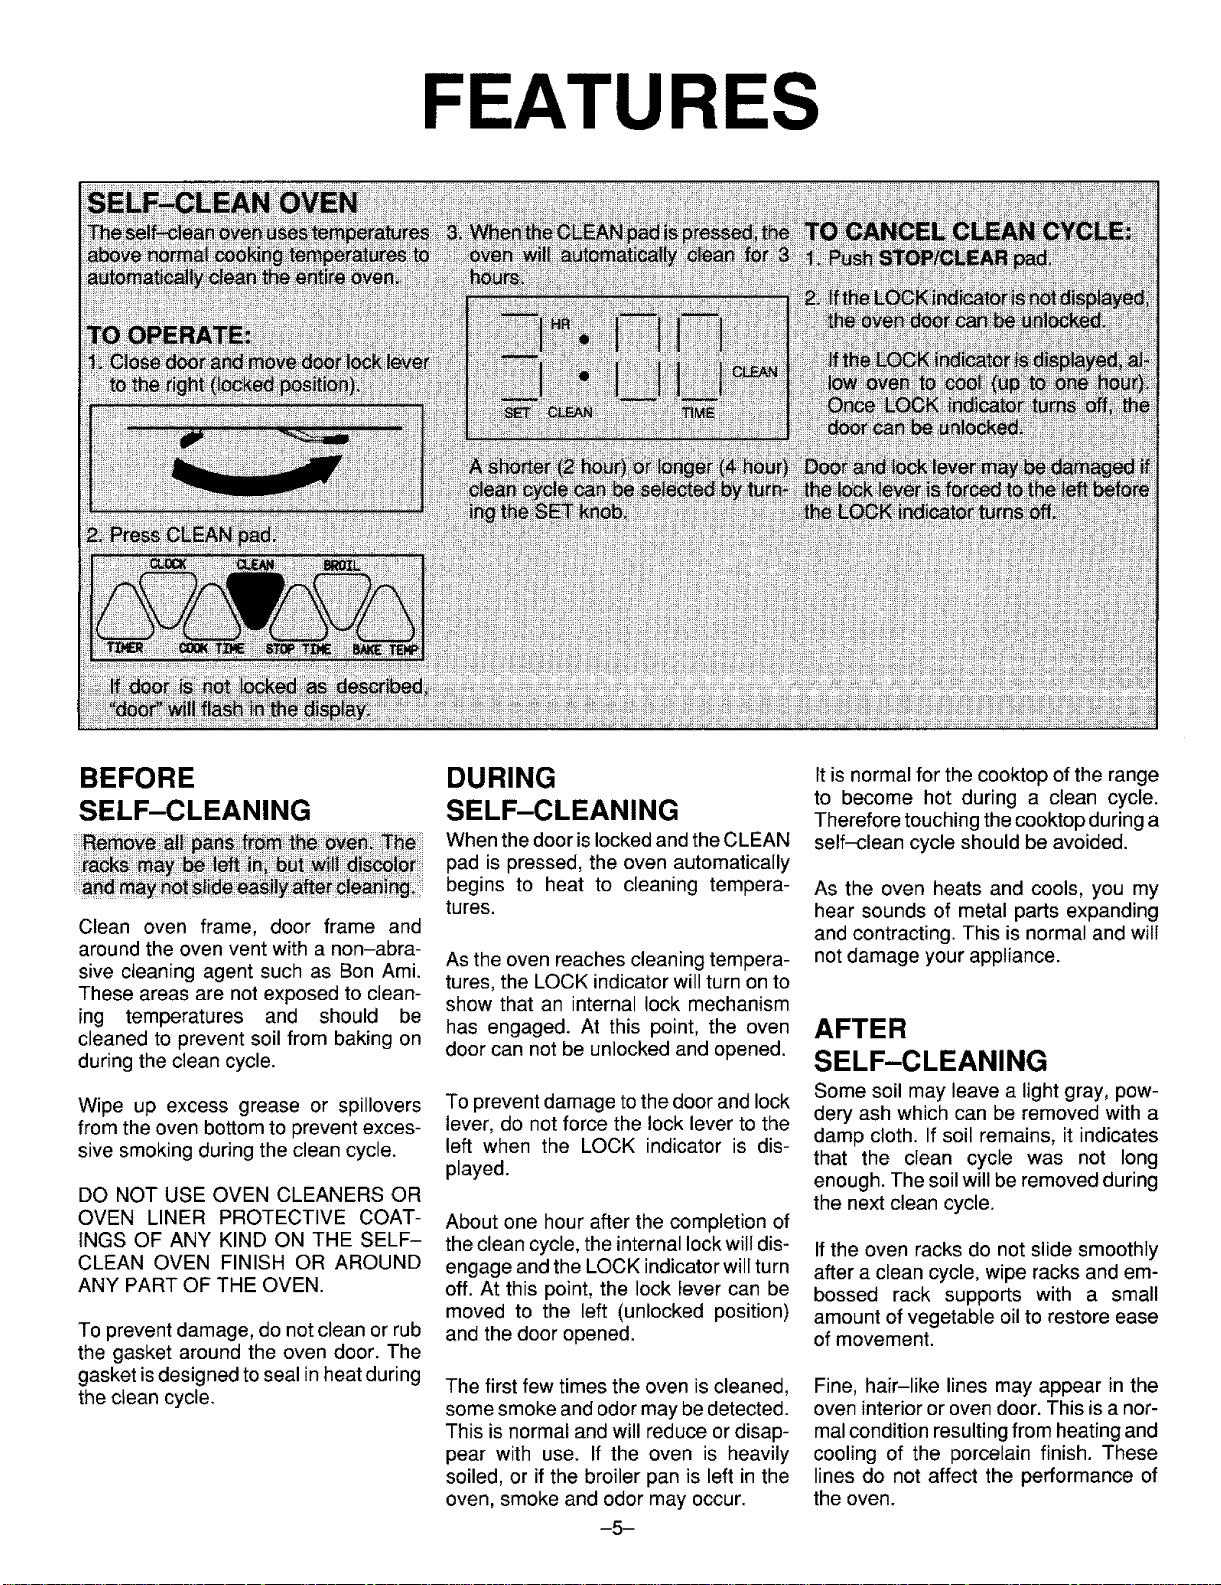
I. Close door.
2. Move door lock lever to locked po-
sition.
3. Press CLEAN pad. ("door" will
flash in display and beeps will
sound ifdoor is not locked.)
4. Oven will automatically clean for 3
hours. Select 2 or 4 hours by turn-
ing the SET knob.
See page 5 for additional information,
I I O Qo
" U U
I • II I CLE .BROIL
DELAY TIMED BAKE
BROIL
!. Press BROIL pad.
2. Turn SET knob clockwise toselect
HI broil or counter clockwise to se-
lect LO broil.
3. Press STOP/CLEAR pad to cancel
broil operation.
See page 12 for additional informa-
tion.
SETO
Turn knob in either di-
rection to enter time,
temperature, or to se-
TIMER COOK TIME STOP TIME BAKE TEMP
(NOTE: All indicator words are displayed to show their location. When oven or timer is not in use,
indicator words are not displayed. Indicators are only displayed when oven is set for a cook, delayed
cook, clean or timer operation.)
TIMER (minute timer)
1. Press TIMER pad.
2. Turn SET knob to desired time.
3. TIMER starts automatically.
3 beeps signal the end ofthe timing
operation and the time-of-day re-
appears in the display.
4. To cancel: Press TIMER pad and
hold for 3 seconds or turn SET
knob until :00 appears in the dis-
play. Time-of-day will reappear
after a slight delay.
COOK TIME/STOP TIME
To begin cooking immediately:
1. Press BAKE TEMP pad and enter
oven temperature with SET knob.
2. Press COOK TIME pad and enter
desired cookingtime by turningthe
SET knob.
To delay the start of cooking:
1. Press BAKE TEMP pad and enter
oven temperature with SET knob.
2. Press COOK TIME pad and enter
cooking time with SET knob.
3. Press STOP TIME pad and enter
time you wish food to stop cooking
with SET knob.
The oven will automatically turn on
and off at the preset times.
BAKE TEMP
1, Press BAKE TEMP pad.
2. Turn SET knob until desired oven
temperature appears in the dis-
play.
3. Press STOP/CLEAR pad to cancel
the baking operation.
See pages 10 to 1t for additional in-
formation on baking and roasting.
LI_,_ i}} ii}_ i i_i ii:ii_ ii}[!!i} i:iL
Press STOP/CLEAR pad to cancel
end-of-cooking beeps. See page 6
for additional information.
-4-
Page 5
FEATURES
BEFORE
SELF-CLEANING
Clean oven frame, door frame and
around the oven vent with a non-abra-
sive cleaning agent such as Bon Ami.
These areas are not exposed to clean-
ing temperatures and should be
cleaned to prevent soil from baking on
during the clean cycle.
Wipe up excess grease or spillovers
from the oven bottom to prevent exces-
sive smoking during the clean cycle.
DO NOT USE OVEN CLEANERS OR
OVEN LINER PROTECTIVE COAT-
INGS OF ANY KIND ON THE SELF-
CLEAN OVEN FINISH OR AROUND
ANY PART OF THE OVEN.
To prevent damage, do not clean or rub
the gasket around the oven door. The
gasket isdesigned to seal in heat during
the clean cycle.
DURING
SELF-CLEANING
When the door is lockedand the CLEAN
pad is pressed, the oven automatically
begins to heat to cleaning tempera-
tures.
As the oven reaches cleaning tempera-
tures, the LOCK indicator will turn on to
show that an internal lock mechanism
has engaged. At this point, the oven
door can not be unlocked and opened.
To prevent damage to the door and lock
lever, do not force the lock lever to the
left when the LOCK indicator is dis-
played.
About one hour after the completion of
the clean cycle, the internal lock will dis-
engage and the LOCK indicator will turn
off. At this point, the lock lever can be
moved to the left (unlocked position)
and the door opened.
The first few times the oven is cleaned,
some smoke and odor may be detected.
This is normal and will reduce or disap-
pear with use. If the oven is heavily
soiled, or if the broiler pan is left in the
oven, smoke and odor may occur.
--5--
It is normal for the cooktop of the range
to become hot during a clean cycle.
Therefore touching the cooktop during a
self-clean cycle should be avoided.
As the oven heats and cools, you my
hear sounds of metal parts expanding
and contracting. This is normal and will
not damage your appliance.
AFTER
SELF-CLEANING
Some soil may leave a light gray, pow-
dery ash which can be removed with a
damp cloth. If soil remains, it indicates
that the clean cycle was not long
enough. The soil will be removed during
the next clean cycle.
If the oven racks do not slide smoothly
after a clean cycle, wipe racks and em-
bossed rack supports with a small
amount of vegetable oil to restore ease
of movement.
Fine, hair-like lines may appear in the
oven interior or oven door. This is a nor-
mal condition resulting from heating and
cooling of the porcelain finish. These
lines do not affect the performance of
the oven.
Page 6

FEATURES
AUTOMATIC OVEN COOKING
Automatic cooking feature is used to turn the oven on and
off at the preset time-of-day. This feature can be used to
delay the start of a cooking operation.
The automatic cooking feature will not operate unless the
clock is functioning and is set at the correct time-of-day.
TO BAKE BY TIME with immediate START:
1. Press BAKE TEMP pad. "BAKE"
lights in the display.
2. Enter oven temperature with the
SET knob.
3. Press COOK TIME pad. "SET
COOK TIME" flashes in the display.
4. Enter cooking time (how long you
wish food to cook) with the SET
knob.
"TIMED BAKE ON" lights in the dis-
play. The oven automatically turns
down.°nand the dispfay begins to count l._Is- " =_1"_IIy_l 3 ,,,oo50°_j
5. At the end of the preset cooking
time, the oven automatically turns
off.
6, Press STOP!CLEAR pad to cancel
end--of-cooking beeps.
Ibl • _II_I
I1"-I • ZII_t O0 nu_°J
CLOQ{ CLEAN BROIL
TTHER COOK TZHE _FOP TIHE BAKE TEHP
TIMER COOK TZNE STOP T'rME BAKE TEHF'
CLOCK CLEAN BROIL
GENERAL
INFORMATION
IMPORTANT: Highly perishable foods
such as dairy products, pork, poultry,
seafoods or stuffing are not recom-
mended for delayed cooking. If cook-
ing more than one food, select foods
that cook for the same length of time
and at the same oven temperature.
To reset or cancel the program: Press
the STOP/CLEAR pad.
After setting the Automatic Cooking
feature, press the CLOCK pad and the
time-of-day will reappear in the dis-
pfay. "TIMED BAKE ON" or "DELAY
BAKE" and the oven temperature will
remain in the display as a reminder that
the oven is set for a cooking operation.
At end of cooking, continuous beeps
will sound. Press STOP!CLEAR pad to
cancel beeps.
TO BAKE BY TIME with delayed START:
1. Follow steps 1,2, 3 and 4 above,
2. Press STOP TIME pad. "SET STOP
TIME" flashes in the display.
3. Enter the time you wish the oven to
turn off by turning the SET knob.
"DELAY TIMED BAKE" lights in the
display, Time-of-day reappears in
the display.
The oven will automatically turn on
in time to have the food cooked by
the preselected STOP TIME. The
oven will automatically turn off at the
preset stop time.
4. Press STOP/CLEAR pad to cancel
end-of-cooking beeps.
I_ ...rqr_ 950 °
• L2J _L .....
CLOCK CI,,_AN BROIL
CLOCK CLEAN BROIL
-6-
Page 7

USING YOUR COOK'rOP
COOKTOP
The cooktop is designed with two con-
toured welts which contain spills until
they can be wiped up. Unlike the stan-
dard gas appliance, THIS COOKTOP
DOES NOT LIFT-UP NOR IS IT RE-
MOVABLE. To prevent damage to the
gas tubing or top, do not attempt to lift
cooktop.
GRATES
Burner grates must be properly posi-
tioned before cooking. Do not operate
burners without a pan on the grate. The
porcelain finish may chip without a pan
to absorb the intense heat.
When reinstalling square grates, place
indented sides together so straight
sides are at front and rear.
Y
lainfinish ofthe grate may chip without a
pan to absorb the intense heat from the
burner flame.
DUAL PURPOSE
SEALED BURNERS*
The four sealed burners are secured to
the cooktop and are NOT designed to
be removed by the consumer.
Since the four burners are sealed into
the cooktop, boilovers won't seep un-
derneath to the burner box area. Thus,
there are no hidden spills in the burner
box area to clean.
Some models feature two special HI
SPEED sealed burners. Use the H!
SPEED burners to quickly bring water to
a boil and for large - pot cooking. See
information on rating plate to determine
if your appliance features the HIGH
SPEED burner.
LOCATION OF BURNERS:
SPEED BURNER
HIGH SPEED BURNER
A properly adjusted burner with dean
ports willlight within a few seconds. On
natural gas, the flame wilt be blue with a
deeper blue inner core; there should be
no trace of yellow in the flame, indicating
an improper mixture of air/gas. This
wastes fuel, so have a serviceman ad-
just the mixture if a yellow flame occurs.
You may hear a "popping" sound on LP
gas when the surface burner is turned
off. This is a normal operating sound of
the burner.
To light burner:
1. Place utensil on burner grate.
2. Push in and turn knob to the LITE po-
sition.
3. After the burner lights, turn knob to
the desired flame size.
If flame shoutd go out during a cooking
operation, turn the burner off. IF GAS
HAS ACCUMULATED AND A
STRONG GAS ODOR IS DETECTED,
WAIT 5 MINUTES FOR THE GAS
ODOR TO DISAPPEAR BEFORE
RELIGHTING BURNER.
IGNITORS
Once burner lights, turn knob to the de-
sired setting. The sparking wili not stop
until the knob is turned from the LITE po-
sition.
Optional re-ignition system (if
equipped) will automaticaJly relight the
burner if a draft should extinguish it
when using a very low setting. When
this occurs, you will hear a sparking or
clicking sound.
CAUTION: Do not operate sealed burn-
er without apan on the grate. The porce- *U.S. Patent Pending
-7-
Page 8

USING YOUR COOK IOP
PILOTLESS IGNITION
Be sure all surface controls are set inthe
OFF position prior to supplying gas to
the appliance.
TO OPERATE SURFACE BURNER
DURING A POWER FAILURE.
1. When lighting surface burners, be
sure all controls are in the OFF posi-
tion. Hold a lighted match to the de-
sired surface burner head.
2. Turn knob to LITE. The burner will
then light.
3. Adjust the flame to the desired level,
Use H IGH to quickly bring foods to a boil
or to begin a cooking operation. Reduce
to a lower setting to continue cooking.
Never leave food unattended during a
cooking operation.
PROPORTIONAL VALVE
To obtain a lower flame size, turn knob
back toward the OFF position until the
desired flame size is reached. The low-
est flame setting is located adjacent to
the OFF position.
SELECTING FLAME SIZE
If a knob is turned very quickly from
HiGH to LOW setting, the flame may go
out, particularly if burner is cold. If this
occurs, turn the knob OFF. Wait several
seconds, then light again.
Flame should be adjusted so itdoes not
extend beyond the edge of cooking
utensil. This isfor personal safety and to
prevent damage to cabinets above
range.
Use LOW to simmer or keep foods at
serving temperatures. Some cooking
may take place if the utensil is covered.
If a LOW setting is to be used, preheat
the burner on HIGH for a minute then re-
duce to the LOW setting and continue
the cooking operation.
CARE INFORMATION
When cleaning around the surface
burner, use care to prevent damage to
the spark ignitor which is located at the
back-side of each burner. If a cleaning
cloth should catch the ignitor, it could
damage or break it. If the ignitor isdam-
aged or broken, the surface burner will
not light.
REAR VIEW OF SEALED BURNER
-8-
Page 9

USING YOUR OVEN
PILOTLESS IGNITION
Gio bar-type ignition
With this type of ignition system, the
oven will not operate during a power fail-
ure or if oven is disconnected from the
wall outlet. No attempt should be made
to operate oven during a power failure.
FAN
Slide in ranges are equipped with a fan
which automatically turns on whenever
the oven is set for cooking or cleaning.
The fan will automatically turn off when
the unit has cooled.
To replace door: Grasp door at each
side, align slots in the door with the
hinge arms and slide door down onto
the hinge arms until completely seated
on hinges.
To replace: Fit front edge of oven bot-
tom into front frame. Lower rear of oven
bottom and slide the catches back to
lock oven bottom into place.
STORAGE DRAWER
To remove: Pull drawer out to the first
stop position. Lift up front of drawer and
pull to the second stop position. Grasp
sides and lift up and out to remove
drawer.
OVEN DOOR
When opening oven door, allow steam
and hot air to escape before reaching in
oven to check, add or remove food.
To remove door: Open door to the
"stop" position (opened about 4 inches)
and grasp door with both hands at each
side. Do not use door handle to lift door.
Lift up evenly until door clears the hinge
arms.
OVEN BOTTOM
Protect oven bottom against excessive
spillovers especially acid or sugary spil-
lovers. Use the correct size cooking
utensil to avoid boilovers.
To remove: When cool, remove the
oven racks. Slide the two catches, lo-
cated at each rear corner of the oven
bottom, toward the front of the oven.
t
To replace: Fit ends of drawer glides
onto rails. Lift up drawer front and gently
push in to first stop position. Lift up
drawer again and continue to slide
drawer to the closed position.
ii ii
Lift the rear edge of the oven bottom
slightly, then slide it back until the front
edge of the oven bottom clears the oven
front frame. Remove oven bottom from
oven.
Page 10

USING YOUR OVEN
OVEN
CHARACTERISTICS
OVEN BURNER
The size and appearance of a properly
adjusted oven burner flame should be
as shown:
Cone in center is smaller
Cone approx. 1/2-inch
The oven temperature is maintained by
cycling the burner on and off. After the
oven temperature has been set, there
wilt be about a 45 second delay before
the burner ignites. This is normal, and
no gas escapes during this delay_
During the clean cycle, and some ex-
tended oven cooking operations, you
may hear a "popping" sound when the
burner cycles off. This is a normal oper-
ating sound of the burner.
OVEN RACKS
The two oven racks are designed with a
"lock-stop" position to keep racks from
accidentally coming completely out of
the oven.
To remove: Be sure rack is cool. Pull
rack out to the "lock-stop" position. Tilt
up and continue pulling until rack re-
leases.
To replace: Place rack on rack sup-
ports, tilt up and push toward rear of
oven. Pull rack out to "lock-stop" posi-
tion to be sure rack is correctly replaced.
RACK POSITIONS:
RACK 1 (top of oven) used for 2 rack
cooking of oven meals.
RACK 2 used for two-rack baking or
broiling thicker cuts of meat.
RACK 3 used for most one-rack baking
and roasting some meats.
RACK 4 used for one or two rack baking
and roasting large meats, cooking
larger foods and for baking angel food
cake or pie shells.
RACK 5 used for roasting turkey or bak-
ing angel food cake or pie shells.
HINTS:
NEVER place pans directly on the oven
bottom. Do not cover entire rack with
aluminum foil. Do not place foil directly
on oven bottom or place foil directly un-
der utensil. To catch spillovers, cut a
piece of foil a little larger than the pan
and place it on the rack below the rack
containing the utensil.
If cooking on two racks, stagger pans so
one is not directly over the other, Use
rack positions 2 and 4, or 2 and 5, de-
pending on baking results, when cook-
ing on two racks,
PREHEATING
Preheating is necessary for baking. Al-
low oven to heat for 10 to 15 minutes be-
fore adding food. It is not necessary to
preheat oven for roasting.
It is not necessary to preheat for broiling
unless darker browning is desired or if
cooking thin (3/4-inch) steaks. Allow
burner to preheat 3 minutes.
Selecting temperature higher than de_
sired will NOT preheat the oven any
faster. Preheating at a higher tempera-
ture may have a negative effect on bak-
ing results.
To preheat: Set oven for baking and al-
low the oven to heat until display shows
the preset temperature. 100 will appear
in the display until the oven reaches
100°F. The display will then show the
oven temperature in 5° increments until
the oven reaches the preset tempera-
ture.
-10-
Once the preset temperature is
reached, and the oven temperature has
stabilized, a single beep will sound.
If the oven temperature ischanged after
preheating, a beep will signal that the
oven has reached the new temperature
setting.
Page 11

USING YOUR OVEN
TO SET OVEN:
1. Press BAKE TEMP pad. BAKE indi-
cator turns on.
2. Turn SET knob until desired tem-
perature is displayed.
3. BAKE ON indicator and oven imme-
diately turn on.
COMMON BAKING PROBLEMS AND WHY THEY HAPPEN
Cakes are uneven.
Cake high in middle.
Cake fafts_
Cakes, cookies, biscuits
don't brown evenly.
Pans touching each other or
oven walls.
Batter uneven in pans.
Temperature set too low or
baking time too short.
Oven not level.
Undermixing.
Too much liquid.
Temperature set too high.
Baking time too long.
Overmixing.
Too much flour.
Pans touching each other or
oven walls.
Incorrect rack position.
Too much shortening or sugar.
Too much or too little liquid.
Temperature set too low.
Old or too little baking powder.
Pan too small.
Oven door opened frequently.
Added incorrect type of oil to
cake mix.
Added additional ingredients
to cake mix or recipe.
Incorrect rack position.
Oven door not closed properly.
Door gasket not sealing
properly.
Incorrect use of aluminum foil.
Oven not preheated.
Pans darkened, dented or
Preheat oven for air baking opera-
tions.
4. Place food in oven when oven has
preheated to set temperature.
5. Check food at minimum time. Cook
longer ifnecessary.
6. Press STOP/CLEAR pad to cancel
the operation.
Cakes don't brown on top,
Excessive shrinkage.
Uneven texture.
Cakes have tunnels.
Cakes crack on top.
Cake not done in middle.
_1- _Jl._l
f_LOQ( CLEAN BROIL
TIMER COOK T'rME _TOP TIME BAKE N
Incorrect rack position.
Temperature set too low.
Overmixing.
Too much liquid.
Pan size too large or too little
batter in pan.
Oven door opened too often.
Too little leavening.
Overmixing.
Pan too large.
Temperature set too high.
Baking time too long.
Pans too close to each other
or oven walls.
Too much liquid.
Undermixing.
Temperature set too low.
Baking time too short.
Not enough shortening.
Too much baking powder.
Overmixing or at too high a
speed.
Temperature set too high.
Batter overmixed.
Temperature set too high.
Too much leavening.
incorrect rack position,
Temperature set too high.
Pan too small.
Baking time too short.
Cakes, cookies, biscuits too
brown on bottom.
Oven not preheated.
Pans touching each other or
oven walls.
Incorrect rack position.
Incorrect use of aluminum foil.
Placed 2 cookie sheets on one
rack.
Used glass, darkened, stained,
warped or dull finish metat
pans. (Use a shiny cookie
s,h,,eet.)
w
Pie crust edges too brown.
Pies don't brown on bot-
tom,
Pies have soaked crust.
-11-
Temperature set too high.
Pans touching each other or
oven walls,
Edges of crust too thin.
Used shiny metal pans.
Temperature set too low.
Temperature too low at start of
baking,
Filling too juicy.
Used shin metal ans,
Page 12

USING YOUR OVEN
HOW TO BROIL
Broiling is a method of cooking tender
meats by direct heat under the burner.
The cooking time is determined by the
distance between the meat and the
burner, the desired degree of doneness
and the thickness of the meat.
Broiling requires the use of the broiler
pan and insert. The correct position of
the insert in the pan is very importanL
The broiler insert should be placed in
the pan so grease wilt drain freely. Im-
proper use may cause grease fires.
The broiler insert CANNOT be covered
with aluminum foil as this prevents fat
from draining into pan below. However,
for easier cleaning, the broiler pan can
be lined with foil.
Do not use disposabre broiler pans.
They do not provide a separate tray.
TO BROIL:
1. Prepare meat by removing excess fat
and slashing remaining fat, being
careful not to cut into meat. This will
help keep meat from curling.
2. Place broiler pan onany of the recom-
mended rack positions. Generally,
for brown exterior and rare interior,
the meat should be close to the
burner. Place further down if you
want meat wel! done.
3. Broiling should be done with oven
door closed.
4. Follow suggested times on broiling
chart. Meat should be turned once
about half way through cooking.
5. Check doneness by cutting a slit in
meat near center for desired color.
6. Press STOP/CLEAR pad to cancel a
broil operation.
Use HI BROIL for most broil operations.
When broiling longer cooking foods
such as pork chops, poultry or thick
steaks, select LO BROIL. Low tempera-
ture broiling arlows food to cook to the
well done stage without excessive
browning. Cooking time may increase if
LO BROIL is serected.
BROILING CHART
BACON #2 Welt Done 6 to 10 minutes
CHICKEN LO BROIL
Whole, split #3 Welt Done 45to 60 minutes
Pieces #3 Well Done 30to 45 minutes
GROUND BEEF PATTIES
3/4 to 1-inch thick #2
LAMB CHOPS
1-inch thick
1 1/2-inch thick
WIENERS, precooked
Hot dogs, smoked or Polish sausage, Bratwurst, etc.
#2
#3
#2
Rare
Medium
Well Done
Medium
Wel! Done
Medium
Well Done
10 to 13 minutes
12 to 15 minutes
15 to 18 minutes
12 to ! 5 minutes
16 to 20 minutes
15 to 19 minutes
25 to 30 minutes
8 to 12 minutes
-I2-
Page 13

MAIN
ENANCE
ELECTRICAL
CONNECTION
Appliances which require electrical
power are equipped with a three-prong
grounding plug which must be plugged
directly into a properly grounded three-
hole 120 volt electrical outlet.
Always disconnect power to appli-
ance before servicing.
If an ungrounded, two-hole or other
type electrical outlet is encountered, IT
ISTHE PERSONAL RESPONSIBILITY
OF THE APPLIANCE OWNER TO
HAVE RECEPTACLE REPLACED
WITH A PROPERLY GROUNDED
THREE HOLE ELECTRICAL OUTLET.
The three-prong grounding plug is pro-
vided for protection against shock haz-
ards. DO NOT CUT OR REMOVE THE
THIRD GROUNDING PRONG FROM
THE POWER CORD PLUG.
HOW TO REMOVE
RANGE FOR CLEANING
AND SERVICING
When necessary, follow these proce-
dures to remove appliance for cleaning
or servicing:
.
Shut-off gas supply to appliance.
2_
Disconnect electrical supply to appli-
ance.
.
Disconnect gas supply tubing to ap-
pliance.
,
Slide range forward to disengage
range from the anti-tip bracket. (See
Installation Instructions for location of
bracket,)
,
Reverse procedure to reinstall. If gas
line has been disconnected, check
for gas leaks after reconnection. (See
Installation Instructions for gas leak
test method.)
BACKGUARD LIGHT
To turn on backguard light, press and
hold "cooktop" rocker switch, located on
backguard, until light turns on.
To replace fluorescent surface light:
Disconnect power to range. Grasp the
toptrim of backguard withthumbs under
front edge and pull outward while lifting
to release trim from catches at each
end.
Remove bulb and replace with an 18
watt fluorescent tube. Snap top trim
back into place, restore power, and re-
set clock.
OVEN LIGHT
To turn on oven light, press "oven"
rocker switch, located on backguard.
To replace oven light: Before replac-
ing light bulb, DISCONNECT POWER
TO RANGE. Be sure bulb iscool, Do not
toucha hot bulbwith a damp cloth as the
bulb may break. Use a dry potholder
and carefully unscrew bulb cover and
bulb.
Replace with a 40 watt appliance bulb.
Reconnect power to range and reset
clock.
-13-
Page 14

MAIN !ENANCE
LEVELING LEGS
Some floors are not level. For proper
baking, your range must be level. Level-
ing legs are located on each corner of
the base of the range. Place a level hori-
zontally on an oven rack and check
front-to-back and side-to-side. Level
by turning the legs.
"4
ANTI-TIP BRACKET
To prevent range from accidently tip-
ping, range should be secured to the
floor by sliding rear leveling leg into an
anti-tip bracket supptied with the range.
PROPORTIONAL VALVE
ADJUSTMENT
The LOW setting should produce a sta-
ble flame when turning the knob from HI
to LOW. The flame should be 1/8 inch or
lower and must be stable on all ports on
LOW setting.
To adjust: Operate burner on Ht for
about 5 minutes to preheat burner cap.
Turn knob back to LOW; remove knob,
and insert a small screwdriver into the
center of the valve stem. Adjust flame
size by turning adjustment screw in
either direction. Flame must be of suffi-
cient size to be stable on all burner
ports. Ifflame adjustment is needed, ad-
just ONLY on the LOW setting. Never
adjust flame size on a higher setting.
NOTE: All gas adjustments should be
done by a qualified servicer only.
-14-
Page 15

CARE AND Ct EANING
Baked Enamel
Side panels
Backguard
Oven door
Storage drawer
Chrome drip
bowls, if equipped
Glass
Backguard
Oven window
Metal finishes
Backguard
Trim parts
Manifold panel
Soap & water. Paste of
baking soda & water.
Soap & water. Paste of
baking soda & water.
Plastic scouring pad.
Soap & water. Paste of
baking soda & water.
Window cleaning fluid.
Soap & water. Paste of
baking soda &water.
Use adry towel or cloth to wipe up spills, especially acid spills, as soon as they occur. (This is espe-
cially important for white surfaces.) When surface is cool, wash with soap and water. Do not use
abrasive or harsh cleaning liquids and powders or oven cleaners. These will scratch and perma-
nently damage the finish. Dry with a soft cloth.
Clean bowls after each use with soap and water. Remove stubborn stains with baking soda paste
and plastic scouring pad. To prevent scratching the finish, do not use abrasive cleaning agents.
Rinse, dry and replace. NOTE: Bowls can permanently discolor if exposed to excessive heat or ifsoil
is allowed to bake on.
Wash with soap and water. Remove stubborn soil with paste of baking soda and water. To avoid
inside staining of oven door glass, do not oversaturate cloth. Do not use abrasive materials such as
scouring pads, steel wool or powdered cleaning agents. They will damage glass. Rinse with clear
water and dry.
Wash with soap and water. Remove stubborn soil with paste of baking soda and water. Do not use
oven cleaners, abrasive or caustic agents. They will damage the finish.
Plastic finishes
Door handles
Backguard trim
Overlays
Knobs
End caps
Manifold panels
Surface burners Soap & water. Paste of Clean as necessary withwarm soapy water. Remove stubborn soil by scouring with a non-abrasive
Soap & water. Paste of
baking soda & water.
Non-abrasive plastic
pad or sponge.
baking soda & water, plastic scouring pad and a paste of baking soda and water. Clean ports with a straight pin. Do not
Plastic scouring sponge enlarge or distort the ports. Do not use a wooden toothpick. It may break off and clog port. DO NOT
or pad. CLEAN BURNERS WITH THE FOLLOWING caustic cleaners: oven cleaners, steel wool or abra-
Never use oven cleaners, abrasive or caustic liquid or powdered cleaning agents on plastic finishes.
These cleaning agents will scratch or marr finish. To prevent staining or discoloration, wipe up fat,
grease or acid (tomato, lemon, vinegar, milk, fruit juice, marinade) immediately with a dry paper
towel or cloth. When surface is coot, clean with soap and water; rinse, and dry.
sive cleaning agents. These may damage finish. Sealed surface burners can not be removed by the
consumer.
-15-
Page 16

SERVICE
BEFORE CALLING A SERVICE TECHNICIAN, CHECK THE FOLLOWING:
1. Burner flame uneven.
2. Burner fails to light.
3. Oven temperature inaccurate.
• food takes too long or cooks to
fast.
• pale browning.
• food over-done on outside and
under-done in center.
• over browning.
4. Clock and/or light do not work.
5. Surface burner flame
• liftsoff port
• yellow in color
F plus a number appears in the dis-
play and a continuous beep sounds.
(Example: F 1)
a. clogged burner port(s), a. clean ports with straight pin. Be
sure ignitors are not sparking.
a. power supply not connected.
b. controller incorrectly set.
a. oven not preheated.
b. incorrect rack position.
c. incorrect use of foil.
d. oven bottom incorrectly re-
placed.
e. oven thermostat sensing device
out of holding clip(s).
a. power supply not connected.
b. burned out light bulb.
c. malfunctioning switch.
d. malfunctioning clock or Ioosewir-
ing.
a. air/gas mixture not proper
This is called a FAULT CODE. If a fault code appears in the display, press the
STOP/CLEAR pad. if the fault code reappears, disconnect power to the unit and
call the servicer.
a. connect power, check circuit
breaker or fuse box. Oven wilt not
operate during a power failure.
b. see page 4.
a. preheat oven 10 minutes.
b. see page 10.
c. see page 10.
d. replace oven bottom correctly.
e. reinsert sensing device securely
into clip(s).
a. connect power supply, check cir-
cuit breaker or fuse box.
b. replace light bulb.
c. call serviceman to check.
d. call serviceman to check.
a. call serviceman to adjust burner
primary air
Control will not accept an entry.
SERVICE
Do not attempt to service the appli-
ance yourself unless directed to do
so in this book. Contact the dealer
who sold you the appliance for serv-
ice.
HOW TO OBTAIN
SERVICE
When your appliance requires service
or replacement parts, contact your
Dealer or Authorized Servicer. Use only
genuine factory or Maycor parts if re-
placement parts are necessary. Consult
the Yellow Pages in your telephone di-
rectory under appliance for the service
center nearest you. Be sure to include
your name, address, and phone num-
ber, along with the model and serial
numbers of the appliance. (See front
This may indicate a "stuck" pad. Press each of the seven pads to disengage the
pad. Then, press STOP/CLEAR pad and reprogram the operation. If the control
still does not accept an entry after checking each pad, call the servicer.
cover for location of your model and se-
rial numbers.)
If you are unable to obtain service, write
to us. Our address isfound on the rating
plate. See front cover for location of rat-
ing plate.
If you are not satisfied with the local re-
sponse to your service requirements,
call or write MAYCOR Appliance Parts
and Service Company, 240 Edwards
Street, S.E., Cleveland, TN 37311,
(615) 472-3500. Include or have avail-
able the complete model and serial
numbers of the appliance, the name and
address of the dealer from whom you
purchased the appliance, the date of
purchase and details concerning your
problem.
-16-
If you did not receive satisfactory serv-
icethrough your servicer or Maycor you
may contact the Major Appliance Con-
sumer Action Panel by letter including
your name, address, and telephone
number, as well as the model and serial
numbers of the appliance.
Major Appliance Consumer Action Panel
20 North Wacker Drive
Chicago, IL 60606
MACAP (Major Appliance Consumer
Action Panel) is an independent agency
sponsored by three trade associations
as a court of appeals on consumer com-
plaints which have not been resolved
satisfactorily within a reasonable period
of time.
Page 17

FULL WARRANTY
DOMESTIC GAS OR ELECTRIC RANGE
Parts & Service Company will repair or replace, without charge, any part
defect in material or workmanship during the first year after the date of the original installation. This warranty extends
to any owner during the one-year warranty period.
LIMITED 5
On electric ranges equipped with solid disc or smoothtop heating elements, and ongas ranges with sealed burners, for
an additional 4 year period beyond the first year of the general coverage ofthis warranty, Maycor will replace any of the
solid disc or smoothtop heating elements, or sealed burners which fail to heat as a result of defective workmanship or
material. Additionally, Maycor will replace any smoothtop cooking surface which cracks or breaks during normal
household cooking. These parts must be installed by a qualified person. Any labor charge required for replacement is
not covered by this warranty.
WARRANTY
HOW TO OBTAIN SERVICE
To obtain the repair or replacement of a defective part under these warranties, you should contact the dealer from
whom you purchased the appliance or a servicer he designates.
WHAT IS NOT COVERED BY THESE WARRANTIES
1. Conditions and damage resulting from improper in- 5. Any product used for other than normal household
stallation, delivery, unauthorized repair, modifica- use. It does not extend to products purchased for
tion, or damage not attributable to a defect in mate- commercial or industrial use.
rial or workmanship.
.
Any expense incurred for service calls to correct in-
,
Conditions resulting from damage, such as: (1) im-
proper maintenance, (b) misuse, abuse, accident,
or (c) incorrect electrical current or voltage.
.
Warranties are void if the original serial number has
been removed, altered, or cannot be readily deter-
mined.
4. Light bulbs.
ADDITIONAL HELP
If you are not satisfied with the local response to your service requirements and wish to contact Maycor, please ad-
dress your letter to the Customer Relations Department, Maycor Parts & Service Company, 240 Edwards Street, S.E.,
Cleveland, TN 37311 or call (615) 472-3500. To save time, your letter should include the complete model and serial
nutubers of the warranted appliance, the name and address of the dealer from whom you purchased the appliance, the
date of purchase and details concerning your problem.
stallation errors or to instruct you on how to use the
products.
. CONSEQUENTIAL OR INCIDENTAL DAMAGES
SUSTAINED BY ANY PERSON AS A RESULT OF
ANY BREACH OF THESE WARRANTIES OR ANY
IMPLIED WARRANTY. Some states do not allow
the exclusion or limitation of consequential or inci-
dental damages, so the above exclusion may not
apply to you.
These warranties are the only written or expressed warranties given by Maycor. No one is authorized to increase,
alter, or enlarge Maycor's responsibilities or obligations under these warranties. These warranties give you specific
legal rights, and you may also have other rights which vary from state to state.
8109P059-60
(6/91)
 Loading...