

Page 1
Care
Instructions for your Electric Smoothtop Range with "A" Clock
CONTENTS
SAFETY INSTRUCTIONS ................... 1-3 USINGYOUR OVEN ...................... 10-12
Ovencharacteristics ....................... 10
ELECTRONICCONTROLLER .................. 4 Fan .................................... 10
Oven racks .............................. 10
FEATURES ............................... 5-6 Hints ................................... 10
Self--cleanoven ........................... 5 Preheating ............................... 10
Automatic oven cooking ..................... 6 Howto set oven to bake .................... 11
USING YOUR COOKTOP ................... 7-9 Common baking problem chart ............... 11
Cooking areas ............................. 7 How to broil .............................. 12
Surface controls ........................... 7 MAINTENANCE ............................ 13
Hot surface light ........................... 7 Light replacement ......................... 13
Retainedheat ............................. 7 Storage drawer ........................... 13
Hints .................................... 7 Oven door ............................... 13
Cookware ................................ 8 Leveling legs ............................. 13
Heat setting chart .......................... 8 Fuses (Canada only) 13
Care information ........................... 9 .......................
CARE AND CLEANING CHART ............... 14
SERVICE .................................. 15
Troubteshooting........................... 15
WARRANTY ............................... 18
8113P009-60
(3/92)
Page 2
SAFETY INSTRUCTIONS
Informationin the SafetyInstructionsection covers all STORAGE IN, ON OR NEAR APPLIANCE - Do not
electriccooking appliances. You may find some infor- store or usegasoline or otherflammable materials,va-
mation that does not pertain to your particular appli- porsandliquidsintheoven, nearsurfaceunitsorinthe
ance. Please review this section before using your vicinity of this or anyother appliance. The fumes can
cooking appliance, create a fire hazard or explosion. Do not use cooktop
oroven as a storage areafor food orcooking utensils.
Thefollowinginstructionsare basedonsafety consid-
erationsand must be strictly followed to eliminate the
potentialrisksof fire, electricshock,or personal injury. DO NOT USE WATER //(l(_
PROPERINSTALLATION- Besureyourapplianceis use dry chemical or
properly installed and grounded by a qualified techni- foam-type extinguisher, _:.112z_"_
clan. if available or sprinkle
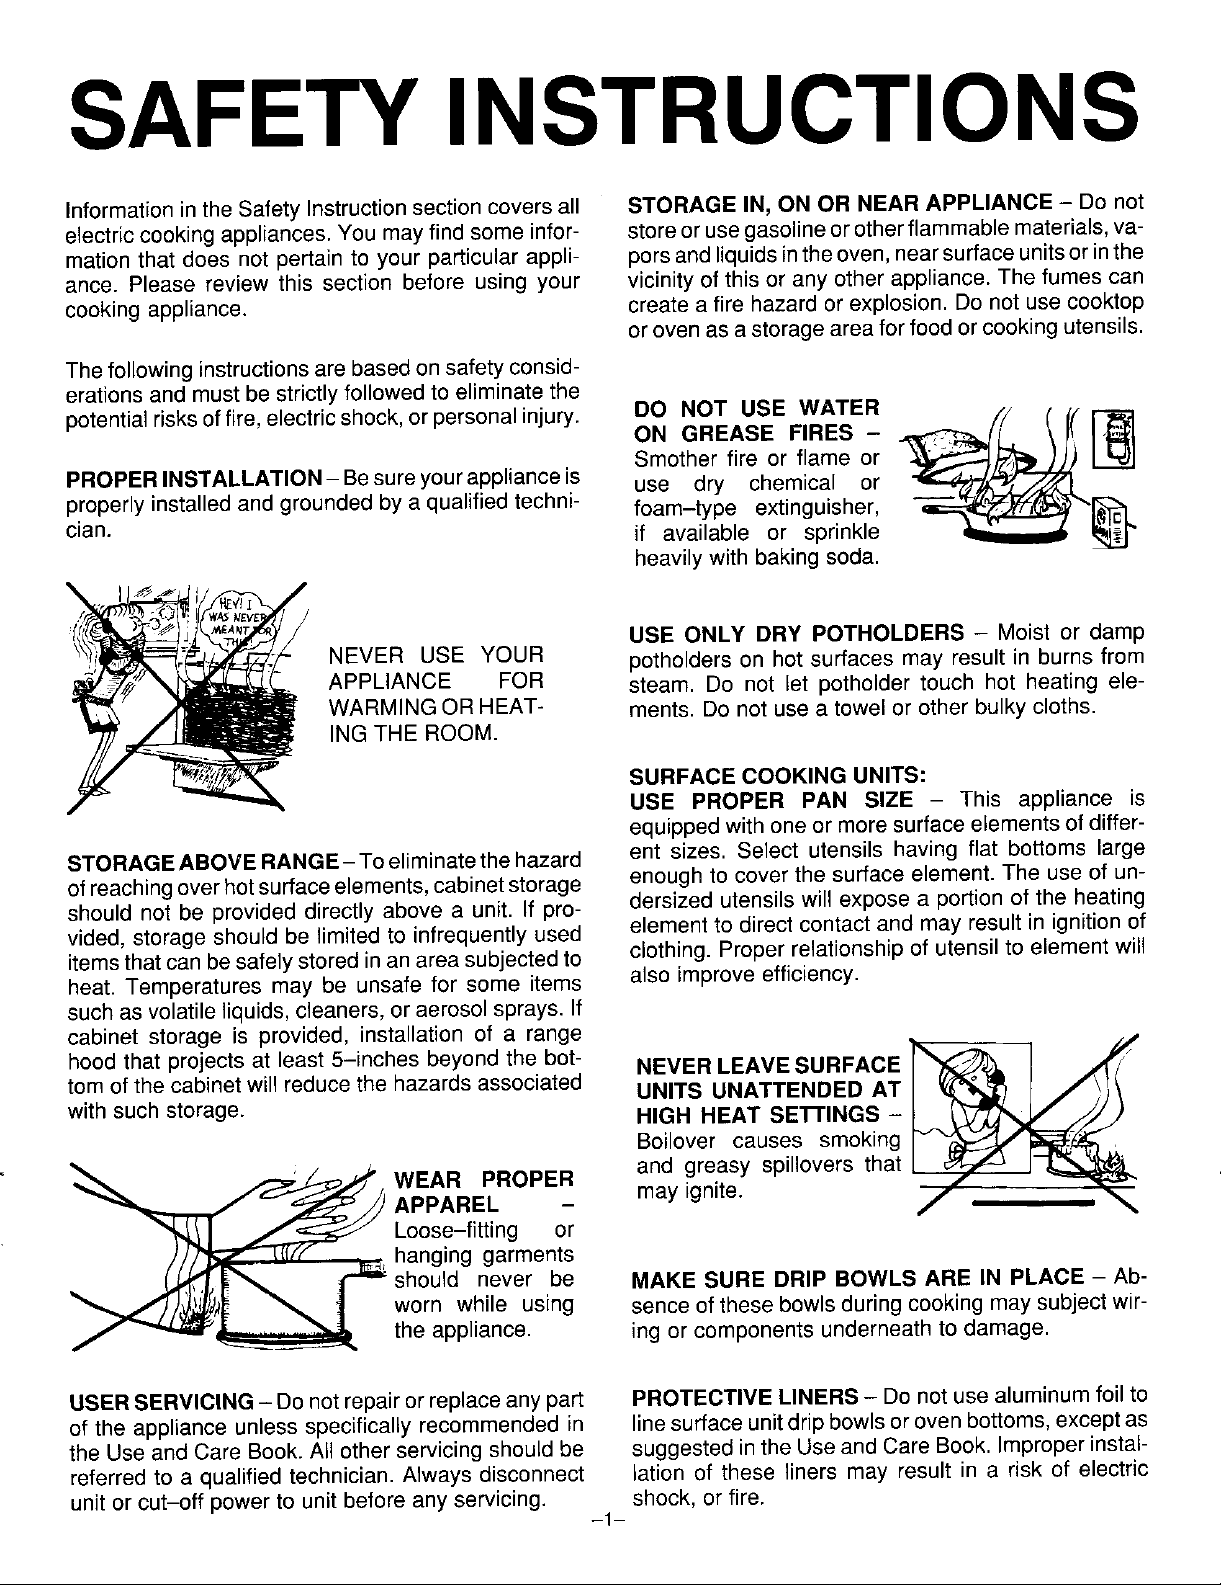
NEVER USE YOUR potholders on hot surfaces may result in burns from
APPLIANCE FOR steam. Do not let potholder touch hot heating ele-
WARMING OR HEAT- ments. Do not use a towel or other bulky cloths.
ING THE ROOM.
ON GREASE FIRES-
Smother fire or flame or
heavilywith baking soda.
USE ONLY DRY POTHOLDERS - Moist or damp
SURFACE COOKING UNITS:
USE PROPER PAN SIZE - This appliance is
equipped with one or moresurface elementsof differ-
STORAGEABOVERANGE-Toeliminatethehazard ent sizes. Select utensils having flat bottoms large
ofreachingoverhotsurfaceelements, cabinetstorage enough to cover the surface element. The use of un-
should not be provided directly above a unit. If pro- dersized utensils will expose a portion of the heating
vided, storage should be limited to infrequently used element to direct contact and may resultin ignition of
itemsthat can be safely stored in an areasubjectedto clothing. Proper relationship of utensil to element will
heat. Temperatures may be unsafe for some items also improve efficiency.
such as volatile liquids, cleaners, or aerosol sprays.If
cabinet storage is provided, instatlation of a range
hood that projects at least 5-inches beyond the bot- NEVERLEAVE SURFACE _ I A_'/_
tom of the cabinet willreduce the hazardsassociated UNITS UNATTENDED AT
with such storage. HIGH HEAT SETTINGS -
Boilover causes smoking
APPAREL - may ignite.
Loose-fitting or
_WEAR PROPER and greasy spillovers that
__]l_ should never be MAKE SURE DRIP BOWLS ARE IN PLACE - Ab-
hanging garments
worn while using sence of these bowls duringcooking may subjectwit-
the appliance, ing or components underneath to damage.
USERSERVICING- Donot repairorreplace any part PROTECTIVE LINERS- Do not use aluminum foil to
of the appliance unless specifically recommended in linesurface unitdrip bowls oroven bottoms, exceptas
the Use and Care Book. All other servicing should be suggested inthe Useand Care Book. Improper instal-
referred to a qualified technician. Arways disconnect lation of these tiners may result in a risk of electric
unitor cut-off powerto unit before any servicing, shock, orfire.
-1-
Page 3
SAFETY INSTRUCTIONS
GLAZED COOKING UTENSILS - Only certaintypes VENTILATING HOODS:
of glass, glass/ceramic, ceramic, earthenware, or CLEAN VENTILATING HOODS FREQUENTLY -
otherglazedutensilsaresuitablefor range-top serv- Grease shouldnotbe allowedto accumulateonhood
icewithoutbreakingduetothesuddenchangeintern- orfilter.When flamingfoodsunderthe hood,turnthe
perature, fanoff. The fan, if operating,mayspreadthe flame.
IMPORTANT SAFETY NOTICE AND WARNING
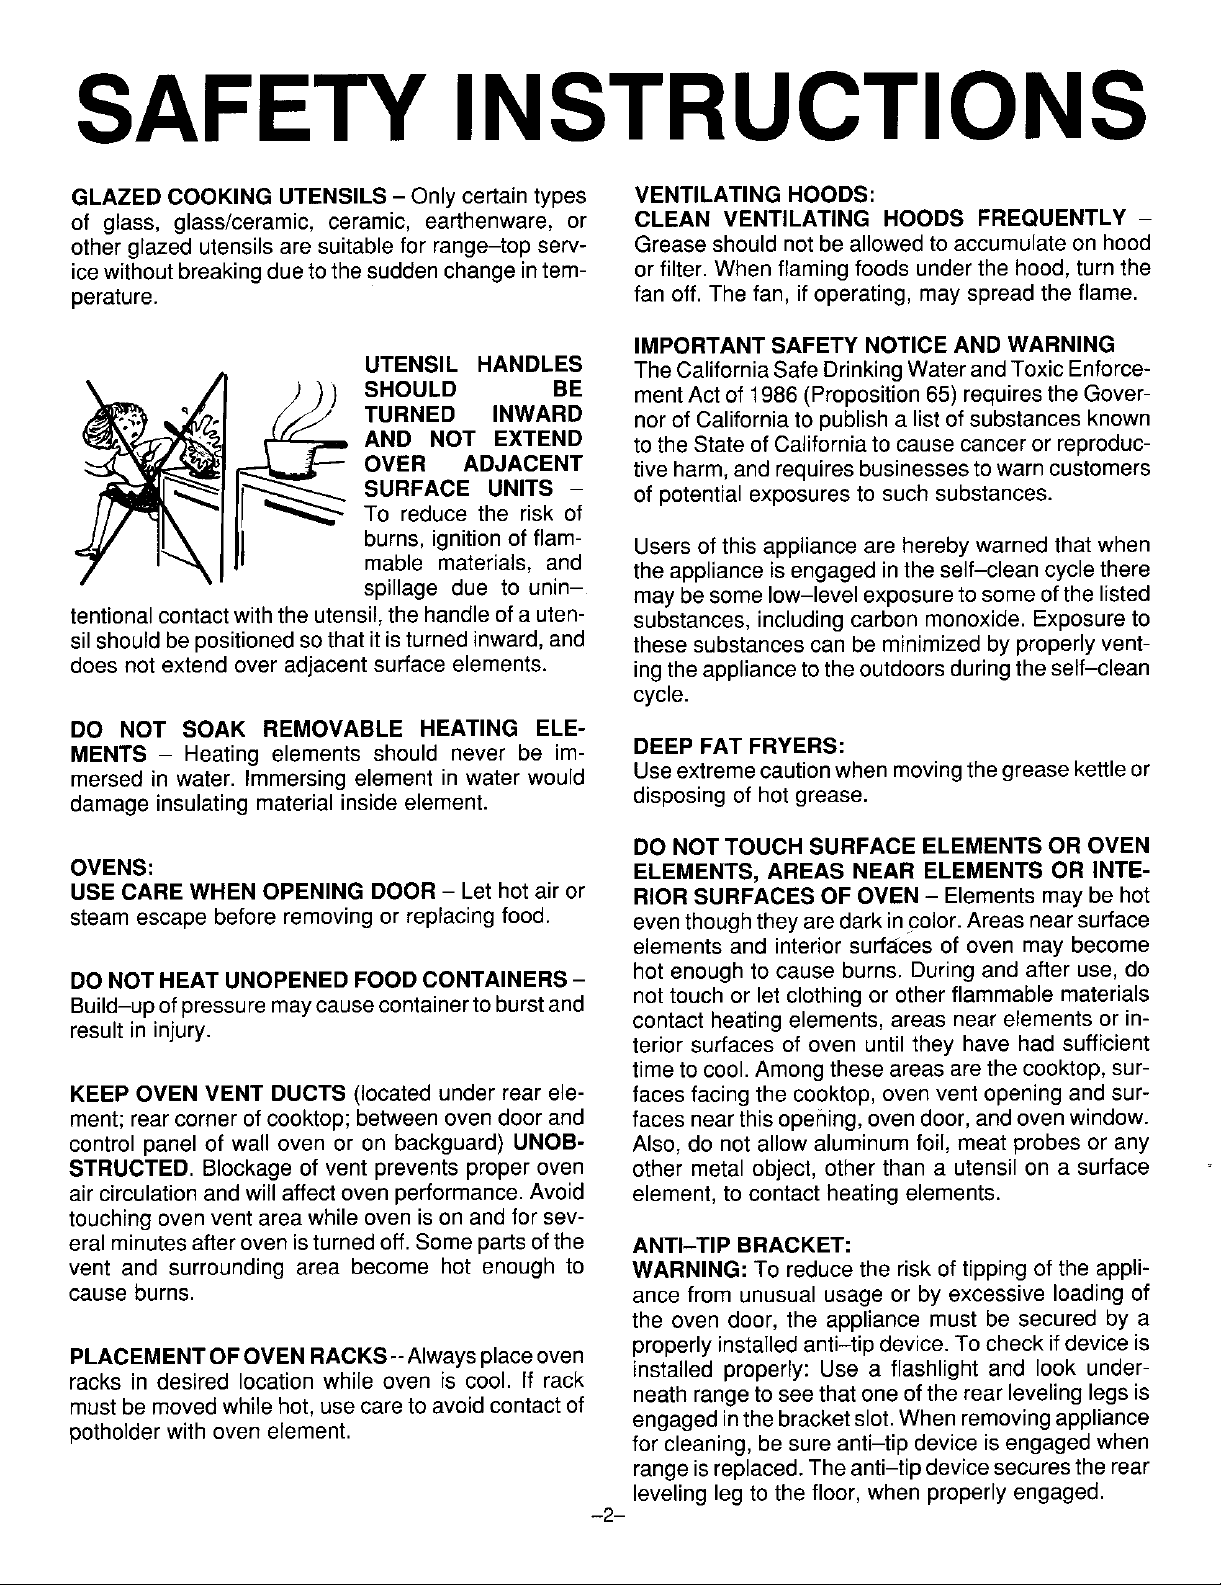
UTENSIL HANDLES TheCaliforniaSafeDrinkingWaterandToxicEnforce-
TURNED INWARD norof California to publish a list ofsubstances known
AND NOT EXTEND to the State of Californiato cause canceror reproduc-
OVER ADJACENT tive harm,and requiresbusinessesto warncustomers
SURFACE UNITS - of potential exposures to such substances.
To reduce the risk of
burns, ignition of flam- Users of this appliance are hereby warned that when
_ _ SHOULD BE ment Actof 1986 (Proposition 65) reqaires the GOver-
tentional contact withthe utensil, the handleof a uten- substances, including carbon monoxide. Exposure to
sil should bepositioned sothat itis turnedinward, and these substances can be minimizedby properly vent-
does not extend over adjacent surface elements, ingthe applianceto theoutdoors duringthe self-clean
DO NOT SOAK REMOVABLE HEATING ELE-
MENTS - Heating elements should never be im- DEEP FAT FRYERS:
mersed in water. Immersing element in water would Useextremecautionwhen movingthe greasekettleor
damage insulating material inside element, disposing of hot grease.
mable materials, and the appliance isengaged in the self-clean cycle there
spillage due to unin- may besome low-level exposure to someofthe listed
cycle.
DO NOT TOUCH SURFACE ELEMENTS OR OVEN
OVENS: ELEMENTS, AREAS NEAR ELEMENTS OR INTE-
USE CARE WHEN OPENING DOOR - Let hot air or RIOR SURFACES OF OVEN - Elements may be hot
steam escape before removing or replacing food. eventhough theyare darkincolor. Areas nearsurface
elements and interior surfa_cesof oven may become
DO NOTHEAT UNOPENED FOODCONTAINERS- hot enough to cause burns. During and after use, do
Build-up of pressure may causecontainerto burstand not touch or let clothing or other flammable materials
result in injury, terior surfaces of oven until they have had sufficient
KEEP OVEN VENT DUCTS (located under rear ele- faces facing the cooktop, oven vent opening and sur-
ment; rear corner of cooktop; between oven door and faces nearthis opening,ovendoor, andoven window.
control panel of wall oven or on backguard) UNOB- Also, do not allow aluminum foil, meat probes or any
STRUCTED. Blockage of vent prevents proper oven other metal object, other than a utensil on a surface
air circulationand will affectoven performance. Avoid element, to contact heating elements.
touching oven vent area while oven is on and for sev-
eral minutes afterovenisturned off. Somepartsofthe ANTI-TIP BRACKET:
vent and surrounding area become hot enough to WARNING: To reduce the risk of tipping of the appli-
cause burns, ance from unusual usage or by excessive loading of
PLACEMENTOFOVEN RACKS--Alwaysplaceoven properly installedanti-tip device.To check if device is
racks in desired location while oven is cool. If rack installed properly: Use a flashlight and look under-
mustbe movedwhile hot, usecare to avoid contact of neath rangeto seethat one ofthe rear leveling legs is
potholder with oven erement, engagedinthe bracketslot. When removing appliance
contact heating elements, areas near elements or in-
timeto cool. Among theseareas arethe cocktop, sur-
the oven door, the appliance must be secured by a
for cleaning, be sureanti-tip device is engaged when
range isreplaced.Theanti-tip device securesthe rear
leveling leg to the floor, when properlyengaged.
-2-
Page 4
SAFETY INSTRUCTIONS
ADDITIONAL INFORMATION:
Afterappliance is installed,be certain all packing ma- ATTENTION: NE LAISSER AUCUN ALIMENT, US-
terials are removedfromthe appliance beforeoperat- TENSILE DE CUISINE, ETC., DANS LE FOUR
ing the unit. If appliance is installed near a window, DURANT LE CYCLE D'AUTONETTOYAGE.
take steps to prevent curtains from blowing over sur-
face elements creating a fire hazard. On some models, a fan should be heard during the
self-clean cycle. If not, cancel clean cycle and call a
Careshould begiven to location of appliance. Besure serviceman before self-cleaning again. (Refer to
floorcovering underappliance,walls adjacentto appli- CONTENTS on front cover for location of self-clean
ance,cabinetryadjacentto appliance,andother mate- instructions and fan information.)
rials adjacent to appliance can withstand prolonged
heat. This isa heavy applianceand cansettle intosoft SMOOTHTOP COOKTOP:
floor coverings such as cushioned vinyl. Use care Do not cook on broken cooktop. If cooktop should
when moving range on this type of floor covering, break, cleaning solutions and spillovers may pene-
trate the broken cooktop and create a risk of electric
shock. Contact a qualified technician immediately.
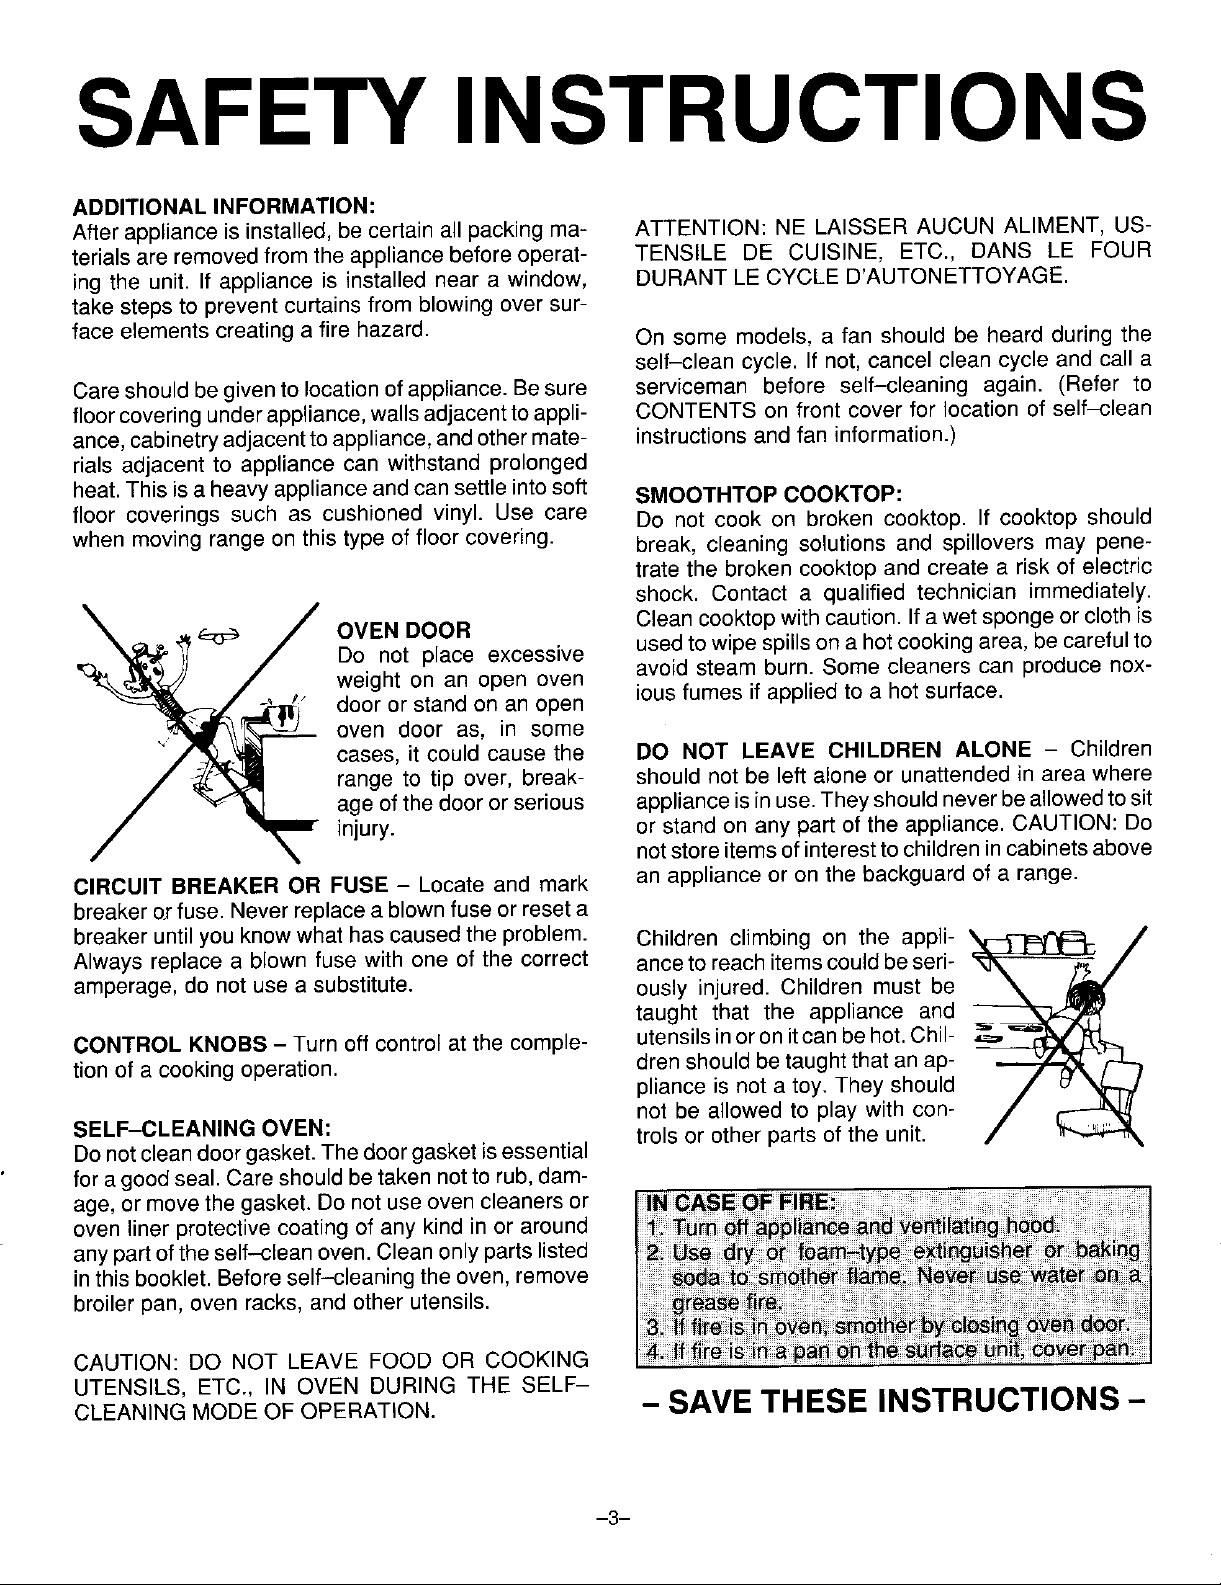
c._,.__,_,.^,_ c._,._ OVEN DOOR Cleancooktop withcaution. If a wet spongeOrcarefulClOthis
Do not place excessive usedtowipe spillson a hotcooking area, be to
weight on an open oven avoid steam burn. Some cleaners can produce nox-
_q_ door or standon an open ious fumes if applied to a hot surface.
,, oven door as, in some
cases, it could cause the DO NOT LEAVE CHILDREN ALONE - Children
range to tip over, break- should not be left alone or unattended inarea where
age of the door or serious applianceisin use.They shouldnever be allowedtosit
_'_ injury, or stand on any part of the appliance. CAUTION: Do
CIRCUIT BREAKER OR FUSE - Locate and mark an appliance or on the backguard of a range.
breakero.rfuse. Neverreplacea blownfuseor reset a
breaker untilyou knowwhat has causedthe problem. Children climbing on the appli- '_/'f_F_ /
amperage, do not use a substitute, ously injured. Children must be /
CONTROL KNOBS - Turn off control at the comple- utensilsinor on itcan be hot.Chil-
tion of a cooking operation, dren should betaught that anap-
Always replace a blown fuse with one of the correct ance to reachitemscould beseri- '-__=_.__ _
SELF-CLEANING OVEN: trois or other parts of the unit.
Donotcleandoor gasket.Thedoorgasket isessential
for agood seal. Careshould be takennot to rub,dam-
age, or movethe gasket. Donot useoven cleaners or
oven liner protective coating of any kind in or around
anypart ofthe self-clean oven.Cleanonly parts listed
inthis booklet. Beforeself-cleaning the oven, remove
broiler pan, oven racks, and other utensils.
notstore itemsof interesttochildren incabinetsabove
taught that the appliance and
pliance is not a toy. They should
not be allowed to play with con-
CAUTION: DO NOT LEAVE FOOD OR COOKING
UTENSILS, ETC., IN OVEN DURING THE SELF-
CLEANING MODE OFOPERATION. -- SAVE THESE INSTRUCTIONS -
-3-
Page 5
ELECTRONIC CONTROLLER
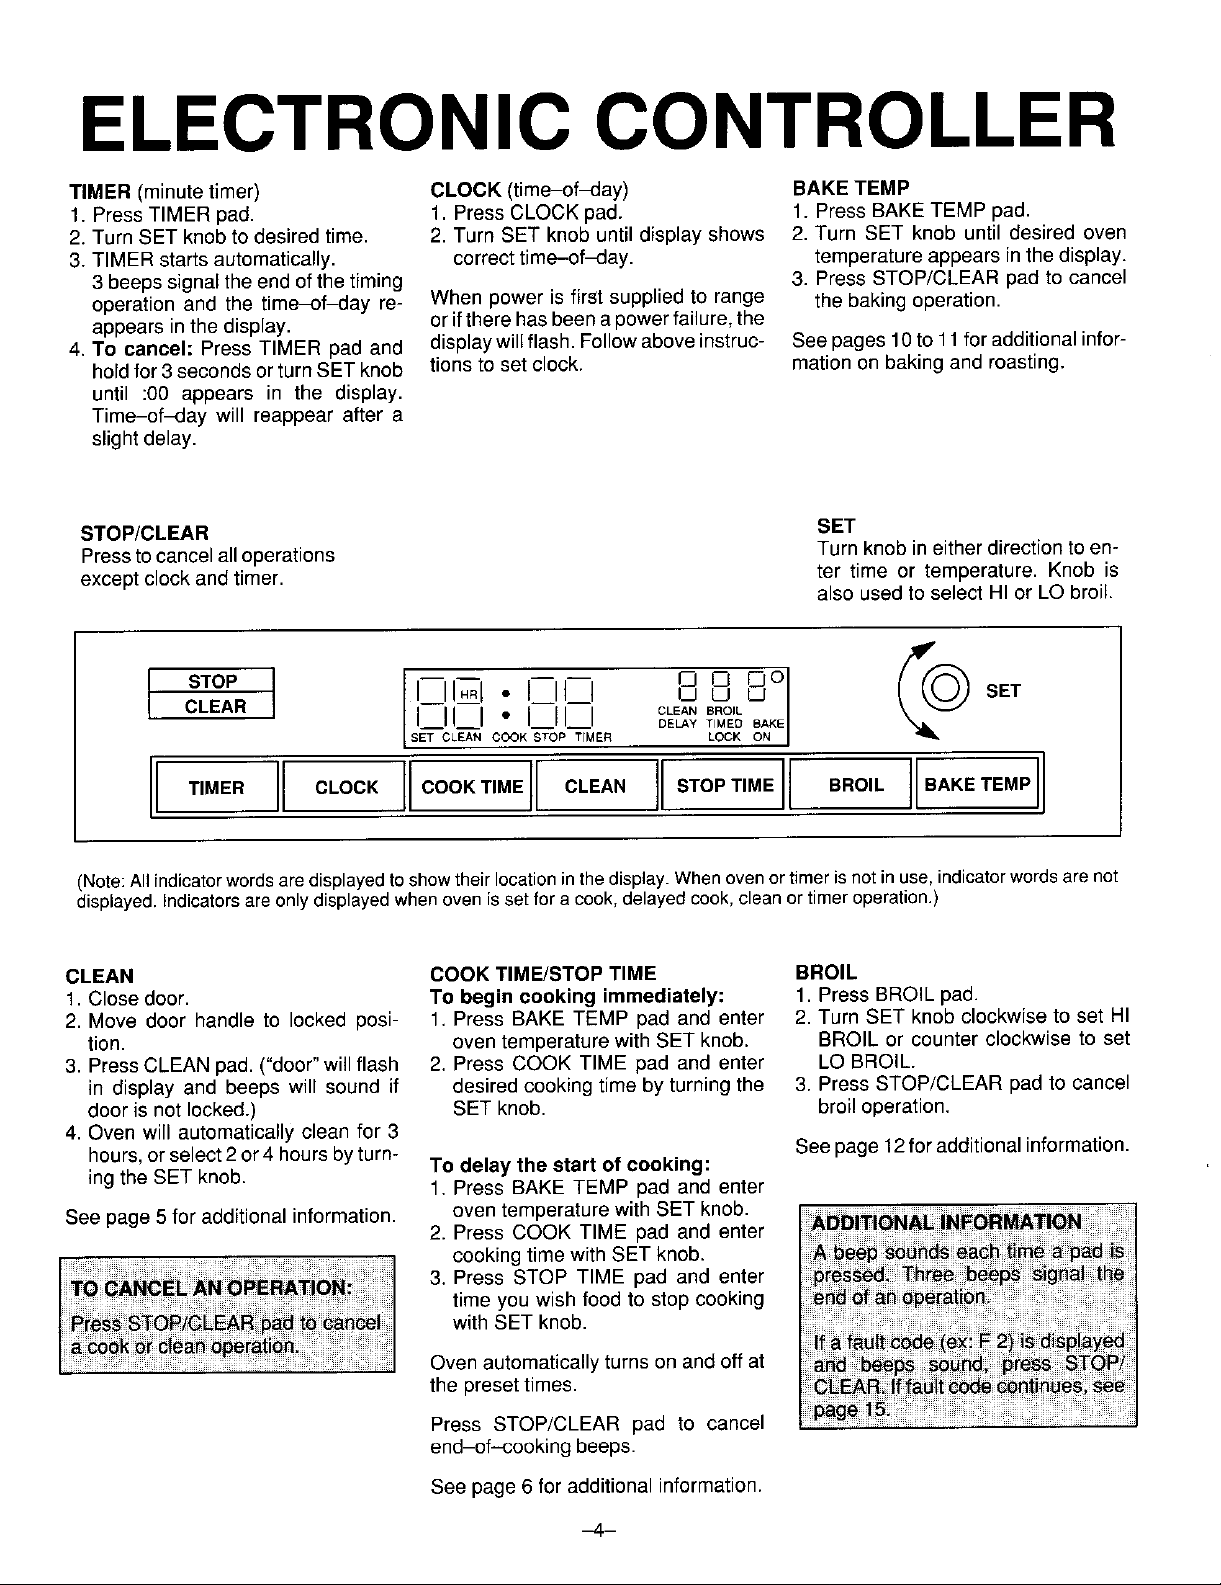
TIMER (minutetimer) CLOCK(time-of_:_ay) BAKETEMP
1. Press TIMER pad. 1. Press CLOCKpad. 1. Press BAKETEMP pad.
2. Turn SET knobto desiredtime. 2. Turn SET knobuntildisplay shows 2. Turn SET knob untildesiredoven
3. TIMER startsautomatically, correcttime-of_:lay, temperatureappearsinthedisplay.
3 beepssignal theend of thetiming 3. Press STOP/CLEAR padto cancel
operationand the time-of_:lay re- When poweris first suppliedto range the bakingoperation.
appearsinthedisplay, oriftherehasbeenapowerfailure,the
4. To cancel: Press TIMER pad and displaywillflash. Followaboveinstruc- See pages10to11 foradditionalinfor-
holdfor3secondsorturnSET knob tionsto set clock, mationonbakingand roasting.
until :00 appears in the display.
Time-of_ay will reappear after a
slightdelay.
STOP/CLEAR SET
Pressto cancelalloperations Turn knob in eitherdirection to en-
exceptclockand timer, ter time or temperature.Knob is
STOP] •, ,, 88 8°1
CLE,R ' '1'"' ,r, CLE,NI
SFc L_'ANCOOK S_-OP-T_ME_ DELAY
also usedto select HI or LO broil.
SET
TIMER CLOCK COOKTIME CLEAN STOPTIME BROIL BAKETEMP
(Note:All indicatorwordsaredisplayedtoshowtheirlocationinthedisplay.Whenovenortimerisnotinuse,indicatorwordsarenot
displayed,indicatorsareonlydisplayedwhenovenis setforacook,delayedcook,cleanortimeroperation.)
CLEAN COOKTIME/STOP TIME BROIL
1. Close door. To begin cooking immediately: 1. Press BROIL pad.
2. Move door handle to lockedposi- 1. Press BAKE TEMP pad and enter 2. Turn SET knobclockwiseto set HI
tion. oventemperaturewithSET knob. BROIL or counterclockwiseto set
3. Press CLEAN pad.("door" will flash 2. Press COOK TIME pad and enter LOBROIL.
in display and beeps will sound if desired cooking time by turning the 3. Press STOP/CLEAR pad to cancel
door is not locked.) SET knob. broiloperation.
4. Oven will automatically clean for 3 See page 12foradditional information.
hours,orselect 2or 4 hoursbyturn- To delay the start of cooking:
ing the SET knob. 1. Press BAKE TEMP pad and enter
See page 5 for additional information, oven temperature with SET knob.
2. Press COOK TIME pad and enter
cookingtime with SET knob.
3. Press STOP TIME pad and enter
time you wish food to stop cooking
with SET knob.
Ovenautomatically turns on and off at
the preset times.
Press STOP/CLEAR pad to cancel
end-of-cooking beeps.
See page 6 for additional information.
-4-
Page 6

FEATURES
SELF-CLEAN OVEN
Theself--cleanovenusestemperatures 3. WhentheCLEANpadispressed,the TO CANCEL CLEAN CYCLE:
above normalcookingtemperaturesto oven will automaticallyclean for 3 1. PushSTOP/CLEAR pad.
automaticallyclean the entire oven. hours.
TO OPERATE: -I ,, o I-I1-1 Ifthe LOCK indicator isdisplayed,al-
to the right (locked position). ° I_11_1 CLEAN lOWoven to cool (up to one hour).
l. Closedoor and move door lock lever S--/LE,,_C
--_
A shorter (2 hour) or longer (4 hour) Door andlock lever may be damaged if
clean cycle can be selected by turn- the lock lever isforced tothe left before
ingthe SET knob. the LOCK indicator turns off.
2. Press CLEAN pad.
If door is not locked as described,
"door"will flash in the display.
T_MER Once LOCK indicator turns off, the
BEFORE DURING to become hot during a clean cycle.
SELF-CLEANING SELF-CLEANING Thereforetouching the cooktopduring a
Whenthe door is lockedandthe CLEAN self-clean cycle should be avoided.
pad is pressed, the oven automatically
begins to heat to cleaning tempera- As the oven heats and cools, you my
tures, hear sounds of metal parts expanding
Clean oven frame, door frame and and contracting. This is normal and will
around the ovenvent with a non-abra- As the oven reaches cleaningtempera- not damage your appliance.
sive cleaning agent such as Bon Ami.
These areas are not exposed to clean- tures,the LOCK indicator will turn on to
ing temperatures and should be has engaged. At this point, the oven AFTER
cleaned to prevent soil from baking on door can not be unlockedand opened. SELF-CLEANING
during the clean cycle. Some soil may leavea light gray, pow-
Wipe up excess grease or spillovers To preventdamageto the door and lock dery ash which can be removed with a
from theoven bottom to prevent exces- left when the LOCK indicator is dis- that the clean cycle was not long
sive smokingduring the cleancycle, played, enough.The soil will be removedduring
DO NOT USE OVEN CLEANERS OR
OVEN LINER PROTECTIVE COAT- About one hour after the completion of the next clean cycle.
INGS OF ANY KIND ON THE SELF- theclean cycle,the internal Iockwill dis- Ifthe oven racksdo not slide smoothly
CLEAN OVEN FINISH OR AROUND engageand theLOCKindicator willturn after a clean cycle, wipe racks and era-
ANY PART OF THEOVEN. moved to the left (unlocked position) amount of vegetable oil to restore ease
show that an internal lock mechanism
lever, do not force the lock lever to the damp cloth. If soil remains, it indicates
off. At this point, the lock lever can be bossed rack supports with a small
2. Ifthe LOCK indicator is notdisplayed,
the oven door can be unlocked.
door can be unlocked.
It is normalfor the cooktop ofthe range
To preventdamage, do not cleanor rub and the door opened, of movement.
the gasket around the oven door. The
gasket is designedtoseal inheatduring somesmoke andodormaybedetected, oven interior or oven door. Thisis a nor-
the clean cycle. This is normal and will reduceor disap- realcondition resultingfrom heatingand
The first few timesthe oven iscleaned, Fine, hair-like lines may appear in the
pear with use. If the oven is heavily cooling of the porcelain finish. These
soiled, or if the broiler pan is left in the lines do not affect the performance of
oven, smoke and odor may occur, the oven.
-5-
Page 7

FEATURES
AUTOMATIC OVEN COOKING
Automaticcooking featureisusedtoturntheovenonand
offatthepresettime-of-day. Thisfeaturecanbe usedto
delaythestart ofa cookingoperation.
Theautomaticcookingfeaturewillnotoperateunlessthe
clockisfunctioningandissetatthe correcttime-of-day.
GENERAL
INFORMATION
IMPORTANT: Highlyperishablefoods
such as dairy products, pork, poultry,
seafoods or stuffing are not recom-
mended for delayed cooking. If cook-
ing more than one food, select foods
that cook for the same length of time
and at the same oven temperature.
To reset orcancel the program: Press
the STOP/CLEAR pad.
After setting the Automatic Cooking
feature, pressthe CLOCK padandthe
time-of_:lay will reappear in the dis-
play. "TIMED BAKE ON" or "DELAY
BAKE" and the oven temperature will
remaininthedisplayasa reminderthat
the oven issetfor acookingoperation.
At end of cooking, continuous beeps
will sound. PressSTOP/CLEARpadto
cancel beeps.
EXAMPLE
Food is to cook for 2 hours and 30
minutesat 350°F.Youwish the food
to be cooked by 6:00.
1. Press BAKE TEMP pad.
2. Turn SET knob until 350° ap-
pears inthe display.
3. Press COOK TIME pad.
4. Turn SET knob until 2:30 (2
hours, 30minutes)appears inthe
display.
5. Press STOP TIME pad.
6. TurnSET knobuntil 6:00appears
in the display.
The oven will turn on at 3:30; cook
the food for 2 1/2 hours, and will
automatically turn off at 6:00.
-6-
Page 8

USING YOUR COOKTOP
COOKING AREAS HINTS
The foursurface cooking areas onyour Do not allow plastic objects, aluminum
range are identified by permanent pat- foil, sugar, orfoodswith highsugarcon-
ternsinthe cooktop.There aretwo large
andtwosmall areas.Usethesmallerar- th_ heat _ _ v'_/_ _ __ tent to meltontothe hotcooktop. Melted
eas for small cooking utensils and the _#Cj_ _ i_ is _i _ _ _ re_ materials can cause permanent dam-
largerareasfor large utensils. This con- _]_ _rO_ _ _t0_ ............. age to the cooktop.
serves energy.
SURFACE CONTROLS
HOT SURFACE LIGHT
Therange isequipped witha HOTSUR-
Your smoothtop is equipped with elec- FACE light. This red light will turn on to
tronic surface controls that provide 9 indicatethat thecooking areaishot and
fixed heat settings, will remainon untilthe area hascooled.
When the HOT SURFACE indicator
ON 1_• 3 • _ • 7 • 9 to touch.
lightturns off,the top will becoolenough
r i
RETAINED HEAT
i.ow .llo. o jI wesuggestthatyoustartw,tha.ower
ON/O_ To protect the top, it is not recom-
The yelle_ !@N !_d_at_( ig_tsto occur, remove lidand reducetoa lower or as a cutting board or to cook food di-
_Ow _ _ iset_ _ _ ee setting.Allow enoughtime for the cook- rectly on thecooktop without a utensil.
!_ _ _i_me_(_ii ing area to adjust to the newsetting.
_ _#| _h_h_at _|i#g heat for a period of time after the ele- the cooktop. These items can mark or
_res.sBiGHER _ad_! re_ _i_ completelymentoff a cookedfewminuteSandusebef°retheretainedf°°dis c=ency.
tore heatto completethecooking operation.
_i#g_!_ _ow _i _ _ _ After 30 minutes, the cooktop may be Thin gaugealuminum cookware, alumi-
RIGR i_i_ _# too cool to keep foods warm; however, nuT foil or foil containers such aspop-
P_essLO_E_ metal marks.
heat setting then gradually increase the
setting until you find the optimum set-
ting. Boilovers are more likely to occur if
you start out on HIGHthen reduce to the
lowersetting.
Iffood is cooking toofast or if believers mendedtousethetop asa worksurface
Do not usea trivetor metalstand (such
The smoothtop cooking area retains as a wok ring) betweenthe utensil and
merit hasbeen turnedoff. Turnthe ele- etchthesurface and affect cookingeffi-
the TOP MAY STILL BE TOO WARM
TO TOUCH. for use on the cooktop. They will leave
corn poppers are NOT recommended
-7-
Do not slide glass items across the
cooktop. They may scratch or damage
the top.
Do NOT slide aluminum cookware
across the cooktop. This may result in
aluminummarkswhichthen mustbeim-
mediately removed with a recom-
mended cooktopcleaner.
Page 9

USING YOUR COOKTOP
COOKWARE
Cookingperformanceisgreatlyaffected Never leave a deep fat frying opera-
by the type of cookware used. Pans tion unattended.
should have aflat bottom. The flat bot-
tom allows good conductivity between
theutensil and the cooking area to pro- Acceptable water-bath or pressure
vide uniform cooking results, faster canners should not be oversized and
heating and more efficient use of en-
ergy.
Pans with uneven, warped, or grooved ment) or a very large canner that rests
bottoms do not make good contact, re- on two surface elements.
duce heat conductivity and result in
slower, less even heating.
Besure utensilis largeenough toprop- sized, havean uneven bottom ordo not
erly contain food and avoid boilovers, meet proper utensil specifications.
Pan size is particularly important in To prevent damage to range, neverll
deepfrying. Besure panwill accommo- operateasurface unit without a pan in
date the volume of food that is to be paceandneverallowapantoboildry.addedaswellasthe bubble actionoffat.
must have a flat bottom. The following
are not recommended: Canners with
ridged bottoms, oversized canner
(2-inches larger than the surface ele-
Do not usespecialtyitemsthat areover-
SUGGESTED HEAT SETTINGS
Usethefollowingchartas a GUIDELINE untilyoubecomemorefamiliarwithyourcooktop.Keepinmindthatdifferenttypesof
cookwarematerialsrequiredifferentheatsettingsforthesame cookingoperation.We suggestthatyouexperimenttofindthe
heatsetting that best suits your particular cooking needs.Information inthe chart is basedon heavy gauge aluminum cook-
ware. Lower the heat setting ifusing stainless steel, cast iron utensilsor glassware designed for surface cooking.
HIGH To bring liquid to aboil, blanch, preheat skillet, or bring pressure up in pressure cooker. (Note:
9 Always follow instructionsinpressure cookeruse and carebook.) Always reduceto alower heat
setting when liquids just begin to boil or food begins to cook.
Medium
6-5 To maintain moderate to slow boil for large amounts of liquids.
LO-1 To keep foods warm before serving.
NOTE:Referto cookwaremanufacturer's recommendationsfor suggested heatsettings. Some manufacturersdo not rec-
ommendthe use of HIGH or the use of HIGH for extended cooking operations.
--8--
Page 10

USING YOUR COOKTOP
CARE INFORMATION CLEANING CHART
Clean smoothtop after each use. Use WARNING: BEFORE CLEANING, BE CERTAIN ALL ELEMENTS ARE
only cleaning agents recommended in TURNED OFF AND THE COOKTOP IS COOL.
the cleaning chart. Other materials
may damage the finish of the smooth-
top.
Carefully blot up spillovers around the
outside of the cooking area as they oc-
cur with dry paper towels. BE CARE-
FUL NOT TO BURN HANDS WHEN Heavystains, Elco Cooktop Cleaning Gentlyscourwithpasteandpapertowel
WIPING UP SPILLS. DO NOT USE A soda or and water, apply paste and let stand for 30 to 45
DAMP CLOTH WHICH MAY CAUSE minutes. Coverwith damp paper towel-
STEAM BURNS. ingtokeep pastemoist.Scourtoremove
When surface is cool, clean as directed dry.
in the chart. DO NOT USE the follow-
ing cleaning agents. _sn
Abrasives (metal scouring pads,
cleansing powders, scouring clean-
ers or pads) will scratch the smooth-
top.
• Chemicals (oven cleaners, chlorine Brown or gray Elco Cooktop Cleaning Gently scour with paste to remove as
bleaches, rust removers or ammo- stains from Creme. muchaspossible. Reapplypasteand let
nia) may damage the finish of the HARD WATER stand for 30 minutes. Scour with addi-
smoothtop, or metal marks, tional paste to remove remaining stain.
• Cleaning agents designed for glass- Rinsecompletely anddry.
ware which contain ammonia may
harm the smoothtop.
• Soiled cloth or sponge will leave an PROBLEM SOLVING CHART
invisible film on the cooktop which
may cause discoloration the next PROBLEM CAUSE TO PREVENT
time the cooktop is used.
burned onfood. Creme. Paste of baking toremove asmuchaspossible.Then re-
remaining stain. Rinse completely and
CAUTION:
If metal melts onto the smoothtop, DO
NOT USE TOP. CALL AN AUTHOR-
IZED SERVICER. Do not attempt to re-
pair cooktop yourself.
To prevent permanent damage to the Metal-marking Sliding or scraping metal Do not slide any glass or metal object
cooktop, do not allow cookware to boil utensils or oven racks across cooktop. Clean immediatelywith
dry. acrosscooktop. ElcoCooktop Cleaning Creme.
Do not place plastics on a warm or hot
I cooking area. They will melt and ad-
here to the smoothtop. The smoothtop
may chip or pit in attempting to remove
melted plastic from the top.
To prevent scratching or damage to the oration with a water and foods, clean and dry. Usecorrect heat setting
smoothtop: Do not leave sugar, salt, metallicsheen to prevent boilovers.
sand, soil, shortening or other fats on
the cooking area. Be sure area is free
from these before turning on cooking
area.
Areas of discol- Mineral deposits from Use cookware with bottoms that are
-9-
Page 11

USING YOUR OVEN
OVEN RACK POSITIONS:
CHARACTERISTICS RACK 1 (top ofoven) usedfor broiling
thinnon-fatty foods such as fish.
RACK 2 used for two-rack baking or
ae broiling thicker cuts of meat.
yo_ and for roastingsome meats, bottom.
RACK 3used for mostone-rack baking NEVERplacepans directly on the oven
RACK 4used forone ortworack baking
and roasting large meats, cooking Donot cover entire rackwith aluminum
larger foods and for baking angel food foil orplace foil directly undercookware.
cake or pieshells. To catch spillovers, cut a piece of foil a
little larger than the pan and place it on
RACK 5usedfor roastingturkey or bak- the rack below the rack containing the
ing angel food cake or pie shells, pan.
PREHEATING
AI
It is not necessary to preheat oven for
FAN 0-- roasting. It is not necessary to preheat
for broiling unless darker browning is
Slide in and drop in models are _;_ desired or it cooking thin (3/4-inch)
equippedwithafan which automatically
turns on whenever the oven is set for _ steaks. Allow broil elementto preheat 3
cooking or cleaning. The fan will auto to 5 minutes.
matically turn off when the unit has /
cooled. / Selecting temperature higher than de-
sired will NOT preheat the oven any
faster. Preheating at a higher tempera-
OVEN RACKS ture mayhave anegativeeffecton bak-
The twooven racksare designedwith a HINTS ing results.
"lock-stop" position to keep racks from Ifcooking ontworacks, staggerpans so
accidentally coming completely out of one is not directly over the other. Use
the oven. rack positions2 and 4 or 2 and5, when To preheat: Setoven for bakingand al-
To remove: Be sure rack is cool. Pull "1 in the display until the oven reaches
cooking on two racks, low the oven to heat untildisplay shows
thepreset temperature. 100will appear
leases. @ ture.
To replace: Place rack on rack sup- A single beep will signal that the oven
ports, tilt up and push toward rear of has reached the preset temperature.
oven. Pull rack out to "lock-stop" posi-
tionto besure rackiscorrectlyreplaced. Iftheoven temperature ischangedafter
up and continue pulling until rack re- _ oven temperature in 5° incrementsuntil
rackout to the "lock-stop" position.Tilt _ 1 100°F. The display will then show the
-10-
the oven reaches the preset tempera-
preheating, a beep will signal that the
oven has reachedthe new temperature
setting.
Page 12

USING YOUR OVEN
TO SET OVEN: Preheat oven for all baking opera-
tions.
1, Press BAKE TEMP pad. BAKE indi- 4. Place food in oven when oven has _--I . _--I1--1 J'3I-_tuNO
cator turns on. preheated to set temperature. I • _11_1
2, Turn SET knob until desired tern- 5. Check food at minimum time. Cook
perature is displayed, longer if necessary.
3. BAKE ON indicator and oven imme- 6. Press STOP/CLEAR pad to cancel
diately turn on. the operation.
BAKE
COMMON BAKING PROBLEMS AND WHY THEY HAPPEN
Cakes are uneven. Panstouching each other or Cakes don't brown on top. Incorrect rack position.
Cakehigh in middle. Temperature set too high. Overmixing.
Cake falls. Too much shortening or sugar. Uneventexture. Too much liquid.
Cakes, cookies, biscuits Incorrect rack position.
don'tbrown evenly. Oven door notclosed properly. Cakes crack ontop. Batterovermixed.
oven walls. Temperature set too low.
Batter uneven in pans. Overmixing.
Temperature set too low or Too much liquid.
baking time too short. Pan size too large or too little
Oven not level, batter in pan.
Undermixing. Oven door opened too often.
Too much liquid.
Bakingtime too long. Pantoo large.
Overmixing. Temperature set too high.
Too much flour. Baking time too long.
Panstouching each other or Panstoo close to each other
oven walls, or oven walls.
Incorrect rack position.
Too much or too little liquid. Undermixing.
Temperature set too low. Temperature set too low.
Old or too little baking powder. Bakingtime too short.
Pan too small.
Ovendoor opened frequently. Cakeshave tunnels. Notenough shortening.
Added incorrect type of oil to Too much baking powder.
cake mix. Overmixing or at too higha
Added additional ingredients speed.
to cake mix or recipe. Temperature set too high.
Doorgasket not sealing Temperature set too high.
properly. Too much leavening.
Incorrect use of aluminum foil. Incorrect rack position.
Oven not preheated.
Pans darkened, dented or
warped. Cake not done in middle. Temperature set too high.
Excessiveshrinkage. Too little leavening.
Pan too small.
Bakingtime too short.
Cakes, cookies, biscuits too Oven not preheated.
brown on bottom. Pans touchingeach other or
oven walls. Pie crust edges too brown. Temperature set too high.
Incorrect rack position. Pans touching each other or
Incorrect use of aluminum foil. oven walls.
Placed2 cookie sheets on one Edges of crust too thin.
rack.
Used glass, darkened, stained,
warped or dull finish metal Pies don't brown on bot- Used shiny metal pans.
pans. (Usea shiny cookie tom. Temperature set too low.
sheet.)
Pieshave soaked crust. Temperature too low at start of
baking.
Filling too juicy.
Used shiny metal pans.
-1 1-
Page 13

USING YOUR OVEN
HOWTO BROIL darker browning is desired.
Broiling is a method of cooking tender TO SET OVEN TO BROIL:
meats by direct heat under the element. 1. Prepare meat by removing excess fat
The cooking time is determined by the and slashing remaining fat, being
distance between the meat and the ele- careful not to cut into meat. This will
ment, the desired degree of aloneness help keep meat from curling.
and the thickness of the meat. 2. Place broiler pan on any of the recom-
Broiling requires the use of the broiler mended rack positions. Generally,
pan and insert. The correct position of for brown exterior and rare interior,
the insert in the pan is very important, the meat should be close to the ele-
The broiler insert should be placed in ment. Place further down if you want
the pan so grease will drain freely. Im- meat well done.
proper use may cause grease fires. 3. Broiling should be done with oven Use HI BROIL for most broil operations.
door opened to the broil stop position When broiling tonger cooking foods
The broiler insert CANNOT be covered (opened about 4-inches). such as pork chops, poultry or thick
with aluminum foil as this prevents fat 4. Follow suggested times on broiling steaks, select LO BROIL. Low tempera-
from draining into pan below. However, chart. Meat should be turned once ture broiling allows food to cook to the
for easier cleaning, the broiler pan can about half way through cooking, well done stage without excessive
be lined with foil. 5. Check doneness by cutting a slit in browning. Cooking time may increase if
Do not use disposable broiler pans. meat near center for desired color. LO BROIL Lsselected. Broil times may
They do not provide a separate tray. 6. Press STOP/CLEAR pad to cancel a need to be increased if range is installed
Preheat broil element 5 to 10 minutes if broil operation, on a 208-volt circuit.
BROILING CHART
BACON #2 Well Done 6to 10 minutes
CHICKEN LO BROIL
Whole, split #3 Well Done 45 to 60 minutes
Pieces #3 Well Done 30 to 45 minutes
GROUND BEEF PATTIES
3/4 to 1-inch thick #2 Rare 10 to 13 minutes
LAMB CHOPS
1-inch thick #2 Medium 12to 15 minutes
1 1/2-inch thick #3 Medium 15to 19 minutes
Medium 12 to 15 minutes
Well Done 15 to 18 minutes
Well Done 16 to 20 minutes
Well Done 25 to 30 minutes
WIENERS, precooked
Hot dogs, smoked or Polishsausage, Bratwurst,etc. #2 8to 12 minutes
-12-
Page 14

MAINTENANCE
LIGHT REPLACEMENT TOreplace: Fit ends of drawer glides
Before replacinglight bulb, DISCON- ontorails.Liftupdrawerfrontandgently
NECT POWERTO RANGE. push in to first stop position. Lift up
To replace fluorescent surface light: drawer to the closed position.
Grasp the top trim of backguard with
ward while lifting to release trim from
catches at each end.
thumbs under front edge and pull out- f_\ __--_*,_ ,_.
Remove bulb and replace with an 18 causethe rangetotip over, breakageof
watt fluorescent tube. Snap top trim the door or serious injury.
backintoplace, restorepowerand reset
clock. When opening oven door, allow steam
To replace oven light: Be sure bulb is ovento check, add or remove food.
cool. Do not touch a hot bulb with a
damp cloth asthe bulb maybreak. Use To remove lift-off door: Open doorto To prevent range from accidently tip-
a dry potholder, to prevent possible the "stop" position (opened about 4 ping, range should be secured to the
harm to hands, and very carefully un- inches)and graspdoor with both hands floor by sliding rear leveling leg into the
screw bulbcover and bulb. ateach side. Do not use door handleto anti-tip bracket suppliedwiththe range.
drawer again and continue to slide
, LEVELING LEGS
baking,yourrange must belevel. Level-
ing legs are located on each corner of
Some floors are not level. For proper
the base of the range. Level by turning
the legs.
OVEN DOOR
Do not place excessive weight on an
open oven door or stand on an open ii j I
oven door as, in some cases, it could
and hot air to escapebefore reachingin
lift door. Lift up evenly until door clears
the hinge arms.
(CANADIAN RANGES ONLY)
- - " Your range is equipped with seven (7)
type"P"fuses.The fusesare locatedon
the back wall. Remove the storage
drawer for access to the fuses.
Replace with a 40 watt appliance bulb.
Replace bulb cover and reconnect
power to range. Resetclock. 1 "- ....
STORAGE DRAWER
The storagedrawer atthe bottomof the
rangeissafe andconvenient for storing
metal and glass cookware. DO NOT 7FUSES-j
store plastic, paperware, food or flam-
mable materialin this drawer. Remove
drawer to cleanunder range.
To remove: Empty drawer then pull To replace door: Grasp door at each Ifpart of your range does not operate,
drawer out to the first stopposition. Lift side, align slots in the door with the check to see if afuse hasblown. A gap
upfrontofdrawerand pulltothe second hinge arms and slide door down onto in the fuse strip or a darkened window
stop position. Grasp sides and lift up the hinge arms until completely seated indicatesablown fuse. Replacewiththe
and out to remove drawer, on hinges, sametype and amperage type "P"fuse.
-13-
Page 15

CARE AND CLEANING
Broiler pan & in- Soap & water. Plastic Remove from oven after use. Cool then pour off grease. Place soapy
sert scouring pad. Soap cloth over insert and pan; letsoak to loosen soil. Wash inwarm soapy
filled scouring pad. water. Use soap filled scouring pad to remove stubborn soil. Clean in
Control knobs Milddetergent &water. To remove knobs,gentlypullforward. Washinmilddetergent andwater.
dishwasher if desired.
Donotuse abrasivecleaning agents.Theywillscratchfinish and remove
markings.Rinse,dry andreplace.Turneach element ONto see if knobs
have been replaced correctly.
Metal finishes: Soap &water. Pasteof Washwith soap and water. Removestubborn soil with paste of baking
Aluminum- back- baking soda& water, soda and water. Do not use oven cleaners, abrasive or caustic agents.
guard base. They will damage the finish.
Chrome & stainless
steel- trim parts
Oven racks Soap & water. Cleans- Cleanwith soapywater. Removestubbornsoil with cleansing powder or
ing powders & plastic soapfilled scouring pad. Rinse and dry.
pads.Soapfilled scour-
ing pad.
Porcelainenamel: Mildliquidcleaners, Porcelainenamel isglass fused on metal. It may crackor chip with mis-
Cooktop detergent or soap & !use. Cleanwith soap andwaterwhen parts arecool.All spillovers, espe-
See page 5 for water. Cleansing pow- ciallyacid orsugarspillovers, should bewiped upimmediatelywith adry
self-clean oven. ders and non abrasive cloth. Surface maydiscolor or dull ifsoil is notremoved.When surface is
nylon orplastic pads. cool, clean with warm soapy water. NEVER WIPE OFF A WARM OR
HOTENAMEL SURFACE WITH A DAMP CLOTH. THIS MAY CAUSE
CRACKING AND CHIPPING. Never use oven cleaners, abrasive or
caustic cleaning agents on exterior finish of range. NOTE:Thecooktop
does NOT lift up.
-14-
Page 16

SERVICE
PART OR ALL OF YOUR Is the range plugdisconnected from the electrical outlet? • Are housefuses blown or
RANGEDOES NOT OPERATE circuit breakers tripped? • Is the range plug loose or improperly plugged in? Has
powersupply to your home been interrupted? • Was range properly set?
FPLUS A NUMBER APPEARS This is called a FAULT CODE. If a faultcode appears in the display, press theSTOP/
IN THE DISPLAY AND A CON- CLEAR button.If the fault code does not reappear, reprogram oven or cooktop. Ifthe
TINUOUS BEEP SOUNDS. fault code reappears again, disconnect power to the range and call a servicer. Iffault
(EXAMPLE: F 2) code is displayed, the oven and cooktop will not operate.
CONTROL WILL NOT AC- Press padagainwith slightly morepressure. Ifcontrol does notacceptentry, calla ser-
CEPT AN ENTRY vicer. • Is LOCK indicator on?Allow oven tocool. LOCK indicatorwillturn offand oven
canbe setfor bake or broil operation. If LOCK indicatordoes notturn off afterallowing
oven to cool for two hours, have a serviceman checkthe range.
SURFACE ELEMENTS FAIL Is range plug disconnectedfrom the electrical outlet? • Check circuit breaker or fuse
TO TURN ON OR HEAT FOOD boxfortrippedcircuitbreakersorblownfuses..Wascontrolproperlyset?Seepage4.
PROPERLY • Was incorrect utensil used? • Foroptimum results, utensil SHOULD HAVEA FLAT
bottom.Seepage8for additionalinformation.(NOTE: Expectcookingtimesto increase
if range is connected to 208 volts). ° Have serviceman check range.
FOOD NOT BAKING SATIS- Was control properly set? See page 4. ° Are racks properly in place and in correct
FACTORILY positionforwhatyouarebaking? * Israngelevel? • Areyou using the properpan? ° Is
itbright, not soiled or dark colored? ° Haveyou usedfoil incorrectly? ,,Are you using
standardmeasuring utensils? ° Didyou preheat ifrecommended? ° Oven tempera-
ture is incorrectlyset - too low or too high. See page 11.
OVEN DOES NOT OPERATE Is the range disconnectedfrom the electrical power? ° Was control properlyset? See
page4.
OVEN LIGHT DOES NOT Is bulb loose or burned out?
WORK
SERVICE
Do not attempt to service the appli- coverfor location of your modeland se- If you did not receive satisfactory serv-
ance yourself unless directed to do rial numbers.) ice through your serviceror Maycor you
so in this book. Contact the dealer may contact the Major Appliance Con-
sumer Action Panel by letter including
who sold you the appliance for serv- Ifyouare unableto obtainservice, write your name, address, and telephone
ice. tous. Ouraddress isfoundonthe rating number,aswell as the model andserial
plate. Seefront coverfor locationof rat- numbers ofthe appliance.
ing plate.
HOW TO OBTAIN
SERVICE if you are not satisfied withthe local re- MajorApplianceConsumerActionPanel
When your appliance requires service sponse to your service requirements, 20 NorthWackerDrive
or replacement parts, contact your call or write MAYCOR Appliance Parts Chicago, IL 60606
DealerorAuthorized Servicer.Use only and Service Company, 240 Edwards
genuine factory or Maycor parts if re- Street, S.E., Cleveland, TN 37311,
placementpartsare necessary.Consult (615) 472-3500. Include or have avail- MACAP (Major Appliance Consumer
the Yellow Pages in your telephone di- able the complete model and serial Action Panel)isanindependent agency
rectory under appliance for the service numbersoftheappliance,the nameand sponsored by three trade associations
center nearest you. Be sure to include address of the dealer from whom you as acourt ofappealson consumercorn-
your name, address, and phone num- purchased the appliance, the date of plaints which have not been resolved
ber, along with the model and serial purchase and details concerning your satisfactorily within a reasonableperiod
numbers of the appliance. (See front problem, of time.
-15-
Page 17

FULLONE-YEAR WARRANTY
Z_
)lianceParts&ServiceCompanywillrepairor replace,withoutcharge, anypartofyourproduct which has
.... a wrier urin one- earwarra r ...........
defecti terialo ork hipdu ingthefi sty arafte thedateoftheo igi linstallati This tye nds
........ to nyo d g the y nty pe led .....
}
.... [2
..... [
H? ....
..... LIMITED5 YEAR WARRANTY .........
it,
Y
n ma rw mans r r e r r na on• warren xte
..... O lectic ngeseq ippedwithsoliddi oothtopheafi gele ando g go ithseal db f ................... ne r ra u scorsm n merits, n asran sw e umers, or
' an additional 4 year period beyond the firstyear ofthe general coverage ofthis warranty Maycor willreplace any of the ..........
.... solid discor smoothtop heatingelements or sealed burnerswhich fail to heatas aresultof defectiveworkmanship or .....
material Additionally Maycor will replace any smoothtop cooking surface which cracks or breaks during normal .....
......: householdcooking These parts must be installedby aqualified person Anylabor charge requiredfor replacement is
..... notcovered by this warranty. ....
...........HOW TO OBTAIN SERVICE ............
To obtain the repair or replacement of a defective part under these warranties, you should contact the dealer from
whom you purchased the appliance or a servicer he designates. ,
WHAT IS NOT COVERED BY THESE WARRANTIES
1. Conditions and damage resulting fromimproper in- 5. Any product used for other than normal household
stallation, delivery, unauthorized repair, modifica- use. Itdoes not extend to products purchased for
tion, ordamagenot attributable to adefect in mate- commercial or industrial use.
rial " _"_
orword,maRs,,,_
2. Conditions resulting from damage, such as: (1) im- stallation errors or to instruct you on how to use the
proper maintenance, (b) misuse, abuse, accident, products.
or (c) incorrect electrical current or voltage.
3. Warranties are void ifthe original serial number has SUSTAINED BYANYPERSON AS A RESULT OF
.................... been removed, altered, or cannot be readily deter- ANYBREACH OFTHESEWARRANTIES OR ANY .....
.... mined. IMPLIEDWARRANTY. Some states do not allow
..... 4 Light bulbs ,so veexcu n m "
....... applyt yo :.....
..... o u.
ADDITIONAL HELP
.... Ifyou are not satisfiedwith the local response to your service requirements and wish to contact Maycor, please ad-
dressyour lettertothe Customer RelationsDepartment,MaycorParts&Service Company,240 EdwardsStreet,S.E., ....
.... Cleveland, TN 373t_or cart(dr5) 472-3500. Tosave time, your lettershould inctudethe comptete modeland serial ........
, .....numbersofthewarrantedappliance thenameandaddressofthedealerfromwhomyou purchasedtheappliance the
date of purchase and details concerning your problem.
iiiiii_ i I
DOMESTIC GAS OR ELECTRIC RANGE
,==
=
6. Any expense incurred for servicecalls to correct in-
7. CONSEQUENTIAL OR INCIDENTAL DAMAGES ......
the exclusion or limitation of consequential or inci-
dental damages the abe I sio ay not .....
........ ly gi by MThese warranties are theon writtenor expressed warranties ven aycor. No one is authorized to increase, ....
.....: alter, or enlarge Maycor's responsibilities or obligations under these warranties• These warranties give you specific
legal rights, and you may also have other rights which vary from state to state.
8109P059-60
(6/9)
-18-
 Loading...