

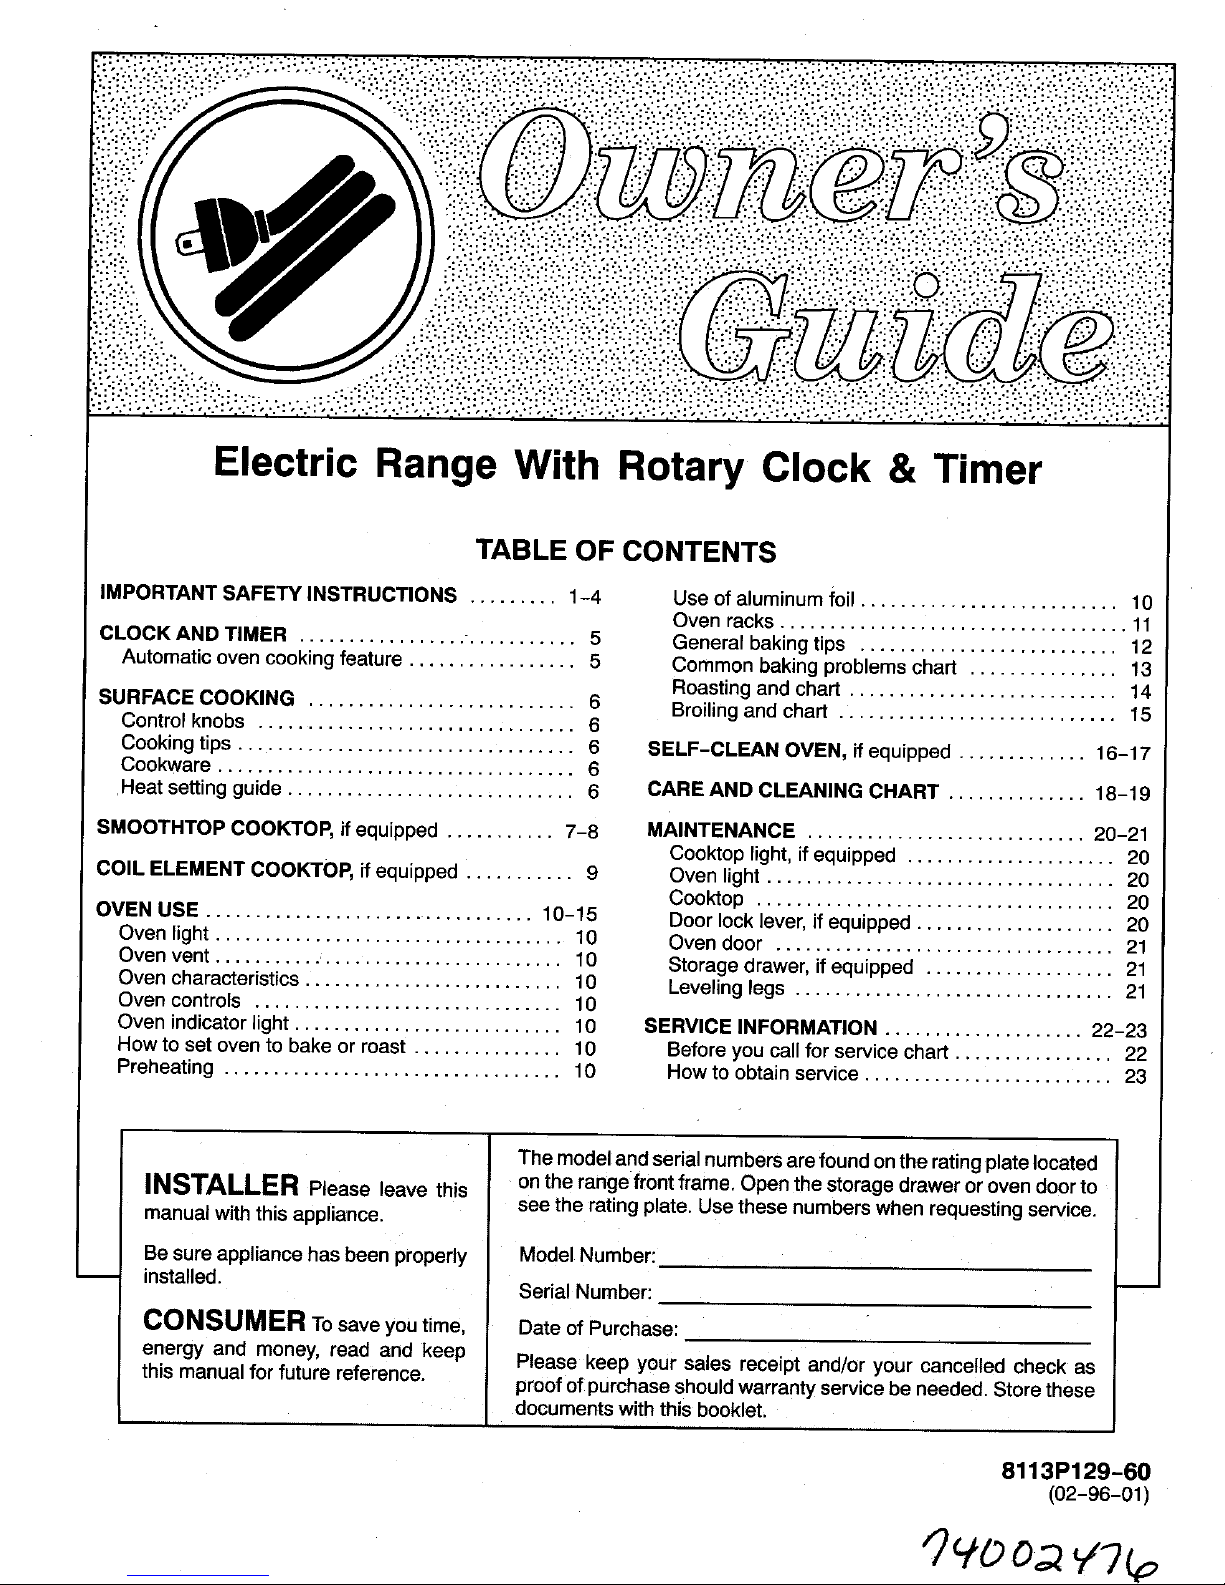
Page 1
.. • _........ • ......... •........•,. • ....... •......... •.. 1...... • .. 1......, .... =...• •.. 1•............ ° .•......., 1...... •.. 1.. 1• .................... 1....... • . •.... •... •...•..
i..)T_-71.:"")T:.-)7.:'::._),:: '_": ":..:)ii_-)7:.')i-::.)7.:_)ii_-)T:_)i-_-)7.:_)i-:.:.)i::)i;i:.".)7:::)7i:.".)7:_:)k:..:.)7:::)7:.:.)7i._.)7..:_0T")i.:.:.)7:_)i;i:.)7:01i".77:.::.)i
-77 II{::::7ilII:
":;.'-':_'.'._:".'-': -. , ._'-','.', ".•-':",'.':;.'.':",'.':'.•.':",':':" .'.':",'.':;.'.':",'. • ... -.'.':'-,'- . ... -,'.':;.','. -.'-':"•',', ".'. • ",'.':;]','. ".'. • "i'.':;.'.':".
• " "'"'" "-*"" "'"'* "'*"" "'"'" "'"*" %%': "-*'*: "'"': "-'"" "'"': "-**': "'"': "-'"; _'"': "-*": _'"': "-"': "'"': "-'": _"*" : "-*": "'"': "-'": "-'": "-"" : "-'": "-'": "-'": "n'": "n'*': "'"': "'"': "'"*: ""
Electric Range With Rotary Clock & Timer
TABLE OFCONTENTS
IMPORTANTSAFETY INSTRUCTIONS ......... 1-4 Useofaluminumfoil.......................... 10
Ovenracks................................... 11
CLOCKAND TIMER ............................ 5 Generalbakingtips .......................... 12
Automaticovencookingfeature................. 5 Commonbakingproblemschart ............... 13
Roastingandchart ........................... 14
SURFACECOOKING ........................... 6 Broilingandchart ............................ 15
Controlknobs ................................ 6
Cookingtips.................................. 6 SELF-CLEAN OVEN,if equipped............. 16-17
Cookware.................................... 6
Heat settingguide............................. 6 CAREAND CLEANINGCHART .............. 18-19
SMOOTHTOPCOOKTOP,ifequipped........... 7-8 MAINTENANCE ............................ 20-21
Cooktoplight,ifequipped..................... 20
COIL ELEMENTCOOKTOP,ifequipped........... 9 Ovenlight................................... 20
Cooktop .................................... 20
OVENUSE ................................. 10-15 Doorlocklever, ifequipped.................... 20
Ovenlight ................................... 10 Oven door .................................. 21
Ovenvent ........... ........................ 10 Storagedrawer,if equipped ................... 21
Ovencharacteristics.......................... 10 Levelinglegs ................................ 21
Ovencontrols ............................... 10
Ovenindicatorlight ........................... 10 SERVICEINFORMATION.................... 22-23
Howto set ovento bakeor roast ............... 10 Beforeyou callfor servicechart ................ 22
Preheating .................................. 10 How to obtain service ......................... 23
The modelandserialnumbersarefoundontheratingplatelocated
INSTALLER Please leave this ontherangefrontframe.Openthestoragedrawerorovendoorto
manualwiththis appliance, seethe ratingplate.Usethesenumberswhenrequestingservice.
Besureappliancehasbeen properly ModelNumber:
installed. Serial Number:
CONSUMERTOsaveyoutime, Date ofPurchase:
energyand money,read and keep Please keepyoursales receiptand/oryourcancelledcheck as
thismanualforfuturereference, proofofpurchaseshouldwarrantyservicebe needed.Storethese
documentswiththisbooklet.
8113P129-60
(02-96-01)
Page 2
IMP()RTANTSAFETYINSTRUCTIONS
Read all instructions before using this appliance.
Congratulationsonyourchoiceofthis electricrange.Asyou Instructionson the followingpages are based on safety
useyour newrange,weknowyouwillappreciatethe many considerationsand mustbestrictlyfollowedto eliminatethe
features that provide excellent performance, ease of potentialrisksof fire, electricshock, or personalinjury.
cleaning,convenienceanddependability.
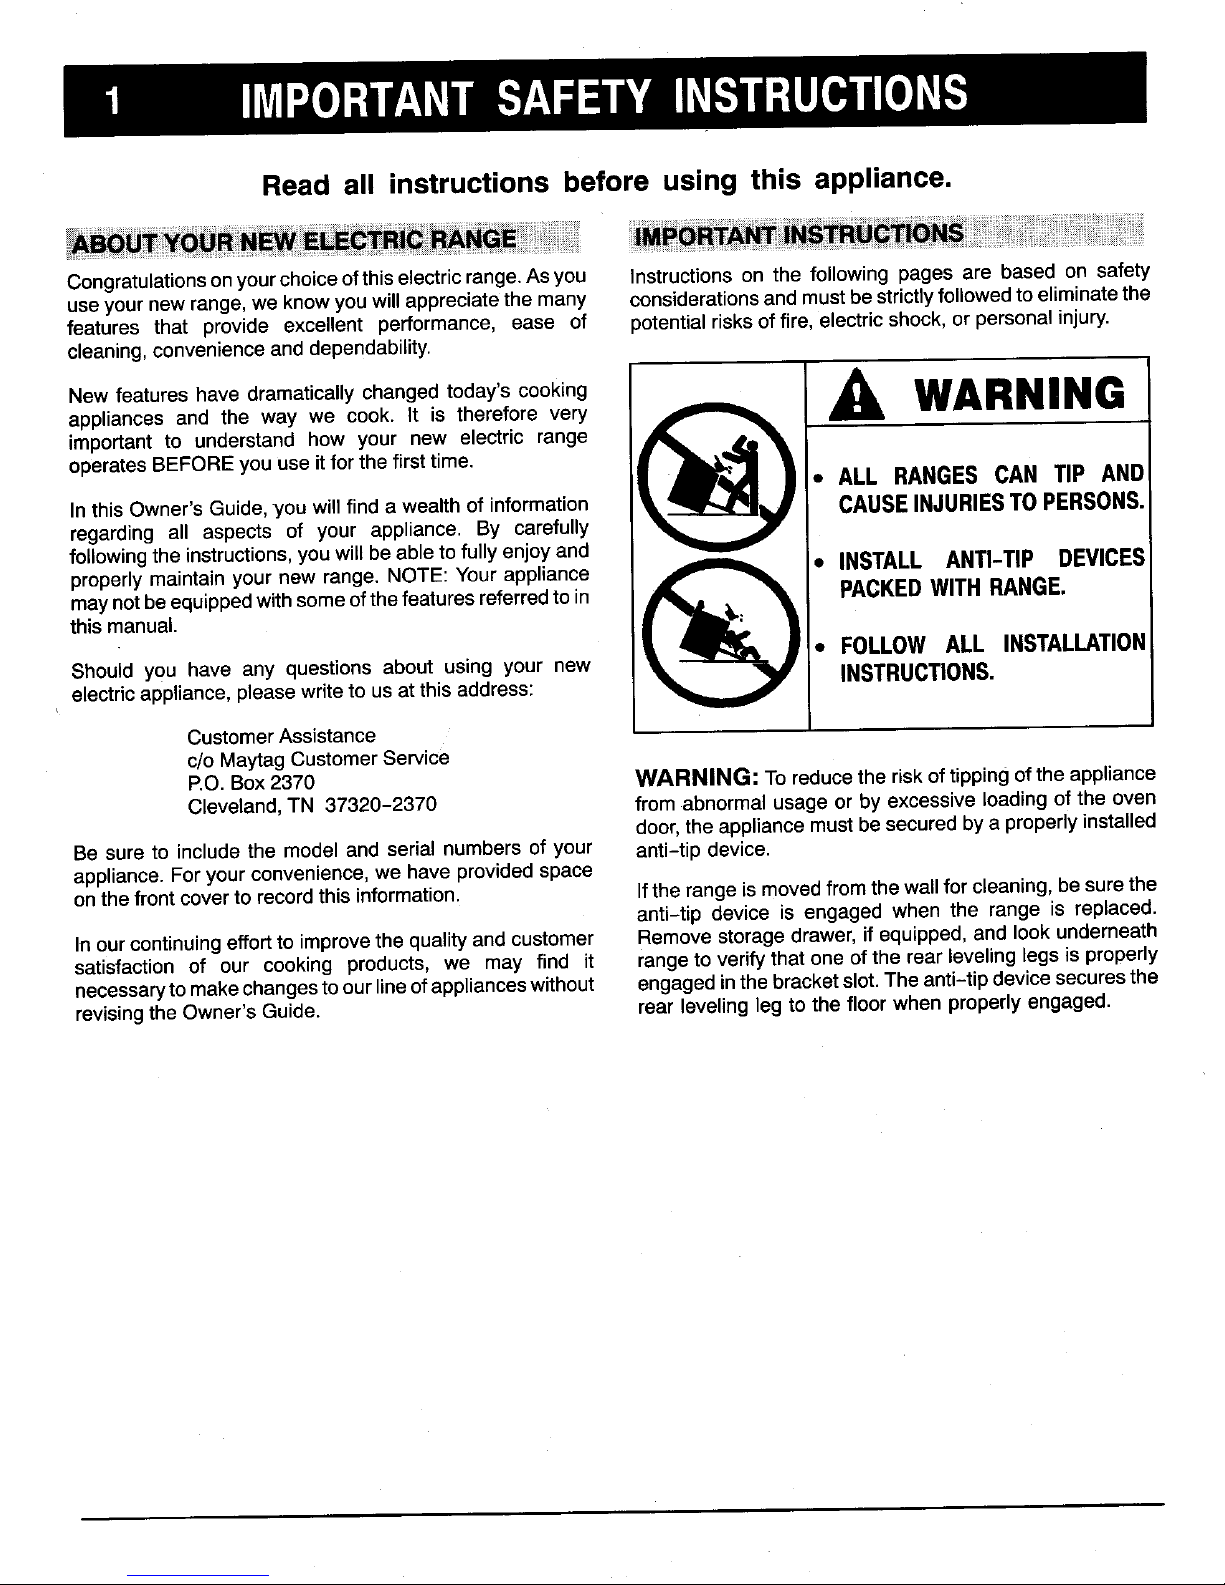
New features have dramaticallychangedtoday's cooking ,_ WAR N I N Gappliances and the way we cook. It is therefore very
important to understand how your new electric range
operatesBEFOREyouuse itforthe firsttime. i
CAN
ALL
RANGES
TIP AND
r
InthisOwner'sGuide,you willfinda wealthof information CAUSEINJURIESTO PERSONS.
regardingall aspects of your appliance. By carefully (
followingthe instructions,youwill beabletofullyenjoyand 11 i
properlymaintainyour new range. NOTE:Your appliance • INSTALLANTI-TIP DEVICES
maynotbeequippedwithsomeofthefeaturesreferredtoin PACKEDWITH RANGE,
thismanual.
• FOLLOW ALL INSTALLATION
Shouldyou have any questionsabout usingyour new INSTRUCTIONS.
electricappliance,pleasewritetousatthisaddress:
CustomerAssistance
c/oMaytagCustomerService
P.O.Box2370 WARNING:Toreducetheriskoftippingof theappliance
Cleveland,TN 37320-2370 fromabnormalusageorby excessiveloadingoftheoven
door,theappliancemustbesecuredbya properlyinstalled
Be sure to includethe model and serial numbers of your anti-tip device.
appliance.Foryour convenience,wehaveprovidedspace
onthefront coverto recordthis information. Ifthe range ismovedfromthe wall for cleaning,besurethe
anti-tip device is engaged when the range is replaced.
Inourcontinuingeffortto improvethe qualityand customer Remove storagedrawer,if equipped, and look underneath
satisfaction of our cooking products, we may find it rangeto verify that one of the rear levelinglegs is properly
necessarytomakechangesto our lineofapplianceswithout engagedinthe bracketslot.Theanti-tip devicesecuresthe
revisingthe Owner's Guide. rear levelingleg to the floor when properlyengaged.
Page 3

IMPORTANT SAFETY NSTRUCTIONS
Be sure applianceis properlyinstalledandgrounded by a
qualifiedtechnician.
Turn offapplianceand ventilating hoodto avoid spreading
the flame. Extinguish flame then turn on hood to remove
Locateand mark circuit breaker or fuse. Never replace a
blownfuse or reset a circuit breaker until you know what smokeand odor.
causedthe problem.Always replacea blownfuse with one Use dry chemicalor foam-type extinguisheror bakingsoda
of the correctamperage,do notuse a substitute, to smotherfire or flame. Neverusewateron a greasefire.
If fire isin the oven or broiler pan, smotherbyclosing oven
To ensure proper operation and avoid possible injury or door.
damageto unit do not attemptto adjust,repair,service, or If fire is ina pan onthe surface element, cover pan. Never
replaceany part of your appliance unless it is specifically attemptto pick up or move aflaming pan.
recommendedin this book. All other servicing should be
referredtoaqualifiedinstallerorservicer.Alwaysdisconnect
powertounitbefore anyservicing bytrippingcircuit breaker
to the OFF positionor removingthe fuse.
Do not leave children alone or unsupervised near the
appliancewhen itisinuseorisstillhot.Childrenshouldnever
beallowedto sit orstand on any partof the appliance.
Childrenmustbe taughtthat the applianceand utensilsin
or on it can be hot. Let hotutensils u
Besureallpackingmaterialsareremovedfromtheappliance coolin a safe place,out of reach of
beforeoperatingit. small children. Children should be
taughtthatan applianceisnotatoy. _,_
Do not storeor use gasolineor otherflammable materials, Childrenshould not be allowed to , _
vaporsandliquidsin theoven,nearsurfaceunitsor in the play withcontrolsor other parts of
vicinityofthisoranyotherappliance.Thefumescancreate theunit.
afire hazardorexplosion. CAUTION"Do not store items of
interesttochildrenincabinetsabove _l_ll/==_(-
If appliance is installedneara window,proper precautions anapplianceoronthe backguardof
should be taken to prevent curtains from blowing over a range. Children climbing on the
surfaceelements, applianceor on the appliancedoor _
to reach items could be seriously
i
Donotleaveanyitemson thecooktop.The hot airfromthe injured.
ventmayigniteflammableitemsandmay increasepressure
in closedcontainerswhichmaycausethemto burst.
Many aerosol-type spray cans are EXPLOSIVE when Topreventinjury or damage to the appliance,do not use
exposedto heat and maybe highly flammable.Avoidtheir appliance as a space _,_._F_/
useorstoragenearanappliance, heaterto heatorwarm a _._ _._ J_=_,=T,_-J' " !:
room. Also, do not use __.'_%_/
Many plastics are vulnerable to heat. Keep plastics away the cooktoporoven as a
frompartsoftheappliancethat maybecomewarmorhot.Do storage area for food or
notleaveplasticitemson the cooktopas theymay melt or cooking utensils.
soften if lefttoo closeto the vent or surfaceelement. The oven vent is located
atthe rearof thecooktop
To eliminate the hazard of reaching over hot surface or at the right rear ele-
elements, cabinet storage should not be provided directly ment.Keepovenventduct unobstructed.Blockageof the
abovea unit.Ifsuchstorageis provided,itshould belimited vent prevents proper oven air circulationand will affect
to items which are used infrequentlyand which are safely ovenperformance.Avoidtouchingventarea while ovenis
stored in an area subjected to heat from an appliance, onand for several minutesafter oven isturned off. Some
Temperatures may be unsafe for some itemS, such as partsof the ventand surroundingareasmay become hot
volatile liquids,cleanersor aerosolsprays, enoughto cause burns.
Page 4
MPq)RTANT SAFETY IN=;TRUCTIONS
Donottouchsurfaceorovenelements,areasnearelements cooking on a higher heat setting then reduce to a lower
or interior surface of oven. Heating elements may be hot setting to continue cooking. For smoothtops: To prevent
even though they are dark in color. Areas near surface boilovers,reducetothedesiredheat settingjust asthefood
elementsand interiorsurfacesof an oven may becomehot beginsto cook or waterbeginsto boil.
enoughto causeburns. Duringand after use, do nottouch,
or letclothingor otherflammablematerialscontactheating Never leave a surface cooking operation unattended
elements,areasnearelements, or interiorsurfacesof oven especially when using a r_r 1 _
untilthey have hadsufficienttimeto cool. high heatsettingor when
deepfat frying.Boilovers
Othersurfacesof the appliancemaybecomehot enoughto cause smoking and
cause burns - among these surfaces are the cooktop, greasy spillovers may
surfacesfacingthecooktop,ovenventopeningandsurfaces ignite. Clean up greasy
neartheventopening,oven door,and ovenwindow, spills as soon as
possible.Donotuse high
Do notallowaluminumfoil, meat probesor anyothermetal heat for extended
object,otherthana utensilonasurfaceelement,to contact cookingoperations.
heatingelements.
Do nottoucha hot oven light bulbwith a dampcloth as the Always let quantitiesof hotfat used for deep fat frying cool
bulb could break.If bulb breaks, disconnect power to the beforeattemptingto moveor handle.
applianceto avoid electricalshockthen removebulb. Never heat an unopened containeras pressure build-up
may cause containerto burst resultingin serious personal
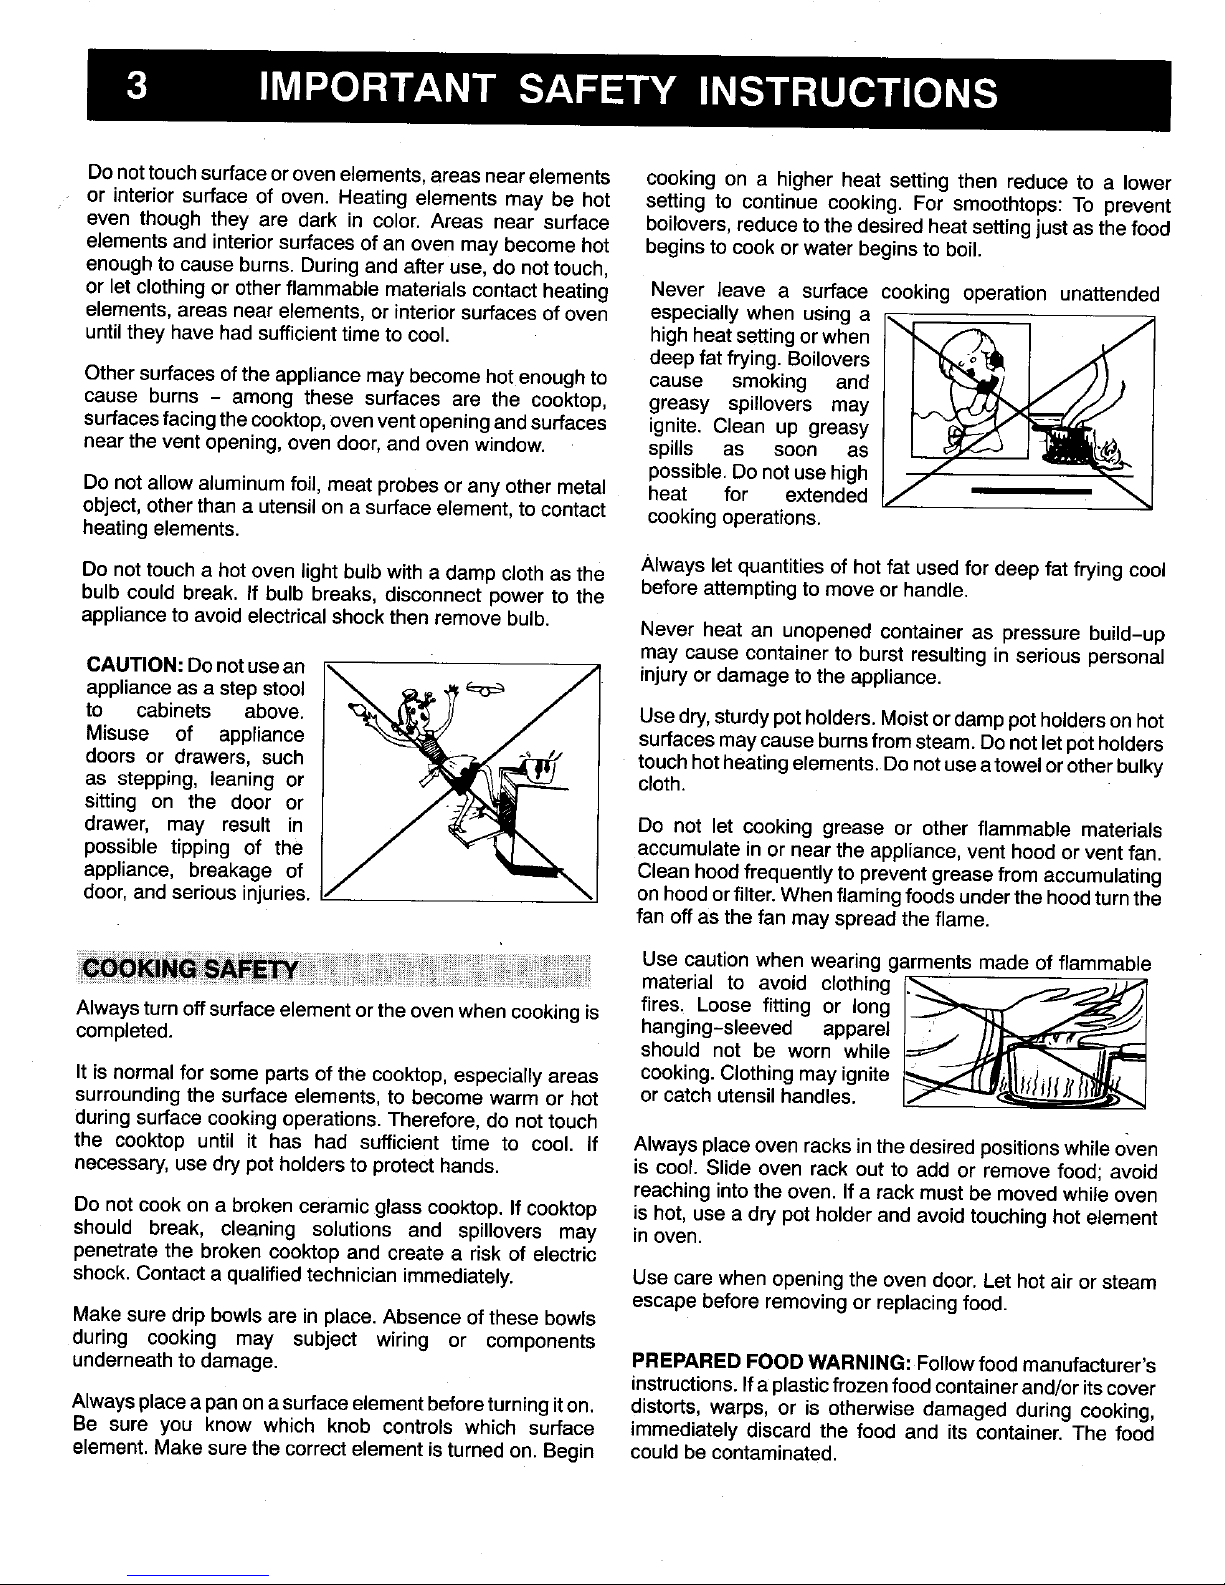
CAUTION:Donotusean _ _ j injuryordamageto theappliance.
applianceasa stepstool _
to cabinets above. Usedry,sturdypotholders.Moistordamppotholdersonhot
Misuse of appliance surfacesmaycauseburnsfromsteam.Donotletpotholders
doors or drawers, such touchhotheatingelements.Donotuseatowelorotherbulky
as stepping, leaning or cloth.
sitting on the door or
drawer, may result in J i Do not let cooking grease or other flammable materials
possible tipping of the accumulate in or nearthe appliance,vent hood orventfan.
appliance, breakage of Clean hoodfrequentlyto preventgreasefromaccumulating
door,and seriousinjuries, onhoodorfilter.Whenflamingfoodsunderthe hoodturnthe
fan offasthe fan may spreadthe flame.
Use cautionwhen wearing garmentsmadeof flammable
material to avoid clothing ._ _j,_J_]
Alwaysturnoffsurfaceelementortheovenwhencookingis fires. Loose fitting or long
completed, hanging-sleeved apparel
should not be worn while
Itisnormalforsomepartsofthecooktop,especiallyareas cooking.Clothingmayignite
surroundingthesurfaceelements,to becomewarm or hot or catchutensilhandles.
duringsurfacecookingoperations.Therefore,donottouch
the cooktopuntil it has had sufficienttime to cool. If Alwaysplaceovenracksinthedesiredpositionswhileoven
necessary,use dry potholdersto protecthands, is cool. Slideoven rack out to add or remove food; avoid
reachingintothe oven. Ifa rackmust be movedwhile oven
Do notcookon a brokenceramic glasscooktop.Ifcooktop is hot, use a drypotholder and avoid touchinghot element
should break, cleaning solutions and spillovers may in oven.
penetratethe brokencooktop and createa risk of electric
shock.Contactaqualifiedtechnicianimmediately. Usecare whenopeningthe oven door.Let hotair or steam
escapebefore removingorreplacingfood.
Makesure drip bowlsare in place.Absence ofthese bowls
during cooking may subject wiring or components
underneathto damage. PREPAREDFOODWARNING:Followfood manufacturer's
instructions.Ifaplasticfrozenfoodcontainerand/oritscover
Alwaysplacea panonasurfaceelementbeforeturningiton. distorts,warps,or is otherwisedamagedduringcooking,
Be sure you knowwhich knob controlswhich surface immediatelydiscardthe food and its container.The food
element.Makesurethecorrectelementisturnedon.Begin couldbecontaminated.
Page 5
IMPO TANT SAFETY IN,c;TRUCTIONS
Use properpansize.Thisapplianceis equippedwith oneor Turnoffallcontrolsandwaitforappliancepartstocoolbefore
more surface elements of different sizes. Select utensils touchingorcleaningthem.Cleanappliancewithcaution.Use
having flat bottoms large enough to cover the surface careto avoidsteamburns if awet spongeor clothisusedto
element.Theuseofundersizedutensilswillexposeaportion wipe spills on a hot surface. Some cleaners can produce
of the heating element to direct contact and may result in noxiousfumes ifappliedto a hot surface.
_gnitionof clothing.Properrelationshipof utensilto element
will alsoimproveefficiency. Do not soak or immerse removable heating elements in
water.Immersingelementin waterwould damageelement
Use pans with flat bottoms and handles that are easily andinsulatingmaterialinsideelement.
graspedandstaycool.Avoidusingunstable,warped,easily
tipped or loose handledpans.Pansthatare heavyto move Donotusealuminumfoil orfoil linersto linedripbowls,cover
whenfilled withfood may also be hazardous, anoven rackor linethe ovenbottom.Improperuseofthese
liners mayresult in a riskof electricshock, or fire and may
Besureutensilislargeenoughto properlycontainfood and causeoventooverheat.Usefoilonlyasrecommendedinthis
avoidboilovers.Pansizeis particularlyimportantin deepfat booklet.
frying.Besurepanwillaccommodatethevolumeoffoodthat
isto be addedas wellas the bubbleactionof fat.
To minimize burns, ignition of flammable materials and
spillagedueto unintentionalcontactwiththeutensil,do not
extend handles over Clean only parts listed in this booklet. Do not clean door
adjacent surface '_ ,_/_ _ gasket.The door gasketis essentialfor a good seal. Care
elements. Always turn should betaken nottorub,damage,ormovethegasket. Do
panhandlestowardthe _ notuseovencleanersorovenlinerprotectivecoatingsofany
side or back of the kind in or aroundany part ofthe self-clean oven.
appliance,not out into
the room where they Before self-cleaning the oven, remove broiler pan, oven
are easily hit or racks,and other utensils, and wipe offexcessivespillovers
reached by small to prevent excessivesmokeorflare ups. CAUTION:Do not
leavefood or cookingutensils, etc. in the oven during the
children, self-clean cycle.
Neverleta panboildry asthiscoulddamagetheutensiland
theappliance. Itisnormalforthe cooktopofthe rangeto becomehotduring
a self-clean cycle. Therefore, avoid touching or lifting the
Follow the manufacturer's directions when using oven cooktopduring a clean cycle.
cookingbags.
Only certain types of glass, glass/ceramic, ceramic,
earthenwareor glazed utensils are suitable for cooktopor
oven usagewithout breakingdue to the sudden change in
The California Safe DrinkingWater and ToxicEnforcement
temperature. Act of 1986 (Proposition 65) requires the Governor of
Thisappliancehas beentestedfor safe performanceusing Californiato publisha list of substancesknownto the State
conventional cookware. Do not use any devices or of California to cause cancer or reproductive harm, and
accessoriesthat are not specificallyrecommended in this requires businesses to warn customers of potential
manual.Donotuseeyelidcoversforthe surfaceunits,stove exposuresto such substances.Usersofthis applianceare
top grills, or add-on oven convection systems.The use of hereby warned that when the oven is engaged in the
devicesoraccessoriesthat arenotexpresslyrecommended self-clean cycle, there may besome low level exposureto
in this manual can createserioussafety hazards,result in some ofthe listed substances,includingcarbon monoxide.
performance problems, and reduce the life of the Exposuretothesesubstancescanbeminimizedbyproperly
componentsof theappliance, ventingtheovento theoutdoorsduringtheself-clean cycle.
SAVETHESE INSTRUCTIONS
Page 6
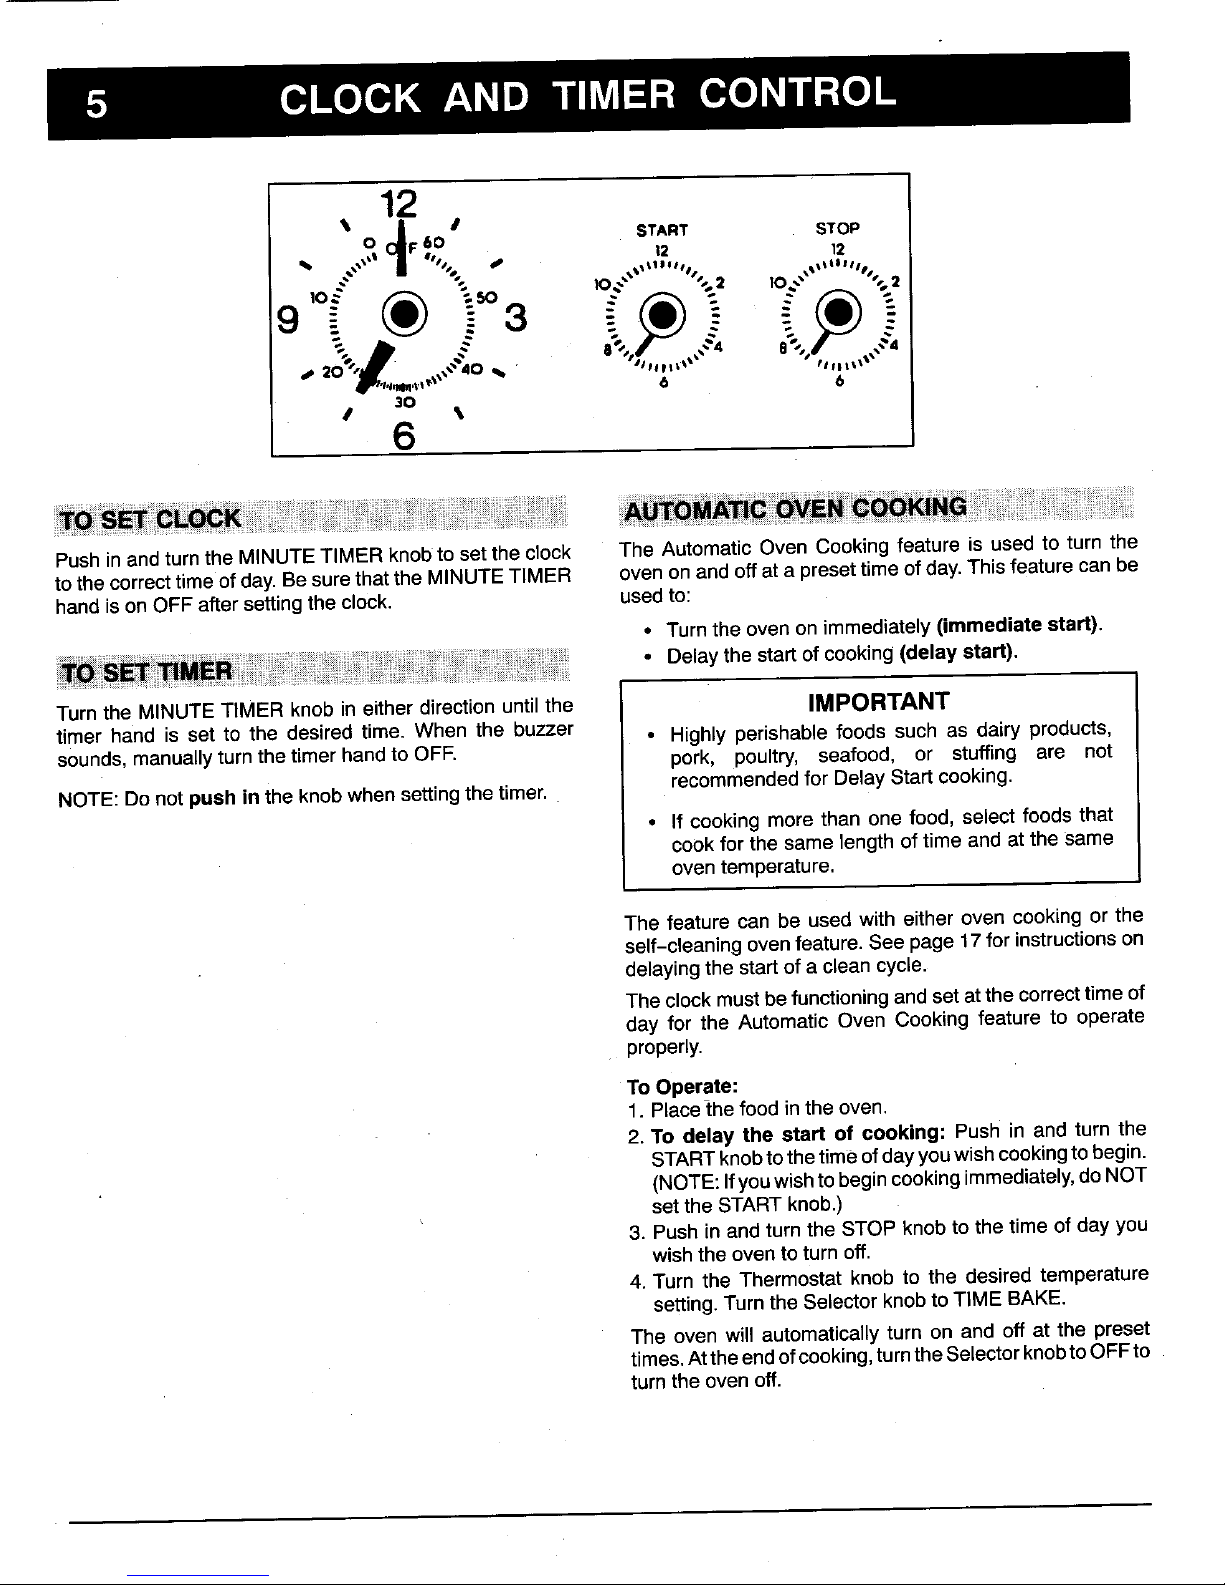
CL(ICK AND TIMER CONTR()L
12
O JF 60 • START STOP
_, _:,,,_l1 wt° 12 12
9 3 -
.. ...'40.. • e'... ...',
30
6
Pushin and turnthe MINUTETIMER knobto set the clock The Automatic Oven Cooking feature is used to turn the
to the correcttimeof day.Besurethatthe MINUTETIMER oven onand off atapresettimeof day.This featurecanbe
handis onOFFafter settingthe clock, usedto:
• Turnthe ovenon immediately(immediatestart).
• Delaythestart ofcooking(delay start).
Turnthe MINUTETIMER knob in either direction untilthe IMPORTANT
timer hand is set to the desired time. When the buzzer • Highly perishable foods such as dairy products,
sounds,manuallyturn the timerhand to OFF. pork, poultry, seafood, or stuffing are not
NOTE:Do notpush in theknobwhensettingthetimer, recommendedfor DelayStartcooking.
° If cooking more than one food, selectfoods that
cookfor the same length oftime and at the same
oven temperature.
The feature can be used with either oven cooking or the
self-cleaning evenfeature. Seepage 17for instructionson
delayingthe startof a clean cycle.
Theclock mustbe functioningandsetatthe correcttimeof
day for the Automatic Oven Cooking feature to operate
properly.
ToOperate:
1.Placethe food in the oven.
2. To delay the start of cooking: Push in and turn the
STARTknobto thetimeofdayyouwishcookingto begin.
(NOTE:Ifyouwishtobegincookingimmediately,do NOT
setthe STARTknob.)
3. Push in andturn the STOPknob to the timeof day you
wishtheoven toturn off.
4. Turn the Thermostat knob to the desired temperature
setting.TurntheSelector knobtoTiME BAKE.
The oven will automaticallyturn on and off at the preset
times.Attheendofcooking,turnthe Selectorknobto OFFto
turnthe ovenoff.
Page 7
SURFACE COOKING
Yourcooktopisequippedwithcontrolknobsthatprovidean Use HIGHjust untilwater comes to a boil or pressure is
infinitechoiceofsettingsfrom LOWto HIGH.Theknobcan reachedin the pressurecanner.Then,reduceto the lowest
beset onorbetweenanyof the numberedsettings, heatsetting that maintainsthe boil or pressure.Prolonged
use of HIGH or the use of incorrect canning utensils will
Tooperatepushinandturntheknobineitherdirectiontothe produce excessive heat. Excessive heat can cause
desiredsetting.Anindicatorlightwill glowwhen a surface permanentdamageto the porcelaincooktop,coilelement
elementisturnedon.The indicatorlightwillremainonuntil andthedripbowl.See page9 foradditionalinformation.
theelementisturnedoff.Aftera cookingoperation,be sure
theelementandindicatorlightareoff.
Cookingperformanceis greatly affectedby the type of
cookwareused.Propercookwarewillreducecookingtimes,
uselessenergyandproducemoreevencookingresults.For
Topreventdamagetotherangeorutensil,neveroperate bestresultsusea heavygaugemetalpanwitha smoothflat
surfaceunitwithoutapaninplace,neverallowapantoboil bottomanda tightfittinglid.
dryand neveroperatean elementon HiGH forextended
periodsoftime. C0okwarewithuneven,warped,orgroovedbottomsdonot
makegoodcontactwiththeheatingsurface,willreduceheat
Foodwillnotcookanyfasteratahighersettingthanneeded conductivityandresultin slower,lessevenheating.
to maintaina gentle boil. Water boils at the same
temperaturewhetherboilinggentlyorvigorously.If a high Differenttypesofcookwarematerialsrequiredifferentheat
settingisused,excessivespatteringwilloccurandfoodmay settingsfor thesamecookingoperation.Thechartbelowis
stickor burnonto thebottomofthe pan. basedonheavygaugealuminumcookware.Lowertheheat
settingif usinga thinner gaugemetalor other materials.
If a higherheat settingis usedto bringliquidto a boilor to Oversized cookwareand cookware that restsacross two
begincooking,alwaysreduceto a lowersettingonceliquid elementsare notrecommendedas they maytrap enough
comesto a boilor food beginscooking.Never leavefood heatto causedamageto thecooktop or elements.This is
unattendedduringa cookingoperation, especiallyimportantwhencanning.
Fitthesizeofthecookwaretothesizeofthe element.This Donotusewoksequippedwithroundmetalrings.The ring,
conservesenergy, whichisdesignedtosupportthewokabovetheelement,will
trapheatand maydamagetheelementandthe cooktop.
Referto cookwaremanufacturer'srecommendationsfor suggestedheatsettings.Somemanufacturersdo notrecommend
theuseof HIGH,orthe use of HIGHforextended cookingoperations.
HIGH Tobringliquidtoa boil,blanch,preheat skillet,orreachpressureina pressurecooker.
Always reduceto a lower heat settingwhen liquidsjust beginto boil or foods beginto cook.
Medium-High Tobrownor sear meat; heatoil for deepfatfrying; scald; to sauteor fry.
7-9 Maintainfast boilfor largeamountsof liquids.
, ,, ,,
Medium Tomaintainmoderateto slowboilfor large amountsof liquids.
4-6 Tocontinuecookinguncoveredfoodsand formostfrying operations.
Medium-Low Tocontinuecookingcoveredfoodsandto maintainpressurein mostpressurecookers.
1-3 Stew,braiseor steamoperations.
Tomaintainboilfor smallamountsof liquid,poach,steamor simmer.
, ,, , ,,, ,,, ,, ,, , , , , ,,, , , ,,, , , , , ,I
LOW Tokeepfoods warm beforeserving.Melt chocolate.
Page 8
SMOOTHTOP COOKTOP, ifequipped
Ion Canadian models only: The surface unitswill not When cooking delicate foods which easily scorch or
operateduringa cleancycle.This is normal, overcook, start with a lower heat setting then gradually
increase the setting until you find the optimum setting.
Boiloversare more likelyto occurif you start out on HIGH
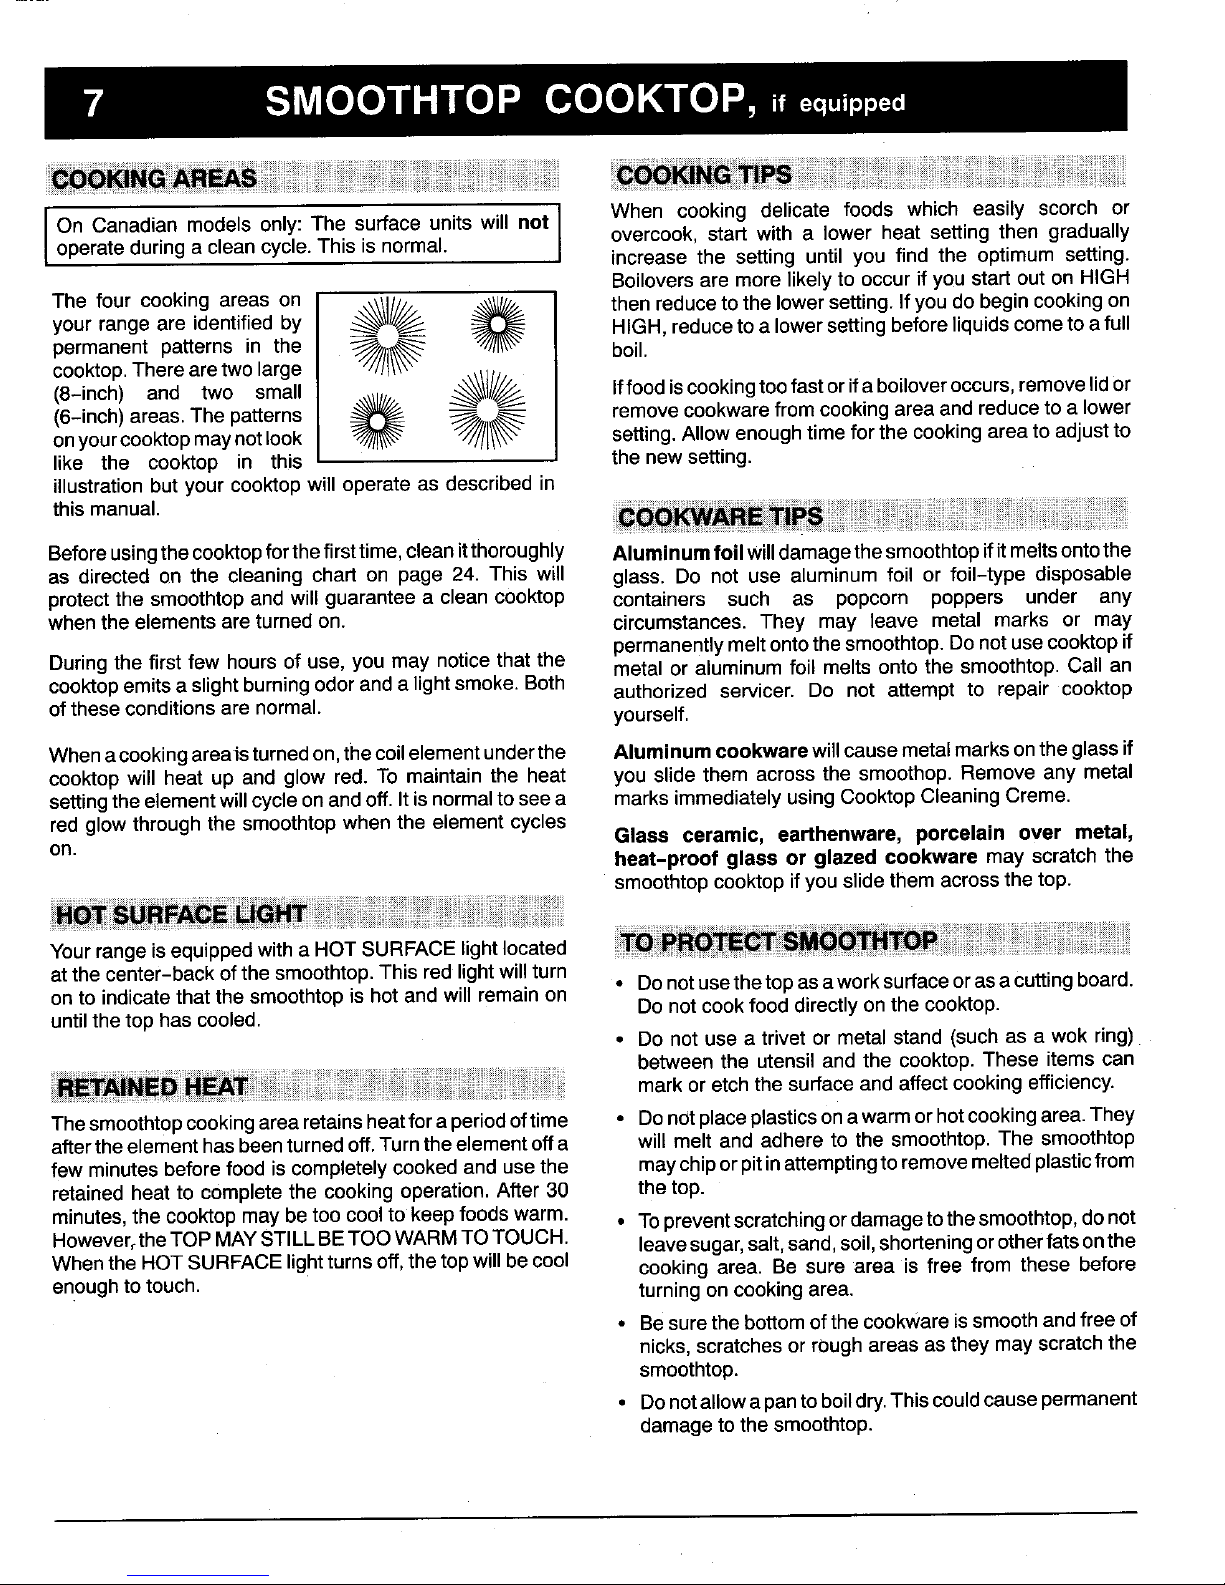
The four cooking areas on ._1__ _ then reducetothe lowersetting.Ifyoudo begincookingon
your range are identifiedby HIGH,reducetoa lowersettingbeforeliquidscometoafull
permanent patterns in the _J_//t_ boil.
cooktop.Therearetwo large _/i//____
(8-inch) and two small Iffoodiscookingtoofastor ifa boiloveroccurs,removelidor
(6-inch)areas.The patterns _///_ _1_ removecookwarefromcookingareaand reducetoa loweronyourcooktopmaynotlook setting.Allowenoughtimeforthecookingareato adjustto
like the cooktop in this the newsetting.
illustrationbutyour cooktop will operateas described in
this manual.
Beforeusingthecooktopforthefirsttime,cleanitthoroughly Aluminumfoil will damagethesmoothtopif itmeltsontothe
as directed on the cleaning chart on page 24. This will glass. Do not use aluminum foil or foil-type disposable
protectthe smoothtopand will guarantee a clean cooktop containers such as popcorn poppers under any
whenthe elementsare turned on. circumstances. They may leave metal marks or may
permanentlymeltontothesmoothtop.Donot usecooktopif
Duringthe first few hoursof use, you may notice thatthe metal or aluminum foil melts onto the smoothtop. Call an
cooktopemitsaslightburningodoranda lightsmoke.Both authorized servicer. Do not attempt to repair cooktop
of theseconditionsarenormal, yourself.
Whenacookingareais turnedon,thecoilelementunderthe Aluminumcookwarewillcausemetalmarksonthe glass if
cooktop will heat up and glow red. To maintain the heat you slide them across the smoothop. Remove any metal
settingtheelementwill cycleon andoff. Itisnormaltoseea marksimmediatelyusingCooktopCleaningCreme.
red glow throughthe smoothtopwhenthe element cycles Glass ceramic, earthenware, porcelain over metal,
on. heat-proof glass or glazed ¢ookware may scratchthe
smoothtopcooktopifyouslidethemacrossthetop.
Yourrangeisequippedwitha HOT SURFACElightlocated
atthe center-back ofthe smoothtop.This redlight will turn • Donotusethetop asaworksurfaceorasacuttingboard.
onto indicatethatthe smoothtopis hot and will remainon Donotcookfood directlyon the cooktop.
untilthe top has cooled.
• Do not use a trivet or metal stand (such as a wok ring)
between the utensil andthe cooktop. These items can
markor etch the surface and affectcookingefficiency.
Thesmoothtopcookingarea retainsheatforaperiodoftime • Donot placeplasticsonawarmor hotcookingarea.They
aftertheelementhasbeenturnedoff.Turntheelementoffa will melt and adhere to the smoothtop.The smoothtop
few minutesbeforefood iscompletelycookedand usethe maychiporpitinattemptingtoremovemeltedplasticfrom
retainedheat to completethe cooking operation.After 30 thetop.
minutes,the cooktopmaybetoo cool to keepfoodswarm. • Topreventscratchingordamagetothe smoothtop,donot
However,the TOPMAYSTILLBETOOWARMTOTOUCH. leavesugar,salt,sand,soil,shorteningorotherfatsonthe
WhentheHOTSURFACElightturnsoff,the topwill becool cooking area. Be sure area is free from these before
enoughto touch, turning oncookingarea.
° Be surethe bottomof thecookwareissmoothandfree of
nicks,scratchesor rOughareas asthey may scratchthe
smoothtop.
• Donotallowapantoboildry.This couldcausepermanent
damageto the smoothtop.
Page 9

SMOOTHT()P COOKTOP, ifequipped
To help keep cooktop clean, be sure cooking area and When surface is cool, clean as directed in the chart on page
cookware bottom are clean and dry before each use. 19. DO NOT USE the following cleaning agents:
Toprevent possible damage to the cooktop, always rinse the • Abrasives (metal scouring pads, cleansing powders,
bottom of cookware to completely remove any cleaning scouring cleaners or pads) will scratch the smoothtop.
agent residue. This is especially important when using a • Chemicals (oven cleaners, chlorine bleaches, rust
copper or aluminum cleaner. In the presence of heat, the removers or ammonia) may damage the finish of the
cleaning residue may stain, discolor or etch the smoothtop, smoothtop.
• Glass cleaners containing ammonia may harm the
Carefully blot upspillovers around the outside of the cooking smoothtop.
area as they occur with dry paper towels. BE CAREFUL
NOT TO BURN HANDS WHEN WIPING UP SPILLS. DO • Soiled cloth or sponge will leave an invisible film on the
NOT USE A DAMP CLOTH WHICH MAY CAUSE STEAM cooktop which may scratch or cause discoloration the
BURNS. next time the cooktop is used.
CAUTION: Do not use cooktop if the smoothtop is IMPORTANT: Watch sugary solutions carefully to avoid
cracked, broken, or if metal melts onto the cooktop. Call boilovers. If a sugar solution (such as jam, jelly, candy)
an authorized servicer. Do not attempt to repair the boilsover, it may pitthe smoothtop. Turn elementto LOW
cooktop yourself, andclean sugary boilovers immediately. See page 19 for
completecleaning instructions.
Tiny scratchesor Coarseparticles(dust,saltand 3iny scratchesarenotremovableanddonotaffectcooking.In
abrasions sand)betweencookwarebottom time,the scratcheswill becomesmootherand lessvisible.Be
andcooktop.Incorrectcleaning sure cookwarebottomsandcooktopareclean beforeuse.Use
materials.Slidingglasswareor meta_ cookware withasmooth, non-scratching bottom.Donotslide
acrosstopor usingcookwarewith cookwareacrosscooktop.
rough bottoms.
Metal-marking Slidingor scraping metalutensilsor De not slide metal objectacross cooktop.When cool, clean
ovenracksacrosscooktop, withCooktop CleaningCreme.
, , , , , ,
Brownstreaksand Boil0vers,incorrect cleaning Remove boilovers before reusing the cooktop.Use a clean
specks materials,usedsoiledcloth or cloth or sponge. Be sure cookware,especially bottoms,are
sponge,soiledcookware, clean anddry.
Areasof discoloration Mineraldepositsfromwater and Usecookwarewithbottomsthatarecleananddry.Usecorrect
witha metallicsheen foods, heatsettingt° preventboilovers.
,,,,, ,, ,,,, ,,,,,,, , ,,,,, ,, ,,, , ,
Pittingorflaking. Sugaryboiloversfromsugar syrups, Use correct heat setting and large enough utensil. Watch
candy,jams, jellies,dessert sauces, cookingoperationto preventboiloversorspattering.
etc.
Page 10

COIL ELEMENT COOKTOP, ifequipped
• Coilsurfaceelementsareself-cleaning. • Be sure drip bowls,locatedunder each element,are in
• Do notimmerseelementsinwater, place.
• Absence of these bowls duringcookingmay subject
• Whenanelementisturnedon,it willcycleonand offto wiringor componentpartsunderneaththe cooktopto
maintainthe heatsetting, damage.
• Topreventdamagetotherange,NEVERoperatesurface • Topreventriskof electricshockor fire,do notlinedrip
elementwithouta paninplaceandNEVERallowa pan bowlswithaluminumfoil.
toboildry.
Yourrangewillbe equippedwitheitherchromeplatedor
ToremoVe:cool,raise elementWhen[ _ I porcelaincoated steeldrip bowls.
and carefully pull out Chrome drip bowls will turn blue or gold over time or if
and away from the overheated.Thistypeof discolorationispermanentandwill
receptacle, notaffectcookingperformance.
To protectthe chromeor porcelainfinish, avoid using high
settingsfor long periodsof time.Reduceto a lowersetting
To replace; Insertthe terminals on the element into the once foodbeginscooking.Donotuse oversizedcookware.
receptacle.Gentlylift uponouteredgeofelement(opposite Panshould notextendmorethan2inchesfromtheelement.
terminal-side of element) while inserting terminals into
receptacle.Gently press down on outer edge of element Iftheovenventis locatedundertheright rearelement,be
untilelementsits levelon drip bowl. surethedripbowlforthiselementhasaholeinthecenter
Besuredrip bowlsare properlyinstalled. Notchontrimring toallowproperovenventing.Topreventbakingproblems,
neverblockthe vent openingby placingasolid dripbowl
should becenteredoverthe screwsecuringthe receptacle inthis locationor bycoveringthe holeinthe centerofthe
tothe maintop.Iftrim ringisnotinstalledproperlyand rests drip bowlwithaluminumfoil.
on thisscrew,thetrim ringanddripbowl will "rock".
CANNING ELEMENT ACCESSORY KIT
(MODELCE1)
The useofoversizedcookwareor largecannersonthe coilelement
cooktopmayresultindamagetotheporcelainenamelfinish.A special
canningelementhas beendesignedto protectthefinishwhenusing
thistypeofcookware.The canningelementandchromedripbowlare
availableasanoptionalaccessorykit.
ForinformationontheCanningElementAccessoryKit,contactyour
dealerorwritetoMaytagCustomerService,P.O.Box2370,Cleveland,
TN37320-2370.
NOTE: ForadditionalcanninginformationcontactyourlocalCounty
ExtensionOffice.Or,contactAIItristaConsumerProductsCompany,
marketerof Ballbrandhomecanningproductsat 800-240-3340 or
write:AIItristaCorp.,ConsumerAffairsDept.,P.O.Box2729, Muncie,
IN 47307-0729.
Page 11

OVEN USE 10
Theovenlightswitchislocatedonthecontrol panel•Toturn
theovenlight on, pushin the bottomhalf ofthe switch. Toturn theovenon,boththe ThermostatandSelector
knobs must be set. The oven will not operate if the
Selectorknobis leftintheOFFposition.Toturntheoven
off,turn the Selector knobtothe OFFposition.
Theovenvent islocatedunderthe rearofthe cooktoporat
therightrear surfaceelement.Whentheoven isinuse,this
areamayfeel warm or hot to the touch. Topreventbaking The OVEN indicatorlight, locatedon the backguard,turns
problems,donot blocktheventopening, onwheneverthe ovenisturnedon.Whentheovenreaches
thepresettemperature,the indicatorlightwillturnoffandon
asthe oven elementscycle off and on.
Because each oven has its own personal baking
characteristics, do not expect that your new oven will 1. Whencool, positionthe racks intheoven.
performexactly likeyour previousoven.You mayfind that
2."rumthe Thermostatknobto thedesiredtemperature.
thecookingtimes,oventemperatures,andcookingresults
differsomewhatfromyourpreviousrange.Allowa periodof 3. Turnthe Selectorknobto BAKE.
adjustment. If you have questions concerning baking 4. Place the food in the center of the oven, allowing a
results,pleasereferto pages11,12,13and22foradditional minimumof 2 inches betweenthe utensil and the oven
information, walls.
5. Check food for doneness at the minimum time in the
recipe.Cook longerif necessary.
6. Removefoodfromthe ovenandturn the Selectorknobto
OFF.
__Preheatingisnecessaryforbaking. TurntheSelectorand
Thermostatknobsto thedesiredsettingandallow about 10
to 15 minutesfor the ovento preheat.Itis not necessaryto
preheatfor roasting.
THERMOSTAT SELECTOR
Selectinga temperaturehigherthandesiredwillNOT J
l
preheattheovenanyfaster,andmayhavea negative
I
NOTE:Theknobson yourrangemaynot lookliketheknobs effecton bakingresults. •
in the above illustration. However, they will operate as
describedbelow.
TheTHERMOSTATknobisusedtoselectandmaintainthe
oventemperature.AlwaysturnthisknobjustTOthedesired Donotcoverthe oven bottomor anentirerackwithfoil
temperature.Donotturntoa highertemperatureandthen or placefoil directlyundercookware.Tocatchspillovers,
back. placea piece offoila little largerthan the pan,on the rack
belowthepan.Forrangeswith onerack,itwill benecessary
The SELECTOR knob determines the type of oven to place the foil directly under the utensil. Cut a small
operation.Turnthisknobtothedesiredsetting. Eachsetting openinginthefoiltoallowheatto thebottomofthepan.This
isidentifiedby an indent(stop)anda "click"sound, isespeciallyimportantwhen bakingpies.
Page 12

11 OVEN USE
Yourrangewillfeatureoneortwoovenracks.Thetwooven For optimumbakingresultsof cakes,cookies or biscuits,
racksare designedwith a safetylock-stop positionto keep useonerack.Positionthe racksothe foodisinthecenterof
theracksfromaccidentlycomingcompletelyout oftheoven theoven. Useeitherrack position2 or 3.
whenpullingtherackout to addor removefood.
Ifcookingonmorethanonerack,staggerthefoodtoensure
properairflow.
CAUTION: Donot attemptto changethe rackpositions
whentheovenishot,
Toremove:Besuretherackiscool.Pullthe rackstraightout __
untilitstopsatthelock-stopposition,Tiltthefrontendofthe
rackupandcontinuepullingtherackoutoftheoven.
Toreplace:Placetherackontheracksupportsandtiltthe
frontendoftherackupslightly.Slideitbackuntilitclearsthe
lock-stopposition.Lowerthefrontandslidetherackstraight
in.Pullthe rackouttothelock-stoppositiontobe sureit is
positionedcorrectlyandthenreturnittoitsnormalposition. Ifcookingontwo racks,userackpositions2and4forcakes
andrackpositions1and4whenusingcookiesheets.Never
Itisimportantthataircancirculatefreelywithintheovenand placetwocookiesheetsononerack.
around the food. To help ensure this, place food on the
centerofthe oven rack.Allowtwoinchesbetweentheedge Ifroastinga largeturkey,placetheturkey on rack1 andthe
ofthe utensil(s)andthe oven wails, sidedishes on rack5.
RACK5 Used fortoastingbread,orfor two-rack baking.
(highestposition) !_ -_
RACK4 Used formostbroilingandtwo-rack baking, _- _----_--_-_-_---
RACK3 Usedformostbakedgoodson a cookiesheet or ! ,
jelly rollpan, or frozen conveniencefoods, or for
two-rackbaking 112 iI
RACK2 Used for roasting small cuts of meat, large _¢.._1
casseroles, baking loaves of bread, cakes (in
eitherbaking.tUbe,bundt, or layer pans) or two-rack _,_=_'_.___ __._,, !
RACK1 Used for roasting large cuts of meat and large
poultry,pies, souffles,or angel food cake, or for
two-rack baking.
Page 13

OVEN USE 12
'. Use a liable recipe and accuratelymeasurefresh • A dark, dull, anodized or satin-finish metal pan
" ingredients. Carefully follow directions for oven absorbs heat and produces darker browningwith a
teml =reandcookingtime. crispercrust. Use dark pansfor pies, pie crustsor
bread.
Preheat van if recommendedinthe recipeorpackage
directions.Selectinga temperature higherthan the • Foroptimumbakingresults,bakecookiesandbiscuits
desiredtemperaturewillnotpreheattheovenanyfaster, ona flat cookiesheet.Ifthepanhassides,suchas a
Infact,thismayhavea negativeeffectonbakingresults, jellyrollpan, browningmaynotbeeven.
Use ;orrect rack position.Bakingresultsmaybe • Ifusingheat-proof glassware,ordarkpanssuch as
affected the wrongrackpositionisused.Foroptimum Baker's Secret or Wilton reduce the oven
results, _kefoodsononerack.Selecta rackposition temperatureby 25°F except when baking pies or
:sthefoodinthecenteroftheoven.Ifbakingon bread. Use thesame bakingtimeas called for in the
two racks selectrack positions#2 and 4,#1 and4 or #2 recipe.
and 5.
• Top )wningmaybe darker iffoodislocatedtoward Allow hot air to flow freely through the oven for
thetOl oftheoven. optimumbakingresults.Improperplacementofpansin
the ovenwill block airflowand may resultin uneven
• Bottom browningmay be darkeriffood is located browning. For optimumbrowningand even cooking
towardthe bottomoftheoven. results:
• Whenusingtworacksforbaking,allowenoughspace • Donotcrowda rackwithpans.Neverplacemorethan
betweentheracksforproperaircirculation.Browning onecookiesheet,one13x9x2-inchcake _anor two
and ,okingresultswill be affectedif air flow is 9-inch roundcake panson onerack.
blocked, • Staggerpanswhenbakingontworackssoonepanis
notdirectlyoveranotherpan.
Cookwarematerial playsan importantpart in baking
results.Alwaysusethe type andsizeofpan calledfor in • Allowtwoinchesbetweenthe panandtheovenwalls.
the recil:.=.Cooking times or cooking results may be
affectedifthe wrongsizeis used. Check the cooking progress at the minimum time
recommendedin the recipe. If necessary,continue
• A shiny metalpan reflectsheatawayfromthefood. checkingat intervalsuntilthe foodis done.If the oven
Thist_ _eofpanproduceslighterbrowningandasofter dooris openedtoofrequently,heatwillescapefromthe
crust. ]seshinypansforbakingcakesorcookies.
oven;thiscanaffectbakingresultsandwastesenergy.
If you add additional ingredientsor altertherecipe,
expectcookingtimesto increaseordecreaseslightly.
i _,i _ .... _ _i_ _ _ , _ _ _ _ , _ _ _ _ ,
Page 14

PROBLE CAUSEM °
Cakesare uneven. • Panstoo closeortouchingeachotheroroven walls.• Batter unevenin pans.
• Temperaturesettoo lowor bakingtime tooshort.• Ovennotlevel.• Undermixing.• Too
muchliquid.
!
Cakehigh in middle; • Temperaturesettoohigh.- BakingtimetooIong_• Overmixingi•Too muchflour.• Pans
touching:eachotherorovenwait&• InCorrectrackposition.
,,,,,
Cakefalls. • Toomuchshorteningorsugar.• Toomuchor too little liquid.• Temperaturesettoo low.
• Oldor too little bakingpowder.° Pantoosmall.• Ovendooropenedfrequently.• Added
incorrecttype of oilto cake mix.° Addedadditionalingredientsto cake mixor recipe.
Cakes,cookies,biscuits • Ovennot preheated.• Panstouchingeachotheror ovenwalls.• Incorrectrackposition.
toobrownon bottom. • Incorrectuseof aluminumfoil. • Placed2cookiesheetsonone rack.• Usedglass,dark,
stainedwarpedor dullfinish metalpans. (Useashiny cookie sheet.)
Followcookwaremanufacturer'sinstructionsfor oven temperature. Glasswareanddark
cookwaresuchas Ecko'sBaker'sSecret may require loweringthe oven temperatureby
25OE
Excessiveshrinkage. • Toolittleleavening.• Overmixing.• Pantoo large. • Temperaturesettoo high.• Baking
timetoolong.• Panstoo closeto eachother orovenwalls.
Cakeshave tunnels. • Notenoughshortening.• Toomuch bakingpowder.• Overmixingorattoohigh aspeed.
• Temperatureset too high.
Pie crustedges too , Temperaturesettoohigh.• Panstouching eachotheror ovenwalls. ° Edgesofcrusttoo
brown, thin; shieldwithfoil.
Pieshave soaked crust. °Temperaturetoo low atstart of baking. • Fillingtoojuicy.• Usedshinymetal pans.
Page 15

OVEN USE 14
Roasting isthe method forcooking large, tender cutsof meat thusallowing better heat circulation for even cooking. As the
uncovered, without adding moisture, fat on top of the roast melts, the meat is basted naturally,
eliminating the need for additional basting.
RoastingTips
The cooking time is determined bythe weight of the meat
Most meats are roasted at 325°F. It is not necessary to and the desired doneness. For more accurate results, use
preheat the oven. Place the roasting pan on either ofthe two a meat thermometer. Insert itso the tip is in the center of the
lowest rack positions, thickest part of the meat. Itshould not touch fat or bone.
Use tender cuts of meat weighing three pounds or more. Remove the roast from the oven when the thermometer
Some good choices are: Beef rib, ribeye, top round, high registers the desired temperature.
quality tip and rump roast, pork loin roast, leg of lamb, veal
shoulder roast and cured or smoked hams.
NOTE: For more information about food safety, call
Season meat, ifdesired, either before or after roasting. Rub USDA's Meat & Poultry Hotline at 1-800-535-4555. For
into the surface of the roast if added before cooking, cooking information write to the National Live Stock and
Meat Board, 444 North Michigan Avenue, Chicago,
Place the meat fat-side-up on a rack in a shallow roasting illinois 60611.
pan. Placing the meat on arack holds itout of the drippings,
Approximate L Oven Approximate*
Weight Temperature Internal RoastingTime
Cutof Meat _ (pounds) in °F Temperature (min.per lb.)
Beef
Rib Roast(cut-side-down) 4 to 8 325°F 160°F (medium) 30-35
Rib Eye Roast 4 to 6 350°F t60°F (medium) 30-35
TopSirloin Roast 3 to 6 325°F 160°F(medium) 30-35
Pork, Fresh
ShoulderBladeRoast,(boneless) 4 to 6 325°F 160°F 35-45
ShoulderBladeRoast 4 to6 325°F t60°F 30-40
LoinBladeorSirloinRoast 3to 4 325°F 160°F 35-40
BonelessPorkLoin 6 to8 325°F 160°F 25-35
Pork,Smoked
Ham,Half(fullycooked)** 5 to7 325°F 140°F 25-35
Ham,Half(cook-before-eating) 5 to 7 325°F 160°F 35-45
Poultry
Turkey,unstuffed*** 12to 16 325°F 180°-185°F 18-20
16to 20 325°F t80°-185°F 16-18
20 to24 325°F 180°-185°F 14-16
Turkey,Breast 3 to8 325°F 180°F 30-40
Chicken,Fryer 2 1/2to3 1/2 350-375° 180°F 20-24
Chicken,Roaster 4 to6 350-375°F 180°F 20-25
Lamb
Leg(boneless) 2 to3 325°F 160°F 35-40
170°F 40-45
WholeLeg 5 to7 325°F 160°F 30-35
* Cookingtimesare approximateandmay varydependingonthe shapeof theroast. Ameat thermometeris the mostaccurate way
to determinealoneness.
** Addwater and followpackagedirections.
*** Stuffedturkey requiresadditionalroasting time.Shieldlegsand breast withfoiltoprevent overbrowninganddrying of skin.
Page 16

15 OVEN US=
Broiling is a method of cooking tender meats by direct heat.
Thecookingtimeisdetermined bythedistance betweenthe _ (_
meat and the broil element, the desired degree of doneness
and the thickness of the meat.
Broiling Tips
Broiling requires the use of the broiler pan and insert. The
broiler insert must be in place toallow fat and liquid todrainto THERMOSTAT SELECTOR
the pan below to prevent spatters, smoke and flare-ups.
Improper use may cause grease fires. ToSet Oven To Broil:
For easier clean up, line the broiler pan with foil and spray 1. Place the oven rack in the recommended rack position.
the insertwithanon-stickvegetablespray. Donor cover the 2. Turn the Thermostat knob to BROIL or, for lower
broiler insert with aluminum foil as this prevents fat from temperature broiling, to 450°F.
draining into pan below. 3. Turn the Selector knob to BROIL.
Trim excess fat and slash remaining fat to help keep meat 4. If desired, preheat the broil element for about 3 minutes
before placing the meat inthe oven.
from curlingandto reduce smoking and spattering. Season 5. Followthe suggested times inthe chart below, Turn meat
meat after cooking, once about halfway through cooking.
Place oven rack in the correct rack position when oven is 6. Checkfordonenessbycuttingaslit nearthecenterofthe
cool. For darker browning, place meat closer to the broil meat.
element. Place meat further down if you wish meat to be well 7. After broiling, turn the Selector knob to OFF to turn the
done or if excessive smoking or flaring occurs, oven off and remove the broiler pan from the oven.
See Care and Cleaning Chart on page 18 for instructions on NOTE: Broil times may increase if the range is installed on
cleaning the broiler pan and insert. 208 volts.
BACON #4 WellDone 6 to 10
BEEF STEAKS
1-inchthick #4 Medium 15to 18
#4 Well Done 19to23
CHICKEN ............... Broil at450°F
Pieces #3 or#4 WellDone 30 to45
FISH
Fillets #4 Flaky 8 to 12
Steaks,1-inch thick #4 Flaky 10to 15
GROUND BEEFPA'n'IES
3/4-inchthick #4 WellDone 15to 18
HAMSLICE, precooked
1/2-inch thick #4 Warm 8 to 12
PORK CHOPS
1-inch thick #4 WellDone 22to 26
* The top rackpositionis position#5.
** Broilingtimes areapproximateandmayvary dependingonthe meat.
Page 17

SELF-(;LEAN OVEN, ifequipped 1(
On Canadianmodels only:The SmoothtopCooktopwillI
I
notoperateduringa cleancycle.This is normal. I Whenthedoorislockedandtheoven issetfor acleancycle,
the oven will automatically begin to heat to cleaning
The self-clean oven uses temperatures above normal temperatures.
cookingtemperaturestoautomaticallycleantheentireoven
interior. Asthe ovenreachescleaningtemperatures,an internallock
mechanismwJJJ
engage.
At this
point,
theovendoorcan not
CAUTION: It is normalfor partsof the rangeto becomeJ
be unlocked and opened. To preventdamage to the door
hotduringa cleancycle.Therefore,duringa cleancycle,J andlocklever,donotforcethedoor openwhenthe internal
avoidtouchingthe cooktop, oven vent area, oven door lockhasengaged.
andw ndow.
The first few timestheoveniscleaned,somesmoke and
Itisbetterto cleanthe ovenregularlyratherthantowait until odor may be detected. This is normal and will lessen or
there isa heavybuild-up ofsoil in the oven. disappearwith use. if the oven is heavily soiled, or if the
broilerpanwas accidentlyleftintheoven, smokeand odor
Turnoffthe ovenlightbeforeacleancycle.Iftheovenlightis mayoccur.
lefton,thelightbulb willburnoutduringthe cleancycle.
As theoven heatsand cools,you mayhearsoundsofmetal
partsexpandingandcontracting.Thisis normalandwill not
damageyour appliance.
Removebroilerpan, all pans andtheoven racksfrom the
oven.The rackswill discolor and may not slide easily
= :
after a clean cycle. A |NG
Cleanovenframe,doorframeandaroundtheovenventwith Aboutonehouraftertheendofthecleancycle,theinternal
a non-abrasive cleaning agent such as non Ami or lockwill disengage.At this point,the door can be unlocked
detergent and water. These areas are not exposed to andopened.Movethe door locklevertotheleftor unlocked
cleaningtemperaturesandshouldbecleanedto preventsoil positionandopenthe door.The oven may still behot.
frombakingonduringthe cleancycle.
Wipeupexcessgreaseor spilloversfromthe ovenbottomto Somesoilmayleavealightgray,powderyashwhichcanbe
preventexcessivesmokingandflare-ups duringthe clean removedwitha dampcloth.Ifsoil remains,itindicatesthat
the clean cycle was not long enough. The soil will be
cycle.
removedduringthe nextclean cycle.
Wipeupsugaryspilloversandacidspilloverssuchas lemon
juice, tomato sauce or milk-based sauces. Porcelain If the oven racks were left in the oven and do not slide
enamelisacidresistant,notacidproof.Theporcelainfinish smoothlyafteracleancycle,wiperacksandembossedrack
maydiscolorif acidspillsare notwiped upimmediately, supportswithasmallamountofvegetableoilto restoreease
of movement.
Donot use ovencleanersontheself-clean ovenfinishor
aroundanypartoftheovenastheywilldamagethefinishor Clean around the oven vent opening at the rear of the
parts, cooktopifthereisadepositfromthefumesventedduringthe
Topreventdamage,do not cleanorrub the gasketaround clean cycle. Use detergent and water and a cloth or
theovendoor.Thegasketisdesignedto sealin heatduring non-abrasive pad.
thecleancycle.
Fine,hair-like linesmayappearintheoven interiororoven
door.This is a normalconditionresultingfrom heatingand
coolingofthe porcelainfinish.These lines do not affectthe
performanceof the oven.
Page 18

OnCanadian models only:The SmoothtopCooktop will
notoperateduringa cleancycle.Thisis normal.
Whenthedooris lockedandtheovenissetforacleancycle,
the oven will automatically begin to heat to cleaning
The self-clean oven uses temperatures above normal temperatures.
cookingtemperaturestoautomaticallycleantheentireoven
interior. Asthe ovenreachescleaningtemperatures,aninternallock
CAUTION: It is normal far parts of the range to become I bemechanismwillengage. Atthis point, the oven door cannOtunlockedand opened. To prevent damage to the door
hotduringa cleancycle.Therefore,duringa cleancycle, andlock lever,do notforcethe door openwhenthe internal
avoidtouchingthe cooktop, oven vent area, oven door lockhas engaged.
and wndow.
The first few times the oven is cleaned,some smoke and
Itisbetterto cleanthe ovenregularlyratherthantowait until odor may be detected. This is normal and will lessen or
there isa heavybuild-up ofsoil inthe oven. disappearwith use. If the oven is heavily soiled, or ifthe
broilerpanwas accidentlyleftintheoven, smokeand odor
Turnoffthe ovenlightbeforeacleancycle.Ifthe ovenlightis mayoccur.
lefton, the lightbulb will burn out duringthe cleancycle.
Asthe ovenheatsandcools, youmayhearsoundsof metal
partsexpandingandcontracting.Thisis normalandwill not
damageyour appliance.
Removebroilerpan, all pans andthe ovenracksfrom the
oven. The racks will discolorand may not slide easily
after a cleancycle. ,A _S_
Cleanovenframe,doorframeandaroundtheovenventwith Aboutonehour afterthe endofthe cleancycle,the internal
a non-abrasive cleaning agent such as Ben Ami or
lockwill disengage.At this point,the doorcanbe unlocked
detergent and water. These areas are not exposed to andopened. Movethedoorlocklevertotheleftorunlocked
cleaningtemperaturesandshouldbecleanedtopreventsoil positionand open the door.The oven may stillbe hot.
frombakingonduringthe clean cycle.
Wipeupexcessgreaseorspilloversfromtheovenbottomto Somesoilmayleavea lightgray,powderyashwhichcanbe
preventexcessivesmoking andflare-ups duringthe clean removedwith a damp cloth. If soil remains,it indicatesthat
cycle, the clean cycle was not long enough. The soil will be
removedduringthenextclean cycle.
Wipeupsugaryspilloversandacidspilloverssuchas lemon
juice, tomato sauce or milk-based sauces. Porcelain If the oven racks were left in the oven and do not slide
enamelisacid resistant,not acidproof.Theporcelainfinish smoothlyafter acleancycle,wiperacksandembossedrack
maydiscolorifacidspillsare notwiped up immediately, supportswithasmallamountofvegetableoiltorestoreease
of movement.
Donot useovencleanersontheself-clean ovenfinishor
aroundanypartoftheovenastheywilldamagethefinishor Clean around the oven vent opening at the rear of the
parts, cooktopifthere isadepositfromthefumesventedduringthe
Toprevent damage,do notclean or rubthe gasketaround clean cycle. Use detergent and water and a cloth or
theovendoor.Thegasketisdesignedto sealinheatduring non-abrasive pad.
thecleancycle.
Fine,hair-like lines mayappear intheoven interioror oven
door.This isa normalconditionresultingfrom heating and
coolingofthe porcelainfinish.These linesdo not affectthe
performanceofthe oven.
Page 19

CARE AND CLEANING CHART 18
Becauseof the many newcleaningproductsintroducedin Non-Abrasive Cleaners - BonAmi, pasteofbakingsoda
the marketplaceeach year, it is not possibleto list all andwater.
productsthatcanbesafelyusedtocleanthisappliance.
Mildly Abrasive Powder or Liquid Cleansers - Ajax,
ALWAYS READ THE MANUFACTURER'S BarkeepersFriend,Cameo,Comet,SoftScrub.
INSTRUCTIONSto besurethe cleanercan besafelyused
on this appliance.Also, read and carefullyfollowthe Non-Abrasiveor ScratchlessPlasticor NylonScouring
manufacturer'sdirectionswhenusinganycleaningproduct. Pads or Sponges - Chore Boy PlasticCleaning Puff,
Scrunge Scrub Sponges, or Scotch-Brite No Scratch,
To determineif a cleaningproductis safe, test a small Cookwareor KitchenSponge.
inconspicuousareausinga verylightpressuretosee ifthe
surfacemayscratchordiscolor.Thisisparticularlyimportant AbrasiveScouringPads - S,O.S.,BrilloSteelWoolSoap,
forporcelainenamel,metal,plasticorhighlypolished,shiny, Scotch-BriteWoolSoapPads.
paintedsurfaces. (Brand names for the above cleaning products are registered
trademarks of the respective manufacturers.)
Thefollowingbrandsmayhelp you tomake anappropriate
selection:
Be sure appliance is off and all parts are cool before
GlassCleaners - BonAmi, Cinch,Glass Plus,Windex. handlingorcleaningtoavoiddamageandpossibleburns.
If a part is removed,be sure it iscorrectlyreplaced.
DishwashingLiquidDetergents- Dawn,Dove,Ivory,Joy.
To prevent staining or discoloration,clean cooktop
Mild LiquidSprayCleaners- Fantastik,Formula409. after each use.
.,.Ts I 0,.EC,'G",
BakedEnamel: • Detergentandwater Usea drypapertowelorclothtowipeupspills,especiallyacidspills,assoonas they
• Sidepanels • Mildliquidcleaner occur.Thisisespeciallyimportantforwhitesurfaces.Whensurfaceiscool,washwith
• Storagedrawer • Glasscleaner detergentandwater.Donotuseabrasiveorharshcleaningliquidsandpowdersor
• Ovendoor ovencleaners.Thesewillscratchandpermanentlydamagethefinish.Drywithasoft
• Backguard cloth.Onsmoothtopcooktops,cleanventopeningarea aftereachovenuse,
BroilerPanand • Detergentandwater Pretreatthebroilerpanandinsertwithanon-stickvegetablecoatingsuchasPareor
Insert • Plasticorsoap-filledscouringpad Mazolatomakecleaningeasier.
• Dishwasher Removefromovenafteruse.Coolthenpouroffgrease.Placesoapyclothoverinsert
andpan;letsoaktoloosensoil.WashinwarmSoapywater.Usesoapfilledscouring
padtoremovestubbornsoil.Broilerpanandinsertcanbecleanedinthedishwasher.
ControlKnobs • Detergentandwater Foreaseof cleaning,turnoffknobandremovebypullingforward,Wash,rinse,and
• Mildliquidsprays dry, Donotuseabrasivecleaningagentsasthey mayscratchthefinishandremove
• Glasscleaners themarkings.Turnoneachelementtobesureknobshavebeencorrectlyreplaced.
Drip Bowls,Chrome
• Brownfoodstains • Detergentandwater Bowlscanpermanentlydiscolorovertimeorifexposedto excessiveheatorifsoilis
• Plasticscouringpads allowedtobakeon. Thediscolorationwillnotaffectthecookingperformance.
• Mildabrasivecleaners Aftereachuse.wash, rinseanddryto preventdifficultsoils.If heavilysoiled,gently
scrubwithplasticscouringpad. Ifsoilisallowedto burnon,itmaybeimpossibleto
remove.
Donot coverwith aluminumfoil,
• Blue/goldheat • FlitzMetalPolish Thesestainsare causedbyoverheating,and normallyoccurovera periodoftime.
stains (Followpackagedirections) Theyare usuallypermanent.Tominimize:
1. Avoidexcessiveuseofthehighheatsetting.UseHIGHonlyto startcooking,then
lowerthesettingto finishcooking.
2. Useflatbottompansthatdonotextendmorethantwo inchesfromthesurface
element.
Anon-abrasivemetalpolishsuchasFtitzmaybeusedto helpremovestains.Ritz is
availablein manyautomotivesupplyandhardwarestores.
Page 20

19 CARE AND CLEANING CHART
' L iNGAGE.TS O,.ECTa.S
PARTS C O
Drip Bowls, • Detergentand water Aftereachuse,wash,rinseanddrytopreventdifficultsoils.Tocleanbyhand,soakin
Porcelain • Mild abrasivecleaners hotsudsywater,thenuse mildabrasivecleanerandplasticscouringpad.
• Plasticscouringpads Do notcoverwithaluminumfoil.
• Dishwasher
Elements, Elementsareself-cleaning.Soilwillburnoffaselementsareused.Donotsprayoven
OvenandCoil cleaneron elements,electricalhookup or connection.Donot immersecoil-type
surfaceelementsin water.
Glass • Detergentandwater Toprevent stainingof the oven window,avoid usingexcessiveamountsof water
• Ovenwindow * Glasscleaner whichmayseep underor behindglass.Washwithdetergentandwater.Remove
stubbornsoilwithpasteof bakingsodaandwater.Donotuseabrasivematerialssuch
asscouringpads,steelwoolorpowderedcleaningagents.Theywilldamageglass.
Rinsewithclearwateranddry.
MetalFinishes • Detergentandwater Donotuseovencleanerorabrasiveagents,astheywilldamagethefinish.Bemove
• Trim ,,Glasscleaner stubbornsoilwithdetergentandwater.Polishwithasoftcloth.
OvenInterior • Followinstructionson pages16-17 Wipe up all spillsimmediatelywith a dry cloth- especially acid spills (milk,fruits,
forSelf-CleaningOven. tomato,etc.). Neverwipea warmorhotsurfacewithadampclothascrackingand
chippingmayresult.
Oven Racks • Detergentandwater Cleanwithsoapywater.Removestubbornsoilwithcleansingpowderorsoapfilled
• Plasticscouringpad scouringpad. Rinseand dry. Rackswill permanentlydiscolorand may notslide
• Cleansingpowders smoothlyifleftintheovenduringa self-cleanoperation.Ifthisoccurs,wipetherack
• Soap-filledscouringpads andembossedracksupportswitha smallamountofvegetableoiltorestoreeaseof
movement,thenwipeoffexcessoil.
Plasticfinishes • Soapandwater
Doorhandles Non-abrasiveplasticPadorsponge Whensurfaceiscool,cleanwithsoapandwater;rinse,anddry.Use a glasscleaner
• • and a soft cloth. NOTE: Never use oven cleaners, abrasive or causticliquid or
• Backguardtrim • Glasscleaner powderedcleanserson plasticfinishes.Thesecleaningagentswillscratchormarr
• Knobs finish.NOTE:Topreventstainingordiscoloration,wipeupfat,greaseoracid(tomato,
• Endcaps lemon,vinegar,milk,fruitjuice,marinade)immediatelywithadrypapertowelorcloth.
PorcelainEnamel • Detergentandwater Porcelainenamelis glass fused on metal and may crackor chipwith misuse.
• Cooktop,coil • Pasteof bakingsodaandwater Porcelainenamelisacidresistant,notacidproof.All spillovers,especiallyacidicor
elements • Non-abrasiveplasticpador sugarspillovers,shouldbewipedupimmediatelywitha drycloth.Thisis especially
• Cooktoptrim, sponge importantaroundthe ventopeningfor smoothtopcooktopmodels.Surfacemay
smoothtop discolorordullifsoil,especiallyacidicsoil,isnotremoved.Neverwipeoffa warmor
hotsurfacewithadampcloth.Thismaycausecrackingandchipping.Neveruseoven
cleaners,abrasiveorcausticcleaningagentsonexteriorfinishofrangeorintheSelf-
cleanorContinuousCleanOven.
SmoothtopCooktop
• Lightto moderate • CooktopCleaningCreme Waituntilcooktophascooledbeforecleaning.Gentlyapplycleaningagentwith a
soil • Detergentandwater non-abrasiveplasticbrush,nylonorplasticpad,papertowelorcleancloth.Rinse
• Pasteofbakingsodaandwater thoroughlyandcompletelydry.
• Heavysoilorbrown/ • CooktopCleaningCreme Gentlyscrubwithcleaningcremeand cleanclothor paper towel.Reapplycleaner.
graystainsfrom Coverwith damppapertowels to keepcleanermoist.Letstandfor 30 to 45 minutes.
hardwater ormetal Scrub to removeremainingstain. Rinse and dry.
marks
• Burned-onor crusty • Single-edge safetyrazorblade Hold razor blade scraperat 30+angle and very carefully scrapeoff soil. Clean
soilsor residue • CooktopCleaning Creme remainingsoil withcleaningcreme.
• Sugar,plastic, * Single-edge safety razor blade Immediatelyturnelementto LOWand scrapefromhot surfaceto acoolarea. Then
aluminumfoil heldwith apotholderor awooden turn element OFF and cool. Clean residue with razor bladescraper and cleaning
handledstainlesssteelspatula creme.
NOTE:Callanauthorizedservicerifthe smoothtopshouldcrack, breakor ifmetalor
aluminumfoil shouldmelt onthecooktop.
Page 21

MAINTENANCE 20
Before replacing the light bulb or fluorescent tube,
DISCONNECTPOWERTO RANGE.Be surethe bulb is
To prevent staining or discoloration, clean cooktop after
cool.Donottouchahot bulbwith adampclothasthebulb
eachuse.Wipe acidorsugar stainsas soonasthe cooktop
maybreak, has cooled as these stains may discolor or etch the
porcelain.
Freestandingrangeswith acoil elementcooktopwill feature
Toturnoncooktoplight:Pressandholdrockerswitchuntil a lift-up cooktop.
the lightturnson.The ovenlightswitchislocatedonthe I top cooktops,slide-inor drop-inrangesandrangesfor
backguard. Cooktopsonthefollowingmodelsdo notliftup:Smooth-
Toreplacecooktoplight: Besurebulbiscool.Graspthe [ Canada.
toptrimofthebackguardwithyourthumbsunderthefront
edge and pulloutwardwhile lifting to releasetrim from To raisethe cooktop:Whencool,graspthefrontedgeof
thecooktopandgentlyliftupuntilthetwosupportrodsatthe
catchesateachend. frontof thecooktopsnapintoplace.
/
i
Remove fluorescent tube and replace with an 18 watt To lowerthe top: Hold thefront edge of the cooktopand
fluorescent tube. Snap top trim back into place and carefully push back on each support rod to release the
reconnectpowerto range. Resetthe clock, notchedsupport. Then gently lowerthe top intoplace.The
support rodswillslide intothe rangeframe.
Toturnonovenlight:Pushtherockerswitchlocatedonthe
backguardoronthecontrolpanel. The ovendoorislockedfora self-cleanoperationonly.Do
notmovethedoorlocklevertotherightor lockedposition
To replace oven light: Be sure bulbis cool.Use a dry duringa cookingoperation.If the door is locked, the
potholder,to preventpossibleharm to hands,and very operationwillautomaticallybecancelled.Iftheovenishot
carefullyunscrewbulbcover,ifequipped,and bulb.(Note: enoughto engagethe internallock,theovendoorwillnot
Non-self-cleaningovens are equippedwithonly a light open.Allowthe ovento coolforupto anhour,thenunlock
bulb.) andopenthedoor.
Replacewitha 40 wattappliancebulb.Replacebulb cover
andreconnectpowerto range.Resetthe clock.
Page 22

21 MAINTENAN( :E
_;_;....... _ _.... ...... _i i ....._i
Do notplaceexcessiveweighton an open ovendooror The storagedrawerat thebottomoftherangeissafe and
standon an open ovendoor as, in somecases, it could convenientforstoringmetalandglasscookware.DO NOT
causethe rangetotipover,breakthedoororcauseserious storeplastic,paperware,foodorflammablematerialinthis
injurytothe user. drawer.Removedrawertocleanunderrange.
Whenopeningthe ovendoor,allowsteamand hotair to To remove:Emptydrawerthenpulldrawerouttothefirst
escapebeforereachingin ovento check,add orremove stopposition.Liftupfrontof drawerand pulltothesecond
food. stopposition.Graspsidesand liftup and outto remove
drawer.
Do not attempt to open or close door until the door is
completely seated on the hinge arms. Never turn on the To replace: Fitthe endsof thedrawer glidesontothe rails.
ovenunlessdoorisproperlyin place.When baking,besure Liftup drawerfront and gently pushin tofirst stop position.
thedooriscompletelyclosed.Bakingresultswillbeaffected Lift up drawer again and continue to slide drawer to the
ifthedoor is notsecurelyclosed, closed position.
CAUTION: Hinge arms are spring mounted and will
slam shut againstthe range if accidentlyhit. Never
placehand or fingers between the hingesand the
front ovenframe. Youcouldbe injuredifhingesnaps Some floorsare not level.
range must be level.
Levelinglegsare locatedon
To remove lift-off door: Whencool, openthedoor to the each corner at the base of
"stop"position(openedabout 6 inches)and graspthe door the range. Level by turning
at eachside.Do not usethe doorhandleto liftthedoor.Lift the legs. To prevent range _
upevenly untilthe door clearsthe hinge arms. from accidently tipping,
range should be secured to the floor by sliding a rear
i_ levelinglegintothe anti-tipbracketsuppliedwiththerange.
Toreplacedoor:Graspthedoorat eachside,alignslotsin
thedoorwiththehingearmsandslidethe doordownonto
thehingearmsuntilitiscompletelyseatedonhinges.
Page 23

SERVICE INFORMATI()N 22
Part or all of your electric rangedoesnotoperate Baking resultsdifferfrom previous oven
• Istherangeplug Iooseordisconnectedfromtheelectrical • Oven thermostatcalibrationmay differ betweenold and
outlet? new oven. The newer oven thermostat may be more
• Are any housefuses blownorcircuit breakerstripped? accurate than the one on your previous oven. Follow a
reliablerecipeandreviewbakinginformationonpages10
• Has thepowersupplyto the homebeeninterrupted? to 13.
• Arethe ovencontrols properlyset?
• Wasthe electroniccontrolcorrectlyset? Fooddoesnot broilcorrectly
• Was the door left in the locked position following a • Was the controlset properlyfor broiling?(See page15.)
self-clean cycle? • Was the properrackposition used?(See page 15.)
• Isthe oven setfor automaticovencooking?
• Didyou allowtime for the broilelementto preheat?
Surface elements fail to turn on or heat the food • Did you usethe broilerpanthat camewiththe range?
properly. • Was aluminumfoil usedonthe broilerinsert, blockingthe
• Istherange pluglooseor disconnectfrom the electrical slitsforfat drainage?
outlet?
• Wasthe ovendooropenedto the broil stopposition?
• Ifthe rangehas coil elements,are theyproperlyplugged
intothe receptacles?
Oven lightdoes not operate
• Were appropriateutensilsused?(Seepage6.)
• Arethe surface elementcontrolsproperlyset? • Is the bulblooseor burned out?
• Is voltageto the house reduced? • Is the light switchin the On position?
• CANADIANMODELSONLY:Thesmeothtopcooktopwill
notoperateduringaself-clean operation.This isnormal. Oven will not self-clean
• Istheself-clean controlsetproperly?(Seepages16-17.)
Foodnot bakingor cookingcorrectly
• Is the over}setfora delayedcleanoperation?
• Arethe ovenracks properlyplacedforbaking?
• Haveyouused aluminumfoilcorrectly? • Is the oven door properlylocked?
• Wasthe ovenpreheatedasrecommended? • Wasthe oven heavilysoiled?
• Arethe controlsproperlyset?
Oven doorwill not lock
• Isthere1to2 inchesofspacebetweenpansandtheoven
walls? • Are the controlsproperlyset forthe self-clean cycle?
• Arethe rangeandovenrackslevel?
• Was goodcookware/bakewareofthe propersizeused? Ovendoorwill not unlock
• Was the oven vent covered or blocked on the range • Hastheself-clean cyclebeencompletedforatleastone
surface? hour?
• Are you using atested recipefrom a reliablesource? • Wasthedoorcorrectly unlocked?
• Haveyou usedaluminumfoil correctly? • Is theLOCKindicatorword inthe display?
Page 24

23 SERVI(:E INFORMATION
Do notattempt to service the appliance yourself unless address, phone number,the completemodeland serial
directedtodosointhismanual.Contactthedealerwho numbersof the appliance,the name and addressof the
sold you the appliance for service or call us. Our dealerfromwhomyoupurchasedtheappliance,thedate of
telephonenumber is found on the separate warranty purchaseanddetailsconcerningyourproblem.
sheet.
Ifyoudo notreceivesatisfactoryservice,youmaycontact
If your appliance should require service or replacement the MajorAppliance ConsumerAction Program by letter.
parts,contactyourdealerorauthorizedservicer.Besureto Includetheinformationlistedabove.
have the model and serial numbers of the appliance MajorApplianceConsumerAction Program
available.Seethe front cover ofthis manualfor locationof 20 NorthWacker Drive
these numbers.Pleasereviewtheseparatewarrantysheet Chicago,IL 60606
that comeswithyour appliancetosee iftheserviceyouare
requestingiscoveredbythe warranty. MACAP(MajorApplianceConsumerAction Program)is an
independentagencysponsoredbythreetrade associations
Ifyouarenotsatisfiedwiththelocalresponsetoyourservice as a court of appealson consumercomplaintswhichhave
requirements,writeto Maytag CustomerService, P.O.Box notbeenresolvedsatisfactorilywithinareasonable3eriodof
2370, Cleveland, TN 37320-2370. Include your name, time.
50%PUT-CBUHB
1g%OE-IIBSPBS,UAZlIir&CATALOGS
 Loading...