

Page 1
GL]'Se
Instructions for your Electric Range
IIII
SAFETY INSTRUCTIONS ................... I-3
FEATURES ............................... 4-5
Clock and timer ............................ 4
Continuous cleaning oven .................... 5
USING YOUR COOKTOP ................... 6-7
Surface elements .......................... 6
Drip bowls ................................ 6
Control knobs ............................. 6
Signal fights ............................... 6
Cooking tips .............................. 6
Cookware ................................ 7
Heat settings .............................. 7
USING YOUR OVEN ...................... 8-10
Oven characteristics ........................ 8
Oven controls ............................. 8
Oven indicator light ......................... 8
CONTENTS
Oven racks ............................... 8
Preheating ................................ 8
Hew to bake or roast ........................ 9
Common baking problem chart ................ 9
How to broil .............................. 10
MAINTENANCE ............................ 11
Oven light ............................... 11
Storage drawer ........................... 11
Oven door ............................... 11
Leveling legs ............................. ! 1
Fuses (Canada only) ....................... 11
CARE AND CLEANING CHART ............... 12
SERVICE .................................. 13
Troubleshooting ........................... I3
WARRANTY ............................... 14
Page 2

SAFETY INS rRUCTIONS
Information in the Safety Instruction section covers all
electric cooking appliances. You may find some infor-
mation that does not pertain to your particular appli-
ance. Please review this section before using your
cooking appliance.
The following instructions are based on safety consid-
erations and must be strictly followed to eliminate the
potential risks of fire, electric shock, or personal injury.
PROPER INSTALLATION- Be sure your appliance is
properly installed and grounded by a qualified techni-
cian,
NEVER USE YOUR
APPLIANCE FOR
WARMING ORHEAT-
ING THE ROOM.
STORAGE ABOVE RANGE- To eliminate the hazard
of reaching over hot surface elements, cabinet storage
should not be provided directly above a unit. If pro-
vided, storage should be limited to infrequently used
items that can be safely stored in an area subjected to
heat. Temperatures may be unsafe for some items
such as volatile liquids, cleaners, or aerosol sprays. If
cabinet storage is provided, instatlation of a range
hood that projects at least 5-inches beyond the bot-
tom of the cabinet will reduce the hazards associated
with such storage.
WEAR PROPER
APPAREL
Loose-fitting or
hanging garments
should never be
worn while using
the appliance.
STORAGE IN, ON OR NEAR APPLIANCE - Do not
store or use gasoline or other flammable materials, va-
pors and liquids in the oven, near surface units or in the
vicinity of this or any other appliance. The fumes can
create a fire hazard or explosion. Do not use cooktop
or oven as a storage area for food or cooking utensils.
DO NOT USE WATER
ON GREASE FIRES -
Smother fire or flame or
use dry chemical or
foam-type extinguisher,
if available or sprinkle
heavily with baking soda.
USE ONLY DRY POTHOLDERS - Moist or damp
potholders on hot surfaces may result in burns from
steam. Do not let potholder touch hot heating ele-
ments. Do not use a towel or other bulky cloths.
SURFACE COOKING UNITS:
USE PROPER PAN SIZE - This appliance is
equipped with one or more surface elements of differ-
ent sizes. Select utensils having flat bottoms large
enough to cover the surface element. The use of un-
dersized utensils will expose a portion of the heating
element to direct contact and may result in ignition of
clothing. Proper relationship of utensil to element will
also improve efficiency.
NEVER LEAVE SURFACE
UNITS UNATTENDED AT
HIGH HEAT SETTINGS -
Boilover causes smoking
and greasy spillovers that
may ignite.
MAKE SURE DRIP BOWLS ARE IN PLACE - Ab-
sence of these bowls during cooking may subject wir-
ing or components underneath to damage.
USER SERVICING - Do not repair or replace any part PROTECTIVE LINERS - Do not use aluminum foil to
of the appliance unless specifically recommended in line surface unit drip bowls or oven bottoms, except as
the Use and Care Book. All other servicing should be suggested in the Use and Care Book. Improper instal-
referred to a qualified technician. Always disconnect lation of these liners may result in a risk of electric
unit or cut-off power to unit before any servicing, shock, or fire.
-1-
Page 3
SAFETY INS [RUC [IONS
GLAZED COOKING UTENSILS - Only certain types
of glass, glass/ceramic, ceramic, earthenware, or
other glazed utensils are suitable for range-top serv-
ice without breaking due to the sudden change in tem-
perature.
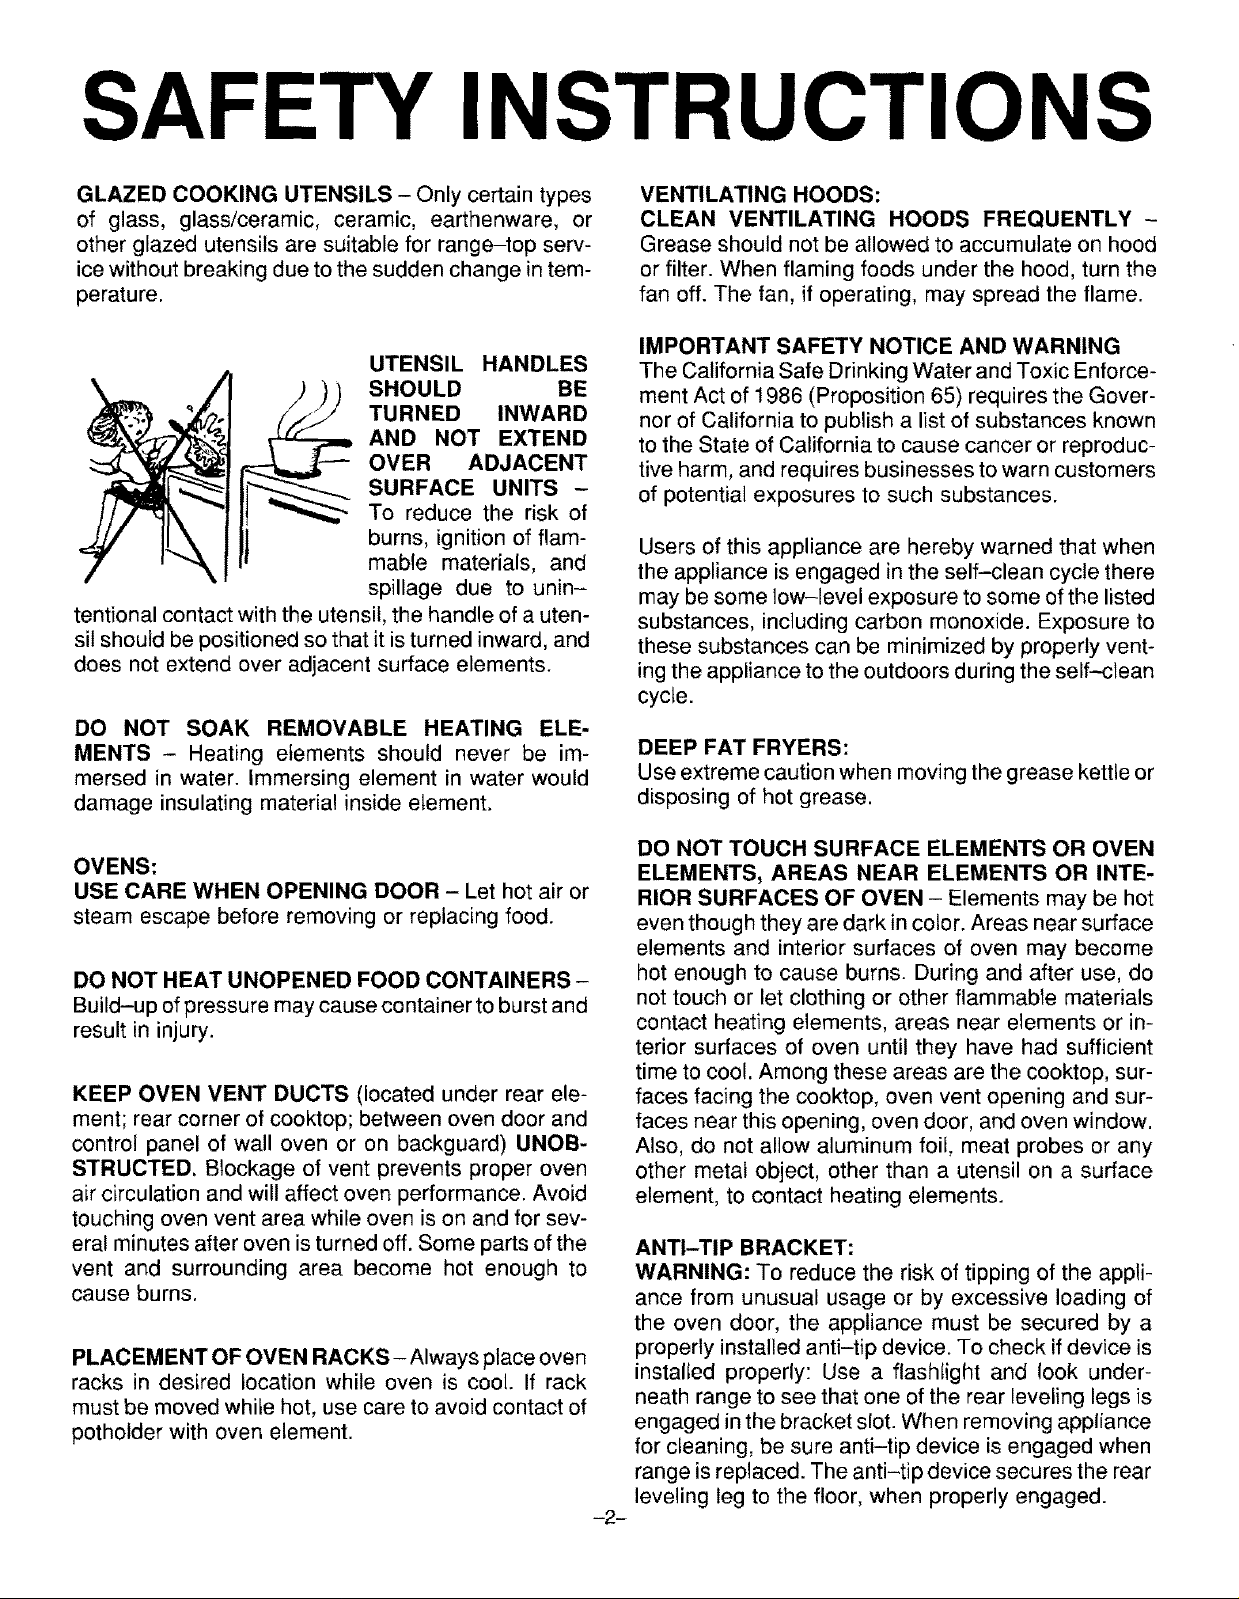
UTENSIL HANDLES
SHOULD BE
TURNED INWARD
AND NOT EXTEND
OVER ADJACENT
SURFACE UNITS-
To reduce the risk of
burns, ignition of flam-
mable materials, and
spillage due to unin-
tentional contact with the utensil, the handle of a uten-
sil should be positioned so that it is turned inward, and
does not extend over adjacent surface elements.
DO NOT SOAK REMOVABLE HEATING ELE-
MENTS - Heating elements should never be im-
mersed in water. Immersing element in water would
damage insulating material inside element.
VENTILATING HOODS:
CLEAN VENTILATING HOODS FREQUENTLY -
Grease should not be allowed to accumulate on hood
or filter. When flaming foods under the hood, turn the
fan off. The fan, if operating, may spread the flame.
IMPORTANT SAFETY NOTICE AND WARNING
The California Safe Drinking Water and Toxic Enforce-
ment Act of 1986 (Proposition 65) requires the Gover-
nor of California to publish a list of substances known
to the State of California to cause cancer or reproduc-
tive harm, and requires businesses to warn customers
of potential exposures to such substances.
Users of this appliance are hereby warned that when
the appliance is engaged in the self-clean cycle there
may be some low-level exposure to some of the listed
substances, including carbon monoxide. Exposure to
these substances can be minimized by properly vent-
ing the appliance to the outdoors during the self-clean
cycle.
DEEP FAT FRYERS:
Use extreme caution when moving the grease kettle or
dLsposing of hot grease.
OVENS:
USE CARE WHEN OPENING DOOR - Let hot air or
steam escape before removing or replacing food.
DO NOT HEAT UNOPENED FOOD CONTAINERS -
Build-up of pressure may cause container to burst and
result in injury.
KEEP OVEN VENT DUCTS (located under rear ele-
ment; rear corner of cooktop; between oven door and
control panel of wall oven or on backguard) UNOB-
STRUCTED. Blockage of vent prevents proper oven
aLrcirculation and will affect oven performance. Avoid
touching oven vent area while oven is on and for sev-
eral minutes after oven is turned off. Some parts of the
vent and surrounding area become hot enough to
cause burns.
PLACEMENT OF OVEN RACKS- Always place oven
racks in desired location while oven is cool. If rack
must be moved white hot, use care to avoid contact of
potholder with oven element.
DO NOT TOUCH SURFACE ELEMENTS OR OVEN
ELEMENTS, AREAS NEAR ELEMENTS OR INTE-
RIOR SURFACES OF OVEN - Elements may be hot
even though they are dark in color. Areas near surface
elements and interior surfaces of oven may become
hot enough to cause burns. During and after use, do
not touch or let clothing or other flammable materials
contact heating elements, areas near elements or in-
terior surfaces of oven until they have had sufficient
time to cool. Among these areas are the cooktop, sur-
faces facing the cooktop, oven vent opening and sur-
faces near this opening, oven door, and oven window.
Also, do not allow aluminum foil, meat probes or any
other metal object, other than a utensil on a surface
element, to contact heating elements.
ANTI-TIP BRACKET:
WARNING: To reduce the risk of tipping of the appli-
ance from unusual usage or by excessive loading of
the oven door, the appliance must be secured by a
properly installed anti-tip device. To check if device is
installed properly: Use a flashlight and look under-
neath range to see that one of the rear leveling legs is
engaged in the bracket slot. When removing appliance
for cleaning, be sure anti-tip device is engaged when
range is replaced. The anti-tip device secures the rear
leveling leg to the floor, when properly engaged.
-2-
Page 4
SAFETY INSTRUCTIONS
ADDITIONAL INFORMATION:
After appliance is installed, be certain all packing ma-
terials are removed from the appliance before operat-
ing the unit. If appliance is installed near a window,
take steps to prevent curtains from blowing over sur-
face elements creating a fire hazard,
Care should be given to location of appliance. Be sure
floor covering under appliance, walls adjacent to appli-
ance, cabinetry adjacent to appliance, and other mate-
rials adjacent to appliance can withstand prolonged
heat. This is a heavy appliance and can settle into soft
floor coverings such as cushioned vinyl. Use care
when moving range on this type of floor covering.
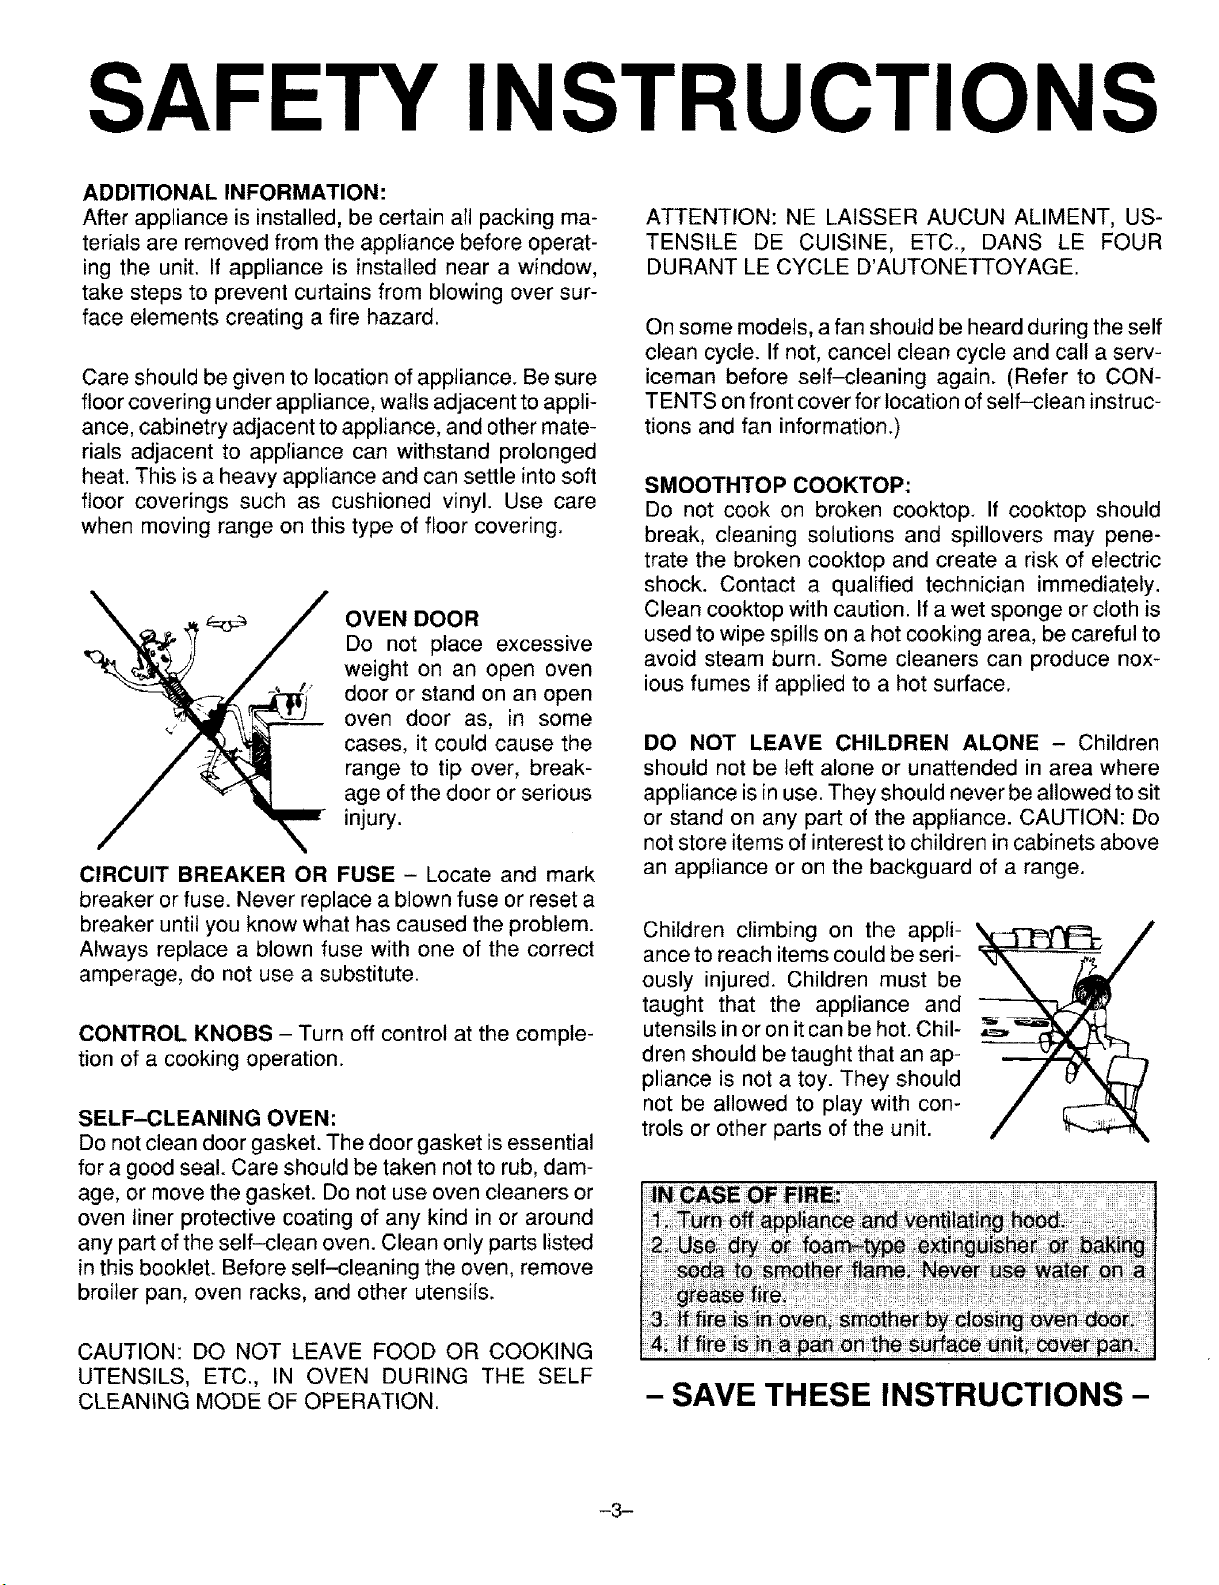
OVEN DOOR
Do not place excessive
weight on an open oven
door or stand on an open
oven door as, in some
cases, it could cause the
range to tip over, break-
age of the door or serious
injury.
CIRCUIT BREAKER OR FUSE - Locate and mark
breaker or fuse. Never replace a blown fuse or reset a
breaker until you know what has caused the problem.
Always replace a blown fuse with one of the correct
amperage, do not use a substitute.
CONTROL KNOBS - Turn off control at the comple-
tion of a cooking operation.
SELF-CLEANING OVEN:
Do not clean door gasket. The door gasket is essential
for a good seal. Care should be taken not to rub, dam-
age, or move the gasket. Do not use oven cleaners or
oven liner protective coating of any kind in or around
any part of the self-clean oven. Clean only parts listed
in this booklet. Before self-cleaning the oven, remove
broiler pan, oven racks, and other utensils.
ATTENTION: NE LAISSER AUCUN ALIMENT, US-
TENSILE DE CUISINE, ETC., DANS LE FOUR
DURANT LE CYCLE D'AUTONETTOYAGE.
On some models, a fan should be heard during the self
clean cycle. If not, cancel clean cycle and call a serv-
iceman before self-cleaning again. (Refer to CON-
TENTS on front cover for location of self-clean instruc-
tions and fan information.)
SMOOTHTOP COOKTOP:
Do not cook on broken cooktop. If cooktop should
break, cleaning solutions and spillovers may pene-
trate the broken cooktop and create a risk of electric
shock. Contact a qualified technician immediately.
Clean cooktop with caution. If a wet sponge or cloth is
used to wipe spills on a hot cooking area, be careful to
avoid steam burn. Some cleaners can produce nox-
ious fumes if applied to a hot surface.
DO NOT LEAVE CHILDREN ALONE - Children
should not be left alone or unattended in area where
appliance is in use, They should never be allowed to sit
or stand on any part of the appliance. CAUTION: Do
not store items of interest to children in cabinets above
an appliance or on the backguard of a range.
Children climbing on the appli-
ance to reach items could be seri-
ously injured. Children must be
taught that the appliance and
utensils in oron itcan be hot. Chil-
dren should be taught that an ap-
pliance is not a toy. They should
not be allowed to play with con-
trols or other parts of the unit.
li1NiZCASE!ii_RE_iii_!i_ii!_iiiiii_ii_!_!iiii_iiii_;_iiii!_;_iiiiii_i!ii!i_ii!!iiii_!_!i_;!_!_ii_i_%_ii
CAUTION: DO NOT LEAVE FOOD OR COOKING
UTENSILS, ETC., IN OVEN DURING THE SELF
CLEANING MODE OF OPERATION.
- SAVE THESE INSTRUCTIONS -
-3-
Page 5
FEAr URES
ELECTRONIC
TIME-OF-DAY CLOCK
AND TIMER
If your range is equipped with a digital
clock and timer, it will either be design
1 or design 2. Follow the instructions
for the illustration that matches the
clock on your range.
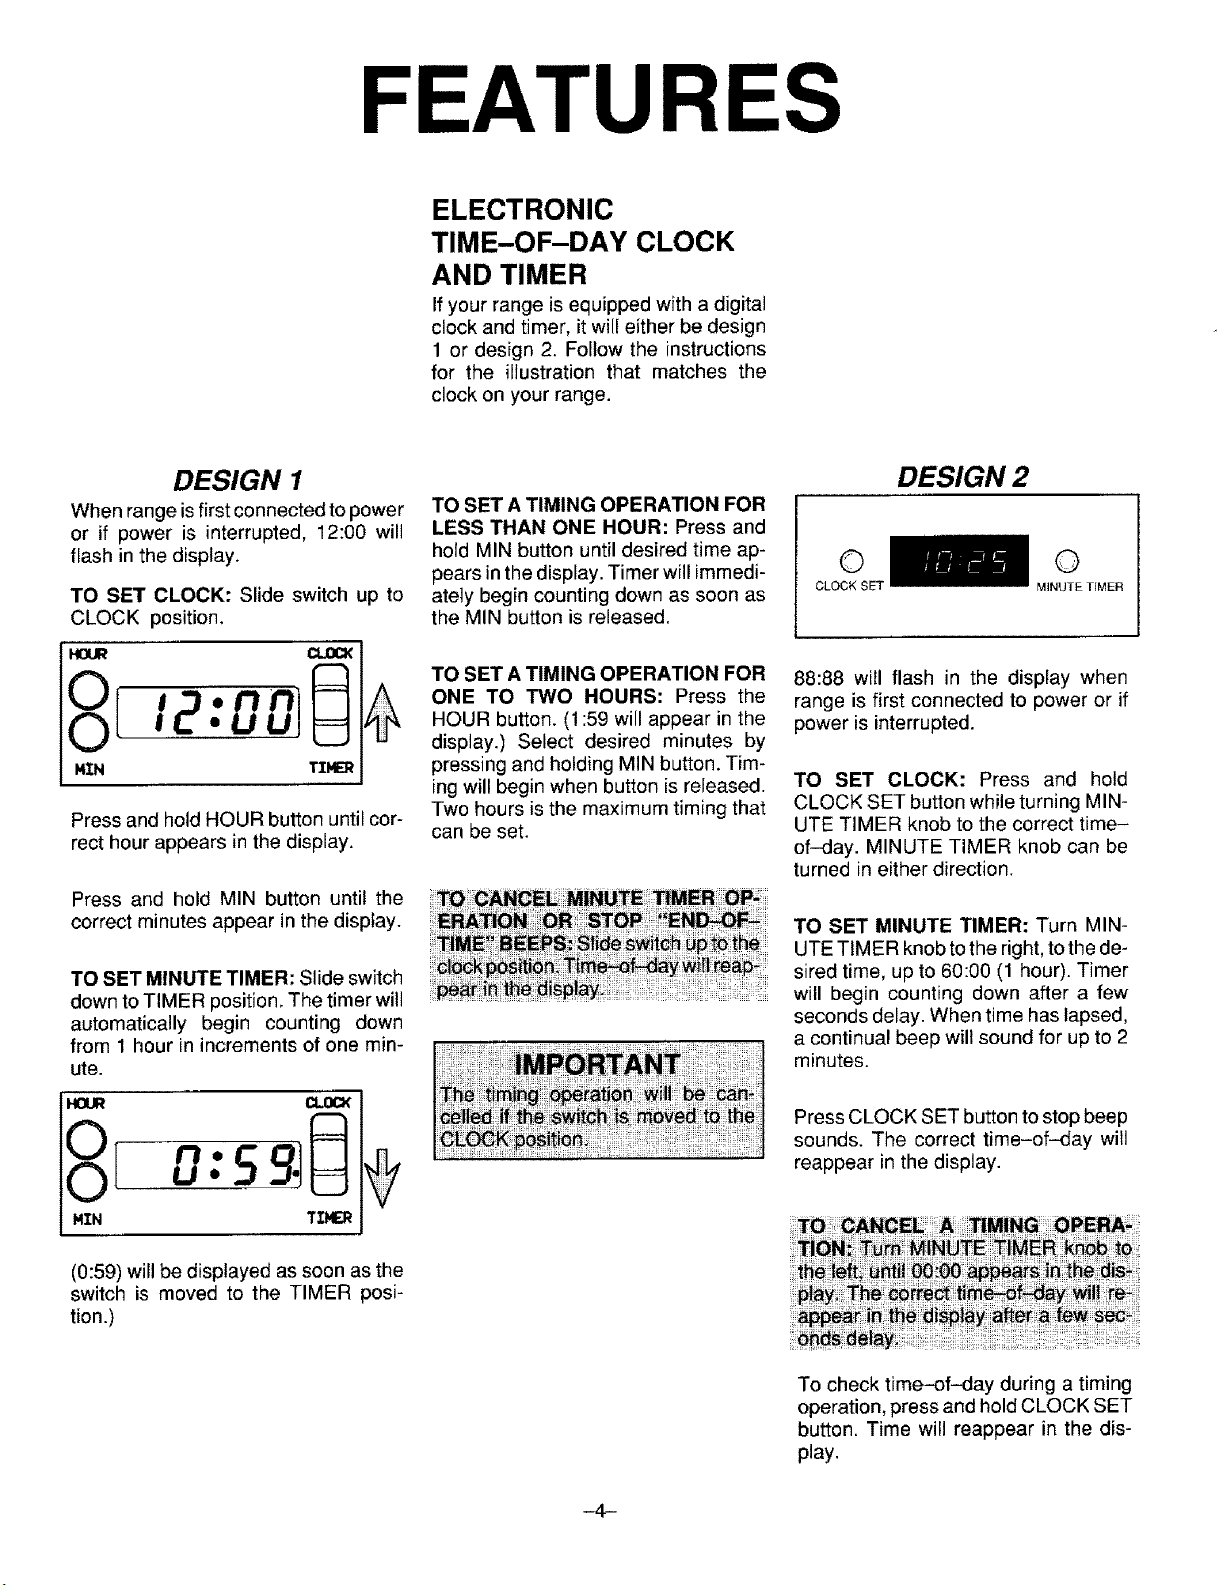
DESIGN 1
When range is first connected to power
or if power is interrupted, 12:00 will
flash in the display.
TO SET CLOCK: Slide switch up to
CLOCK position.
HOUR CLOCK
12:00)
MIN TIMER
Press and hold HOUR button until cor-
rect hour appears in the display.
Press and hold MIN button until the
correct minutes appear in the display.
TO SET MINUTE TIMER: Slide switch
down to TIMER position. The timer will
automatically begin counting down
from 1 hour in increments of one min-
ute.
HOUR
0:59.1
CL.O_
TO SET ATIMING OPERATION FOR
LESS THAN ONE HOUR: Press and
hold MIN button until desired time ap-
pears inthe display. Timer will immedi-
ately begin counting down as soon as
the MIN button is released.
TO SET ATIMING OPERATION FOR
ONE TO TWO HOURS: Press the
HOUR button. (1:59 will appear in the
display.) Select desired minutes by
pressing and holding MIN button. Tim-
ing will begin when button is released.
Two hours is the maximum timing that
can be set.
DESIGN 2
©
CLOCK SET
88:88 will flash in the display when
range is first connected to power or if
power is interrupted.
TO SET CLOCK: Press and hold
CLOCK SET button while turning MIN-
UTE TIMER knob to the correct time-
of-day. MINUTE TIMER knob can be
turned in either direction.
TO SET MINUTE TIMER: Turn MIN-
UTE TIMER knob tothe right, tothe de-
sired time, up to 60:00 (1 hour). Timer
will begin counting down after a few
seconds delay. When time has lapsed,
a continual beep wilt sound for up to 2
minutes.
Press CLOCK SET button to stop beep
sounds. The correct time-of-day will
reappear in the display.
©
MINUTE TIMER
MIN
(0:59) will be displayed as soon as the
switch is moved to the TIMER posi-
tion.)
TIMER
To check time-of-day during a timing
operation, press and hold CLOCK SET
button. Time will reappear in the dis-
play.
-4-
Page 6

FEATURES
CONTINUOUS CLEANING
OVEN (if equipped)
WHAT IS THE CONTINUOUS
CLEANING OVEN'?.
The finish of the Continuous Cleaning
Oven isidentified by its dark gray color,
white stipple and rough, porous texture.
The rough texture prevents grease
spatters from forming beads which run
down the walls leaving unsightly
streaks. Rather, the rough texture ab-
sorbs spatters and allows them to
spread, thus exposing a larger area to
the hot oven air. The catalyst, when ex-
posed to heat, speeds the oxidation of
soil+
Cleaning action automatically begins
whenever the oven isturned on for bak-
ing or roasting. The oven MUST be "on"
for cleaning to take place. No cleaning
will occur when the oven is off. The spe-
cial catalytic finish must be exposed to
hot oven air before soil will begin to
gradually reduce in size.
FACTORS AFFECTING LENGTH OF
CLEANING TIME
The higher the oven temperature, the
faster the cleaning action. The length of
cleaning time will depend on these fac-
tors: Type of soil, amount or size of soil,
oven temperature and length of time
oven is inuse. Time may vary from afew
minutes to several hours. Soil deposited
at the end of a cycle may still be visible.
This will usually fade with continued
oven use until the soil gradually disap-
pears or can be wiped up manually. The
oven will appear presentably clean,
even though some spatters may be pre-
sent.
MANUALLY CLEANING
HEAVY SPILLOVERS
The special finish wil! clean most spat-
ters during normal oven use unless
there is a heavy buildup of soil. Heavy
spillovers such as pie or casserole
boilovers will not clean effectively with-
out some manual help. The crusty or
varnish-like stains that form from these
spillovers clog the pores and prevent
the special finish from being exposed to
the hot oven air. This greatly reduces
the cleaning effectiveness of the finish.
These crusty orvarnish-like stains must
either be removed or broken up before
cleaning can effectively take place.
TO MANUALLY CLEAN
HEAVY SPILLOVERS
Brush off heavy soil with a nylon brush
or plasticpad+DO NOT USE paper tow-
els, clothsor sponges for the ovenwalls
are porous and particles of these mate-
rialswill ruboff onthe walls. Rinse area
with clear water only.
HINTS
Brittle crusts or stains can be loosened
by GENTLY tapping stain with a
wooden or plastic utensi!. Brush away
any loose soil that flakes off. Varnish
type stains usually need to be softened
with a small amount of water or damp
cloth. Remaining soil will gradually re-
duce with continued oven use at normal
baking temperatures.
DO NOT USE ANY TYPE OF OVEN
CLEANER, POWDERED CLEANS-
ERS, SOAP, DETERGENT OR PASTE
ON ANY CONTINUOUS CLEANING
SURFACE. ALSO, DO NOT USE ANY
ABRASIVE MATERIALS, STEEL
WOOL, SHARP INSTRUMENTS OR
SCRAPERS FOR THEY WILL DAM-
AGE THE FINISH.
Avoid spillovers by using utensils that
are large enough to hold food. A cookie
sheet or piece of aluminum foil, just a lit-
tle larger than the pan, can be placed on
the rack directly below the rack holding
the utensil to catch spills.
Over a period of time, wear marks may
appear on the embossed rack supports.
This is normal and results from sliding
the racks in and out of the oven. Wear
marks will not affect the cleaning action
of the oven.
-5-
Page 7

USING YOUR COOKTOP
COOKTOP
Ranges with a coil-type cooktop will
feature either an "upswept" cooktop or a
"fiat" cooktop. Both tops can be lifted up
for convenient access to the area under
the cooktop.
To raise "upswept" cooktop: When
cool, grasp front edge of cooktop and
gently lift up until the two support rods at
the front of the cooktop snap into place.
To replace: Insert the terminals on the
element into the receptacle. Gently lift
up on outer edge of element (opposite
terminal-side of element) while insert-
ing terminals into receptacle. Gently
press down on outer edge of element
until element sits level on drip bowl.
Drip bowls will turn blue or gold over
time or if overheated. This type of discol-
oration is permanent and will not affect
cooking performance. To protect finish,
avoid using high settings for long peri-
ods of time. Reduce to a lower setting
once food begins cooking. Also, do not
use oversized utensils. Utensil should
not extend more than 2 inches from the
element.
CONTROL KNOBS
Your cooktop is equipped with control
knobs that provide an infinite choice of
settings from LOW to HIGH. The knob
can be set on any of the numbered set-
tings or between the numbered settings.
To operate push in and turn knob to the
desired setting.
To lower top: Hold front edge of cook-
top and carefully push back on each
support rod to release the notched sup-
port. Then gently lower top into place.
The support rods wil! slide into the range
frame.
To raise "flat" cooktop: Grasp front
edge of cooktop and lift up.
SURFACE ELEMENTS
Surface elements are self-cleaning. Do
not immerse elements in water. When
an element is turned on, it wil! cycle on
and off to maintain the heat setting.
Be sure drip bowl and chrome trim ring,
if equipped, are properly installed.
Notch on trim ring should be centered
over the screw securing the receptacle
to the maintop. If trim ring is not installed
properly and rests on this screw, the trim
ring and drip bowl will "rock".
DRIP BOWLS
The drip bowls, located under each sur-
face element, are designed to catch
spills or boilovers.
Be sure drip bowls are in place. Ab-
sence of these bowls during cooking
may subject wiring or component parts
underneath the cooktop to damage.
Clean after each use with soap and
water. Remove stubborn stains with
baking soda paste and plastic scouring
pad. To prevent scratching the finish, do
not use abrasive cleaning agents.
Rinse, dry and replace.
To prevent risk of electric shock or fire,
do not line drip bowls with aluminum foil.
SIGNAL LIGHTS
Ranges are equipped with one to four
signal lights to indicate when a surface
element is on. The light will remain on
until the element is turned off. After a
cooking operation, be sure element and
signal light are off.
COOKING TIPS
Food will not cook any faster when a
higher heat setting is used than needed
to maintain a gentle boil. Water boils at
the same temperature whether boiling
gently or vigorously. If a high setting is
used, excessive spattering will occur
and food may stick or burn ontothe bot-
tom of the pan.
Use a higher heat setting to bring liquid
to a boil or to begin cooking, then re-
duce to a lower setting. Never leave
food unattended during a cooking
operation,
Always place pan on the surface ele-
ment before turning element on.
-6-
Never let a pan boil dry as this could
damage the utensil and the appliance.
Page 8

USING YOUR COOKTOP
COOKWARE
Cooking performance isgreatly affected
by the type of cookware used. Cook-
ware SHOULD HAVE A FLAT BOT-
TOM. The flat bottom allows good con-
ductivity between the cookware and the
element to provide uniform cooking re-
sults, faster heating and more efficient
use of energy.
• i i |
Cookware with uneven, warped, or
grooved bottoms do not make good
contact, will reduce heat conductivity
and result in slower, less even heating.
A pan with a badly curved bottom will
not make good contact with the element
and may not get enough heat to bring
water to a boil.
Fit the size of the cookware to the size of
the element. This conserves energy.
Do not use woks equipped with round
metal rings. The ring, which is designed
to support the wok above the element,
will trap heat and may damage the ele-
ment and the cooktop.
CANNING
Acceptable water-bath or pressure
canners should not be oversized and
must have a flat bottom. The following
are not recommended: Canners with
ridged bottoms, oversized canners
(2-inches larger than the surface ele-
ment) or a very large canner that rests
on two surface elements.
When canning, use the HIGH setting
just until water comes to a boil or pres-
sure is reached in the pressure canner.
Then, reduce to the lowest heat setting
that maintains the boil or pressure.
Prolonged use of the HIGH setting, or
the use of incorrect canning utensils
produce excessive heat. Excessive
heat can cause permanent damage to
the porcelain cooktop, surface element
and the drip bowl.
SUGGESTED HEAT SETTINGS
Use the following chart as a GUIDELtNE until you become more familiar with your cooktop. Keep inmindthat different types of
cookware materials require different heat settings for the same cooking operation. We suggest that you experiment to find the
heat setting that best suits your particular cooking needs. Information in the chart is based on heavy gauge aluminum cook-
ware. Lower the heat setting if using stainless steel, cast iron utensils or glassware designed for surface cooking.
HI
Medium
6-5
LO To keep foods warm before serving.
NOTE: Refer to cookware manufacturer's recommendations for suggested heat settings. Some manufacturers do not rec-
ommend the use of HIGH or the use of HIGH for extended cooking operations.
To bring liquid to a bell, blanch, preheat skillet, or bring pressure up in pressure cooker. (Note:
Always follow instructions in pressure cooker use and care book.) Always reduce to a lower heat
setting when liquids just begin to boil or food begins to cook.
To maintain moderate to slow boil for large amounts of liquids.
--7--
Page 9

USING YOUR OVEN
OVEN
CHARACTERISTICS
OVEN CONTROLS
Q
THERMOSTAT SELECTOR
The THERMOSTAT knob is used to se-
lect and maintain the oven temperature.
Always turn this knob just TO the de-
sired temperature. Do not turn to a
higher temperature and then back. On
some models, there is an indent at the
350°F setting.
OVEN RACKS
The two oven racks are designed witha
"lock-stop" position to keep racks from
accidentally coming completely out of
the oven.
To remove: Be sure rack is cool. Pull
rack cut to the "lock-stop" position. Tilt
up and continue pulling until rack re-
leases.
To replace: Place rack on rack sup-
ports, tilt up and push toward rear of
oven. Pull rack out to "lock-stop" posi-
tion to besure rack is correctly replaced.
RACK POSITIONS:
RACK 1 (top of oven) used for broiling
thin non-fatty foods such as fish.
RACK 2 used for two-rack baking or
broiling thicker cuts of meat.
RACK 3 used for most one-rack baking
and for roasting some meats.
RACK 4 used for one or two rack baking
and roasting large meats, cooking
larger foods and for baking angel food
cake or pie shells.
RACK 5 used for roasting turkey or bak-
ing angel food cake or pie shells.
HINTS:
If cooking on two racks, stagger pans so
one is not directly over the other. Use
rack positions 2 and 4 or 2 and 5, when
cooking on two racks.
NEVER place pans directly on the oven
bottom.
The SELECTOR knob determines the
type of oven operation. Turn this knob to
desired setting. Each setting is identi-
fied by an indent (stop) and a "click"
sound,
To turn the oven on, both the Thermo-
stat and Selector knobs must be set.
The oven will not operate if the Selector
knob is left in the OFF position. To turn
the oven off, turn the selector knob to
the OFF position.
OVEN INDICATOR LIGHT
The OVEN indicatorlight, located onthe
backguard, turns on whenever the se-
lectorknob isturned to BAKE or BROIL.
When the oven reaches the preset tem-
perature, the indicatorlight turnsoff and
on as the oven elements cycle off and
on.
Do not cover entire rack with aluminum
foil or place foil directly under cookware.
To catch spillovers, cut a piece of foi! a
little larger than the pan and place it on
the rack below the rack containing the
pan.
PREHEATING
Preheating is necessary for baking. Al-
low oven to heat for 10 to 15minutes be-
J
/
-.8-
fore adding food. It is not necessary to
preheat oven for roasting.
It is not necessary to preheat for broiling
unless darker browning is desired or if
cooking thin (3/4-inch) steaks. Allow
broil element to preheat 3 to 5 minutes.
Selecting temperature higher than de-
sired will NOT preheat the oven any
faster. Preheating at a higher tempera-
ture may have a negative effect on bak-
ing results.
Page 10

USING YOUR OVEN
HOW TO BAKE OR
ROAST
1. When cool, position rack in oven de-
pending on what you are baking,
2. To set oven: Turn thermostat knob to
COMMON BAKING PROBLEMS AND WHY THEY HAPPEN
Cakes are uneven.
Cake high in middle.
Cake fails,
Cakes, cookies,biscuits
don't brown evenly,
Pans touching each other or
oven walls.
Batter uneven in pans.
Temperature set too low or
baking time too short.
Oven not level,
Undermixing.
Too much liquid.
Temperature set too high,
Baking time too long.
Overmixing.
Too much flour.
Pans touching each other or
oven wails.
Incorrect rack position,
Too much shortening or sugar.
Too much or too little liquid.
Temperature set too Iow.
Old or too little baking powder.
Pan too small.
Oven door opened frequently.
Added incorrect type of oil to
cake mix.
Added additional ingredients
to cake mix or recipe.
Incorrect rack position.
Oven door not closed properly.
Door gasket not sealing
properly.
Incorrect use of aluminum foil.
Oven not preheated.
Pans darkened, dented, warped,
or large cookie sheet.
desired temperature and the selector
knob to BAKE+
3. Place food in center of oven, allowing
a minimum of 2 inches between uten-
sil and oven walls.
4. Check food for doneness at minimum
Cakes don't brown on top.
Excessive shrinkage.
Uneven texture.
Cakes have tunnels,
Cakes crack on top.
Cake not done in middle.
time in recipe. Cook longer if neces-
sary. Remove food from the oven
and turn the selector knob to OFF,
If you have carefully followed the basic
instructions and still experience poor re-
sults, these suggestions may be helpful:
Incorrect rack position.
Temperature set too low.
Overmixing.
Too much liquid.
Pan size too large or too little
batter in pan.
Oven door opened too often.
Too little leavening.
Overmixing.
Pan too large,
Temperature set too high.
Baking time too long.
Pans too close to each other
or oven walls.
Too much liquid,
Undermixing.
Temperature set too low.
Baking time too short.
Not enough shortening.
Too much baking powder.
Overmixing or at too high a
speed.
Temperature set too high.
Batter overmixed.
Temperature set too high,
Too much leavening.
Incorrect rack position.
Temperature set too high.
Pan too small.
Baking time too short.
Cakes, cookies, biscuits too
brown on bottom.
Oven not preheated.
Pans touching each other or
oven walls.
Incorrect rack position.
Incorrect use of aluminum foil.
Placed 2 cookie sheets on one
rack.
Used glass, darkened, stained,
warped or dull finish metal
pans. (Use a shiny cookie
Pie crust edges too brown.
Pies don't brown on bot-
tom.
Pies have soaked crust.
-9-
Temperature set too high.
Pans touching each other or
oven walls.
Edges of crust too thin.
Used shiny metal pans,
Temperature set too low.
Temperature too low at start of
baking.
Filling too juicy,
Used shiny metal pans.
Page 11

USING YOUR OVEN
HOW TO BROIL
Broiling is a method of cooking tender
meats by direct heat under the element.
The cooking time is determined by the
distance between the meat and the ele-
ment, the desired degree of doneness
and the thickness of the meat.
Broiling requires the use of the broiler
pan and insert. The correct position of
the insert in the pan is very important.
The broiler insert should be placed in
the pan so grease will drain freely. Im-
proper use may cause grease fires.
The broiler insert CANNOT be covered
with aluminum foil as this prevents fat
from draining into pan below. However,
for easier cleaning, the broiler pan can
be tined with foil.
BACON
Do not use disposable broiler pans.
They do not provide a separate tray.
Preheat broil element 5 to 10 minutes if
darker browning is desired.
TO BROIL:
1. Prepare meat by removing excess fat
and slashing remaining fat, being
careful not to cut into meat. This will
help keep meat from curling.
2. Place broiler pan on the recom-
mended rack position. For brown ex-
terior and rare interior, the meat
should be close to the element. Place
further down if you wish meat well
done. Excessive smoking may occur
if meat is placed too close to the broil
element.
3. To set oven: Turn both the thermostat
and selector knobs to BROE.
BROILING CHART
#2 Welt Done 6 to 10 minutes
Q
THERMOSTAT
4. Broiling should be done with oven
door opened to the broil "STOP" posi-
tion (opened about 4 inches.).
5. Follow suggested times on broiling
chart. Meat should be turned once
about half way through cooking.
6. Check aloneness by cutting a slit in
meat near center for desired color.
7. Turn the selector knob to OFF after
cooking. Broil times may need to be
increased if range is installed on a
208-volt circuit.
SELECTOR
CHICKEN
Whole, split
Pieces
GROUND BEEF PATTIES
3/4 to 1-inch thick
LAMB CHOPS
1-inch thick
1 1/2-inch thick
WIENERS, precooked
Hot dogs, smoked or Polish sausage,
Bratwurst, etc.
#3
#2
#3
#2
#2
#3
Well Done
Well Done
Rare
Medium
Well Done
Medium
Well Done
Medium
Weir Done
BROIL AT 450°F
45 to 60 minutes
30 to 45 minutes
10 to 13 minutes
12 to 15 minutes
I5 to 18 minutes
12 to 15 minutes
t 6 to 20 minutes
15 to 19 minutes
25 to 30 minutes
8 to 12 minutes
TOaSt; : :: :: : ;
:;T0_st6rPastdes : : i;
-10-
Page 12

MAIN ENANCE
LIGHT REPLACEMENT
Before replacing oven light bulb, DIS-
CONNECT POWER TO RANGE. Be
sure bulb iscool. Do not touch a hot bulb
with a damp cloth as the bulb may
break.
Very carefully remove bulb with a dry
potholder to prevent possible harm to
hands. Replace with a40 watt appliance
bulb. Reconnect power to range and re-
set clock, if equipped.
STORAGE DRAWER
The storage drawer at the bottom ofthe
range is safe and convenient for storing
metal and glass cookware. DO NOT
store plastic, paperware, food or flam-
mable material in this drawer. Remove
drawer to clean under range.
To remove: Empty drawer then pull
drawer out to the first stop position. Lift
up front of drawer and pull to the second
stop position. Grasp sides and lift up
and out to remove drawer.
To replace: Fit ends of drawer glides
onto rails. Lift up drawer front and gently
push in to first stop position. Lift up
drawer again and continue to slide
drawer to the closed position.
OVEN DOOR
Do not place excessive weight on an
open oven door or stand on an open
oven door as, in some cases, it could
cause the range to tip over, breakage of
the door or serious injury,
When opening oven door, allow steam
and hot air to escape before reaching in
oven to check, add or remove food.
To remove lift-off door: Open door to
the "stop" position (opened about 4
inches) and grasp door with both hands
at each side. Do not use door handle to
lift door. Lift up evenly until door clears
the hinge arms.
LEVELING LEGS
Some floors are not level. For proper
baking, your range must be level. Level-
ing legs are located on each corner of
the base of the range. Level by turning
the legs.
To prevent range from accidentty tip-
ping, range should be secured to the
floor by sliding rear leveling leg into the
anti-tip bracket supplied with the range.
FUSES
(CANADIAN RANGES ONLY)
Your range is equipped with seven (7)
type "P" fuses. The fuses are located on
the back wall of the range. Remove the
storage drawer for access to the fuses.
To replace door: Grasp door at each
side, align slots in the door with the
hinge arms and slide door down onto
the hinge arms until completely seated
on hinges.
ilii i
-1!-
If part of your range does not operate,
check to see if a fuse has blown. A gap
in the fuse strip or a darkened window
indicates a blown fuse. Replace with the
same type and amperage type "P" fuse.
Page 13

CARE AN D CLEAN !NG
21i_i!!iiii_ii!iiiliiliiiil i]il iii_il_ii_ii_}ii!1_ii!ii_iiii_i_iiiii!_i_iiii!_i_!!_ii_B_!_i_ii_i_!_!_i_]_!!a_i__!!!!_ii!!!'¸i!!!!!!_;i!!!ii!!i
Broiler pan & in- Soap & water. Plastic Remove from oven after use. Cool then pour off grease, Place soapy
sert scouring pad. Soap cloth over insert and pan; let soak to loosen soil, Wash in warm soapy
filled scouring pad. water. Use soap filled scouring pad to remove stubborn soil. Clean in
dishwasher if desired.
Control knobs Mild detergent & water. To remove knobs, gently pull forward. Wash in mild detergent and water.
Do not use abrasive cleaning agents. They will scratch finish and remove
markings. Rinse, dry and replace. Turn each element ON to see if knobs
have been replaced correctly.
Wa__ _ _ _tei _ _t_ _i!i_i__i_ a_i_
Metal finishes:
Aluminum - back-
guard base.
Chrome & stainless
steel - trim parts
Plastic finishes:
Door handle, Trim,
Backguard trim,
Overlay, Knobs, or
End caps
Soap & water. Paste of
baking soda & water.
Soap & water. Paste
of baking soda and
water. Non-abrasive
plastic pad or sponge.
Wash with soap and water. Remove stubborn soil with paste of baking
soda and water. Do not use oven cleaners, abrasive or caustic agents.
They will damage the finish.
Do not use oven cleaner, powder or liquid cleansers, abrasive or caustic
cleaning agents on plastic finishes. These cleaning agents will scratch or
marr finish. To prevent staining or discoloration, wipe up fat, grease or
acid (tomato, lemon, vinegar, milk, fruit juice, marinade) immediately
with a dry paper towel or cloth. When surface is cool, clean with soap and
water; rinse, and dry.
Silicone rubber
door gasket
Soap & water. Door gasket is located on the door plug. DO NOT REMOVE GASKET.
Wash with soap. Rinse thoroughly.
-12-
Page 14

SERVICE
PART OR ALL OF YOUR
RANGE DOES NOT OPERATE
SURFACE ELEMENTS FAIL
TO TURN ON OR HEAT FOOD
PROPERLY
FOOD NOT BAKING SATIS-
FACTORILY
OVEN DOES NOT OPERATE Is the range disconnected from the electrical power? = Was the Selector knob
OVEN LIGHT DOES NOT Is bulb loose or burned out?
WORK
Isthe range plug disconnected from the electricat outlet? • Are house fuses blown
or circuit breakers tripped? • Is the range plug loose or improperly plugged in?
Has power supply to your home been interrupted? • Was oven properly set?
Is range plug disconnected from the electrical outlet? Check circuit breaker or fuse
box for tripped circuit breakers or blown fuses. • iselement properly plugged into
receptacle? • Was incorrect pan used? For optimum results, pan SHOULD HAVE
A FLAT bottom. See pages 6 and 7 for additional information. (NOTE: Expect cook-
ing times to increase if range is connected to 208 volts).o Have serviceman check
element.
Are racks properly in place and in correct position for what you are baking? • ts
range level? * Are you using the proper pan? Isit bright, not soiled or dark colored ?
=Have you used foil incorrectly? • Are you using standard measuring utensils? •
Did you preheat ifrecommended? • Oven temperature is incorrectly set- too low
or too high. See Common Baking Problem chart on page 9+
turned to bake or broil? =Was oven properly set?
SERVICE
Do not attempt to service the appli-
ance yourself unless directed to do
so in this book. Contact the dealer
who sold you the appliance for serv-
ice.
HOW TO OBTAIN
SERVICE
When your appliance requires service
or replacement parts, contact your
Dealer or Authorized Servicer. Use only
genuine factory or Maycor parts if re-
placement parts are necessary. Consult
the Yellow Pages in your telephone di-
rectory under appliance for the service
center nearest you. Be sure to include
your name, address, and phone num-
ber, along with the model and serial
numbers of the appliance. (See front
cover for location of your model and se-
rial numbers.)
Ifyou are unable to obtain service, write
to us+Our address is found on the rating
plate. See front cover for location of rat-
ing plate.
If you are not satisfied with the local re-
sponse to your service requirements,
call or write MAYCOR Appliance Parts
and Service Company, 240 Edwards
Street, S.E., Cleveland, TN 37311,
(615) 472-3500. Include or have avail-
able the complete model and serial
numbers of the appliance, the name and
address of the dealer from whom you
purchased the appliance, the date of
purchase and details concerning your
problem.
If you did not receive satisfactory serv-
ice through your servicer or Maycor you
may contact the Major Appliance Con-
sumer Action Panel by letter including
your name, address, and telephone
number, as well as the model and serial
numbers of the appliance.
Major Appliance Consumer Action Panel
20 North Wacker Drive
Chicago, IL 60606
MACAP (Major Appliance Consumer
Action Panel) is an independent agency
sponsored by three trade associations
as a court of appeals on consumer com-
plaints which have not been resolved
satisfactorily within a reasonable period
of time.
-13-
Page 15

FULL ONE-YEAR WARRANTY
DOMESTIC GAS OR ELECTRIC RANGE
Parts &Service Company will repair or replace, without charge, any part of your product which
defect in material or workmanship during the first year after the date of the original installation. This warranty extends
to any owner during the one-year warranty period.
LIMITED 5 YEAR WARRANTY
On electric ranges equipped with solid disc or smoothtop heating elements, and on gas ranges with sealed burners, for
an additional 4 year period beyond the first year of the general coverage of this warranty, Maycor will replace any of the
solid disc or smoothtop heating elements, or sealed burners which fail to heat as a result of defective workmanship or
material. Additionally, Maycor will replace any smoothtop cooking surface which cracks or breaks during normal
household cooking. These parts must be installed by a qualified person. Any labor charge required for replacement is
not covered by this warranty.
HOW TO OBTAIN SERVICE
To obtain the repair or replacement of a defective part under these warranties, you should contact the dealer from
whom you purchased the appliance or a servicer he designates.
WHAT IS NOT COVERED BY THESE WARRANTIES
1. Conditions and damage resulting from improper in- 5. Any product used for other than normal household
stallation, delivery, unauthorized repair, modifica- use. It does not extend to products purchased for
tion, or damage not attributable to a defect in mate- commercial or industrial use.
rial or workmanship.
6. Any expense incurred for service calls to correct in-
2. Conditions resulting from damage, such as: (1) im-
proper maintenance, (b) misuse, abuse, accident,
or (c) incorrect electrical current or voltage.
3. Warranties are void ifthe original serial number has
been removed, altered, or cannot be readily deter-
mined.
4. Light bulbs.
ADDITIONAL HELP
If you are not satisfied with the local response to your service requirements and wish to contact Maycor, please ad-
dress your letter to the Customer Relations Department, Maycor Parts & Service Company, 240 Edwards Street, S.E.,
Cleveland, TN 37311 or call (615) 472-3500. To save time, your letter should include the complete model and serial
numbers of the warranted appliance, the name and address ofthe dealer from whom you purchased the appliance, the
date of purchase and details concerning your problem.
stallation errors or to instruct you on how to use the
products.
7. CONSEQUENTIAL OR INCIDENTAL DAMAGES
SUSTAINED BY ANY PERSON AS A RESULT OF
ANY BREACH OF THESE WARRANTIES OR ANY
IMPLIED WARRANTY. Some states do not allow
the exclusion or limitation of consequential or inci-
dental damages, so the above exclusion may not
apply to you.
These warranties are the only written or expressed warranties given by Maycor. No one is authorized to increase,
alter, or enlarge Maycor's responsibilities or obligations under these warranties. These warranties give you specific
legal rights, and you may also have other rights which vary from state to state.
8109 P059-60
(6/91)
-14-
iilii ;ii
 Loading...